


Polymer clay earrings are one of the most famous DIY crafts currently. They are easy to make at home, colorful, and greatly chic. You can also make any simple, cute or make specific ones. Floral designs and geometric shapes are easy to make. Polymer clay earrings are multi-colored articles of jewelry that are made using oven-baked modeling clay. They are simple to make with simple equipment and would be great to make as crafts, gifts, or even to sell online.
So, how to make polymer clay earrings- it is very easy. Just prepare your workspace and take your supplies. First, condition your clay. Then, roll out the Clay properly. Next, cut the clay into earring shape. After that, add some texture and design to it. Then, make holes for hooks. The final step is baking to make it stronger.
This beginner’s guide is designed for those new to the subject. We’ll keep the language easy and the steps simple. Also, there is no need for you to be an artist to follow you in the game. How to make polymer clay earrings? It is a question with an answer that has been answered many times. This article will also help you find the answer to this question.
In This Post
- Key Takeaways
- What is polymer clay?
- Best Brands of Polymer Clay
- About Polymer Clay Earrings
- Supplies You’ll Need to Make Polymer Clay Earrings
- How to Make Polymer Clay Earrings
- How to Bake Polymer Clay Earrings
- Prepare Workspace for Clay Earrings
- Condition Clay and Mix Colors
- Polymer Clay Earring Kit
- Types of Polymer Clay Earrings
- Frequently Asked Questions (FAQs)
- 1. What are the home instructions for creating polymer clay earrings?
- 2. What are the things that I should have to make clay earrings?
- 3. What is the time of baking polymer clay earrings?
- 4. Are polymer clay earrings made by kids?
- 5. Which earrings can I create by using polymer clay?
- 6. Do polymer clay earrings weigh a lot?
- 7. Do you have to be able to finish and decorate polymer clay after baking?
- 8. Before I get down to work, how do I make my clay clean?
- 9. What is the process of threading the earring hooks into the polymer clay?
- 10. May I sell the DIY polymer clay earrings in an internet store?
- Final Thoughts
Key Takeaways
- Basic tools and easy-to-make polymer clay earrings at home. Get a kit on clay earrings or collect the material yourself.
- Condition the clay before shaping and cutting your designs. Learn how to bake polymer clay earrings in the right manner to avoid burning.
- Suitable for all ages and abilities, from children to adults. Endless styles: floral earrings, drop earrings, dangle earrings, Christmas polymer clay earrings, and more.
What is polymer clay?
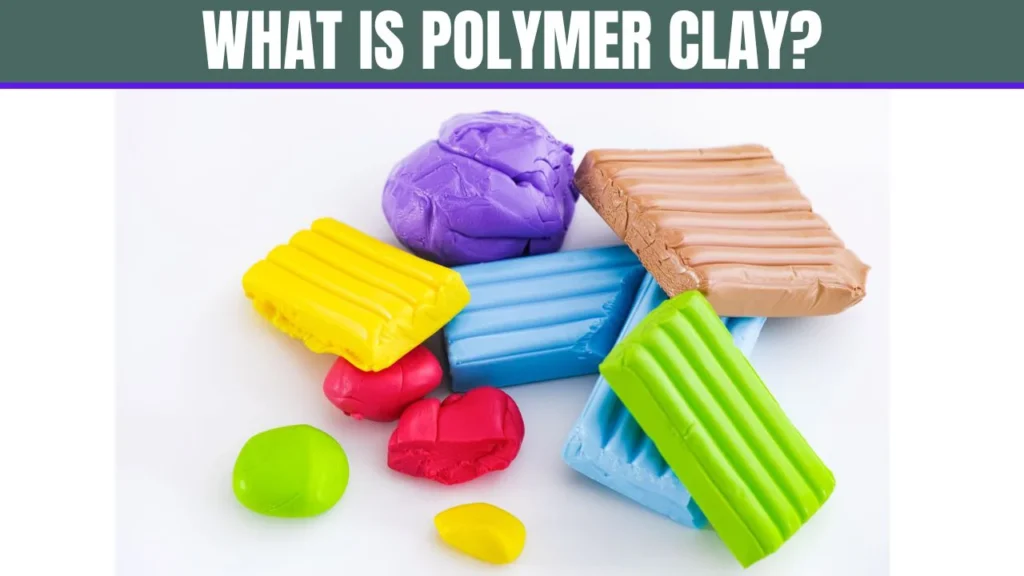
Polymer clay, also called modeling clay, is a clay that remains unhardened until it is heated in an oven. It is capable of taking a shape when it is hard, and otherwise, when it initially appears out of the oven, it is soft. Polymer clay, unlike air-dry clay, is long-lasting, colored, and can be used as jewelry, such as earrings, necklaces, and bracelets.
Polymer clay is a plastic base (PVC) that has coloring substances and softeners. It is not toxic, is convenient to use, and has numerous colors and finishes available. You can also blend colors, sculpt details, or roll it flat for simple shapes.
Because it’s so flexible, polymer clay is used to create everything from miniature food charms to modeling clay flower earrings and even professional-looking gold earrings. But one of the easiest and most popular uses is for polymer clay earring DIY projects.
Best Brands of Polymer Clay
Clay is not global. There are the ones that are softer and suitable for beginners, and the ones that are firmer and used in precise work. Here are some of the best suppliers of polymer clay earring-making brands.
| Brand | Features | Best For |
| Sculpey III | Soft, easy to shape, wide color range | Beginners and kids |
| Premo! | Strong, flexible after baking, vibrant | Jewelry and professional results |
| Fimo | Holds detail well, slightly firmer | Intricate designs |
| Kato | Very firm, best for sharp lines | Advanced makers |
| CosClay | Bends without breaking after baking | Flexible earrings and durability |
Each of these brands works well with a polymer clay earrings kit or for DIY beginners using individual tools.
About Polymer Clay Earrings
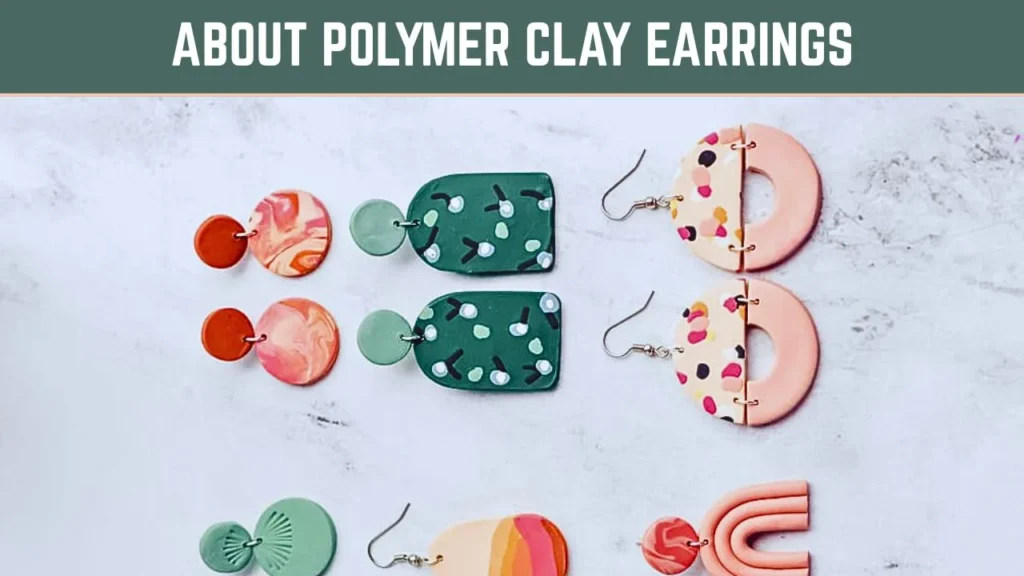
Polymer clay earrings are homemade or handmade earrings that are made of baked polymer clay. They may be detailed or simple as you like. You are also able to make conventional stud earrings, cool hanging earrings, or fashionable drop earrings.
The earrings do not strain your ears because the clay material is lightweight. It can qualify them as an excellent choice for everybody, including children. You can even apply materials, e.g., gold leaf, glitter, or even paint details later after baking.
Clay earrings are enjoyable to people, as they make creating earrings an activity where they exercise their creative rights. It could be floral earrings, geometric shapes, and even things that are preventive or seasonal, such as Christmas polymer clay earrings, and there is nothing that could limit you.
Supplies You’ll Need to Make Polymer Clay Earrings
As far as simple tools are required to start with polymer clay earrings, several things will be necessary. There is also a full clay earrings kit, which you can purchase when you need all the products in a single box.
| Item | Purpose | Notes |
| Polymer Clay | Main material for shaping earrings | Select Sculpey, Fimo, or Premo! |
| Roller or Pasta Machine | Flattens the clay evenly | Optional but helpful |
| Shape Cutters | Used to cut clay into shapes | Circle, teardrop, heart, etc. |
| Craft Knife or Blade | Cuts clay cleanly | Use carefully for fine cuts |
| Earring Hooks | Turns clay into wearable earrings | Choose silver, gold, or color types |
| Jump Rings | Connects pieces and adds movement | Use pliers to open and close |
| Parchment Paper | Non-stick surface for baking | Do not use wax paper |
| Baking Tray | Holds clay while baking | A standard kitchen tray works fine |
| Oven or Toaster Oven | Bake the clay to harden it | Always follow baking instructions |
| Sandpaper or Nail File | Smooths edges after baking | Use 400–600 grit |
| Jewelry Pliers | Helps attach hooks and rings | Use flat-nose or round-nose pliers |
| Optional: Glaze or Resin | Adds shine or seal to finished earrings | Glossy or matte finish |
You can find most of these in any local craft store or online. A polymer clay kit may include many of these items together, which is a good choice for beginners.
How to Make Polymer Clay Earrings
Now you will learn how to make polymer clay earrings in a step-by-step way. First, condition and roll out the clay, then cut it into pieces and add texture. After that, make holes for hooks and finally bake it. You can follow this, even if you still have no experience with any handmade earring DIY.
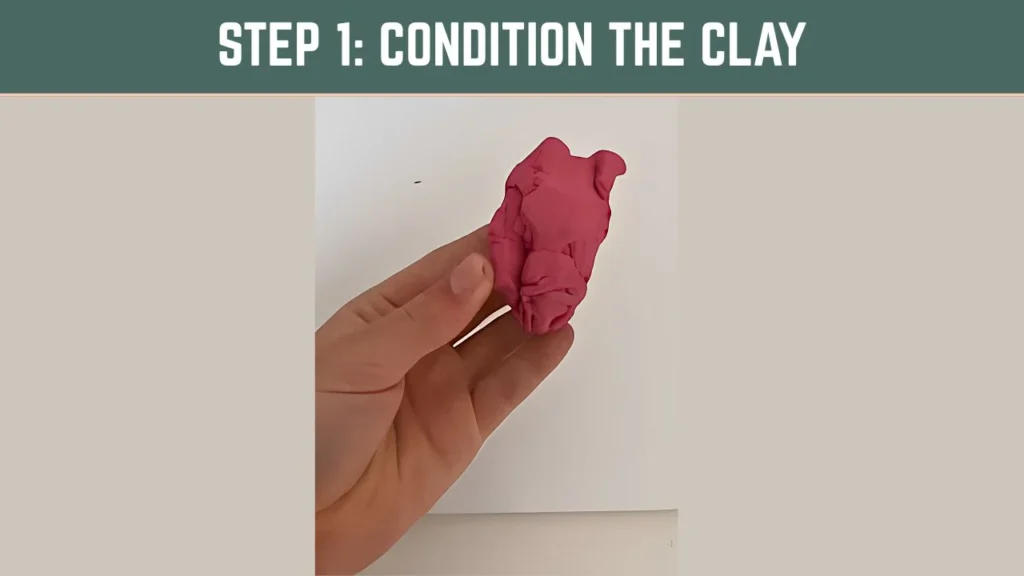
Step 1: Condition the Clay
First, remove the clay from the package. Then roll it up with your hands until it becomes soft. You can also use a pasta machine or roller to make it smooth. This step is called “conditioning.” You must condition all colors before using them. It helps the clay bake properly and last longer.
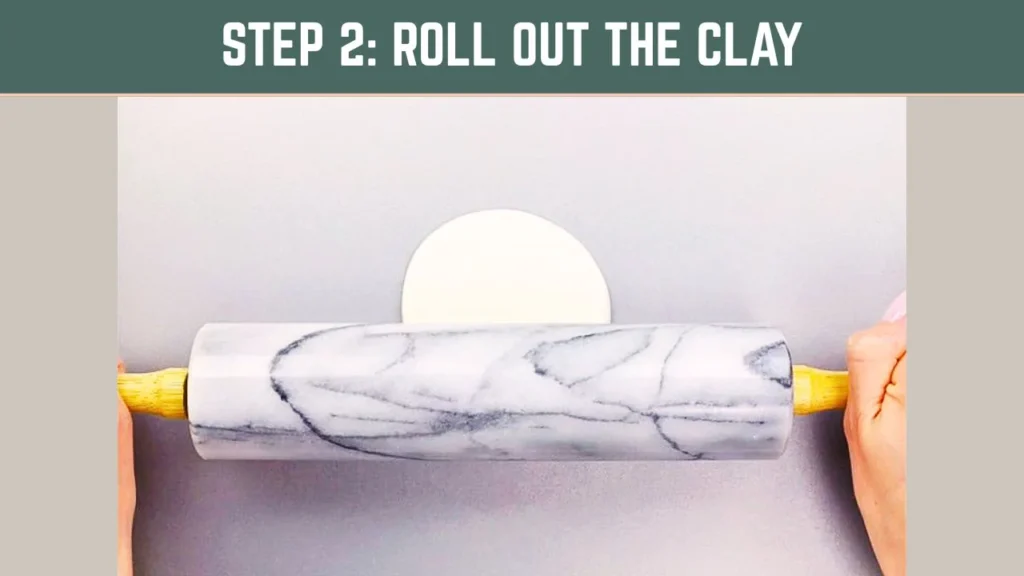
Step 2: Roll Out the Clay
Once you’ve conditioned the clay, roll it out on a clean surface. Roll or use a glass bottle. Attempt to roll the clay to a thickness of 2 to 3 mm. After this, you have to check that the thickness is even all around.
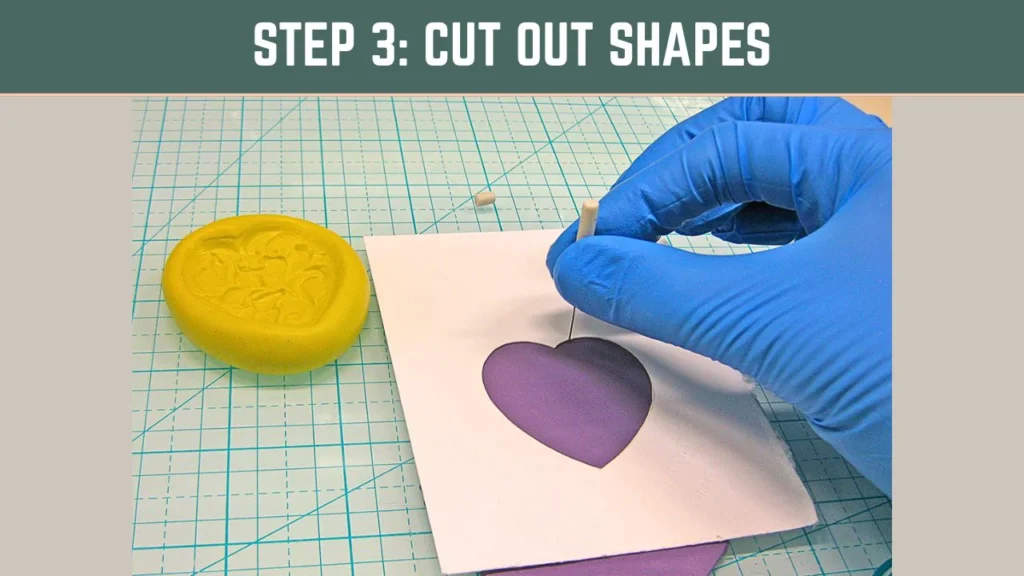
Step 3: Cut Out Shapes
Now it’s time to cut your designs. Use cookie cutters of the smallest size or shape cutters. For custom shapes, you can use a craft knife, too. Circles, hearts, leaves, and flowers represent well-known shapes. If you enjoy modeling clay flower earrings, create each petal by hand.
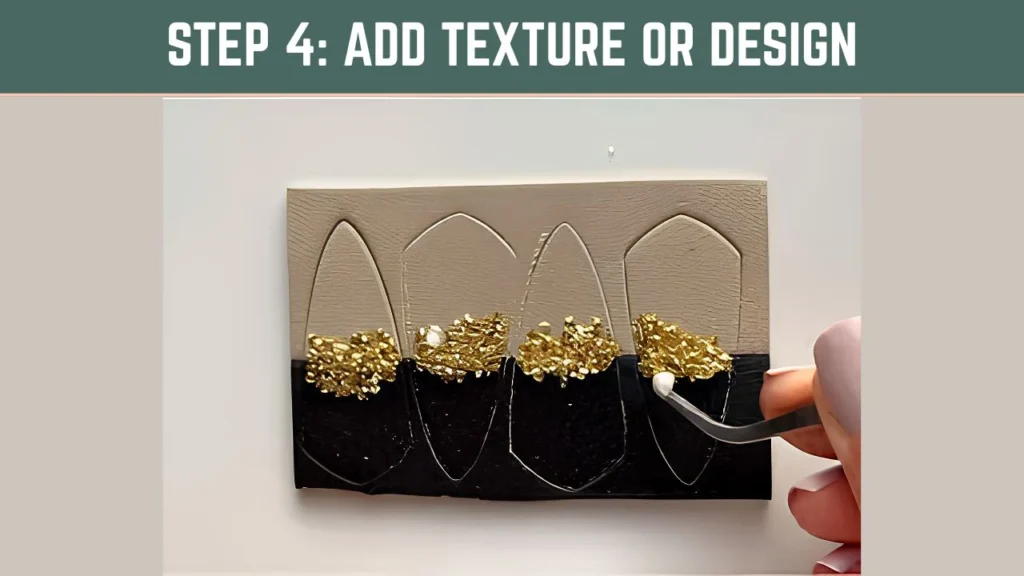
Step 4: Add Texture or Design
Then, add details if you want. You can press lace, stamps, or fabric into the clay. It creates cool textures. Some people also swirl colors to make unique polymer clay earrings. Other people will draw lines or dots with clay creatures.
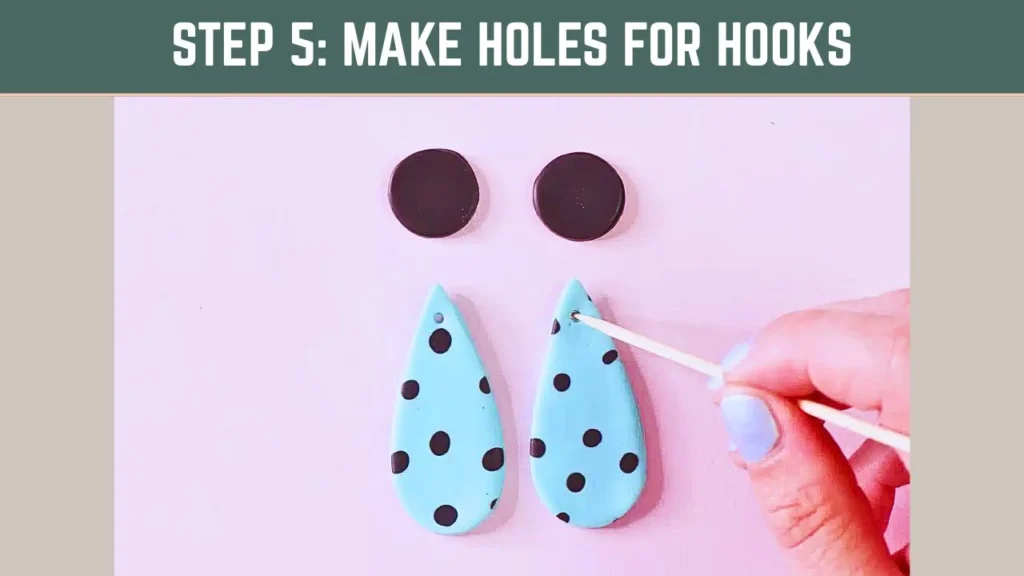
Step 5: Make Holes for Hooks
After that, use a toothpick or a straw to make a hole on top of the earrings. Here you will insert earring hooks or jump rings further. Get the holes large enough to fit your findings. Also, make sure you make the holes in the same place on both pieces. This way, earrings will be at the same level.
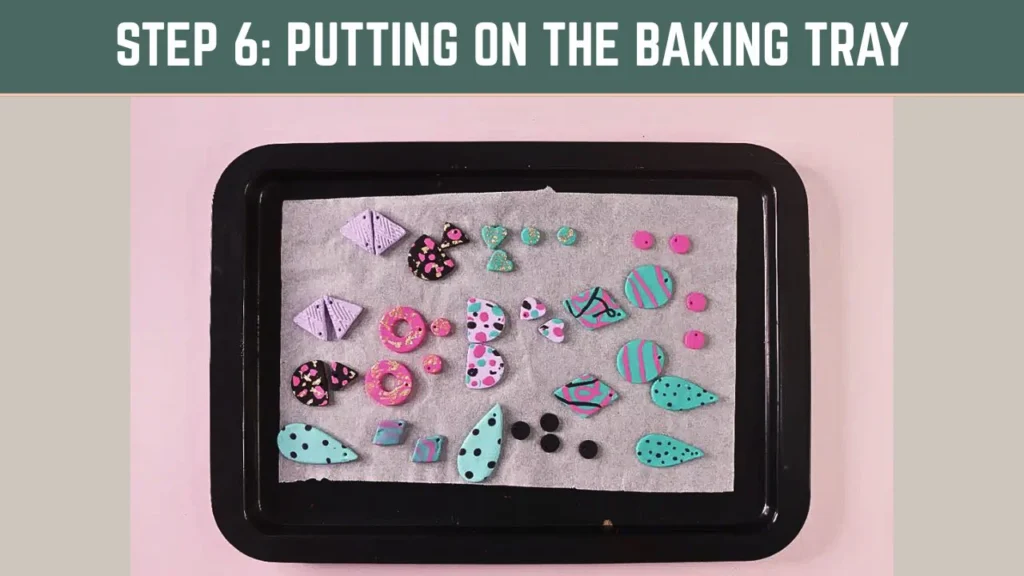
Step 6: Putting on the Baking Tray
At this point, tenderly arrange your clay forms upon a parchment paper-lined tray. Avoid bending or pressing them. Do not put them very close together. Keep them placed until the oven is hot.
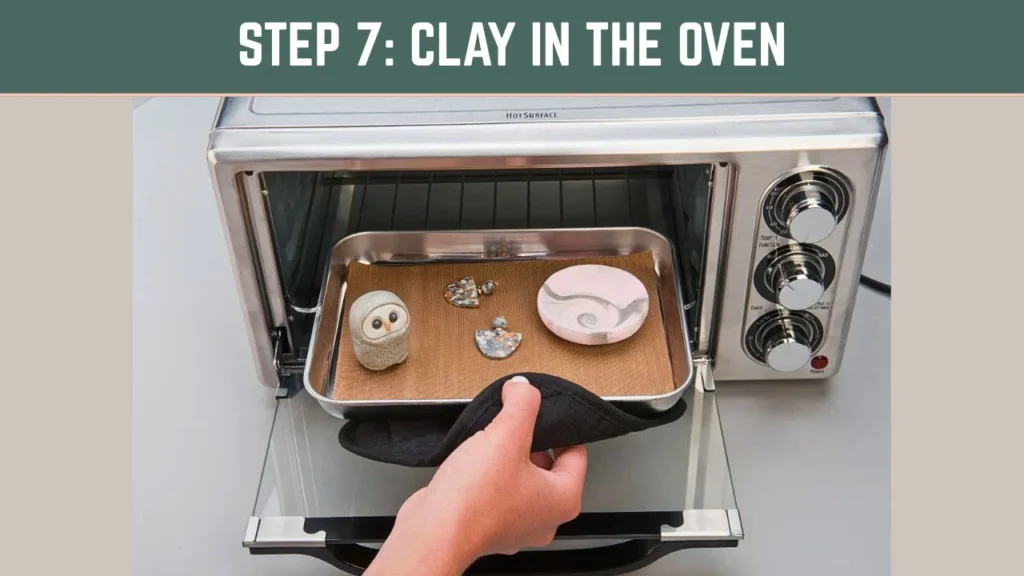
Step 7: Clay in the Oven
The oven needs to be preheated at the temperature stated on the package of the clay. Typically, it is at 265°F. Then bake your earrings for 15-30 minutes. Less expensive earrings take less time. However, larger or thicker ones require more. It is the duration of time during which polymer clay should be baked.
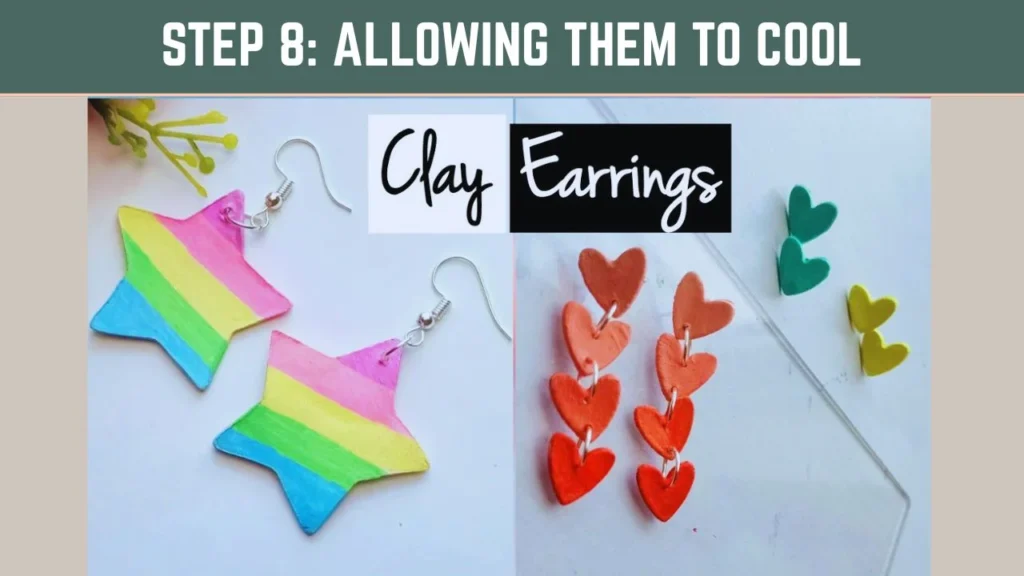
Step 8: Allowing them to cool
When the baking process is over, turn off the oven. Keep the tray indoors for 10 minutes. After that, pull it out and allow the earrings to cool completely. Rather, do not handle them too soon. As they cool off, they will harden.
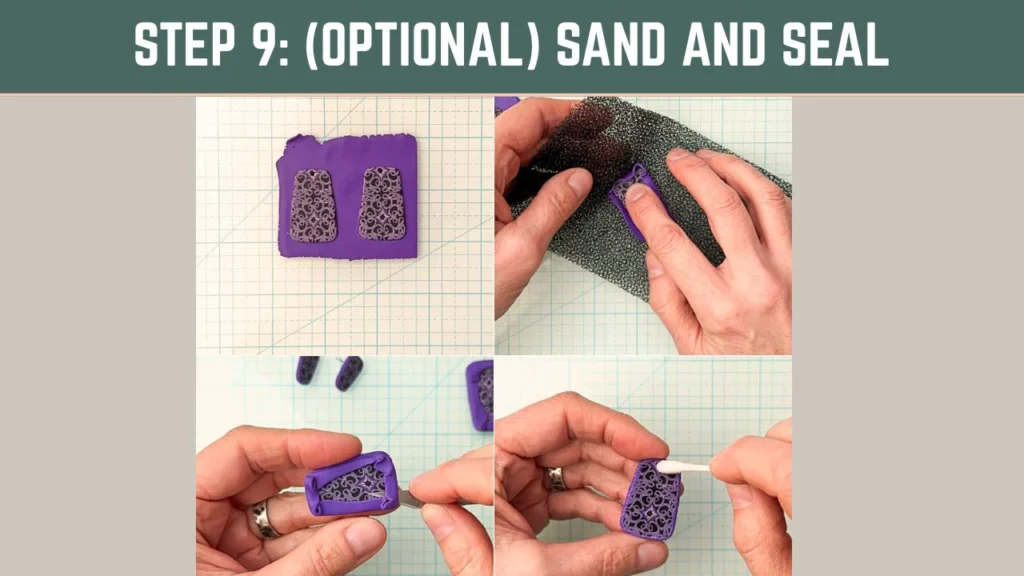
Step 9: (Optional) Sand and Seal
After cooling, you may smooth the edges with fine sandpaper. It eliminates any rough bits. You can also seal them with glaze or resin if you want. Clay jewelry appears great with glossy or matte finishes.
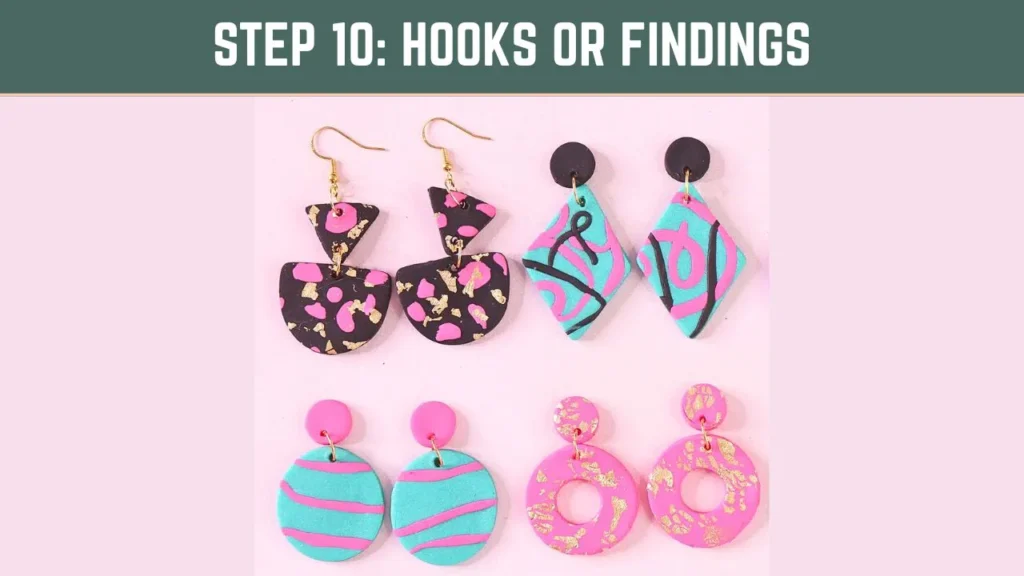
Step 10: Hooks or Findings
Now fasten your earring hooks or gold earring findings. Jump rings can be opened and closed using small pliers. Join the clay to the hooks. Tighten them such that they will not fall apart.
And that is it! A success is that you have created your polymer clay earring. Now you can earn more in other new styles, such as dangle earrings, drop earrings, or even Christmas polymer clay earrings during the Christmas holidays.
How to Bake Polymer Clay Earrings
Baking is a very important step because it makes your earrings strong and ready to wear.
Step 1: Read the Clay Package
Different brands are prepared at different temperatures. 265 to 275°F (129 to 135°C) is needed by most. Hence, take the instruction book before baking.
Step 2: Warm up your oven
Then switch on your oven. Bake it when it has warmed all the way up. It can be made either in a toaster oven or in a regular oven. A microwave should never be used. It will be corrupting the clay.
Step 3: The Tray Ready
Cut parchment paper on a baking tray. Then, place your shapes of clay on top. Space them between each one. It prevents their adherence.
Step 4: Baking of Clay
At this point, bake the earrings for 15 to 30 minutes. What takes around 15 to 20 minutes are thin slices. Bowl-like forms require up to 30 minutes. That is the time to bake polymer clay safely.
Step 5: Allow Them to Cool
Turn off the oven after baking. Place the tray in there and wait 10 minutes. Then remove it, and allow all to cool. Hot earrings must never be handled. They are flexible or brittle.
Step 6: Inspection & Completion
The earrings, when cold, ought to be brittle. Now you are capable of sanding the edges or polishing them. They can also be glazed, should they require a shiny look.
Your baking polymer clay earrings are done now.
Prepare Workspace for Clay Earrings
Before you start, prepare your workspace carefully. First, clean your table well. Then, gather all your tools and materials. Also, set up a clean surface to work on. It helps you make beautiful earrings easily and quickly.
- First, clean your table well. Dust and dirt can spoil your clay.
- Then spread parchment paper or a silicone mat. It keeps your clay neat and clean.
- Then, place all your tools close by. You’ll need cutters, a roller, and your polymer clay.
- Also, keep baby wipes or paper towels nearby. You will want to clean your hands between colors.
- After that, set out your earring hooks, jump rings, and pliers. In this manner, you will be able to lose any small parts.
- Lastly, ensure that the oven is preheated for baking later.
Condition Clay and Mix Colors
You need to prepare the clay first before you go ahead and make earrings. It can be referred to as conditioning. Conditioning supplies the clay with softness that makes it easy to shape.
The clay is hard at first. But when you continue rolling and squishing, it becomes soft and smooth. It is also possible to blend colors to create other shades. The ability to mix the clay assists you in creating alluring colors for your clay earrings.
- Break and Roll the Clay: Take a little bit of clay. You should roll it in your hands several times until it gets soft and agreeable. It might start with stiffness, but do continue.
- Use a Roller or Pasta Machine: Then roll the clay a few times with a roller or pasta machine. It smoothens and softens the clay in a shorter time of application.
- Condition Every Color: Repeat the same procedure with each of the colors to be used. Conditioning assists in the clay to form well and bake well.
- Mix Colors to Make New Shades: To mix colors, roll each clay color into thin logs. Turn the logs over and then press and fold the clay.
- Blend Until Smooth: Continue to roll and fold, and then the colors will mix into one smooth color. It makes your earrings lovely and unique shades.
Polymer Clay Earring Kit
A polymer clay earrings kit is perfect for beginners. You don’t need to buy every tool one by one.
Kits come with everything in one box.
Most kits include:
- Blocks of polymer clay in many colors
- Clay cutters or molds
- Roller or shaping tools
- Jump rings and earring hooks
- Pliers
- Sandpaper or buffer
- A full polymer clay earrings tutorial
Other kits additionally include some extras, such as gold leaf or glaze. A kit is available online or in a craft store. Look for one labeled for jewelry making or clay jewelry.
Types of Polymer Clay Earrings
There are so many styles of polymer clay earrings. Each one looks different and has its feel. Here are the most popular types:
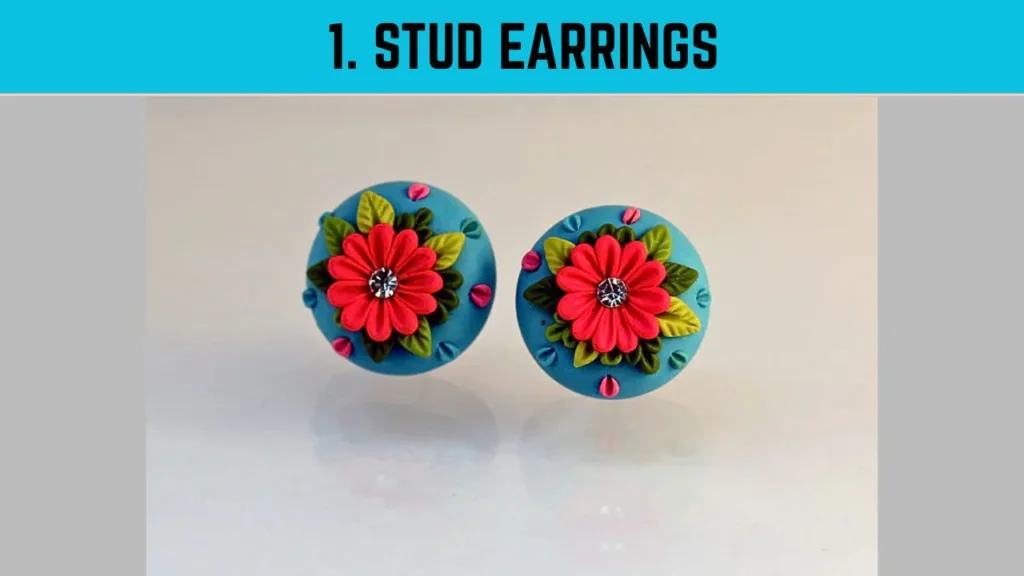
1. Stud Earrings
These are small and simple. These sit flat on the ear. These are very good earrings to wear to school or any day of the week. Simple, cute polymer clay earrings are extremely popular among them.
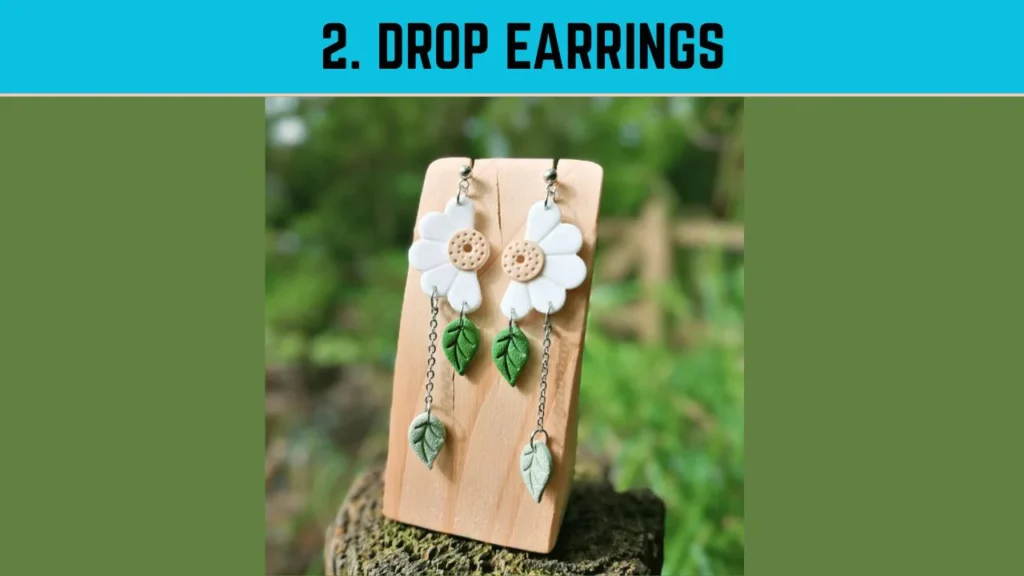
2. Drop Earrings
These hang just below the earlobe. These are very easy to make. You can easily wear it. You may use circles, ovals, or other shapes.
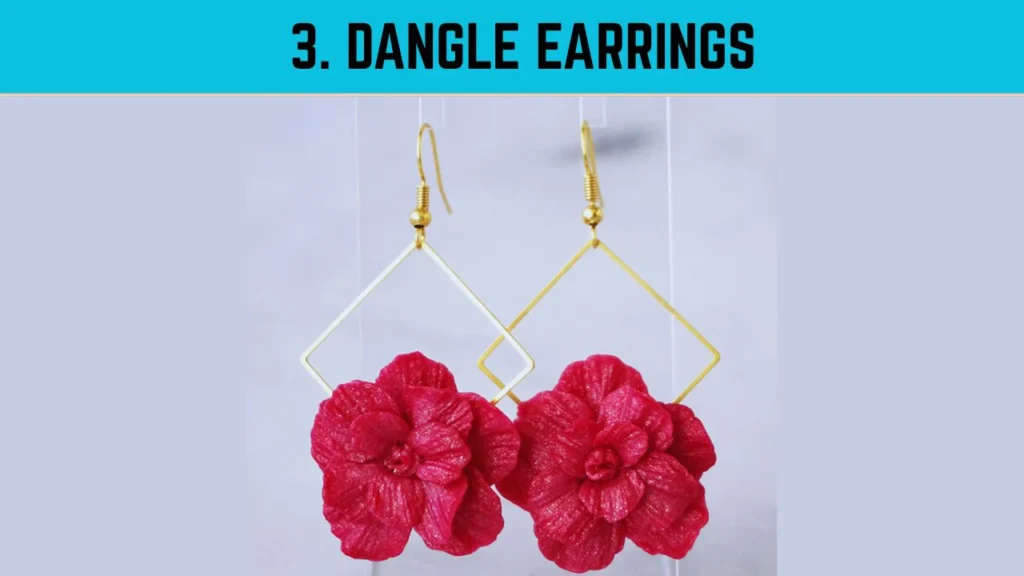
3. Dangle Earrings
These are longer earrings that swing when you move. They can have one piece or many parts.
These are great for floral earrings or layered looks.
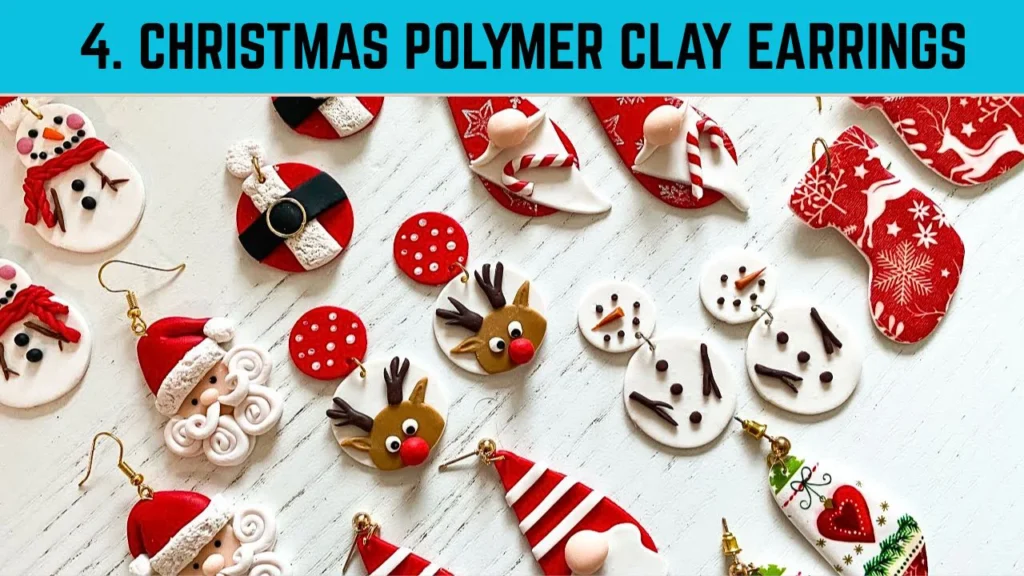
4. Christmas Polymer Clay Earrings
These are fun earrings shaped like holiday items. They include trees, stars, candy canes, or snow lakes. They are perfect for gifts or holiday outfits.
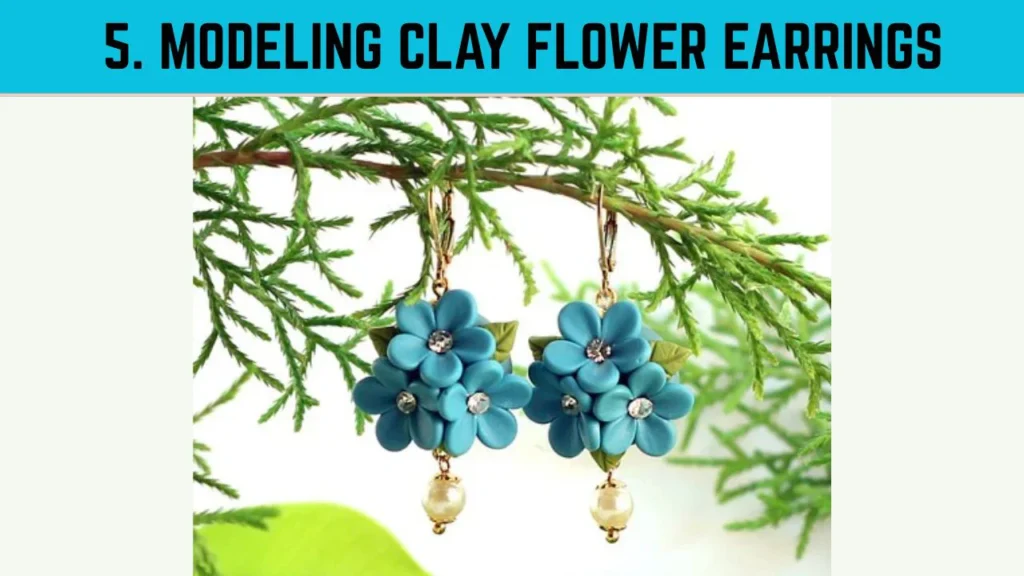
5. Modeling Clay Flower Earrings
They are made to look like real flowers. Use small tools to shape petals.
These are cute, detailed, and great for spring.
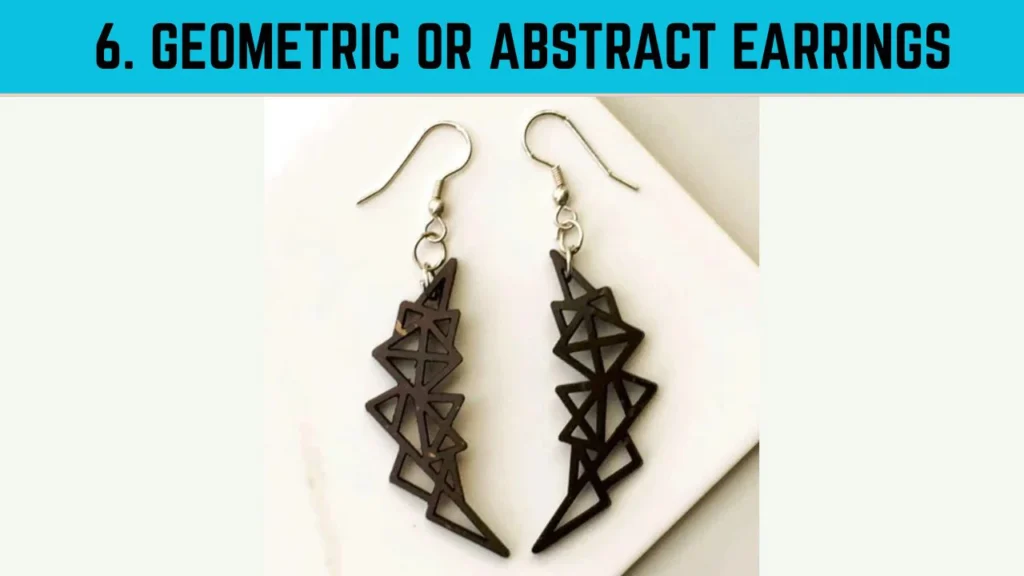
6. Geometric or Abstract Earrings
Use simple shapes like triangles, lines, or arches. These look modern and clean. Great for creating unique earrings.
Frequently Asked Questions (FAQs)
1. What are the home instructions for creating polymer clay earrings?
To create polymer clay earrings, roll out the clay first until it is soft. Small, flat, cut-out shapes develop holes. Put into an oven, cool, and add earring hooks. It is a simple DIY project that involves making earrings by hand, and it is fun.
2. What are the things that I should have to make clay earrings?
You will require polymer clay, cutters, a roller, jump rings, earring hooks, an oven, and a tray. The Polymer Clay earring kit has everything in a box, and this is ideal for beginners.
3. What is the time of baking polymer clay earrings?
Preheat the oven to around 265 to 275°F and bake for 15 to 30 minutes. Slimmer slices cook in a short time. Make sure you do everything to prevent burning, just as your clay brand tells you to.
4. Are polymer clay earrings made by kids?
Yes, children will have fun in this craftwork with adult support. They will adore producing adorable homemade earrings using polymer clay. It is enough to make sure that an adult and sharp objects are used during baking.
5. Which earrings can I create by using polymer clay?
You have the option of making studs, dangles, drops, and floral earrings, and Christmas polymer clay earrings. Polymer clay earrings ideas do not have an end. Cut with cutters or craft them up to make them look unique.
6. Do polymer clay earrings weigh a lot?
On the contrary, polymer clay is quite light. Big dangle earrings or drop earrings are also comfortable to wear the entire day.
7. Do you have to be able to finish and decorate polymer clay after baking?
Yes. A final touch can be effected by baked acrylic paint or gold leafing, or after baking, glazing. It aids in the manufacture of gold earrings and colorful patterns, as well as encapsulated finishes to give durability to the shine.
8. Before I get down to work, how do I make my clay clean?
Clean off hands and paint tools between color changes. On your table, use parchment paper. It ensures that dust and lint do not stick to your clay jewelry.
9. What is the process of threading the earring hooks into the polymer clay?
Before baking, use a straw or toothpick to make holes. Put the clay to cool down, then use pliers and jump rings to secure it to the earring hooks.
10. May I sell the DIY polymer clay earrings in an internet store?
Indeed, this hobby can be a business for many people. The simplicity of such designs as modeling clay flower earrings or plain, cute polymer clay earrings is what sells well on Etsy or at local craft fairs.
Final Thoughts
Polymer clay earrings can be created simply, are enjoyable to design, and are so gorgeous to wear. You don’t need to use any fancy tools or possess special skills. One just begins with soft clay, does, and then bakes it with care. Regardless of whether you make Christmas polymer clay earrings, unique, cute polymer earrings, or something very basic, each pair is going to be exceptional.
It is an ideal craft project suitable for newbies, children, and those who vibe with handmade DIY earrings. Your homemade clay earrings would look spectacular and even last forever, provided you can gain some experience. Therefore, go ahead. Give it a go. Your new pleasurable hobby may be sitting on your dinner table.


![The Best 30+ Free Crochet Cat Patterns [Beginner-Friendly Guide]](https://crochetmind.com/wp-content/uploads/2025/04/1-The-Best-30-Free-Crochet-Cat-Patterns-Beginner-Friendly-Guide.webp)


