
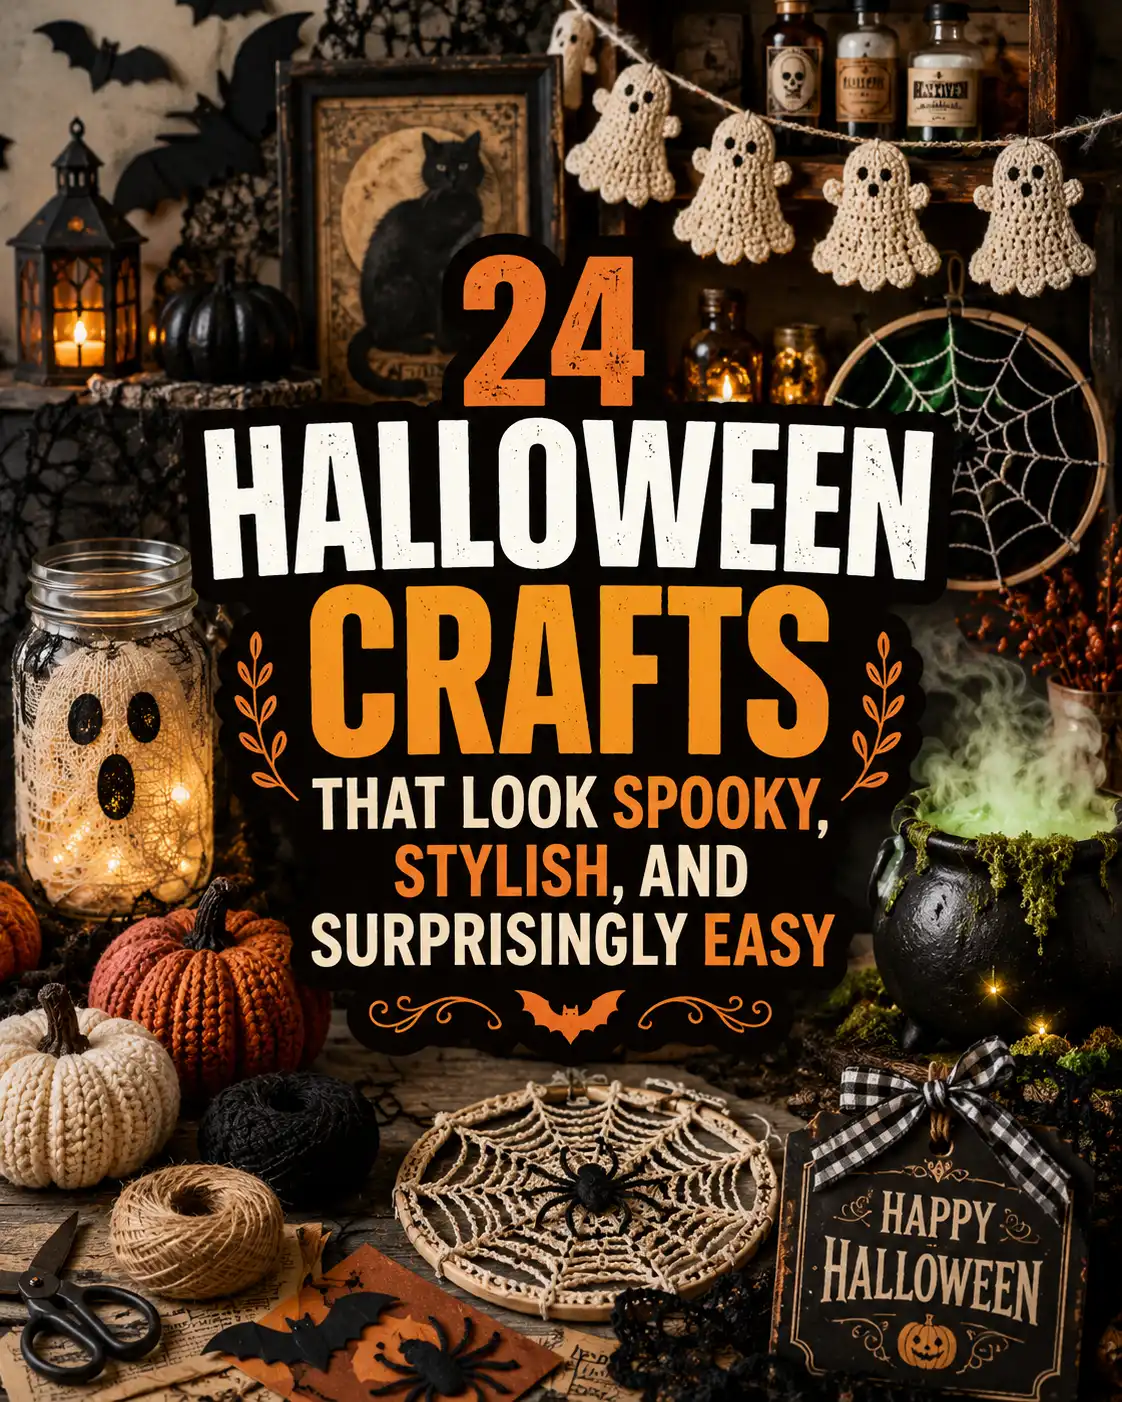
Halloween crafts can transform inexpensive paper, fabric, yarn, jars, thrift-store finds, and natural materials into decorations that look far more expensive than they are. These 24 projects include quick beginner ideas, crochet details, vintage-inspired pieces, and more involved Halloween crafts for adults, with options for mantels, tables, walls, porches, and parties.
Halloween crafts feel especially rewarding because they let you shape the mood instead of relying on ready-made decorations. You can keep everything cozy and playful, lean into vintage halloween details, or create a darker gothic display using materials you already enjoy. Whether you have one quiet afternoon or an entire weekend, there is a project here that can fit your time, skill level, and available space. Start with the idea that immediately catches your attention, then use its colors and textures to guide the rest of your seasonal decorating.
There is something especially satisfying about making your own Halloween decorations. You can choose exactly how spooky, playful, gothic, colorful, or old-fashioned your home feels instead of settling for whatever happens to be available in a store.
Some of these crafts can be completed in less than an hour. Others are the kind of cozy weekend projects you can work on while watching a favorite Halloween movie. Either way, the finished pieces are designed to feel creative and display-worthy—not like disposable classroom decorations.
Key Takeaways
- Match each craft to your skills, space, and available time.
- Reuse jars, fabric, yarn, paper, and thrifted finds.
- Choose flameless lights for paper, fabric, and yarn decorations.
- Use muted colors for polished vintage halloween style.
- Store flat or soft crafts to reuse next year.
Which Halloween Crafts Are Best for Your Home?
The best Halloween craft is one that suits your decorating space, preferred material, available time, and current skill level.
At a Glance
- Choose paper projects for fast, affordable decorating.
- Use yarn and fabric for soft, reusable pieces.
- Select jars and frames for polished adult projects.
- Match project size to your display and storage space.
The best Halloween crafts combine a clear seasonal theme with materials you already enjoy using. Paper and felt are ideal for fast garlands, yarn works beautifully for soft ghosts and spiderwebs, while jars, frames, trays, and thrifted objects are perfect for more polished halloween decor diy projects.
Before choosing a project, decide where you want to display it and how much time you want to spend.
| Halloween craft | Skill level | Approximate time | Best place to display |
|---|---|---|---|
| Paper bat wall | Beginner | 20–40 minutes | Entryway or staircase |
| Crochet ghost garland | Intermediate | 2–4 hours | Mantel or shelf |
| Vintage cat sign | Beginner | 45–90 minutes | Wall or console |
| Bubbling cauldron | Beginner | 1–2 hours | Porch or party table |
| Spiderweb hoop art | Intermediate | 1–2 hours | Gallery wall |
| Apothecary bottles | Beginner | 30–60 minutes | Shelf or table |
| Fabric pumpkins | Intermediate | 1–3 hours | Basket or centerpiece |
| Haunted dollhouse | Advanced | Weekend project | Display cabinet or table |
What supplies should you prepare first?
You will not need every item for every project, but a small Halloween craft kit makes the process much easier.
Keep these basics nearby:
- Black, white, orange, cream, and metallic craft paint
- Cardstock, kraft paper, and old book pages
- Felt, yarn, lace, ribbon, and fabric scraps
- Scissors, a craft knife, and a cutting mat
- Hot glue, tacky craft glue, and double-sided tape
- Paintbrushes and foam brushes
- Battery-operated tea lights
- Twine, embroidery hoops, and wooden shapes
- Recycled jars, bottles, cans, and boxes
When using spray paint, strong adhesives, permanent markers, or similar craft materials, work in a well-ventilated space and follow the product label. The U.S. Environmental Protection Agency’s indoor air quality guidance also recommends increasing ventilation when using products that emit VOCs. The U.S. Environmental Protection Agency notes that glues, adhesives, permanent markers, and some paints can release volatile organic compounds, and levels of several common organic pollutants may be two to five times higher indoors than outdoors.
How Can You Make Halloween Crafts Look More Expensive?
Use a controlled color palette, layered textures, matte finishes, and restrained embellishments to make handmade Halloween decorations look more refined.
At a Glance:
- Limit each project to two or three colors.
- Mix smooth, rough, soft, and distressed textures.
- Repeat materials across nearby decorations.
- Use metallic details sparingly.
- Leave some visual space around each piece.
Limit each project to two or three main colors, repeat one material across several decorations, and avoid adding every embellishment you own. Matte black, aged cream, tarnished gold, dark green, dusty orange, and burgundy tend to create a more collected look than bright plastic colors.
Texture also matters. Torn paper edges, distressed paint, loose yarn, faded ribbon, and brushed metallic details make handmade crafts feel intentional. A little imperfection often gives Halloween decorations their personality.
24 Creative Halloween Crafts to Make This Year
These 24 Halloween crafts range from quick paper and recycled-material projects to crochet decorations, gothic accessories, and detailed weekend displays.
At a Glance
- Begin with simple bats, jars, pumpkins, or garlands.
- Try crochet projects for reusable seasonal texture.
- Use thrifted objects for distinctive adult decorations.
- Save large displays for weekend crafting sessions.
- Combine related projects into one coordinated scene.
1. How Can You Make a Crochet Ghost Garland?
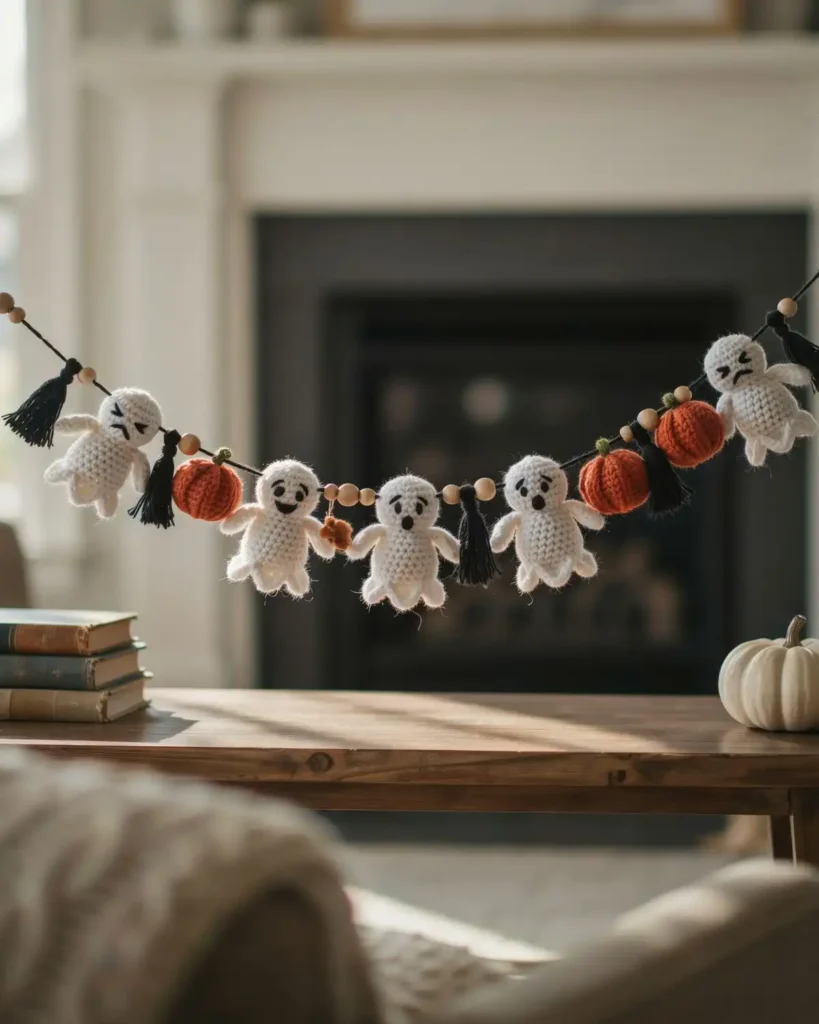
A crochet ghost garland brings softness to Halloween without losing the spooky mood. Unlike flat paper ghosts, the crocheted shapes have enough texture to stand out against a wall, shelf, or fireplace mantel. I especially like this project in rooms where harsh plastic decorations would feel out of place. It is perfect for crocheters who want a reusable decoration, and the best part is that every ghost can have a slightly different expression.
Crochet several small ghost shapes using white cotton or acrylic yarn. Add tiny black embroidered eyes, then attach the finished ghosts to a long chain or piece of twine. If you’re looking for more seasonal crochet inspiration, browse these Halloween crochet ideas before starting your garland.
You can alternate the ghosts with:
- Mini crocheted pumpkins
- Black yarn tassels
- Wooden beads
- Small pom-poms
- Felt stars or moons
Special Tip: Lightly stuff each ghost before closing it if you want the garland to look more three-dimensional.
2. Vintage Black Cat Wall Art
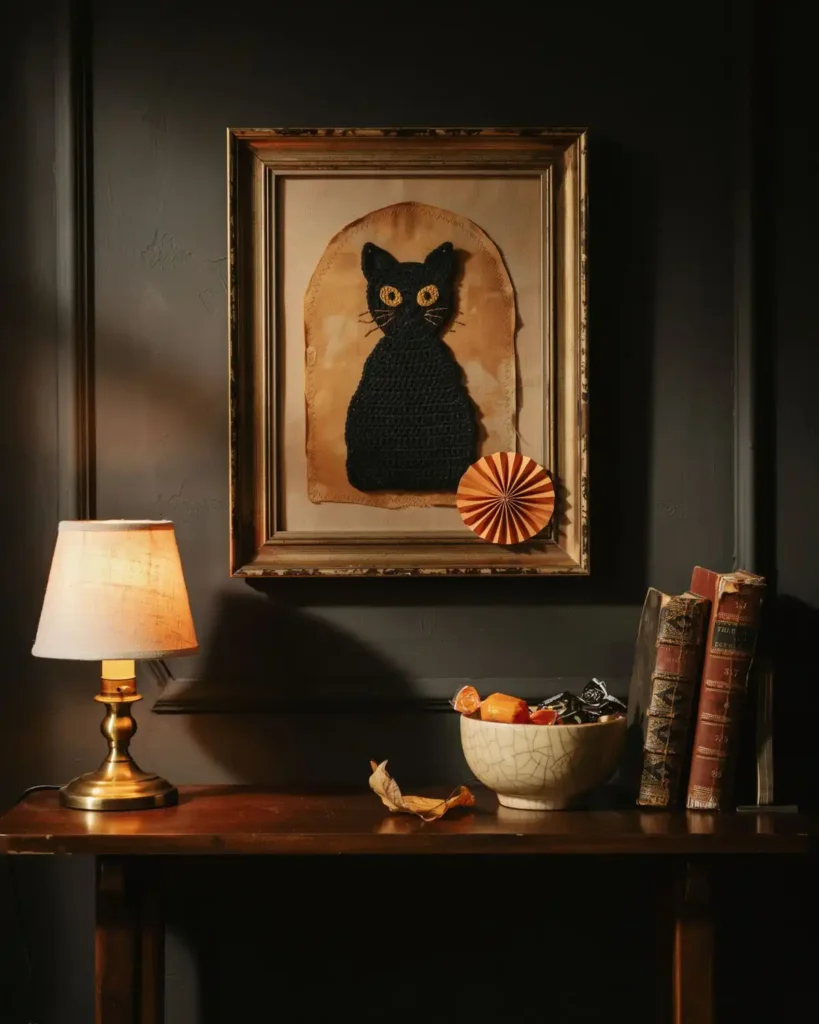
Vintage black cat wall art gives a plain frame the feeling of an old Halloween collectible. Modern printed decorations can look too clean, but distressed paper and faded orange tones create the charming wear found in older seasonal pieces. This looks especially good above a narrow console table with a small lamp and a bowl of candy. Choose it when you want vintage halloween character without searching antique shops for an original.
Print or draw a black cat with an arched back, round eyes, and an exaggerated tail. Mount it on muted orange, cream, or aged-looking paper.
To create an older finish, gently darken the edges with brown ink or diluted paint. A secondhand frame painted black or antique gold completes the project.
The Smithsonian’s National Museum of American History preserves paper and cardboard Halloween decorations dating to around 1935, including black-cat and pumpkin designs. That makes these simple materials an authentic reference point for recreating a vintage-inspired look.
3. How Do You Create a Paper Bat Wall?
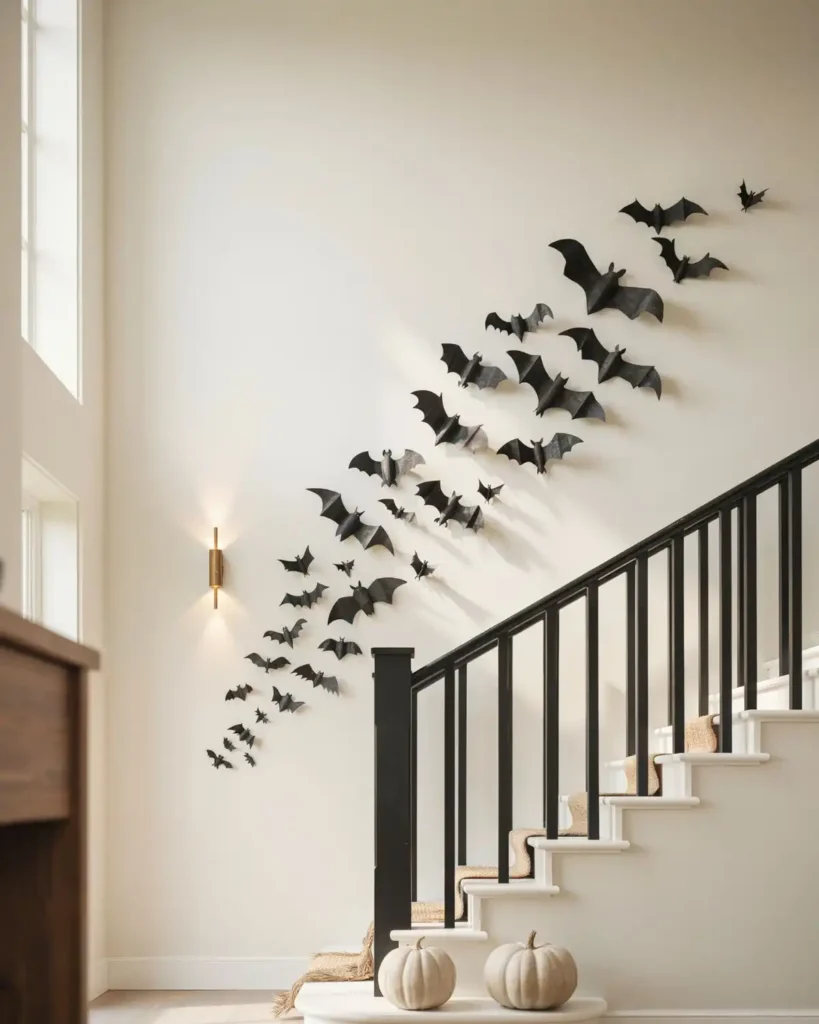
A paper bat wall is one of the fastest ways to make a large visual impact with almost no cost. Instead of hanging a single banner, a scattered flock creates movement and draws the eye through the room. I use this idea when an empty staircase, doorway, or television wall needs something dramatic for only a few weeks. It works best for anyone who wants maximum coverage from a very simple material.
Cut bats in at least three sizes from black cardstock. Fold each bat slightly along the center so the wings lift away from the wall.
Arrange the bats in a loose rising pattern rather than a perfect line. Begin with a dense cluster near the bottom, then spread them farther apart as they move upward.
Use removable adhesive strips or poster putty to help protect painted walls.
4. Mini Pumpkin Candle Holders
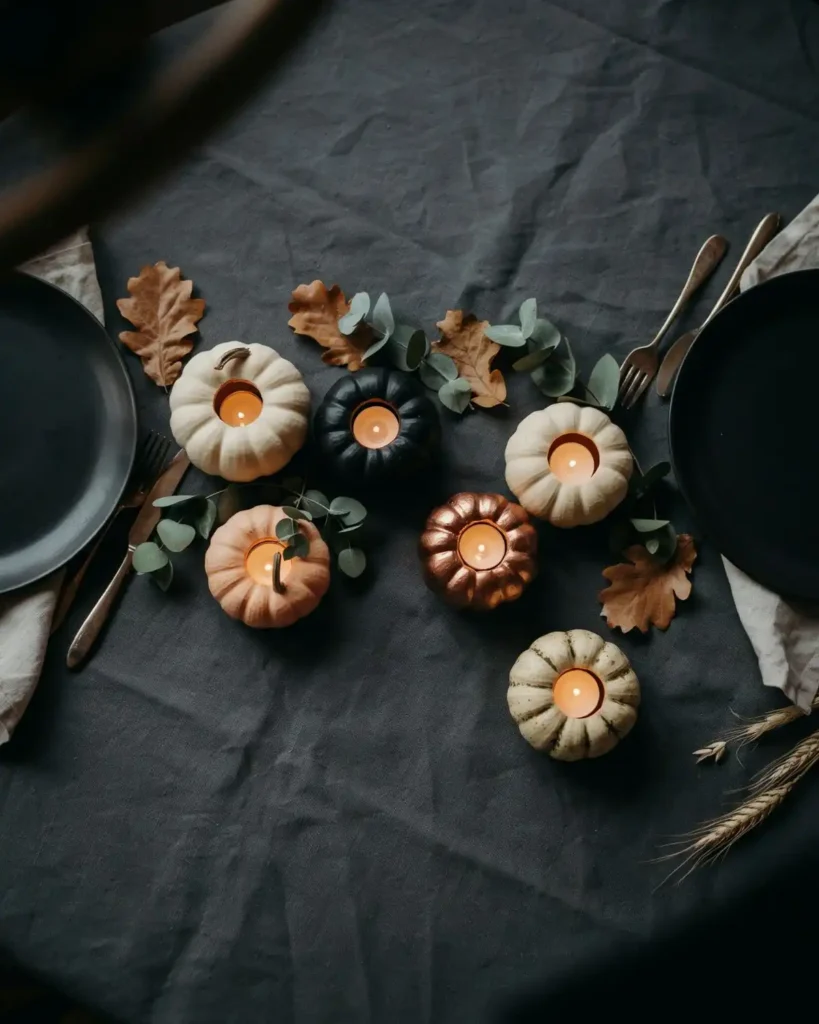
Mini pumpkin candle holders turn ordinary gourds into warm table decorations that do not need complicated carving. Store-bought candle holders can feel disconnected from the rest of a fall centerpiece, while pumpkins naturally blend with leaves, fabric, and seasonal flowers. They look lovely running down the center of a dinner table or grouped on a tray. This idea is best for hosts who want a quick centerpiece with a polished autumn feel.
Remove the stem area from each mini pumpkin and cut a shallow opening sized for a battery-operated tea light. Paint the pumpkin first if you prefer black, cream, gold, or copper instead of natural orange.
For safety, use flameless lights rather than real candles. The U.S. Consumer Product Safety Commission recommends battery-operated lights or glow sticks inside jack-o’-lanterns instead of open flames.
5. How Can You Turn Jars Into Spooky Apothecary Bottles?
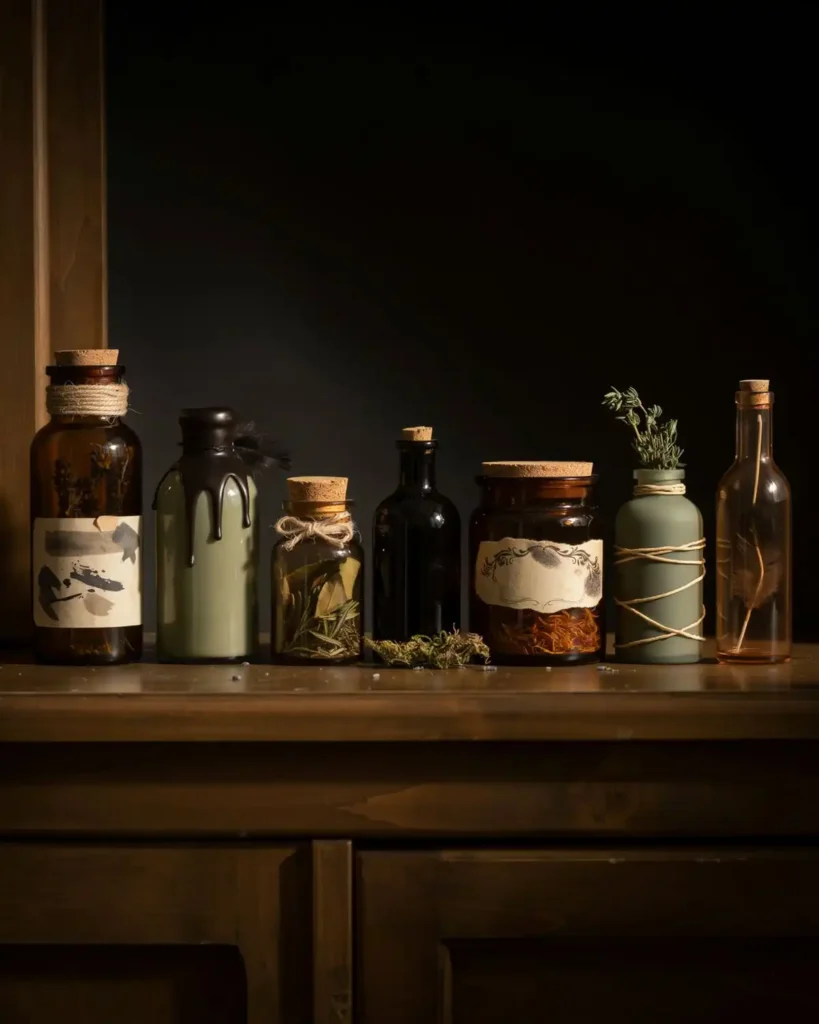
Spooky apothecary bottles make recycled jars look like ingredients from a mysterious old cabinet. Clear food jars usually feel ordinary, but dark paint, corks, wax, and aged labels completely change their personality. I like arranging them beside old books, dried herbs, and a small skeleton hand. They are ideal for anyone who enjoys theatrical crafts that can be customized with funny or genuinely eerie labels.
Wash and dry several bottles or jars in different shapes. Paint the glass with translucent color, matte black paint, or a light layer of brown and green to imitate aged glass.
Create labels with names such as:
- Bat Wing Tonic
- Moon Dust
- Spider Venom
- Witch Hazel No. 13
- Bottled Shadows
- Graveyard Moss
Tear the paper edges and stain them lightly with diluted coffee before attaching them to the bottles.
Special Tip: Drip hot glue around the bottle neck before painting it to imitate old sealing wax.
6. Embroidery Hoop Spiderweb Art
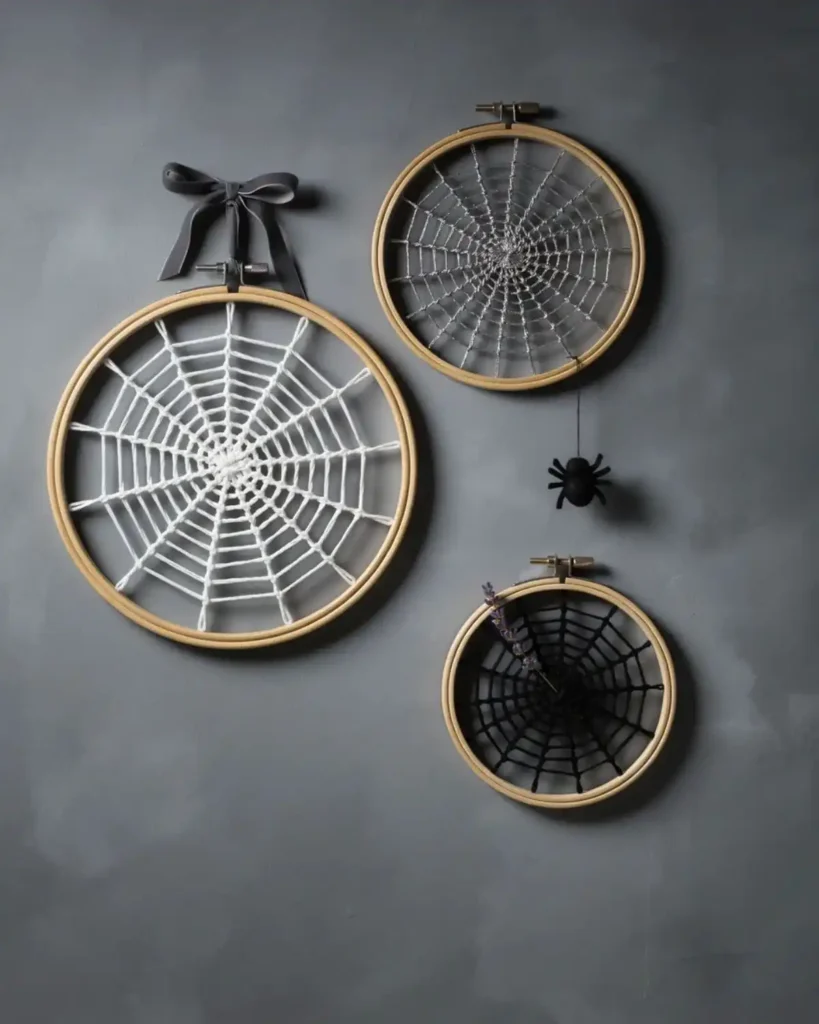
Embroidery hoop spiderweb art turns a familiar sewing tool into a clean, modern Halloween decoration. Plastic spiderwebs often tangle and lose their shape, but a hand-wrapped web stays crisp and can be stored flat. This project works beautifully in a craft room, reading nook, or gallery wall where you want something handmade but not overly cute. It is especially satisfying for people who enjoy fiber crafts but do not want to follow a detailed pattern.
Wrap black, white, or silver yarn around an embroidery hoop to create spokes. Weave another strand around the spokes in widening circles, leaving uneven spaces to keep the web organic.
Finish the hoop with one felt, crocheted, or plastic spider. A strip of lace or velvet ribbon at the top adds a slightly gothic finish.
7. What Is the Easiest Way to Make Yarn Pumpkins?
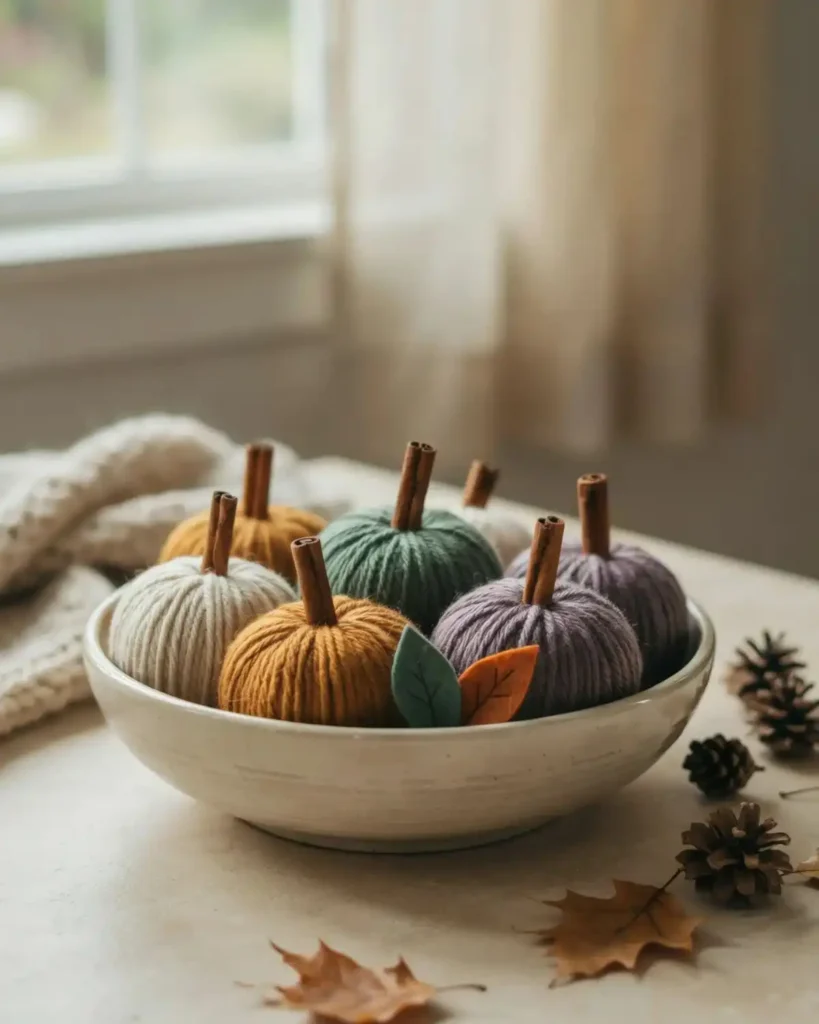
Yarn pumpkins are soft, lightweight, and much easier to store than real or ceramic pumpkins. If you’d rather crochet them than wrap yarn, these crochet pumpkin patterns offer plenty of reusable ideas. Many quick pumpkin crafts depend on bright foam, while yarn creates a warmer texture that suits both farmhouse and modern interiors. I keep a few in a shallow bowl with pinecones and dried leaves so they can stay out through Thanksgiving. They are a smart choice for yarn lovers who want to use leftover skeins, and the color possibilities are nearly endless.
Wrap yarn repeatedly around a piece of cardboard or your fingers. Tie the center tightly, remove the bundle, then spread the loops into a rounded pumpkin shape.
Push a short cinnamon stick, twig, or rolled piece of felt into the center as the stem. Add a small felt leaf for a finished look.
Try colors beyond orange:
- Mustard yellow
- Cream
- Rust
- Sage green
- Charcoal gray
- Plum
8. Aged Halloween Book Covers
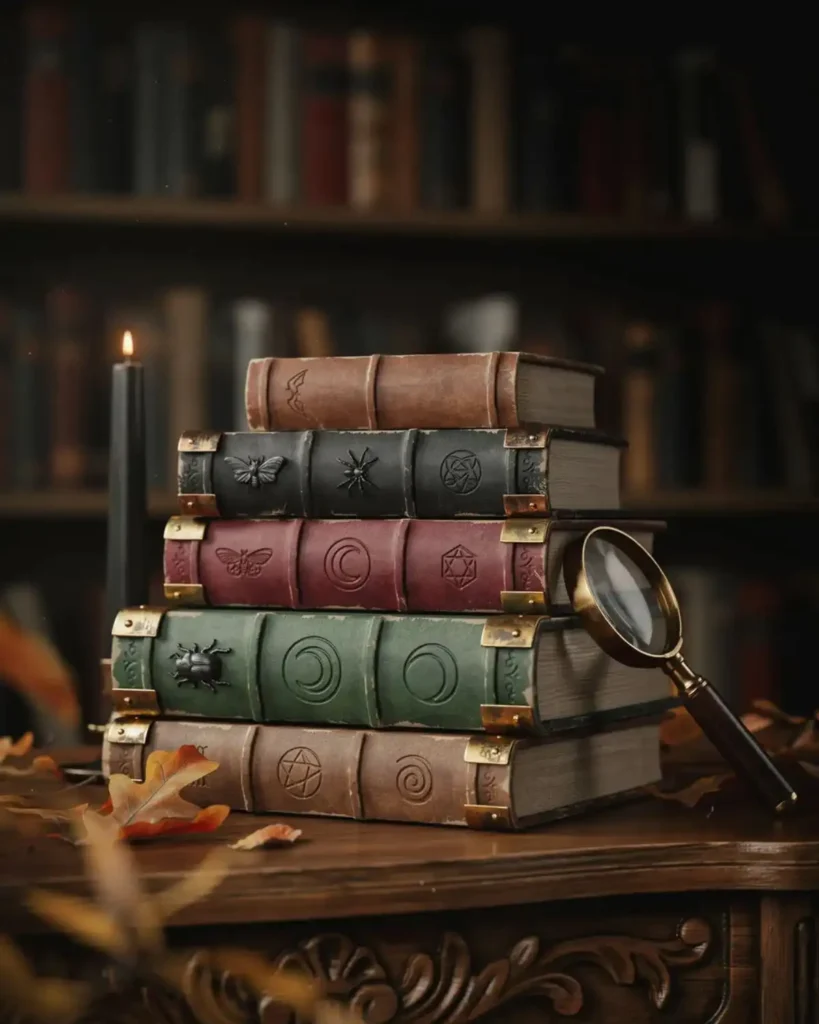
Aged Halloween book covers transform ordinary books or storage boxes into convincing spell books. Printed novelty books are easy to recognize as props, but layered paper, raised lettering, and uneven paint make handmade versions feel more believable. Stack them on a mantel or use them to add height beneath another decoration. This project is worth making when you need background pieces that bring an entire Halloween display together.
Wrap hardcover books or empty boxes in kraft paper. Glue on raised letters, thin foam shapes, plastic insects, or decorative trim before painting the entire cover.
Use black, brown, deep green, or burgundy as the base. Dry-brush gold or bronze paint over the raised areas so the details appear worn.
Write titles such as The Book of Shadows, Midnight Botany, or A Brief History of Ghosts along the spine.
9. How Do You Make a Bubbling Witch Cauldron?
A bubbling witch cauldron creates the illusion of a magical potion without water, fog machines, or complicated electronics. A plain plastic cauldron can look empty and unfinished, while clear ornaments and green light make it appear active. Place it near the front door, under a covered porch, or at the end of a Halloween buffet. It is perfect for anyone who wants a large statement piece that is still surprisingly lightweight.
Fill a black cauldron with clear plastic ornaments, transparent balls, or iridescent cellophane. Place green battery-powered lights beneath and between the “bubbles.”
Add a wooden spoon, curled wire steam, faux moss, or a pair of striped witch legs. Keep fabric, paper, dried moss, and other combustible embellishments away from open flames and hot bulbs.
10. Fabric Scrap Pumpkin Stack
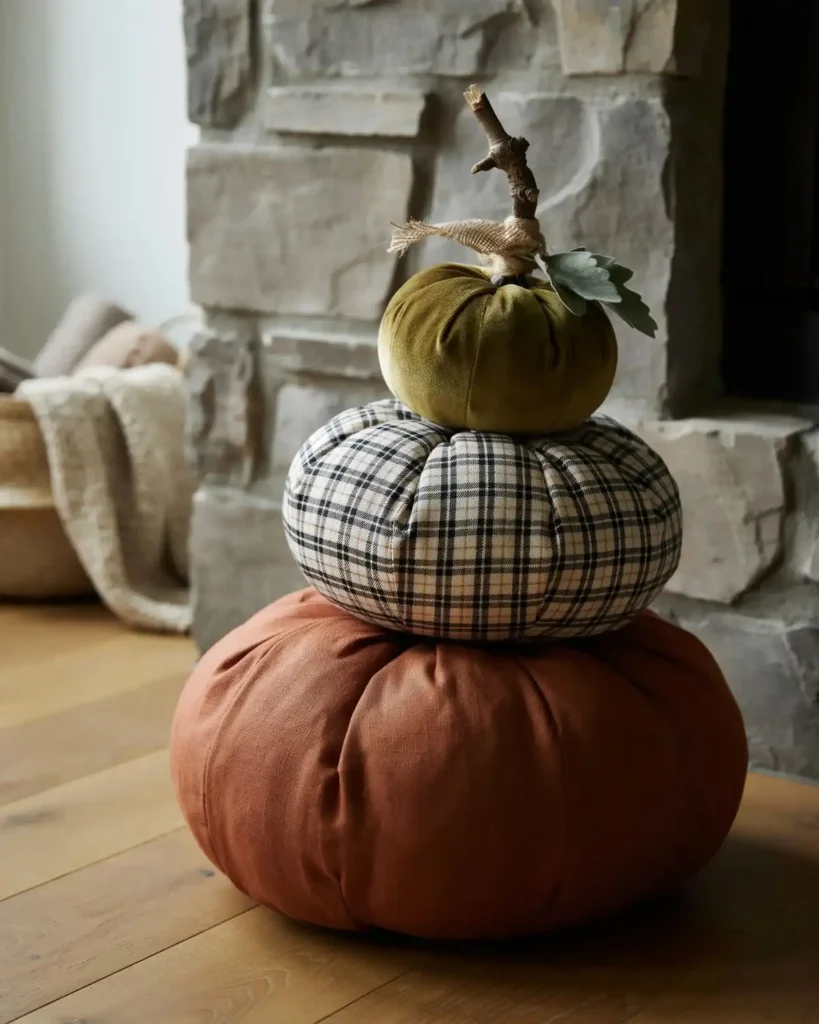
A fabric pumpkin stack turns leftover textiles into a decoration that looks soft, full, and deliberately coordinated. Mass-produced pumpkin towers often use identical shapes, while handmade layers can mix velvet, linen, plaid, and printed cotton. This piece looks particularly good beside a fireplace or in an entryway basket. Make it when you want to use meaningful fabric scraps and create something that feels more personal than standard seasonal decor.
Sew or glue three round fabric pumpkins in graduated sizes. Stuff them firmly, then stack them from largest to smallest.
Run a wooden dowel or long skewer through the center for stability. Finish the top with a twig, ribbon, raffia, or curled floral wire.
Use one repeated color across all three layers to keep mixed patterns cohesive.
11. Can You Make a Haunted Terrarium Without Live Plants?
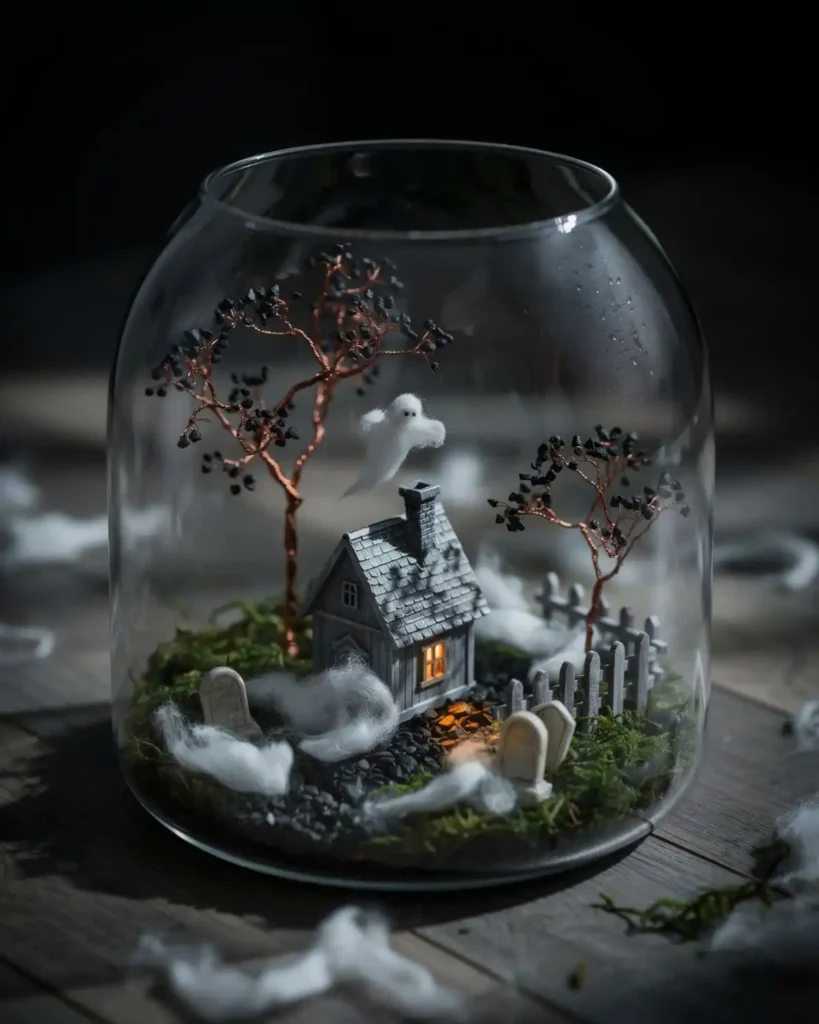
A haunted terrarium captures an entire miniature scene inside one glass container. A typical Halloween figurine sits alone, but a terrarium builds a tiny story with paths, trees, fog, and hidden details. I love placing one on a desk where the small pieces can be viewed up close. It is ideal for patient crafters who enjoy arranging miniatures, and the best part is discovering something new every time you look at it.
Layer gravel, preserved moss, bark, and dark decorative sand inside a glass jar or bowl. Add a tiny house, fence, skeleton, ghost, or gravestone.
Twisted wire branches make excellent miniature dead trees. Stretch a very small amount of fiberfill around the scene to imitate fog.
Do not add water unless every component is intended for a wet terrarium.
12. Pressed-Flower Ghost Frames
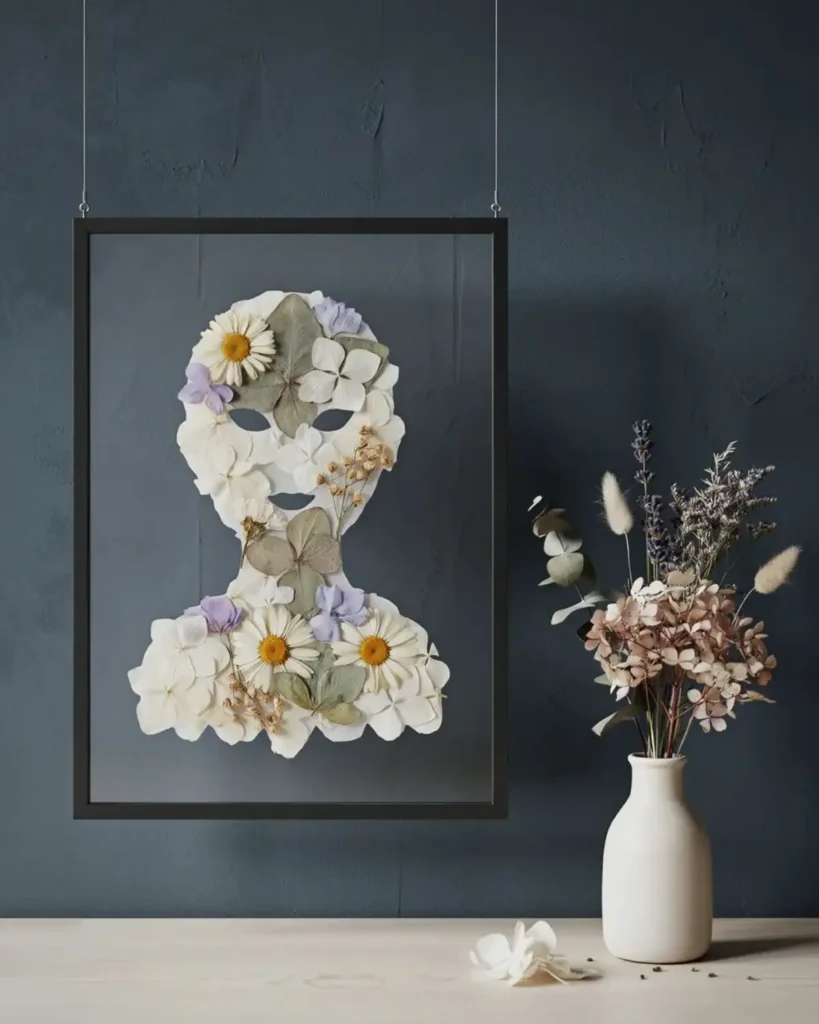
Pressed-flower ghost frames mix delicate botanical details with a slightly strange Halloween shape. Plastic ghosts can overpower a quiet room, while pressed petals give the silhouette an almost storybook quality. Hang the frame near dried flowers or place it on a bedroom shelf for a softer seasonal touch. This craft suits anyone who prefers pretty Halloween decor with only a hint of spookiness.
Draw a simple ghost outline on cardstock. Fill the shape with pressed white, cream, gray, and pale purple flowers.
Leave two small spaces for the eyes or add them with black paper. Place the finished design in a floating glass frame so the edges remain visible.
A dark background will make light-colored petals stand out more clearly.
13. How Do You Create a Vintage Halloween Garland?
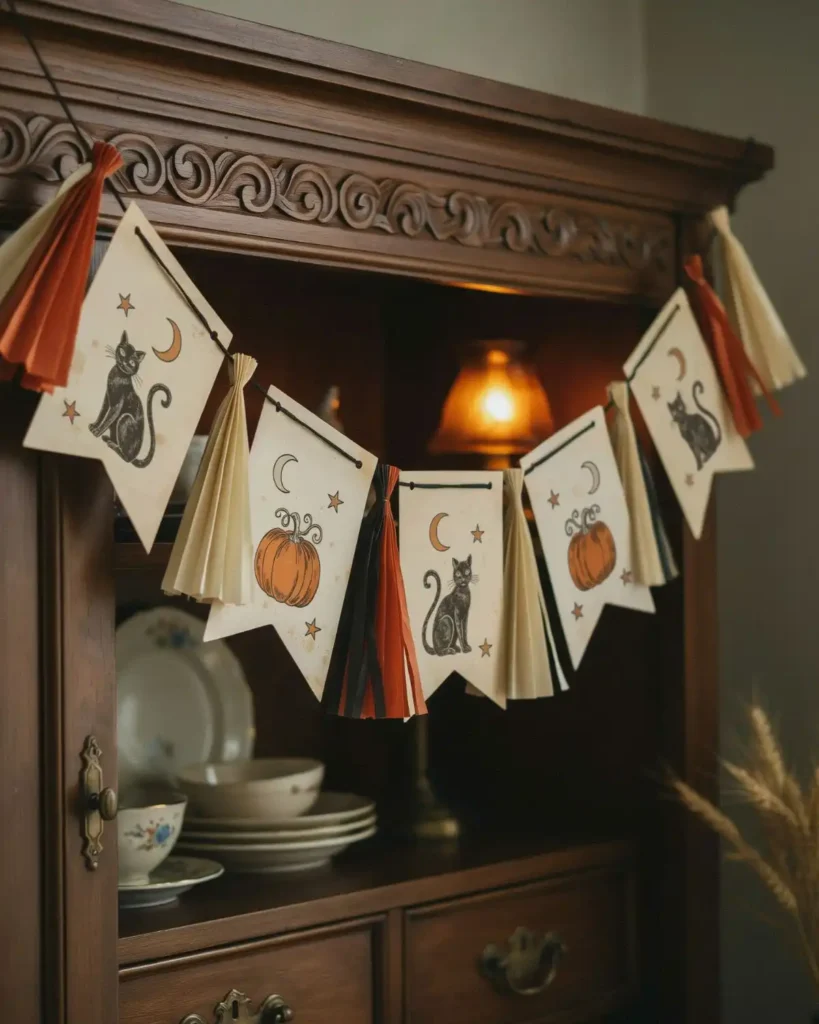
A vintage Halloween garland brings together black cats, moons, pumpkins, and stars in a cheerful old-fashioned style. Most ready-made banners repeat one modern icon, but a handmade version lets every flag look like a different piece of seasonal ephemera. Drape it across a mirror, hutch, or mantel where the illustrations can be seen clearly. Choose this project when you want a nostalgic focal point that packs flat after the holiday.
Cut flag shapes from thick cream cardstock. Add hand-painted or printed illustrations in faded black, orange, yellow, and green.
Ink the edges lightly, punch two holes in each flag, and thread them onto black ribbon or cotton twine. Alternate illustrated flags with pleated paper rosettes for more dimension.
The Smithsonian notes that crepe paper was commonly used for Halloween decorating in the late 1800s and early 1900s, so crepe-paper fringe is a historically appropriate detail for this style.
14. Spiderweb Crochet Coasters
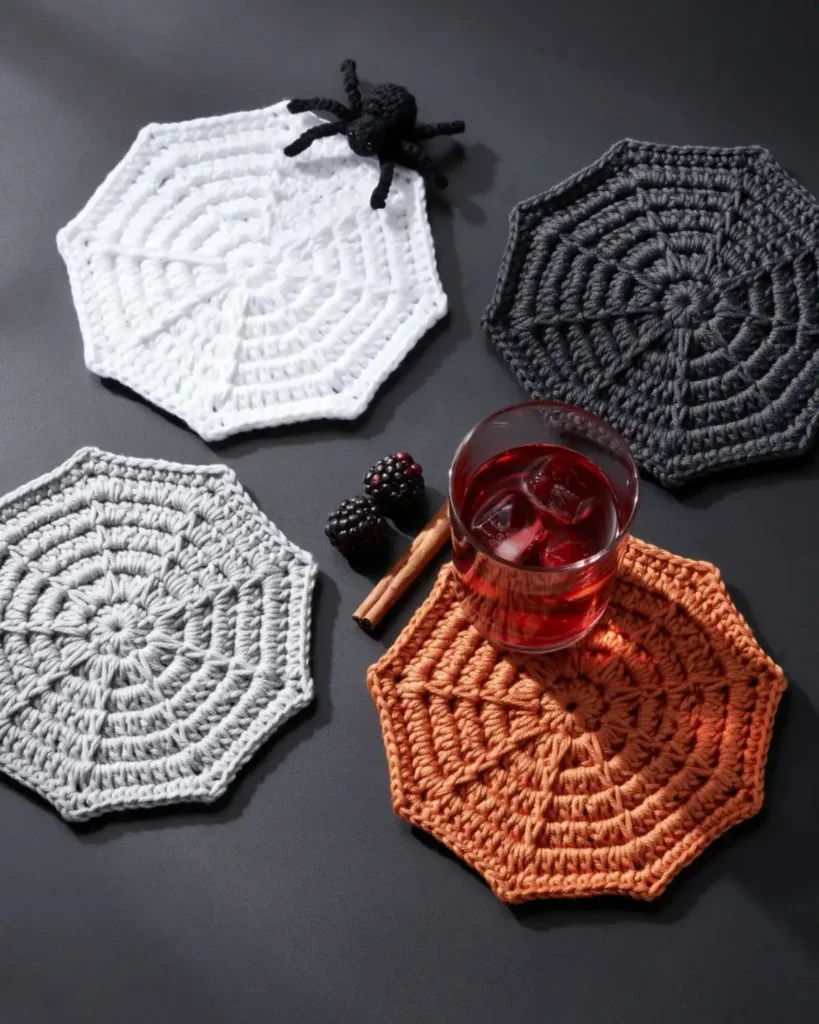
Spiderweb crochet coasters give a practical household item a subtle seasonal update. Disposable printed napkins disappear after one party, but a set of cotton coasters can return every October. They look especially striking beneath clear glasses filled with dark punch or cider. This is a satisfying project for crocheters who want something small, giftable, and easy to finish in one sitting.
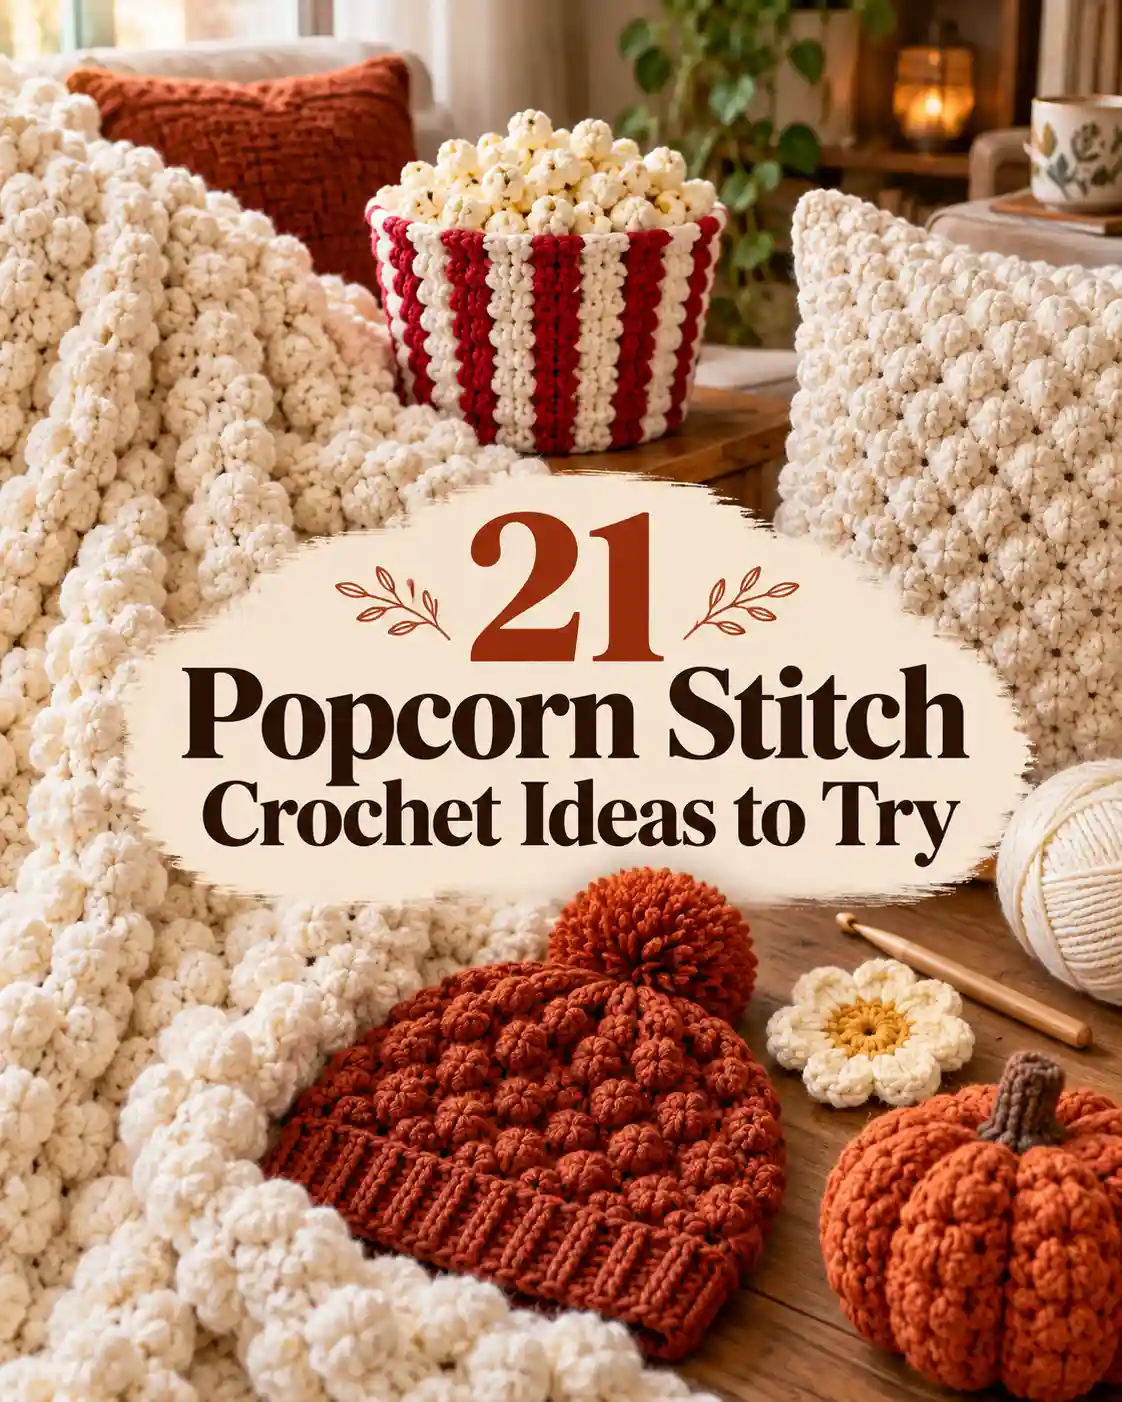
Crochet a round center, then build open chain spaces to form the web. Block each coaster after finishing so the points and openwork hold their shape. If you’re new to finishing techniques, how to block crochet explains how to help your coasters keep their shape.
Black, white, gray, and orange cotton yarn all work well. Cotton is usually preferable for coasters because it absorbs moisture and tolerates repeated use.
Add a tiny crocheted spider to one edge only so cups remain stable.
15. What Can You Make From an Old Thrift-Store Painting?
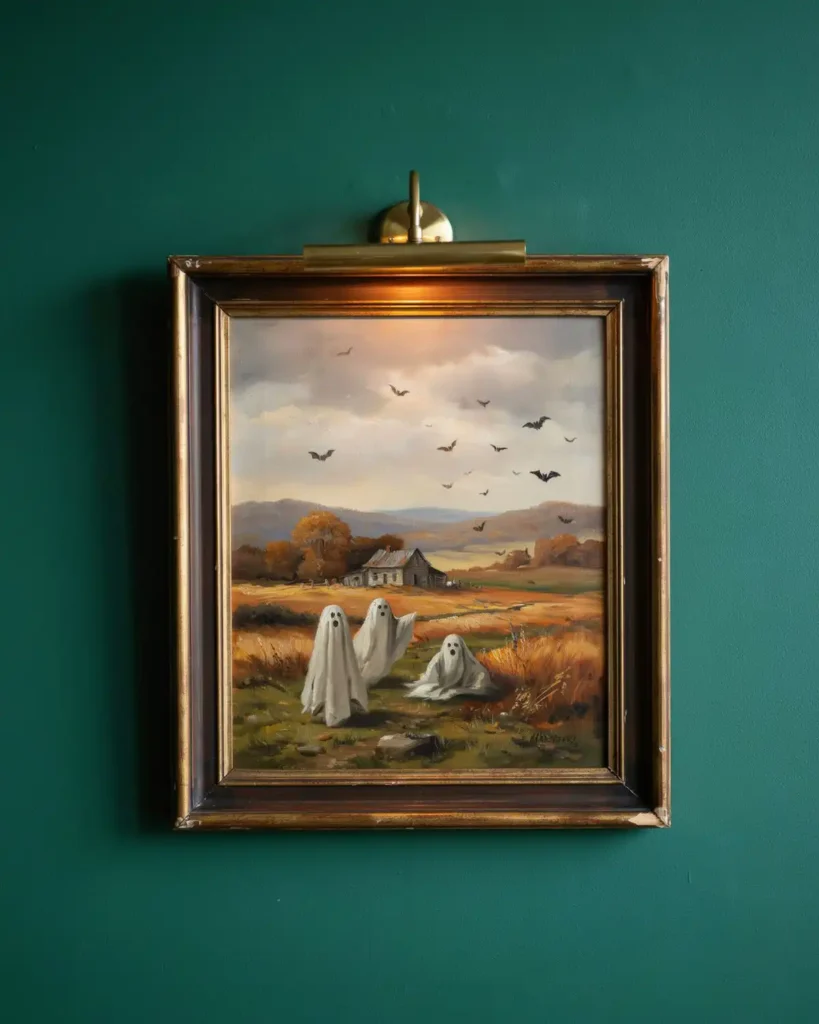
A thrift-store Halloween painting gives forgotten wall art a completely new story. New Halloween prints are predictable, but painting ghosts, bats, or a shadowy figure into an existing landscape creates something nobody else owns. I look for quiet country scenes, floral paintings, and formal portraits because the contrast makes the additions more amusing. It is one of the best halloween crafts for adults who enjoy painting but do not want to start with a blank canvas.
Clean the artwork gently and study the existing composition. Add one or two supernatural details that match the original perspective and lighting.
Good additions include:
- Small sheet ghosts in a field
- A distant haunted house
- Bats in the sky
- A dark figure in a window
- Pumpkins along a garden path
- A black cat beneath a chair
Start with removable chalk marks before committing with acrylic paint.
16. Lace Ghost Table Runner
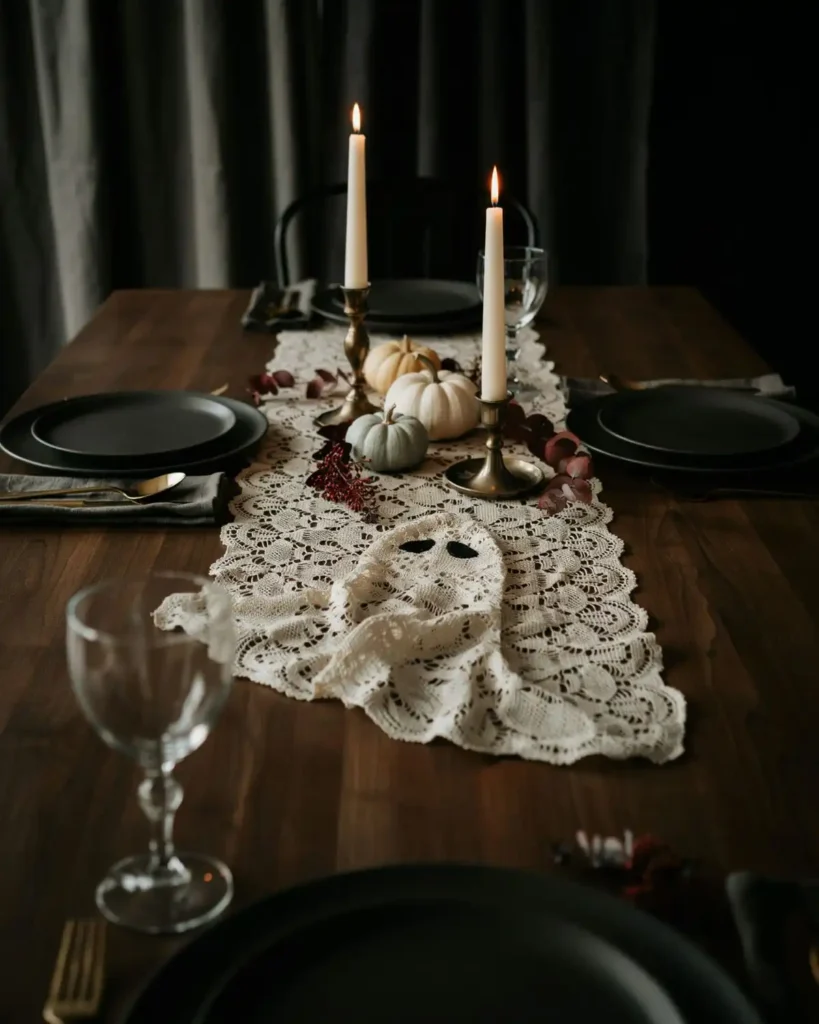
A lace ghost table runner creates a long, airy layer across a dining table without hiding the surface underneath. Heavy Halloween linens can make a small table feel crowded, while open lace keeps the arrangement light. Use it beneath black dishes, tarnished candlesticks, or a row of miniature pumpkins. This craft is for decorators who prefer an elegant haunted-house mood, and it can be made from inexpensive curtains or thrifted lace.
Cut a long strip of white or cream lace to fit your table. Shape the ends into soft points or rounded ghost silhouettes.
Add small black felt eyes at irregular intervals. For an aged look, dye bright white lace with weak tea, then rinse and dry it fully before assembling.
Keep flowing fabric away from flames. Flameless taper candles offer a similar atmosphere without placing an ignition source beside lace or paper decorations.
17. How Can You Make a Skeleton Hand Jewelry Holder?
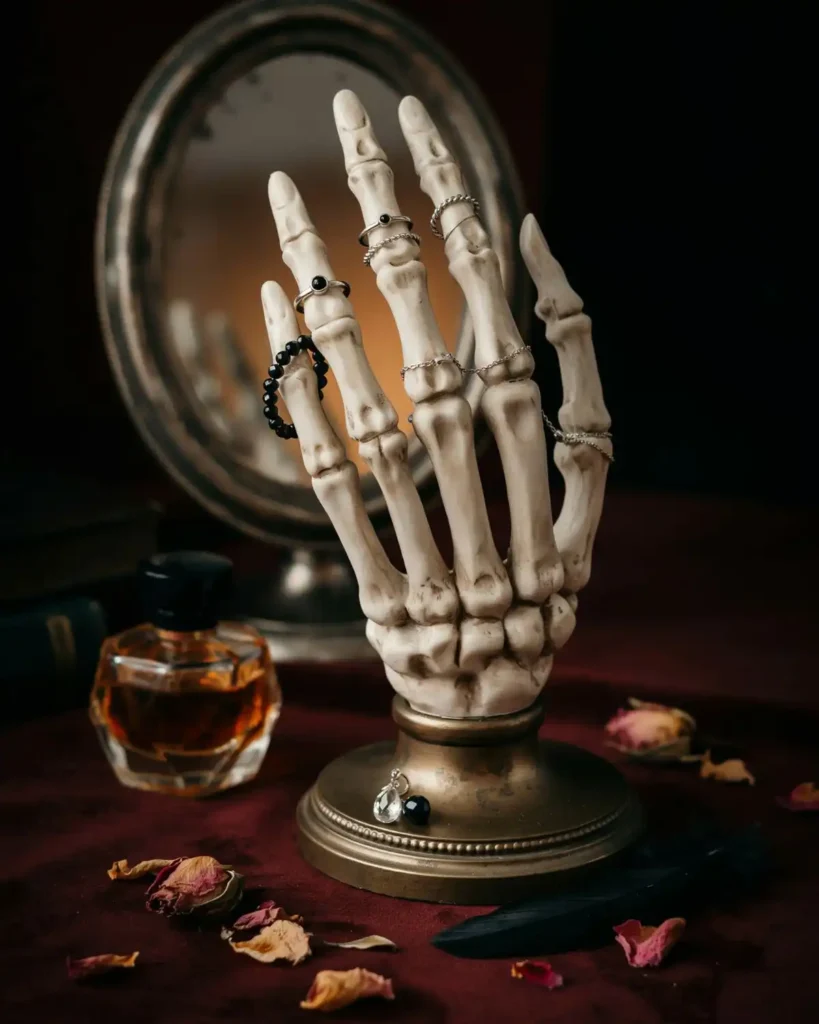
A skeleton hand jewelry holder turns a creepy prop into a useful bedside or dressing-table object. Flat trays hide necklaces beneath one another, but raised fingers keep rings and chains visible. I like painting the base in a muted metallic color so it feels more like an odd antique than a party favor. It works well for anyone who wants a Halloween craft that can stay out all year in a gothic room.
Attach a plastic skeleton hand to a small wooden plaque or heavy dish. Secure it firmly with an adhesive suitable for both materials.
Paint the hand matte black, bone white, antique gold, or aged bronze. Dry-brush a contrasting shade over the joints to emphasize the shape.
Use the fingers for rings and bracelets, then place loose earrings in the base.
18. Moon-Phase Wall Hanging
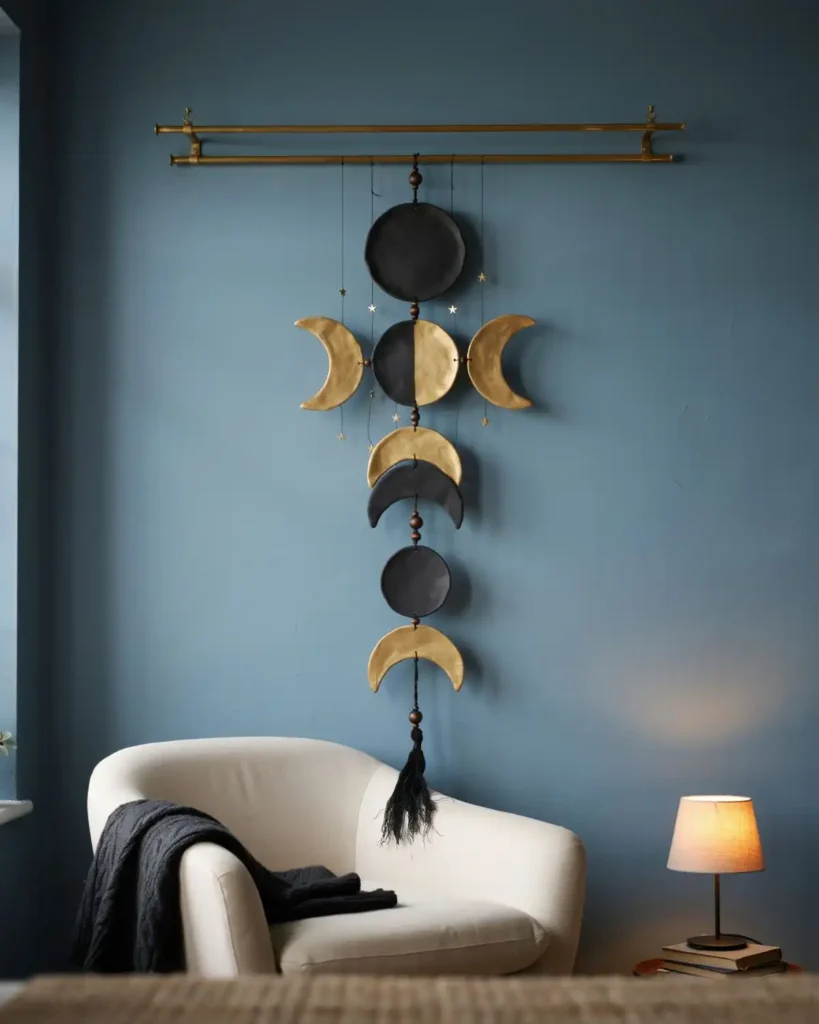
A moon-phase wall hanging offers Halloween atmosphere without using pumpkins, ghosts, or orange. Typical seasonal decorations are very literal, while lunar shapes feel mysterious enough for October and calm enough for year-round display. Hang it above a bed, reading chair, or small altar-style shelf. Choose this piece when you enjoy celestial crafts and want the finished result to work beyond one holiday.
Cut circles and crescent shapes from air-dry clay, painted wood, thick cardstock, or black felt. Arrange the phases in order and connect them with fine chain or black cord.
Add stars, beads, tassels, or a central crystal-shaped ornament. Metallic paint along the edges catches light without making the piece overly shiny.
Special Tip: Use a dinner plate and drinking glass as tracing templates when you need evenly curved crescents.
19. How Do You Make a No-Sew Felt Witch Hat?
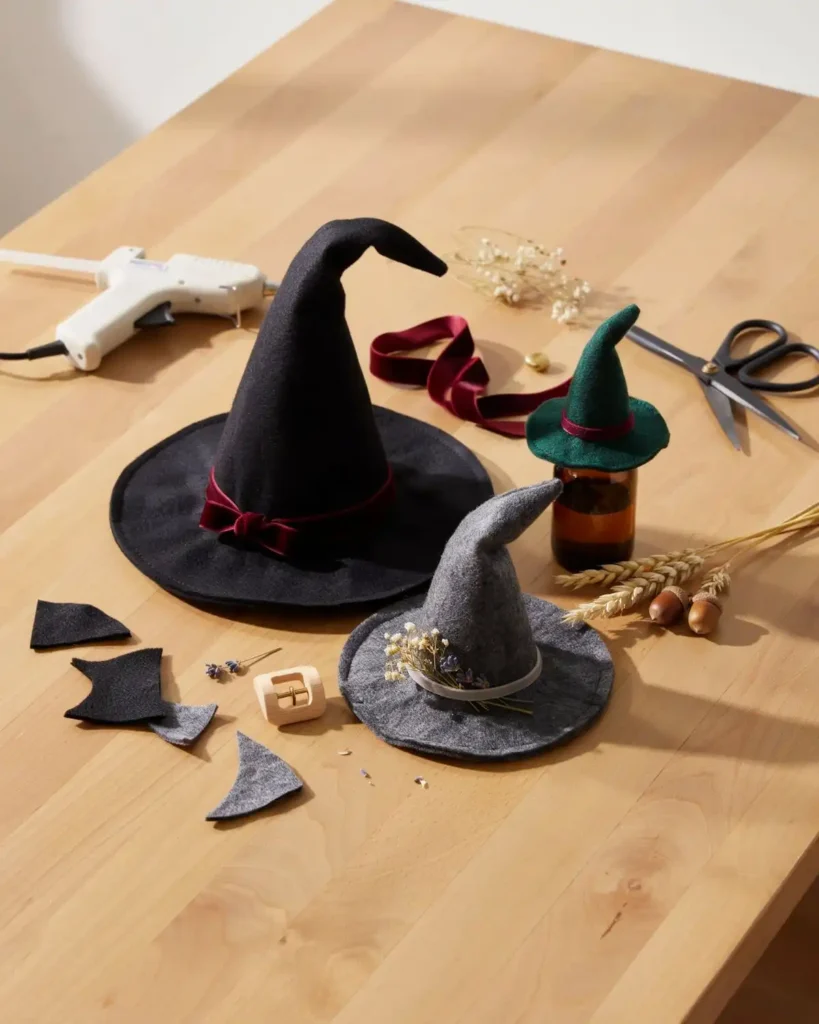
A no-sew felt witch hat is fast enough for a last-minute centerpiece but polished enough to display all season. Flimsy costume hats collapse easily, while layers of stiff felt keep a handmade version upright. I use small hats over bottles, jars, pumpkins, or wooden stands rather than wearing them. This is a great choice for beginners who want sculptural crafts without needing a sewing machine.
Cut a large felt semicircle and roll it into a cone. Overlap and glue the edge, then attach the cone to a wide felt brim.
Decorate the hat with velvet ribbon, a buckle, feathers, dried flowers, or a small fabric rose. Bend the top gently while the glue is still flexible.
For a more natural shape, avoid making the cone perfectly straight.
20. Gothic Mirror Silhouette
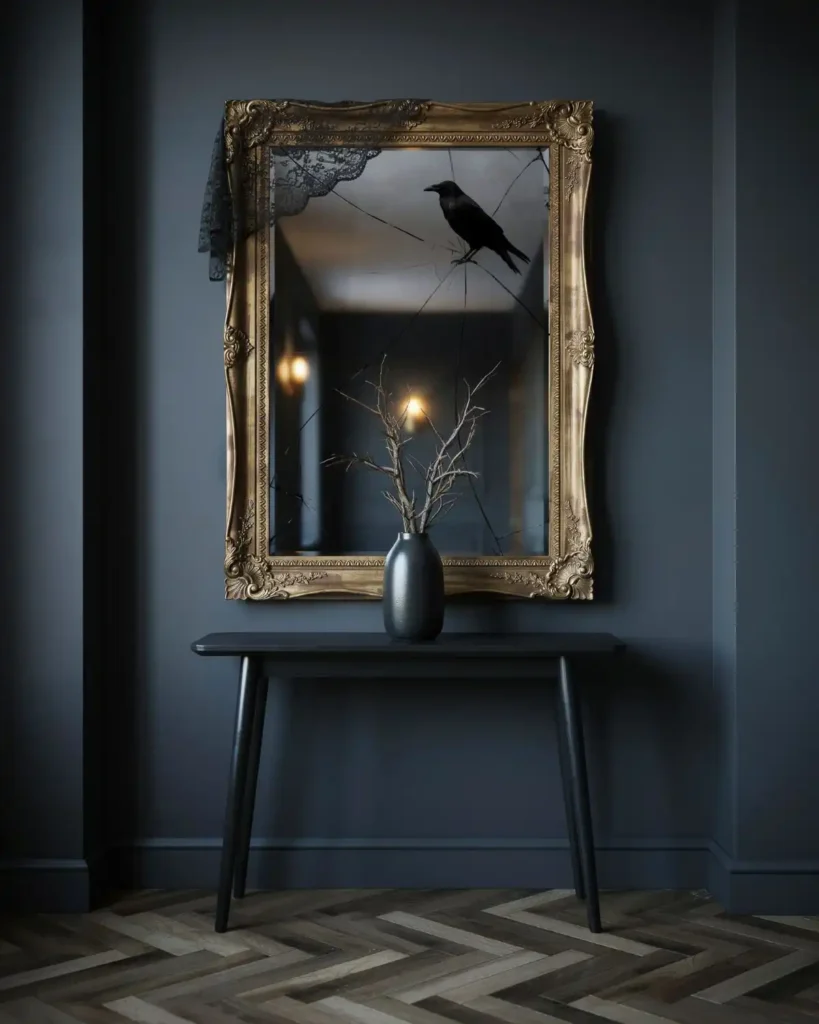
A gothic mirror silhouette changes a basic mirror into something that looks as though it belongs in an old haunted hallway. Covering the entire glass with paint removes its reflective magic, but a removable silhouette allows faces and shadows to appear behind the design. Place it where guests will unexpectedly catch their reflection. It is perfect for decorators who enjoy subtle scares, and it requires very few supplies.
Cut a raven, ghost, skeletal profile, or ornate frame shape from removable black vinyl. Apply it carefully to clean mirror glass.
Add faux cracks with thin vinyl lines rather than damaging the mirror. A small piece of black lace draped across one corner makes the effect more theatrical.
Remove the vinyl slowly after Halloween and clean any residue with a product approved for mirrors.
21. Can You Turn Tin Cans Into Halloween Lanterns?
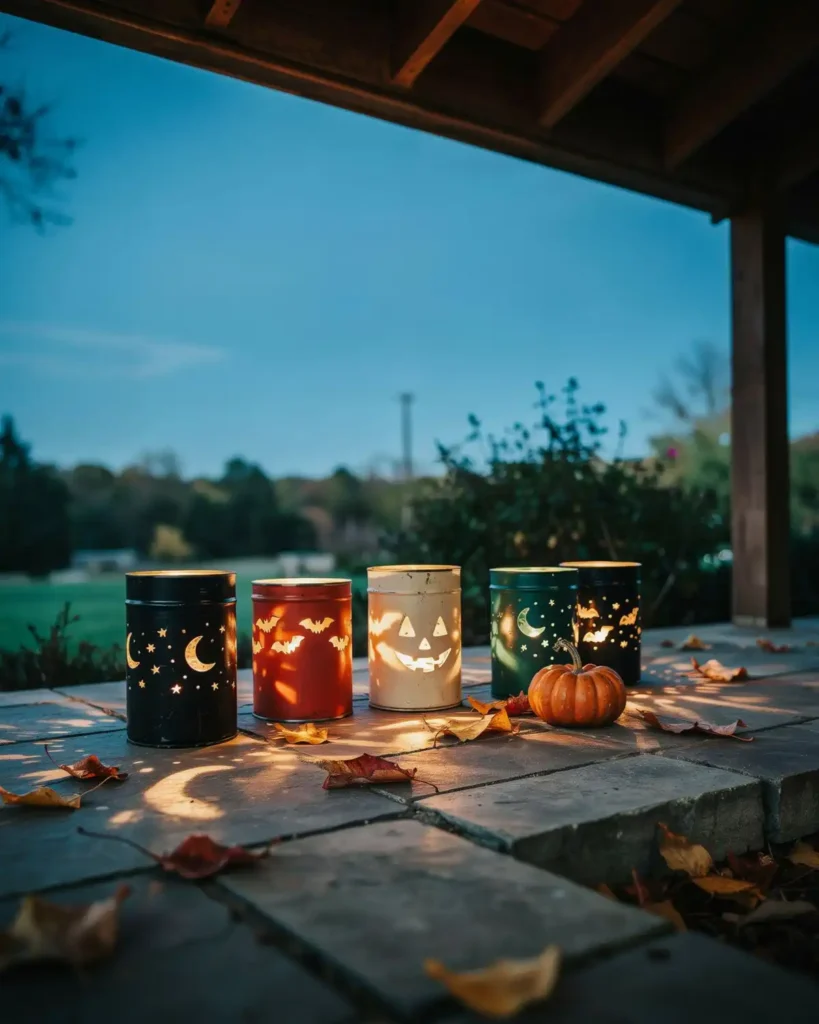
Tin-can lanterns convert packaging that would normally be discarded into sturdy outdoor-style decorations. Paper luminaries soften quickly in damp weather, while metal cans hold their shape and create sharper patterns of light. Line them along a covered step or cluster them on a patio table. They are ideal for crafters who like recycled materials, and the punched designs can be as simple or detailed as you want.
Clean the cans thoroughly and remove sharp edges. Fill each can with water and freeze it before punching holes so the metal is less likely to collapse.
Draw a simple pattern, then use a hammer and nail to make the openings. Paint the cans after the ice has melted and the metal is completely dry.
Use battery-powered lights inside. The CPSC also advises choosing decorative light strands tested by a recognized safety laboratory when electrical lighting is used in seasonal displays.
22. Crochet Pumpkin Basket
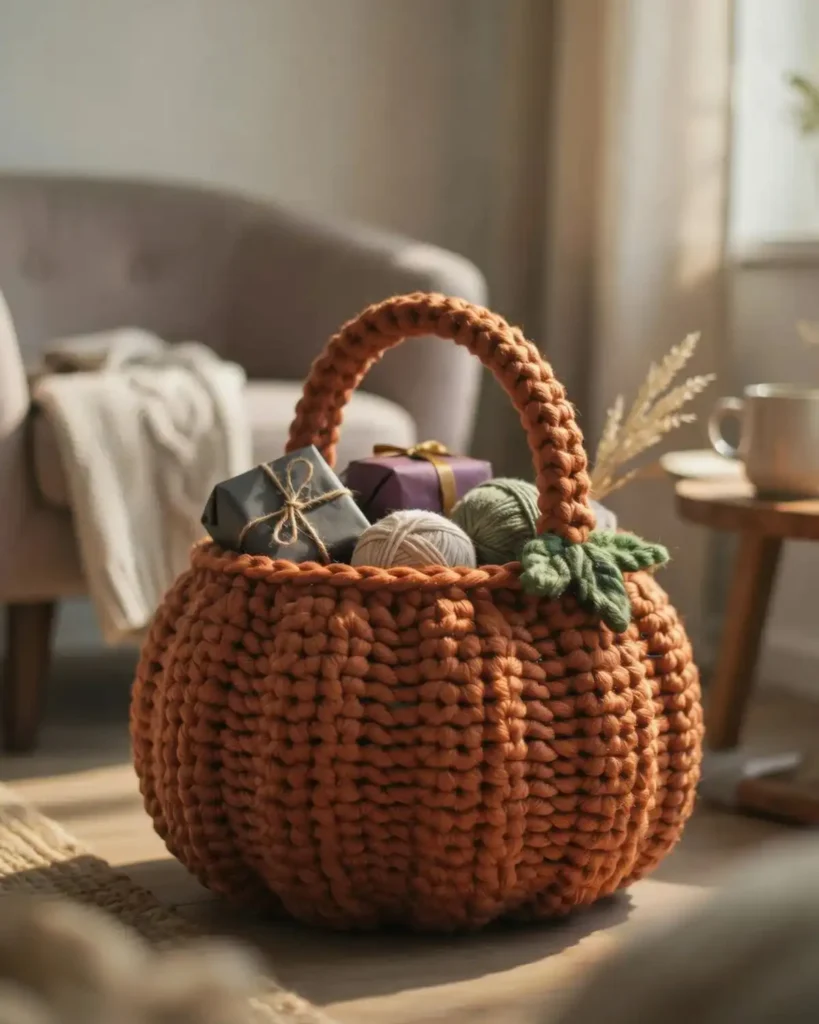
A crochet pumpkin basket is both a decoration and a place to hold wrapped treats, yarn, or small craft supplies. Hard plastic buckets are useful but visually loud, while a yarn basket brings warmth and texture to the room. Keep it near the front door for candy or beside your chair for an October crochet project. This makes sense for anyone who values functional crafts, and the basket can be resized simply by adding or removing rounds.
Work a sturdy round base using two strands of yarn or bulky yarn. Crochet the sides with gentle increases and decreases to create the pumpkin shape. If you’d like to make more functional projects, try these crochet basket patterns for additional storage ideas.
Add vertical surface stitches or wrapped yarn sections to define the ribs. Finish with a brown handle or stem and one green leaf.
Place a washable fabric liner inside if the basket will hold unwrapped items.
23. How Can You Make Floating Cheesecloth Ghosts?
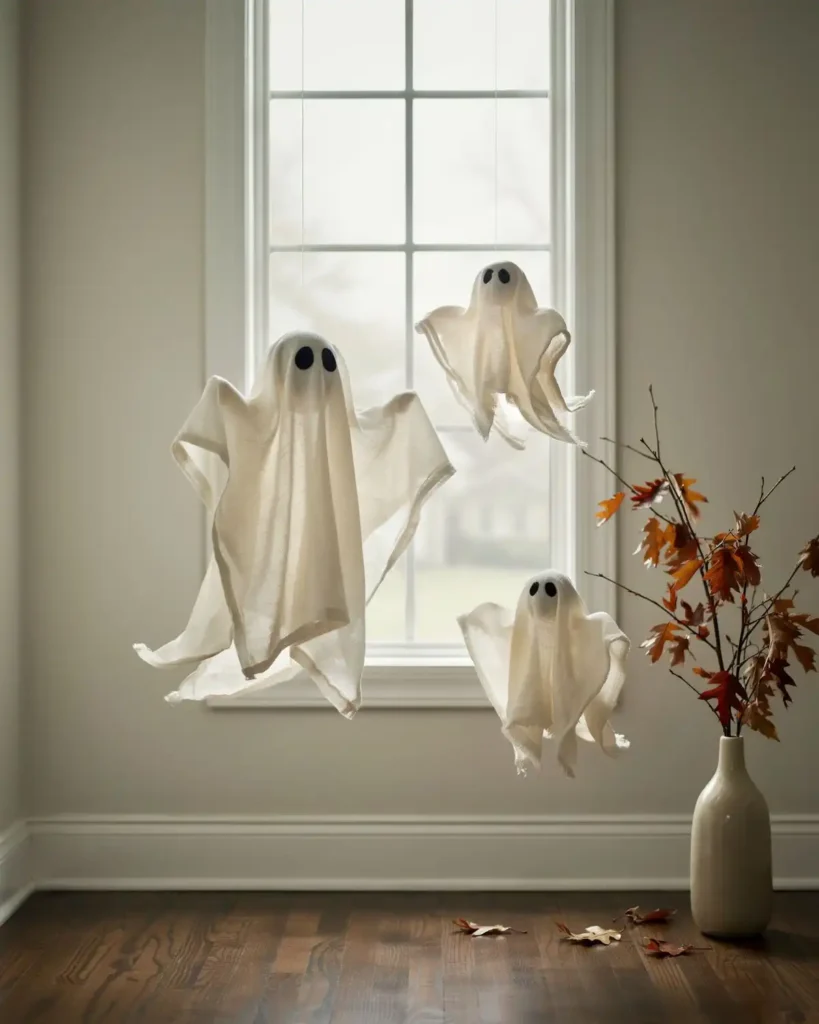
Floating cheesecloth ghosts create height and movement without needing a heavy frame. Stuffed hanging ghosts tend to look solid, while hardened cheesecloth keeps a translucent, drifting shape. Suspend them near a window or display smaller versions beneath glass cloches. Make these when you want lightweight decorations that look impressive from across the room and almost weightless up close.
Build a temporary form using a bottle, foam ball, and wire arms. Drape cheesecloth over the structure, then brush it with fabric stiffener or diluted white craft glue.
Allow it to dry fully before removing the support. Add felt eyes, or leave the face blank for a quieter, more mysterious appearance.
Save this idea to your diy halloween dec planning board when you need a project that fills vertical space without using bulky materials.
24. Miniature Haunted Dollhouse
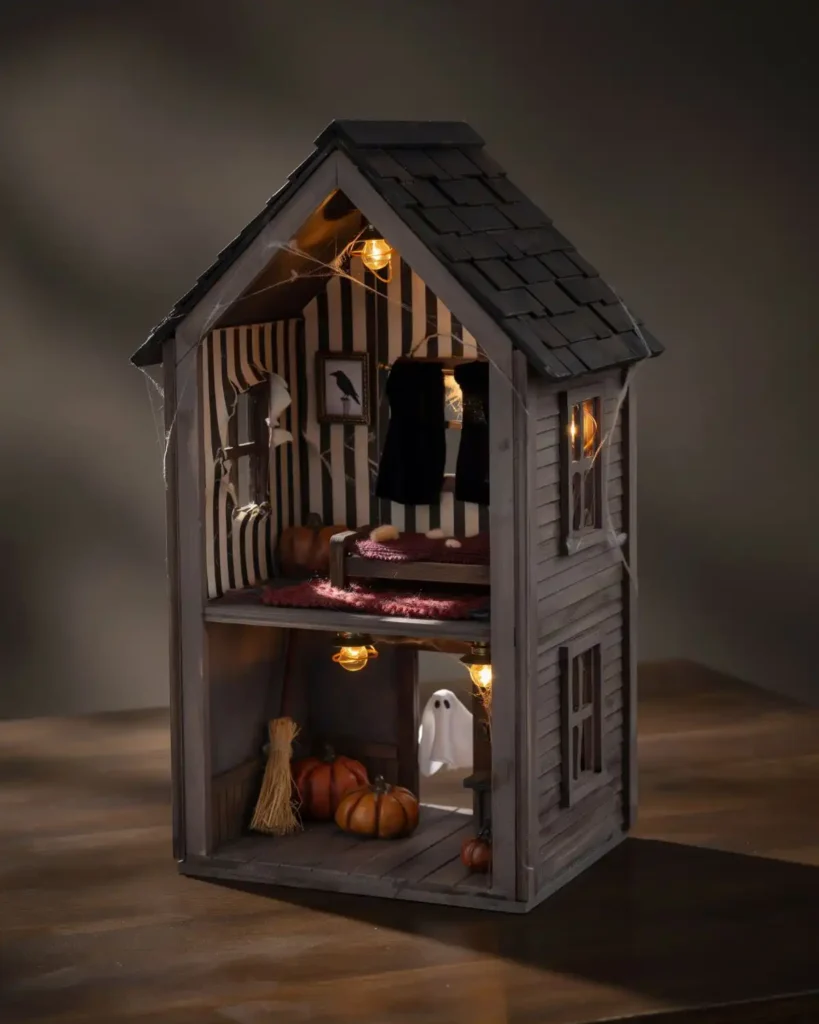
A miniature haunted dollhouse is the project that can become the centerpiece of your entire Halloween collection. Small ready-made haunted houses are charming but limited, while a custom house can include peeling wallpaper, crooked portraits, tiny cobwebs, and rooms with their own stories. I would place it where guests can walk around it and notice the details from several angles. It is best for experienced crafters who want a weekend challenge, and the creative possibilities are nearly endless.
Start with a secondhand dollhouse, wooden house-shaped shelf, or sturdy cardboard model. Paint the exterior in faded gray, black, dark green, or weathered white.
Inside, add miniature details such as:
- Torn paper wallpaper
- Tiny framed silhouettes
- Crocheted rugs
- A miniature broom
- Crooked curtains
- Clay pumpkins
- Thread cobwebs
- Battery-powered lights
Age the surfaces with dry-brushed brown and gray paint. Work room by room rather than trying to complete the whole house at once.
The Library of Congress maintains Halloween collections spanning folk customs, art, photographs, literature, and popular culture, which can be useful visual references when developing historically inspired rooms and decorations.
How Do You Choose the Right Halloween Craft?
Choose a Halloween craft by matching the material, difficulty, display location, storage needs, and visual style to your preferences.
At a Glance
- Start with a material you already enjoy.
- Consider drying and assembly time.
- Measure the intended display space first.
- Check how the finished craft will be stored.
- Choose one clear decorating mood.
Begin with the material you already enjoy. A crocheter will probably have more fun making ghosts, pumpkins, baskets, or spiderwebs than painting a complicated miniature house. Someone who loves paper crafts may prefer garlands, bat walls, altered books, and vintage artwork.
Next, consider storage. Flat garlands, fabric decorations, hoops, and crochet pieces are easier to store than large rigid props.
Finally, think about the mood you want:
| Desired look | Best materials | Suggested projects |
|---|---|---|
| Cute and cozy | Yarn, felt, fabric | Ghost garland, yarn pumpkins, crochet basket |
| Vintage | Aged paper, crepe paper, muted paint | Black cat art, vintage garland, book covers |
| Gothic | Lace, black paint, metallic finishes | Mirror silhouette, moon hanging, skeleton hand |
| Natural | Twigs, moss, pumpkins, pressed flowers | Terrarium, flower ghost, pumpkin holders |
| Dramatic | Lights, large forms, layered props | Cauldron, bat wall, dollhouse |
What Safety Rules Matter When Making Halloween Decorations?
Use good ventilation, safe cutting practices, flameless lighting, suitable adhesives, and clear walkways when making or displaying Halloween decorations.
At a Glance
- Follow every paint and adhesive label.
- Ventilate rooms during chemical-based craft work.
- Cut away from your hands.
- Keep decorations away from heat and flames.
- Prevent cords and props from blocking walkways.
Craft in a ventilated space when using spray paint, solvent-based coatings, strong adhesives, or permanent markers. Open windows when practical, keep containers closed when not in use, and follow all label instructions. The EPA specifically recommends increasing ventilation when using products that emit VOCs.
Use a cutting mat and direct craft-knife blades away from your hands. Allow hot glue to cool before touching it, and keep cords away from walkways.
Battery-operated lights are generally the simplest choice for paper, fabric, yarn, dried flowers, and other combustible displays. Keep decorations clear of exits, steps, heaters, cooking surfaces, and any source of open flame.
Frequently Asked Questions
What are the easiest Halloween crafts for beginners?
Paper bats, apothecary jars, yarn pumpkins, vintage garlands, and no-sew felt witch hats are among the easiest options. They use basic cutting, painting, wrapping, or gluing techniques. Most can also be completed with inexpensive supplies and very little previous crafting experience.
What Halloween crafts can adults make?
Popular halloween crafts for adults include altered thrift-store paintings, crochet decorations, haunted dollhouses, gothic wall art, fabric pumpkins, apothecary bottles, and embroidery-hoop spiderwebs. These projects are easy to customize for elegant, gothic, nostalgic, or modern decorating styles.
How can I make DIY Halloween decorations look vintage?
Use muted orange, cream, black, and faded green rather than bright colors. Distress paper edges, apply brown ink sparingly, choose matte finishes, and study genuine historical decorations for shape and typography references.
What can I make with leftover yarn for Halloween?
Small ghosts, pumpkins, tassels, spiderweb coasters, garlands, baskets, and pom-pom spiders are practical ways to use leftover yarn. Choose small projects first so you can combine partial skeins without needing exact yardage.
When should I start making Halloween crafts?
Begin larger projects four to eight weeks before Halloween. Small crafts can be completed during October, but an early start gives paint, glue, clay, and fabric stiffener enough time to dry properly.
Final Thoughts
The most memorable Halloween decorations are not always the biggest or most expensive. They are usually the pieces with an unexpected texture, a funny detail, or a handmade imperfection that gives the room personality.
Choose one project that matches your favorite material and build from there. A crochet ghost can inspire a whole mantel, a vintage cat print can set the colors for a garland, and one altered thrift-store painting can become the beginning of an annual collection.
Explore more seasonal crafts on CrochetMind.com and save your favorite ideas before your next creative weekend. Whether your style is cozy, gothic, playful, or deeply nostalgic, there is plenty of room to make Halloween feel entirely your own.

![The Best 30+ Free Crochet Cat Patterns [Beginner-Friendly Guide]](https://crochetmind.com/wp-content/uploads/2025/04/1-The-Best-30-Free-Crochet-Cat-Patterns-Beginner-Friendly-Guide.webp)