






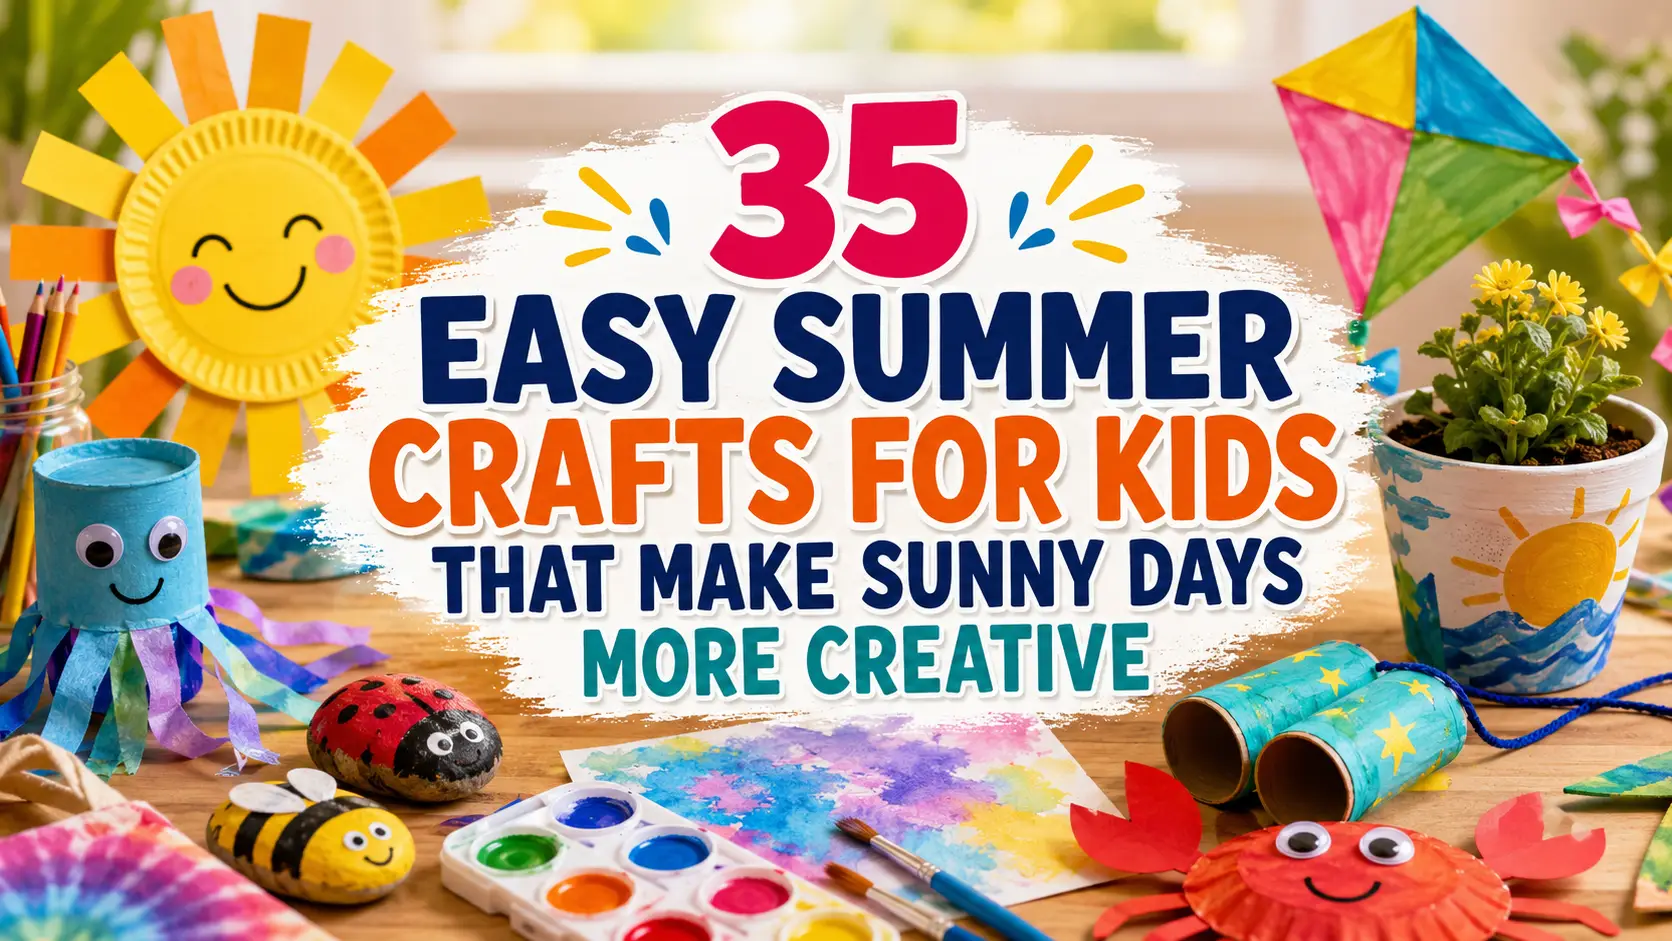
The best easy summer crafts for kids use simple supplies, take about 10–40 minutes, and leave plenty of room for children to choose their own colors, textures, and details. This collection includes 35 paper crafts, toddler-friendly projects, outdoor art ideas, camp crafts, and keepsakes for ages 2–10+, with adult help adjusted to each child.
Summer crafting is one of my favorite ways to turn an ordinary afternoon into something children remember. You do not need expensive kits, advanced skills, or a perfectly organized craft room, just a few familiar materials and enough freedom for kids to experiment. Some projects will become decorations, others will turn into toys, and a few may simply create a happy mess before cleanup. The goal is not perfection; it is giving children a relaxed space to explore, make decisions, and feel proud of what they created.
For even more creative inspiration, explore our collection of easy craft patterns and tutorials for different seasons, occasions, and skill levels.
Key Takeaways
- Choose crafts that match each child’s current abilities.
- Prepare safe, washable, age-appropriate materials before starting.
- Try summer crafts for kids with paper first.
- Let children choose colors, shapes, and finishing details.
- Use recycled and natural materials whenever practical.
- Focus on creativity instead of copying a perfect example.
By Francine K. Medina, creator of CrochetMind and writer of beginner-friendly craft tutorials. CrochetMind focuses on clear, organized DIY instructions that help makers approach new projects with confidence.
Summer crafting does not need a packed supply cabinet or a perfectly planned afternoon. A stack of paper, washable paint, recycled cardboard, yarn, leaves, and a little imagination can turn a slow morning into something children proudly carry, display, gift, or play with.
Which Easy Summer Crafts for Kids Are Best for Different Ages?
The best craft is one that matches the child’s motor skills, attention span, interests, and need for adult support.
At a Glance
- Use large materials for toddlers.
- Introduce guided cutting around ages 4–5.
- Offer multi-step projects to school-age children.
- Let older children plan colors and construction.
- Adjust every activity to the individual child.
Choose a project by looking at the child’s current skills, attention span, and interests—not only the age printed beside an activity. The CDC explains that developmental milestones describe things at least 75% of children can do by a certain age, so age bands are useful guides rather than pass-or-fail rules.
| Age group | Best craft style | Typical adult help | Good ideas from this list |
|---|---|---|---|
| Age 2 | Stamping, finger painting, sticking large paper pieces | Prepare shapes and supervise throughout | Sunshine face, bubble prints, nature paintbrushes |
| Age 3 | Large collages, simple painting, chunky threading | Help with cutting and glue control | Watermelon fan, jellyfish, egg-carton crab |
| Age 4–5 | Folding, tracing, guided cutting, pretend-play crafts | Demonstrate steps and assist when needed | Fish puppet, aquarium, binoculars, octopus |
| Age 6–8 | Multi-step paper crafts, weaving, and nature projects | Set up materials and supervise tools | Raft boat, campfire collage, windsock, shell frame |
| Age 9–10+ | Detailed decorating, knotting, and fabric crafts | Support planning and manage specialty materials | Friendship bracelets, kite, pinwheel, tie-dye tote |
Safety first: For children under 3, leave out beads, buttons, shells, loose googly eyes, and other small pieces. Products intended for children under 3 should not contain small detachable parts that could create choking, aspiration, or ingestion hazards.
What Supplies Do You Need for Easy Kids Crafts?
A basic collection of paper, washable coloring supplies, glue, child-safe scissors, recycled cardboard, and simple natural materials can support most of these projects.
At a Glance
- Gather paper and cardboard.
- Choose washable paint and markers.
- Keep glue and tape nearby.
- Save clean recyclable containers.
- Collect safe leaves, twigs, and stones.
Most of these projects begin with materials already found at home:
- Construction paper, cardstock, paper plates, and paper bags
- Washable paint, crayons, markers, and child-safe stamp pads
- Glue sticks, school glue, tape, and child-safe scissors
- Cardboard tubes, egg cartons, jars, and cereal boxes
- Yarn, ribbon, craft sticks, tissue paper, and coffee filters
- Leaves, flowers, stones, twigs, and clean shells
Many of these affordable materials can also be used for our easy Mother’s Day crafts for kids, including paper flowers, handprint keepsakes, painted pots, and recycled egg-carton projects.
Read every product label and follow its age guidance. Parents and caregivers should always use art materials as directed and supervise children according to their age and the tools involved.
How Can Adults Keep Summer Crafts Fun Instead of Perfect?
Adults can support creativity by preparing safe materials, demonstrating necessary steps, and allowing children to control the design.
At a Glance
- Demonstrate tools without controlling the artwork.
- Praise choices instead of neatness.
- Avoid correcting unusual colors or shapes.
- Leave room for experimentation.
- Treat mistakes as part of creating.
Show children how to use the materials, then let their decisions shape the result. Process-focused art gives children space to explore materials, make choices, and develop their own ideas without an adult correcting or “fixing” the final artwork.
That means a purple watermelon, crooked jellyfish, or wildly spotted sun is not a mistake. It is evidence that the child made the craft instead of simply copying the adult.
Which Summer Crafts for Kids With Paper Are Easiest?
Paper plate suns, watermelon fans, collages, puppets, and tissue-paper suncatchers are easy because they use familiar materials and flexible steps.
At a Glance
- Start with paper plates and bags.
- Pre-cut shapes for younger children.
- Add folding for school-age kids.
- Use torn paper for easier collages.
- Turn finished crafts into toys or décor.
1. How Do You Make a Paper Plate Sunshine Face?
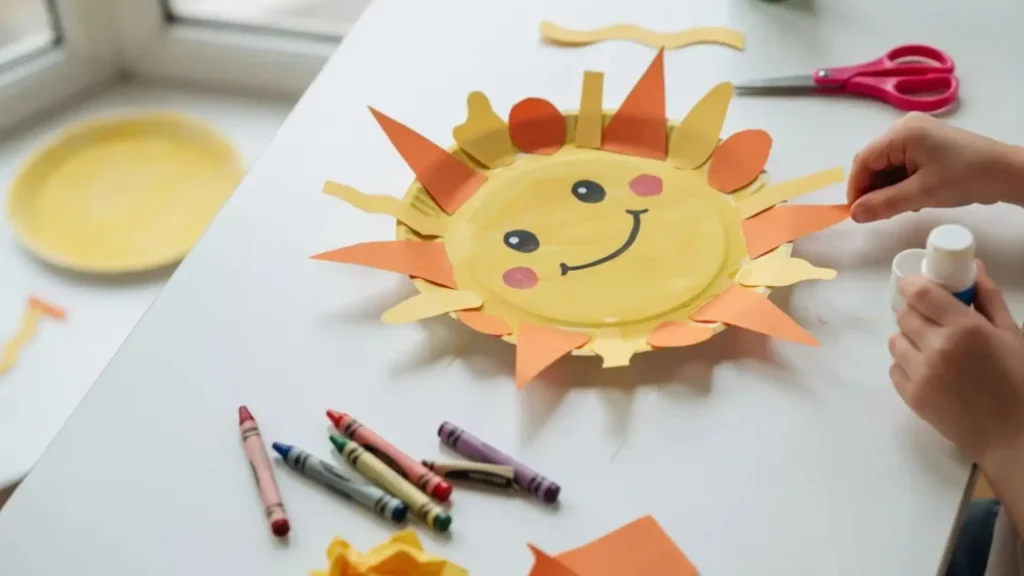
A paper plate sunshine turns one round shape into a cheerful decoration with almost no measuring. It feels more personal than a printed coloring page because children invent the face, ray pattern, and expression themselves. This project works beautifully for the first morning of summer break, when everyone wants something bright but nobody wants a complicated setup. It suits toddlers through early elementary kids, and the best part is how different every sun looks.
Supplies: Paper plate, yellow paint or crayons, yellow or orange paper, glue, and marker.
Make it: Color the plate, cut or tear paper rays, glue them around the edge, and add a face. Toddlers can stick on large pre-cut rays while older children cut triangles, loops, or zigzags.
2. What Is the Easiest Paper Watermelon Fan?
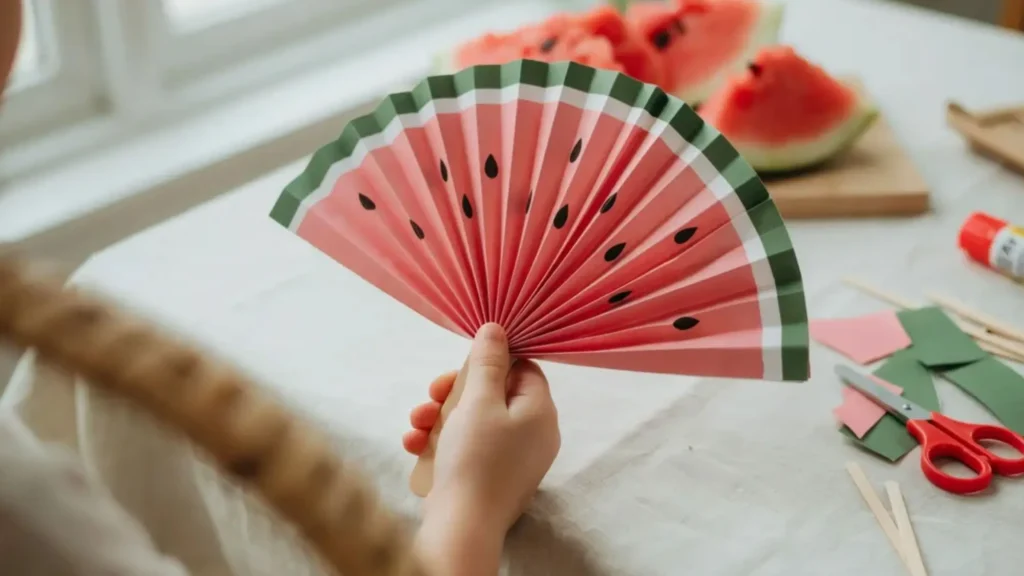
The paper watermelon fan is both a craft and a useful prop for hot afternoons. A flat watermelon picture only decorates the wall, but accordion folds give this version movement and make it fun to carry outdoors. It works especially well before a picnic or fruit-themed snack because children can match the colors they see on the table. Choose it for kids who enjoy folding, and keep it for the satisfying snap when the fan opens.
Supplies: Green, pink, and white paper; black marker; glue; and a craft stick.
Make it: Layer semicircles of colored paper, draw seeds, accordion-fold the stack, and attach the bottom to a craft stick. Younger children can decorate while an adult handles the folds.
3. How Can Kids Turn Cupcake Liners Into Jellyfish?
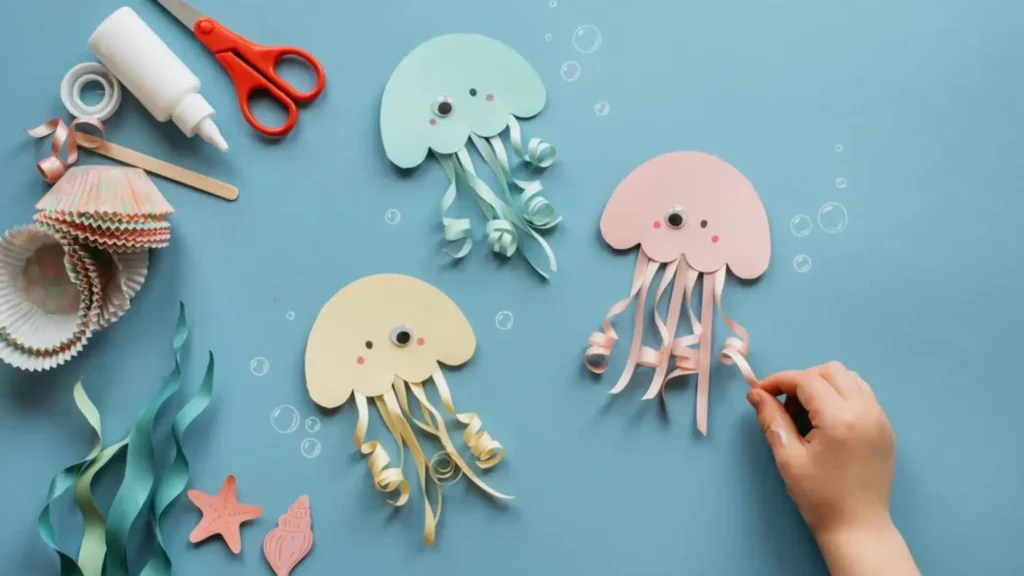
Cupcake-liner jellyfish float across a page with ruffled bodies and long, wiggly tentacles. They have more texture than a basic ocean drawing, yet they avoid the fiddly construction of a full 3D model. Hang several in a playroom or use them after a beach or aquarium day to continue the conversation at home. This is a strong choice for ages 3–6 because gluing the tentacles is simple and the finished movement feels magical.
Supplies: Cupcake liners, paper, ribbon or paper strips, glue, and crayons.
Make it: Flatten each liner, glue it down as the jellyfish body, and add curled or zigzag tentacles. Draw bubbles, seaweed, or tiny fish around the scene.
4. What Makes a Paper Ice Cream Cone Collage So Fun?
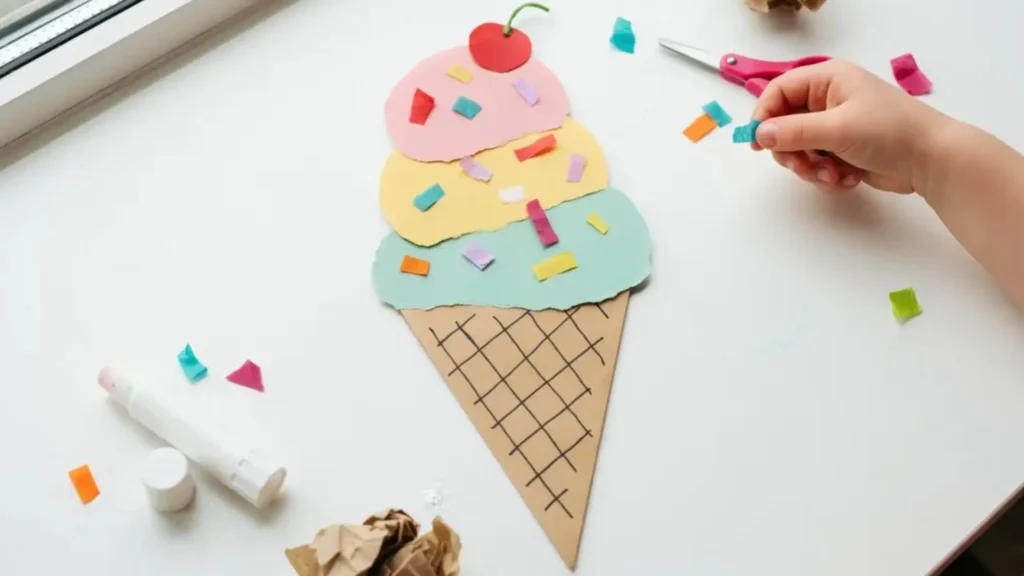
A paper ice cream collage lets children build the dessert of their imagination without melting drips. Unlike a rigid template, torn-paper scoops can be tall, lopsided, rainbow-colored, or covered in handmade toppings. Set this one out during a quiet afternoon when kids want to talk and create at the same table. It is ideal for anyone who loves pretend menus, and the payoff is an ice cream tower that can be as impossible as they like.
Supplies: Brown paper, colorful paper scraps, glue, markers, and tissue paper.
Make it: Cut a triangle cone, add crisscross lines, and stack torn or cut paper scoops. Finish with paper sprinkles, cherries, fruit, or silly candy shapes.
5. How Do You Make a Tissue-Paper Summer Suncatcher?
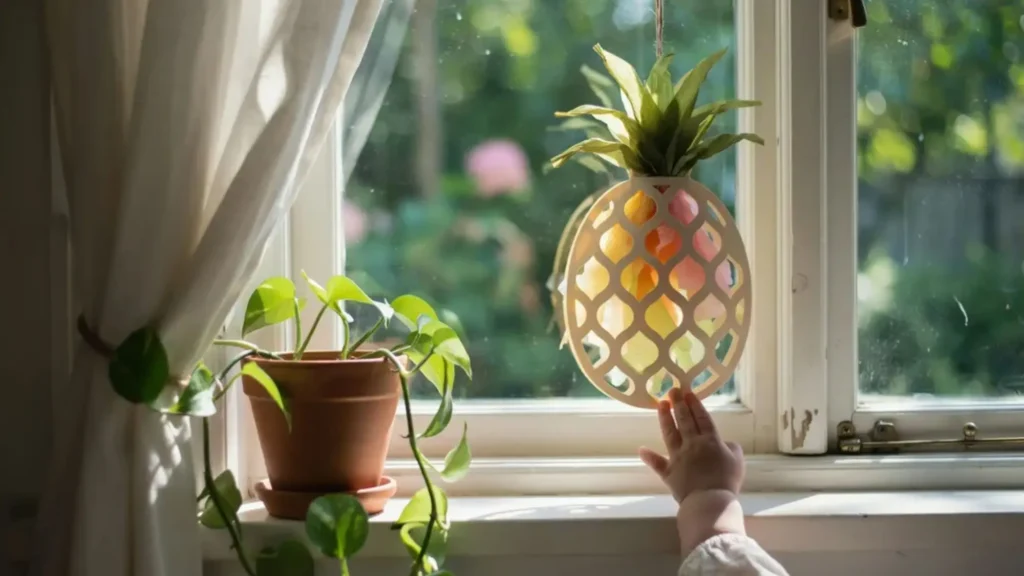
A tissue-paper suncatcher turns a sunny window into part of the artwork. Cardstock pictures stay the same all day, while translucent tissue changes as light moves through the colors. This works well as a calm indoor break after outdoor play, especially near a window where children can see the result immediately. It is perfect for kids who enjoy arranging color more than drawing details, and the glowing finish makes even random scraps look intentional.
Supplies: Clear contact paper, tissue paper, cardstock for the frame, and scissors.
Make it: Place tissue pieces on the sticky side of contact paper, seal them with a second sheet, and trim the artwork inside a paper frame. Try a sun, popsicle, pineapple, or beach-ball silhouette.
6. Can Coffee Filters Become Watercolor Butterflies?
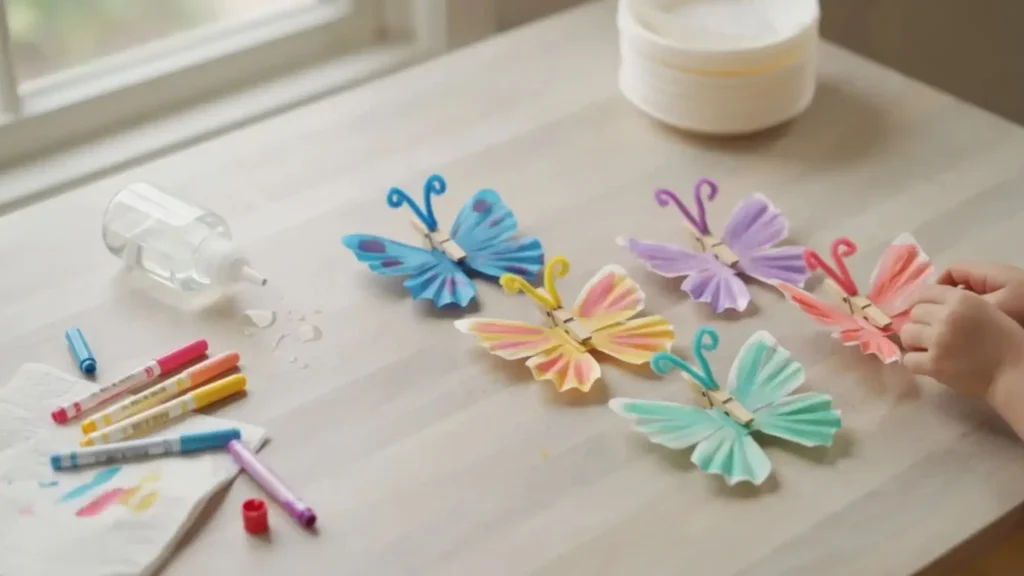
Coffee-filter butterflies create soft, blended wings with materials that react beautifully to water. Marker drawings can look controlled, but a light mist lets colors spread into surprising new patterns. Make them on a warm day when the filters can dry quickly on a tray or clothesline. Kids who enjoy experiments will love this one most because no two wings blend in exactly the same way.
Supplies: White coffee filters, washable markers, spray bottle, clothespins, and pipe cleaners.
Make it: Color the filters, mist them lightly, let them dry, pinch the center, and secure it with a clothespin or pipe cleaner. For children under 3, skip detachable decorations and keep the finished butterfly out of reach.
7. How Do You Create a Paper-Bag Fish Puppet?
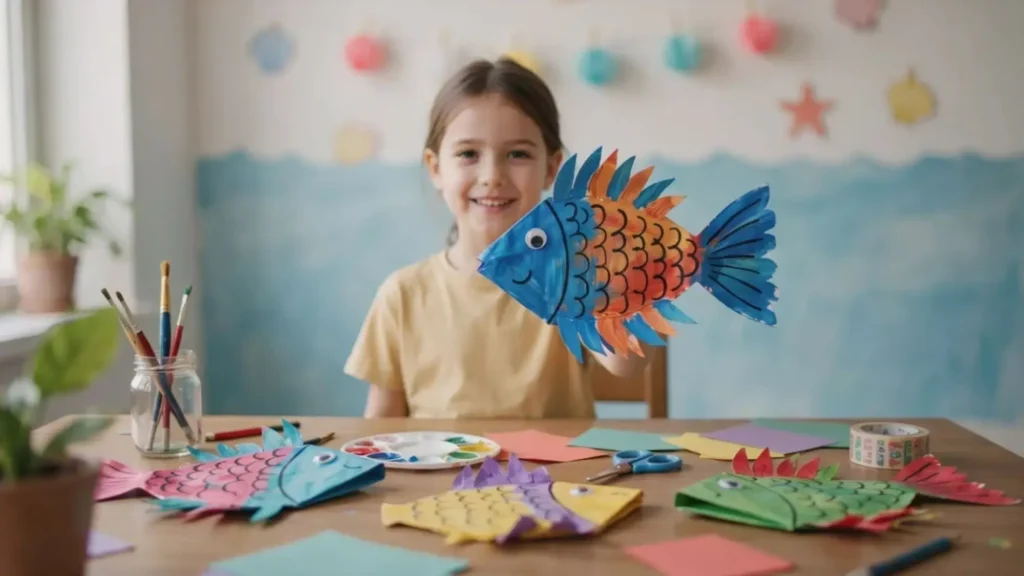
A paper-bag fish puppet keeps the fun going after the glue dries. A flat fish is finished once it reaches the wall, but this one can swim through stories, songs, and pretend ocean adventures. It is especially handy for siblings or camp groups because every child can invent a different species and personality. Choose it when you want a craft with a second life, and enjoy the instant puppet show afterward.
Supplies: Paper lunch bag, paint or colored paper, glue, markers, and large paper shapes.
Make it: Decorate the folded bag flap as the fish’s face, add fins and a tail, and draw scales. Keep the eyes and decorations large for younger children.
8. What Can Kids Put Inside a Paper Plate Aquarium?
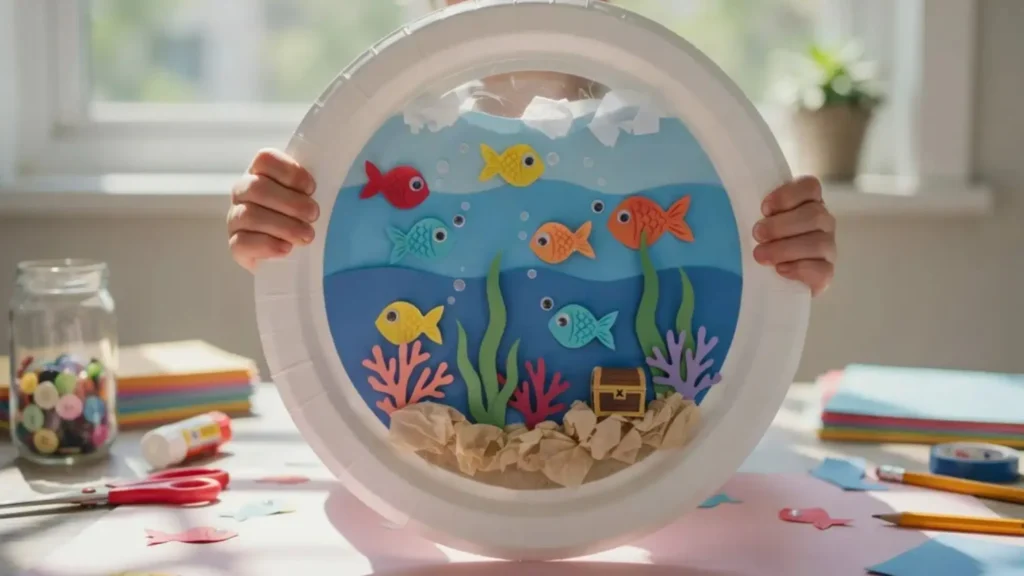
A paper plate aquarium creates a tiny underwater world that children can layer, rearrange, and personalize. It offers more storytelling than a single fish craft because the background can include coral, treasure, plants, bubbles, or a mysterious cave. Try it after reading an ocean book, when children already have creatures and colors in mind. It is best for patient crafters ages 4–8, with the depth of the scene as the standout detail.
Supplies: Two paper plates, blue paint, paper scraps, glue, string, and optional clear wrap.
Make it: Cut the center from one plate, decorate the second as an underwater scene, and join them around the edges. Add clear wrap behind the front plate only when an adult can secure it safely.
9. How Can Handprints Become a Summer Flamingo?
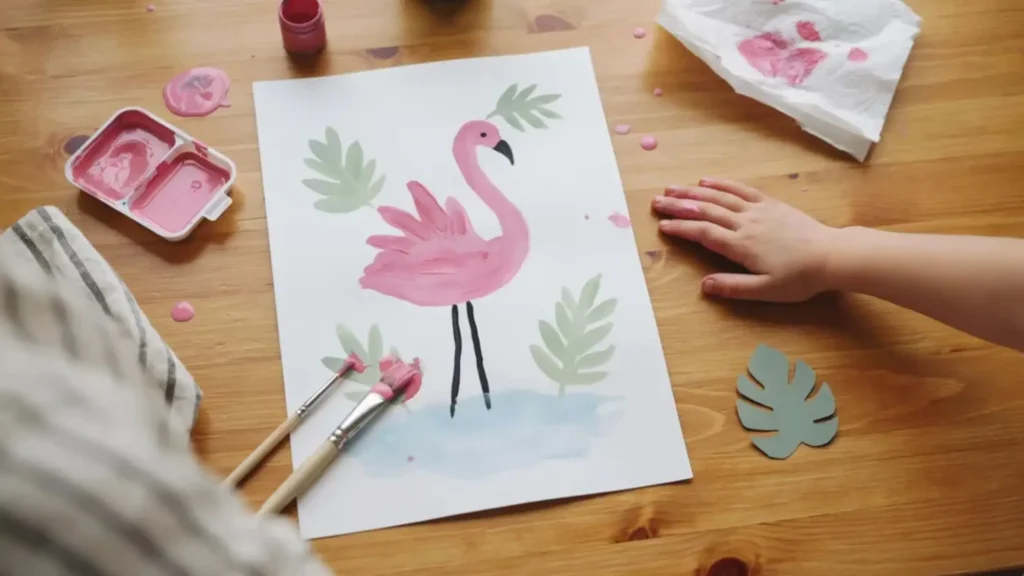
A handprint flamingo turns one painted print into a funny tropical bird with built-in personality. A traced bird shape may look polished, but the child’s fingers naturally form feathers and make the picture feel like a keepsake. This shines as a family project because everyone can make a differently sized flamingo on one large page. It is a sweet pick for preschoolers, and the best part is recording how small those hands were during this summer.
Supplies: Pink washable paint, paper or canvas, marker, and paintbrush.
Make it: Print a pink hand sideways, then add a curved neck, head, beak, and two thin legs after the paint dries. Paint water, grass, or a sunset around the bird.
10. How Do You Make an Easy Summer Craft Challenge Printable?
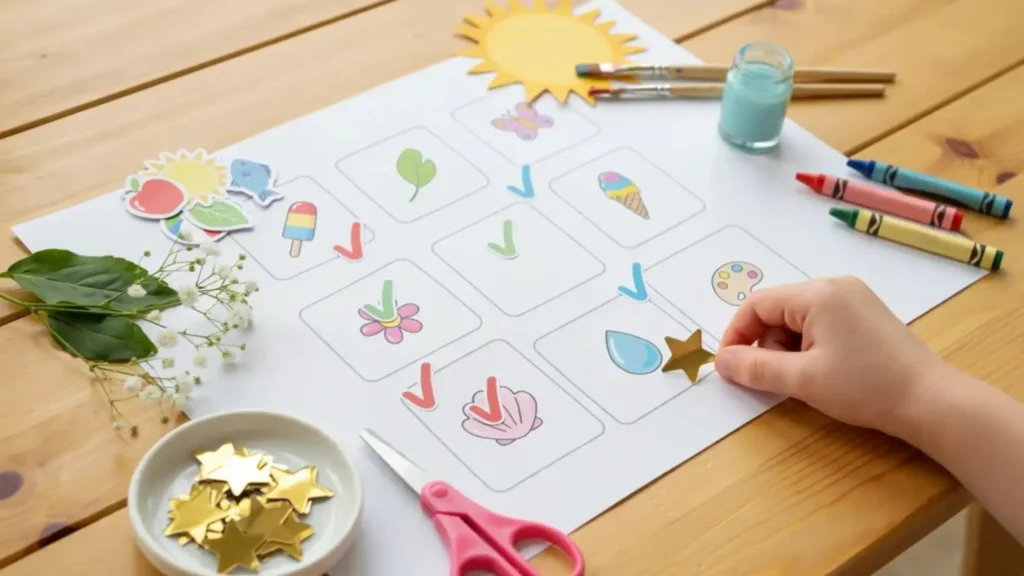
A summer craft challenge printable solves the daily “What should we make?” question before it starts. A random list can be forgotten, but a one-page grid gives children visible choices and the pleasure of checking off completed projects. Place it on the fridge or inside a camp folder and let each child choose the next square. It is ideal for families planning several weeks of kid crafts, with independence as the real benefit.
Supplies: Paper, printer or marker, ruler, stickers, and crayons.
Make it: Create a 4-by-4 grid and fill it with short prompts such as “paint a rock,” “make a paper sun,” “draw at sunset,” and “build with sticks.” Leave one square blank for a child-designed craft.
What Nature and Outdoor Art Projects for Kids Work Best?
Nature brushes, leaf rubbings, bubble prints, chalk paint, painted rocks, and twig rafts turn outdoor materials into creative experiments.
At a Glance
- Collect only safe, permitted natural materials.
- Work outdoors when paint may splash.
- Combine observing with making.
- Test textures, movement, and balance.
- Wash hands after handling natural finds.
11. How Can Kids Paint With Bubbles?
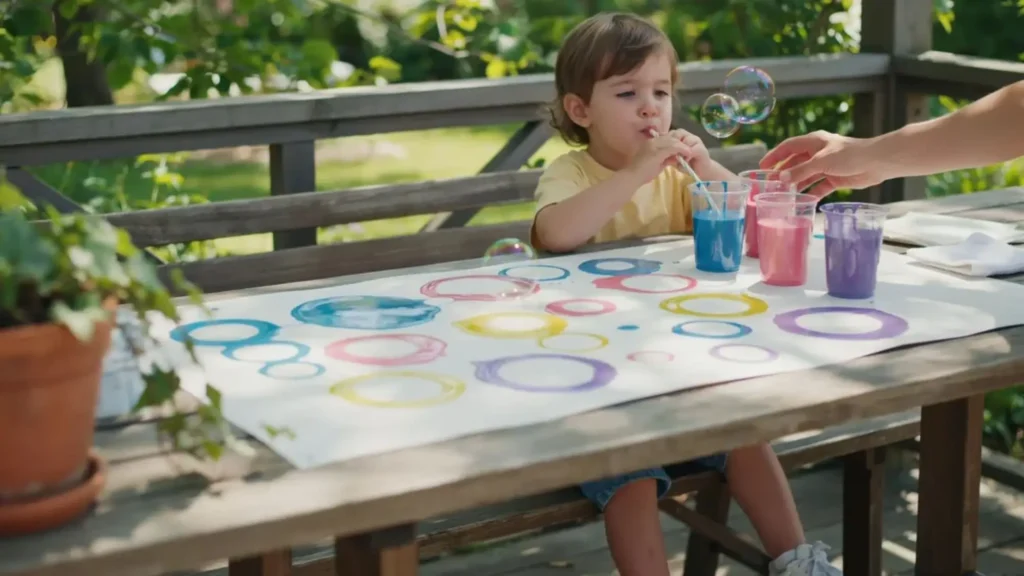
Bubble prints cover paper with airy circles that look like sea foam, clouds, or clusters of grapes. Brush painting gives direct control, while bubble painting lets breath, color, and chance build the pattern together. Try it outside on a covered table where spills do not matter and the pages can dry in the breeze. It suits kids who enjoy sensory art, and the surprise left when each bubble pops is the best part.
Supplies: Washable paint, dish soap, water, cups, straws, and heavy paper.
Make it: An adult mixes paint, soap, and water. Children blow through a straw to raise bubbles and then press paper onto the foam. Teach children to blow rather than sip, and supervise closely.
12. What Is Sidewalk Chalk Paint?
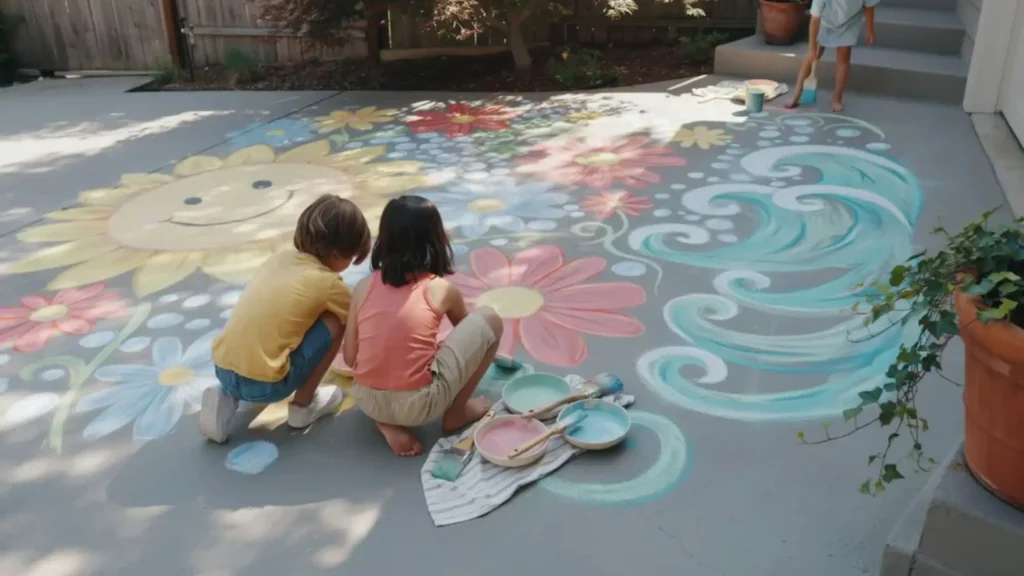
Sidewalk chalk paint brings the bold coverage of paint to a driveway or patio and washes away later. Regular chalk creates sharp lines, but the liquid version is easier for broad roads, giant flowers, games, and collaborative murals. Save this one for mornings when several children need space instead of one crowded table. It is excellent for energetic makers, and the oversized canvas makes every brushstroke feel important.
Supplies: Cornstarch, water, washable food coloring, bowls, and wide brushes.
Make it: Mix equal parts cornstarch and water, divide the mixture into bowls, and tint each portion lightly. Paint on a safe paved surface and rinse it according to the property owner’s rules.
13. How Do Nature Paintbrushes Change a Picture?
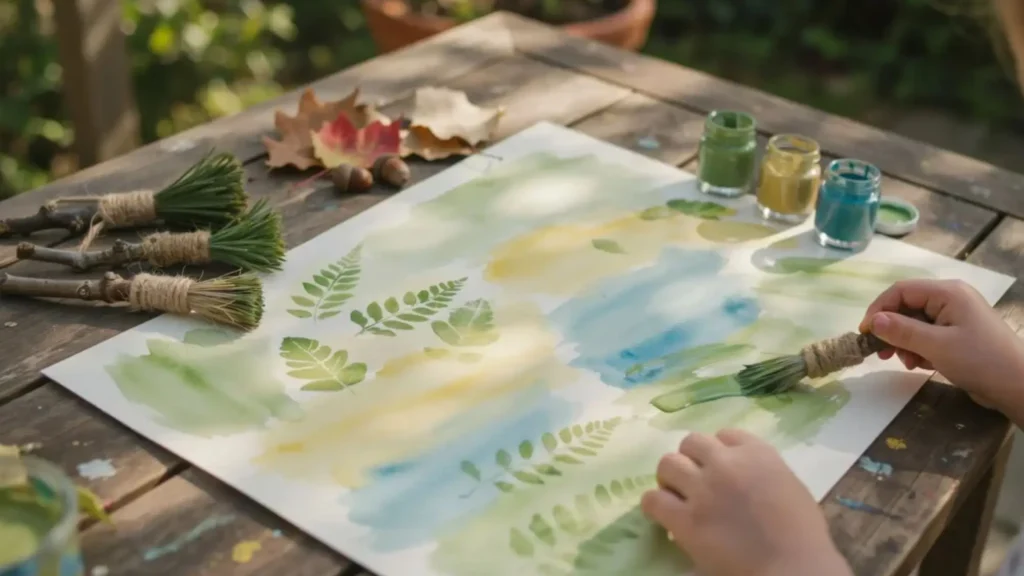
Nature paintbrushes replace store-bought bristles with grass, leaves, pine needles, or fern-like stems. A normal brush repeats a familiar stroke, while each gathered bundle creates its own scratches, dots, fans, and soft swipes. Use them after a short garden walk so collecting becomes part of the project rather than a separate task. They are perfect for curious children of many ages, and the real payoff is discovering what each texture can do.
Supplies: Twigs, leaves or grass, string or tape, washable paint, and large paper.
Make it: Attach plant materials to a twig, dip the end in paint, and experiment with stamping, dragging, twisting, and tapping. Collect only abundant, safe plants and wash hands afterward.
14. Can Leaf Rubbings Become Summer Postcards?
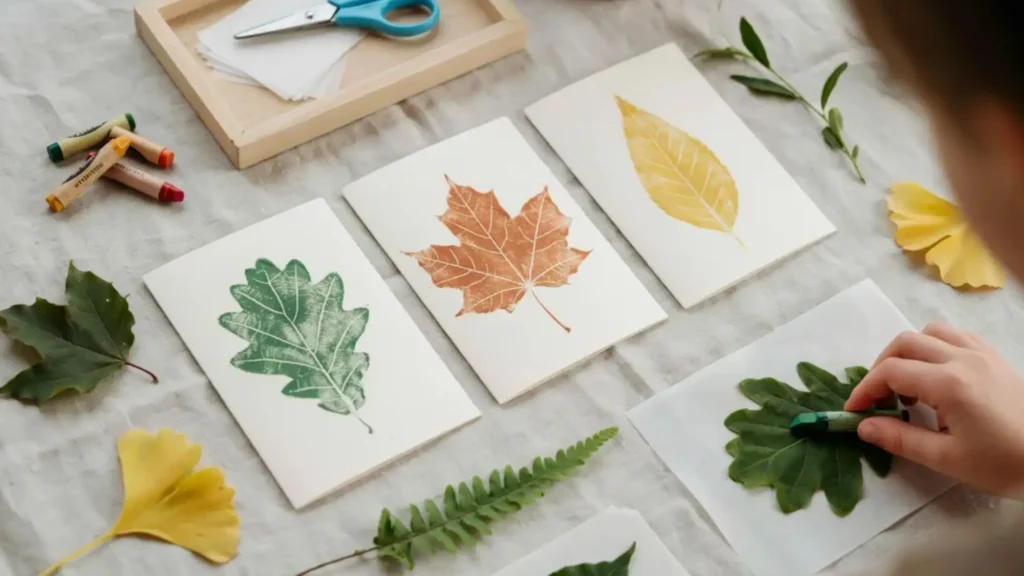
Leaf-rubbing postcards turn familiar backyard textures into mail-worthy artwork. Pressed leaves can be delicate and slow, but rubbing reveals their veins in seconds and works even with ordinary shapes. Make a few before visiting grandparents or sending a camp note so the craft has a clear destination. This idea is especially good for ages 5–9, and the best feature is that the summer walk becomes part of the message.
Supplies: Leaves, thin paper, crayons, cardstock, and glue.
Make it: Place paper over a leaf, rub with the side of a crayon, trim the design, and mount it on folded cardstock. Add the date and location where the leaf was found.
15. How Do You Make Pressed-Flower Bookmarks?
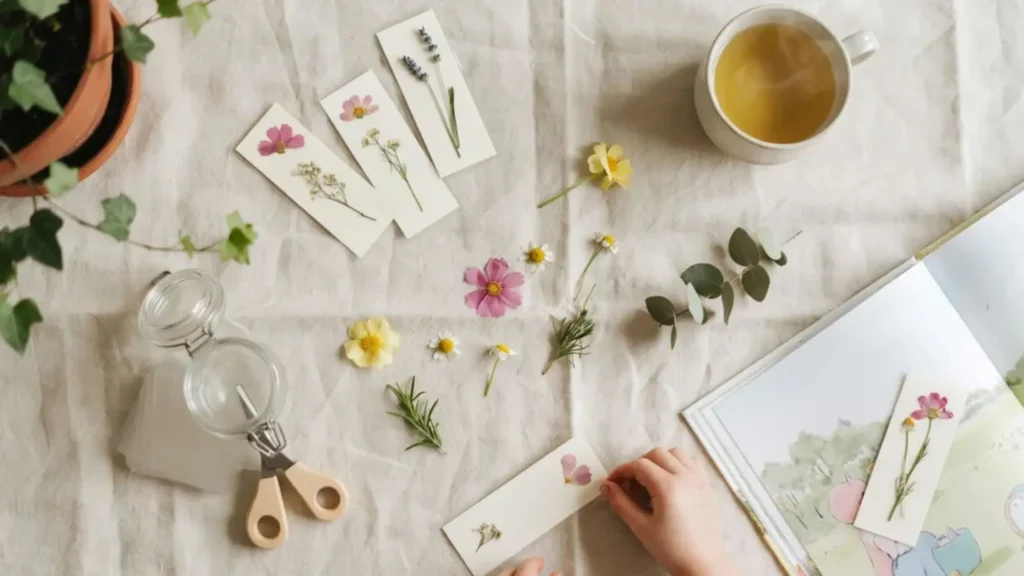
Pressed-flower bookmarks preserve small pieces of summer without needing a large display. A flower bouquet fades quickly, whereas a sealed bookmark can return each time a child opens a favorite book. This is lovely after a garden visit, particularly for children who notice tiny colors and shapes others miss. Choose it for careful makers, and enjoy the quiet little landscape trapped between the layers.
Supplies: Pressed flowers, cardstock, clear contact paper, and optional ribbon.
Make it: Dry flowers between heavy book pages with adult guidance, arrange them on cardstock, and seal both sides with contact paper. Use only plants that are safe to handle and permitted to collect.
16. What Can Kids Make With Clean Seashells?
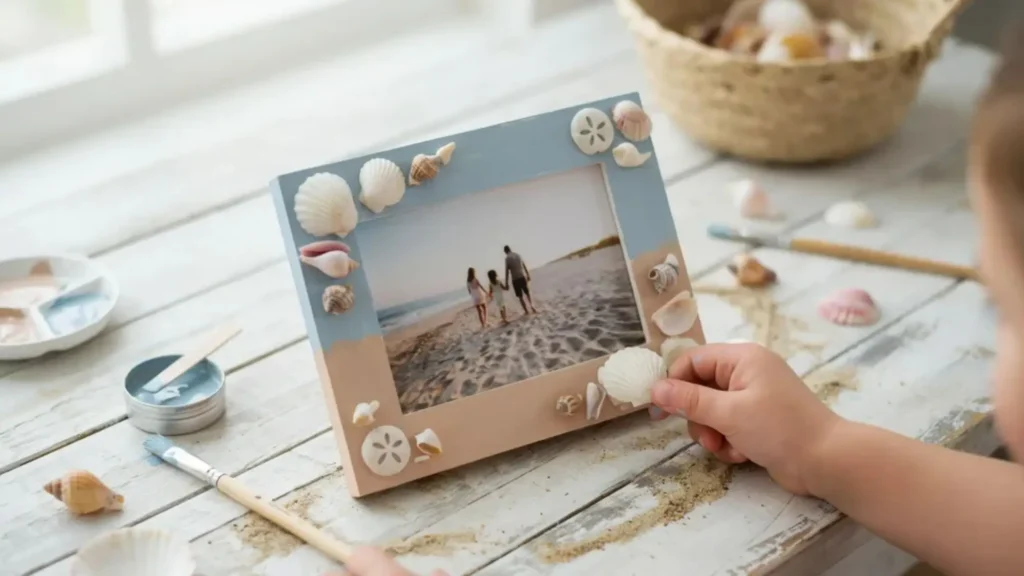
A shell picture frame gives beach finds a job instead of leaving them loose in a jar. Store-bought beach décor can feel generic, but each shell here comes with a memory of where it was found. Build it after a coastal trip and place one favorite summer photo in the center. It is best for school-age children who can plan a border, and the meaningful material is what makes it special.
Supplies: Cardboard frame, clean dry shells, paint, and strong craft glue.
Make it: Paint the cardboard, arrange the shells before gluing, and then let an adult handle any adhesive requiring extra care. For toddlers, use shell-shaped paper cutouts instead of real small shells.
17. How Can Painted Rocks Become Ladybugs and Bees?
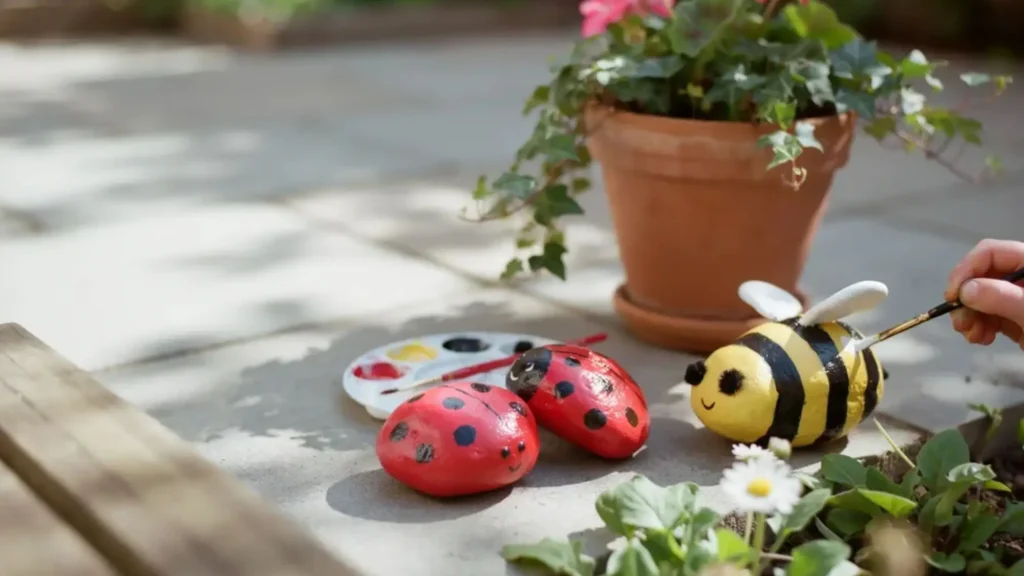
Painted rock insects turn plain stones into tiny garden characters. Stickers peel and plastic toys get lost, but a well-painted rock feels sturdy, collectible, and pleasantly weighty in the hand. Make a set for a flowerpot, fairy garden, or scavenger hunt around the yard. This project works for almost any age with suitable paint, and the best part is finding personality in the stone’s natural shape.
Supplies: Smooth rocks, washable or acrylic paint, brushes, and optional sealant.
Make it: Wash and dry the rocks, paint a base color, and then add wings, stripes, spots, and faces. Adults should manage permanent paints and sealants and keep painted rocks away from children who mouth objects.
18. Can Twigs Really Become a Floating Raft?
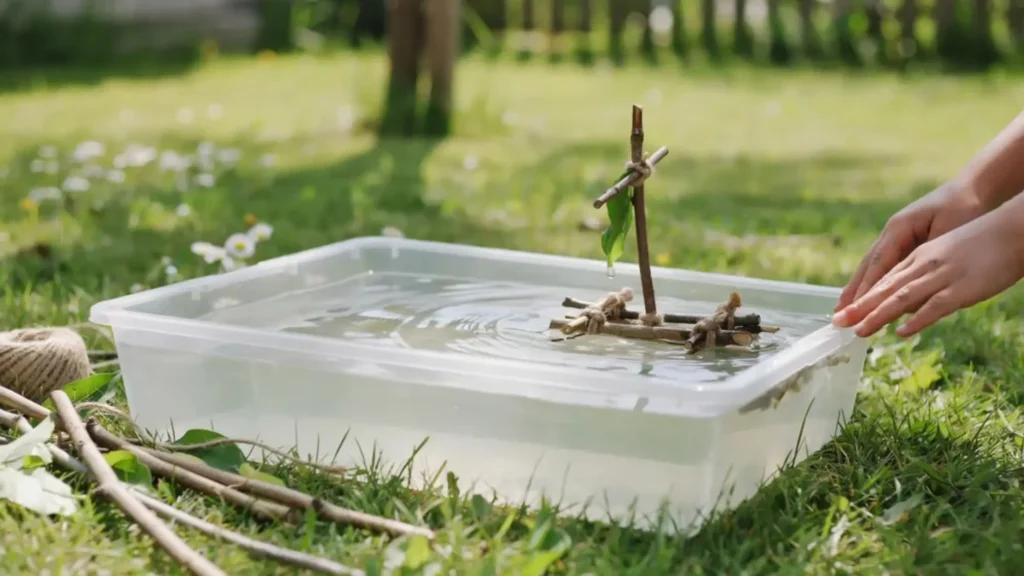
A twig raft feels like a miniature engineering project disguised as a camp craft. A paper boat is quicker, but tied sticks encourage children to test balance, buoyancy, and different sail shapes. Build one beside a shallow basin or calm puddle where adjustments are easy and safe. It is a great choice for ages 6–10, and seeing the handmade raft stay afloat delivers the biggest thrill.
Supplies: Straight twigs, twine, a large leaf or paper sail, and a shallow water tray.
Make it: Line up the twigs, tie them across two support sticks, add a simple mast and sail, and then test the raft in a basin. Use only shallow water with direct adult supervision.
Which Camp Crafts Keep School-Age Kids Busy?
The most useful camp crafts combine simple supplies with building, decorating, knotting, pretend play, or nature exploration.
At a Glance
- Pack lightweight and reusable materials.
- Choose projects suitable for small groups.
- Include crafts children can play with.
- Mix active and quiet activities.
- Prepare alternatives for different skill levels.
19. How Do You Build a Paper Campfire Collage?
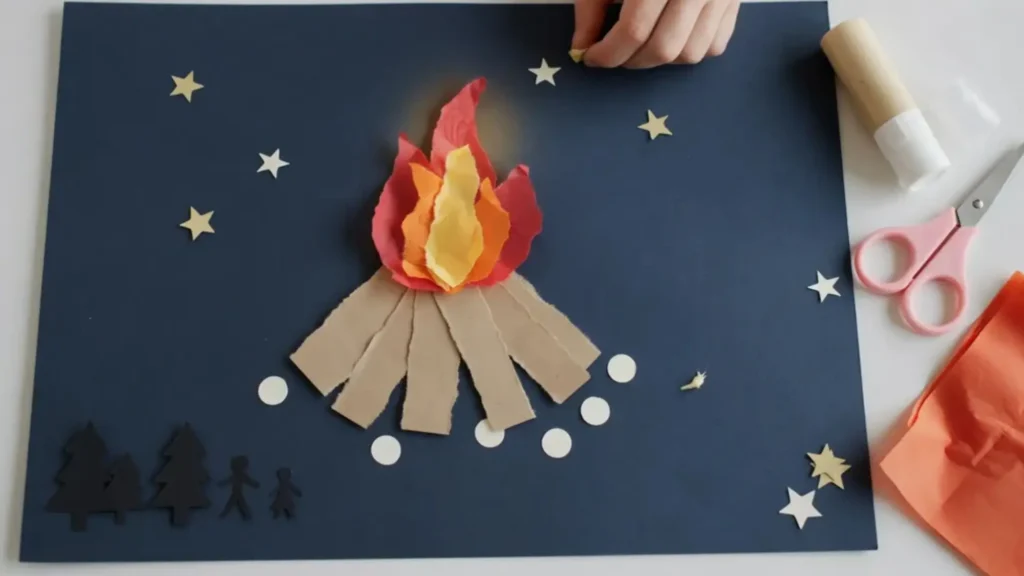
A paper campfire collage brings campsite atmosphere indoors without smoke, sparks, or cleanup. A simple drawing can look flat, but layered logs, tissue flames, and a dark background create convincing depth. Use it during a rainy camp day or before a family backyard sleepout. It suits mixed-age groups because everyone can tear and layer paper, and the glowing-looking flame is the visual payoff.
Supplies: Black or navy paper, brown paper, red, orange, and yellow tissue paper, and glue.
Make it: Cross paper logs near the bottom, tear flame shapes, and layer yellow inside orange and red. Add stars, tents, or paper marshmallows.
20. What Is the Simplest Popsicle-Stick Tent?
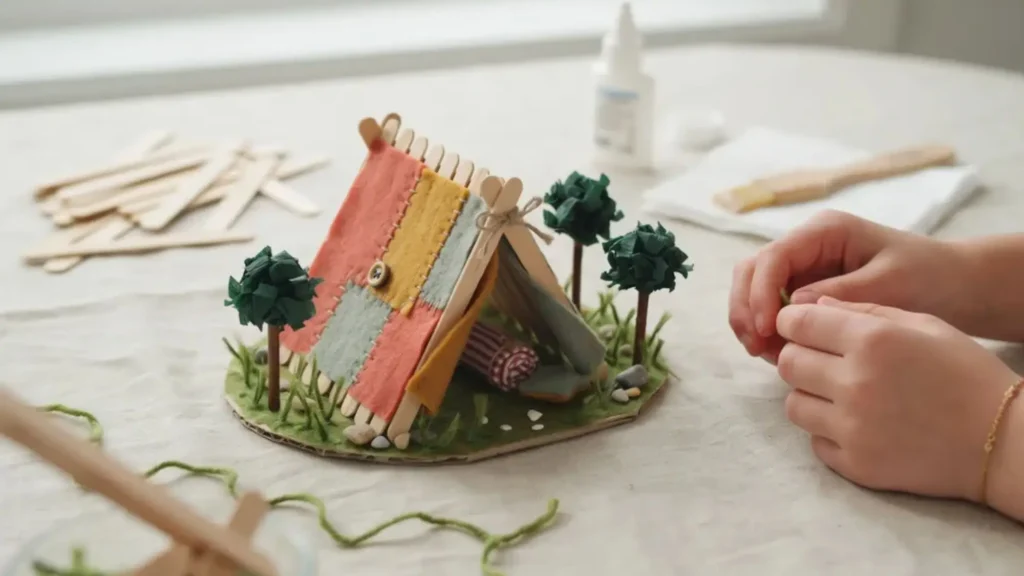
A popsicle-stick tent makes a tiny campsite from three basic shapes. Cardboard tents often require tabs and measurements, while craft sticks create a frame children can understand at a glance. Place the finished tents in a sensory bin, on a map, or beside toy animals for open-ended play. It is ideal for ages 5–8, and the sturdy little structure invites more play than a picture alone.
Supplies: Craft sticks, glue, felt or paper, and a cardboard base.
Make it: Glue sticks into two triangles, connect the frames, and drape paper or felt over the top. Let the structure dry fully before moving it.
21. How Can Kids Make Cardboard Tube Binoculars?
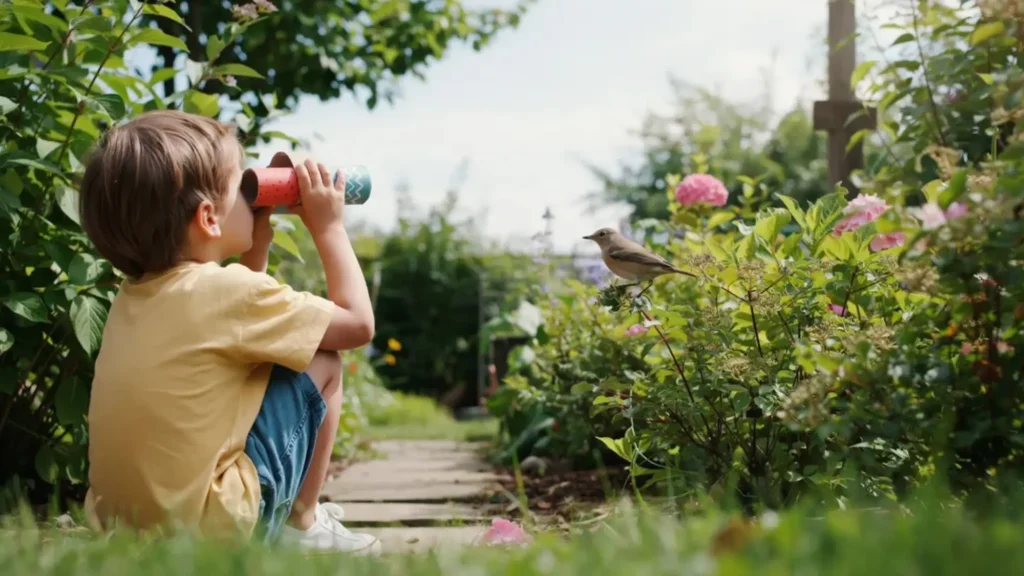
Cardboard tube binoculars turn a recycling item into an invitation to explore. Toy binoculars show a magnified view, but this lightweight version works better as a prompt for pretend safaris, bird counts, and color hunts. Make them before a park walk so children have a reason to look slowly and notice details. They are perfect for younger campers, with imaginative play as the main reward.
Supplies: Two cardboard tubes, tape, paper, crayons, and optional yarn.
Make it: Join the tubes side by side, wrap them in decorated paper, and add a neck strap only for older children under supervision. For toddlers, skip the string and add a paper handle instead.
22. What Can Children Add to a Nature Crown?
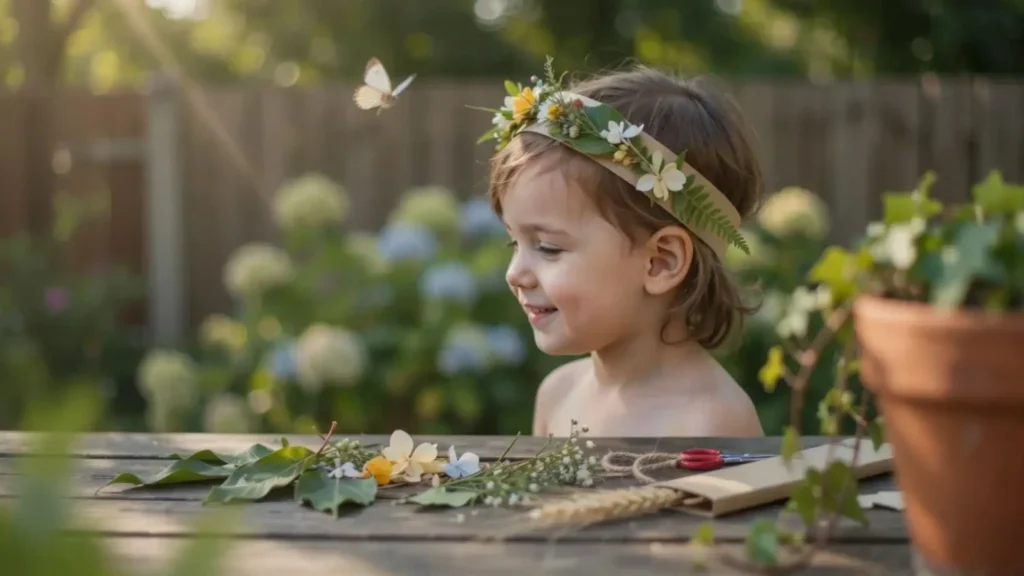
A nature crown transforms fallen leaves and petals into wearable art. A plastic party crown arrives finished, while this one changes with the place, season, and child who collects the pieces. It works beautifully on a camp walk, at a picnic, or during a garden-themed birthday. Choose it for kids who like scavenger hunts, and the best thing is that collecting feels as important as crafting.
Supplies: Cardstock strip, tape or stapler, double-sided tape, and safe natural finds.
Make it: Fit and secure the paper band, place tape around the outside, and press on leaves, grasses, and petals. Collect only fallen items where permitted.
23. How Do Beginners Make a Friendship Bracelet?
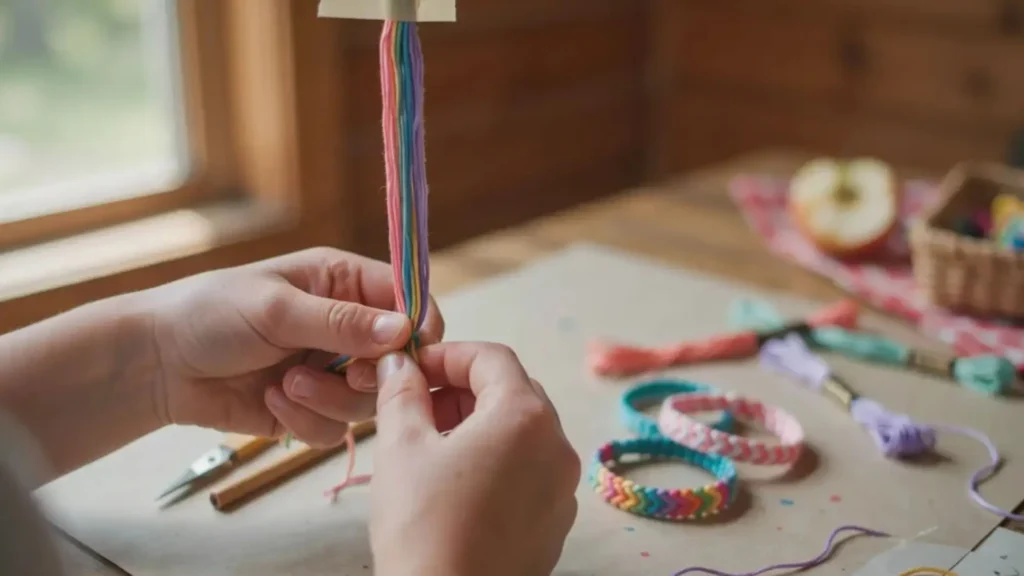
A simple friendship bracelet turns a few strands of thread into a small gift with real meaning. Beaded jewelry can require many loose pieces, but a basic braided or knotted bracelet travels easily and uses only thread. Choose it for camp bunks, long car rides, or quiet time with a best friend. It is one of the strongest fun summer crafts for 10 year olds because the design feels grown-up while remaining approachable.
Supplies: Embroidery floss or yarn, tape, and scissors.
Make it: Cut three equal strands, knot one end, tape it to the table, braid, and tie it to fit. Older beginners can progress to striped knot patterns after mastering the braid.
Once children feel comfortable with a simple braid, they can follow our candy stripe friendship bracelet tutorial to practice a more detailed knotted pattern.
24. Why Wrap Yarn Around Found Sticks?
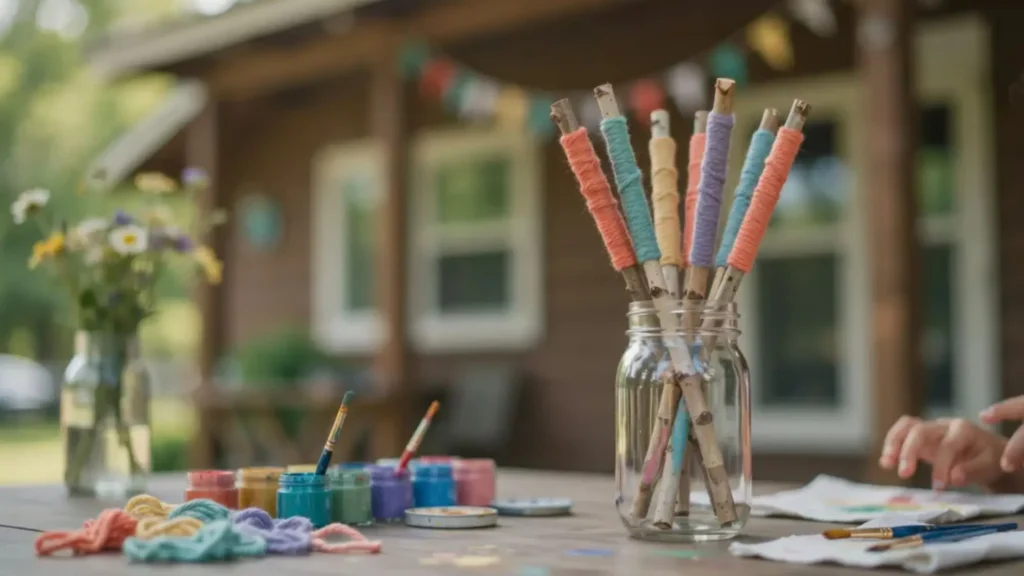
Yarn-wrapped sticks combine natural texture with bright color in a project that cannot come out “wrong.” Painted sticks cover the bark, but wrapping leaves glimpses of the original surface and adds soft bands children can rearrange. Make several during camp and display them in a jar like a handmade bouquet. They are especially good for children who prefer repetitive motions, and the tactile finish is the standout detail.
Supplies: Clean dry sticks, yarn scraps, and tape or glue.
Make it: Secure one yarn end, wrap tightly or loosely in color blocks, and then knot or glue the finish. Add feathers or beads only for older children.
25. How Can Older Kids Make a Beaded Suncatcher?
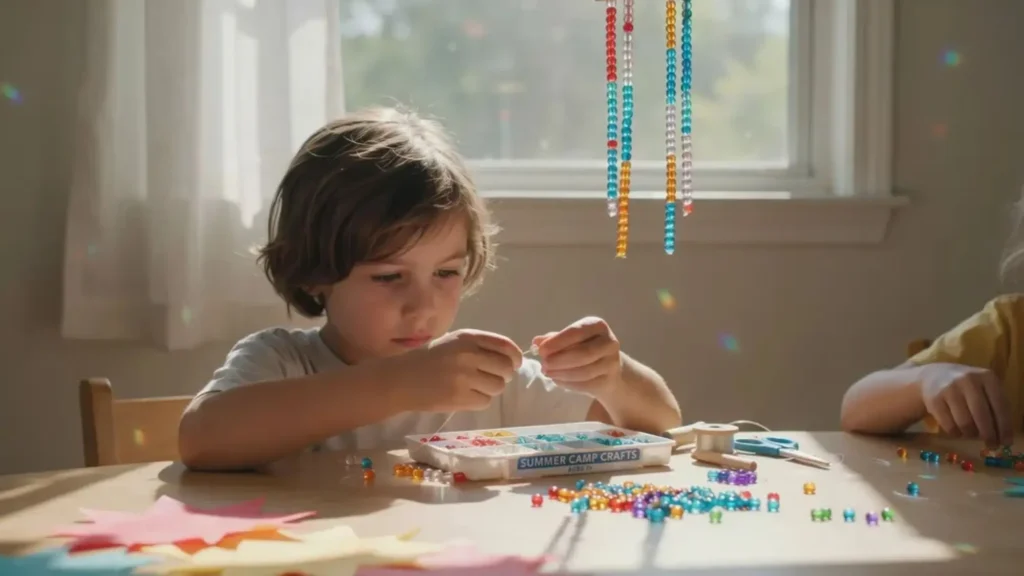
A beaded suncatcher throws tiny spots of color across a bright window. Paper suncatchers are safer for little ones, but older children may enjoy planning repeating bead patterns and balancing the hanging strands. Use it as a focused camp-table activity when kids need a break from running games. It fits ages 7–10+ with close supervision, and the moving light makes the careful work worthwhile.
Supplies: Large translucent beads, cord, and a sturdy ring or stick.
Make it: String a small number of large beads, knot the cord securely, and attach the strands to a support. This project is not suitable for children under 3 because of small parts.
26. What Is an Easy Egg-Carton Crab Craft?
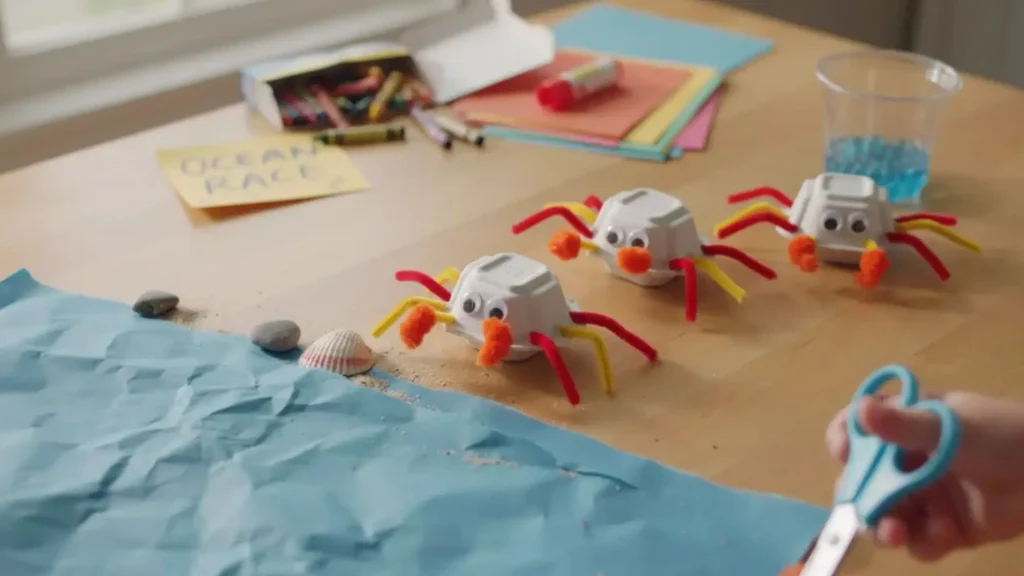
An egg-carton crab gives recycled packaging a surprisingly convincing new shape. A flat paper crab needs several cut pieces, while one carton cup already has the rounded body built in. Make a whole group for an ocean diorama or let children race them across a blue paper “shore.” It is a cheerful option for ages 3–7, and the curved shell makes it look more dimensional than the effort suggests.
Supplies: Cardboard egg carton, red paint, paper legs and claws, and glue.
Make it: Cut one cup, paint it, add wide paper claws and folded legs, and then draw the face. Adults should cut the carton because the edges can be tough.
27. How Do You Turn a Cardboard Tube Into an Octopus?
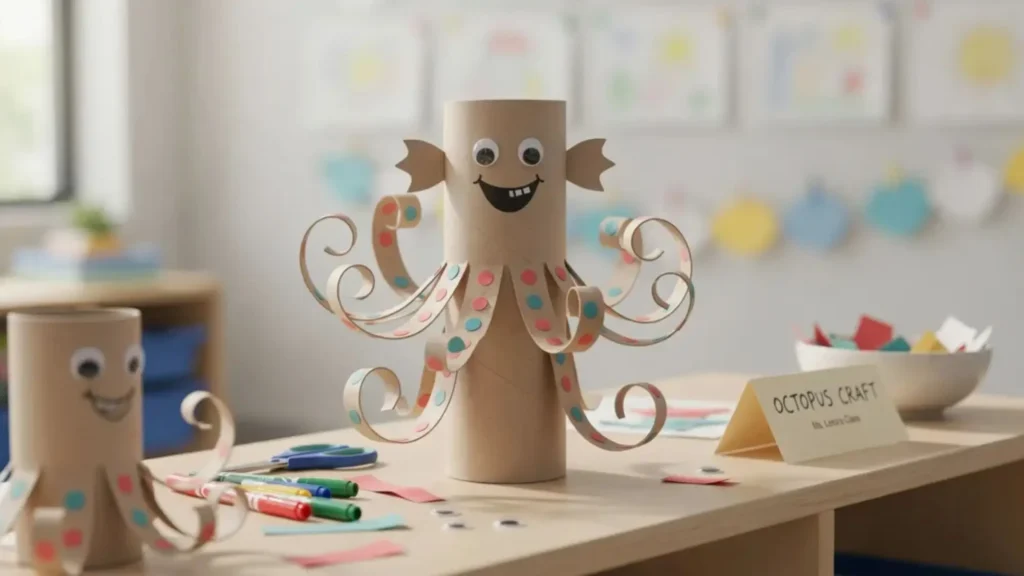
A cardboard tube octopus creates eight springy legs with a few cuts and curls. Separate paper strips can slip out of place, while cutting directly into the tube keeps the body and tentacles connected. Set finished octopuses on a shelf or use them as characters in an underwater story. This is one of those kids crafts easy enough for preschoolers to decorate, with adult cutting support and plenty of room for silly expressions.
Supplies: Cardboard tube, paint, scissors, and marker.
Make it: Paint the tube, cut eight strips upward from the bottom, curl the ends around a pencil, and draw a face. Pre-cut the tentacles for younger children.
These projects work best when children can explore instead of copying an adult-made example. The National Association for the Education of Young Children’s process-art guidance explains how open-ended materials and independent choices support meaningful creative experiences.
What Summer Season Craft Ideas Make Useful Keepsakes?
Useful keepsakes include projects children can wear, display, grow, collect, fly, or revisit after summer ends.
At a Glance
- Preserve memories with jars and impressions.
- Create objects children can use.
- Add dates to meaningful keepsakes.
- Choose durable materials for long-term display.
- Let children personalize every finished item.
28. How Do You Make Salt-Dough Shell Impressions?
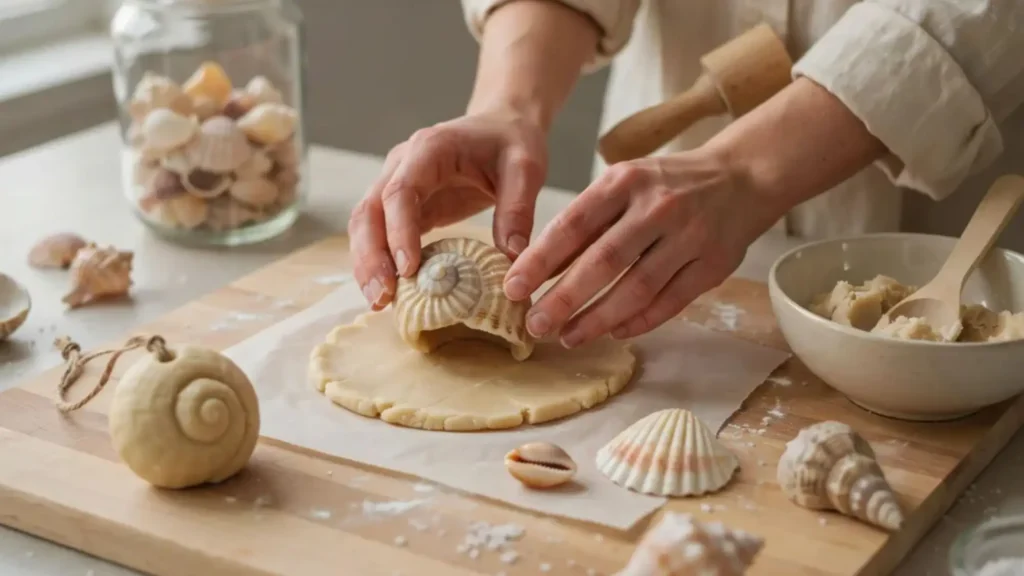
Salt-dough impressions preserve the ridges and spirals of summer finds in a sturdy keepsake. A glued shell displays the object itself, while pressing it into dough captures the texture and lets the shell return to a collection. Make one ornament for each beach day or stamp several textures into a small plaque. It suits ages 5–10 with adult kitchen help, and the fossil-like result feels far more special than the basic ingredients.
Supplies: Flour, salt, water, shells or leaves, and optional paint.
Make it: Mix two parts flour, one part salt, and approximately one part water, adjusting slowly until the dough is firm. Press in textures and dry or bake according to an adult-approved salt-dough method. Salt dough is not edible, so supervise young children.
29. Can Kids Build a Simple Paper Kite?
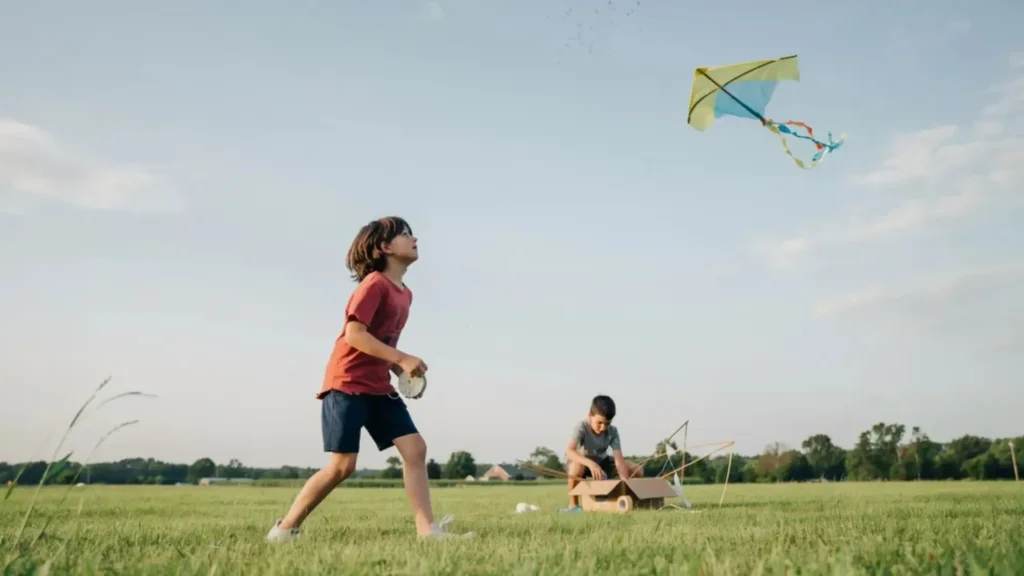
A simple kite gives children a project they can test against the wind. A store-bought kite may fly more predictably, but a handmade one makes every lift, wobble, and adjustment feel earned. Build it on a breezy day in an open space away from roads, trees, and power lines. It is a rewarding project for older children, and the first successful rise is the unforgettable payoff.
Supplies: Lightweight paper or plastic, two thin dowels, tape, string, and ribbon.
Make it: Cross and secure the dowels, attach the sail, add a tail, and tie the flying line at the balance point. An adult should supervise construction and all outdoor flying.
30. How Can a Recycled Windsock Show the Breeze?
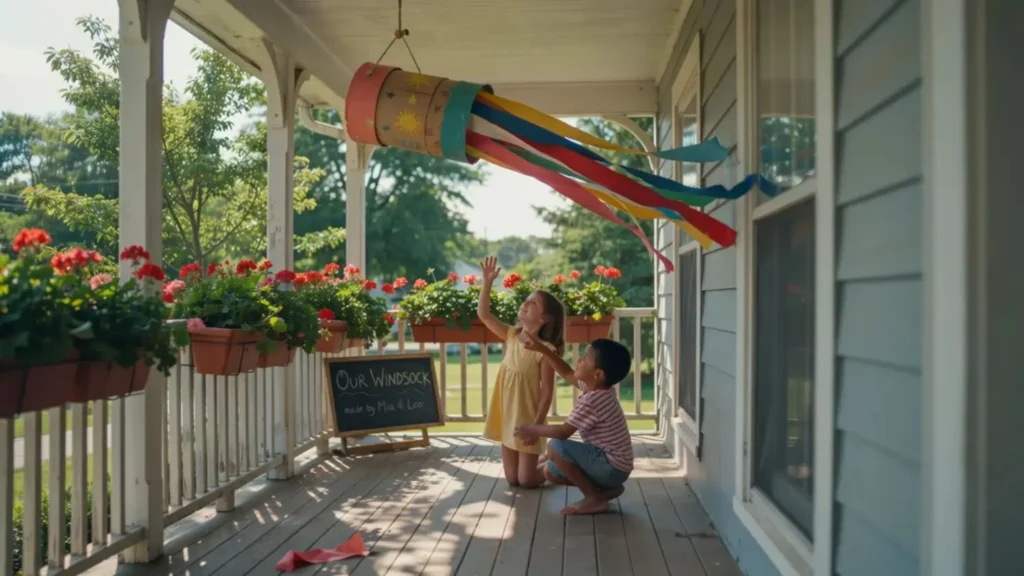
A recycled windsock turns a container or paper tube into moving porch décor. A hanging picture stays still, whereas long ribbons make even a light breeze visible. Place it near a covered balcony, classroom window, or campsite shelter and watch children check it throughout the day. It is great for summer crafts for 6-8 year olds because decorating is easy, assembly feels purposeful, and the result keeps responding to the weather.
Supplies: Paper cup or cardboard tube, paint, ribbon or crepe paper, and string.
Make it: Decorate the base, attach streamers around the lower edge, and add a hanging loop at the top. Keep long cords out of reach of very young children.
31. What Makes a Paper Pinwheel Spin?
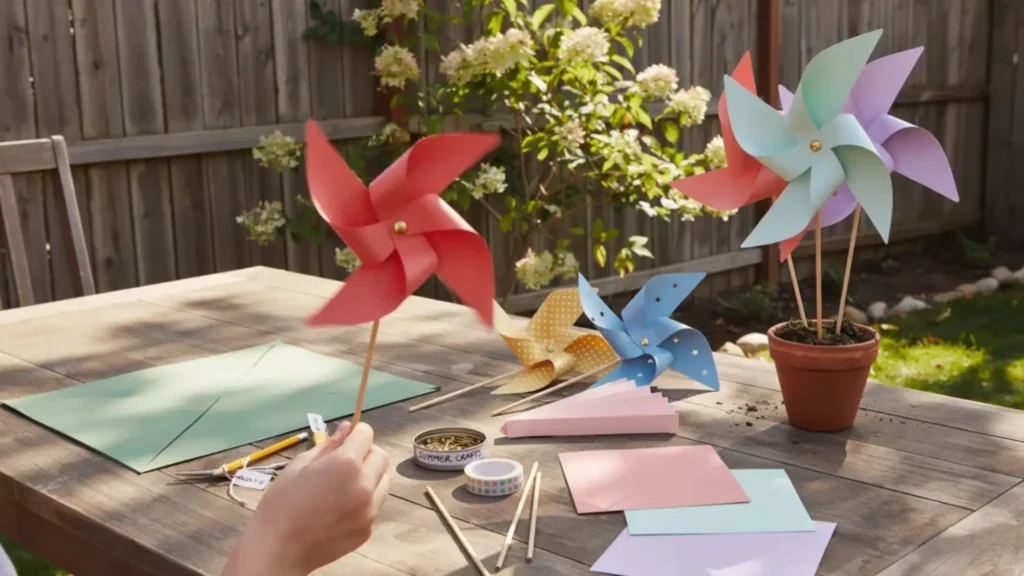
A paper pinwheel looks decorative at rest and comes alive with a small puff of air. Folded fans move back and forth, but the pinwheel’s rotating shape gives older children a satisfying construction challenge. Make several for a garden pot, parade, or summer party table. It is best for ages 7–10 with adult help at the center fastener, and the spin provides an instant test of careful assembly.
Supplies: Square paper, ruler, scissors, pushpin, and a pencil with an eraser.
Make it: Cut from each corner toward the center, fold alternating points inward, and secure them to the pencil eraser. Because a pushpin is sharp, an adult must assemble and control this part.
32. How Do You Paint a Lemonade-Stand Banner?
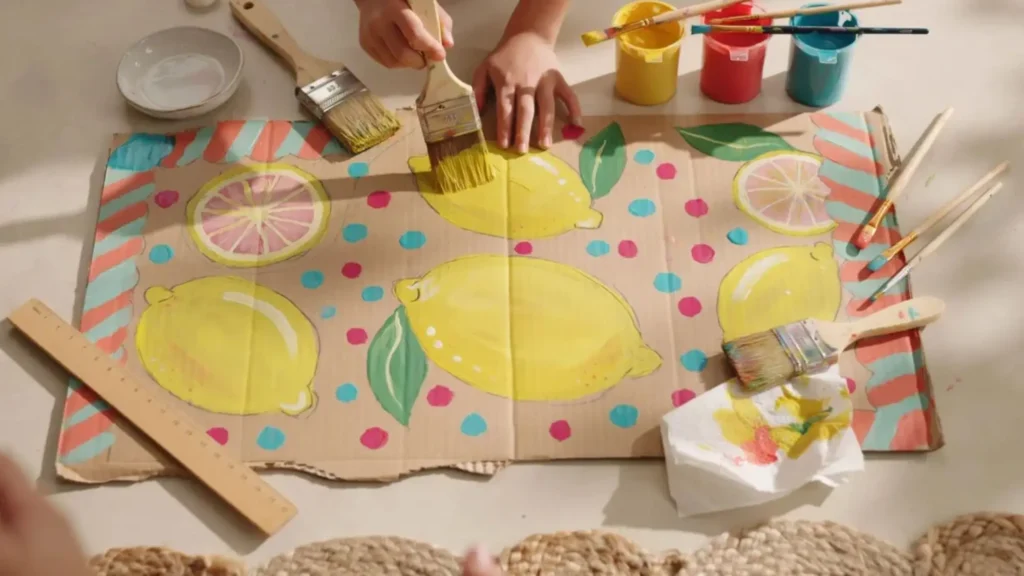
A lemonade-stand banner turns sign-making into part of the event rather than a last-minute task. Printed letters are fast, but hand-painted lemons, prices, and playful lettering make the stand feel like the child’s own idea. Spread the banner across the floor the evening before, when there is time to plan without customers waiting. This works well for siblings or friends, and the best payoff is seeing their artwork become the front of a real summer project.
Supplies: Long paper or flattened cardboard, paint, markers, ruler, and tape.
Make it: Sketch the words lightly, outline them, add lemon slices and borders, and then display the dry sign securely. Adults should manage setup near sidewalks or driveways.
33. How Can Kids Tie-Dye a Summer Tote Bag?
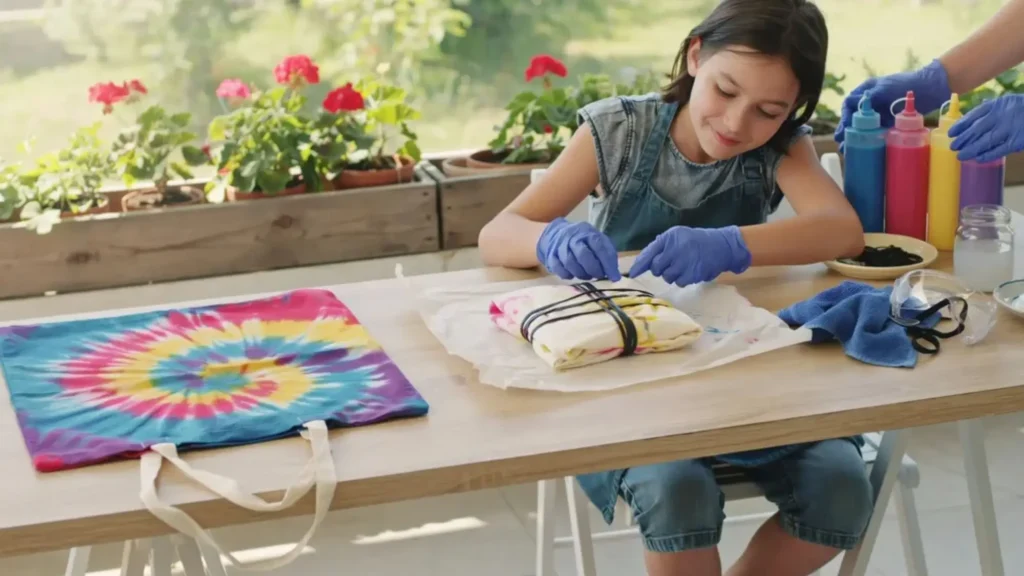
A tie-dye tote gives older kids a wearable craft without requiring sewing. Paper marbling stays on the page, while dye travels through fabric and creates a pattern that remains useful for library books, swim gear, or camp supplies. Do this outdoors with gloves and a protected work surface so the color can be part of the fun rather than a source of worry. It is another excellent craft for 10-year-olds, and the reveal after untying the fabric is hard to beat.
Supplies: Plain cotton tote, fabric dye kit, rubber bands, gloves, and plastic covering.
Make it: Follow the dye manufacturer’s directions exactly, folding and banding the tote before adding color. An adult should manage dye mixing, rinsing, ventilation, and cleanup.
Before preparing the fabric, read our beginner guide to tie-dyeing at home for clear instructions on folding, applying color, rinsing, and drying the finished project.
34. What Goes Inside a Summer Memory Jar?
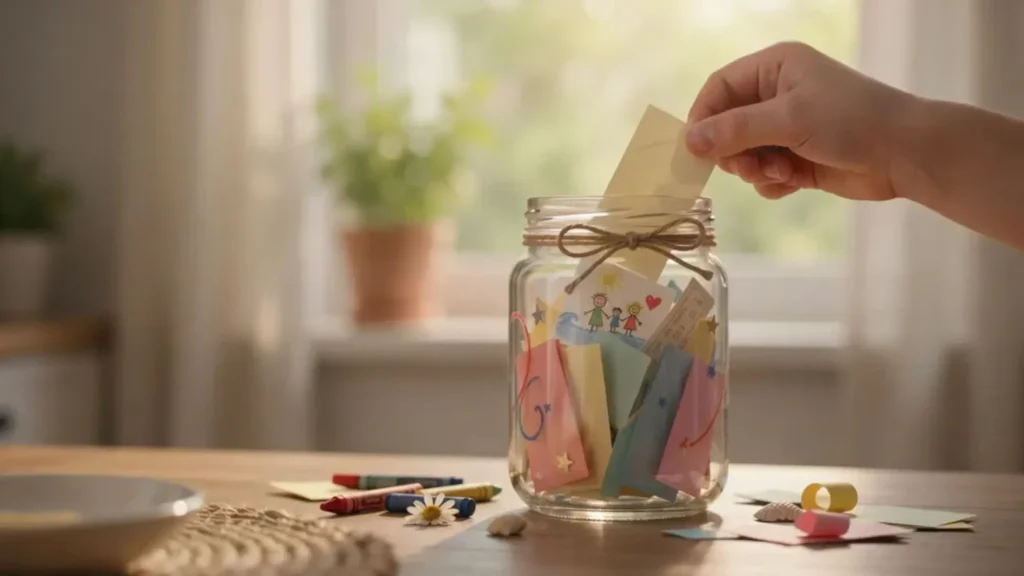
A summer memory jar collects experiences rather than craft supplies. A scrapbook asks children to finish a whole page, while a tiny note takes less than a minute and captures ordinary moments before they disappear. Keep the jar near the dinner table and add tickets, drawings, or written memories each week. It suits the entire family, and opening everything on the final weekend creates the emotional payoff.
Supplies: Wide plastic jar or container, paper strips, crayons, and label.
Make it: Decorate the container, write one memory on each slip, fold it, and add it to the jar. Use a plastic container instead of glass for young children.
35. How Do You Decorate a Summer Flowerpot?
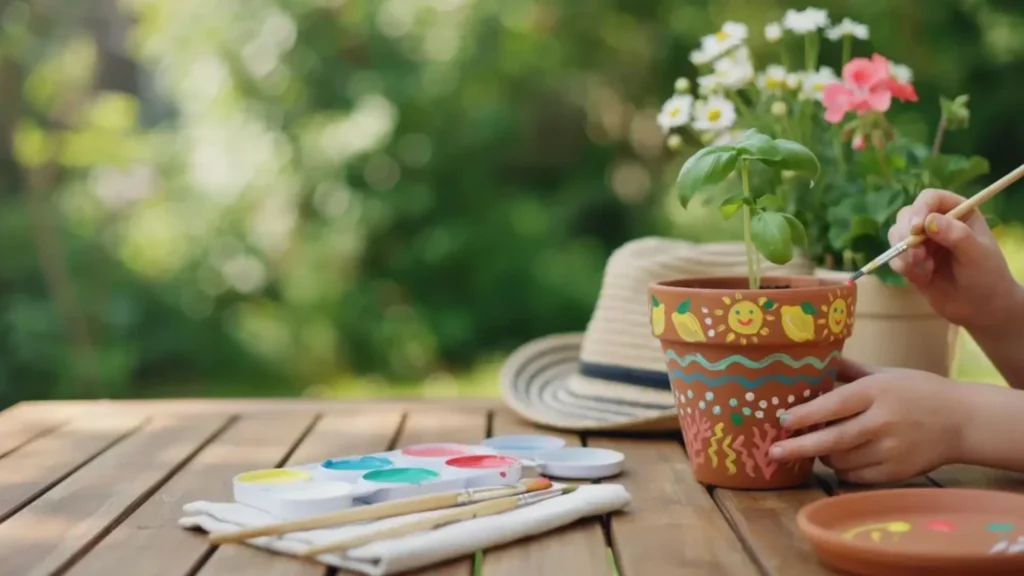
A painted flowerpot connects craft time with something children can continue caring for. A paper flower looks complete immediately, but a real planted pot changes throughout the season and gives the decoration an ongoing purpose. Paint it before choosing herbs or flowers together, and then place it where the child can help with watering. It is a lovely final project for the list, and watching new growth rise above their artwork is the best reward.
Supplies: Terracotta or plastic pot, suitable paint, brushes, plant, and soil.
Make it: Paint simple fruit, sunshine, waves, or abstract patterns, let the pot dry, and plant with adult help. Follow the paint label and use a child-safe work area.
How Do You Choose Summer Crafts by Age?
Choose simpler sensory projects for toddlers, guided construction for younger school-age children, and more detailed functional crafts for older kids.
At a Glance
- Prioritize large materials for ages 2–3.
- Add cutting and folding around ages 4–5.
- Introduce construction for ages 6–8.
- Offer design independence around ages 9–10.
- Supervise based on tools, not age alone.
How Can You Turn These Into Easy Summer Crafts for Kids Printable Pages?
Convert the ideas into checklists, activity cards, bingo grids, craft passports, and reflection sheets that children can use independently.
At a Glance
- Use large, readable text.
- Place one prompt in each box.
- Add checkboxes or sticker spaces.
- Separate crafts by age or material.
- Leave room for original ideas.
Create a small printable pack that makes the list easier to use at home, school, or camp:
- Supply checklist: Group paper, paint, recycled materials, nature finds, and specialty items.
- Pick-a-craft cards: Print one idea per card and let a child draw the day’s project.
- Summer craft passport: Add a stamp or sticker after each completed craft.
- Craft bingo: Use 16 prompts such as “make something that moves,” “paint outside,” or “use recycled cardboard.”
- Reflection page: Leave space for “What I made,” “My favorite part,” and “What I would change.”
An easy summer crafts for kids printable does not need complex artwork. Large text, clear icons, and one instruction per box make it more useful than a crowded worksheet.
Frequently Asked Questions
What Is the Easiest Summer Craft for Kids?
A paper plate sunshine is one of the easiest choices because children can color, glue, tear paper, and add a face without measuring. Adults can pre-cut the rays for toddlers.
What Summer Crafts Can Kids Make With Paper?
Children can make watermelon fans, ice cream collages, jellyfish, fish puppets, aquariums, flamingos, pinwheels, and suncatchers. These summer crafts for kids with paper are inexpensive and easy to adapt by age.
What Are Good Camp Crafts With Few Supplies?
Friendship bracelets, nature crowns, yarn-wrapped sticks, cardboard binoculars, leaf-rubbing postcards, and paper campfire collages pack well and work with small groups.
How Can I Make Kids Crafts Less Messy?
Cover the table, portion paint into small cups, use trays for loose pieces, and keep a damp cloth nearby. Outdoor painting and washable supplies also make cleanup easier.
Are All 35 Crafts Safe for Toddlers?
No. Beads, shells, pushpins, long cords, permanent dyes, and small decorations are intended for older children or require direct adult handling. For children under 3, choose large paper pieces, washable paint, and projects without detachable small parts.
How Can Children Craft More Independently?
Prepare a small tray with safe materials, show one step at a time, and allow children to choose colors and details. An easy summer crafts for kids printable can also help them select projects and follow simple prompts. Keep adult-only tools separate while allowing children to complete safe steps without unnecessary correction.
Creative activities do not need to stop when sunny weather ends. Save our collection of winter crafts for kids for more paper, painting, and seasonal projects to enjoy later in the year.
Final Thoughts
The most memorable easy summer crafts for kids are rarely the ones that look exactly like the example. They are the projects with an extra fin, a purple sun, a lopsided tent, a name written backward, or a story that grew while the glue dried.
Choose one idea that matches the materials you already have, prepare only the steps your child cannot safely do, and leave the rest open. That simple balance keeps summer crafting affordable, manageable, and genuinely theirs.

![The Best 30+ Free Crochet Cat Patterns [Beginner-Friendly Guide]](https://crochetmind.com/wp-content/uploads/2025/04/1-The-Best-30-Free-Crochet-Cat-Patterns-Beginner-Friendly-Guide.webp)