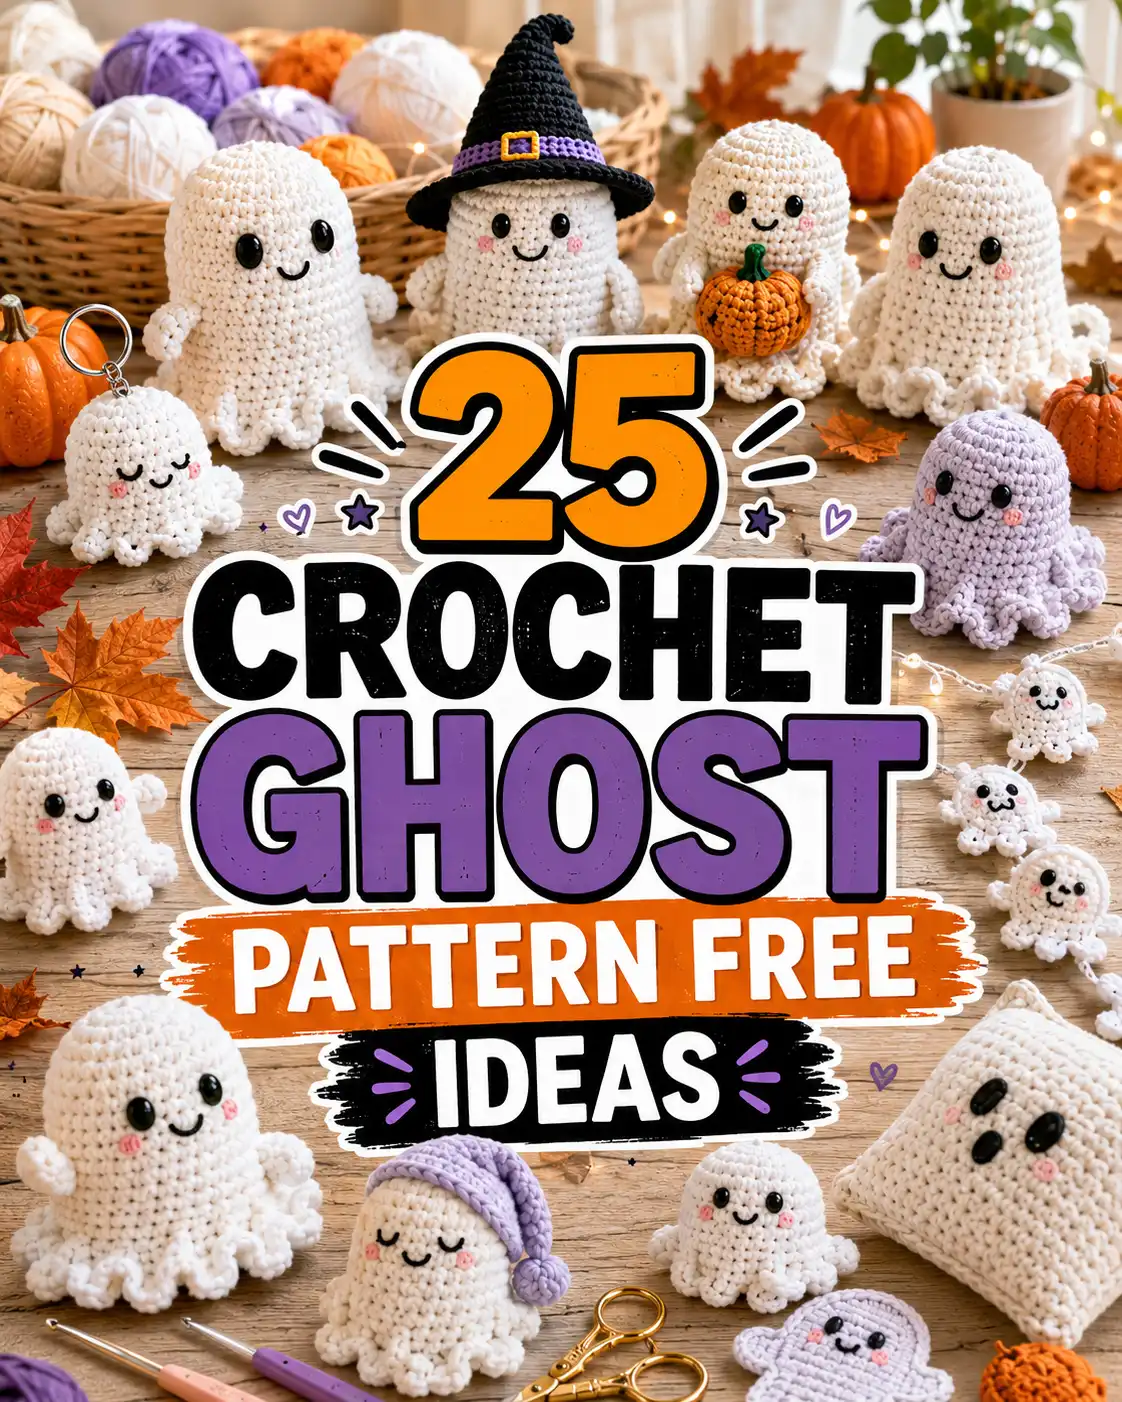
A handmade ghost is one of my favorite quick Halloween projects because the same simple shape can become a tiny keychain, soft plush, garland decoration, bookmark, or pillow. This crochet ghost pattern free collection brings together 25 approachable ideas that you can adjust with different yarn weights, expressions, colors, and accessories. Whether you are learning amigurumi or looking for a fast project to use up leftover yarn, you can start with the basic ghost body and make each version feel completely different. If you’re new to the craft, this crochet guide for beginners will help you master the essential skills before tackling these ghost patterns.
Looking for a crochet ghost pattern free collection that includes tiny amigurumi, plush decorations, keychains, garlands, and beginner-friendly projects? These 25 crochet ghost ideas use simple shapes, basic stitches, and customizable details, so you can make everything from a five-minute mini ghost to a soft Halloween pillow.
Most designs begin with a magic ring and use single crochet increases to create a rounded head. If this technique is new to you, follow this step-by-step tutorial before starting your first ghost. You can then change the yarn weight, facial features, base, arms, accessories, or finishing method to make each ghost completely different.
Key Takeaways
- Start with a simple one-piece crochet ghost.
- Use thicker yarn for larger plush designs.
- Embroider faces for secure, customizable expressions.
- Add accessories to personalize each ghost crochet project.
- Adjust increase rounds to change the finished size.
- Use leftover yarn for appliqués and mini decorations.
Crochet Ghost Pattern Free: Quick Project Guide
A crochet ghost can be made as a stuffed toy, flat appliqué, ornament, keychain, garland, pillow, or seasonal accessory.
At a Glance
- Beginners can start with one-piece ghost crochet designs.
- Cotton yarn creates crisp, defined stitches.
- Chenille yarn produces soft, chunky plush ghosts.
- Flat patterns require no stuffing.
- Most designs can be resized easily.
| Project | Skill level | Suggested yarn | Approximate size | Sewing |
|---|---|---|---|---|
| Classic mini ghost | Beginner | DK or worsted | 3–4 inches | Minimal |
| Chunky plush ghost | Beginner | Super bulky | 7–10 inches | Minimal |
| No-sew ghost | Beginner | Worsted | 4–5 inches | None |
| Ghost keychain | Easy | Cotton DK | 2–3 inches | Minimal |
| Ghost pillow | Easy | Bulky | 12–16 inches | Some |
| Ghost garland | Easy | DK | Custom | Minimal |
| Flat ghost appliqué | Beginner | Cotton | 2–5 inches | None |
| Glow-style ghost | Easy | Pale yarn | 4–8 inches | Minimal |
Materials for These Free Crochet Ghost Patterns
Most crochet ghost projects require yarn, a suitable hook, stuffing, scissors, a yarn needle, and materials for the face. If you’re building your toolkit, these essential crochet supplies cover everything you’ll need for beginner and advanced projects alike.
At a Glance
- Match the hook size to your yarn.
- Choose dense stitches for stuffed pieces.
- Use embroidery thread for facial details.
- Keep stitch markers nearby for spiral rounds.
- Add accessories only when appropriate.
You do not need every item for every design. Choose materials according to the project you want to make.
- White, cream, pale gray, pastel, or glow-effect yarn
- A crochet hook suitable for your yarn
- Polyester stuffing
- Black embroidery thread
- Yarn needle
- Stitch marker
- Scissors
- Optional safety eyes
- Optional keychain rings, ribbon, felt, beads, or wire
For toys intended for babies or young children, embroidered facial features are generally a more suitable choice than detachable eyes or decorations. Check every seam carefully and review the U.S. Consumer Product Safety Commission toy safety guidance for age-appropriate recommendations.
Common Crochet Abbreviations
These abbreviations cover the basic stitches and techniques used throughout the crochet patterns in this collection.
At a Glance
- MR begins most rounded amigurumi pieces.
- Inc adds stitches and widens the shape.
- Dec removes stitches and narrows the shape.
- BLO creates ridges or shaping lines.
- FO means to finish and secure the yarn.
- MR: Magic ring
- ch: Chain
- sc: Single crochet
- hdc: Half double crochet
- dc: Double crochet
- sl st: Slip stitch
- inc: Two single crochets in one stitch
- dec: Single crochet decrease
- BLO: Back loop only
- FO: Fasten off
- st/sts: Stitch/stitches
- R: Round or row
Unless a pattern says otherwise, work amigurumi pieces in continuous rounds. Place a stitch marker in the first stitch of every round.
Master Ghost Body Pattern
The master ghost body uses increases for the head, plain rounds for height, decreases for shaping, and a decorative wavy base.
At a Glance
- Work in continuous spiral rounds.
- Mark the first stitch of each round.
- Add facial features before closing.
- Stuff gradually to avoid lumps.
- Customize the final edge as desired.
Several projects below use this adaptable ghost body.
R1: Make 6 sc in an MR. (6)
R2: Inc in each st around. (12)
R3: [Sc, inc] around. (18)
R4: [2 sc, inc] around. (24)
R5–R9: Sc around. (24)
R10: [2 sc, dec] around. (18)
R11: Sc around. (18)
Add the eyes and begin stuffing.
R12: [Sc, inc] around. (24)
R13: [3 sc, inc] around. (30)
Create a wavy base:
R14: Repeat [sl st, sc, hdc, dc, hdc, sc] around, adjusting the final repeat when necessary.
Fasten off and weave the yarn tail securely through the base.
You can lengthen the body by adding plain rounds before R10. For a wider ghost, continue increasing after R4.
1. Classic Mini Crochet Ghost
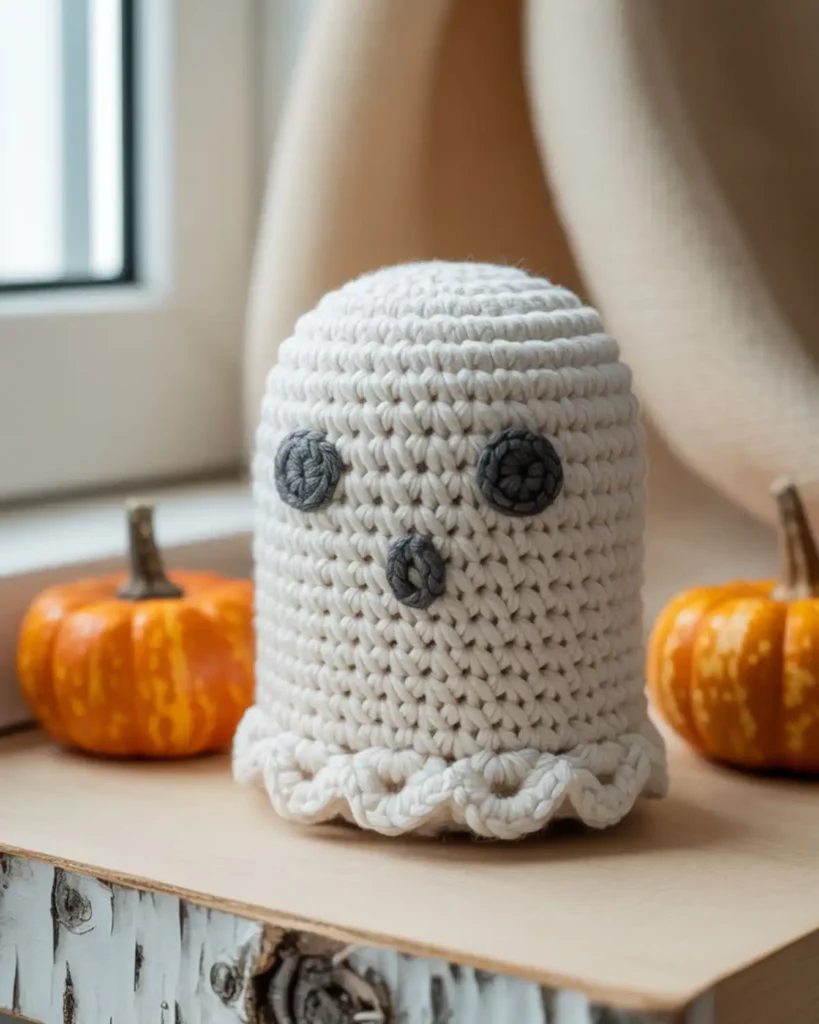
The Classic Mini Crochet Ghost is the easiest place to begin because its round head and wavy base create an instantly recognizable shape. Unlike patterns with separate legs, clothes, and accessories, this one uses a single continuous body. I like placing several on a bookshelf between pumpkins because each face gives the group a different personality. It is a practical choice when you need a quick Halloween project that still looks polished.
Use the master ghost body with DK or light worsted yarn.
Place the eyes between R7 and R8, about four stitches apart. Embroider a tiny oval mouth one round below the eyes.
For a softer expression, make the mouth with one short horizontal stitch. For a surprised ghost, embroider a narrow vertical oval.
Special Tip: Make three ghosts with different eye positions. Even when the body pattern is identical, the finished characters will look noticeably different.
2. Chunky Plush Ghost
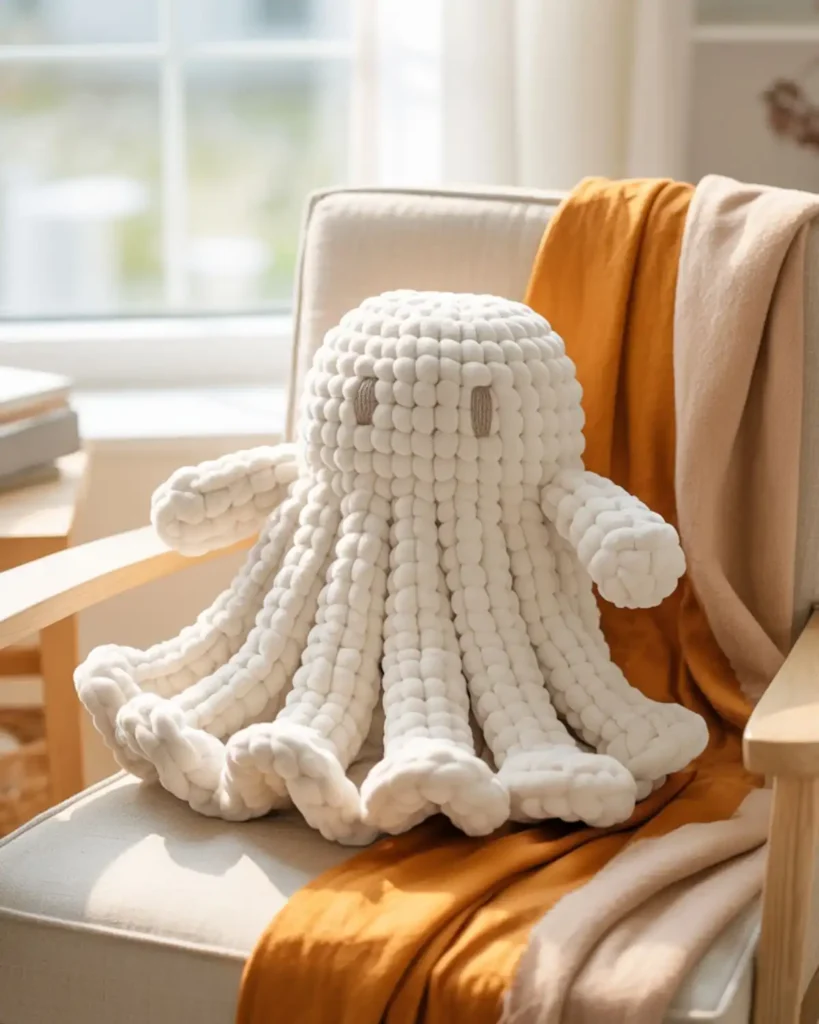
A Chunky Plush Ghost turns the same basic shape into a soft, squeezable decoration. Regular yarn creates neat stitch definition, but chenille or blanket yarn gives the ghost a rounded, cloudlike finish. It works particularly well on a bed, reading chair, or Halloween display where a tiny amigurumi would disappear. Choose this version when the main goal is a fast project with a large visual impact.
Use super-bulky yarn and an appropriately sized hook. Follow the master body, but stop increasing at 18 stitches for a small plush or continue to 30 stitches for a larger one.
Keep your stitches firm enough to hold the filling, but avoid pulling so tightly that the chenille yarn becomes difficult to work through.
Stuff the ghost gradually. Place small amounts of stuffing around the sides first, then fill the center to maintain an even shape.
Add embroidered eyes or large felt circles after finishing.
3. No-Sew Mini Ghost
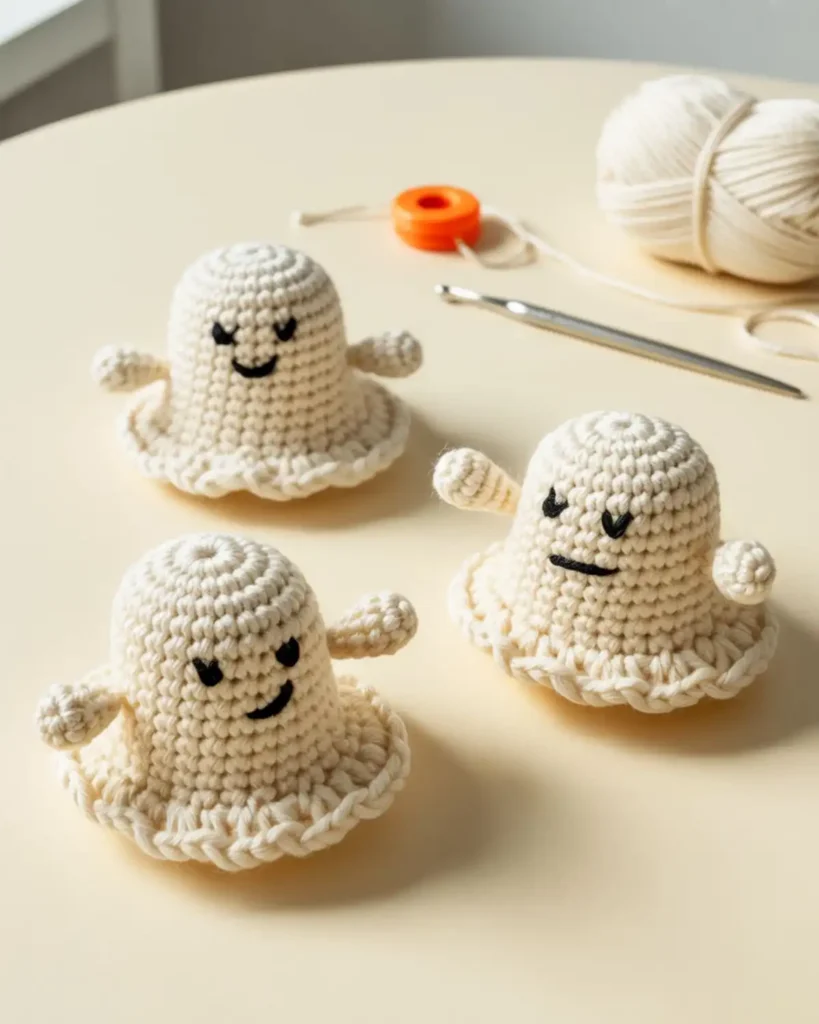
The No-Sew Mini Ghost removes the most time-consuming part of amigurumi finishing. Separate arms can look charming, but crocheting every feature directly into the body makes batch-making much faster. I use this method when I want several matching pieces for treat bags or a market display. It suits crocheters who enjoy amigurumi but prefer not to attach small parts.
Follow the master body pattern. Make the arms during R9.
At the first arm position:
- Ch 4.
- Starting in the second ch from the hook, work 3 sl sts.
- Continue crocheting around the body.
Repeat on the opposite side.
The chain arms will naturally curl slightly. For longer arms, chain five or six instead.
Embroider the face directly onto the body before adding the final rounds.
4. Tiny Ghost Keychain
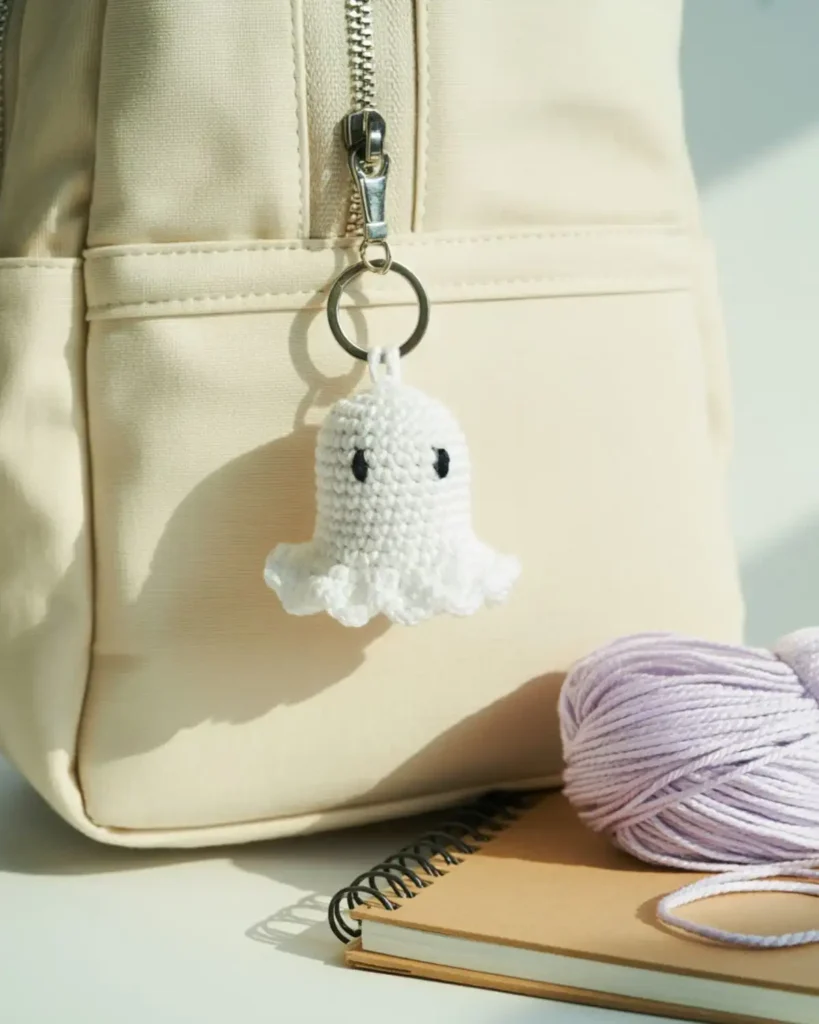
The Tiny Ghost Keychain keeps all the charm of a full amigurumi in a pocket-sized design. A larger stuffed ghost is better for decorating a room, while this version can travel on a backpack, pencil case, or key ring. I prefer mercerized cotton for keychains because the stitches remain defined after regular handling. Make this one when you want a small handmade gift that does not require much yarn.
Use sport-weight or DK cotton yarn.
Follow the master pattern with these changes:
- Stop increasing at 18 stitches.
- Work only three plain body rounds.
- Add one decrease round.
- Finish with a small scalloped edge.
Insert the keychain loop through the top center. Pass a strong thread through the ring and several crochet stitches rather than attaching it to only one loop.
Special Tip: Add a small felt circle inside the top of the head before securing the keychain hardware. This helps distribute pressure across a wider area.
5. Five-Minute Flat Ghost Appliqué
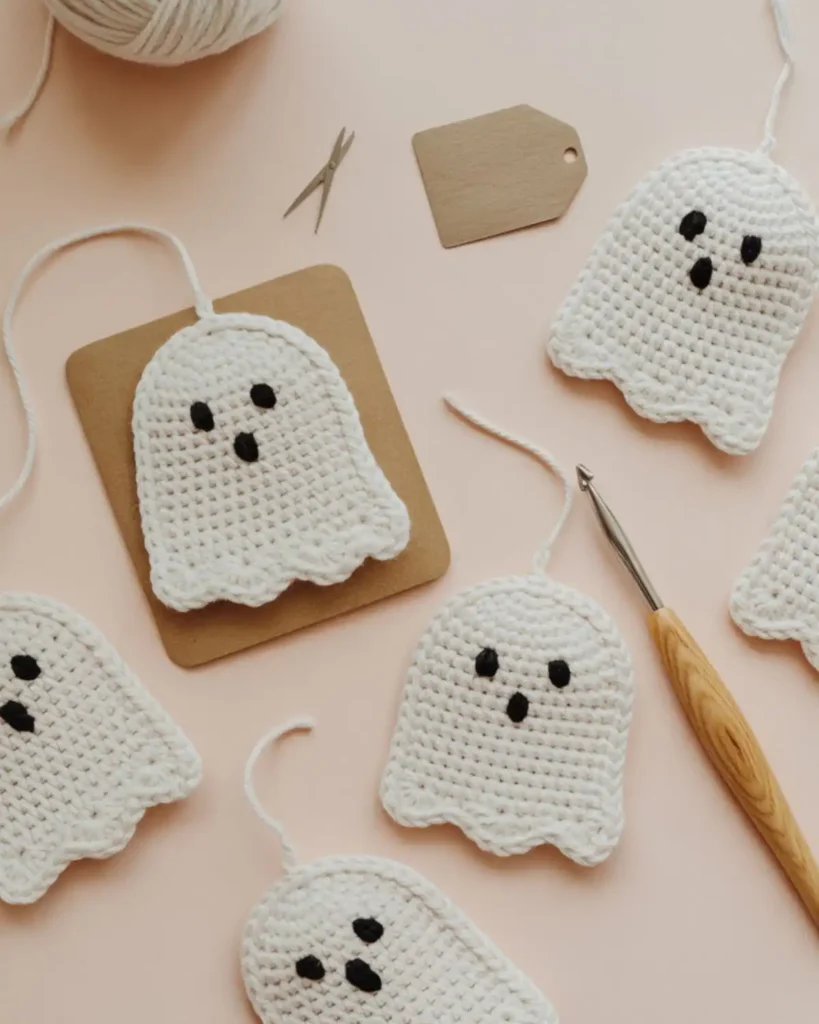
A Flat Ghost Appliqué is faster than stuffed amigurumi and can be attached to almost anything. A three-dimensional ghost works as a toy or ornament, but a flat motif is more useful for cards, clothing patches, gift tags, and bunting. I often keep a few unfinished appliqués ready for last-minute Halloween projects. This is the best option when you want the ghost shape without stuffing or complicated assembly.
R1: Ch 8.
R2: Starting in the second ch from the hook, sc across. Ch 1 and turn. (7)
R3: Inc, 5 sc, inc. Ch 1 and turn. (9)
R4–R6: Sc across. Ch 1 and turn.
R7: Dec, 5 sc, dec. (7)
Do not turn.
Work down the side with evenly spaced sc. Across the bottom, repeat:
- Sl st in the next st.
- Work 3 dc in the next st.
- Sl st in the next st.
Continue around the opposite side and top. Fasten off.
Embroider the face or attach small felt features.
6. Ghost With Waving Arms
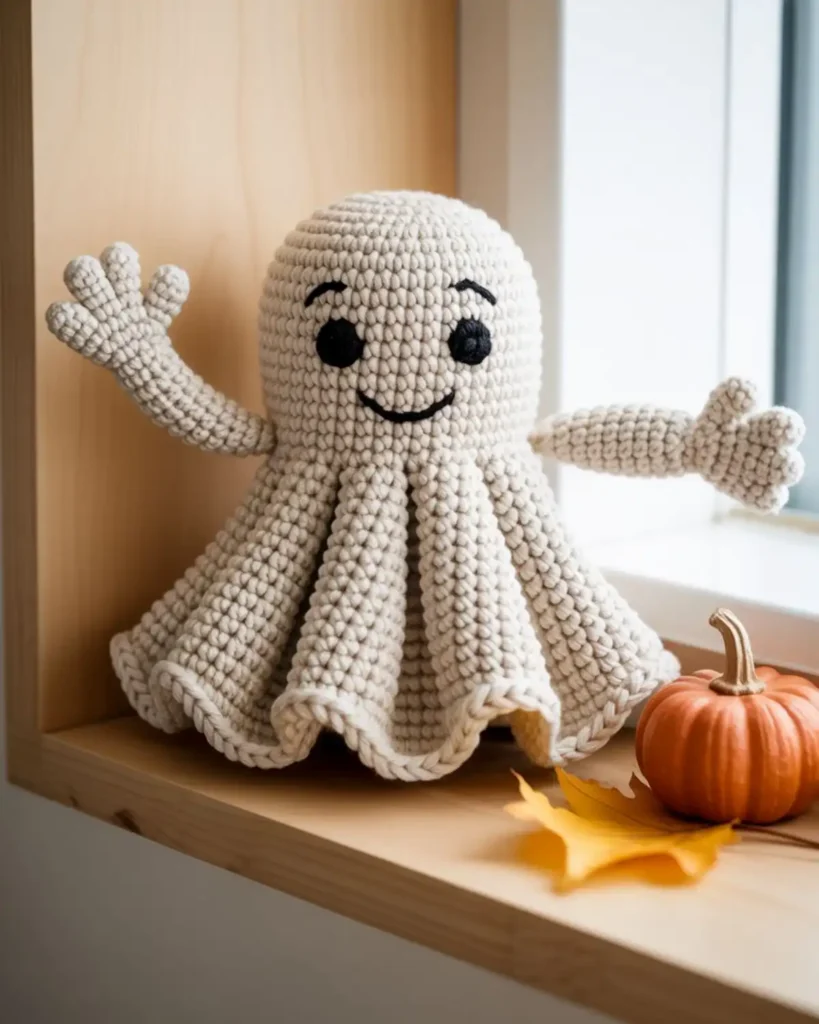
The Ghost With Waving Arms looks as though it has just floated into the room to say hello. Short chain arms are quick, but shaped stuffed arms give the character more movement and expression. I like posing one arm upward and the other outward instead of making them perfectly symmetrical. This design is ideal when you want a friendly ghost rather than a spooky one.
Make the body using the master pattern.
For each arm:
R1: Make 5 sc in an MR. (5)
R2–R5: Sc around. (5)
Fasten off, leaving a sewing tail. Do not stuff unless you are using very thin yarn.
Sew one arm between R8 and R9 at an upward angle. Attach the other slightly lower.
To help an arm remain raised, sew the tip of the arm lightly to the side of the head with one hidden stitch.
7. Blushing Pastel Ghost
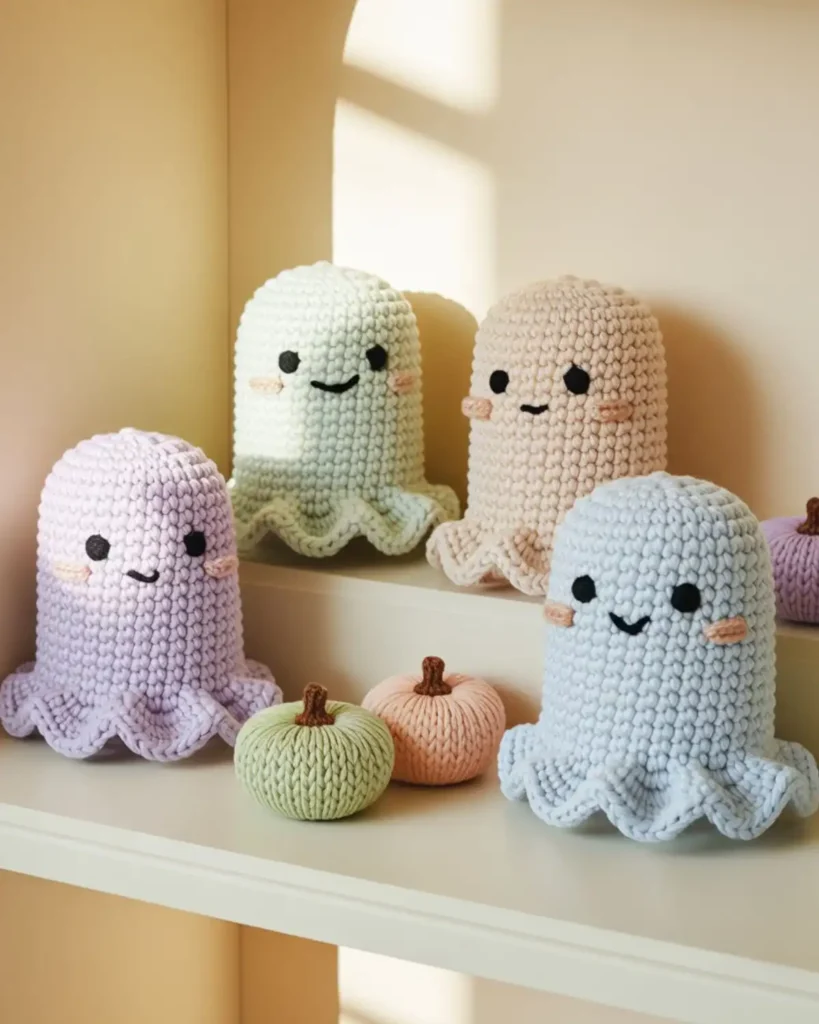
The Blushing Pastel Ghost swaps traditional black-and-white contrast for a softer, playful finish. Bright orange and black are classic Halloween choices, but lavender, mint, pink, and pale blue make the design useful beyond October. A row of pastel ghosts looks especially sweet in a nursery-style seasonal display. Choose this version when your decorating style is cute, light, or modern.
Use pale yarn for the body and embroidery thread for the face.
Add blush in one of three ways:
- Embroider two short pink lines beneath each eye.
- Crochet two tiny pink circles.
- Apply a small amount of fabric-safe color.
For crocheted cheeks, make 5 sc in an MR and join with a sl st. Leave a tail and sew each circle flat against the face.
Avoid overstuffing the cheek pieces. They should sit like flat patches rather than small balls.
8. Sleepy Crochet Ghost
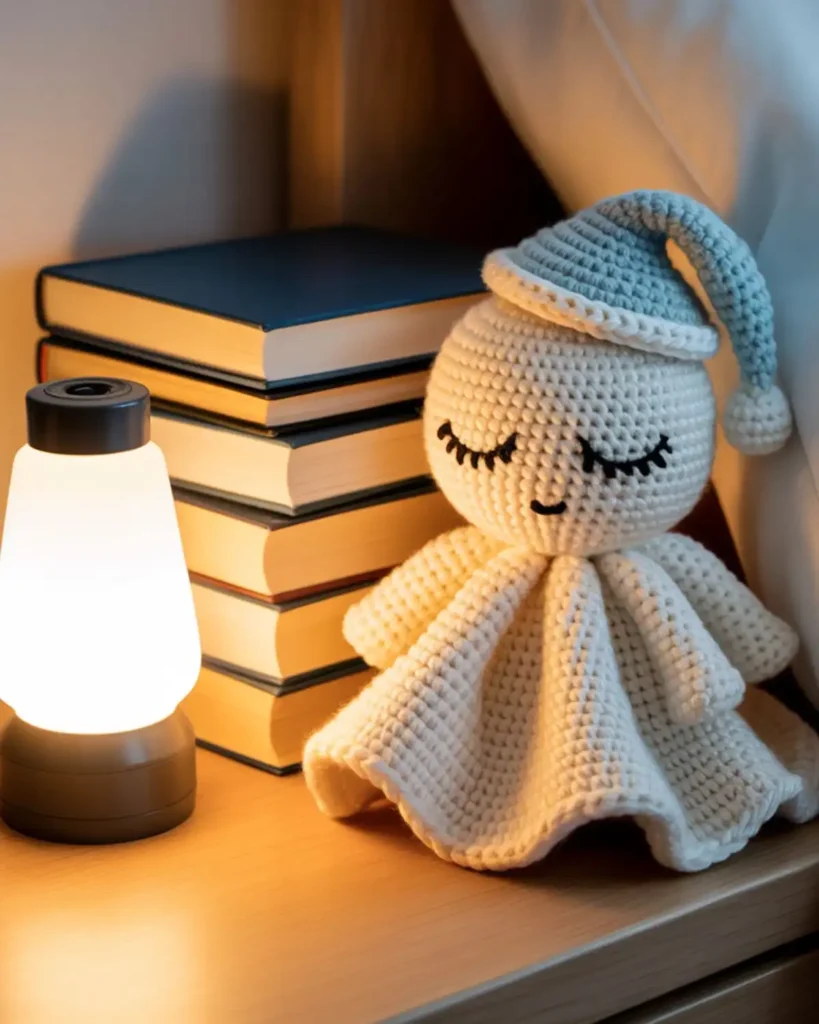
The Sleepy Crochet Ghost uses closed embroidered eyes to create a calm, cozy expression. Standard round eyes make a ghost look alert, while curved lashes instantly change the mood. I like this design as a desk companion because it feels seasonal without looking overly dramatic. It is a good match for soft colors, bedtime-themed gifts, or relaxing autumn décor.
Make the master ghost body.
Using black embroidery thread, stitch a shallow curved line for each closed eye. Add two or three tiny lashes at the outer edge.
Position the eyes slightly lower than you would place safety eyes. This leaves enough room for a small forehead detail, nightcap, or star.
Optional: embroider a tiny “o” mouth or leave the mouth off completely.
9. Crochet Ghost With a Witch Hat
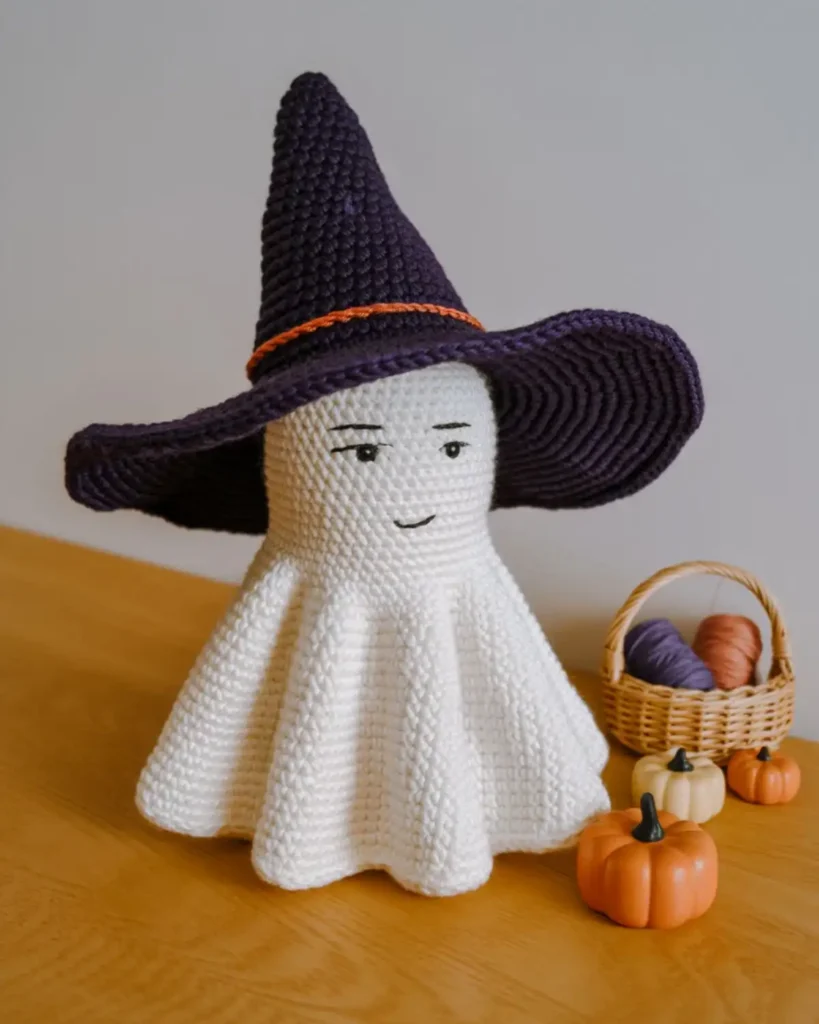
The Witch Hat Ghost combines two recognizable Halloween shapes in one compact project. A plain ghost is faster, but the removable hat adds height, color, and more opportunities for customization. I use a contrasting hat band to connect the ghost to the other colors in a seasonal display. Make this version when you want a centerpiece character rather than a background decoration.
Mini Witch Hat
R1: Make 4 sc in an MR. (4)
R2: [Sc, inc] twice. (6)
R3: Sc around. (6)
R4: [2 sc, inc] twice. (8)
R5: Sc around. (8)
R6: [3 sc, inc] twice. (10)
R7: [4 sc, inc] twice. (12)
R8: BLO sc around. (12)
R9: Inc in each st. (24)
R10: [Sc, inc] around. (36)
Fasten off.
Wrap a contrasting chain around the crown to create the hatband. Sew or lightly tack the hat to the ghost’s head.
10. Pumpkin-Holding Ghost
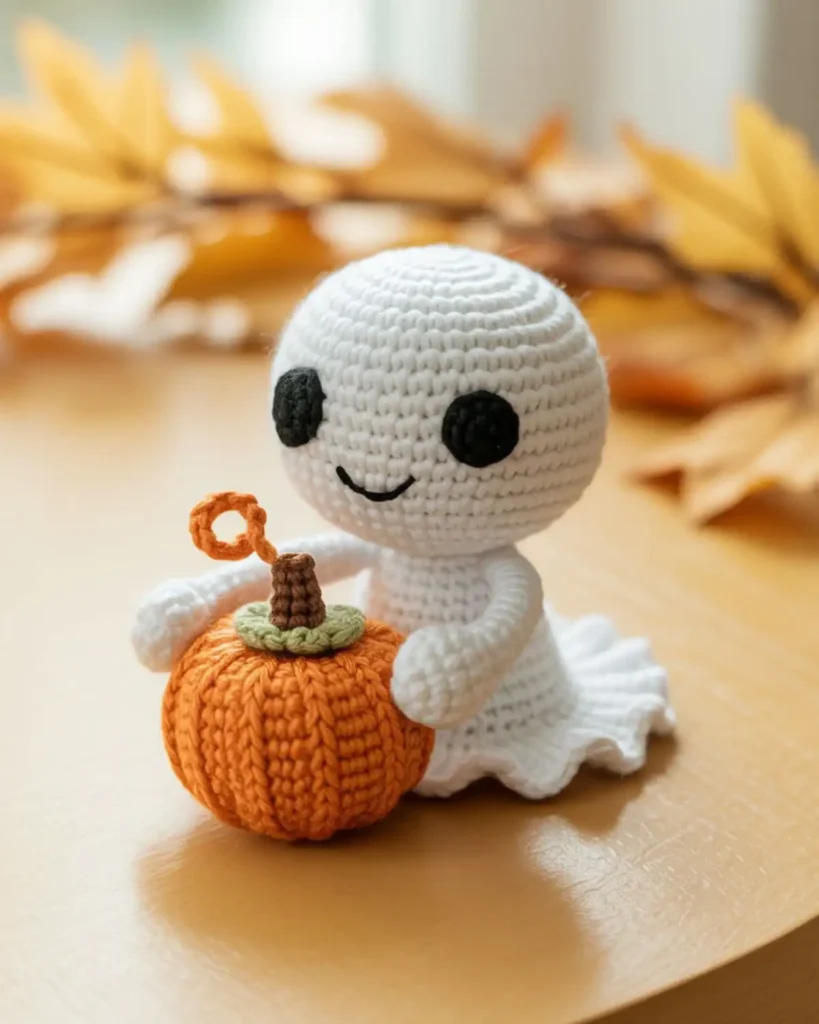
The Pumpkin-Holding Ghost feels like a complete little Halloween scene instead of a single character. A separate pumpkin takes longer than a simple accessory, but its bright color creates a strong focal point against the white body. I like displaying this ghost beside miniature houses or autumn leaves. It is worth making when you enjoy storytelling details and small seasonal props.
Mini Pumpkin
R1: Make 6 sc in an MR. (6)
R2: Inc around. (12)
R3: [Sc, inc] around. (18)
R4–R6: Sc around. (18)
R7: [Sc, dec] around. (12)
Stuff lightly.
R8: Dec around. (6)
Fasten off and close the opening.
Pass a long strand of orange yarn around the outside of the pumpkin several times, pulling gently to form sections.
Crochet a small brown stem with three chains. Attach the pumpkin between the ghost’s arms.
11. Floating Ghost Ornament
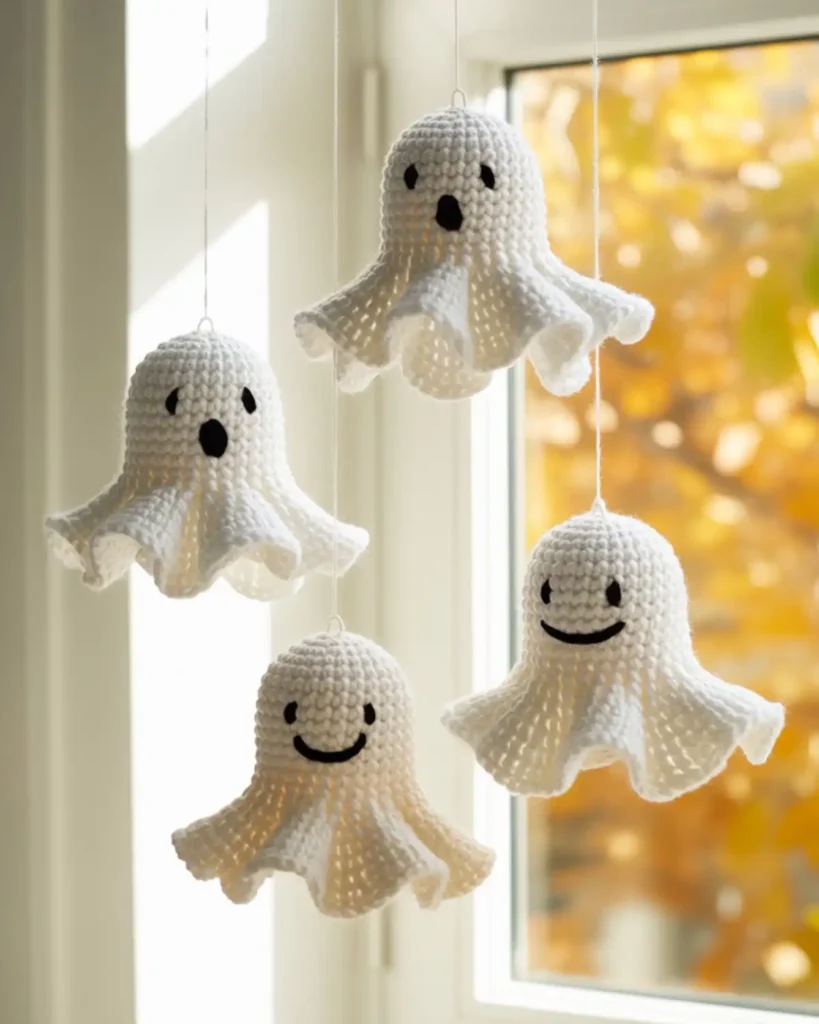
The Floating Ghost Ornament is designed to move gently rather than sit on a flat surface. A weighted plush works better on a shelf, but a light hollow body makes a more convincing hanging decoration. I hang these at different heights so they appear to be drifting together. Choose this design for a Halloween tree, window, doorway, or ceiling display.
Follow the master ghost pattern but use only a small amount of stuffing in the head.
Thread clear hanging cord or strong white thread through the top. Bring both ends through separate stitches and tie them together inside or beneath the body.
You can also crochet a hanging loop:
- Join yarn at the top.
- Ch 18.
- Sl st into the starting stitch.
- Fasten off securely.
Add a small bell inside the base for a gentle sound, but keep detachable additions away from young children and pets.
12. Long-Tailed Floating Ghost
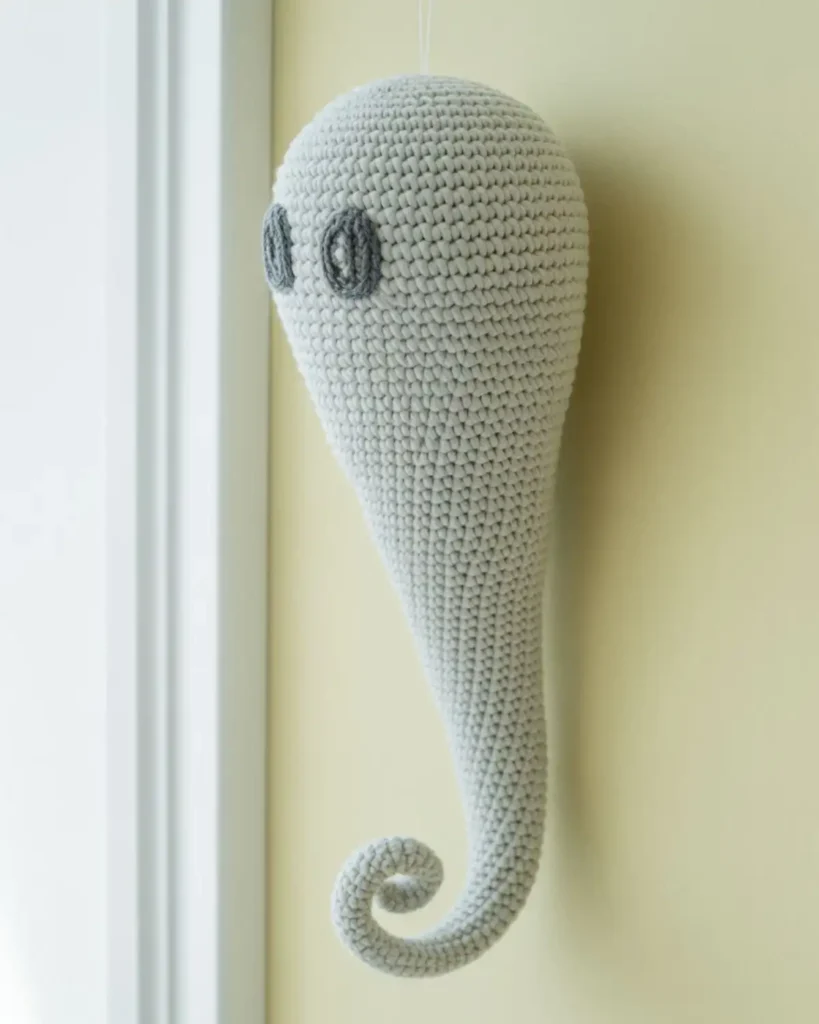
The Long-Tailed Floating Ghost replaces the usual scalloped skirt with a curled spectral tail. A rounded base makes a ghost look plush and grounded, while a narrowing tail creates the illusion of movement. This piece looks especially effective hanging near a window or leaning from a shelf edge. Make it when you prefer a slightly more dramatic silhouette.
Work the head through R10 of the master body.
Continue:
R11: [Sc, dec] around. (12)
R12–R14: Sc around. (12)
R15: [2 sc, dec] around. (9)
R16–R19: Sc around. (9)
R20: [Sc, dec] around. (6)
R21–R24: Sc around. (6)
Stuff only the head and upper body.
Flatten the final section and crochet through both layers. Chain 10–15 stitches, then work two sc in each chain to create a curling tail.
13. Ghost Finger Puppet
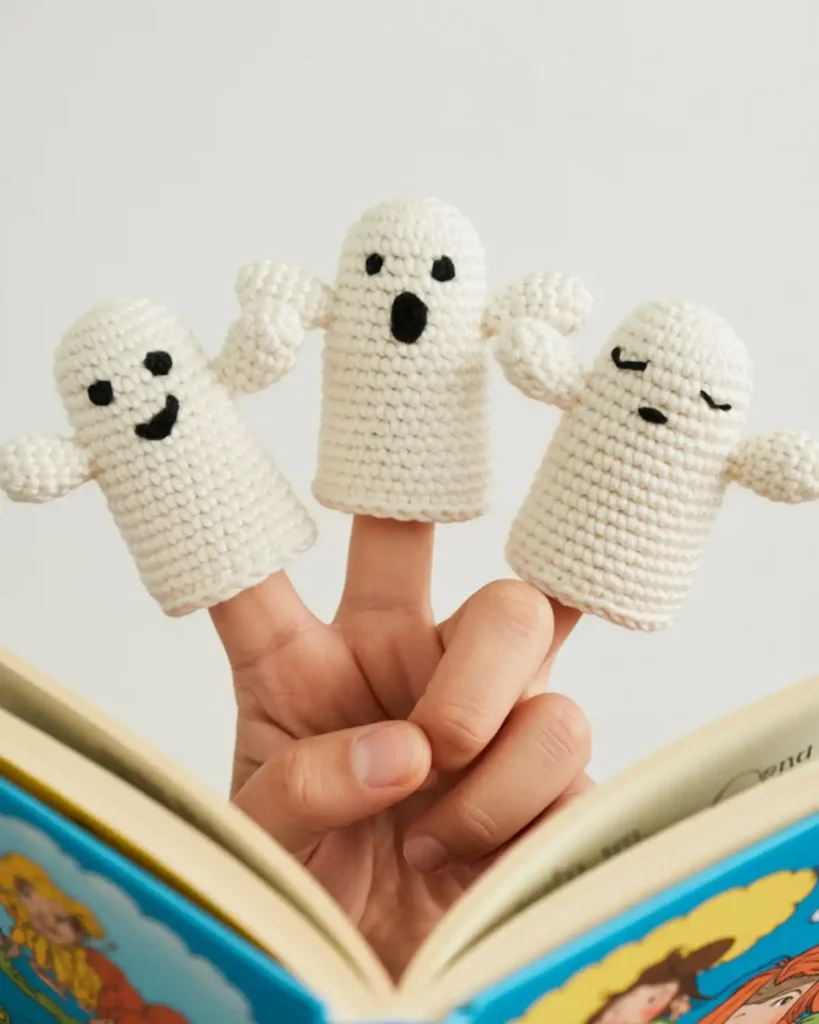
The Ghost Finger Puppet turns a small crochet piece into an interactive character. Stuffed toys hold their shape independently, but an open puppet can be used for storytelling, classroom activities, or Halloween party games. I like making several expressions so each ghost has a distinct role. It is a useful project when you need something quick, lightweight, and playable.
R1: Make 6 sc in an MR. (6)
R2: Inc around. (12)
R3: [Sc, inc] around. (18)
R4–R8: Sc around. (18)
Do not stuff.
For the base, repeat [sl st, 3 dc in the next st, sl st] around.
Fasten off.
Check the opening as you work. Add or remove stitches to fit the intended finger comfortably without making it too tight.
14. Ghost Pencil Topper
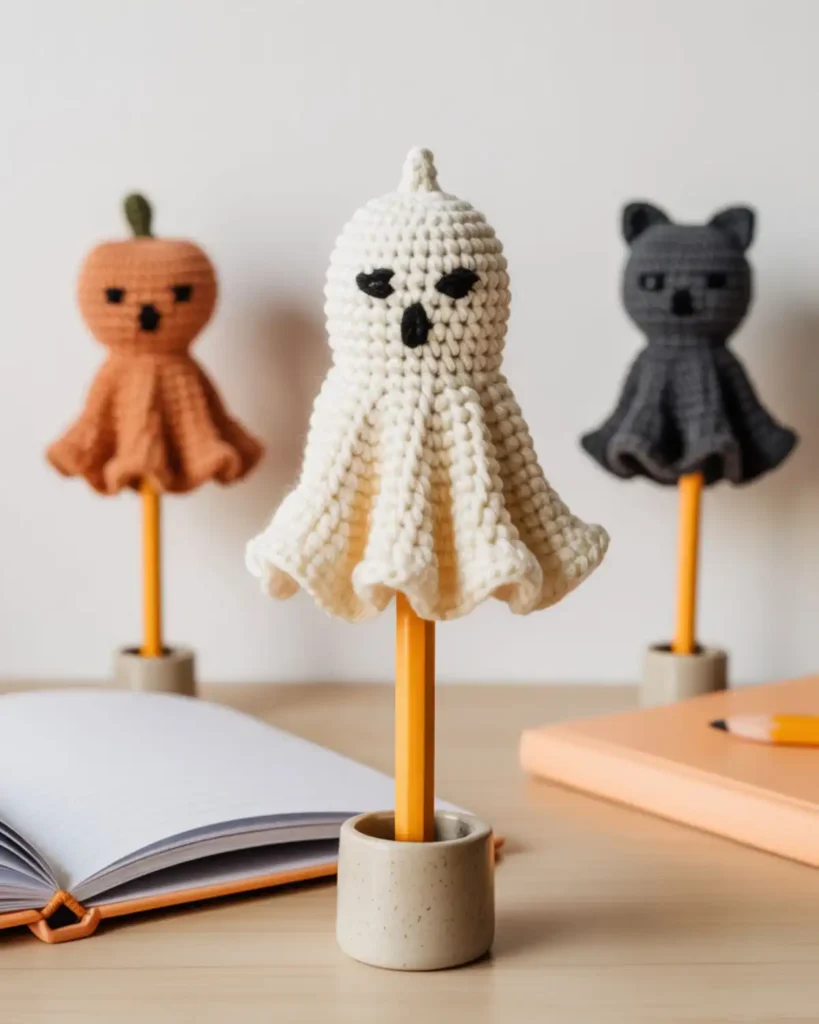
The Ghost Pencil Topper makes a small seasonal accessory without requiring keychain hardware. A finger puppet can be loose and wide, while a pencil topper needs a narrower opening that grips the pencil gently. I use cotton yarn so the piece does not stretch too quickly. This project works well for classroom favors, study desks, or Halloween stationery sets.
Follow the finger-puppet pattern but stop increasing at 12 stitches.
Work four or five plain rounds, then add a tiny wavy edge.
Test the fit before fastening off. The topper should slide over the eraser without falling off when the pencil is lifted.
Embroider the face before placing the topper on the pencil.
Special Tip: Crochet a matching pumpkin or black cat topper to create a small themed set.
15. Ghost Bookmark
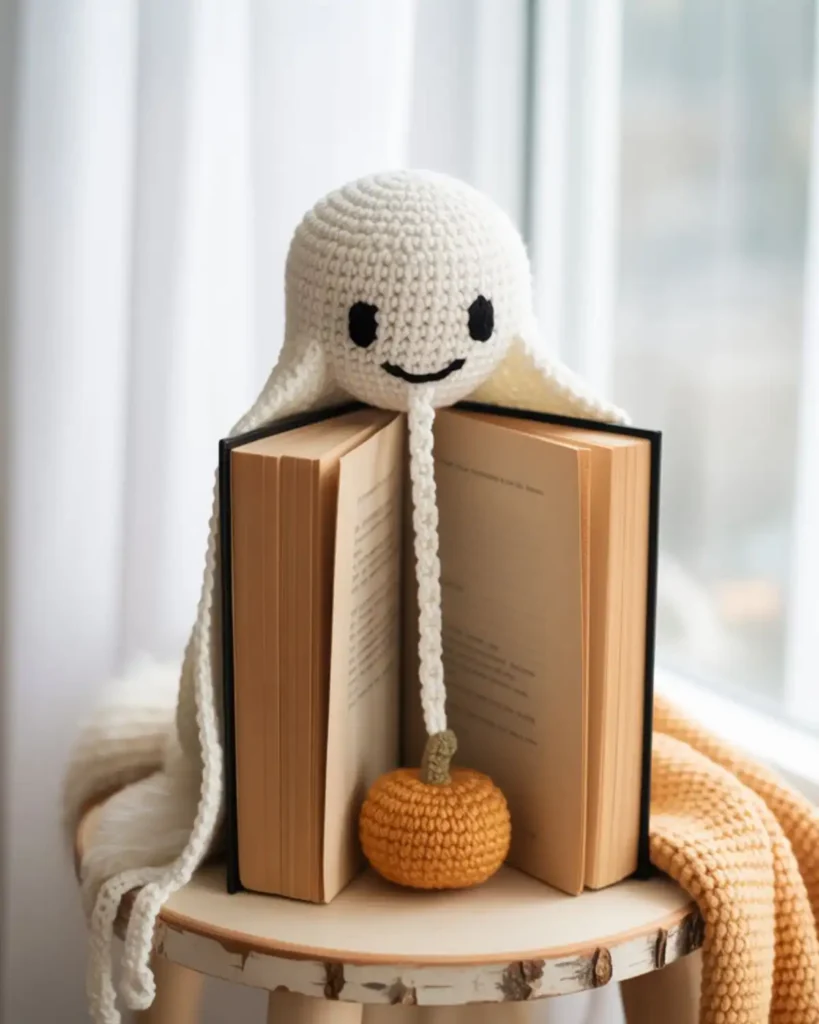
The Ghost Bookmark combines a flat ghost head with a long, flexible chain tail. If you enjoy functional projects like this, you’ll also love making a crochet flower bookmark for everyday reading. A thick stuffed design can damage book pages, but a flat motif sits neatly between them. I like leaving the ghost visible above the top edge while the tail marks the exact page. Choose this project for readers, teachers, students, or small handmade gifts.
Make a small flat ghost appliqué using the pattern from item five.
Join yarn at the center of the lower edge and chain 45–65 stitches, depending on the desired length.
At the end of the chain, add one of these finishes:
- A small tassel
- A tiny pompom
- A crocheted circle
- A miniature pumpkin
- A simple knotted yarn end
Keep the appliqué lightly blocked so it lies flat.
16. Ghost Garland
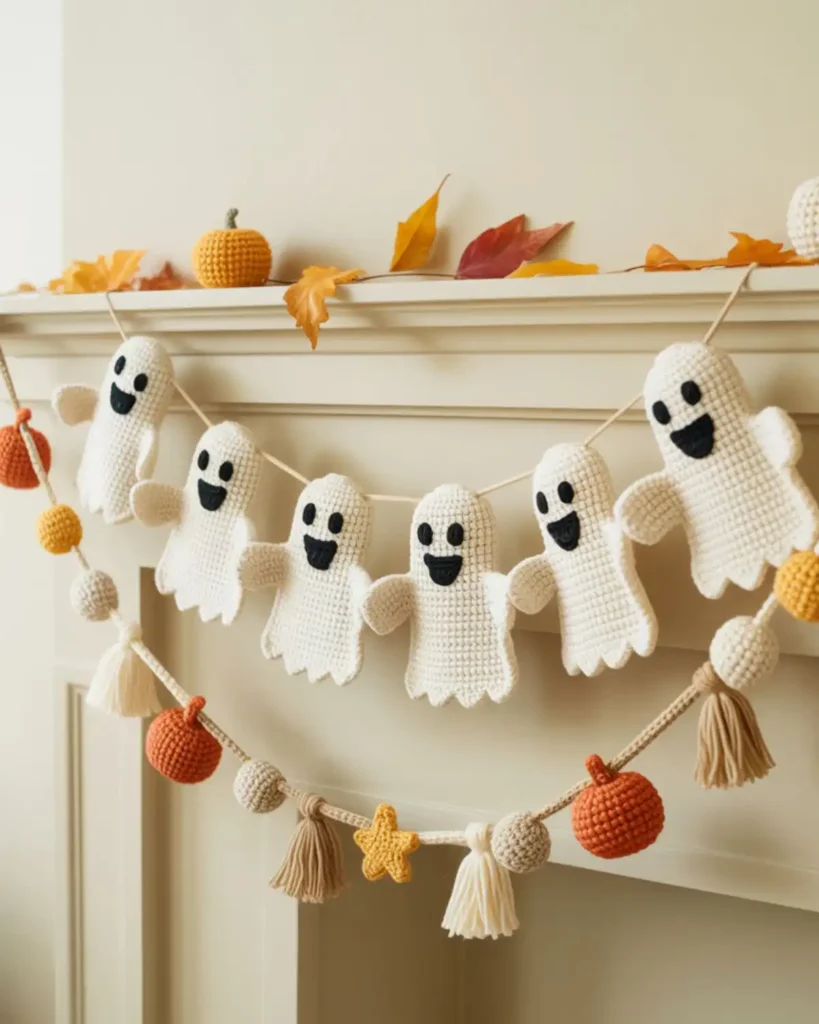
A Ghost Garland lets you turn several small motifs into one finished decoration. Individual ghosts work well as ornaments, but joining them creates a stronger display across a mantel, shelf, mirror, or doorway. I like alternating ghost expressions so the strand feels handmade rather than repetitive. This project is ideal for using leftover white and pastel yarn.
Make five to nine flat ghost appliqués.
Create the cord:
- Ch 20 for the first hanging section.
- Sl st across the top of the first ghost.
- Ch 15–25 between motifs.
- Continue attaching ghosts.
- Ch 20 after the final motif.
For a fuller garland, add crocheted pumpkins, stars, moons, or small yarn tassels between the ghosts.
Lay the garland flat before fastening off to check that every ghost faces forward.
17. Stacked Ghost Trio
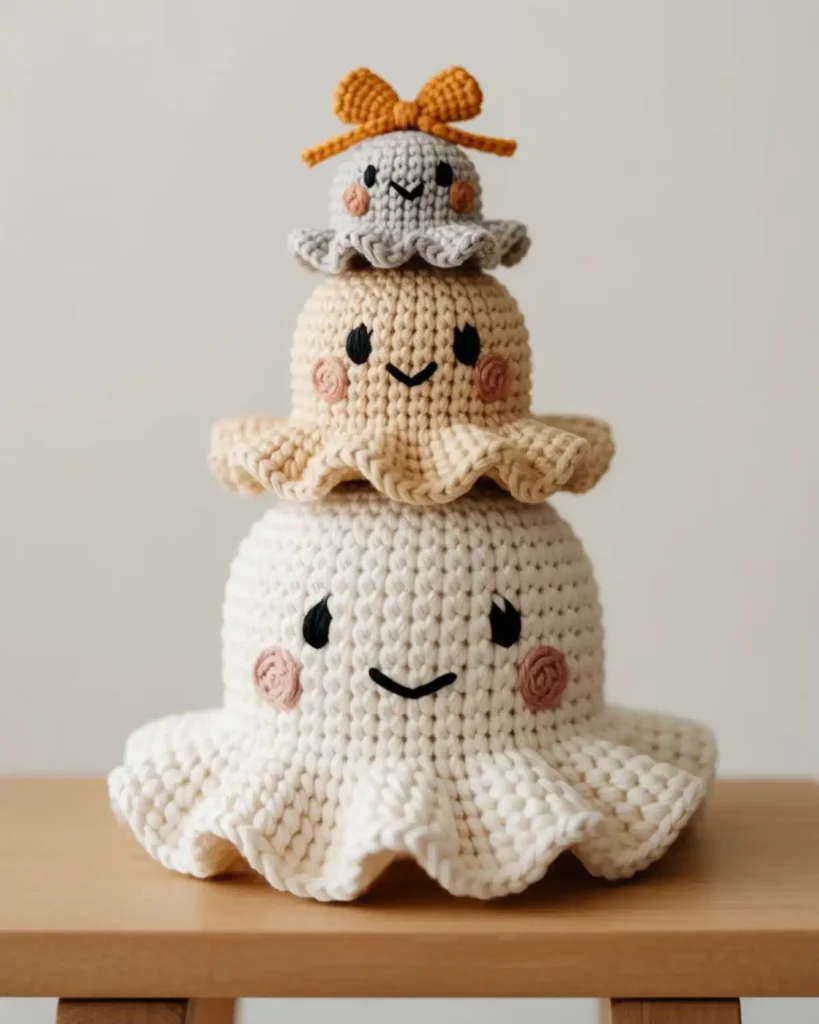
The Stacked Ghost Trio creates a playful tower from three simple shapes. Three separate decorations need more display space, while stacking them creates one compact piece with a stronger vertical silhouette. I give each ghost a different face so the tower looks like three characters rather than repeated balls. Make this design when you want a shelf ornament that stands out among shorter pumpkins and candles.
Crochet three ghosts in graduated sizes:
- Small: increase to 18 stitches.
- Medium: increase to 24 stitches.
- Large: increase to 30 stitches.
Use a flatter scalloped base on the bottom two ghosts so the next piece can sit securely.
Sew the medium ghost to the center of the large ghost’s head. Add the smallest ghost on top.
Pass a long yarn strand through all three pieces from bottom to top, then back down. This helps stabilize the stack.
18. Ghost in a Pumpkin Costume
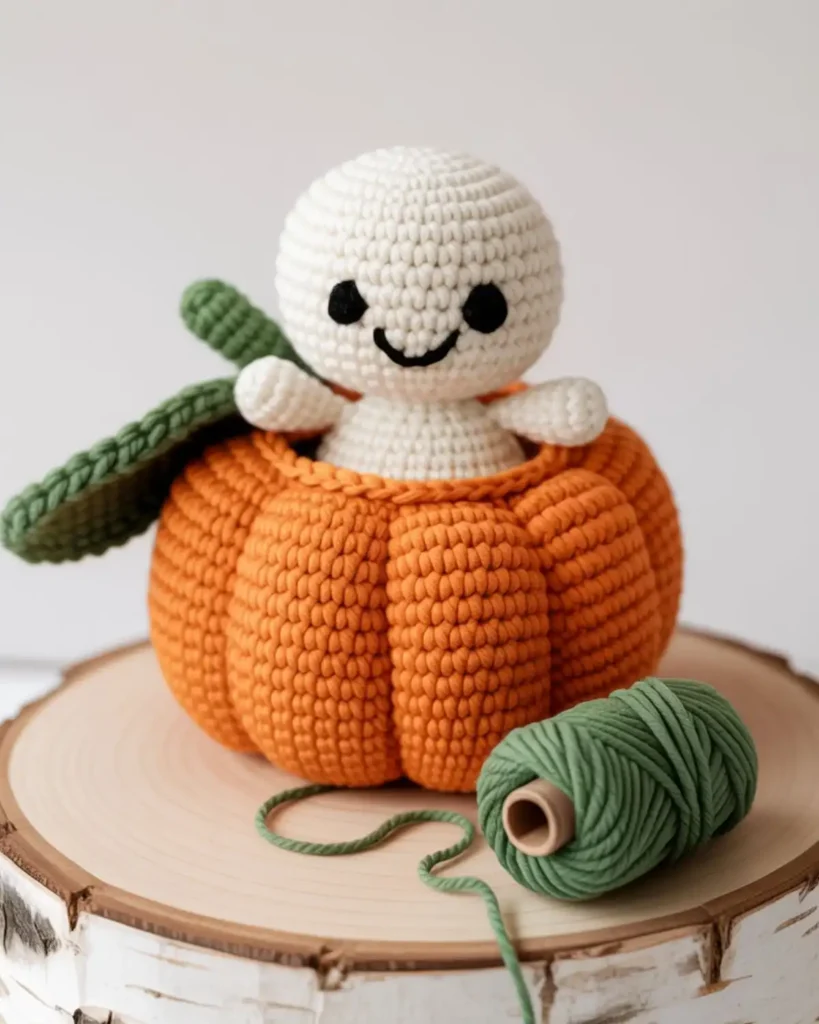
The Ghost in a Pumpkin Costume adds a bright round body around the familiar white head. A pumpkin-holding ghost carries a separate accessory, while this design looks as though the ghost has dressed up for Halloween. I enjoy adding a crooked green leaf because it breaks up the round symmetry. It is a strong choice for anyone who wants an unusual character with extra color.
Make a small white ghost head, stopping after the first few plain rounds.
Make an orange pumpkin body:
R1: 6 sc in an MR. (6)
R2: Inc around. (12)
R3: [Sc, inc] around. (18)
R4: [2 sc, inc] around. (24)
R5–R8: Sc around. (24)
R9: [2 sc, dec] around. (18)
Insert the ghost head into the opening and sew it in place.
Use orange yarn to create pumpkin sections. Add a green chain leaf beside the head.
19. Candy Corn Ghost
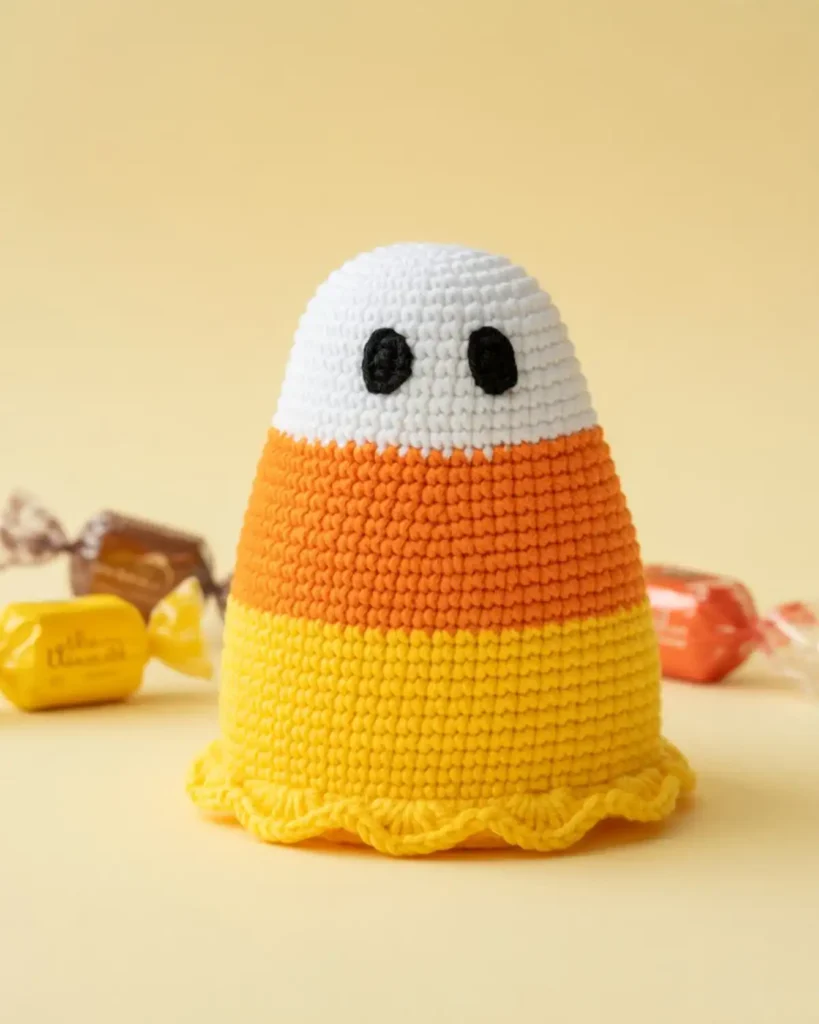
The Candy Corn Ghost uses three color sections to transform a basic body into a bold seasonal piece. A solid white ghost has a traditional look, but color blocking makes the shape more graphic and noticeable. I place the orange section across the middle so the face remains clear against the white head. Make this version when you want to use classic Halloween colors without adding separate accessories.
Follow the master pattern using:
- White for the head
- Orange for the middle
- Yellow for the lower body
Change colors at the end of a round. Complete the final yarn-over of the last stitch with the new color to create a cleaner transition.
Carry unused yarn only when the color section is very short. Otherwise, cut the yarn and secure the ends inside the body.
Use black embroidery for the face.
20. Bobble-Stitch Ghost
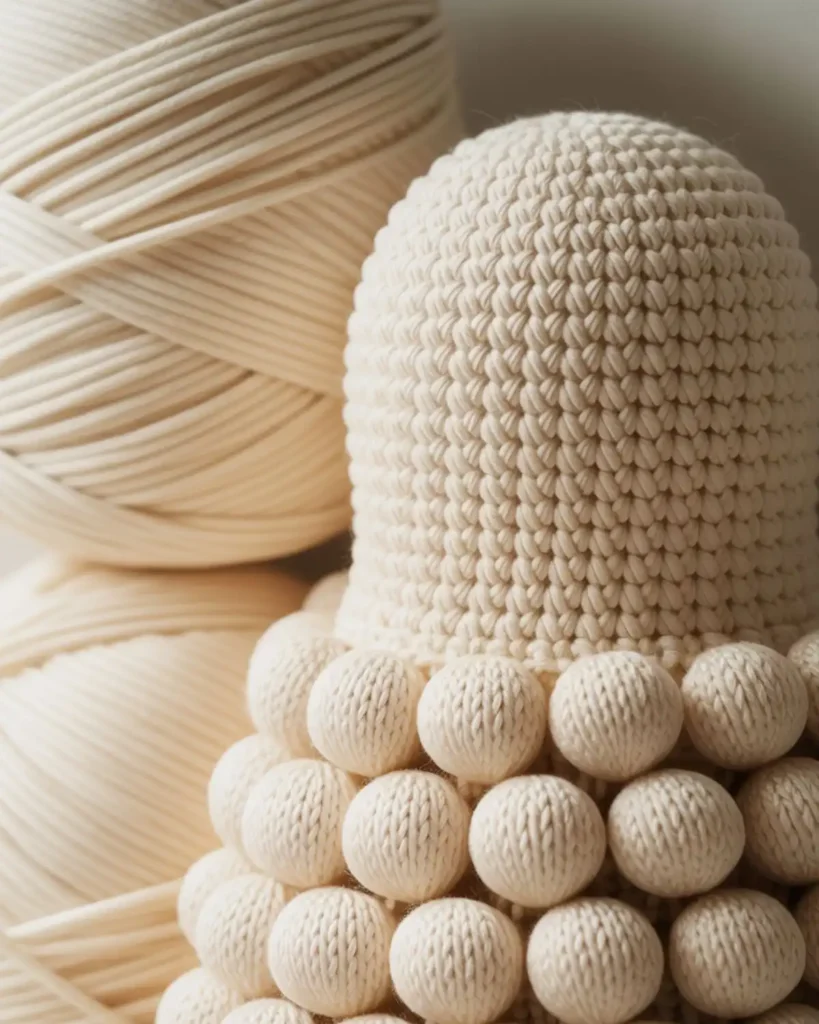
The Bobble-Stitch Ghost has a textured body that catches light and gives the plain white yarn more depth. Smooth single crochet is easier and uses less yarn, but bobbles make the surface feel decorative without requiring extra pieces. I use the texture mainly on the lower half so the face remains easy to read. Choose this project when you want a familiar ghost shape with a more tactile finish.
Work the head in regular single crochet.
For the textured body, alternate:
Texture Round A: [Sc, bobble stitch] around.
Texture Round B: Sc around.
To make a bobble, work several partially completed double crochets into the same stitch, then yarn over and pull through all remaining loops.
Because bobbles can tighten the fabric, move up one hook size for the textured section when necessary.
Stuff lightly so the texture remains visible.
21. Ruffled Ghost
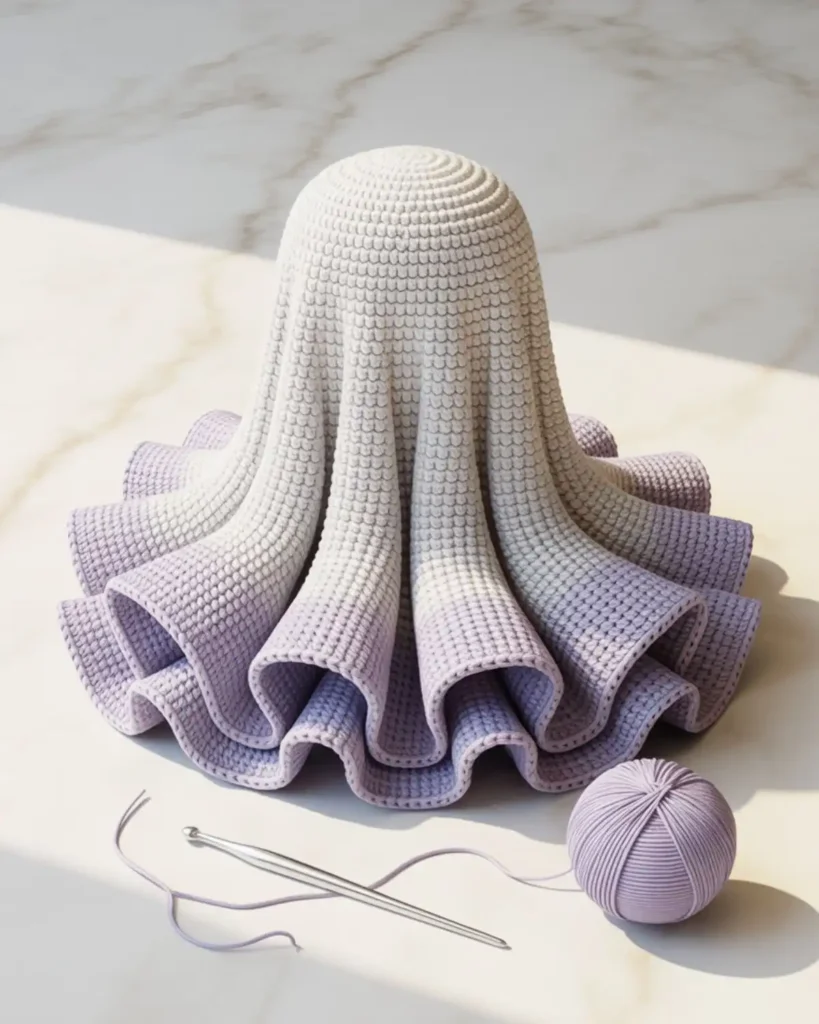
The Ruffled Ghost has a dramatic, flowing edge instead of a small basic wave. A short scallop looks tidy and compact, while a wide ruffle makes the ghost appear to float. I like using a thinner hook for the body and a slightly larger one for the final round. This is an effective choice for hanging decorations or elegant Halloween displays.
Complete the master body through R13.
For the ruffle:
R14: Work 2 sc in every stitch around.
R15: [Sl st, sc, 2 hdc, 3 dc, 2 hdc, sc] repeatedly around.
A fuller ruffle can be created by working three stitches into each stitch during R14.
Steam or wet-block the edge carefully if the ruffle folds inward.
22. Ghost Pillow
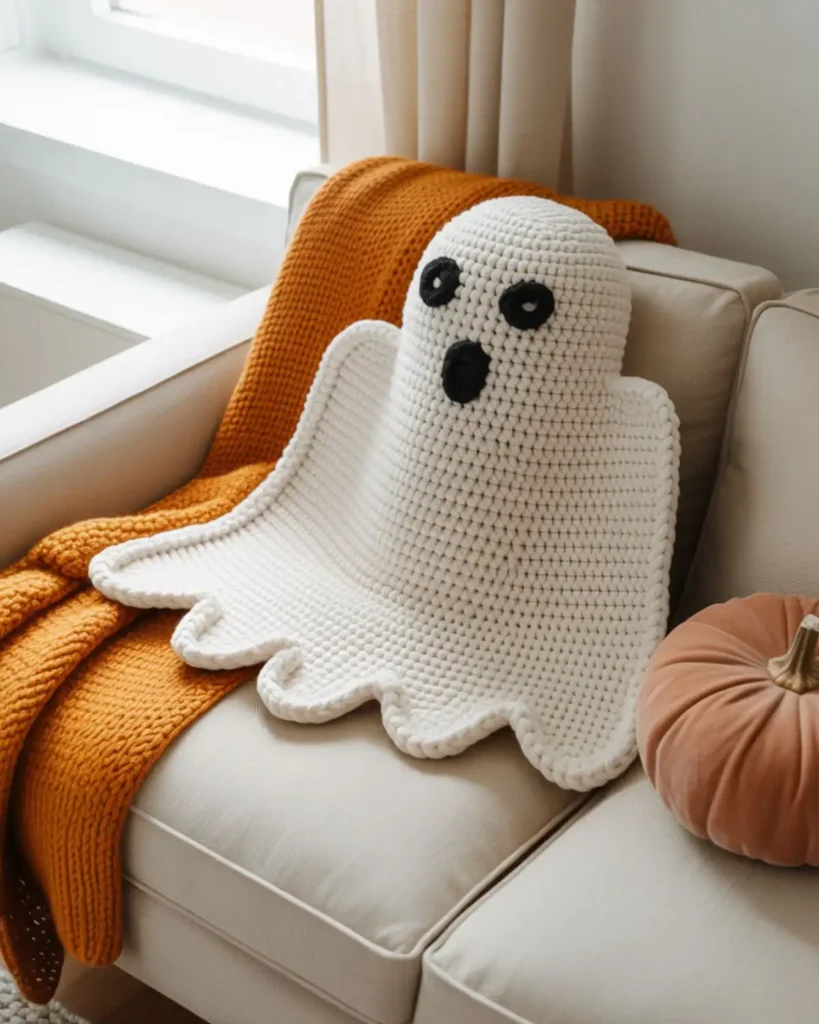
The Ghost Pillow enlarges the motif into a practical piece of seasonal décor. Small amigurumi is ideal for shelves, but a pillow fills an empty chair or bed with one clear Halloween shape. I prefer a flat front and back construction because it is easy to resize and does not require working a very large spiral. Make this one when you want a statement project that still uses basic stitches.
Create two matching ghost panels.
Begin with a foundation chain wide enough for the pillow. Work rows of single crochet, increasing at both ends for the rounded head and decreasing later to shape the sides.
At the bottom, create three broad curves by using combinations of:
- Slip stitches
- Single crochet
- Half double crochet
- Double crochet
Embroider or attach felt facial features to the front panel.
Place both panels together. Single crochet around the edges, adding stuffing before closing the final section.
Special Tip: Insert a removable fabric pillow form instead of loose filling when you want easier washing and storage.
23. Ghost Drawstring Treat Bag
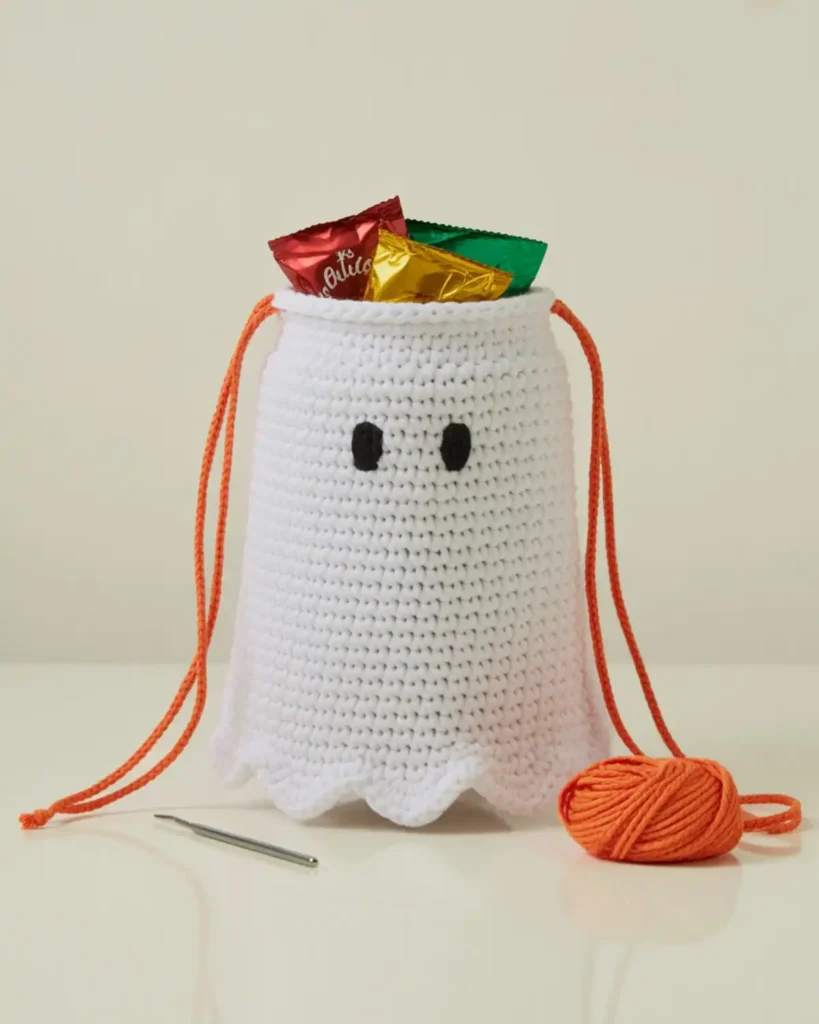
The Ghost Drawstring Treat Bag looks decorative while holding candy, stitch markers, or small gifts. A stuffed ghost is only ornamental, but this version adds storage without losing the character shape. I like making the drawstring in orange or purple so it becomes part of the design. This is a useful choice for party favors and reusable Halloween packaging.
Crochet a flat circular base, increasing evenly until it reaches the desired width.
Work upward without increases until the bag is tall enough.
Make a drawstring round:
- Dc in the next stitch.
- Ch 1 and skip one stitch.
- Repeat around.
Finish with a wavy or scalloped top edge.
Create a long chain and weave it through the eyelet round. Add the face to one side of the bag.
For a wider opening, use two drawstrings inserted from opposite sides.
24. Ghost Plant Pot Cover
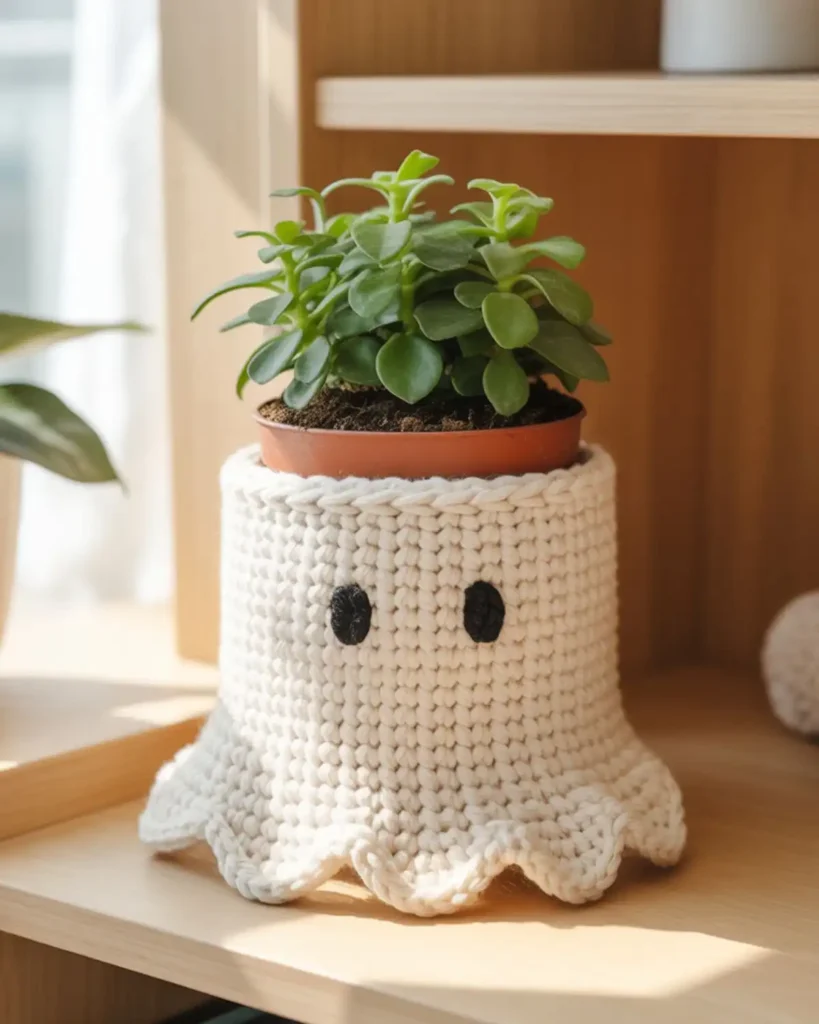
The Ghost Plant Pot Cover gives an ordinary container a temporary Halloween makeover. A permanent crocheted pot can be difficult to clean, but a removable sleeve can be taken off after the season. I like using it around a plain nursery pot and removing the plant before watering. Make this project when you want seasonal décor that does not require storing another large ornament.
Measure the pot’s circumference and height.
Crochet a foundation chain that fits snugly around the widest part. Join without twisting.
Work single crochet in joined or continuous rounds until the sleeve reaches the desired height.
For the ghost points, work several shaped sections around the base:
- Sl st
- Sc
- Hdc
- Dc
- Hdc
- Sc
- Sl st
Add an embroidered or felt face.
Keep yarn and crocheted fabric away from wet soil, drainage holes, flames, and hot surfaces.
25. Glow-Effect Halloween Ghost
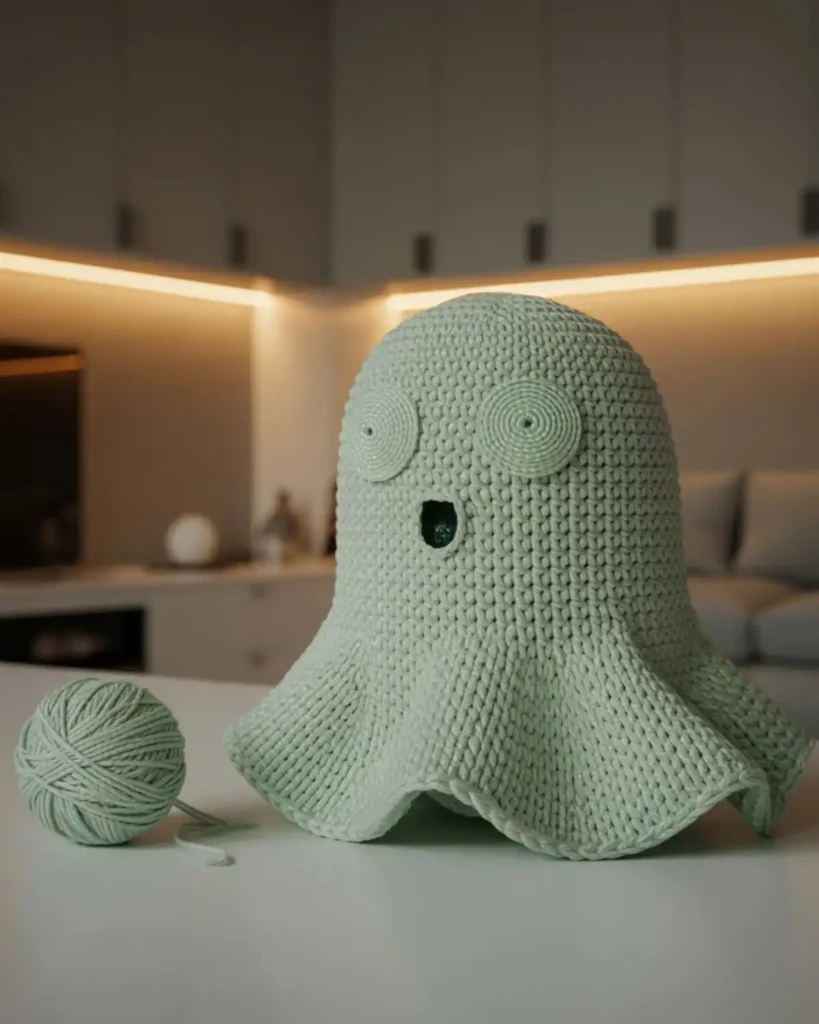
The Glow-Effect Halloween Ghost is designed to appear bright in dim seasonal displays. Standard white yarn works well in daylight, while pale neon, reflective, or glow-style yarn adds a stronger evening effect. I place these ghosts near indirect decorative lighting rather than relying on complicated electronics. Choose this final design when you want the simplest pattern to feel more atmospheric.
Use the master ghost pattern with pale green, icy blue, white, or specialty yarn.
Keep the face bold and simple so it remains visible against the unusual fiber.
You can also hold a strand of white yarn together with a thin reflective strand. Test a small swatch first because combining fibers may change the fabric’s stiffness.
Do not place yarn decorations directly against hot bulbs, open flames, candles, heaters, or other heat sources.
How Do You Make a Crochet Ghost Bigger or Smaller?
Change the yarn thickness, hook size, increase rounds, or number of plain rounds to adjust the ghost’s width and height.
At a Glance
- Thicker yarn creates a larger finished ghost.
- More increase rounds produce a wider body.
- Extra plain rounds increase the height.
- Fewer rounds create a smaller version.
- Stuffing affects firmness, not stitch size.
The easiest way to resize a crochet ghost is to change the yarn and hook. Thicker yarn with a larger hook produces a bigger ghost without changing the stitch counts, while thinner yarn creates a miniature version.
You can also resize the actual pattern:
- Add increase rounds for a wider body.
- Add plain rounds for a taller body.
- Remove plain rounds for a shorter ghost.
- Stop increasing earlier for a narrow ghost.
- Use more stuffing for a firm shape.
- Use less stuffing for a soft, relaxed shape.
Keep increases evenly spaced. Sudden increases in one area can create corners instead of a smooth curve.
What Yarn Is Best for a Crochet Ghost?
Worsted acrylic is versatile, cotton gives crisp stitches, and chenille yarn creates the softest plush ghost crochet projects.
At a Glance
- Acrylic works well for general decorations.
- Cotton is durable and clearly defined.
- Chenille creates soft plush toys.
- DK yarn suits mini amigurumi.
- Bulky yarn speeds up large projects.
Worsted-weight acrylic is a practical starting choice because it is widely available, affordable, and easy to handle. Cotton gives the ghost sharper stitch definition, while chenille creates a softer plush finish.
| Yarn type | Best for | Main quality |
|---|---|---|
| Acrylic | Beginners and decorations | Affordable and versatile |
| Cotton | Keychains and appliqués | Clear stitch definition |
| Chenille | Plush ghosts | Soft and thick |
| DK yarn | Mini amigurumi | Small, neat stitches |
| Bulky yarn | Pillows and large décor | Fast growth |
| Reflective or specialty yarn | Display ghosts | Unusual visual effect |
Select a hook that creates a dense fabric. For stuffed pieces, gaps between stitches may allow the filling to show.
How Do You Crochet a Smooth Amigurumi Ghost?
Count each round carefully, space increases evenly, use invisible decreases, and add stuffing in small amounts.
At a Glance
- Mark the first stitch every round.
- Keep stitch tension consistent.
- Use small pieces of stuffing.
- Shape the head while filling.
- Secure embroidery without pulling tightly.
Use a stitch marker, count every round, and keep your increases evenly spaced. Invisible decreases can also make the narrowing sections look neater.
A few small adjustments make a noticeable difference:
- Crochet in continuous spirals unless instructed otherwise.
- Use the yarn-under method when you want compact stitches.
- Place stuffing in small pieces rather than one large clump.
- Shape the head with your fingers while stuffing.
- Avoid pulling embroidered features too tightly.
- Secure every yarn tail inside the body.
How Can You Customize a Crochet Ghost?
Change the face, yarn color, accessories, texture, arms, or base to create a different character from the same ghost crochet pattern.
At a Glance
- Alter the eyes and mouth.
- Add hats, bows, or scarves.
- Use pastel or Halloween colors.
- Combine smooth and textured stitches.
- Turn one body into multiple characters.
The face is the fastest way to change the ghost’s personality. Try sleepy eyes, wide eyes, eyelashes, eyebrows, blush, a smile, or a surprised mouth.
You can also add:
- A bow
- A witch hat
- A flower crown
- A miniature pumpkin
- A scarf
- A nightcap
- A tiny bag
- A crown
- A bat wing
- A heart
- A star
- A seasonal sign
Changing only the accessory can turn the same body pattern into a complete collection.
Common Crochet Ghost Problems
Uneven shaping, visible stuffing, leaning bodies, curling edges, and damaged chenille yarn usually come from tension, hook size, stuffing, or stitch-count issues.
At a Glance
- Recount rounds when shaping looks uneven.
- Reduce stuffing when stitches stretch.
- Redistribute filling to correct leaning.
- Adjust edge increases to control curling.
- Handle chenille yarn gently.
Frequently Asked Questions
Can a beginner make a crochet ghost?
Yes. Most crochet ghost patterns use a magic ring, single crochet, increases, decreases, and basic embroidery. A flat appliqué or one-piece mini ghost is usually the easiest starting project.
How long does it take to crochet a small ghost?
A simple mini ghost may take less than an hour once you are comfortable with amigurumi. Accessories, embroidered details, thinner yarn, and complicated finishing will increase the time.
Can I make a crochet ghost without a magic ring?
Yes. Chain two and work the starting stitches into the second chain from the hook. You can also chain three or four, join them into a ring, and crochet into the center.
Do crochet ghosts need safety eyes?
No. Embroidered eyes, crocheted circles, and securely attached felt features can all create clear expressions. Embroidery is particularly useful when avoiding detachable pieces.
How do I make a no-sew crochet ghost?
Crochet the body in one piece and form the arms with chains or bobble stitches while completing a body round. Embroider the face before the opening becomes too narrow.
Final Thoughts
A good crochet ghost pattern free project does not need complicated shaping. A rounded head, simple body, expressive face, and wavy edge are enough to create a recognizable ghost.
Start with the Classic Mini Ghost, then reuse the body pattern with thicker yarn, chain arms, color changes, hats, pumpkins, ruffles, or hanging loops. With a few small adjustments, one basic pattern can become an entire Halloween collection for your home, gifts, market table, or seasonal craft box.

![The Best 30+ Free Crochet Cat Patterns [Beginner-Friendly Guide]](https://crochetmind.com/wp-content/uploads/2025/04/1-The-Best-30-Free-Crochet-Cat-Patterns-Beginner-Friendly-Guide.webp)