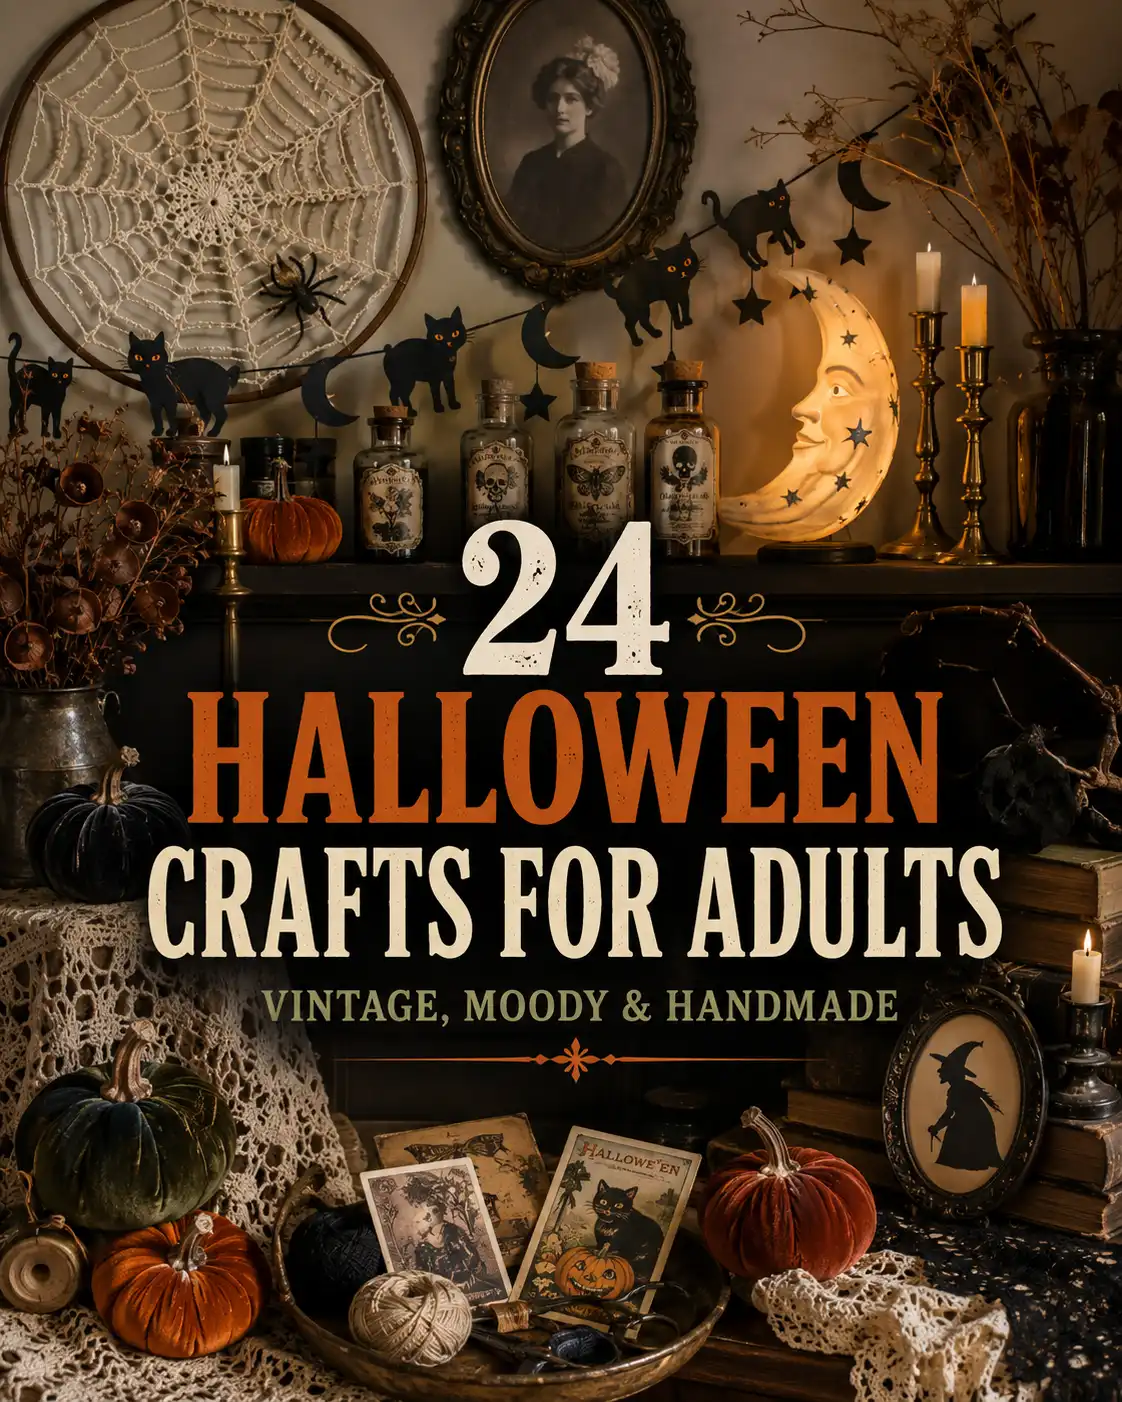
If you love seasonal projects that feel collected rather than cartoonish, these halloween crafts for adults are a practical place to start.
The best Halloween crafts for adults feel less like a school project and more like something you would actually display. Think aged paper, faded orange, matte black, tarnished gold, old portraits, moody florals, and handmade pieces that look as though they have been collected over time.
This list includes 24 projects ranging from quick paper crafts to more detailed Halloween decor DIY ideas. Most can be made with thrifted objects, basic craft-store supplies, or materials you may already have, and every idea can be adjusted to suit a gothic, whimsical, neutral, or vintage Halloween decor style. If you want even more inspiration beyond this roundup, explore these Halloween crafts for additional handmade project ideas.
Key Takeaways
- Choose a restrained vintage color palette.
- Use thrifted frames, bottles, fabric, and paper.
- Prioritize texture over bright plastic embellishments.
- Mix vintage halloween decor with practical seasonal styling.
- Use battery lights instead of open flames.
What Makes Halloween Crafts for Adults Look More Polished?
Polished adult Halloween crafts use a limited palette, tactile materials, and one clear focal point instead of many competing motifs.
At a Glance
- Limit the palette to three or four tones.
- Repeat one material across several projects.
- Choose matte, aged, or softly reflective finishes.
- Leave open space around each finished display.
Adult Halloween crafts usually look best when the color palette is limited, the materials have visible texture, and the finished piece has one strong focal point. Instead of combining every Halloween symbol at once, choose one idea—black cats, moons, ravens, pumpkins, ghosts, or antique labels—and repeat it with restraint.
For this Crochet Mind roundup, I prioritized projects that feel decorative first and seasonal second. That means you can place them on a mantel, shelf, wall, table, or front door without the room feeling crowded or overly themed.
| Craft style | Best materials | Approximate time | Best place to display |
|---|---|---|---|
| Vintage paper crafts | Cardstock, book pages, ink, ribbon | 30–90 minutes | Frames, mantels, shelves |
| Textile crafts | Yarn, felt, lace, fabric scraps | 1–3 hours | Sofas, doors, walls |
| Thrifted makeovers | Frames, trays, bottles, candlesticks | 45 minutes–2 hours | Entryways, tables, cabinets |
| Nature-inspired decor | Twigs, dried leaves, seed pods, moss | 30–75 minutes | Porches, wreaths, centerpieces |
| Lighted decor | Paper lanterns, jars, battery lights | 30–60 minutes | Windows, shelves, party tables |
A vintage direction also has real historical roots. The Smithsonian National Museum of American History preserves Halloween decorations from around 1930 and 1940, including cardboard black cats, tissue-paper honeycomb pumpkins, and papier-mâché lanterns. Those objects are a useful reminder that simple paper, bold silhouettes, and a limited orange-and-black palette can look more authentic than heavily embellished decor.
24 Vintage Halloween DIY Crafts to Make This Year
These 24 projects combine paper, textiles, thrifted objects, natural materials, and safe lighting for decorative Halloween pieces with an adult, vintage finish.
At a Glance
- Start with paper garlands or altered frames.
- Try crochet, embroidery, sewing, or quilting.
- Repurpose jars, trays, boxes, and mirrors.
- Build coordinated displays from repeated colors and textures.
1. How Can You Turn a Thrifted Portrait Into Haunted Wall Art?
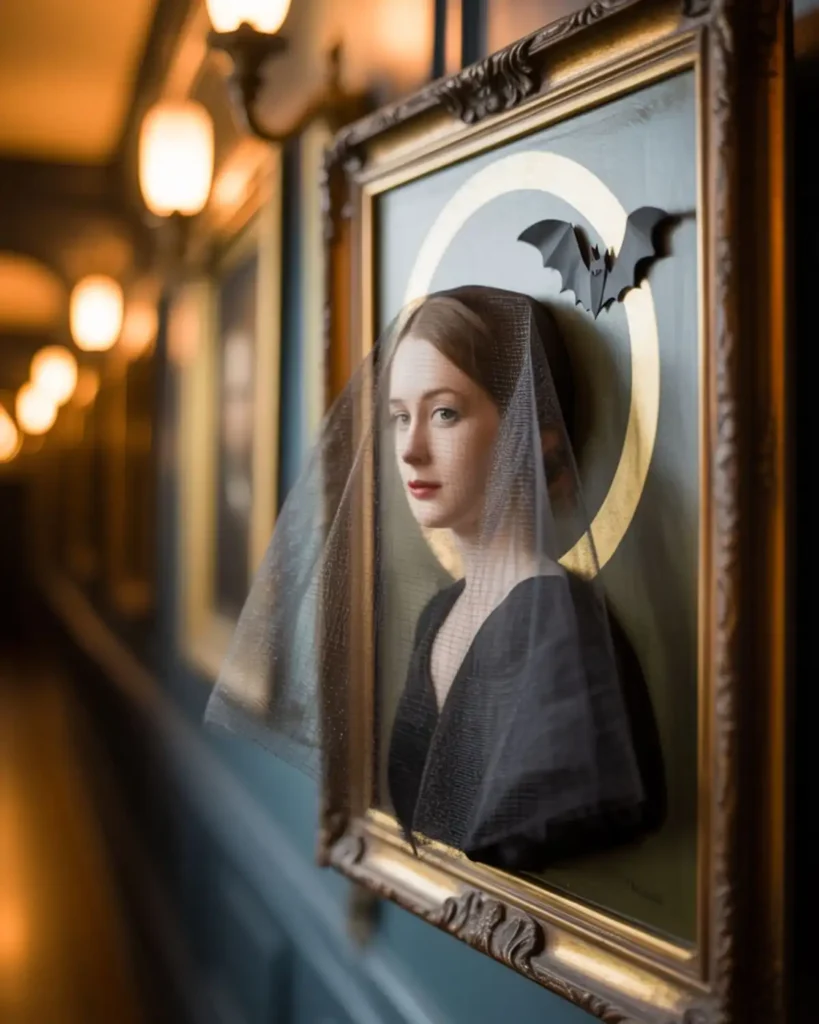
A thrifted portrait becomes instantly more interesting when it looks as though the subject has been keeping a secret for a century. Rather than covering the entire picture with fake cobwebs, add one restrained detail such as a painted black veil, a tiny paper bat, a faded moon, or a shadowy figure in the background. I like this project for narrow hallways and bookshelf displays because it rewards anyone who stops long enough to notice the alteration. It is ideal for vintage Halloween decor lovers who want a piece that feels eerie without becoming graphic or cartoonish.
Choose an inexpensive framed print from a thrift store and make removable changes on a clear acetate sheet placed over the image. This protects the original art and lets you reuse the frame after October.
Special Tip: Rub a small amount of brown or gray craft wax around the frame’s raised details to create a softly aged finish.
2. Vintage Black Cat Paper Garland
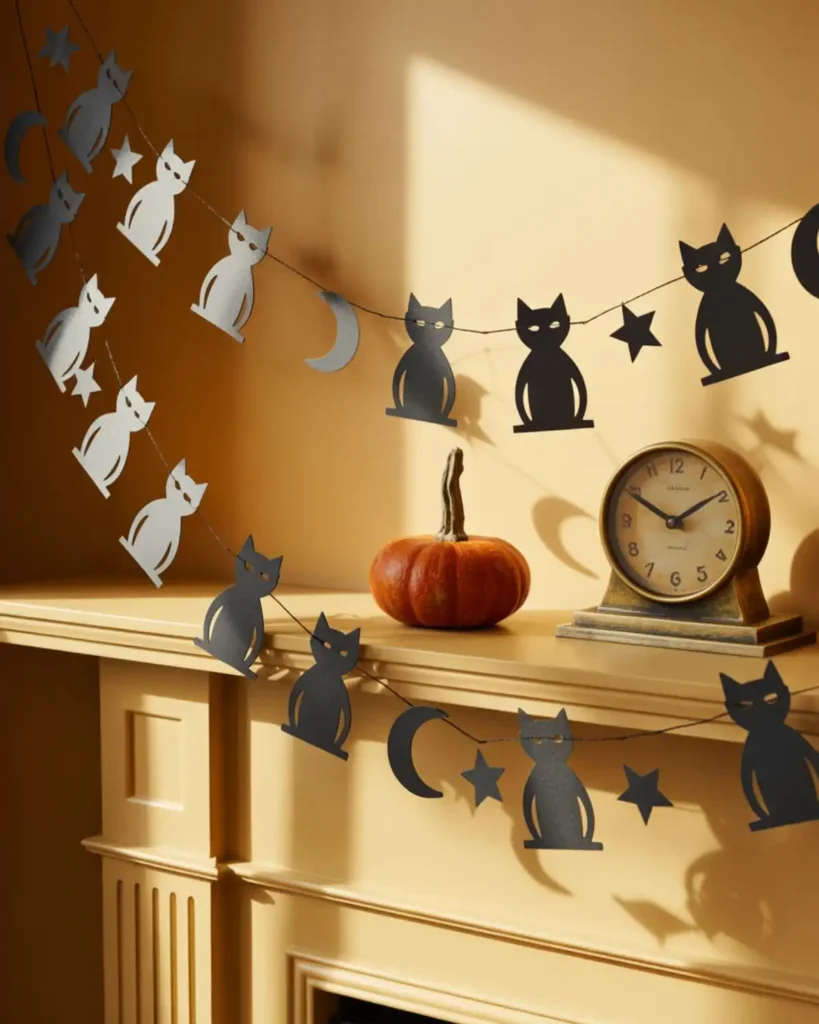
The vintage black cat paper garland is the easiest way to add old-fashioned Halloween charm across a mantel or doorway. Unlike glossy store-bought banners, matte cardstock silhouettes look closer to the flat cardboard decorations popular in the early twentieth century. I would mix cats in different poses with small moons and stars so the garland feels collected rather than perfectly matched. This is a good choice when you need a low-cost halloween decor DIY project with a surprisingly large visual impact.
Cut the shapes from heavyweight black paper, add orange paper eyes, and connect them with black cotton string. Slightly bend the tails and ears forward to create dimension when the garland catches the light.
3. How Do You Make Faux Antique Halloween Apothecary Bottles?
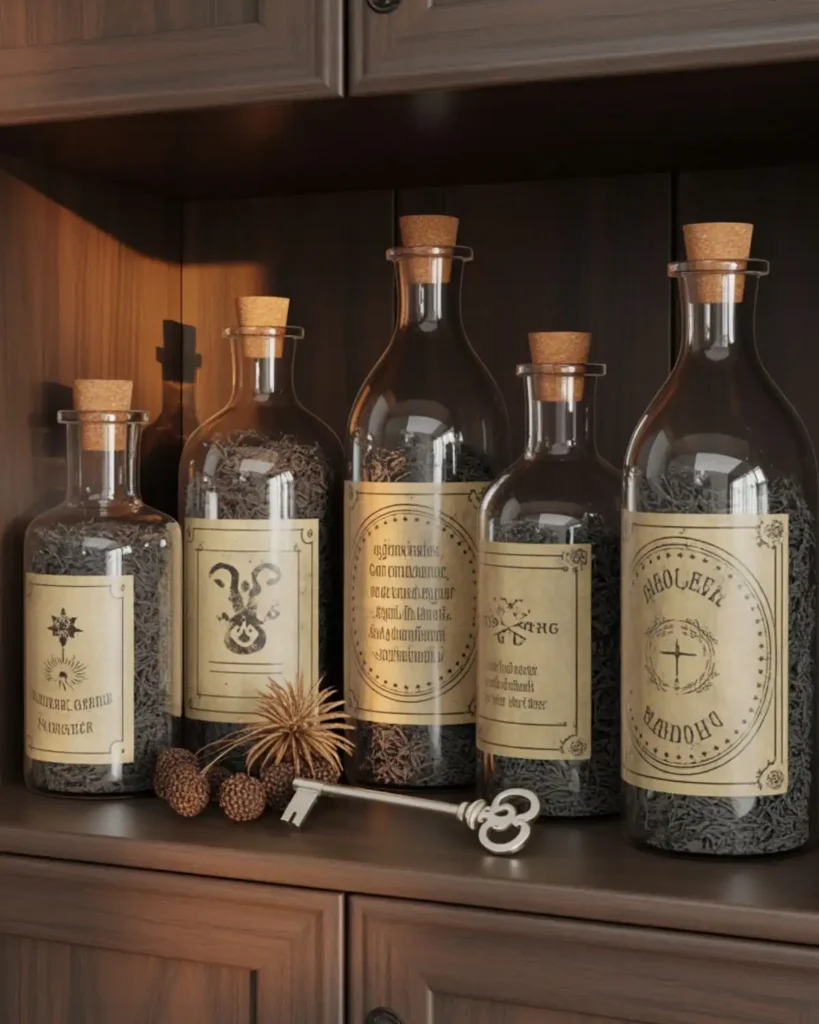
Faux antique apothecary bottles can turn an ordinary shelf into a tiny cabinet of seasonal curiosities. The best version avoids bright plastic embellishments and focuses on cloudy glass, aged labels, corks, and muted contents such as dried herbs or black paper shreds. I use mismatched bottles because identical containers make the display look newly purchased instead of slowly gathered. Make this if you enjoy vintage Halloween DIY projects that can be rearranged into different displays every year.
Soak labels from recycled jars, add printable or hand-lettered labels, and distress the paper edges with diluted brown watercolor. Keep decorative contents dry and nonperishable, and never reuse the bottles for food or drinks after adding craft materials.
4. How Can You Create a Moody Moon Phase Wall Hanging?
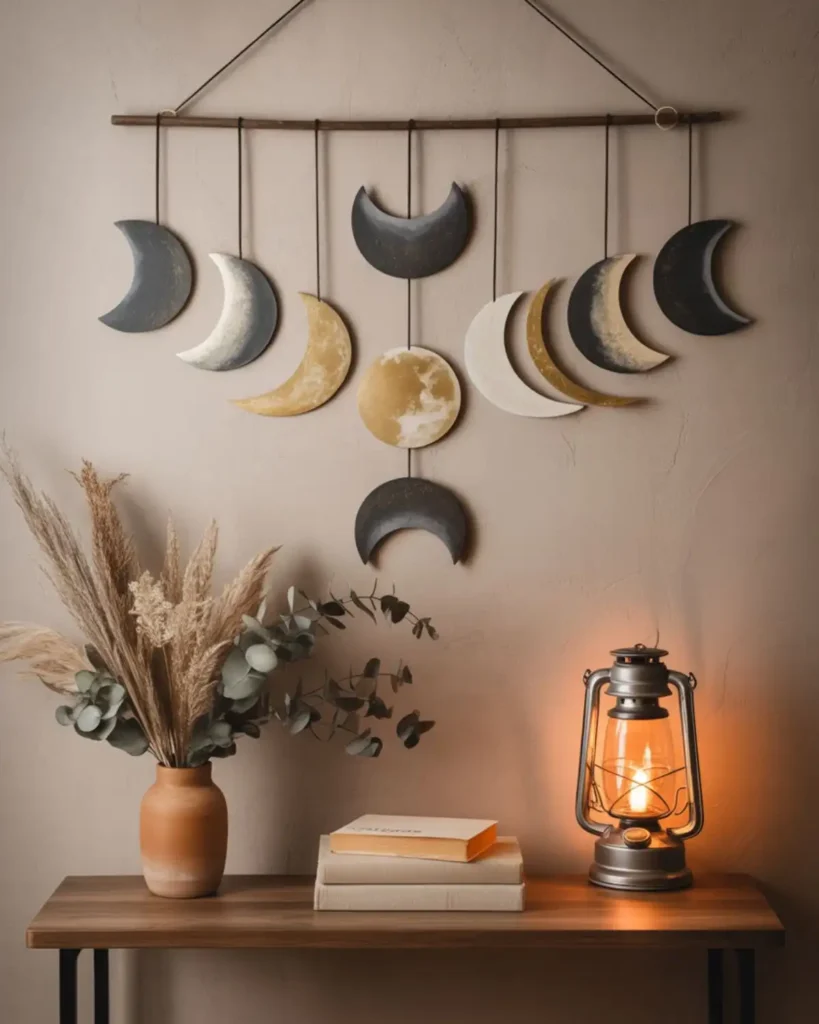
A moon phase wall hanging gives Halloween decor a mystical look without relying on obvious party-store symbols. Compared with a printed poster, layered wooden or cardboard moons cast real shadows and feel more substantial on the wall. I like it above a small console table with books, dark flowers, and one battery-lit lantern. It works especially well for anyone who wants halloween diy crafts that can remain on display after October 31.
Paint five or seven circles in matte black, charcoal, antique gold, and cream, then arrange them from crescent to full moon. Hang each piece from a narrow wooden dowel with black thread or fine chain.
5. Pressed Botanical Ghost Frames
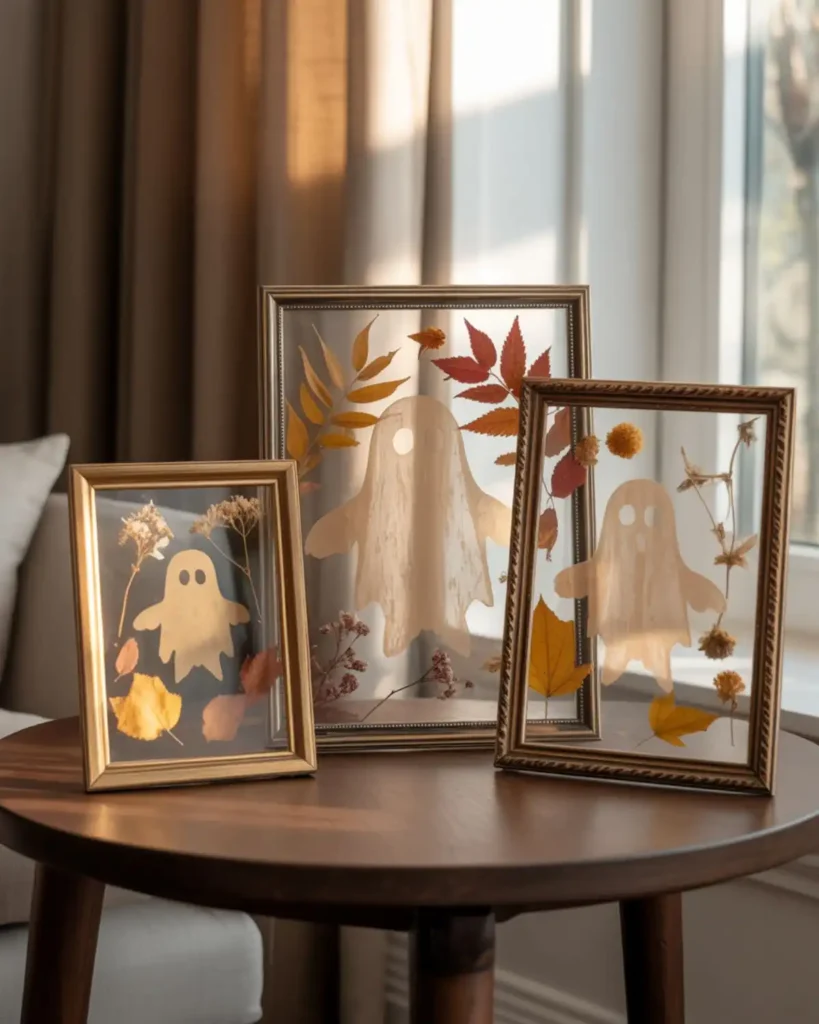
Pressed botanical ghost frames combine delicate dried plants with a quiet little surprise. Instead of making a solid white ghost, leave the body translucent so stems and leaves remain visible through the shape. I would make a set of three in mismatched brass frames for a bedroom, reading corner, or vintage gallery wall. The project suits crafters who prefer softer Halloween crafts for adults over anything loud or frightening.
Place pressed leaves or flowers between two clear sheets, then layer a small vellum ghost silhouette over the arrangement. Use removable adhesive dots so the design can be changed without damaging the botanicals.
6. How Do You Make an Old-World Pumpkin Centerpiece?
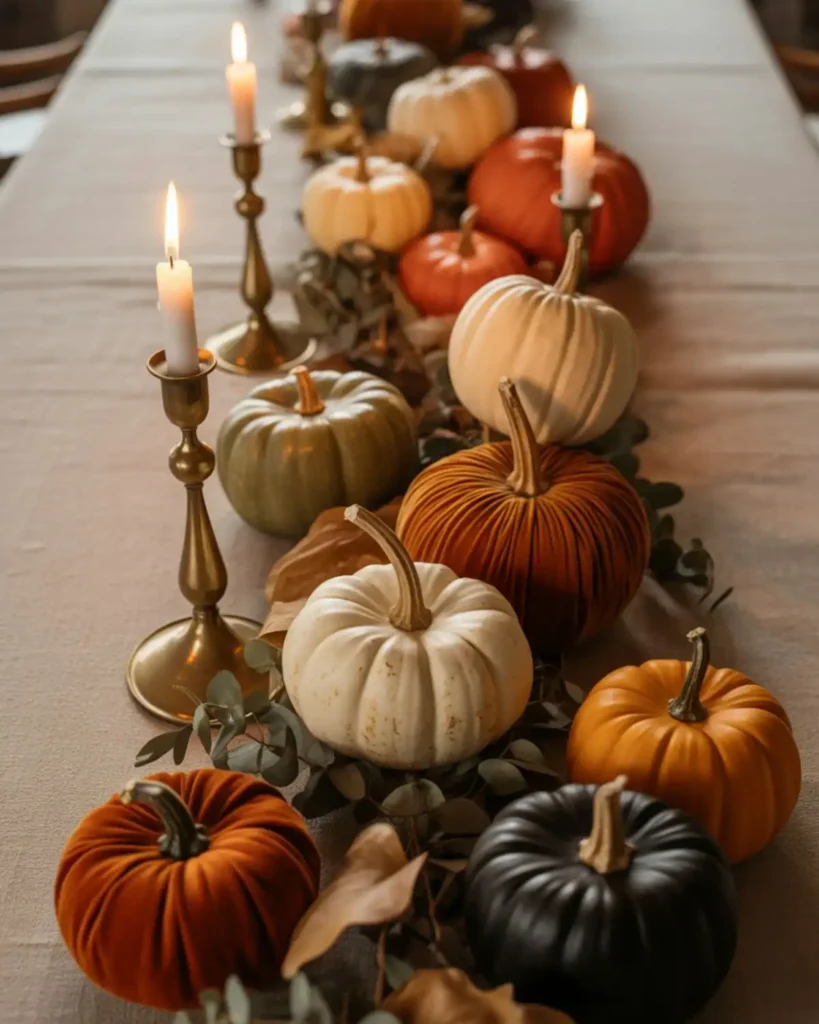
An old-world pumpkin centerpiece looks rich because it combines shapes and finishes rather than relying on one oversized orange pumpkin. Velvet, papier-mâché, painted foam, and real miniature pumpkins can sit together when the palette stays around rust, cream, olive, brown, and black. I like this arrangement down the center of a dining table with tarnished candlesticks and dried foliage. It is best for anyone who wants a reusable focal point that feels more like fall styling than a temporary Halloween prop.
Use books or small boxes under the fabric runner to create hidden height. Then cluster pumpkins in odd numbers and leave breathing room between groups so the table still feels usable.
The University of Minnesota Extension notes that decorative pumpkins and gourds can decay when left in rain or hot sun, so natural pieces last better in a protected, dry display.
7. Crocheted Spiderweb Hoop Art
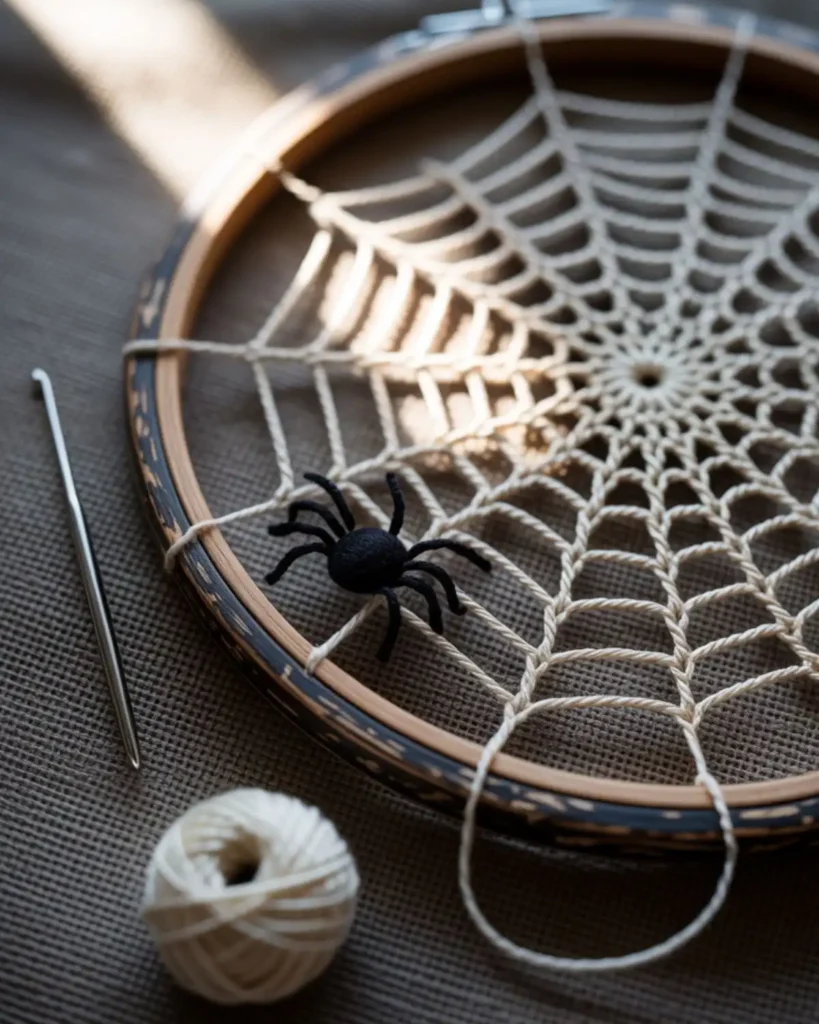
Crocheted spiderweb hoop art is one of those projects that looks detailed even when the pattern is simple. A real yarn web has more depth and softness than a flat paper cutout, especially when stretched inside an aged wood or black embroidery hoop. I would hang several small hoops together instead of making one giant web because the group feels more like a handmade collection. Choose this project when you want crafts for adults that use leftover yarn and can be customized to any room.
Work the web in cream, gray, or black yarn, then add a tiny crocheted or felt spider near one edge. A loose, imperfect web usually looks more natural than one with perfectly even spacing. If you’d like a few more spooky yarn projects, these Halloween crochet ideas pair beautifully with this display.
8. How Can You Make a Victorian-Inspired Halloween Silhouette?
A Victorian-inspired silhouette gives you the drama of antique portraiture with very few materials. The twist is to replace the expected profile with a witch hat, raven, cat, skeletal tree, or mysterious figure holding a lantern. I like the look inside an oval frame with faded floral paper behind it, especially in a powder room or entryway. This is a strong vintage Halloween DIY choice for anyone who enjoys precise cutting and understated decor.
Print or draw the silhouette, cut it from black paper, and mount it on ivory or tea-colored cardstock. Add a handwritten date or fictional family name beneath the image to make it feel like an old keepsake.
9. How Do You Build a Miniature Haunted Village From Recycled Boxes?
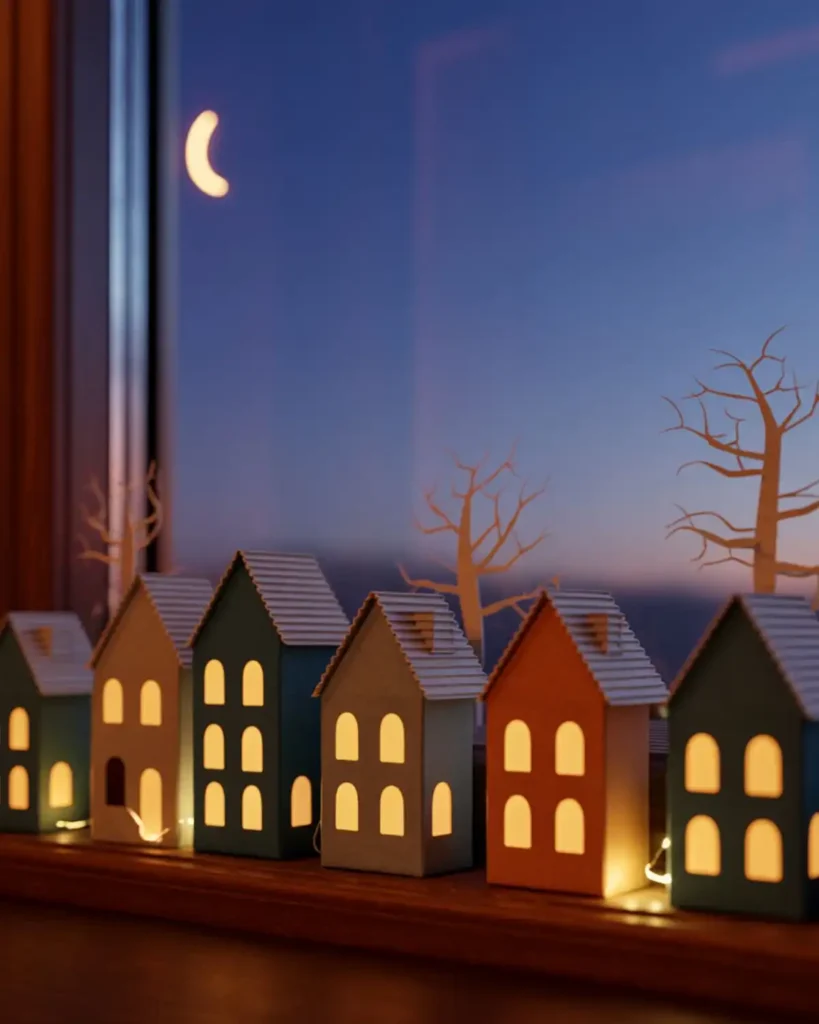
A miniature haunted village made from recycled boxes delivers the charm of ceramic houses without the storage weight or price. Narrow medicine boxes, tea cartons, and small packaging already have useful building shapes, so you only need to alter the rooflines and windows. I would keep the houses mostly black with cream windows and one dusty orange building to break up the row. It is perfect for a mantel or deep windowsill where battery lights can glow behind the cut openings.
Cover each box with paper, add crooked roofs from chipboard, and cut the windows before assembling the final layers. Place only cool-running battery-operated lights behind the village.
The U.S. Consumer Product Safety Commission recommends battery-operated lights instead of open-flame candles in Halloween decorations and advises checking decorative light strands for damaged sockets, exposed wires, or loose connections.
10. Vintage Halloween Postcard Banner
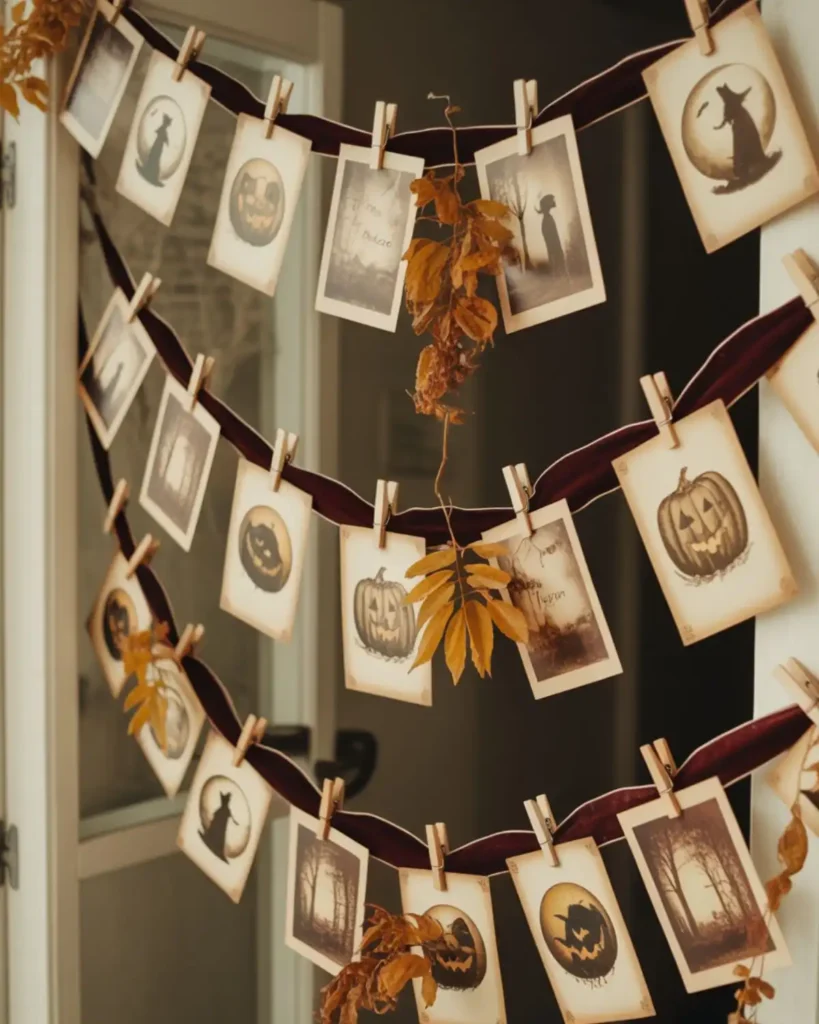
A vintage Halloween postcard banner brings color into the room without looking modern or overly bright. Rather than printing every card at the same size, mix narrow portraits, wide scenes, and small labels so the line feels like a display assembled over many years. I would clip the cards to velvet ribbon with tiny dark clothespins and tuck in a few faded leaves. This is a simple halloween decor DIY idea for renters because it can be hung with removable hooks and stored flat.
Use public-domain Halloween images or your own original illustrations, print them on matte cardstock, and lightly distress the clean white edges with watercolor. Avoid darkening every inch; uneven aging looks more convincing.
11. How Can You Make a Lace-and-Ribbon Witch Hat Wreath?
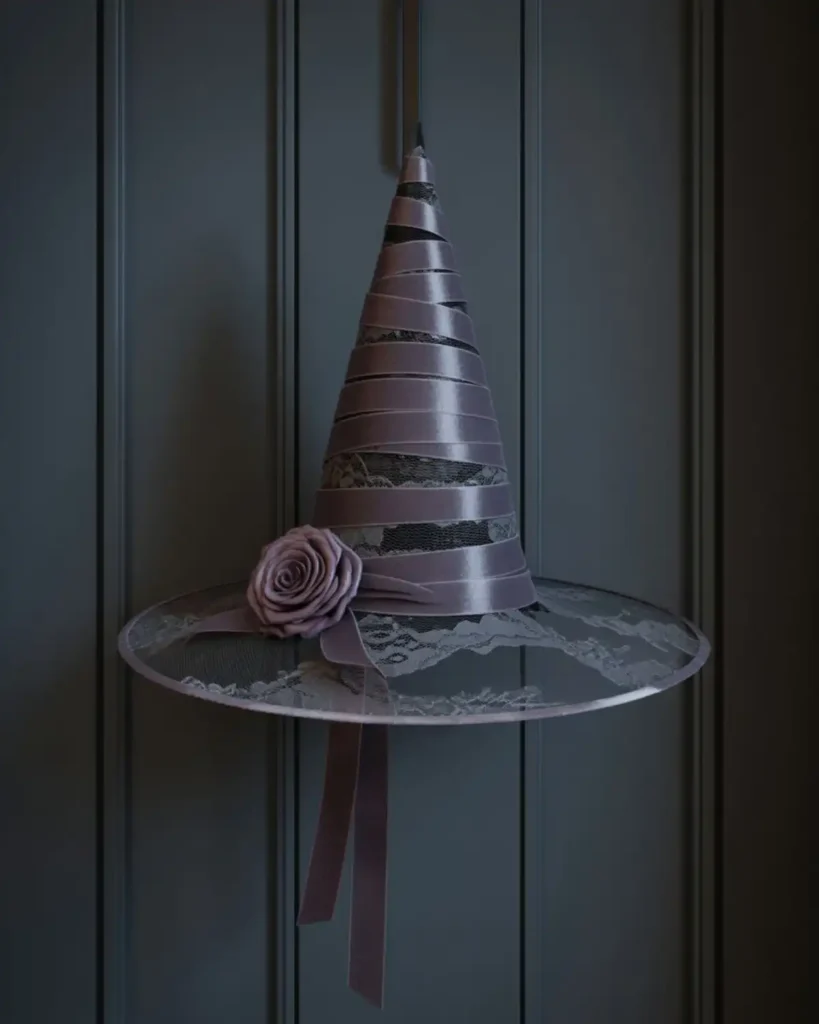
A lace-and-ribbon witch hat wreath feels theatrical, but it can still look elegant when the materials stay tonal. Most mesh wreaths become bulky very quickly, while flat lace, velvet ribbon, and a narrow hat form create a cleaner silhouette. I like it on an interior door where the fine details will not be damaged by weather. Make this when you want a feminine or gothic craft that uses texture instead of glitter.
Wrap a wire witch-hat frame with black ribbon, layer sections of lace across the opening, and finish one side with a small velvet bow or fabric rose. Keep the embellishment slightly off-center so the shape remains recognizable.
12. How Do You Transform a Plain Mirror Into a Haunted Looking Glass?
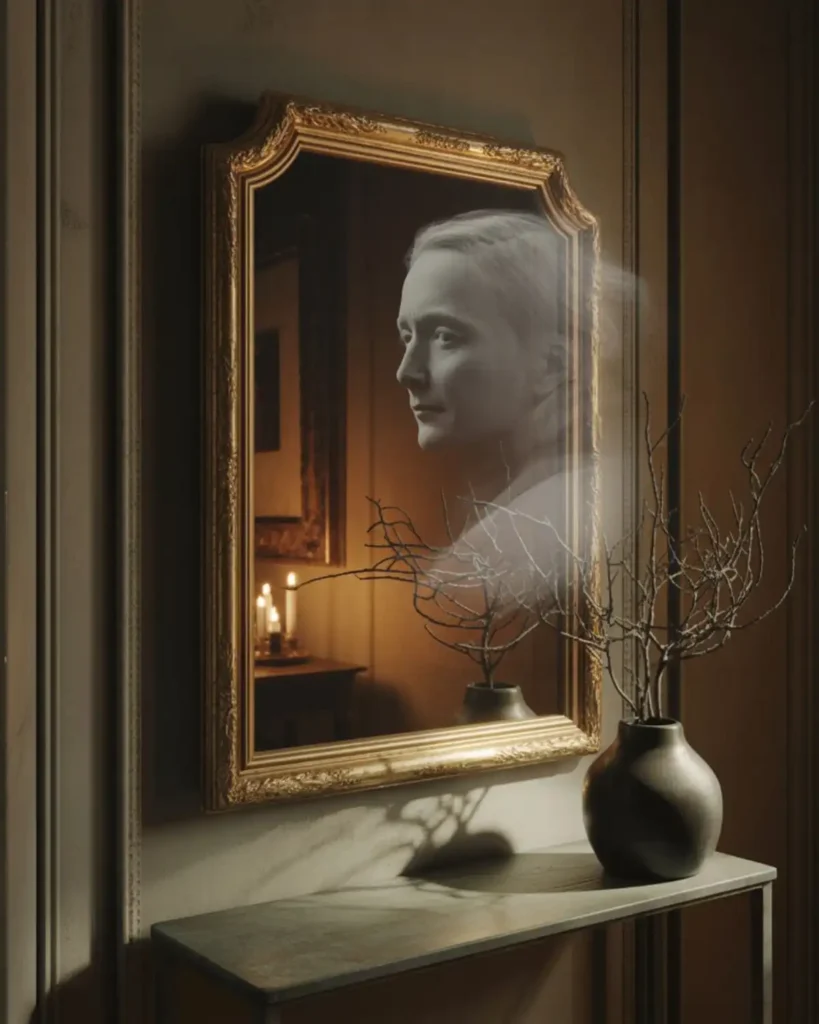
A haunted looking glass can become the centerpiece of an entire Halloween room. Instead of permanently damaging a mirror, create the illusion with removable smoky film, transparent printed imagery, or a thin acetate portrait placed behind a decorative frame. I would position it where the image appears only from certain angles, which makes the effect feel discovered rather than announced. This project is for patient crafters who want one memorable statement piece instead of many small decorations.
Use a thrifted mirror with an ornate frame and apply all effects to removable materials. Keep reflective areas clear enough that the piece still catches light and does not become a flat black rectangle.
13. Embroidered “Memento Mori” Sampler
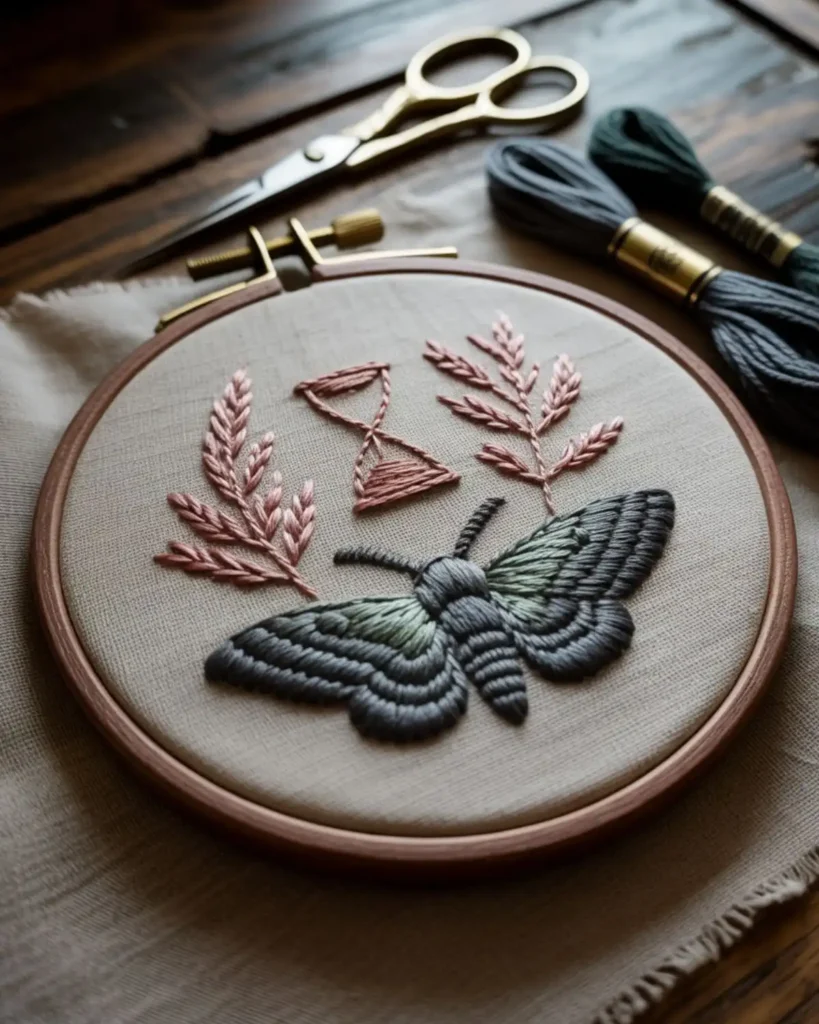
An embroidered “Memento Mori” sampler gives traditional needlework a moody seasonal turn. Unlike a mass-produced sign, hand stitching makes even a simple skull, moth, hourglass, or Latin phrase feel personal and worth keeping. I would use faded linen with brown, black, and dull gold thread so it resembles an old textile found in a trunk. It is an excellent choice for experienced stitchers or anyone ready to practice a slightly more detailed Halloween craft.
Keep the design small enough to finish in a few evenings. Frame it in a dark wood hoop, or mount it behind glass with uneven antique-style matting.
14. How Can You Make Floating Ghosts From Cheesecloth Without Making Them Look Childish?
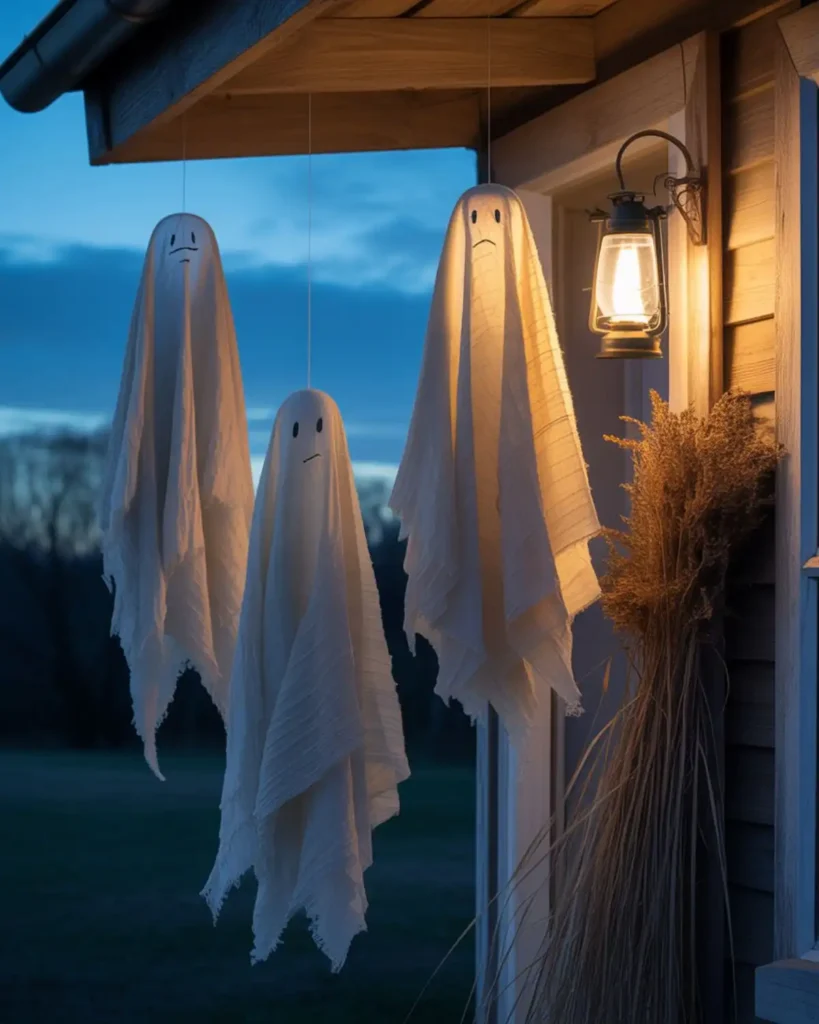
Floating cheesecloth ghosts look sophisticated when the shapes are long, simple, and nearly featureless. The usual oversized eyes can push them toward a children’s craft, but tiny stitched faces or no faces at all create a more atmospheric result. I like a group of three at different heights above an unused corner or sheltered porch. Choose this project when you want lightweight halloween diy crafts that fill vertical space without taking up a shelf.
Shape the fabric over forms, stiffen it with a craft-safe fabric medium, and let it dry fully before removing the supports. Add thin clear thread at the top and keep the lower edges irregular. You can also mix them with a crochet ghost pattern to create a layered handmade Halloween display.
15. How Do You Make a Vintage-Inspired Paper Moon Lantern?
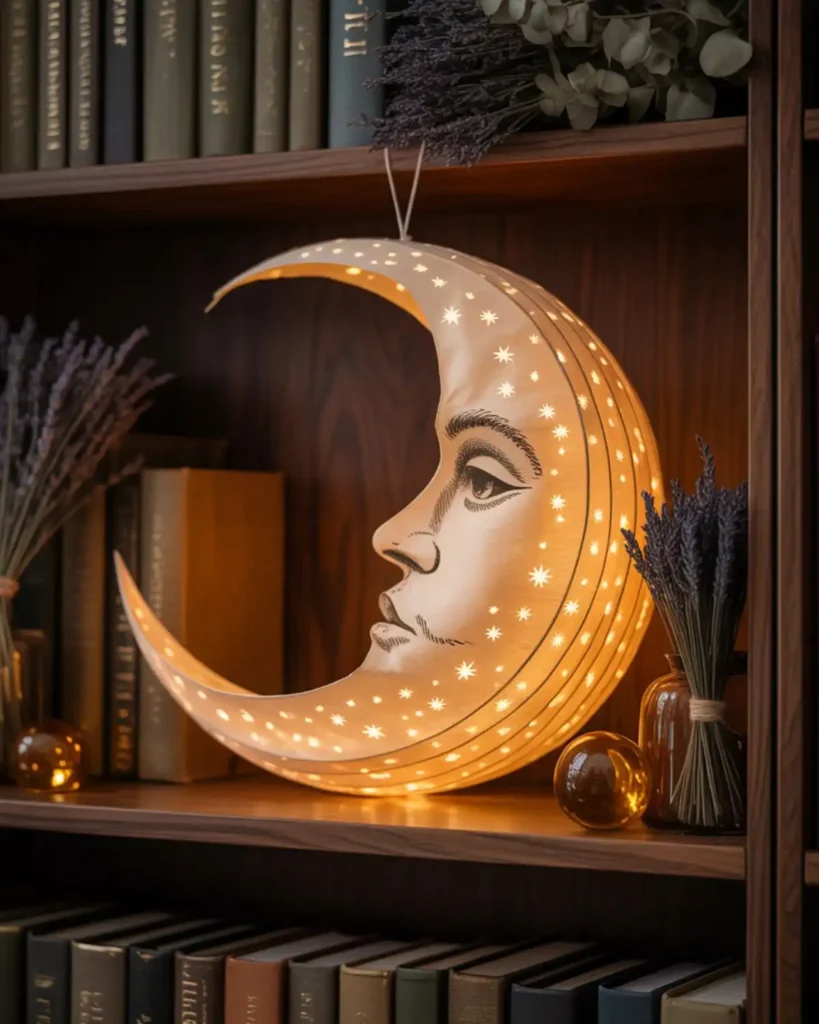
A paper moon lantern creates the soft glow that vintage Halloween decor needs. Instead of drawing a modern smiling face, use an old-fashioned crescent profile with a long nose, closed eye, and small stars. I would place one in a dark bookcase where the side lighting emphasizes the cut paper layers. It is best for paper crafters who enjoy careful assembly but want a project that still finishes in one afternoon.
Build the lantern from two moon-shaped cardstock panels connected by a narrow folded strip. Use a battery-operated tea light only, and leave an opening for easy access to the switch.
Long before pumpkins became the familiar jack-o’-lantern material, carved turnips were used as lanterns in Halloween tradition, according to the National Park Service. That older silhouette is useful inspiration when you want your moon or lantern design to feel less modern.
16. Antique Gold Skeleton Leaf Garland
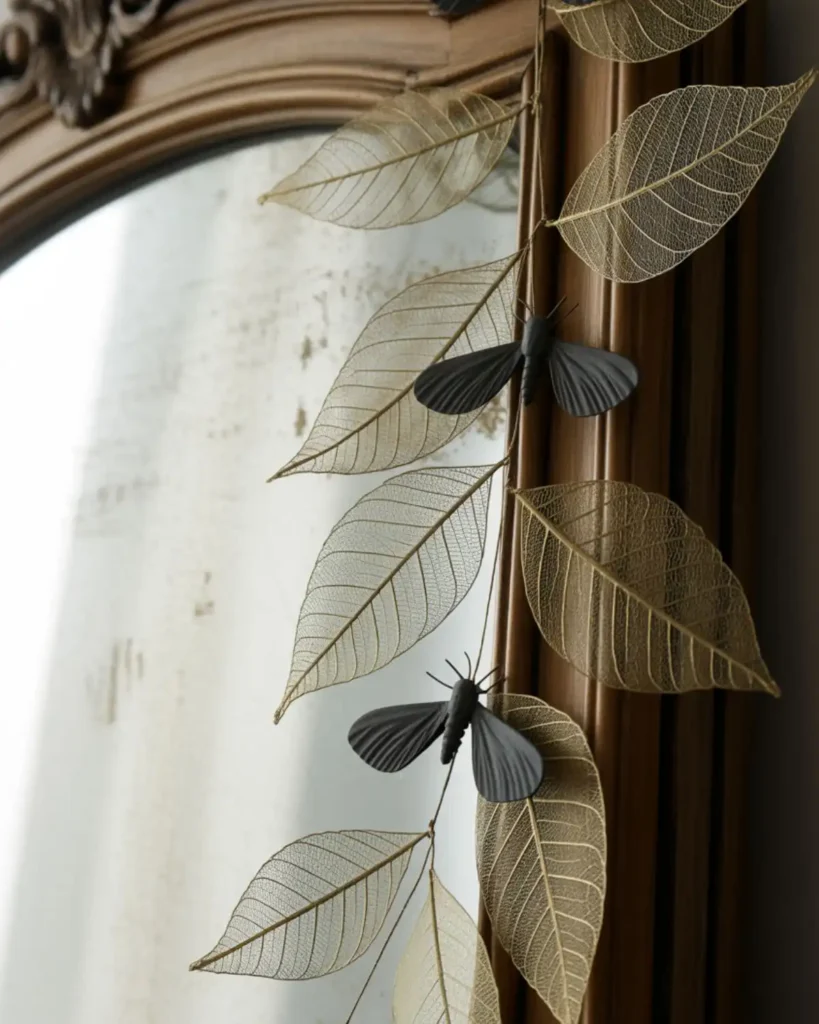
An antique gold skeleton leaf garland catches light without covering the room in bright metallic shine. Real skeleton leaves already look fragile and slightly mysterious, so they need very little decoration beyond diluted paint and dark string. I would drape the garland loosely across a mirror, framed artwork, or cabinet rather than stretching it into a perfectly straight line. This project fits neutral homes where orange decorations feel too strong but plain black disappears.
Brush the leaves with a thin layer of muted metallic acrylic paint, allowing some natural color to show through. Alternate larger leaves with small black paper moths for an easy rhythm.
17. How Can You Turn a Thrifted Tray Into a Halloween Curiosity Display?
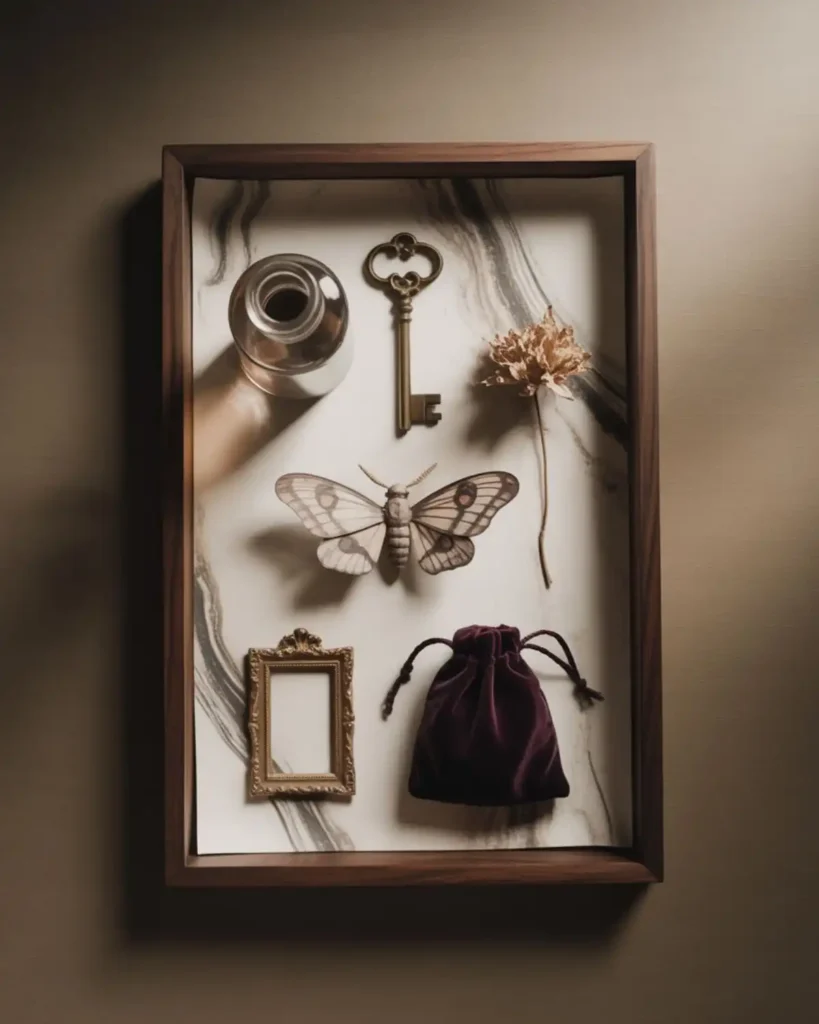
A thrifted tray creates a finished boundary for several tiny objects that might otherwise look like clutter. The trick is to treat it like a miniature museum display, using only three to five objects such as a bottle, old key, paper moth, dried flower, and small framed label. I like a dark wood or tarnished metal tray on a coffee table because it can be moved in one piece when the surface is needed. It is a smart halloween decor DIY for people who already own plenty of small decorative objects.
Line the tray with velvet, marbled paper, or faded book pages. Vary the object heights and leave one open area so the arrangement does not become visually heavy.
18. How Do You Make Faux Mercury Glass Pumpkin Jars?
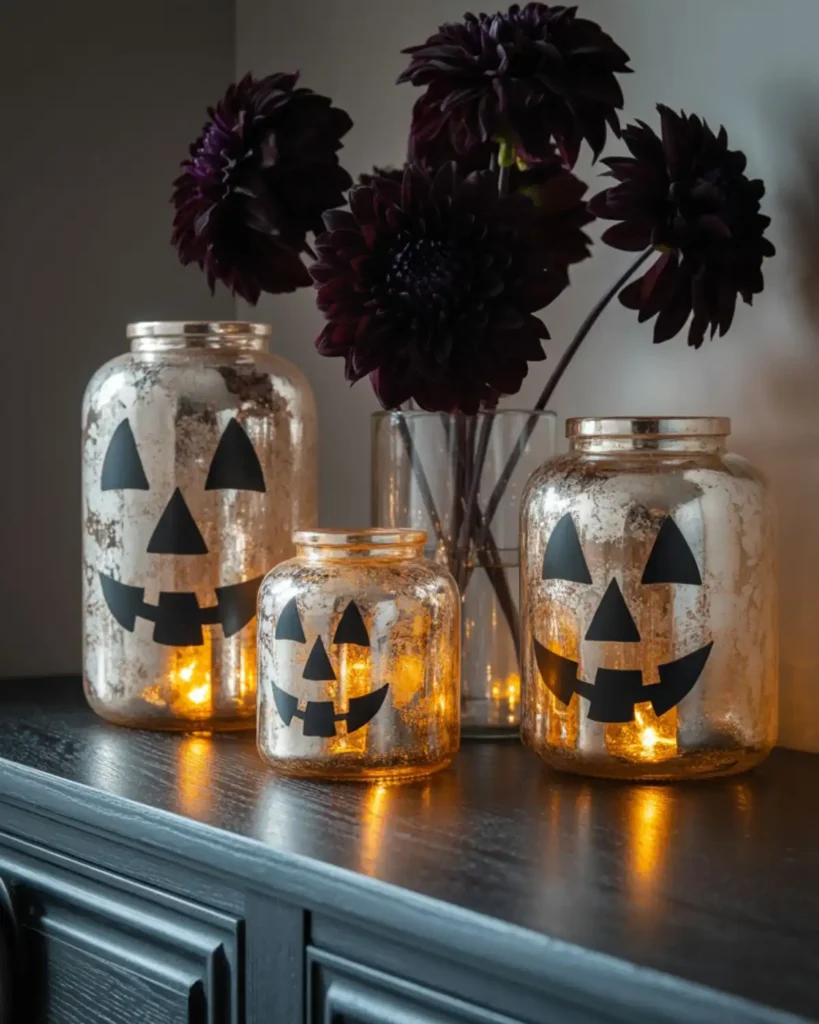
Faux mercury glass pumpkin jars bring reflective texture to a palette that can otherwise become very matte. They look more grown-up than glittered jars because the finish appears worn, cloudy, and irregular instead of uniformly shiny. I would group two or three small jars with dark flowers or battery lights on a sideboard. This project is ideal when you want halloween crafts for adults that look expensive but begin with recycled glass.
Use mirror-effect craft paint according to its label, working in a well-ventilated area and keeping the finish on decorative surfaces only. Add a pumpkin face with removable vinyl if you want to reuse the jars after Halloween.
The U.S. Environmental Protection Agency advises increasing ventilation when using products that emit volatile organic compounds and following all label precautions. It also notes that paints, glues, adhesives, and permanent markers used in arts and crafts can contribute to indoor pollutants.
19. Vintage Fabric Pumpkin Stack
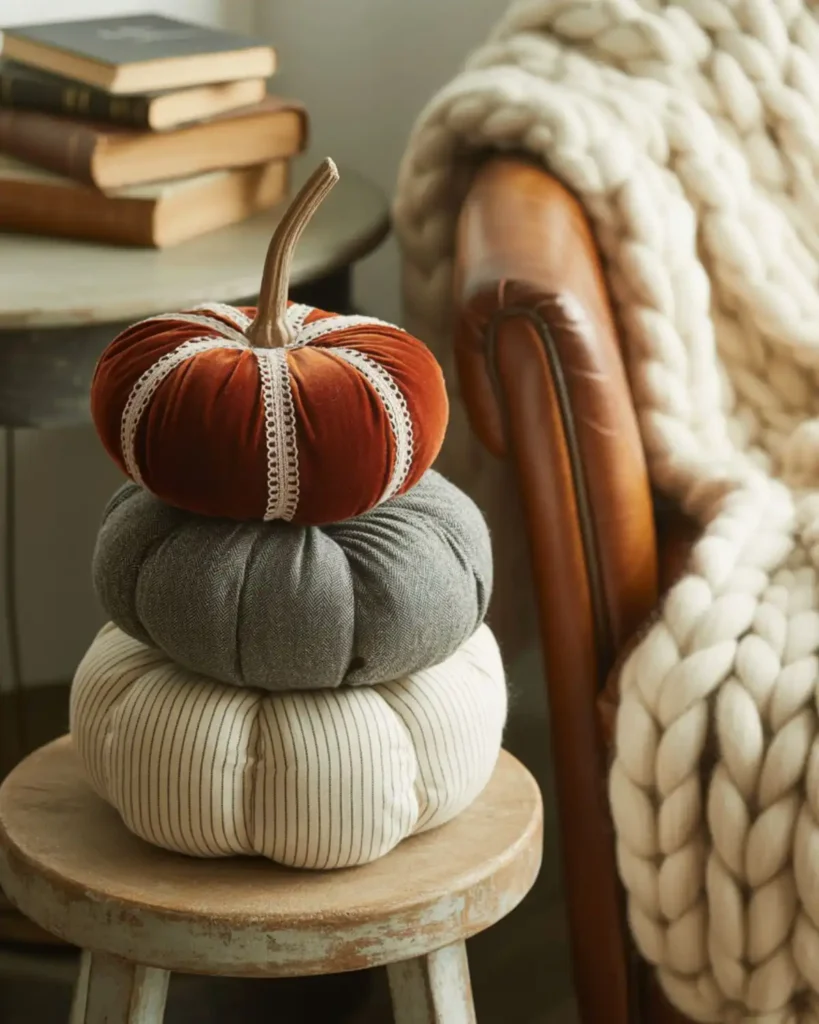
A vintage fabric pumpkin stack has the softness of a handmade heirloom without requiring a complicated sewing pattern. Old velvet, tweed, ticking stripe, faded florals, and linen look more convincing together than five pumpkins cut from identical fabric. I would stack three on a stool or place several small ones among books where their texture can balance hard surfaces. Make these if you have meaningful fabric scraps you want to turn into seasonal keepsakes.
Use simple gathered circles, fill them lightly, and shape the ridges with strong thread. Real twigs, corks, or rolled fabric can become stems, while narrow ribbon or frayed lace adds a finished edge. If you prefer yarn over fabric, try a crochet pumpkin pattern for another reusable seasonal decoration.
20. How Can You Create a Raven-and-Branches Door Swag?
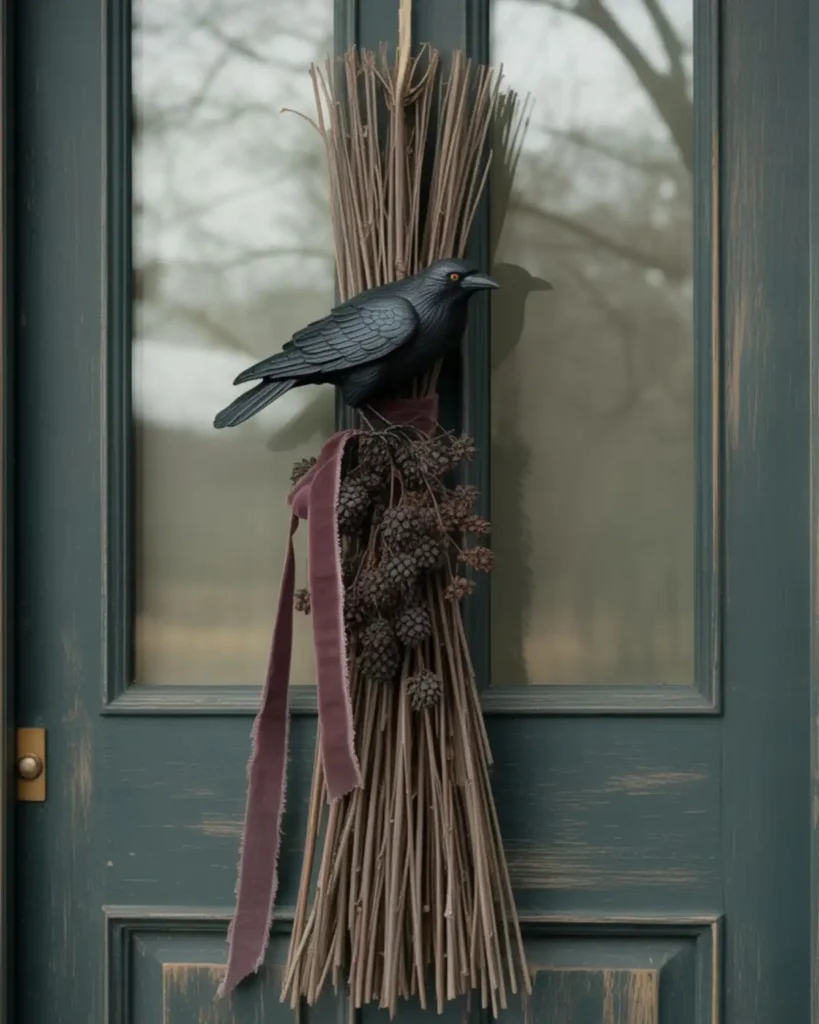
A raven-and-branches door swag is a leaner alternative to a full round wreath. Bare twigs create natural movement, and one well-placed raven has more impact than a crowded collection of plastic birds. I would add a strip of worn velvet and a few dark seed pods, then let the lower branches remain uneven. It is right for a narrow door, apartment entry, or anyone who wants outdoor Halloween decor without a large wreath form.
Bundle lightweight fallen branches securely, attach a weather-resistant faux raven, and hang the swag from a strong loop. Check that no pointed branch ends project into the walking path.
21. How Do You Make a Gothic Book Stack Without Ruining Real Books?
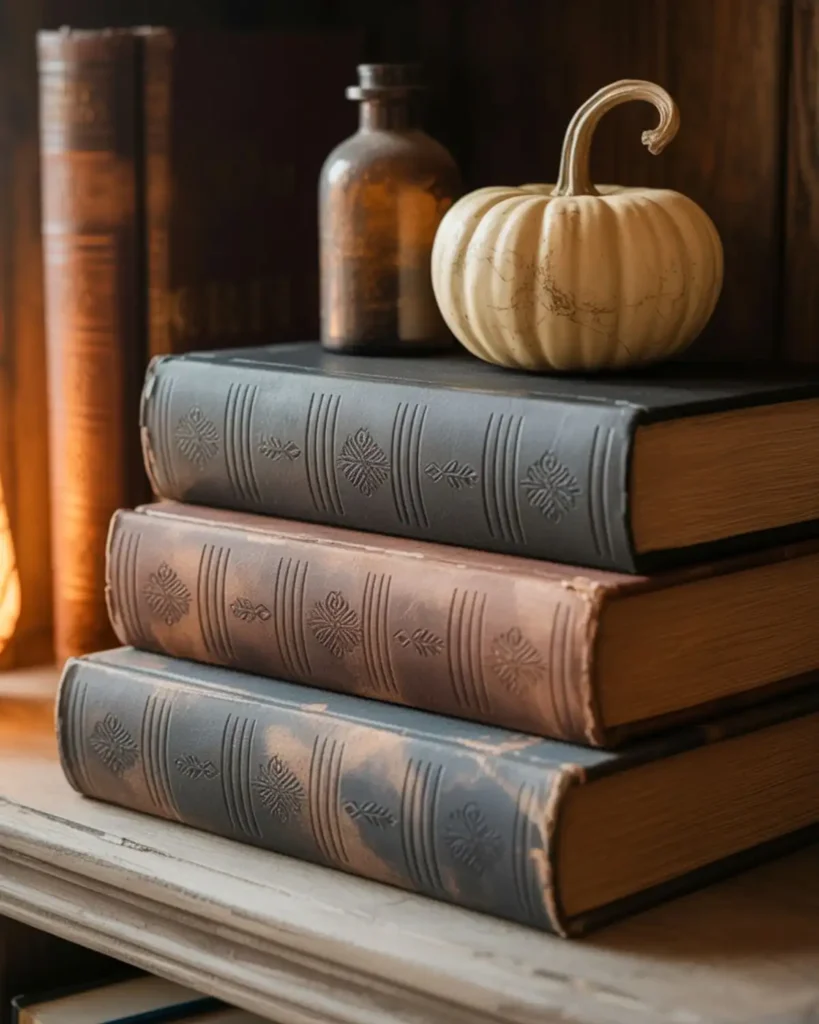
A gothic book stack gives height to a display and creates the look of an old library without sacrificing readable books. Decorative boxes and blank papier-mâché book forms are better than painting valuable hardcovers, and they are easy to label with fictional titles. I like names such as “Midnight Botany,” “The House Beyond the Pines,” or “Collected Lunar Notes” because they imply a story without copying a known franchise. This craft is for anyone who loves shelf styling and wants reusable risers for bottles, pumpkins, and frames.
Cover the forms with matte paper, add raised spine bands, and dry-brush the edges. Mix one black book, one brown book, and one faded cloth-look book for a believable stack.
22. How Can You Make an Heirloom-Style Black-and-Cream Quilt Block?
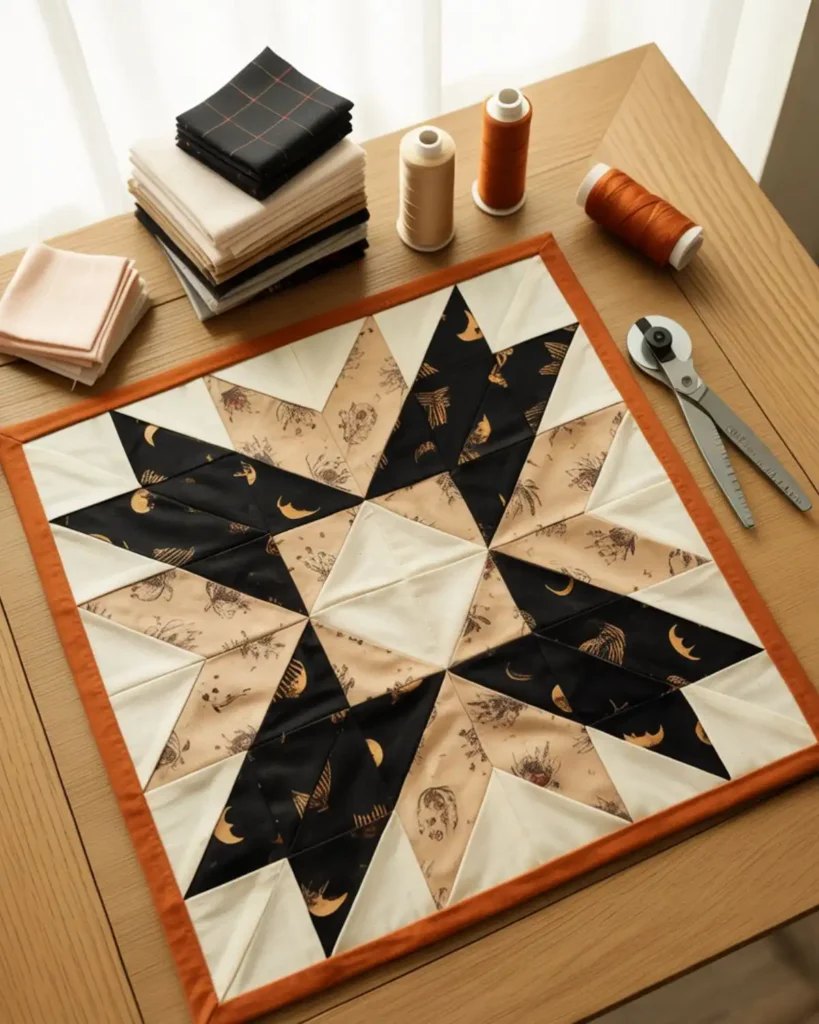
A black-and-cream quilt block brings Halloween into a room without turning the whole space orange. Traditional stars, log cabins, and flying-geese patterns can feel seasonal simply through fabric choice, especially with tiny moons, bats, or vintage florals. I would finish one oversized block as a wall hanging or pillow front instead of committing to a full quilt. It is a satisfying project for sewists who want crafts for adults with real technique and long-term usefulness.
Choose two or three prints plus one solid fabric so the pattern remains readable. A narrow rust-colored binding can add warmth without dominating the design.
23. How Do You Make a Miniature Halloween Specimen Frame?
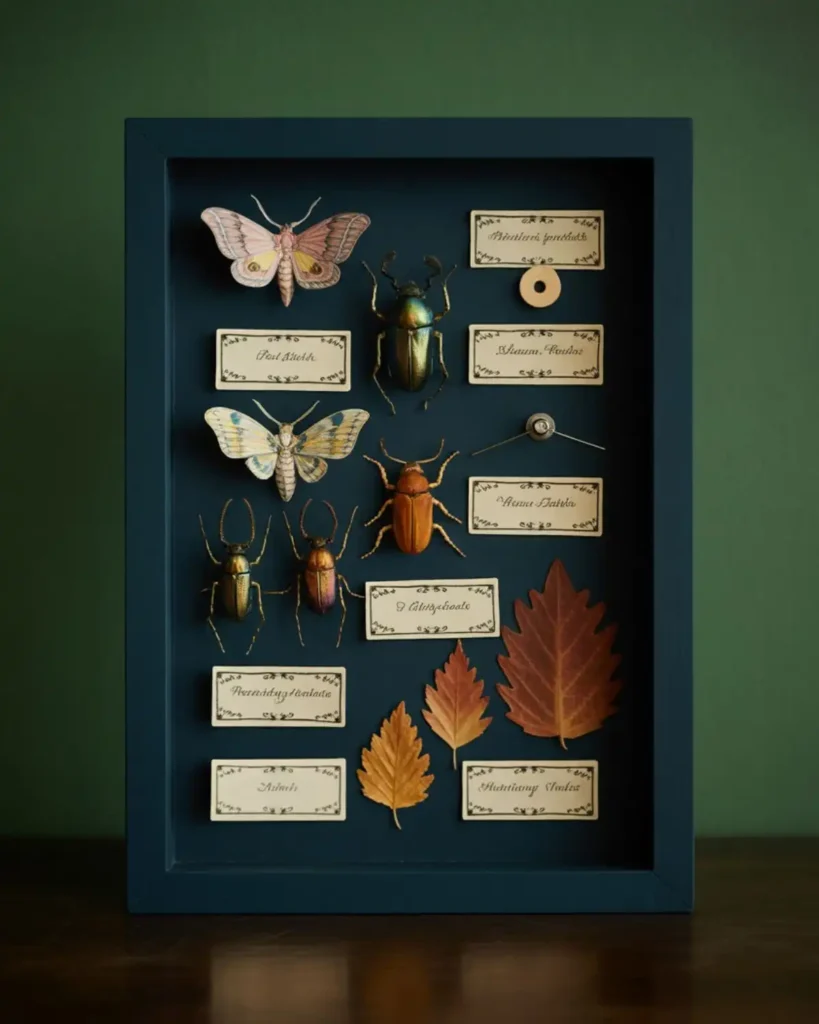
A miniature specimen frame turns paper moths, beetles, leaves, and labels into a tidy cabinet-of-curiosities display. Unlike loose plastic insects, carefully arranged paper specimens feel illustrative and decorative rather than startling. I would use a deep shadow box and place each object on a pin or tiny folded paper mount. This is a strong choice for detail-oriented crafters who enjoy arranging, labeling, and building a small visual story.
Create all specimens from printed or hand-painted paper, and give each one a fictional catalog number. Add one empty space or missing-label outline to make the collection feel as though it has a history.
24. Vintage Halloween Memory Box
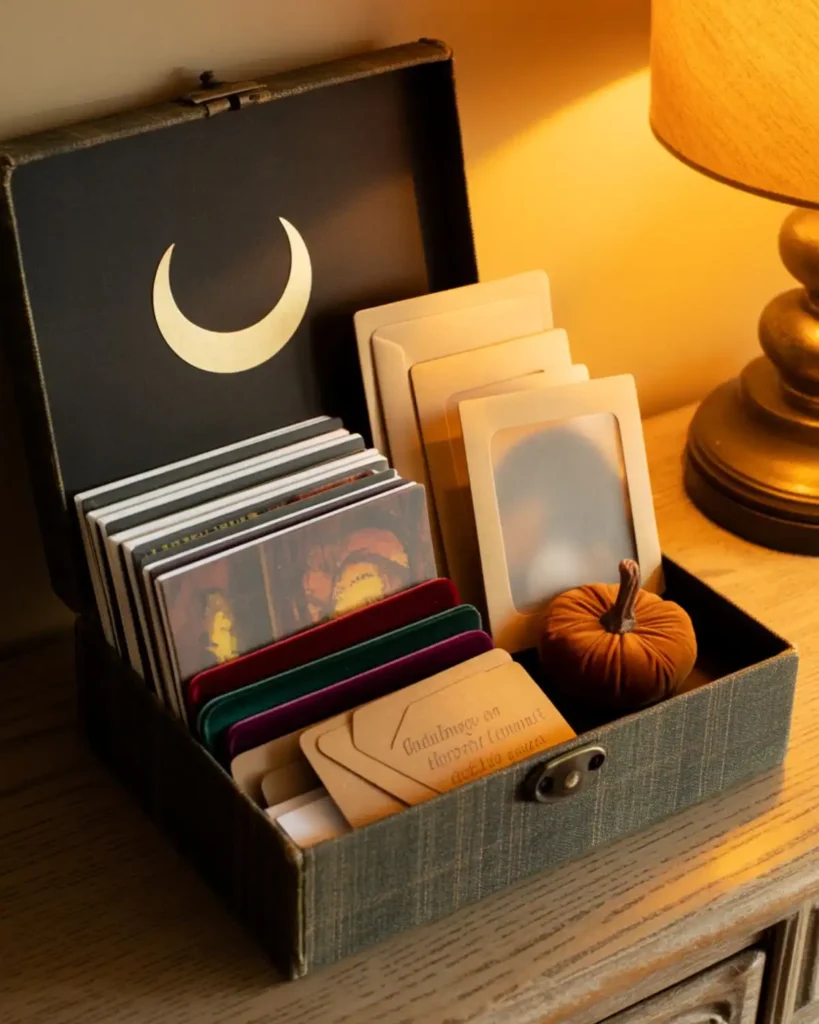
A vintage Halloween memory box gives all the smaller crafts, tags, photos, ribbons, and postcards from the season one intentional home. Most seasonal storage is purely practical, but a decorated box can become part of the display before it is packed away. I would add one new item every year, a party photo, a handmade tag, a tiny fabric pumpkin, or a note about the year’s favorite project. This is the best final craft for anyone who wants Halloween DIY crafts to become a personal tradition rather than disposable decor.
Cover a sturdy lidded box with book cloth or painted paper, then add a simple moon, cat, or pumpkin label. Use acid-free envelopes for photographs and paper keepsakes you want to preserve.
How Do You Keep Handmade Halloween Decor Looking Cohesive?
Keep handmade Halloween decor cohesive by repeating a small palette, shared materials, and similar finishes throughout the room.
At a Glance
- Select three main colors and one metal.
- Repeat ribbon, paper, or fabric between projects.
- Vary display heights without crowding surfaces.
- Remove pieces that interrupt the visual rhythm.
Start with a palette of three main colors and one metal finish. A vintage combination might include matte black, faded orange, warm cream, and antique gold, while a gothic version could use black, plum, gray, and tarnished silver.
Repeat materials across the room. If one project uses velvet ribbon, bring the same ribbon onto a wreath, bottle label, or memory box. If your wall art uses ivory paper, use that paper again in garlands and specimen labels.
Finally, edit the display after everything is in place. Remove one or two objects from each surface, vary the heights, and keep walking paths clear. The CPSC specifically advises removing obstacles from lawns, steps, and porches when expecting visitors, which is especially relevant when seasonal decor expands beyond shelves and onto entryways.
What Supplies Are Most Useful for Vintage Halloween DIY Projects?
The most useful supplies are versatile basics that can create several projects, including cardstock, fabric scraps, thrifted objects, paint, natural materials, and battery-operated lights.
At a Glance
- Stock neutral paper and muted craft paint.
- Save ribbon, lace, yarn, and fabric scraps.
- Collect reusable frames, jars, trays, and boxes.
- Choose removable adhesives for temporary alterations.
You do not need a separate bin of highly specific Halloween supplies. A smaller collection of versatile materials can cover most of these projects:
- Matte black, cream, brown, and muted orange cardstock
- Cotton string, black thread, velvet ribbon, and lace
- Water-based craft paint and small brushes
- Thrifted frames, trays, bottles, mirrors, and boxes
- Dried leaves, twigs, moss, seed pods, and pressed flowers
- Battery-operated tea lights or miniature light strands
- Removable adhesive, acetate, vellum, and clear thread
The Smithsonian notes that crepe paper became a common Halloween decorating material in the late 1800s and early 1900s. That history supports an approach many modern crafters already love: inexpensive paper can become convincing vintage decor when the shapes, colors, and styling are strong.
Frequently Asked Questions
What are the easiest Halloween crafts for adults?
Paper garlands, altered thrift-store frames, apothecary bottles, specimen frames, and decorated trays are among the easiest because they use simple cutting, painting, and arranging techniques.
How can I make Halloween decor look vintage?
Use matte finishes, aged paper, restrained orange-and-black color combinations, old-fashioned silhouettes, dark wood, velvet, lace, and tarnished metal. Avoid combining too many bright plastics or unrelated motifs in one display.
What Halloween crafts can stay up through fall?
Fabric pumpkins, moon phase art, botanical frames, neutral quilt blocks, leaf garlands, curiosity trays, and old-world pumpkin centerpieces can remain on display into November.
How do I light handmade Halloween decor safely?
Use cool-running battery-operated lights rather than open flames, keep cords out of walking paths, and discard decorative light strands with cracked sockets, bare wires, or loose connections.
Can I make vintage Halloween decor without buying antiques?
Yes. Thrifted frames, recycled jars, matte paper, fabric scraps, and restrained aging techniques can create the look without requiring collectible or expensive objects.
What colors work best for vintage halloween decor?
Matte black, faded orange, warm cream, brown, olive, plum, and muted metallics work well because they create contrast without looking overly bright. Limit the palette to three main colors and one metal finish so separate projects feel connected.
Are these halloween diy crafts suitable for beginners?
Yes. Paper garlands, altered frames, labeled bottles, decorated trays, and simple fabric pumpkins are beginner-friendly halloween diy crafts. Start with projects that use cutting, painting, gluing, or arranging before moving into crochet, embroidery, sewing, or layered lantern construction.
Final Thoughts
The most convincing Halloween crafts for adults are not necessarily the most complicated. A single haunted portrait, stitched sampler, paper moon lantern, or carefully arranged curiosity tray can change the mood of a room more effectively than a pile of generic decorations. If you’re planning your entire seasonal decor, don’t miss these fall crafts for projects that transition beautifully beyond Halloween.
Choose two or three projects that share a color palette, give yourself time to enjoy the process, and let the handmade details stay slightly imperfect. That is usually what makes vintage Halloween decor feel collected, personal, and worth bringing out again next year.

![The Best 30+ Free Crochet Cat Patterns [Beginner-Friendly Guide]](https://crochetmind.com/wp-content/uploads/2025/04/1-The-Best-30-Free-Crochet-Cat-Patterns-Beginner-Friendly-Guide.webp)