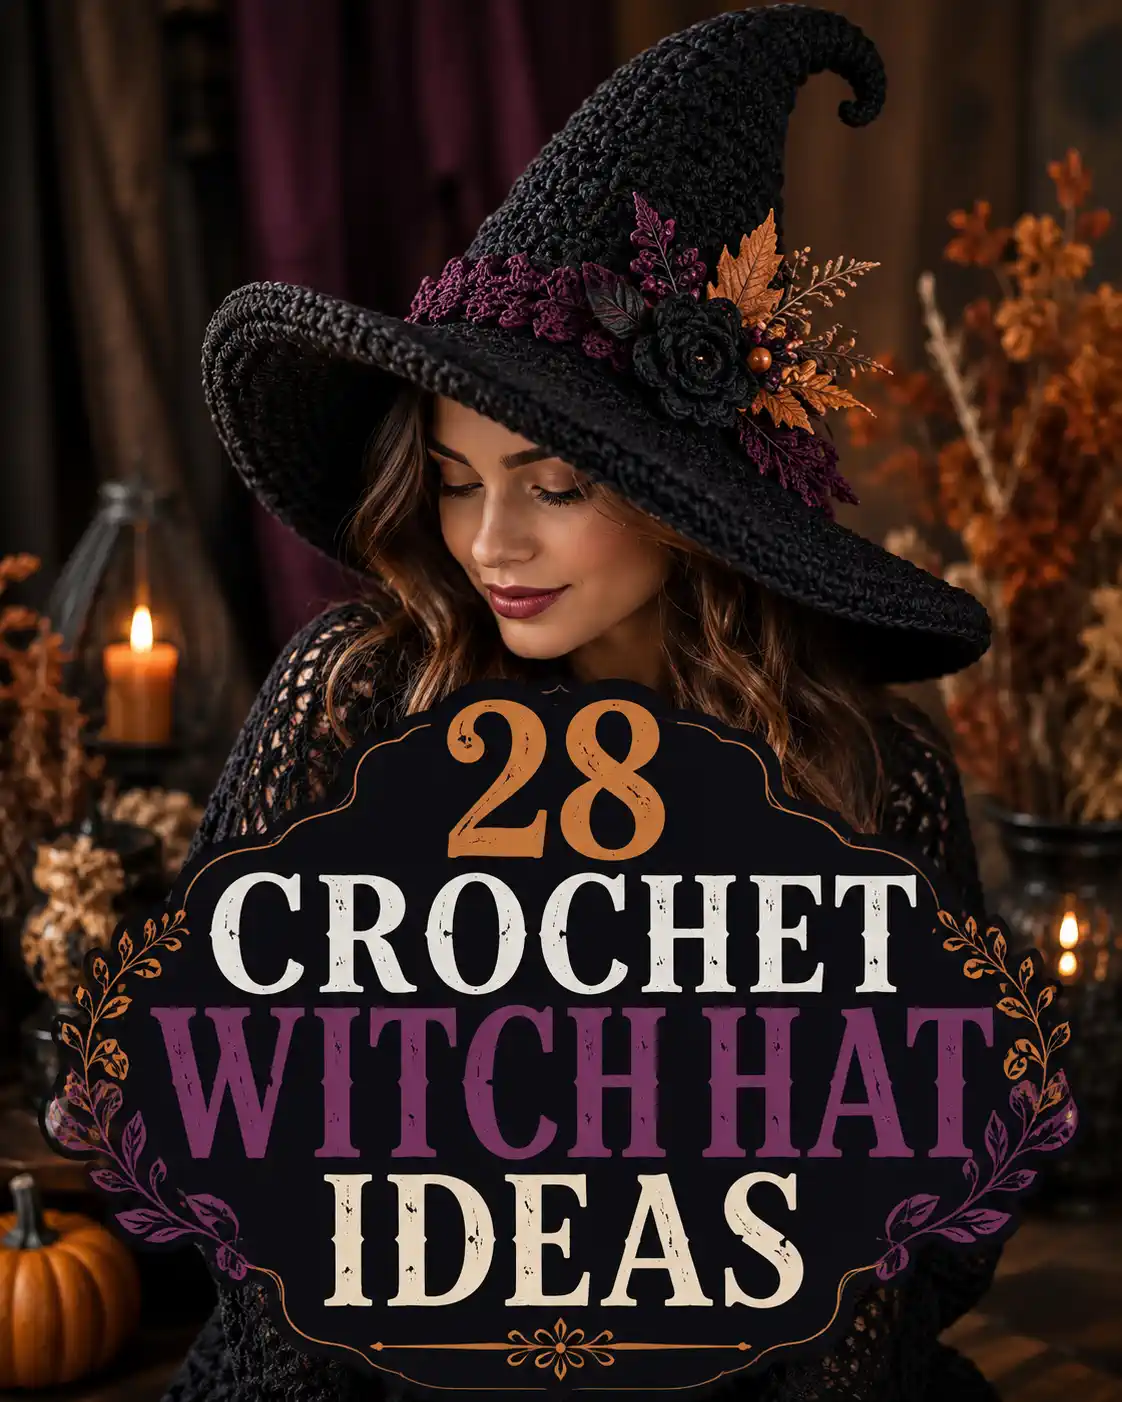
A crochet witch hat is built by gradually increasing a cone, fitting the crown to the head, and then expanding into a brim. For most designs, tight stitches, accurate gauge, and the right yarn weight matter more than complicated techniques, so even confident beginners can make a hat that looks structured and wearable.
If you’re deciding where to begin, start with the hat shape you would actually enjoy wearing structured, slouchy, wide-brimmed, colorful, or miniature and let that guide the yarn and finishing details. Below, I’ve gathered 28 different crochet witch hat ideas so you can compare classic Halloween styles with softer, whimsical, amigurumi, and statement versions before choosing your favorite.
Key Takeaways
- Measure the wearer’s head before shaping the crown.
- Swatch first to control structure and drape.
- Use a Free crochet witch hat pattern with clear gauge.
- Choose gradual increases for a taller pointed cone.
- Customize with bands, color, appliqués, or brim shape.
- Keep costume fit, visibility, and comfort in mind.
What Makes a Crochet Witch Hat Hold Its Shape?
A crochet witch hat holds its shape best when the yarn, gauge, stitch density, cone height, and brim width work together.
At a Glance:
- Use denser stitches for more structure.
- Swatch before making a tall cone.
- Keep increases gradual through the crown.
- Reinforce very wide brims when needed.
The secret is structure. A tall witch-hat cone naturally wants to soften or fold, so the fabric needs enough density to support the point without becoming stiff and uncomfortable.
The Craft Yarn Council classifies worsted/aran yarn as medium weight (category 4), bulky as category 5, and super bulky as category 6. Its standard chart also gives progressively larger hook ranges as yarn gets heavier, but it specifically notes that those numbers are guidelines and that the pattern gauge should take priority.
That is especially useful for a hat. A slightly smaller hook can create a denser fabric, while a larger hook usually gives a softer, more relaxed result. If you are unsure which size to use, this crochet hook size chart can help you compare hook measurements before swatching. Make a swatch before committing to a tall cone, because even a small gauge difference compounds over many rounds.
Here is the quick comparison I would use before choosing a style:
| Witch Hat Style | Best Yarn Direction | Skill Level | Best Feature |
|---|---|---|---|
| Classic pointed | Worsted or bulky | Beginner–intermediate | Clean traditional silhouette |
| Slouchy | Worsted | Beginner | Soft bent tip |
| Chunky | Bulky or super bulky | Beginner | Fast, dramatic texture |
| Wire-edged brim | Worsted | Intermediate | Highly shapeable brim |
| Mini/amigurumi | Worsted or sport | Beginner | Great for toys and décor |
| Lace or openwork | DK or worsted | Intermediate | Light, decorative finish |
What Size Should a Crochet Witch Hat Be?
Measure the actual wearer’s head and use that measurement with your pattern gauge rather than relying only on age-based sizing.
At a Glance:
- Measure around the fullest part of the head.
- Check the crown before starting the brim.
- Allow for the stretch of your crochet fabric.
- Keep children’s brims clear of their vision.
Measure the head instead of guessing from an age label. The Craft Yarn Council lists typical adult head circumferences of 21–23 inches (53–58.5 cm) for women and 22–24 inches (56–61 cm) for men; its child and tween ranges run from 18–20 inches and 20–22 inches respectively.
Those are reference ranges, not a substitute for the wearer’s actual measurement. Crochet fabric can stretch differently depending on fiber, stitch, and tension, so check the crown around the head before starting the brim.
If the hat is part of a Halloween costume, keep visibility and fire safety in mind too. The U.S. Consumer Product Safety Commission advises that costume hats and scarves should be secured so they cannot slip over a child’s eyes, and it recommends keeping costume materials away from flames; Health Canada similarly warns against oversized or dangling costume pieces near ignition sources.
Which 28 Crochet Witch Hat Ideas Are Worth Making?
The best crochet witch hat is the one that matches how you want to use it, from a structured Halloween costume hat to a soft slouchy design or tiny amigurumi accessory.
At a Glance:
- Choose classic shapes for traditional Halloween costumes.
- Try slouchy styles for a softer silhouette.
- Use chunky yarn when you want bold texture.
- Make mini versions for décor and amigurumi.
- Add color and appliqués for easy customization.
The best design depends on whether you want a wearable costume, a soft everyday statement hat, or a tiny Halloween decoration. These 28 variations all start from the same basic idea—a tapered crown plus a brim, but change the texture, point, color, or finishing details enough to feel completely different.
28 Crochet Witch Hat Ideas From Simple to Seriously Spooky
1. Classic Pointed Crochet Witch Hat: Why Is It the Best Place to Start?
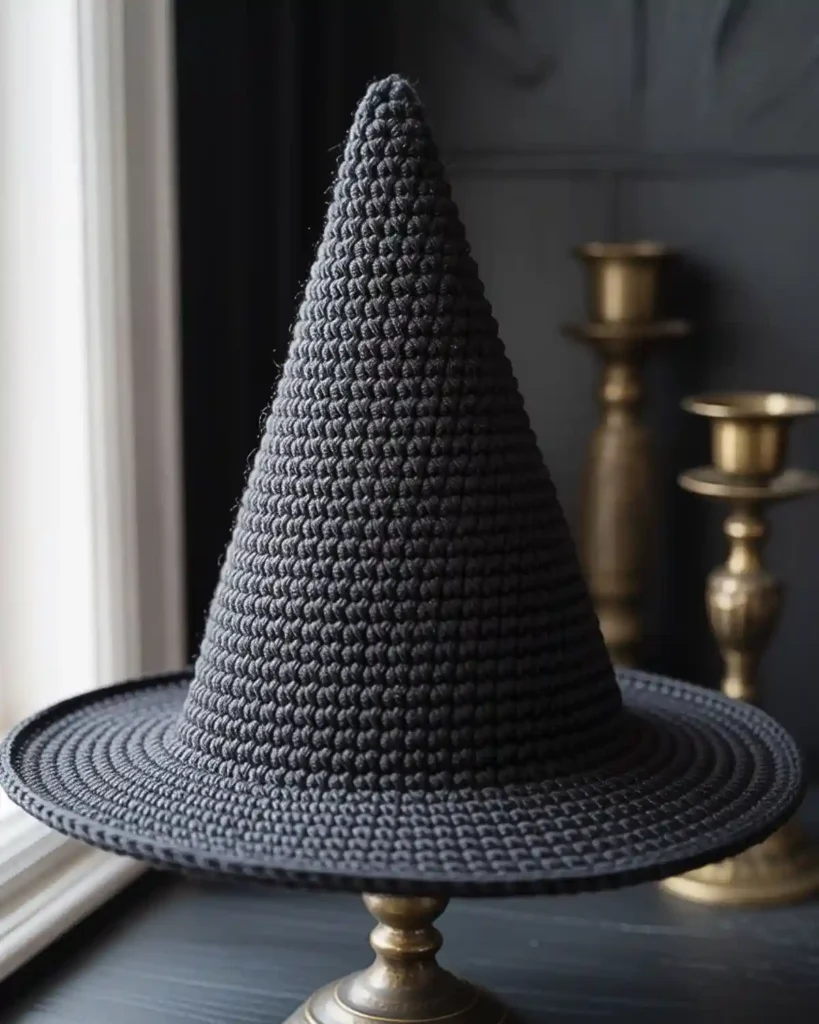
The classic pointed crochet witch hat gives you the silhouette everyone recognizes: a narrow cone, fitted crown, and wide circular brim. It beats an overly decorated design when you want the shape itself to do the work, especially in solid black or charcoal yarn. I would use this version for a first full-size Halloween hat because you can focus on increases and fit without juggling extra stitch patterns.
If you want one hat that works with almost any witch costume, this is the safest choice and the crisp point is its strongest feature.
Special Tip: Keep the cone increases gradual. Fast increases make the crown flare too soon and can turn the hat into more of a bucket shape.
2. Slouchy Witch Hat: How Do You Get That Bent Tip?
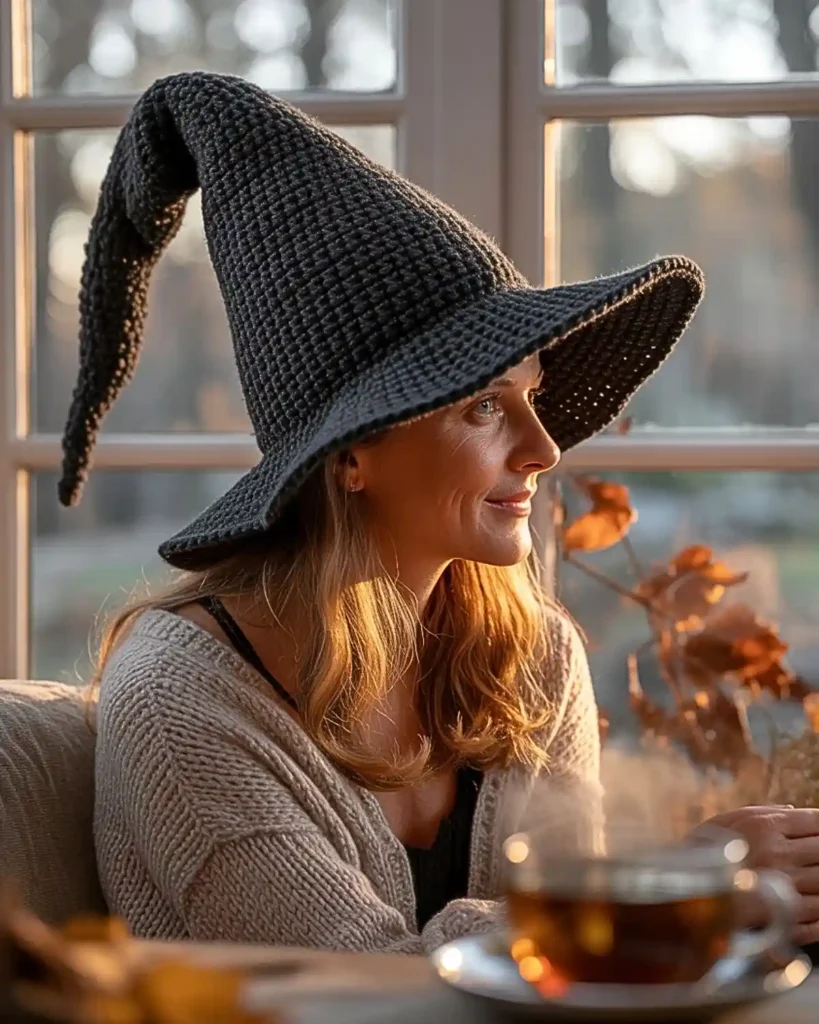
A slouchy witch hat looks instantly more whimsical because the cone is long enough to fold naturally to one side. Compared with a heavily structured point, this version feels softer, more relaxed, and easier to pack away after Halloween. It works especially well with medium-weight yarn and a slightly looser fabric that can bend without collapsing at the brim. If you searched for “Slouchy witch hat crochet pattern free,” this is the direction to try when you want movement rather than a rigid storybook point.
Let the final few inches of the cone stay light. You can even add a tiny tassel or charm at the tip to encourage the bend.
3. Beginner Single-Crochet Witch Hat: Can One Stitch Really Be Enough?
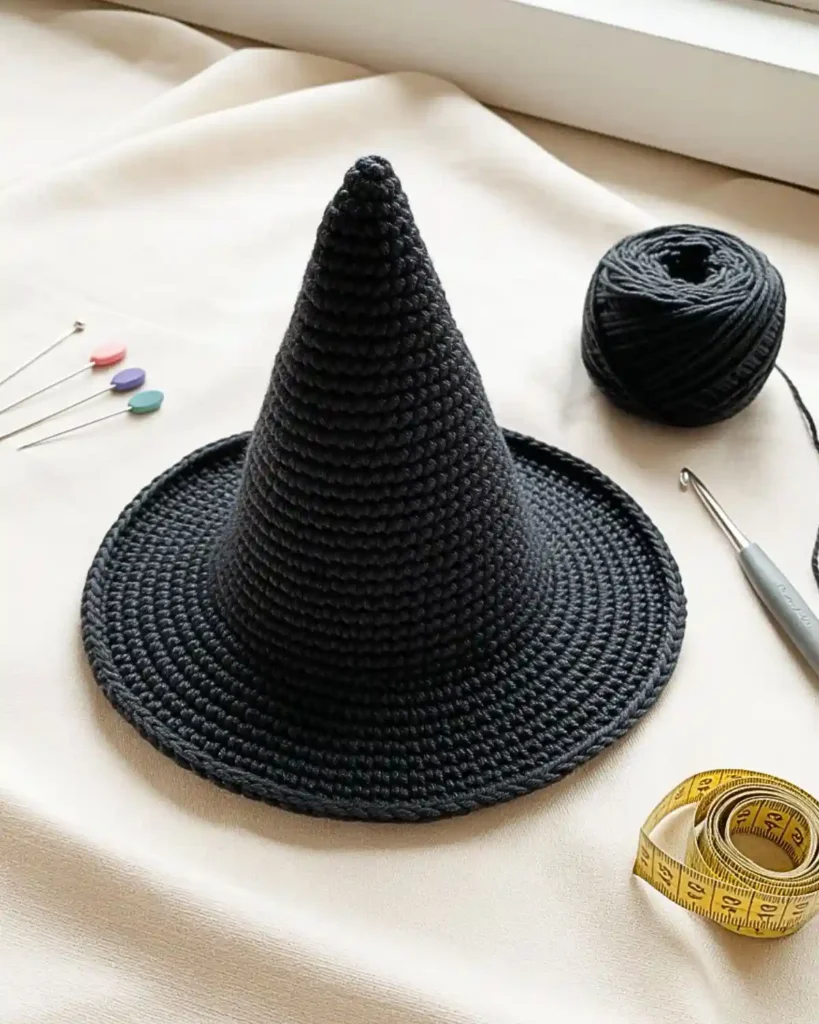
Yes, the beginner single-crochet version proves that a dramatic hat does not require fancy stitches. Single crochet creates a dense surface that is easier to shape than many open textures, so the finished cone can look cleaner than a more complicated stitch pattern. I like this approach for anyone already comfortable working in rounds and placing increases. If your goal is a Simple crochet witch hat Free pattern style, the best part is that nearly all the visual interest comes from the silhouette rather than difficult technique.
Use stitch markers generously, especially when the increases begin shifting around the crown.
4. Chunky Crochet Witch Hat: How Can You Make One Faster?
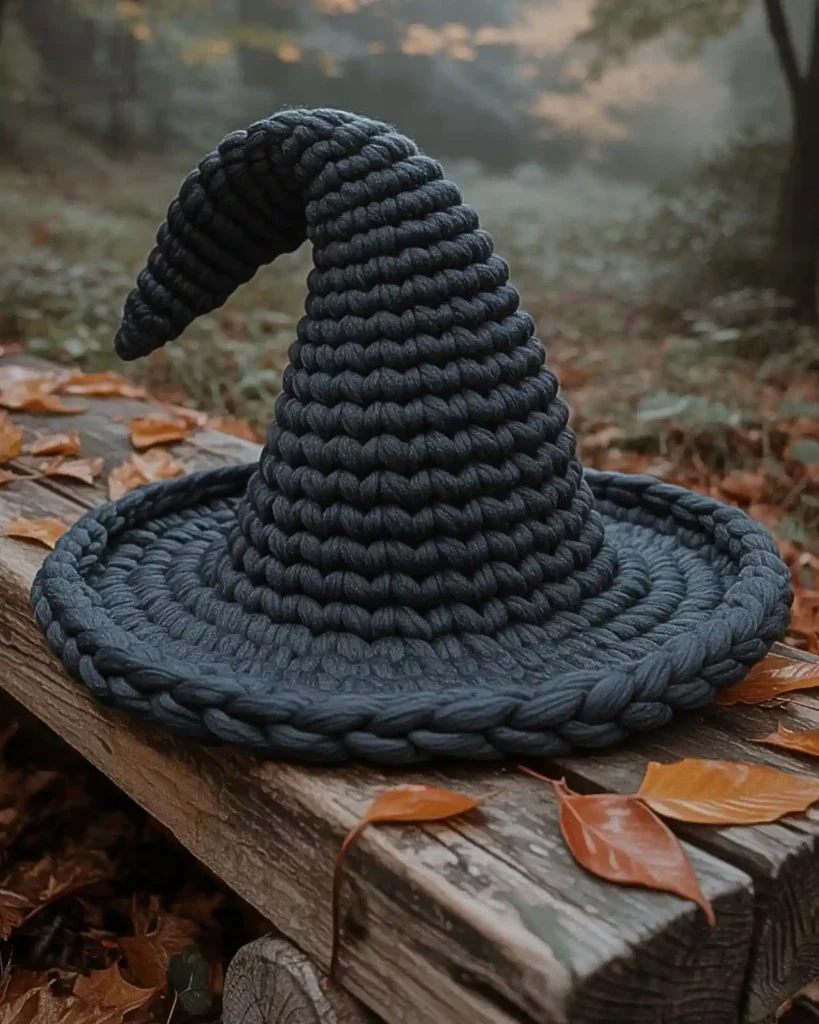
The chunky crochet witch hat swaps fine detail for bold texture and a much faster-growing fabric. A bulky or super-bulky yarn makes the hat feel more dramatic than a standard worsted version, especially when the brim is kept wide and simple. This is the one I would choose for a last-minute costume or an outdoor autumn photo where you want the stitches to show clearly. If speed matters more than delicate shaping, chunky yarn gives you the biggest visual payoff per round.
Because thick yarn can get heavy, keep checking whether the cone still stands the way you want before adding an oversized brim.
5. Tall Storybook Witch Hat: How High Should the Point Go?
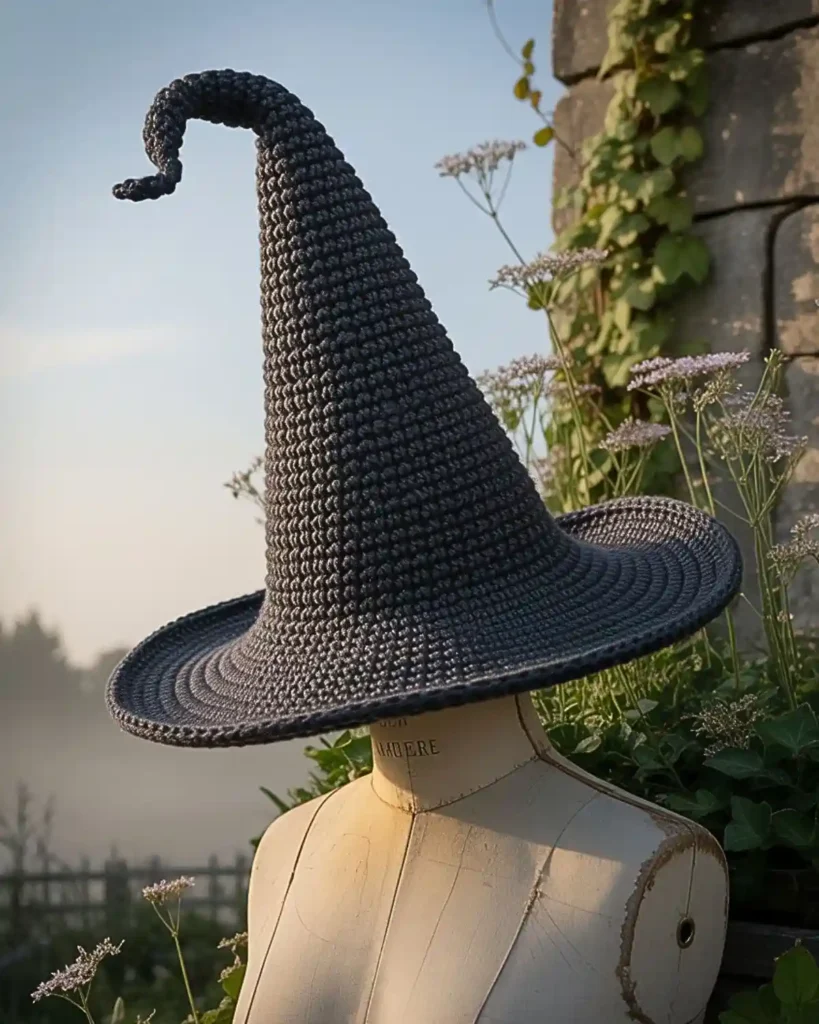
The tall storybook version stretches the cone well above the head for an exaggerated, theatrical look. It feels more magical than a short point because the extra height creates that old illustrated-fairytale silhouette. I would pair it with a simple brim and minimal decoration so the height remains the star. This style suits anyone who wants a costume that photographs dramatically, and its best feature is the unmistakable towering point.
For stability, use tighter tension through the lower crown and let the very top soften slightly.
6. Short-Brim Witch Hat: When Is Less Brim Better?
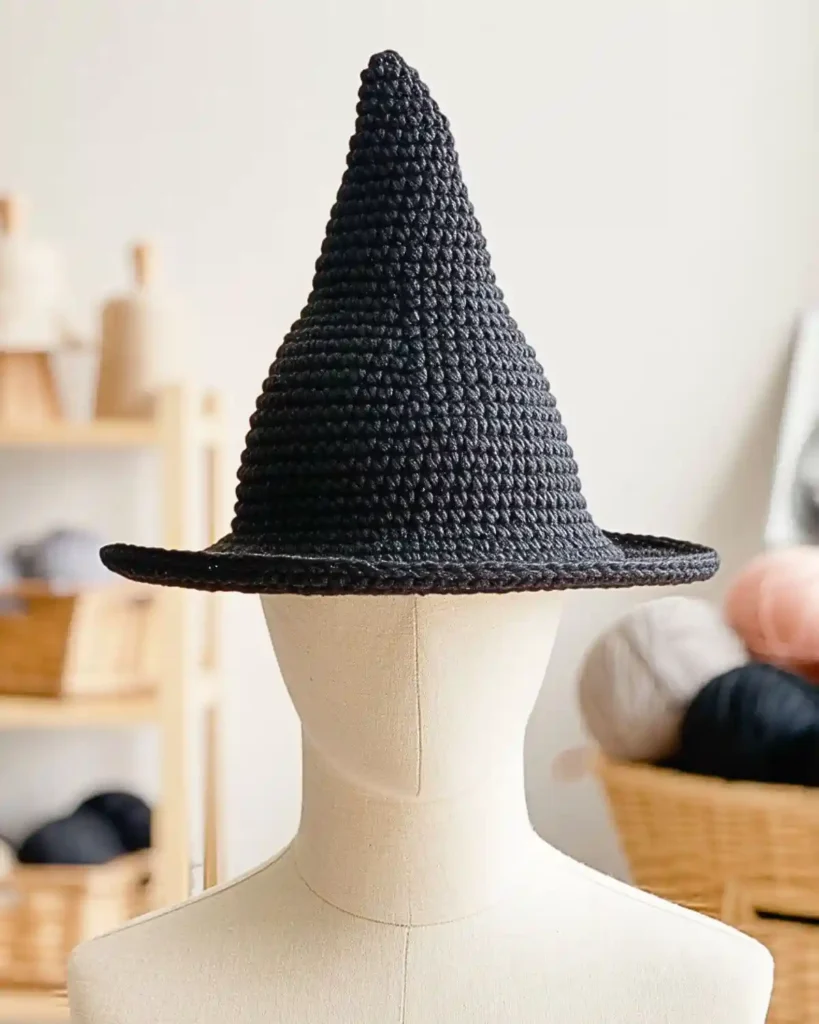
A short-brim witch hat is easier to wear in crowded parties, classrooms, or indoor events where a giant brim can become annoying. It is less theatrical than a wide-brim design, but that restraint makes the hat lighter and more practical. I like it for children’s costumes and for adults who want the witchy shape without constantly bumping into doorframes or other people. If comfort is the priority, the compact brim is the detail that makes this version work.
Keep the brim just wide enough to define the silhouette without blocking peripheral vision.
7. Wide-Brim Dramatic Witch Hat: How Do You Make It Feel Cinematic?
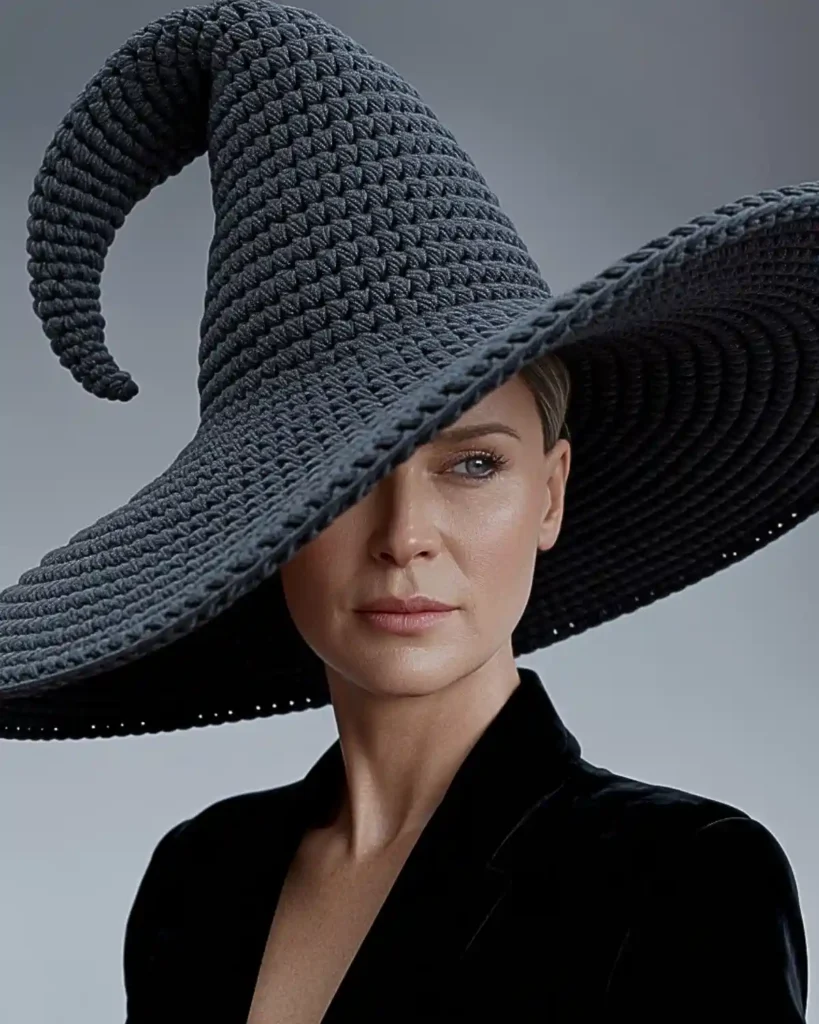
The wide-brim version creates drama before you add a single embellishment. Compared with a short brim, it frames the face more strongly and gives you extra surface for shaping, edging, or decorative bands. This is my pick for costume photos, themed parties, or a witch look built around a flowing dress or cape. If you want the hat to be the main accessory, nothing has more presence than a broad, slightly wavy brim.
A dense final round or reinforced edge helps stop an extra-wide brim from looking limp.
8. Wire-Edged Witch Hat: Is a Shapeable Brim Worth It?
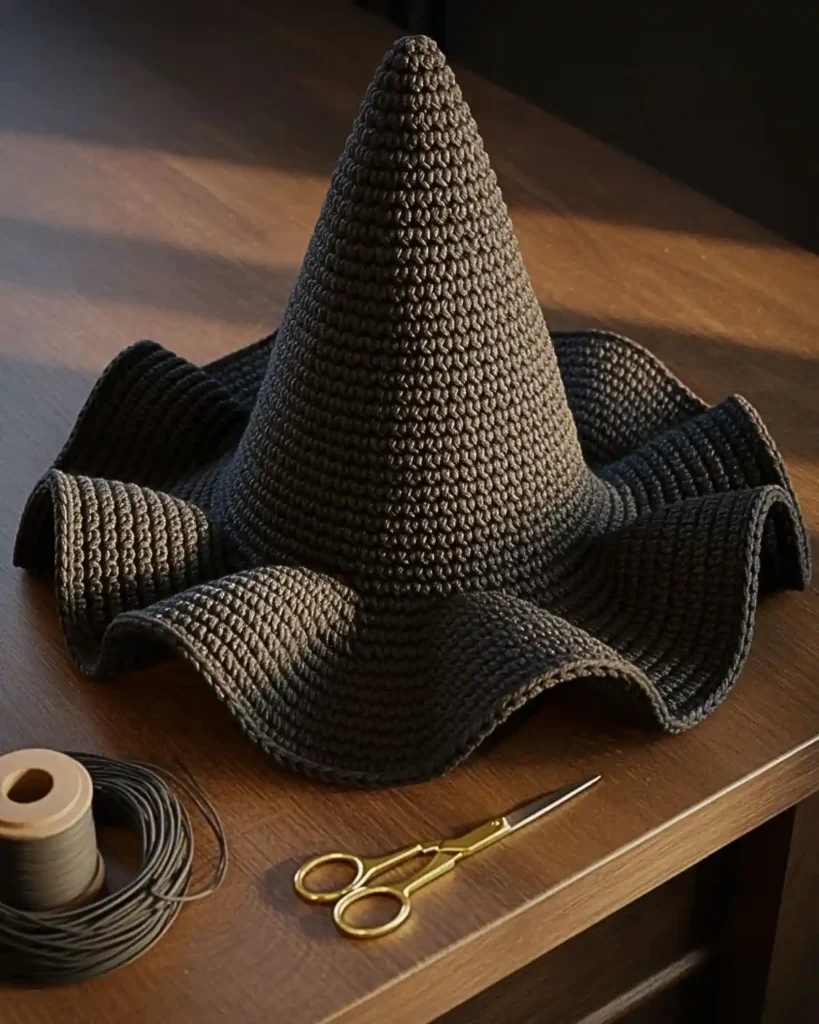
A wire-edged witch hat lets you curl, dip, or wave the brim exactly where you want it. That control beats a plain crochet edge when you are after an asymmetrical, high-fashion, or stage-ready silhouette. I would use it for an adult costume that needs to hold a specific shape through photos or an event. If you enjoy sculpting the final look after the crochet is finished, the adjustable brim is the real advantage.
Special Tip: Cover and secure any wire ends carefully so no sharp edge can work through the stitches. For children’s costumes, a soft, flexible construction is the safer direction.
9. Spiral Cone Witch Hat: How Do You Add Movement Without Extra Decorations?
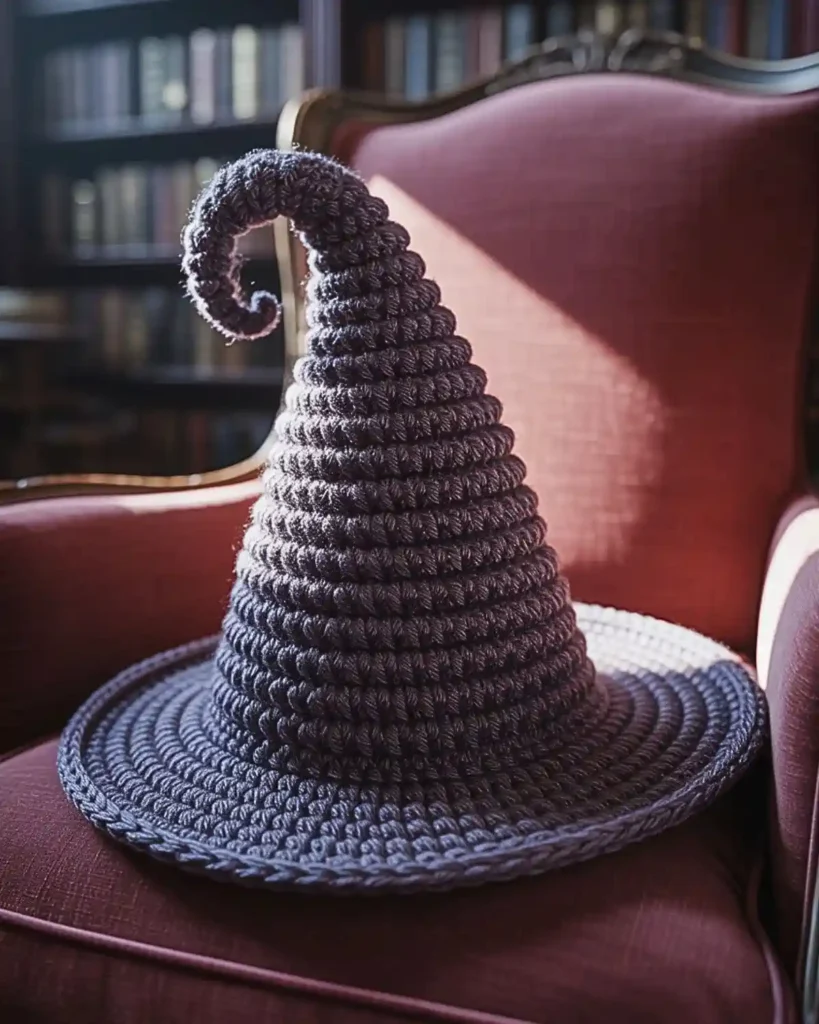
A spiral cone witch hat creates visual motion by shifting increases or using a subtle textured line that winds upward. It looks more playful than a perfectly straight cone, even in one solid color. I like this style when the costume is quirky, woodland-inspired, or intentionally imperfect. If you want the hat to feel handmade in the best possible way, the twisting point gives it personality without adding bulk.
Use a contrasting stitch marker so you can see where each round begins while you shape the spiral.
10. Ribbed Crochet Witch Hat: Can Texture Make the Hat Look More Expensive?
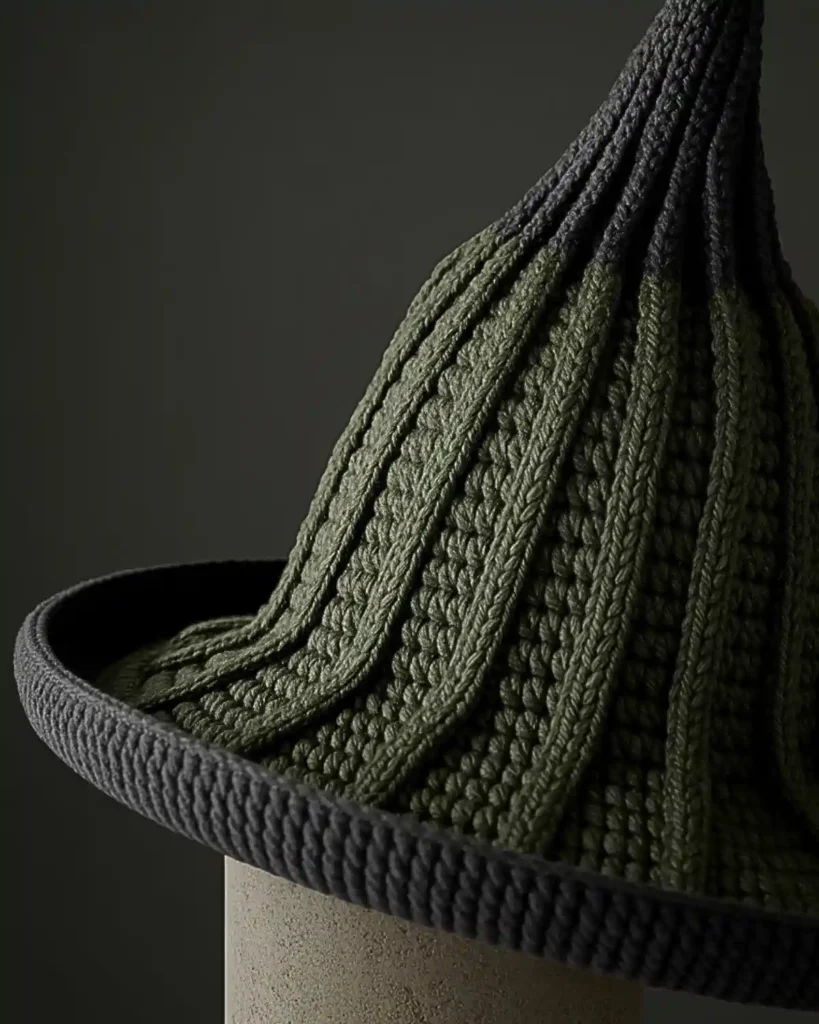
Ribbing gives a crochet witch hat a strong vertical texture that can make a simple shape look more intentional. Unlike flat single crochet, raised ribs catch light and shadow, which is especially effective in black, deep purple, or forest green. I would choose this for a modern witch costume where you want texture instead of appliqués or glitter. If you prefer subtle detail, the ribbed surface is the element that makes this design stand out.
Try front-post stitches or strategically placed back-loop rounds to create dimension without changing the overall silhouette too much.
11. Striped Witch Hat: Which Color Pairing Works Best?
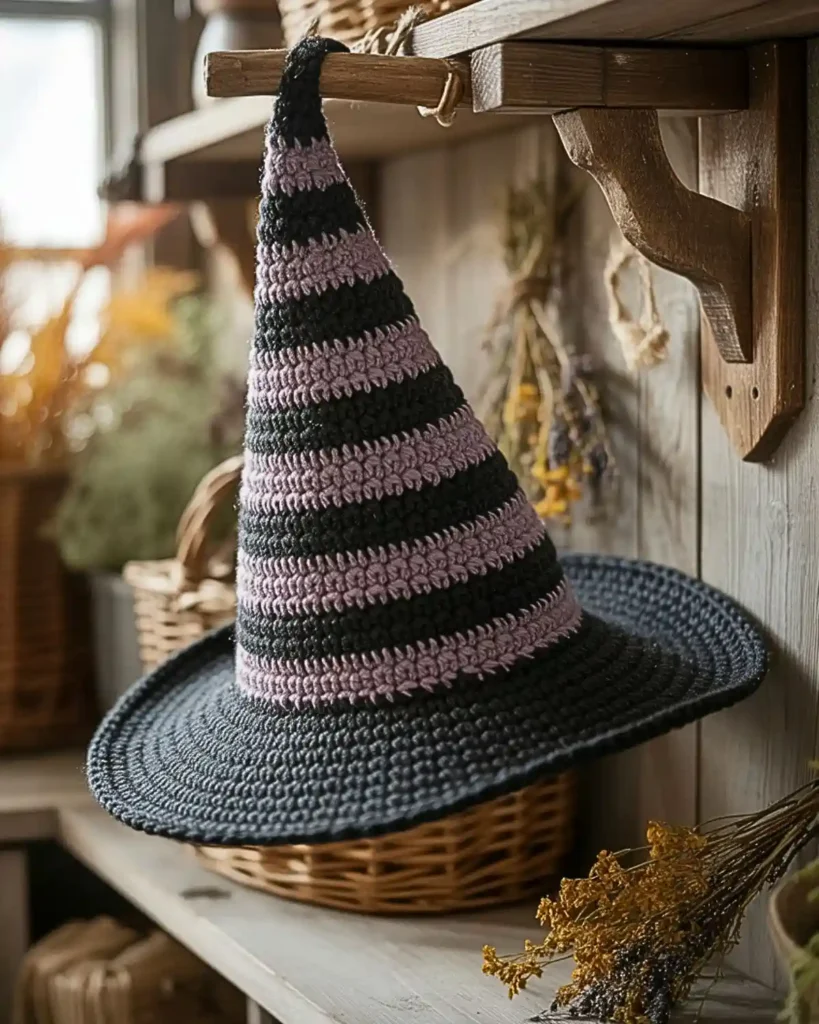
A striped witch hat is one of the easiest ways to make the shape feel fun instead of severe. Black with purple feels classic, black with orange goes full Halloween, and cream with muted brown can lean toward a softer cottage-witch mood. I would use narrow stripes on the cone and keep the brim solid so the design does not become visually busy. If color is your favorite part of crochet, this version gives you the most freedom with very little extra technique.
Carry colors neatly or fasten off carefully so the inside of the cone stays comfortable.
12. Color-Block Brim Witch Hat: How Can One Color Change Transform the Design?
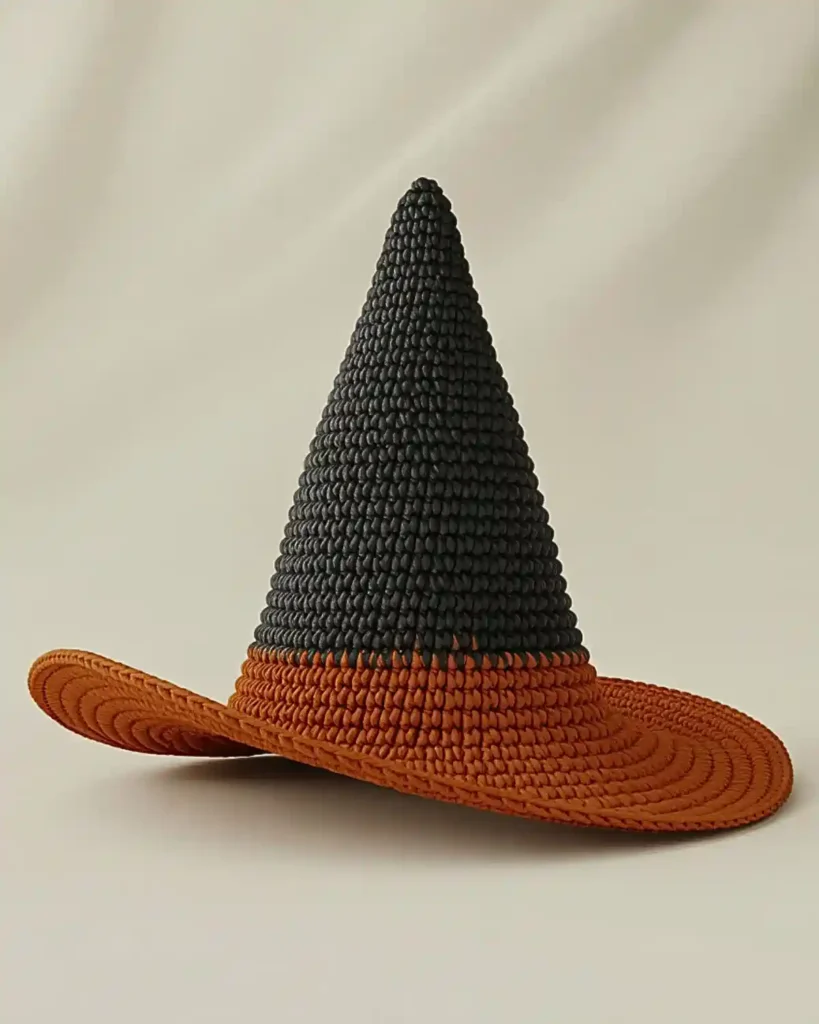
A contrasting brim makes a basic hat look styled rather than unfinished. Instead of changing colors throughout the cone, you keep the crown simple and switch only when the brim begins, which creates a clean graphic break. I like black with burnt orange, deep plum with black, or moss green with brown for a more natural palette. If you want a quick upgrade without learning a new stitch, the color-block brim does the job immediately.
Add a narrow band in the brim color around the base of the cone to make the contrast feel deliberate.
13. Purple-and-Black Witch Hat: Why Does This Combination Always Read “Witchy”?
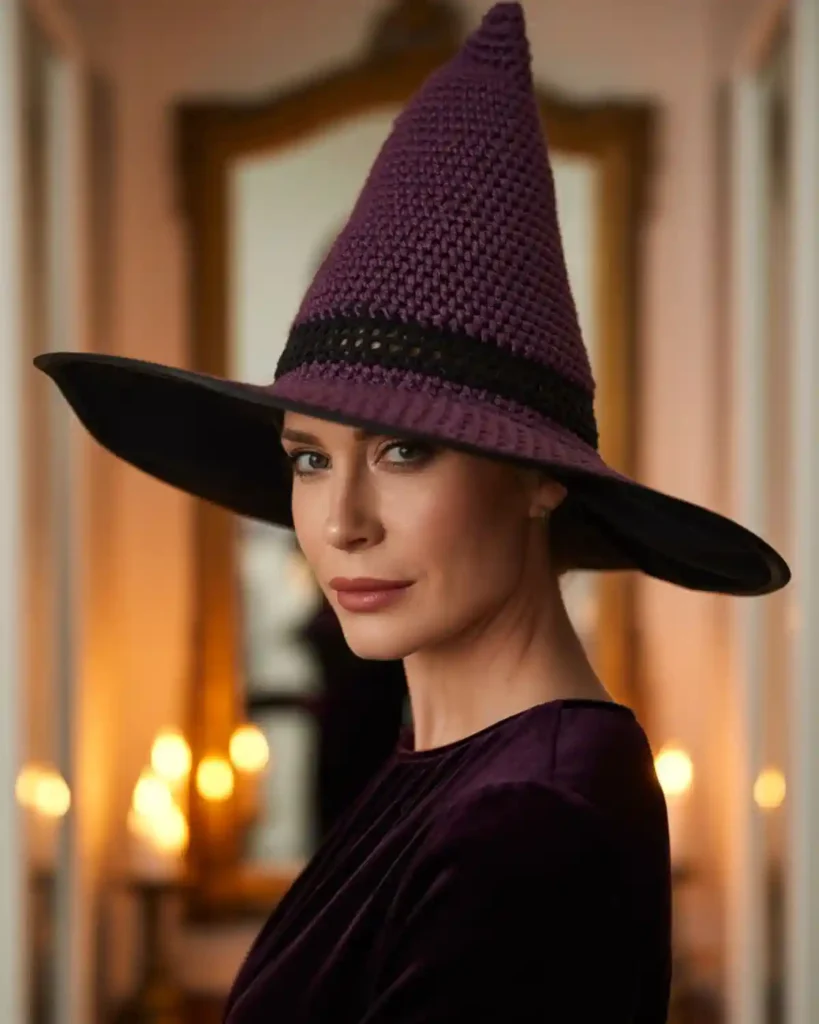
Purple and black deliver a recognizable magical look without relying on novelty decorations. The combination feels richer than plain black but still keeps the hat dark enough for a traditional Halloween costume. I would use deep violet for the crown and black for the brim, then repeat violet in a narrow band or buckle detail. If you want color without losing the classic witch mood, this pairing is one of the easiest wins.
A matte yarn gives the colors a moody finish, while a subtle metallic strand can push the look more fantasy-inspired.
14. Orange-and-Black Halloween Hat: How Do You Keep It From Looking Too Busy?
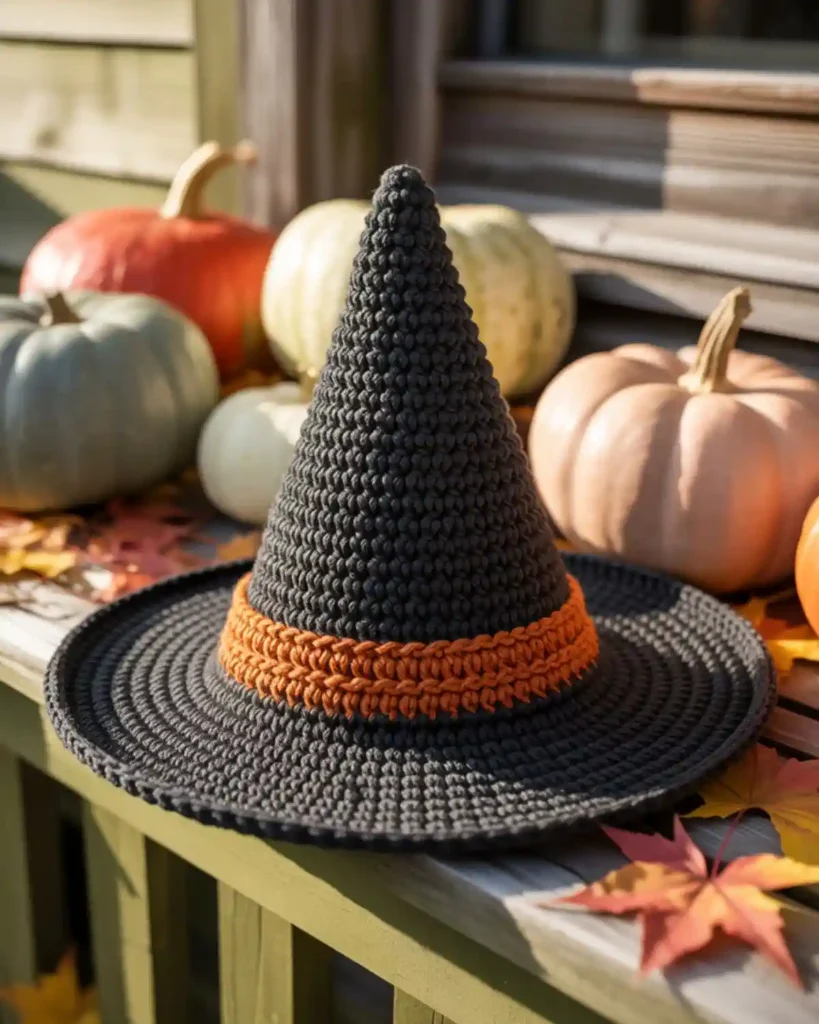
Orange and black can become loud quickly, so the trick is to let one color dominate. A black cone with an orange band or two narrow orange stripes feels cleaner than alternating every round. I would make this for a Halloween party, porch-photo session, or matching family costume where the color theme matters. If you want unmistakable seasonal energy, the bright accent is the best part but restraint keeps it polished.
Use pumpkin, rust, or burnt orange if neon orange feels too sharp for your palette.
15. Pastel Witch Hat: Can a Witch Hat Be Soft and Cute?
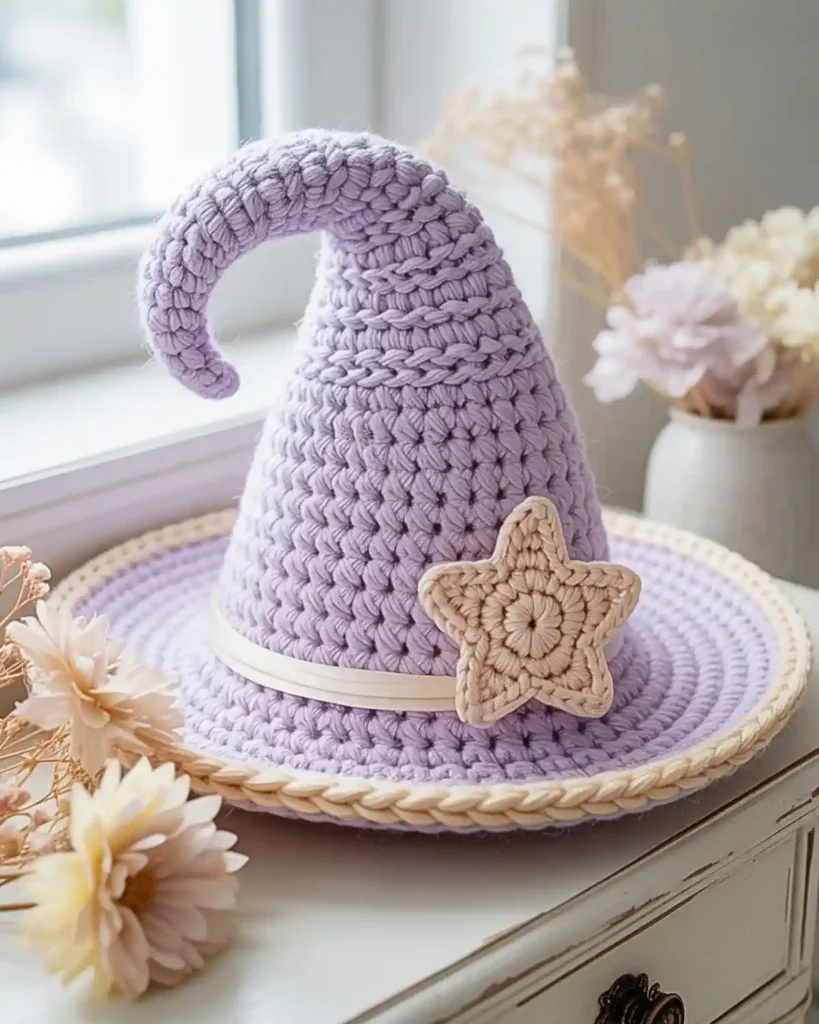
A pastel witch hat replaces the usual dark palette with lavender, blush, mint, cream, or dusty blue. It feels more whimsical than spooky, which makes it perfect for fairy-witch costumes, playful photo shoots, or pastel Halloween décor. I would keep the shape traditional so the unexpected color remains the main surprise. If you love cute seasonal projects more than scary ones, the gentle palette is what makes this idea worth trying.
A small satin-style crochet bow or star appliqué pairs nicely with the softer color story.
16. Cottage Witch Hat: How Do You Make It Feel Earthy?
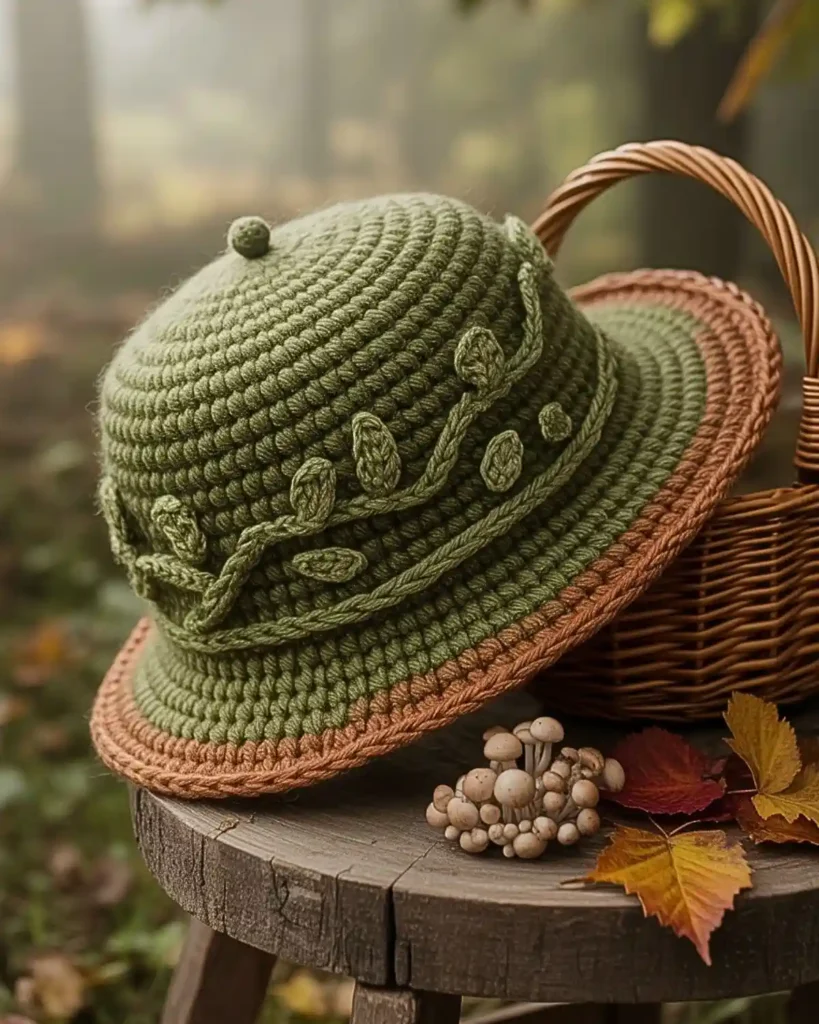
The cottage witch hat leans into moss, bark, mushroom, oatmeal, and muted berry shades instead of Halloween black. That natural palette makes the same pointed silhouette feel warmer and more wearable, especially with textured yarn. I would add a simple crocheted vine, leaf, or tiny mushroom detail around the band rather than a shiny buckle. If your style is more woodland than haunted house, the earthy finishing is the feature that sets this hat apart.
Keep embellishments lightweight so they do not pull the cone out of shape.
17. Star-Appliqué Witch Hat: Where Should the Stars Go?
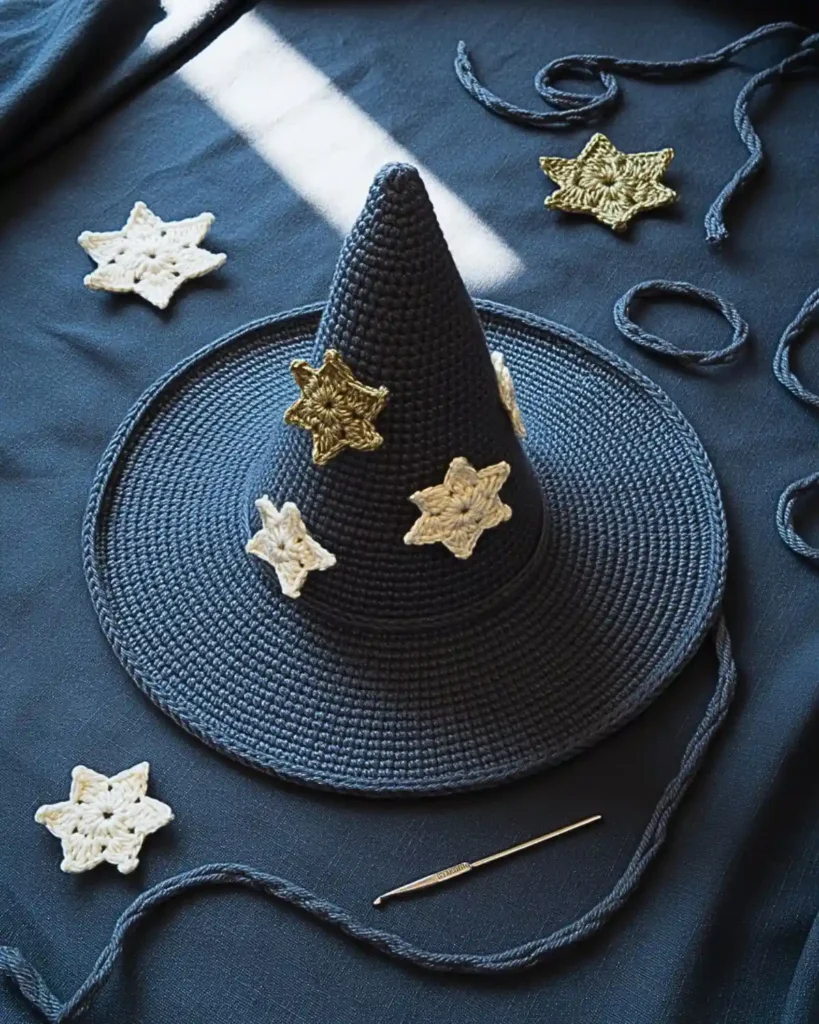
Small crocheted stars can turn a plain hat into a celestial witch design in minutes. Scattering a few stars asymmetrically looks more handmade and interesting than covering the entire cone in a repeated grid. I like placing one larger star near the band and two or three smaller ones climbing toward the point. If you want a magical theme without changing the base construction, appliqués are the quickest payoff.
Use leftover yarn in cream, gold, silver-gray, or lavender so this also becomes a good scrap-yarn project. For more decorative variations, these crochet stars can give you extra appliqué inspiration.
18. Moon-and-Stars Witch Hat: How Do You Create a Night-Sky Theme?
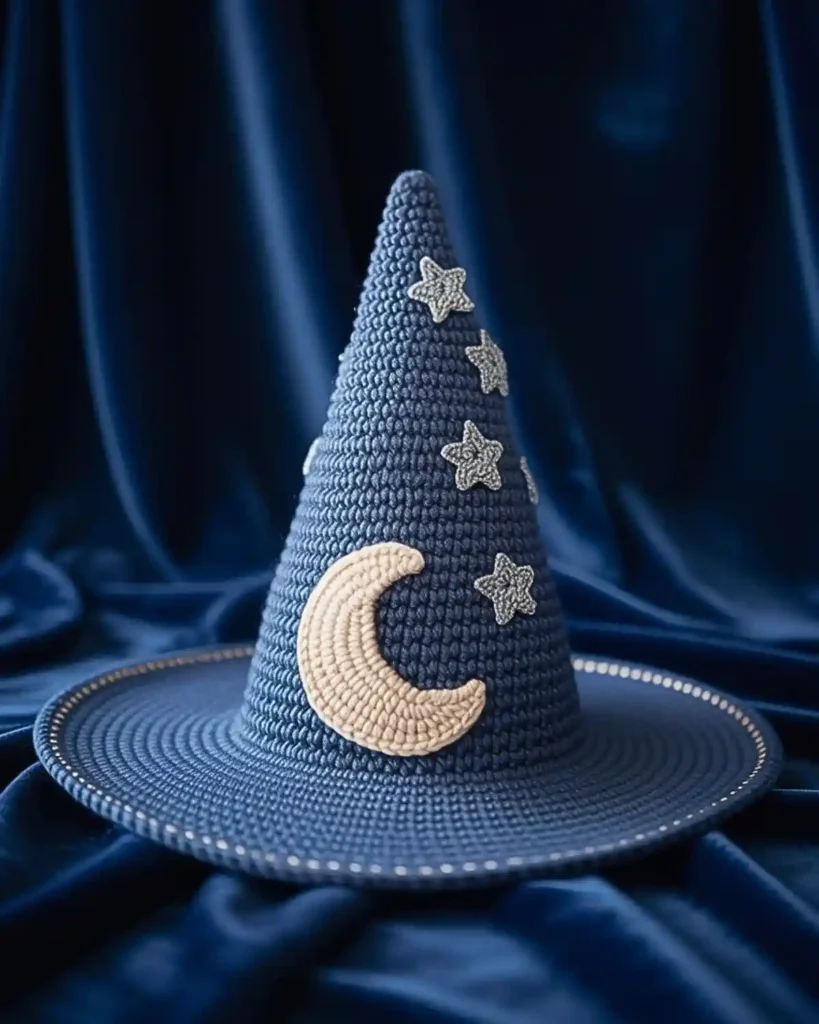
A crescent moon paired with tiny stars gives the hat a clear night-sky identity. It feels more storybook than a standard Halloween band because the decoration tells a theme rather than simply adding color. I would place the moon slightly off-center near the crown base, where it stays visible without competing with the point. If you are building a celestial witch costume, the crescent is the single detail that ties everything together.
For cleaner appliqués, make them separately, block them flat, and sew them on only after the main hat is finished.
19. Spiderweb Brim Witch Hat: Can the Brim Become the Decoration?
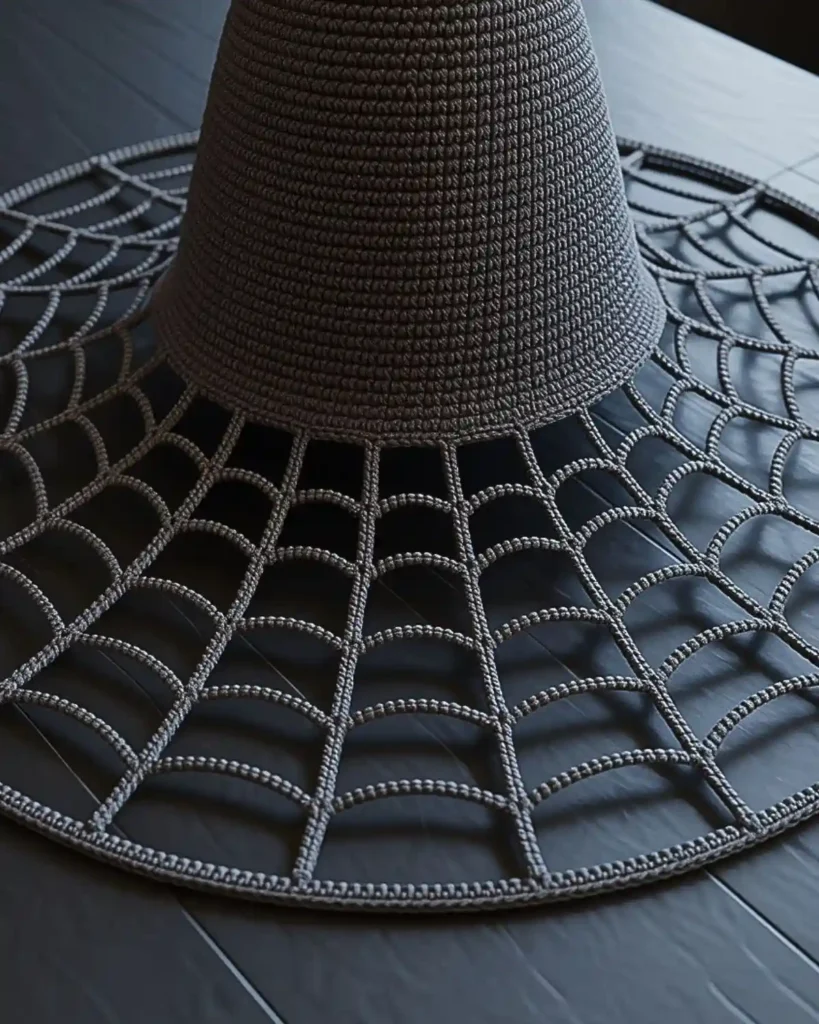
A spiderweb-inspired brim uses open spaces, surface crochet, or contrasting lines to turn the widest part of the hat into the focal point. That approach feels more integrated than attaching a plastic spider or premade decoration afterward. I would keep the crown solid black so the web pattern has room to show. If you like detailed Halloween crochet, these crochet spider web ideas offer even more ways to play with the theme.
Avoid making the openwork too loose at the outer edge or the brim may lose the strong shape you want.
20. Buckle-Band Witch Hat: What Makes the Classic Detail Work?
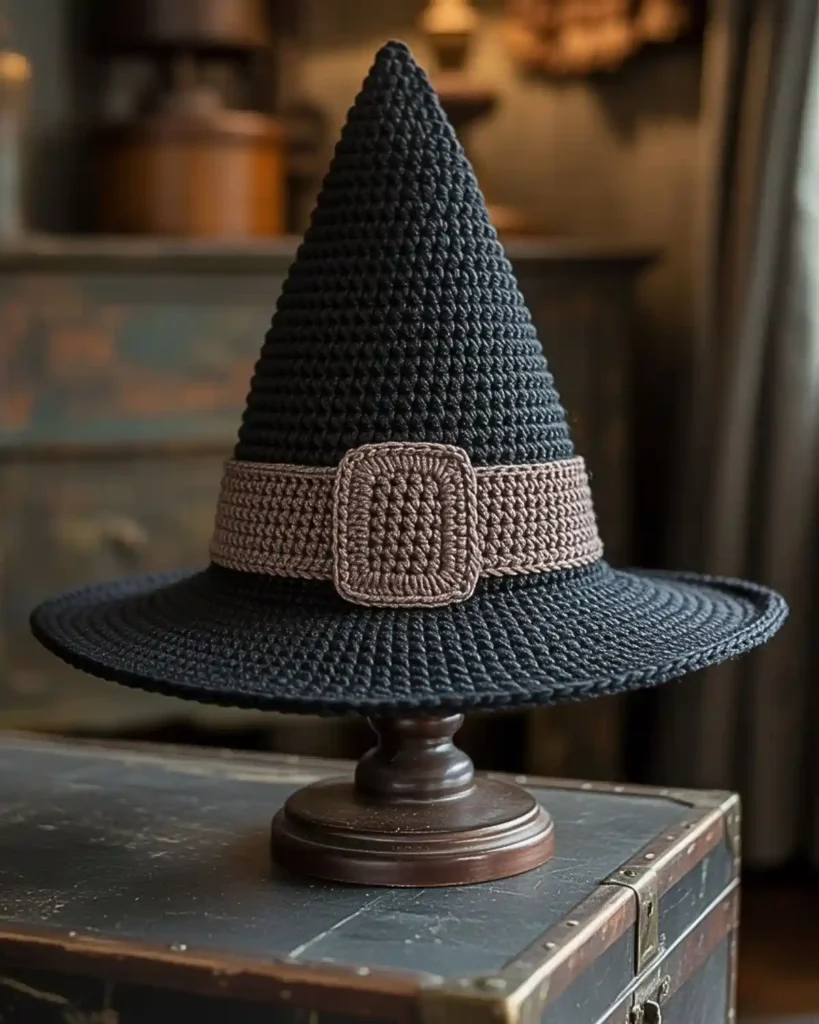
A crochet buckle band gives the hat a familiar old-fashioned witch look without requiring any change to the crown. Compared with a plain band, a contrasting buckle adds a clear focal point right above the brim. I would use a gold, mustard, gray, or cream rectangle over a black or brown band for enough contrast to show in photos. If you want traditional character with minimal extra work, the buckle is the detail that delivers it.
Crochet the buckle separately and stitch it down at several points so it does not flop forward.
21. Velvet-Look Witch Hat: Is Plush Yarn a Good Choice?
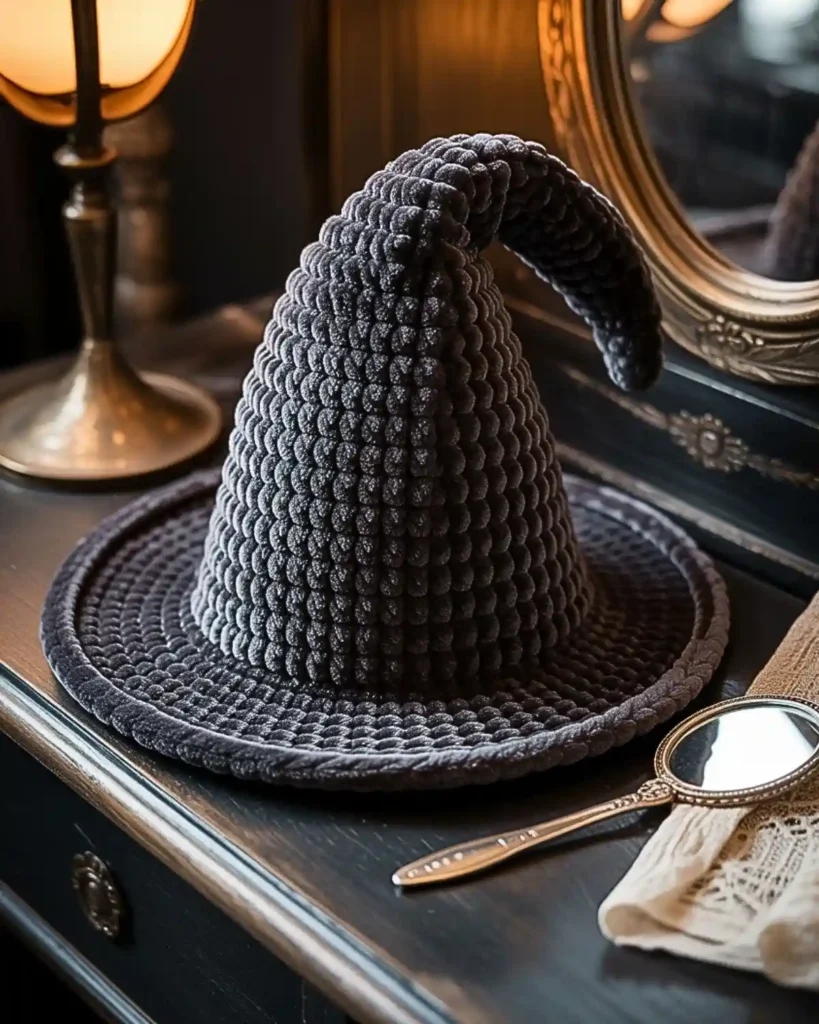
A velvet-look witch hat can feel rich, soft, and almost costume-shop luxurious when the yarn has a smooth plush finish. It looks very different from crisp worsted cotton or acrylic because the stitches blend into a soft surface. I would use it for a shorter cone or a relaxed slouchy shape rather than expecting a very tall point to stand on its own. If tactile softness matters most, the plush finish is what makes this version memorable.
Make a generous swatch first because fuzzy yarn can hide stitch definition and make increases harder to see.
22. Ombre Witch Hat: How Can One Yarn Create the Whole Color Story?
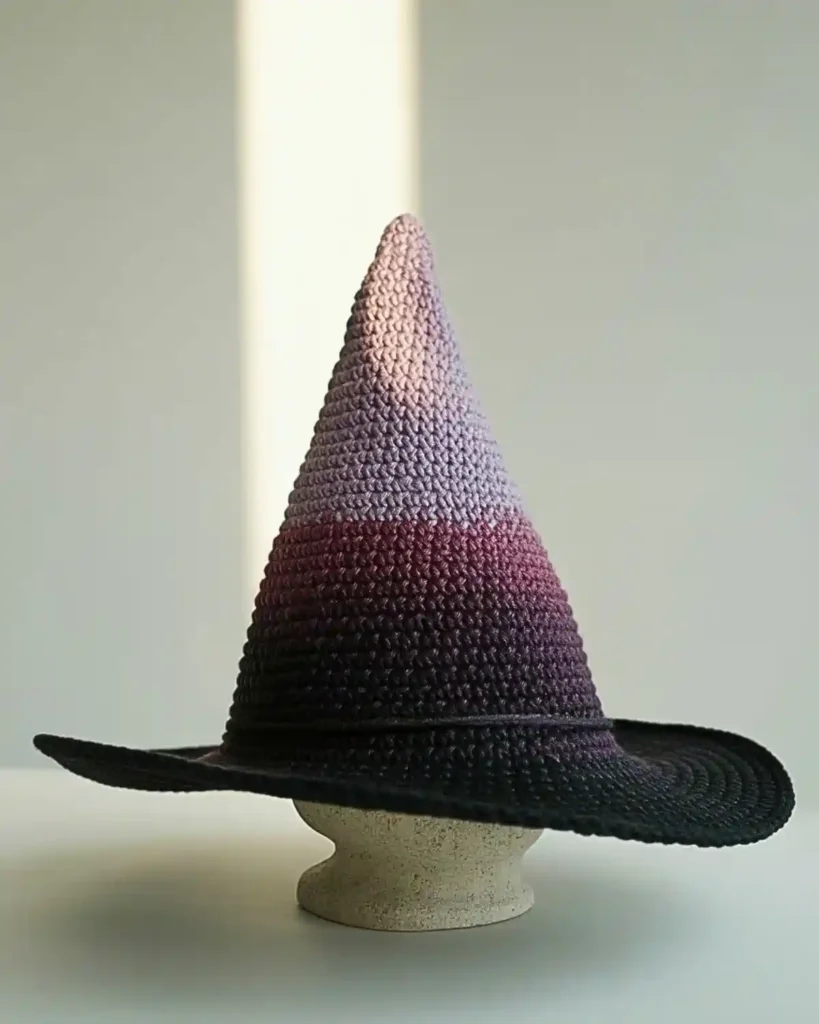
An ombre witch hat lets the yarn do the decorating as the cone shifts gradually from one shade to another. It is cleaner than manually changing colors every few rounds, and the long vertical shape gives a gradient plenty of room to develop. I would choose a cake or gradient yarn with dark purple, gray, teal, or orange tones and keep the brim in the darkest section. If you want visual complexity without weaving in many ends, the gradual color change is the best feature.
Check where the color transitions fall before starting so the most interesting shade does not disappear into the very tip.
23. Foldable Travel Witch Hat: Can You Make One Easy to Pack?
A foldable witch hat is intentionally soft enough to roll or flatten without a permanent stiffener in the cone. It is more practical than a wired or heavily reinforced version when you need to carry a costume in a suitcase or tote. I would use medium-weight yarn, a flexible brim, and a slouchy point that looks good even after being folded. If storage matters as much as appearance, this version wins because it can bounce back with a little reshaping.
Pack it with tissue or soft clothing inside the cone if you want to protect the basic form during travel.
24. Child-Sized Crochet Witch Hat: What Should You Prioritize First?
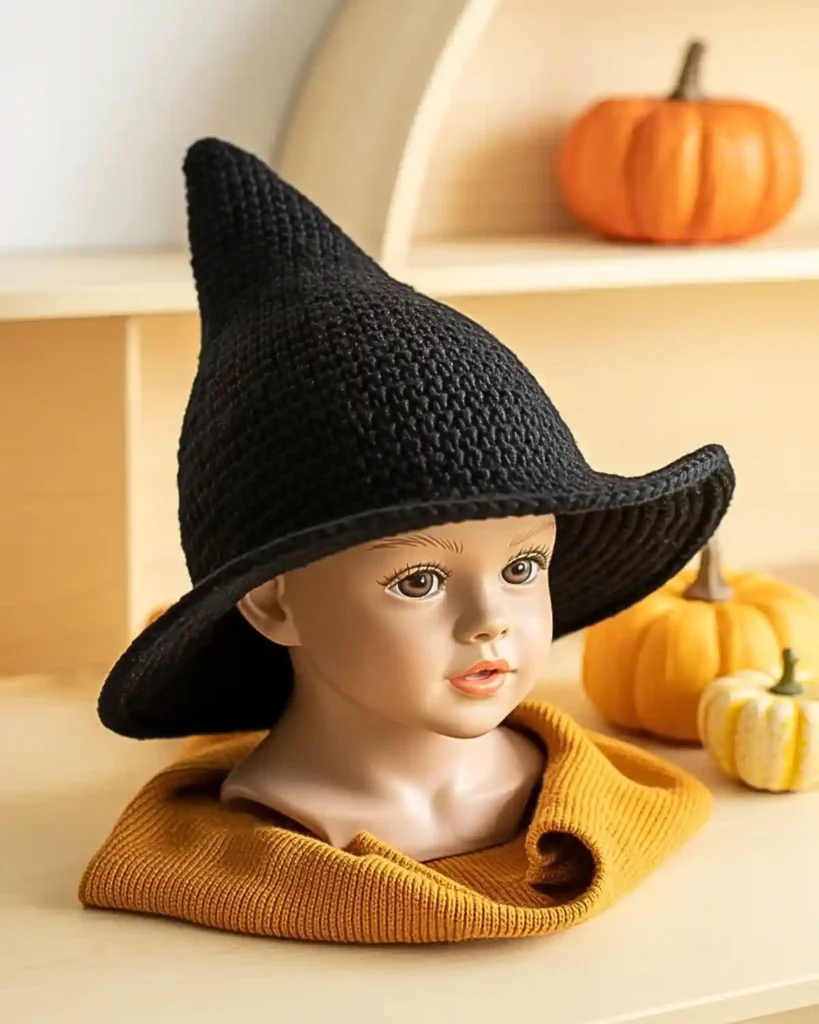
A child-sized witch hat should start with fit, comfort, and visibility before extra decoration. It beats an oversized dramatic version when the wearer needs to walk, play, or trick-or-treat without the brim sliding into the eyes. I would measure the child’s head directly, keep the brim manageable, and avoid long dangling trims. If you are making a costume hat for a child, a secure comfortable fit is the most important feature, and CPSC specifically recommends securing hats so they do not obstruct vision.
For reference, the Craft Yarn Council lists child head circumference at 18–20 inches and tween at 20–22 inches, but actual measurement should still guide your project.
25. Crochet Witch Hat Amigurumi: How Small Can You Go?
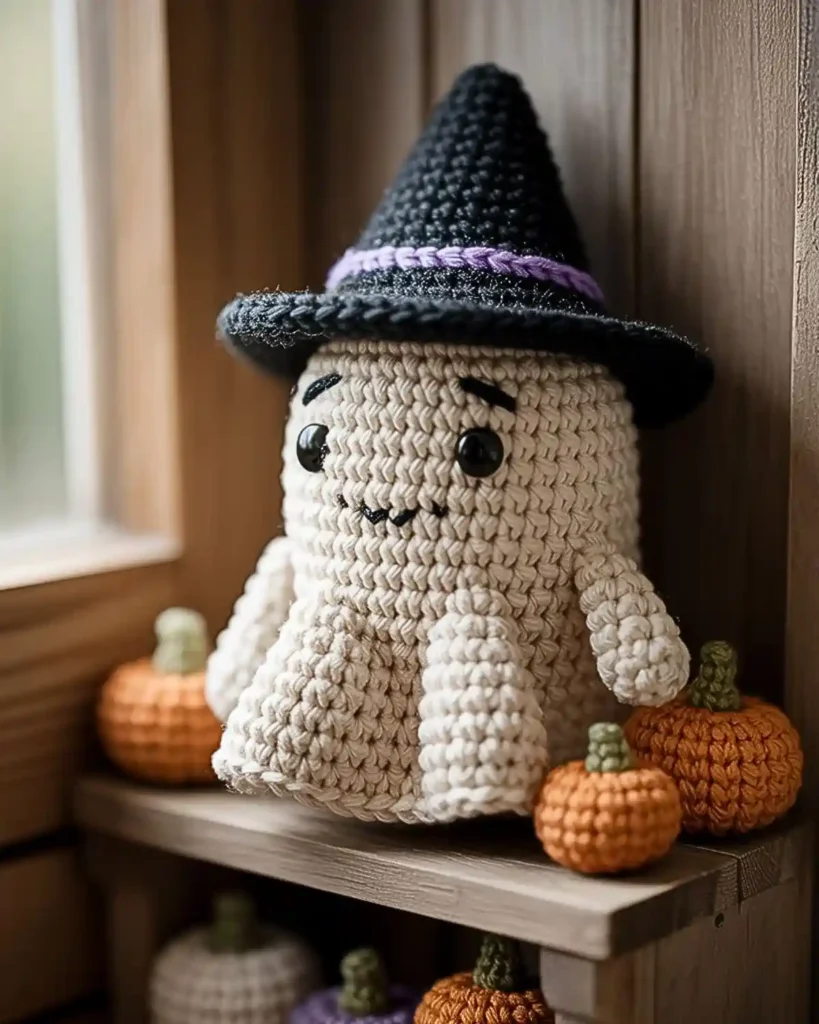
Crochet witch hat amigurumi projects are tiny hats made to sit on plush witches, ghosts, cats, pumpkins, or dolls. They are faster and use less yarn than a wearable version, but the small scale actually makes clean stitch placement more noticeable. I like making the cone first, then adding a sharply increased brim and a contrasting band so the hat reads clearly even at miniature size. If you love seasonal amigurumi, these free amigurumi crochet patterns can give you more projects to pair with your tiny witch hats.
Use a smaller hook relative to your yarn if you want a dense miniature fabric with minimal gaps.
26. Mini Witch Hat Ornament: How Can You Use Scrap Yarn?
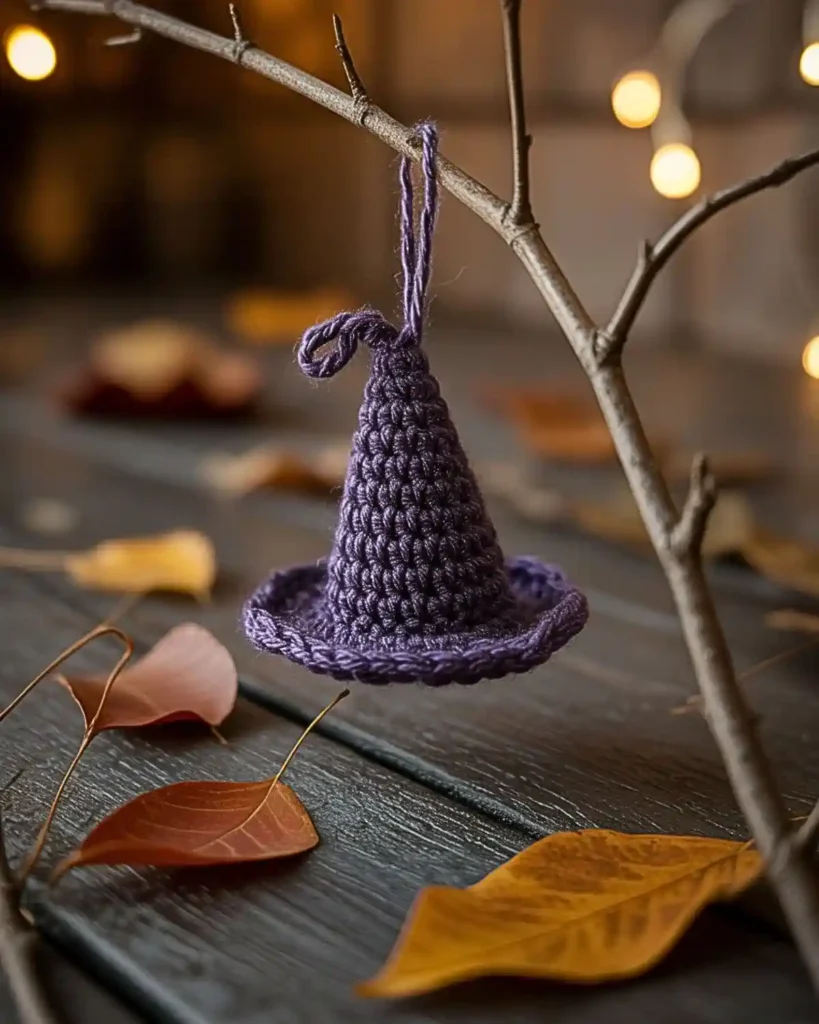
A mini ornament hat turns leftover yarn into something you can hang from a tree branch, garland, cabinet knob, or gift bag. It is more versatile than a full amigurumi hat because it does not need to fit a toy or person. I would add a small loop at the top and keep the brim compact so it hangs neatly instead of tipping forward. If you have a basket full of Halloween-colored scraps, the low yarn commitment is the biggest reason to make several.
Mix colors across the set rather than forcing every ornament to match exactly.
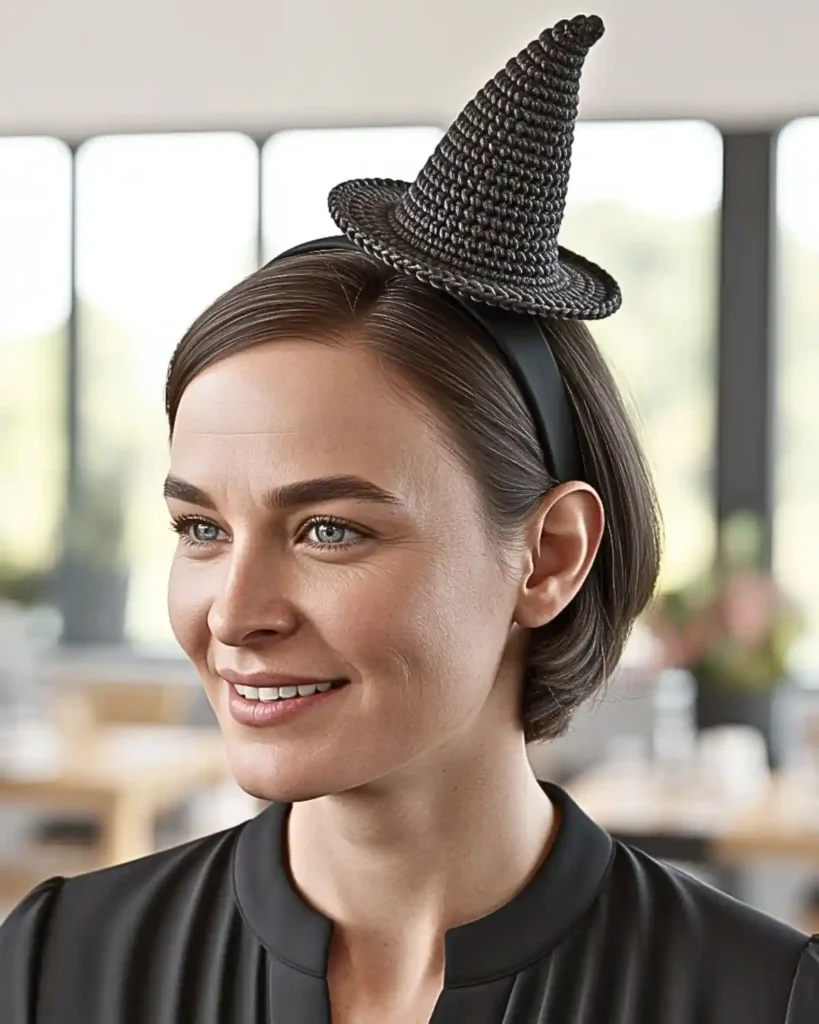
27. Witch Hat Headband: Why Make a Tiny Wearable Version?
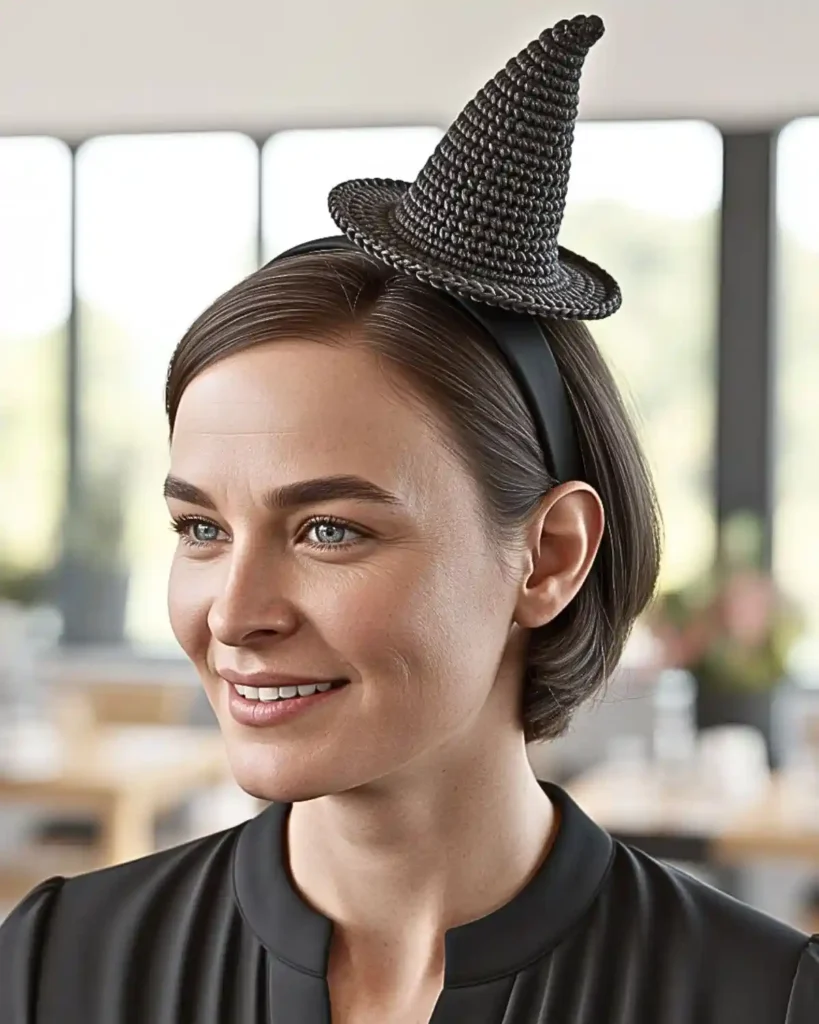
A witch hat headband gives you the Halloween silhouette without committing to a full-size crown. It is lighter than a traditional hat and works well for parties, work events, school days, or anyone who wants a subtle costume accessory. I would crochet a firm mini hat, attach it slightly off-center to a comfortable headband, and angle the point for a playful look. If you want something easy to wear for hours, the small scale is its biggest advantage.
Keep the mini brim proportionate; too wide and the hat can twist the headband forward.
28. Matching Full-Size and Mini Witch Hats: Who Is This Set For?
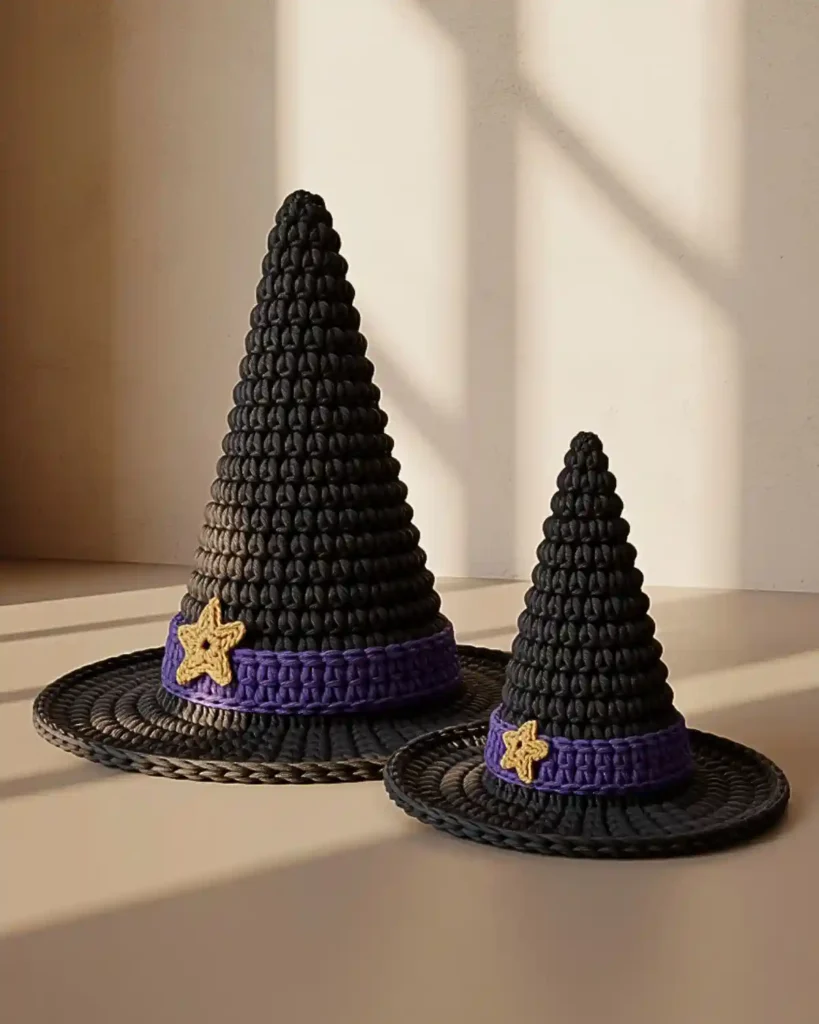
A matching set pairs one wearable witch hat with a miniature version for a doll, amigurumi, pet-safe prop, bag charm, or decoration. It feels more thoughtful than making two unrelated Halloween projects because the same colors and band details connect them instantly. I would repeat one unmistakable feature, perhaps a purple stripe, gold buckle, or tiny star across both sizes. If you enjoy coordinated seasonal crochet, the best payoff is seeing the same design language work at two completely different scales.
For animals, treat the miniature hat as a supervised photo prop only if it can be used safely and comfortably; do not attach tight ties or leave accessories unattended.
What Should a Free crochet witch hat pattern Include?
A useful Free crochet witch hat pattern should give you enough information to reproduce the intended fit and shape, including yarn, hook, gauge, measurements, abbreviations, construction, and brim instructions.
At a Glance:
- Check the listed yarn weight.
- Match the pattern gauge before starting.
- Confirm the intended finished head measurement.
- Follow crown and brim increases carefully.
- Review abbreviations before crocheting.
A useful Free crochet witch hat pattern should clearly state yarn weight, hook size, gauge, head measurement, abbreviations, how rounds are joined or worked continuously, and where the cone transitions into the brim. That information prevents the two most common frustrations: a crown that does not fit and a brim that behaves differently from the sample.
The Craft Yarn Council also recommends relying on millimeter hook sizing because letter and number labels can vary among manufacturers, and it advises making a gauge swatch and changing hook size if the swatch does not match the pattern.
For a simple construction plan, think in four stages:
- Start with a small ring and build a narrow point.
- Increase gradually until the cone approaches the required head circumference.
- Work even rounds as needed to refine fit and height.
- Increase more aggressively at the base to create the brim, then finish or reinforce the edge.
That is the basic architecture behind many witch-hat designs, but exact stitch counts should come from a tested pattern or your own swatched calculations.
How Do You Choose Between a Structured and Slouchy Witch Hat?
Choose a structured witch hat for a crisp point and defined brim, or choose a slouchy hat when you want the cone to bend and drape naturally.
At a Glance:
- Structured hats need denser fabric.
- Slouchy hats benefit from more drape.
- Taller cones may need additional support.
- Gauge affects both fit and flexibility.
Choose structured when you want a tall point, crisp brim, and strong costume silhouette. Choose slouchy when you want the cone to bend, fold, or look intentionally relaxed.
The yarn and gauge should support that choice. Dense worsted, bulky, or feltable wool-blend fabrics can support firmer shapes, while a softer gauge creates more drape; the Craft Yarn Council’s weight system is useful for understanding the broad differences between medium, bulky, and super-bulky yarn categories, but your pattern’s gauge remains the deciding measurement.
What Are the Easiest Ways to Customize a Crochet Witch Hat?
The easiest customizations are changes that leave the fit untouched, such as color, bands, buckles, appliqués, surface crochet, and small decorative details.
At a Glance:
- Change colors without changing construction.
- Add a contrasting crochet band.
- Sew on stars, moons, or leaves.
- Adjust brim width after mastering the base.
- Experiment with cone height as confidence grows.
Start with changes that do not alter the fit: color, bands, buckles, appliqués, surface crochet, and small embellishments. Once you are comfortable with the basic construction, experiment with cone length, brim width, spiral increases, ribbing, and different yarn weights. You can also learn how to make your own crochet pattern when you are ready to design the shape from scratch.
On CrochetMind, this is the approach worth keeping: build a dependable base shape first, then make the personality obvious with one or two strong details rather than adding everything at once.
Frequently Asked Questions About Crochet Witch Hats
Is a crochet witch hat hard for beginners?
A basic version can be beginner-friendly if you are comfortable with single crochet, increases, stitch markers, and working in rounds. The main challenge is maintaining gauge while shaping a long cone.
What yarn is best for a crochet witch hat?
Worsted weight is a practical starting point because it balances stitch definition, speed, and structure. Bulky yarn works well for quicker, chunkier hats, while softer yarns are better for slouchy designs.
How do I make a crochet witch hat stand up?
Use a dense gauge, gradual increases, and a yarn with enough body for the height of the cone. For an especially dramatic brim, reinforcement can help, but any wire or stiff material must be fully covered and securely finished.
Can I make a crochet witch hat without wire?
Yes. Many hats rely only on tight stitches, appropriate yarn, and careful shaping, especially when the brim is moderate rather than extremely wide.
What is the easiest mini version to make?
A tiny single-crochet cone with a sharply increased brim is a good starting point. It works well for ornaments, dolls, garlands, and Crochet witch hat amigurumi projects.
Final Thoughts
A crochet witch hat is one of those projects that can be as simple or as creative as you want it to be. You can keep things classic with a tall black point and wide brim or experiment with slouchy shapes, chunky yarn, celestial appliqués, bold colors, and tiny amigurumi versions.
If you are making your first one, start with a simple shape and focus on getting the gauge, crown fit, and brim right. Once you understand the basic construction, it becomes much easier to customize the height, texture, colors, and decorations.
Whether you choose a dramatic Halloween hat or a cute mini version, the best part is making it feel personal. Save your favorite crochet witch hat idea and use it as inspiration for your next spooky-season crochet project.

![The Best 30+ Free Crochet Cat Patterns [Beginner-Friendly Guide]](https://crochetmind.com/wp-content/uploads/2025/04/1-The-Best-30-Free-Crochet-Cat-Patterns-Beginner-Friendly-Guide.webp)