Clay figures are one of those crafts that can be as simple or detailed as you want. You can make tiny animals, miniature food characters, people, plants, fantasy creatures, or little desk companions using air-dry clay or polymer clay, and most beginner-friendly designs start with basic balls, ovals, coils, and flattened shapes.
If you are looking for clay figure ideas that feel achievable rather than intimidating, start small. Mini clay figures are easier to finish, use less material, and give you plenty of room to experiment with expressions, colors, textures, and accessories without committing to a huge sculpture.
Key Takeaways
- Start with mini clay figures using simple shapes.
- Choose clay based on drying or curing needs.
- Keep delicate parts thick enough for easier handling.
- Use oversized details to strengthen cute clay figures.
- Follow manufacturer instructions before painting or sealing.
What Are the Best Clay Figure Ideas for Beginners?
The best beginner clay figure ideas use a few basic shapes, minimal fragile details, and simple expressions that are easy to sculpt and adjust.
At a Glance:
- Begin with frogs, mushrooms, cats, or simple food characters.
- Build figures from balls, ovals, coils, and flattened shapes.
- Keep the first project small and uncomplicated.
- Add detailed faces only after mastering basic forms.
The easiest clay figure ideas are designs built from a few recognizable shapes. Think frogs with round bodies, mushrooms with dome caps, cats with triangle ears, or tiny people made from a head, torso, and simple limbs.
You do not need advanced sculpting tools to begin. A toothpick, craft knife, small rolling pin, soft brush, and a smooth work surface can take you surprisingly far.
For beginners, I would pick a design with fewer than six main parts and save the ultra-detailed faces for later. There is something very satisfying about finishing a tiny figure in one sitting and actually liking how it turned out.
| Clay figure idea | Difficulty | Best for | Main shapes |
|---|---|---|---|
| Tiny frog | Very easy | First project | Balls, ovals |
| Mini mushroom | Very easy | Cute desk decor | Dome, stem |
| Chubby cat | Easy | Animal lovers | Oval, triangles |
| Tiny bear | Easy | Gifts and charms | Balls, cylinders |
| Mini person | Moderate | Character practice | Ball, torso, limbs |
| Little dragon | Moderate | Fantasy themes | Ovals, cones |
| Food character | Easy | Kawaii collections | Rounded food shapes |
| Mini plant buddy | Easy | Desk decor | Pot, leaves, face |
Which Clay Should You Use for Small Clay Figures?
Air-dry clay is convenient for no-bake projects, while polymer clay can work well when you want small details and an oven-cured finish.
At a Glance:
- Use air-dry clay for simple room-temperature drying.
- Consider polymer clay for detailed miniature designs.
- Check the exact instructions for your chosen product.
- Match the material to your figure’s size and details.
Air-dry clay and polymer clay can both work well, but they behave differently. Air-dry clay hardens at room temperature, while oven-hardening polymer clay needs to be cured according to the manufacturer’s instructions. If you choose polymer clay, our How to Bake Polymer Clay guide covers the curing process in more detail.
For a concrete example, Crayola says its Air-Dry Clay generally takes about 24 hours to become dry to the touch and about 72 hours to dry completely, though thickness and environmental conditions can change the timing. STAEDTLER, meanwhile, specifies 110°C for 30 minutes for several FIMO Soft oven-hardening products, which is a good reminder that curing instructions should come from the exact clay brand you are using rather than a generic rule.
If I were making lots of small clay figures with tiny ears, horns, tails, or accessories, I would usually choose a clay that holds detail well and suits the way I want to cure the finished piece. For soft, handmade-looking figures, air-dry clay can be especially approachable.
What Basic Tools Do You Actually Need?
You can keep your first setup simple:
- Clay in a few colors, or one neutral clay you plan to paint
- A smooth tile, mat, or protected tabletop
- Toothpicks or a simple sculpting tool
- A small blade or craft knife used carefully
- Acrylic paint and a fine brush if you want painted details
- A soft brush or fingertip for smoothing
- Manufacturer-recommended varnish or finish if your project needs one
When buying art materials, especially for children, check the safety labeling rather than assuming every craft product is identical. The U.S. Consumer Product Safety Commission says art materials are subject to chronic-hazard review and should carry a statement of conformance to ASTM D-4236 when practicable. The Art and Creative Materials Institute also explains that its AP Seal identifies products evaluated by a toxicologist and intended to be non-injurious when used as directed.
25 Clay Figure Ideas to Make
Start with simple animals, food characters, plants, or stylized people, then gradually add accessories, textures, expressions, and miniature scenes as your sculpting confidence grows.
At a Glance:
- Try simple animals for your first figures.
- Turn food shapes into expressive characters.
- Add props to create miniature stories.
- Experiment with people after practicing basic forms.
- Build collections around colors or themes.
25 Clay Figure Ideas That Are Cute, Easy, and Fun to Make
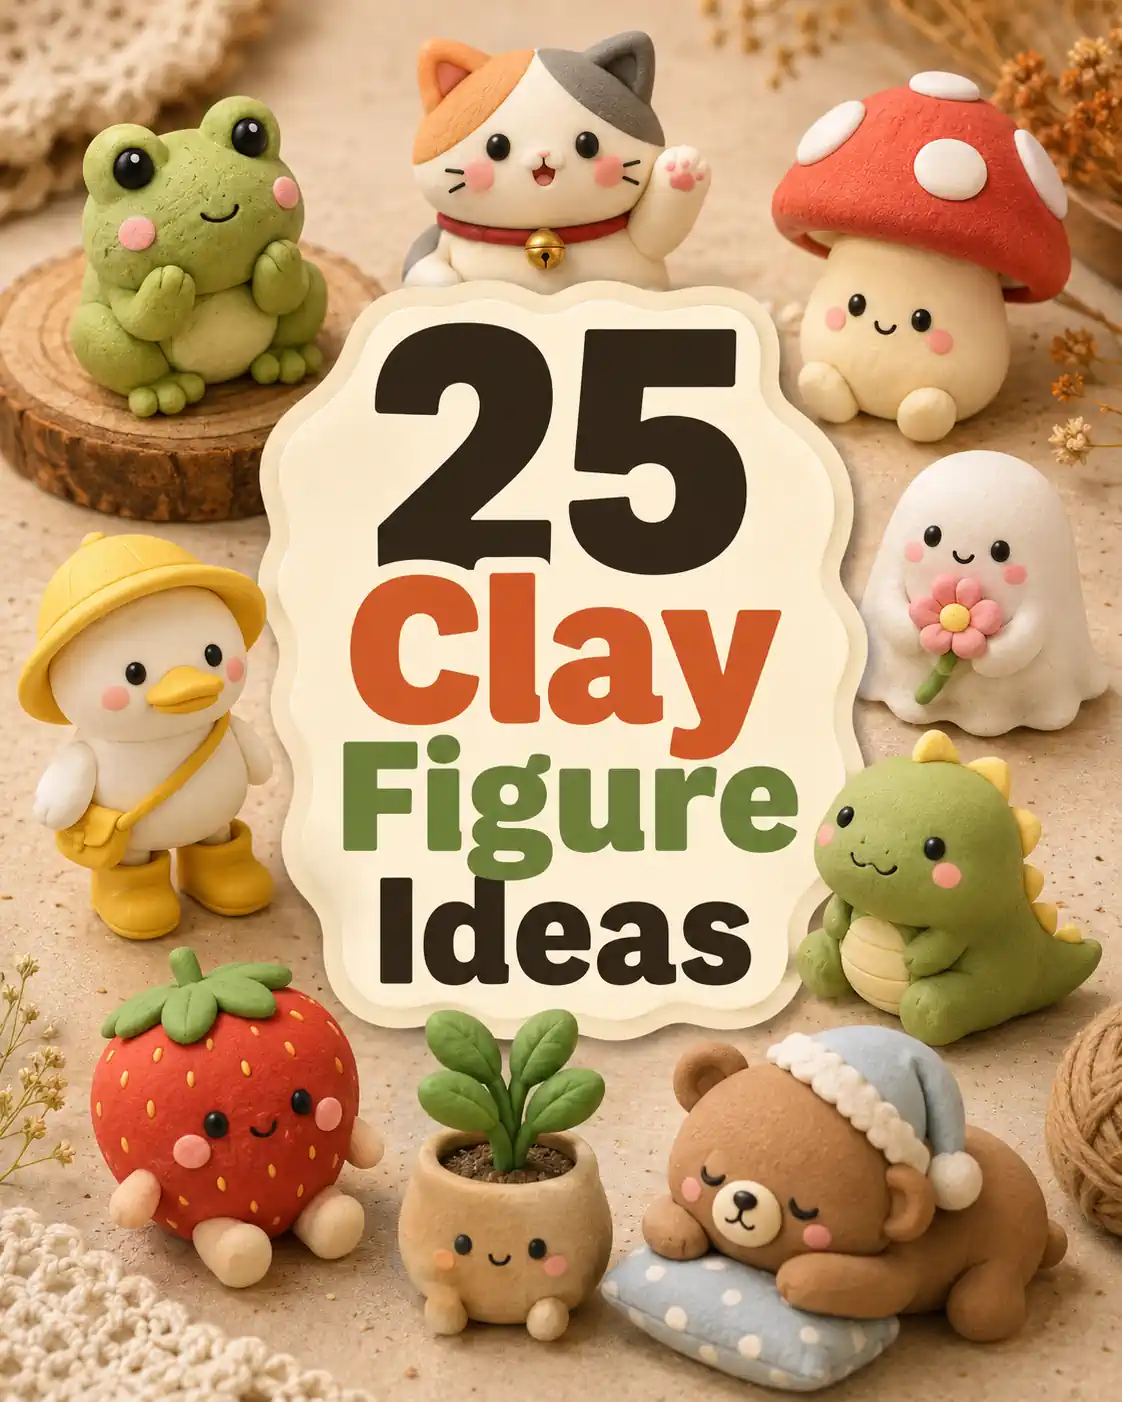
1. Tiny Frog With Blushing Cheeks
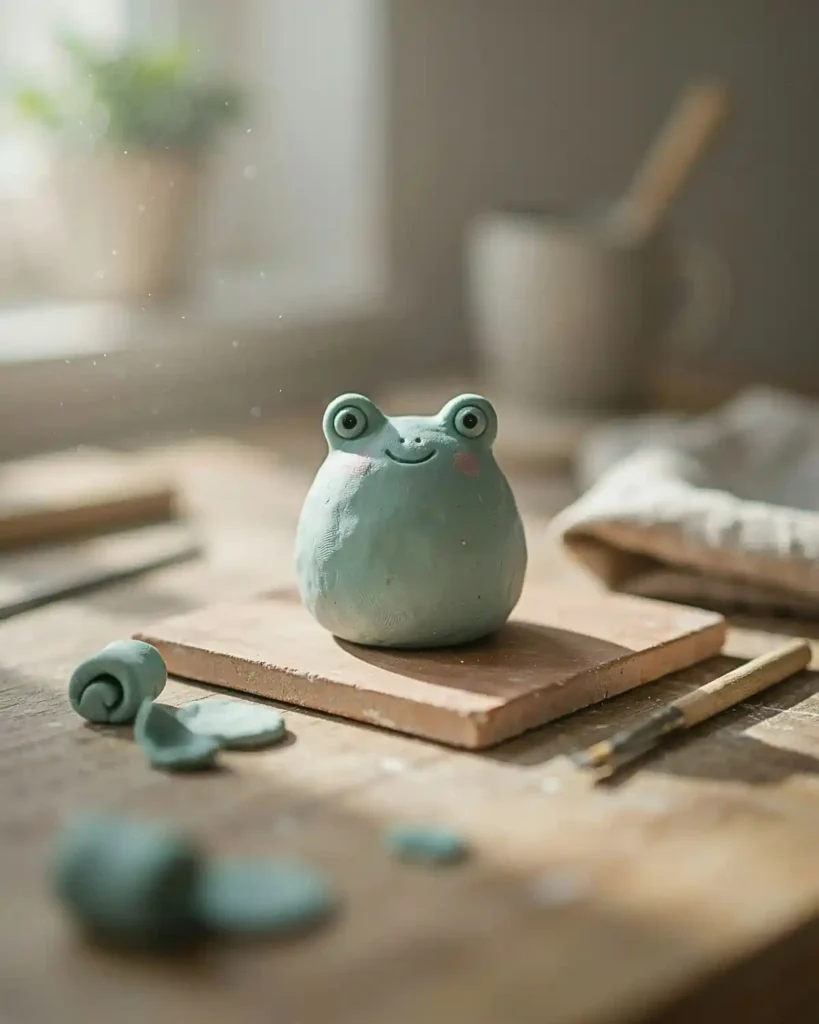
A tiny frog is probably the clay figure I would hand to someone who says, “I’m not good at sculpting.” The body can be one rounded blob, the eyes can be two smaller balls, and suddenly it already looks like a frog. Add pink cheeks and a tiny smile, and the simplicity starts working in your favor rather than looking unfinished.
This is one of the best mini clay figures for practicing facial placement because moving the eyes just a few millimeters changes the whole personality.
Special Tip: Flatten the base slightly before drying or curing so the frog sits without wobbling.
2. Chubby Sitting Cat
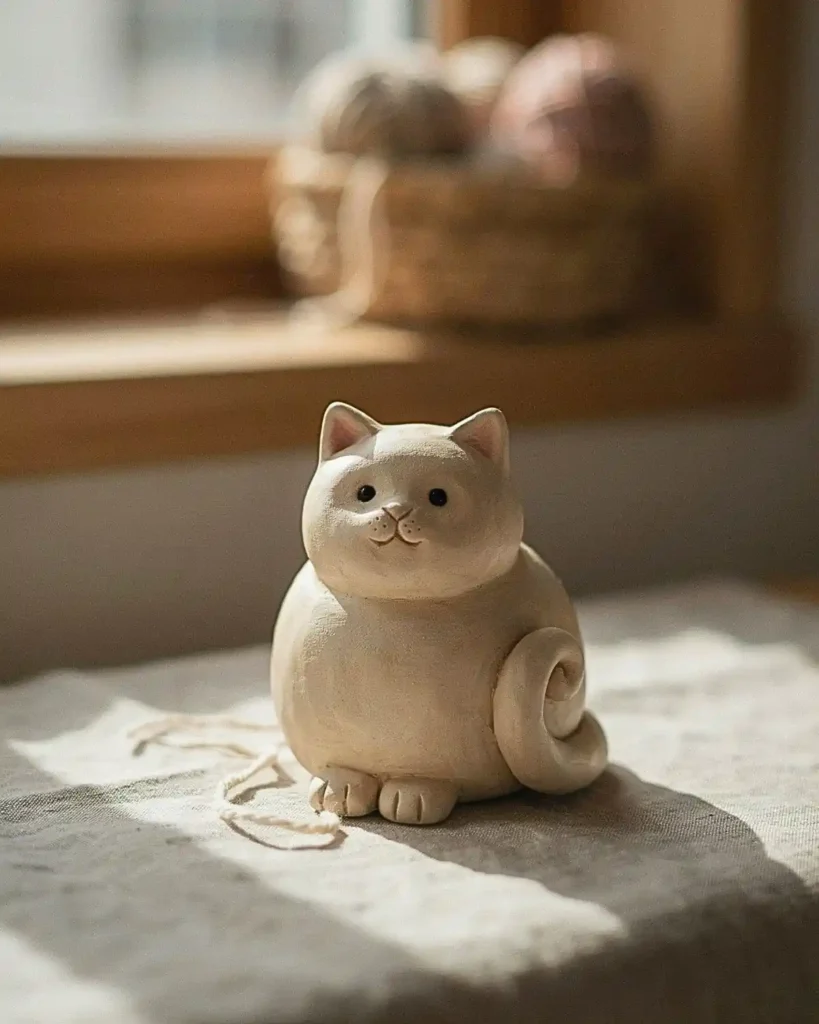
A chubby cat looks polished even when the shapes are intentionally simple. Instead of trying to sculpt realistic legs and paws, use one pear-shaped body, a round head, two triangle ears, and a curled tail pressed gently against the side.
I like this idea for a shelf or desk because you can match the colors to a real pet without needing a realistic portrait. The best part is how easily you can make a whole litter and give every cat a different expression.
3. Mini Mushroom Character
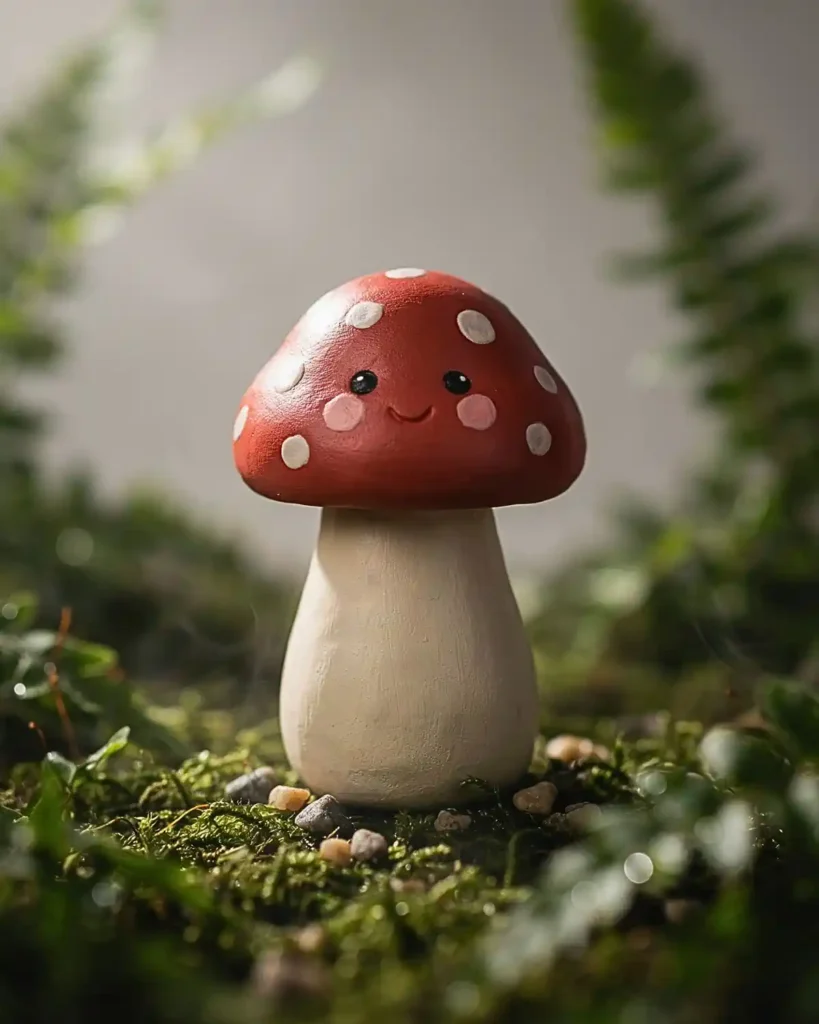
If you want cute clay figures enough to turn into a whole collection, start with mushrooms. A little stem, a rounded cap, and two dot eyes give you a finished character before you have even added spots or texture.
Make one in classic red and white, then try pastel pink, lavender, sage green, or warm brown. I would use these around a tiny fairy garden or as miniature shelf decor because they look good in groups.
Special Tip: Push the cap onto the stem gently and blend the join underneath where it will not show.
4. Sleepy Little Bear
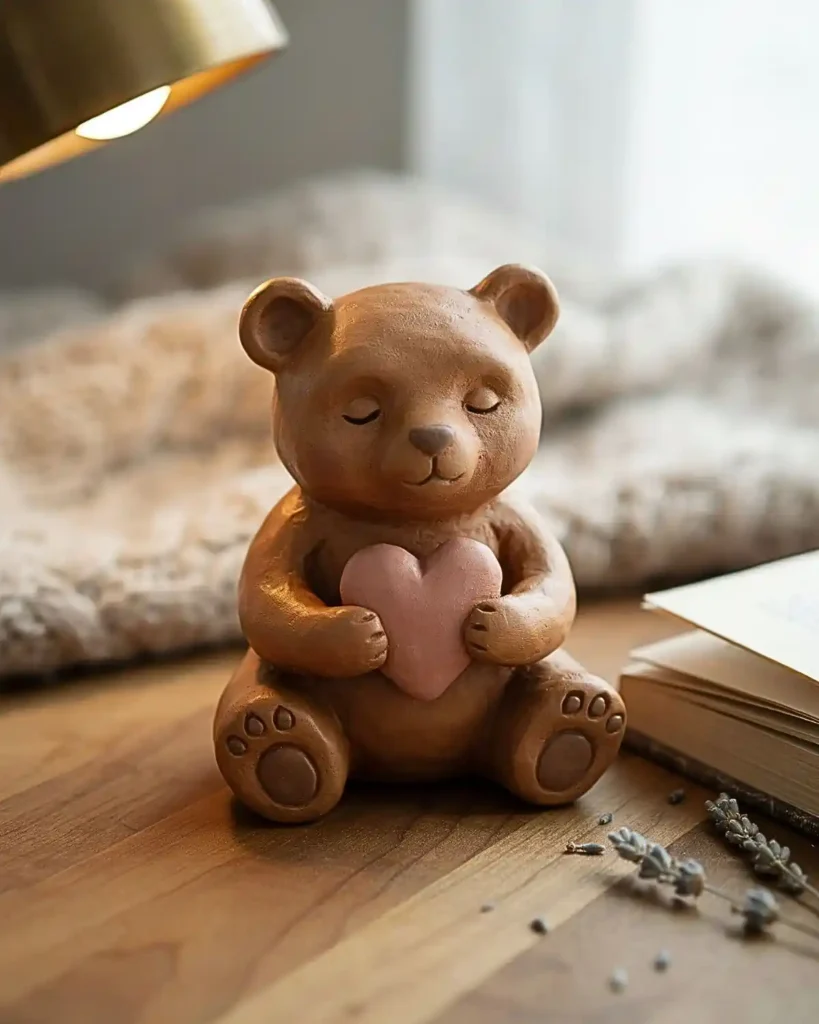
This bear is softer and calmer than the usual wide-eyed kawaii character. Shape a round head, short snout, tiny ears, and a plump seated body, then use closed curved lines for the eyes.
It is a good figure idea when you want something giftable without making anything too complicated. I especially like it in warm cream, caramel, or dusty brown with one tiny heart held between the paws.
5. Tiny Person in an Oversized Sweater
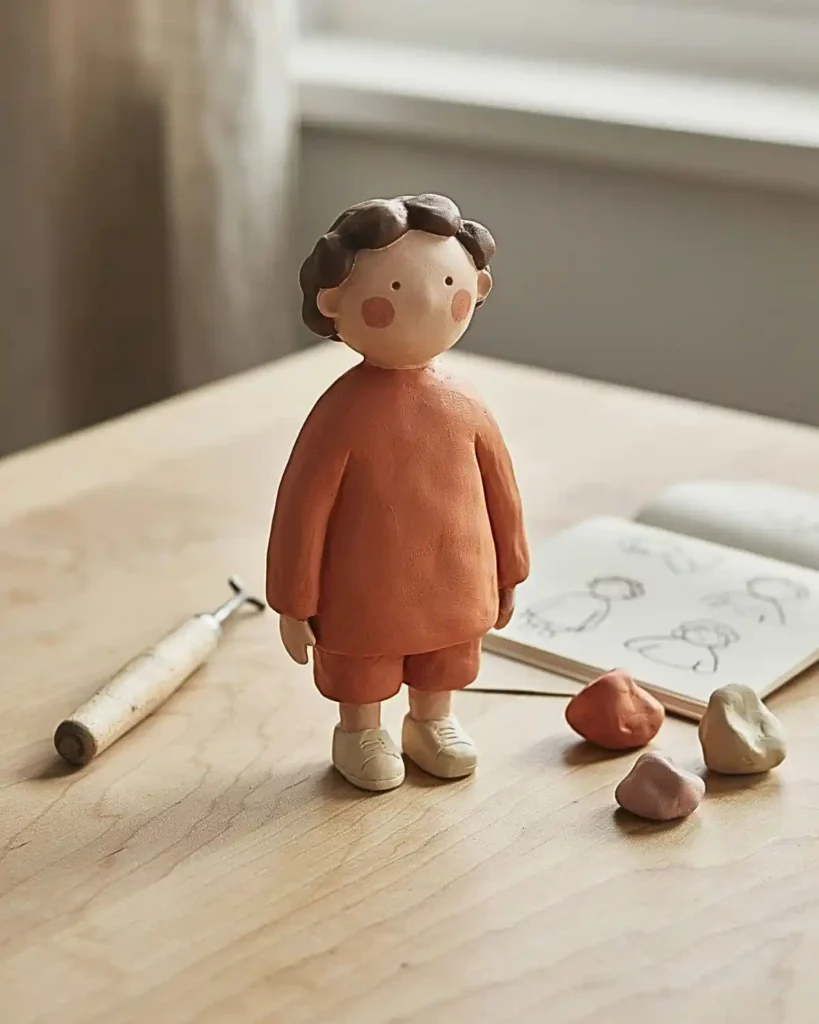
Clay figures people can feel difficult because faces and proportions get complicated fast, so cheat a little and make the clothing the star. Give your figure a round head, simple hair, a loose sweater body, and tiny shoes peeking out underneath.
That oversized silhouette hides most anatomy problems and makes the character look intentional. It is perfect for recreating a favorite outfit, making a tiny version of a friend, or designing an original character without chasing realism.
6. Mini Bunny Holding a Carrot
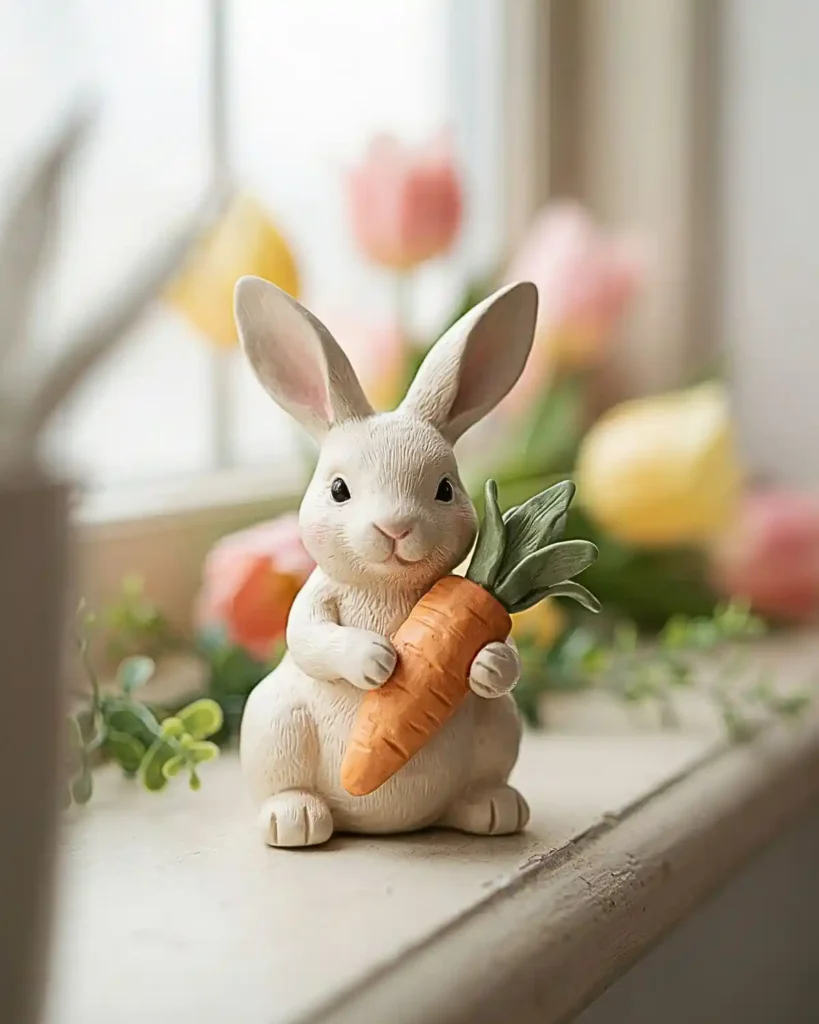
A bunny and a carrot belong together, but the fun part here is making the carrot almost comically large. The oversized prop gives your bunny something to hold and instantly tells a story, which is more interesting than a plain standing animal.
Keep the ears thick enough to avoid fragile tips. If you want a spring-themed display, make three bunnies with different carrot poses rather than repeating the same figure.
7. Tiny Strawberry With a Face
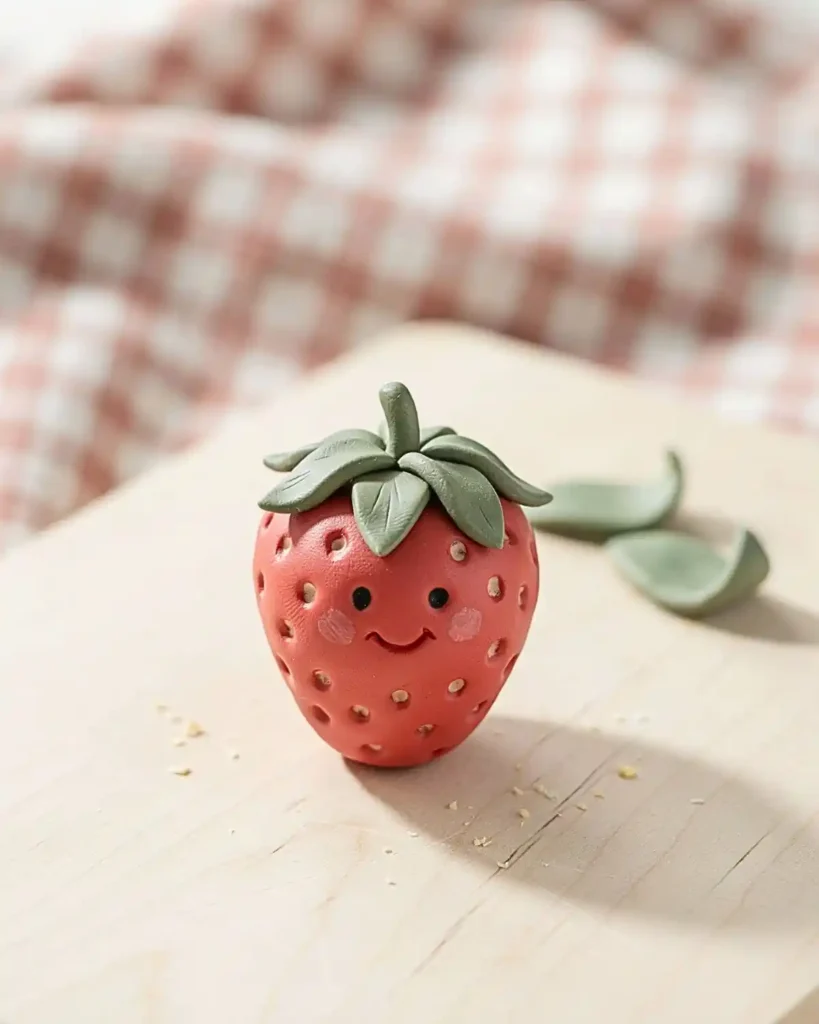
This is one of the easiest clay figure ideas because the strawberry itself is just a tapered rounded shape. Add small seed marks, a leafy top, and a tiny expression, and it becomes a character rather than miniature food.
I would make a few with different moods happy, sleepy, surprised, maybe one looking mildly offended. That tiny variation makes a set feel handmade in the best way.
8. Mini Dinosaur
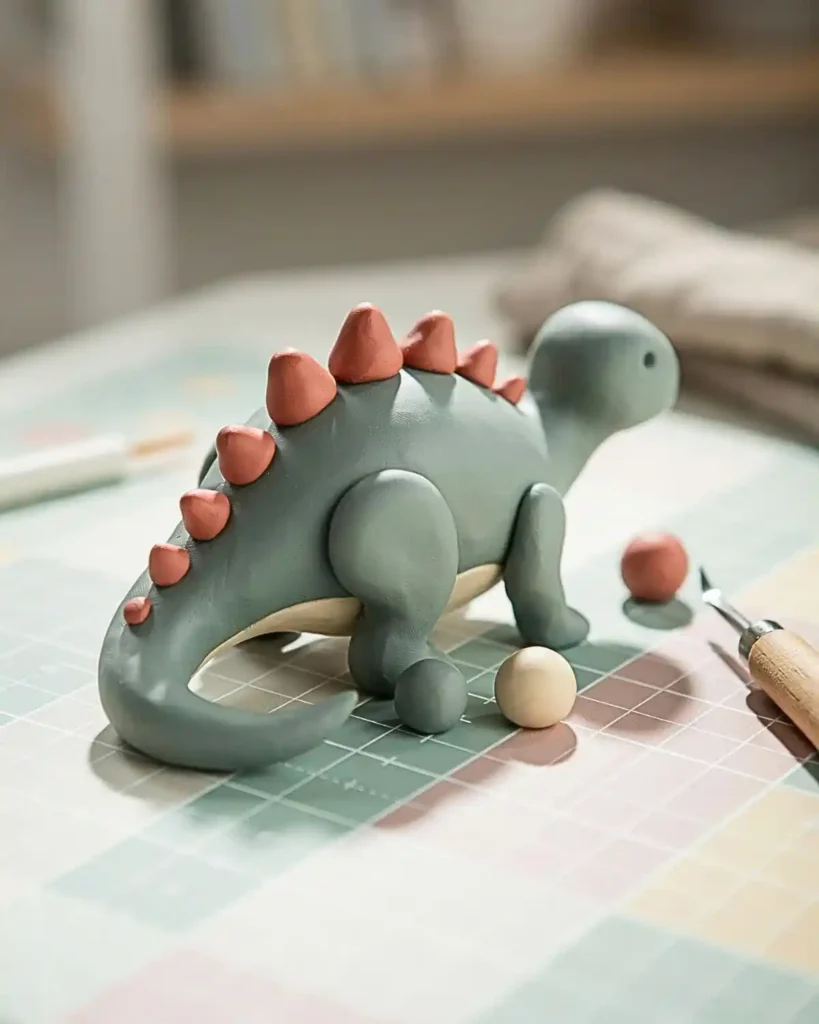
A miniature dinosaur gives you room to play with shapes without needing scientific accuracy. Start with a chunky body, thick tail, small head, and stubby legs, then decide whether your dinosaur needs spikes, plates, or tiny horns.
Compared with a realistic dinosaur sculpture, the cute version is much more forgiving because exaggerated proportions are part of the charm. This is a great project for using leftover clay colors that do not match anything in nature.
9. Little Duck With Rain Boots
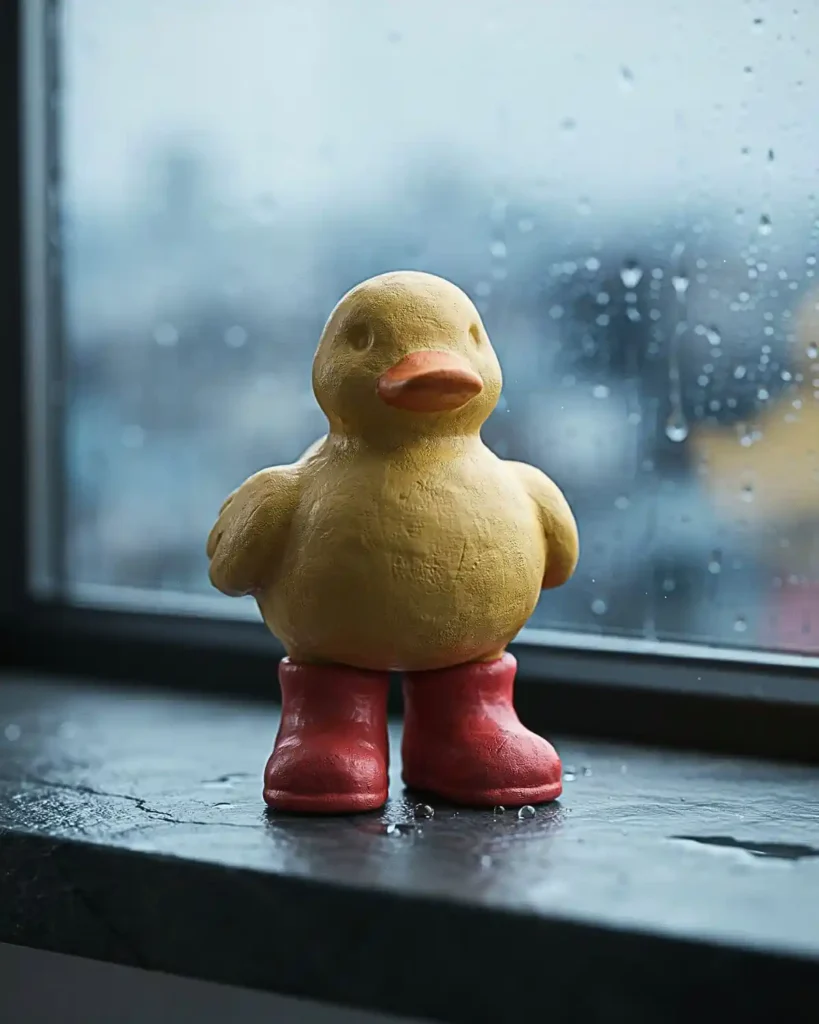
A duck is already simple: round body, small head, flat beak. Add a pair of bright rain boots and suddenly it becomes one of those clay figures cute enough that it looks like it needs a name.
I love this for a rainy-day craft theme because the accessory carries the whole design. Keep the boots slightly oversized so the duck stands firmly and the silhouette reads clearly from a distance.
10. Tiny Ghost With a Flower
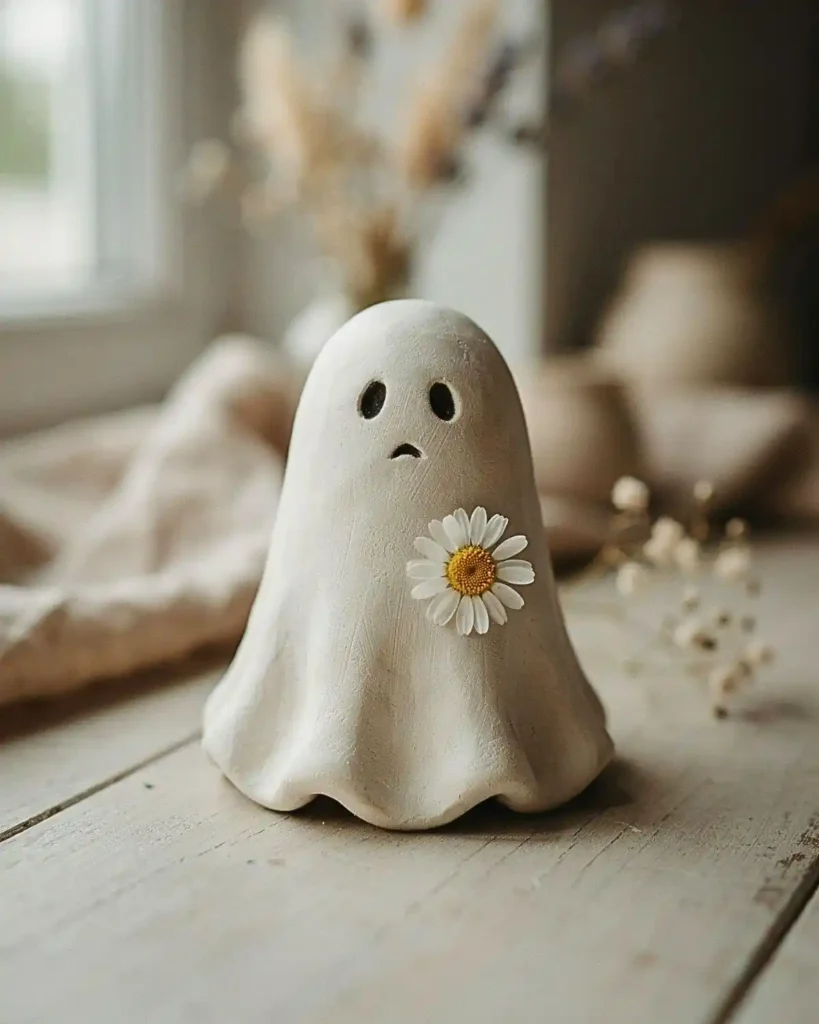
You do not need to save ghost figures for Halloween. A soft white ghost holding one tiny flower can look sweet, calm, and almost cottagecore instead of spooky. If you do want a seasonal theme, our Halloween Crafts collection has more spooky project inspiration.
The advantage is that there are no legs, fingers, or complicated features to sculpt. Make the lower edge slightly wavy, give it a tiny face, and use the flower as the single detailed focal point.
Special Tip: If the flower feels too delicate, sculpt it directly against the ghost’s body instead of leaving it unsupported.
11. Mini Snail With a Swirl Shell
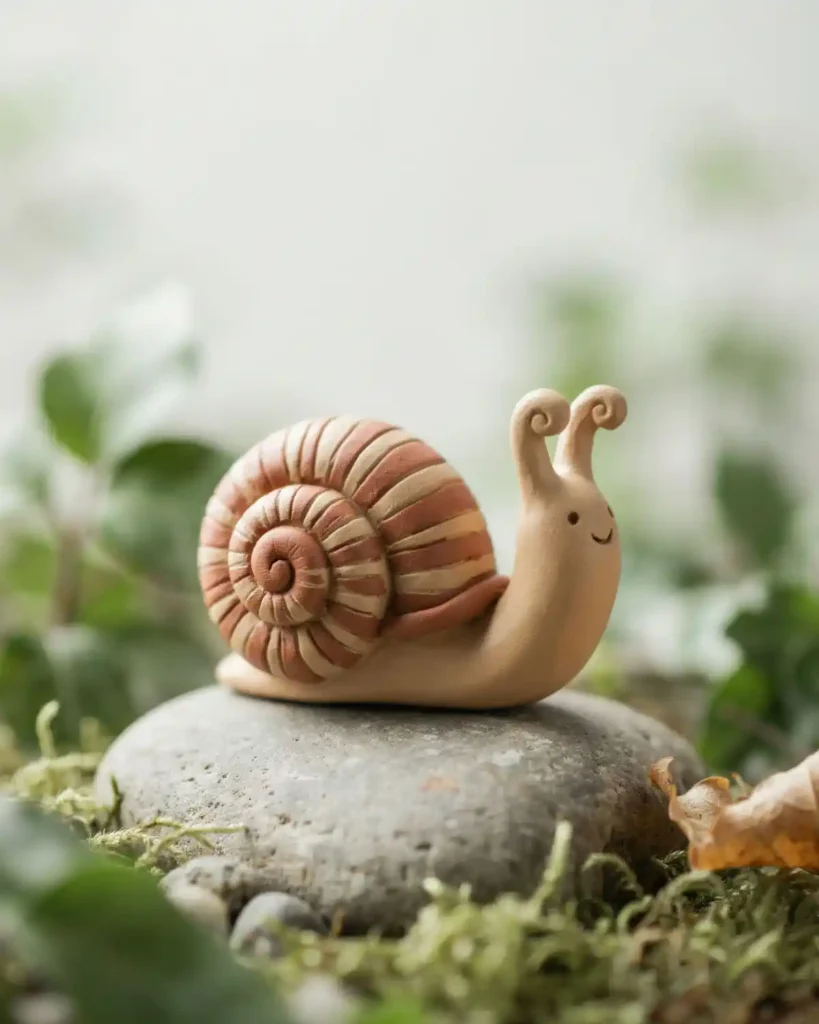
A snail lets you practice coils in a way that actually becomes part of the design. Roll one long piece for the body and another for the shell, curl the shell into a spiral, then press the parts together carefully.
I prefer an oversized shell because it gives you more room for color blocking, dots, or tiny flowers. This is also a smart option for small clay figures because the low shape is naturally stable.
12. Tiny Penguin in a Scarf
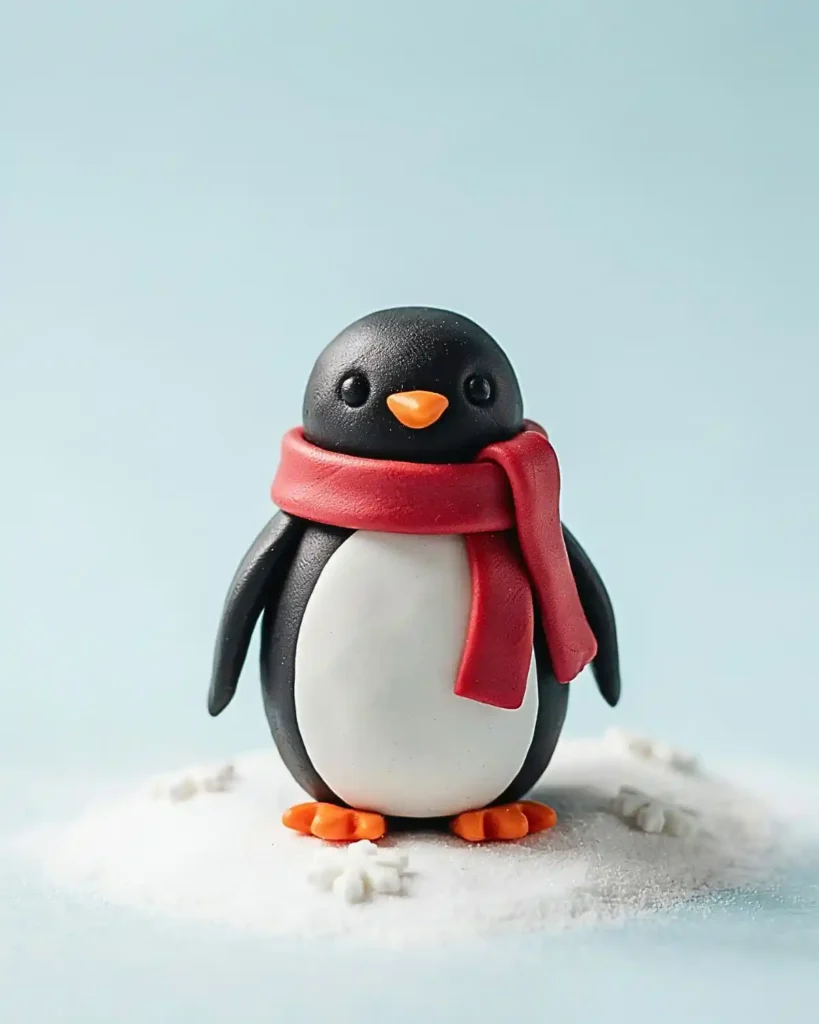
The scarf does more than make the penguin cute, it hides the join between the head and body. That makes this figure surprisingly beginner-friendly. For more cold-weather projects beyond clay, explore Winter Crafts For Kids.
Start with a black oval body, add a white belly patch, tiny wings, beak, and feet, then wrap a thin clay strip around the neck. I would make the scarf in a strong contrasting color and let one end hang down the side for movement.
13. Mini Plant Buddy in a Pot
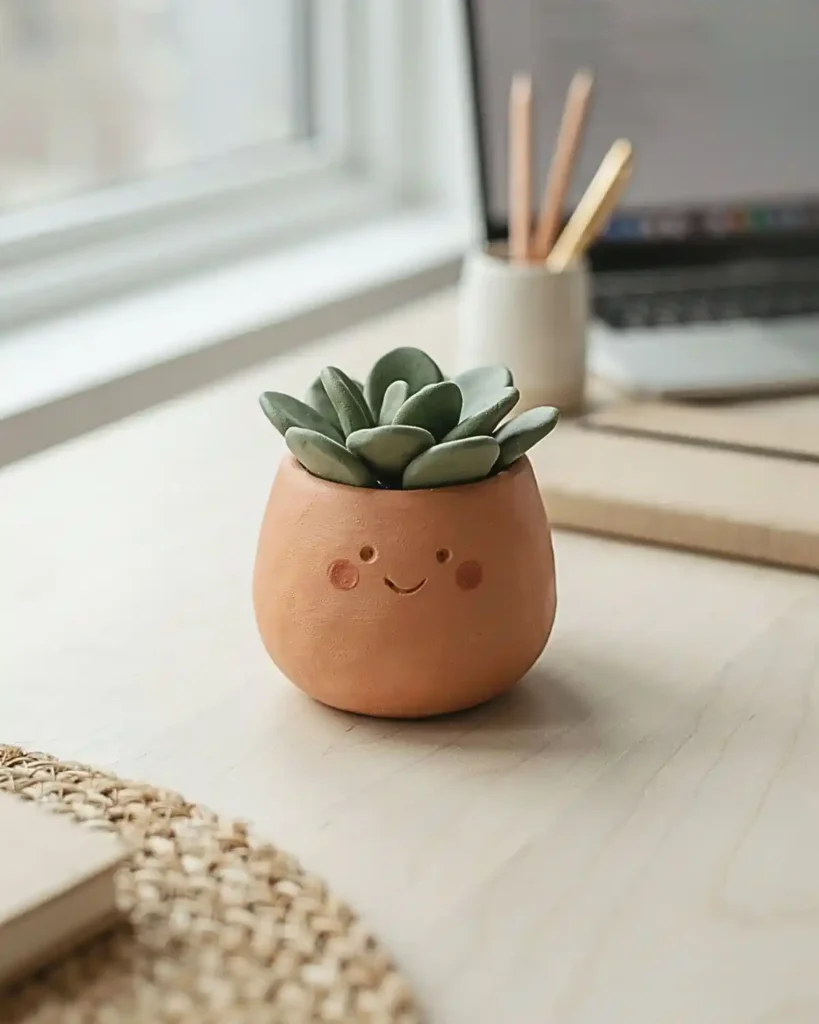
This one sits halfway between a plant sculpture and a character. Make a tiny pot, add a round face to the front, then build simple leaves, a cactus, or a little sprout coming from the top.
Unlike a normal mini plant, the expression gives it personality without adding much work. It is one of my favorite desk-friendly figure ideas because you can change the plant shape while keeping the same basic pot character.
14. Tiny Bee Character
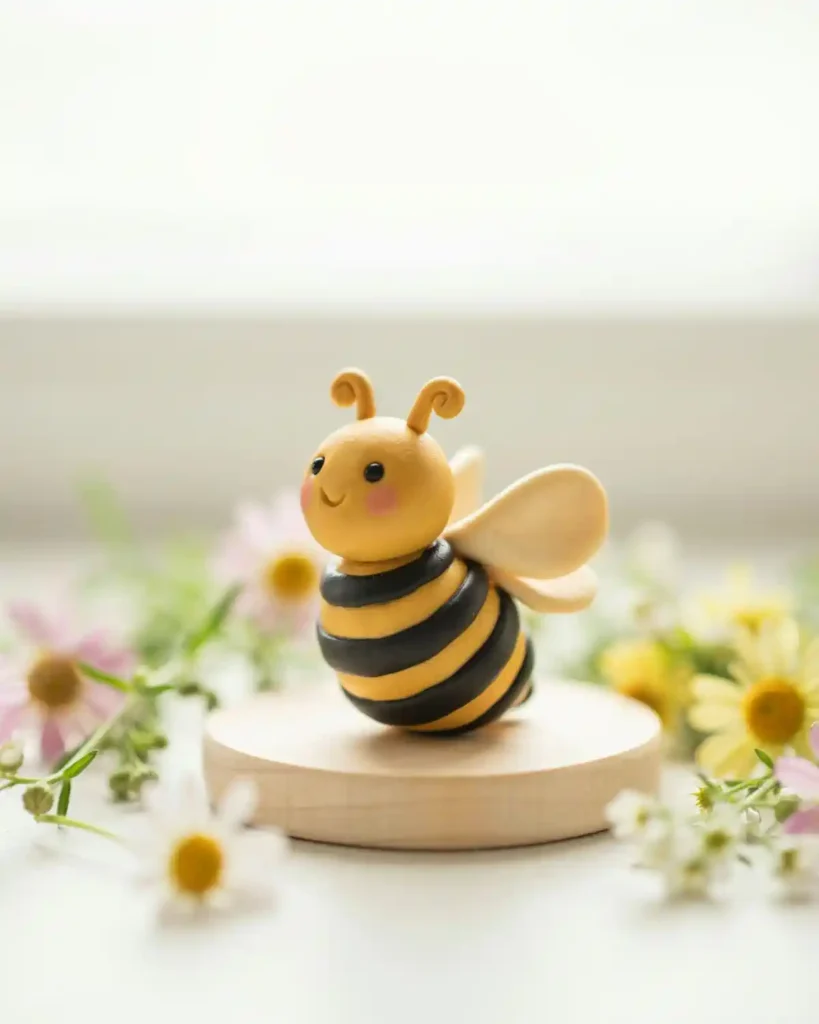
A bee figure is mostly stripes, wings, and attitude. Build the body as a rounded yellow oval, add black bands, then attach small wings and a cheerful face.
The obvious alternative is a realistic bee, but the chunky cartoon version is much easier to sculpt and much less fragile. I would keep the wings thick and close to the body so they survive handling.
15. Mini Capybara
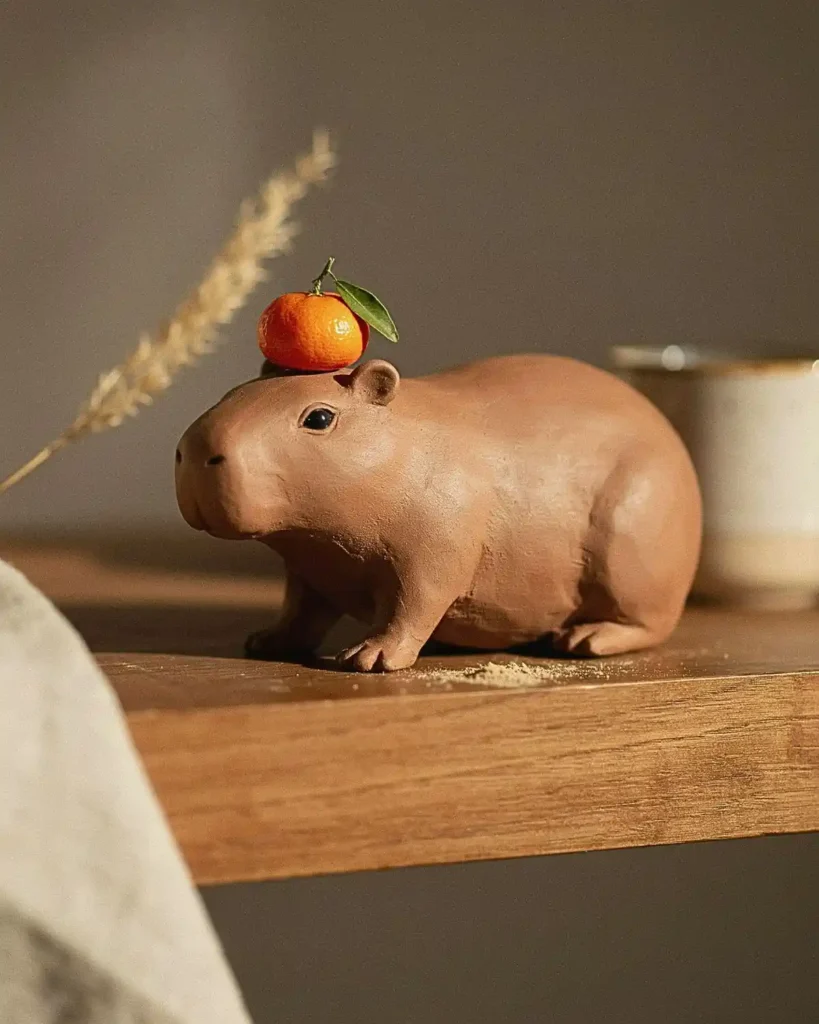
Capybaras are almost unfairly suited to simple clay because their rounded shapes already look adorable when simplified. Use a long oval body, blunt little snout, tiny ears, and short legs.
You can stop there, or give the capybara an orange, flower, leaf, or tiny towel on its head. For anyone collecting cute clay figures for a themed shelf, this one fits in immediately.
16. Tiny Cow With Pink Nose
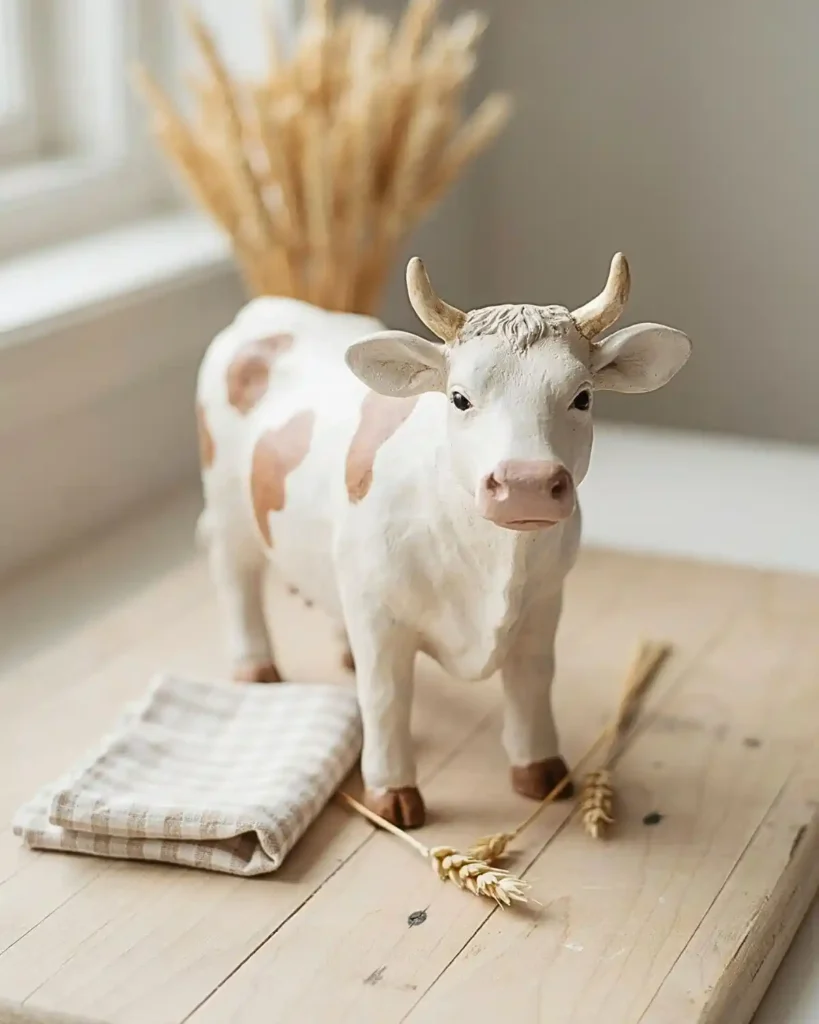
A small cow gives you a little more detail without becoming overwhelming. Start with a white rounded body, add black or brown patches, tiny ears, horns, and a wide pink muzzle.
The irregular spots are what make this fun because they do not need to match on both sides. I like turning each cow into a different character by changing the pattern, ear position, or expression.
17. Mini Dragon With Tiny Wings
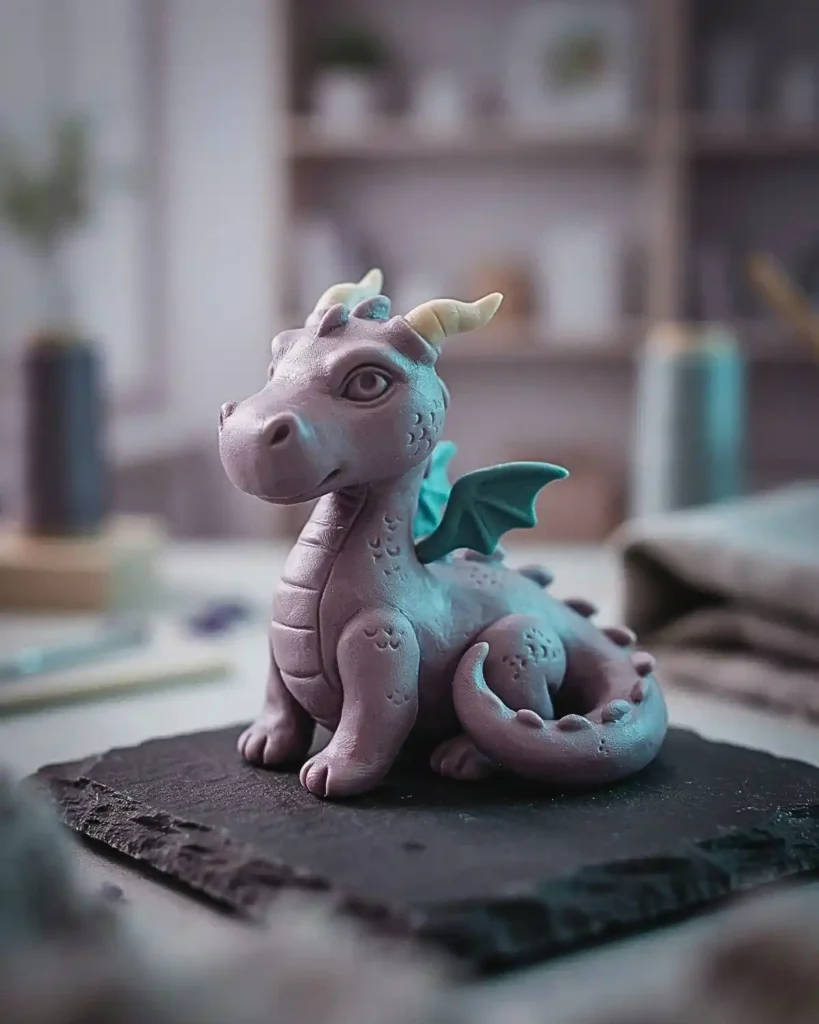
A dragon is where you can stop following real-world rules and just make what looks good. Give it a chunky body, big head, little horns, a tapered tail, and wings that are much too small to work in real life.
That exaggeration is exactly why the figure feels cute instead of intimidating. If detailed scales feel like too much, add only three or four raised spots down the back and let the color palette do the rest.
18. Tiny Fox Curled Into a Ball
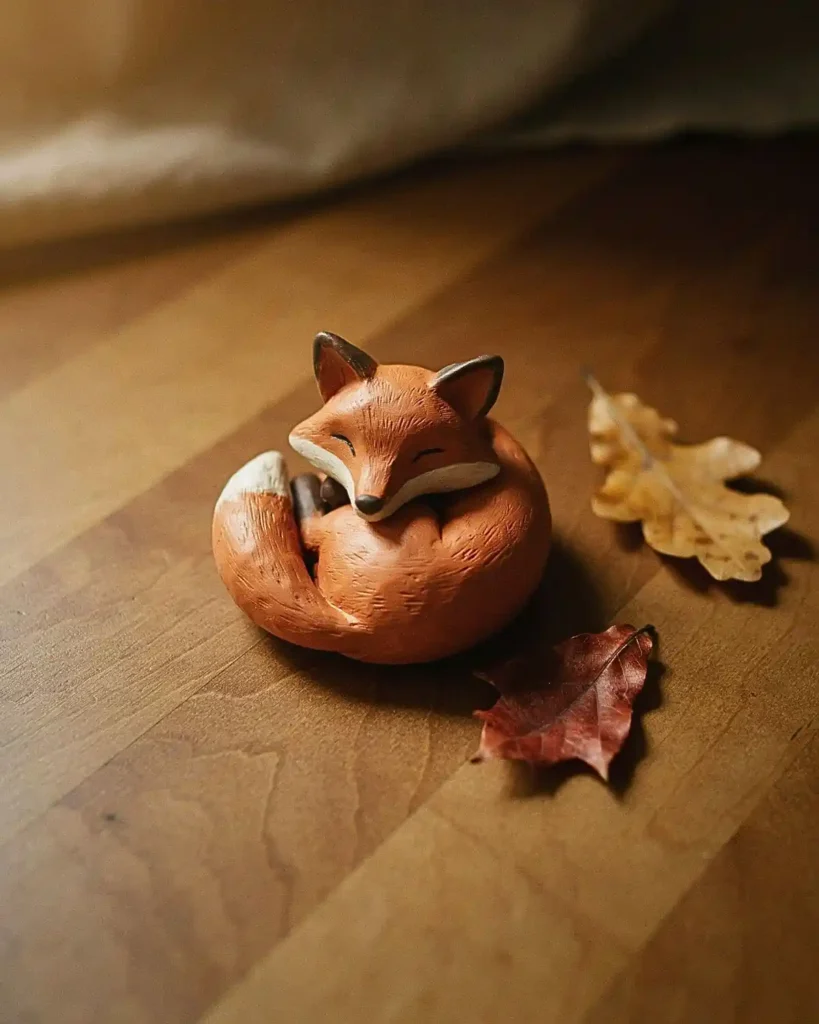
A curled fox is much easier than a standing fox because the pose keeps everything compact. Shape the body into a rounded curl, wrap the tail around the front, then tuck the head slightly downward.
The tail becomes the main visual feature, especially if you add a cream-colored tip. This design looks especially good in warm orange, rust, or even fantasy colors like dusty pink.
19. Mini Toast Character
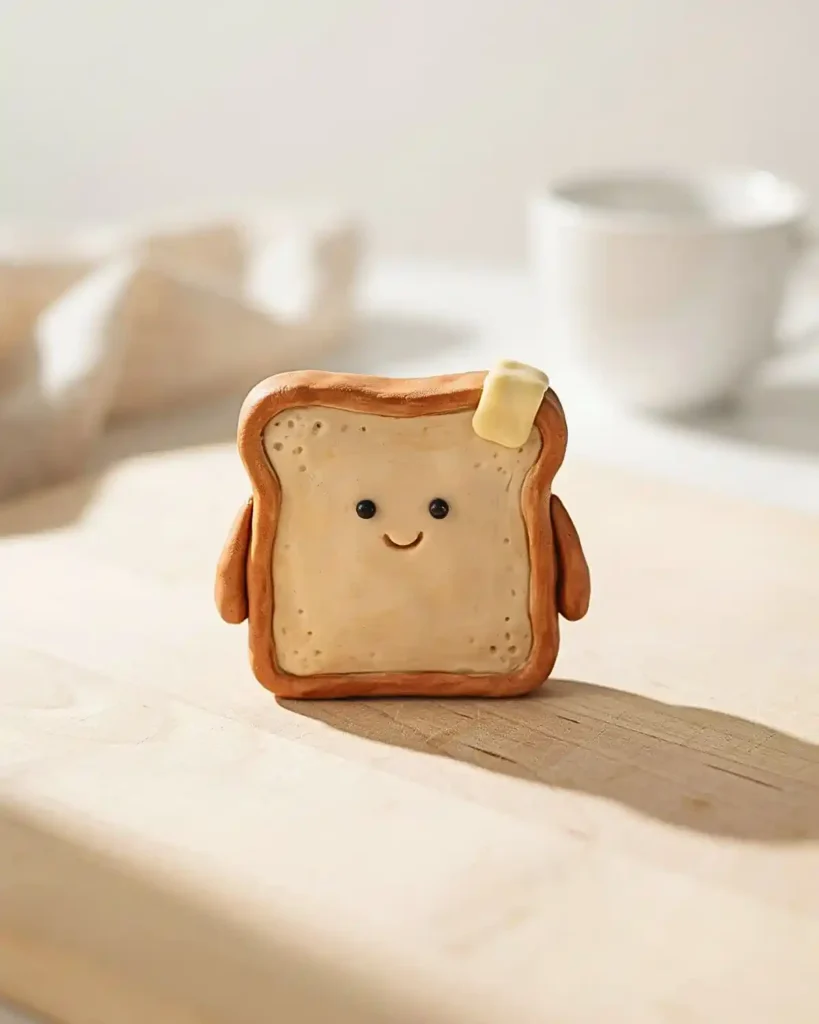
A slice of toast with a face is one of those clay figures ideas that sounds silly until you make one. The shape is recognizable instantly, so you can spend your time on details like butter, jam, tiny arms, or an expression.
I would make the crust slightly raised around the edge instead of simply painting it. That tiny bit of dimension makes the figure look more finished without adding much difficulty.
20. Little Cloud With Dangling Stars
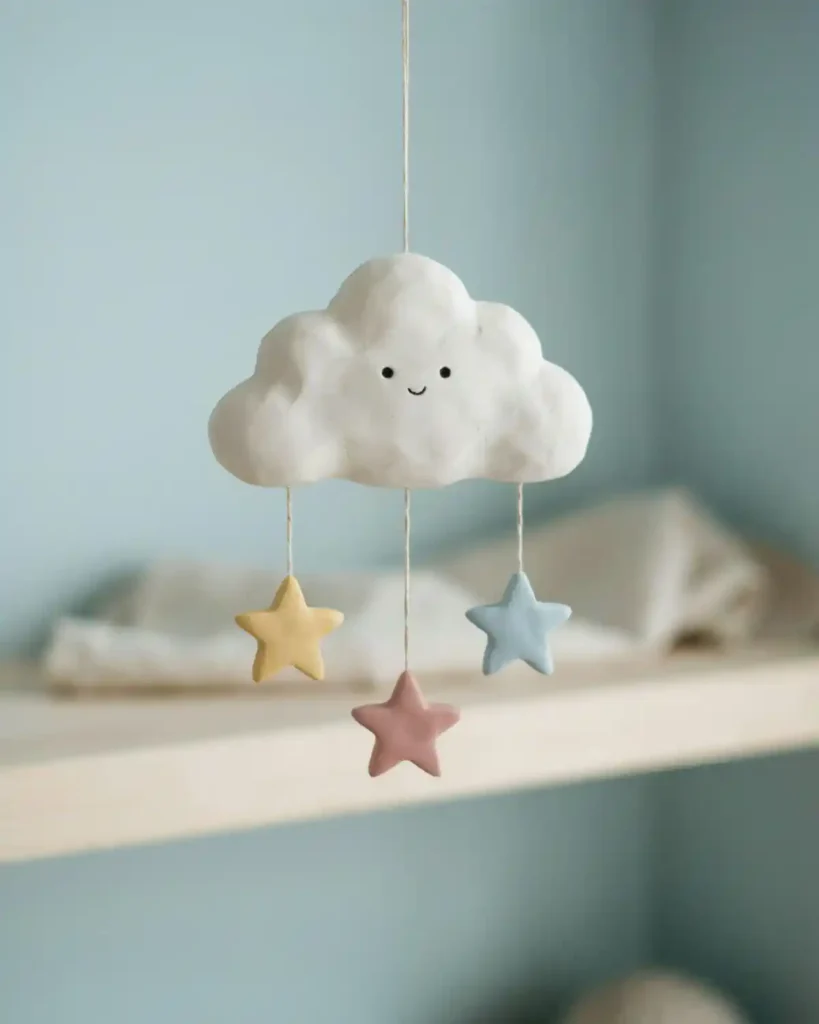
This design works beautifully as a standing figure or hanging ornament. Make a puffy cloud from several blended balls, add a face, then attach tiny stars beneath it if your material and construction method can safely support them.
Compared with a plain cloud, the stars give you movement and a second color story. If dangling pieces feel too delicate, place the stars directly beside the cloud on a small base.
21. Tiny Octopus
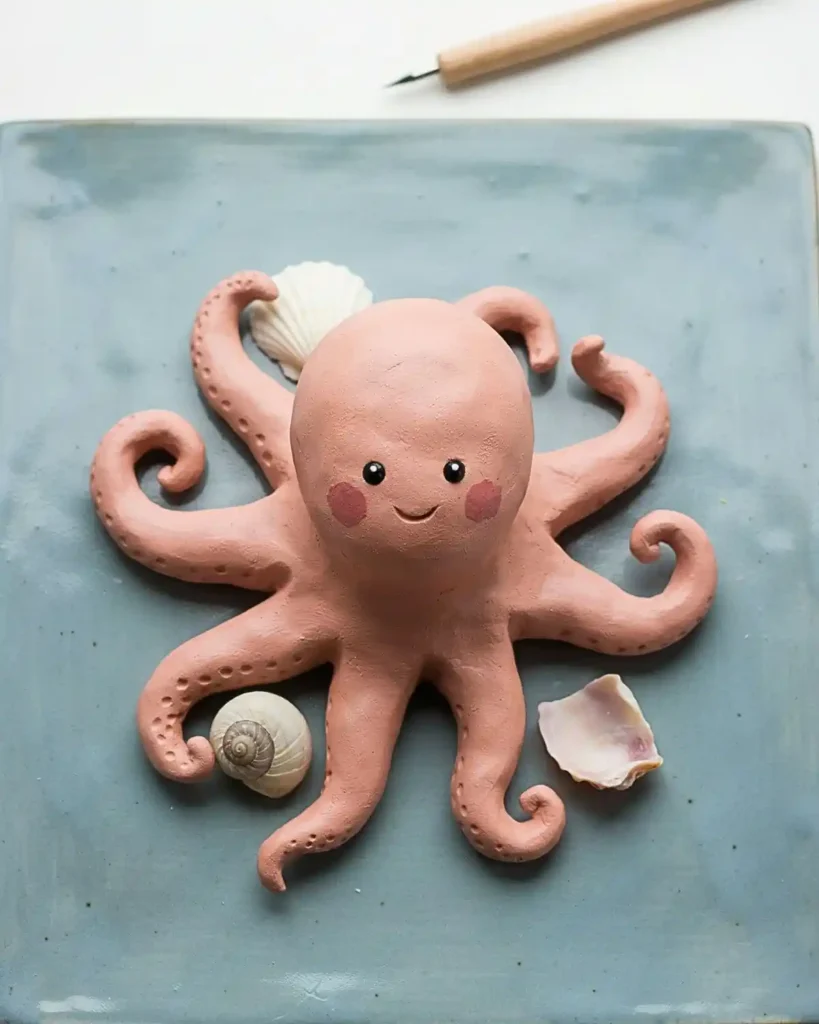
An octopus looks detailed even though the construction is repetitive. Make one rounded head and eight short tapered arms, then curl each arm in a slightly different direction.
I like this project because imperfect symmetry actually improves it. Add a tiny blush, hat, bow, or sailor cap if you want a stronger character theme.
22. Mini Frog on a Lily Pad
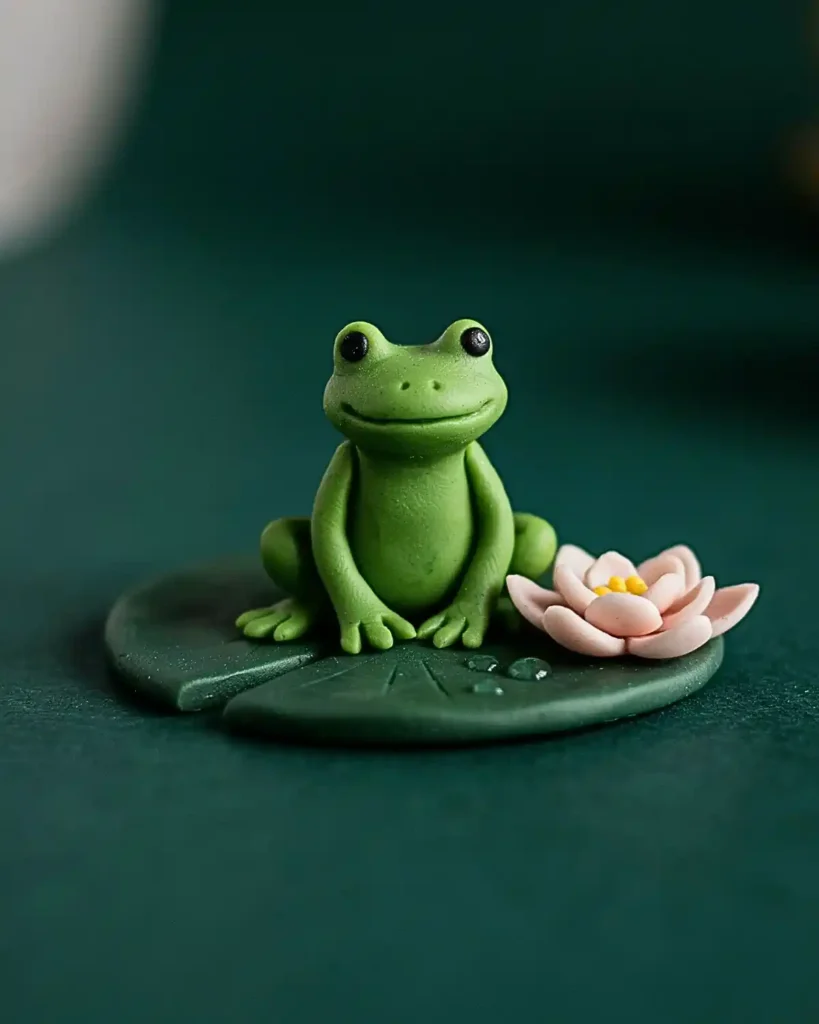
Once you have made the basic tiny frog, this is the upgrade. Instead of leaving it as a standalone clay figure, seat it on a flattened lily pad and add one miniature flower or water-drop detail.
The base turns the figure into a tiny scene, which makes it feel more collectible. It is ideal when you want to move from simple figures into miniature storytelling without building a full diorama.
23. Tiny Bookworm Character
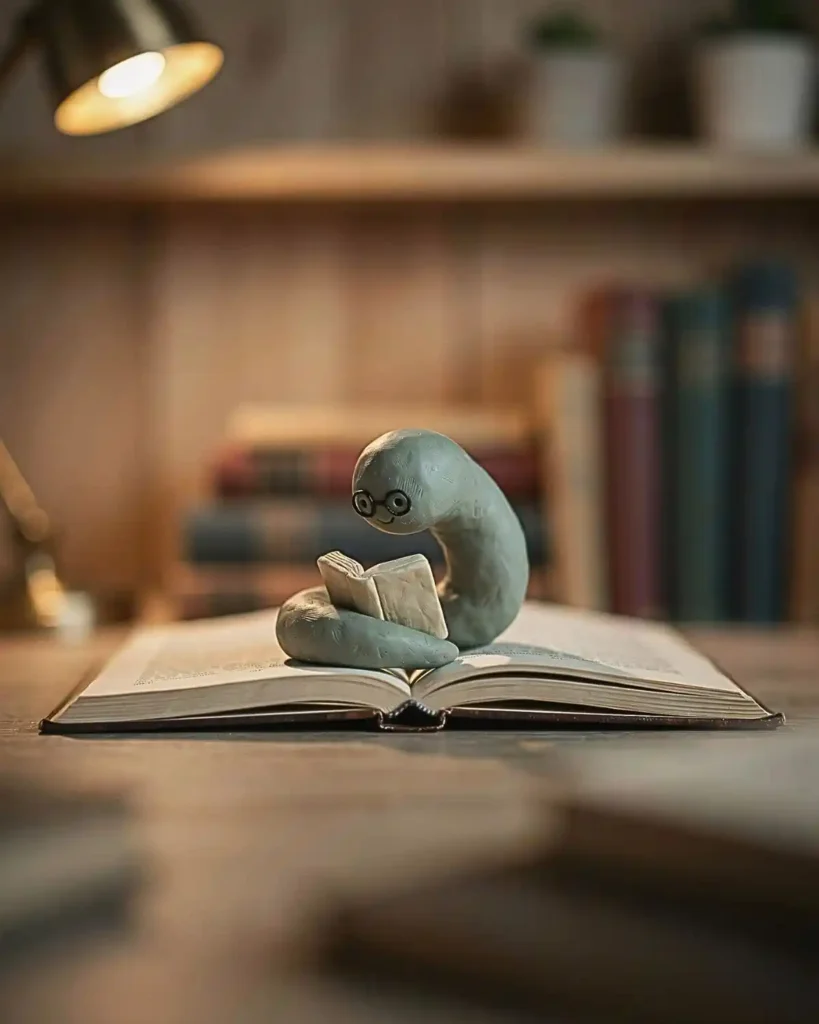
Make a little worm curled around a miniature book, and you get a figure that feels perfect for a reading nook or bookshelf. The worm itself is easy, just a smooth coil with a face so the book can carry the detail.
You can personalize the cover with a tiny initial, heart, star, or simple painted line. This would be a fun handmade gift for a reader because it feels specific without requiring portrait-level sculpting skills.
24. Mini Best-Friend Figures
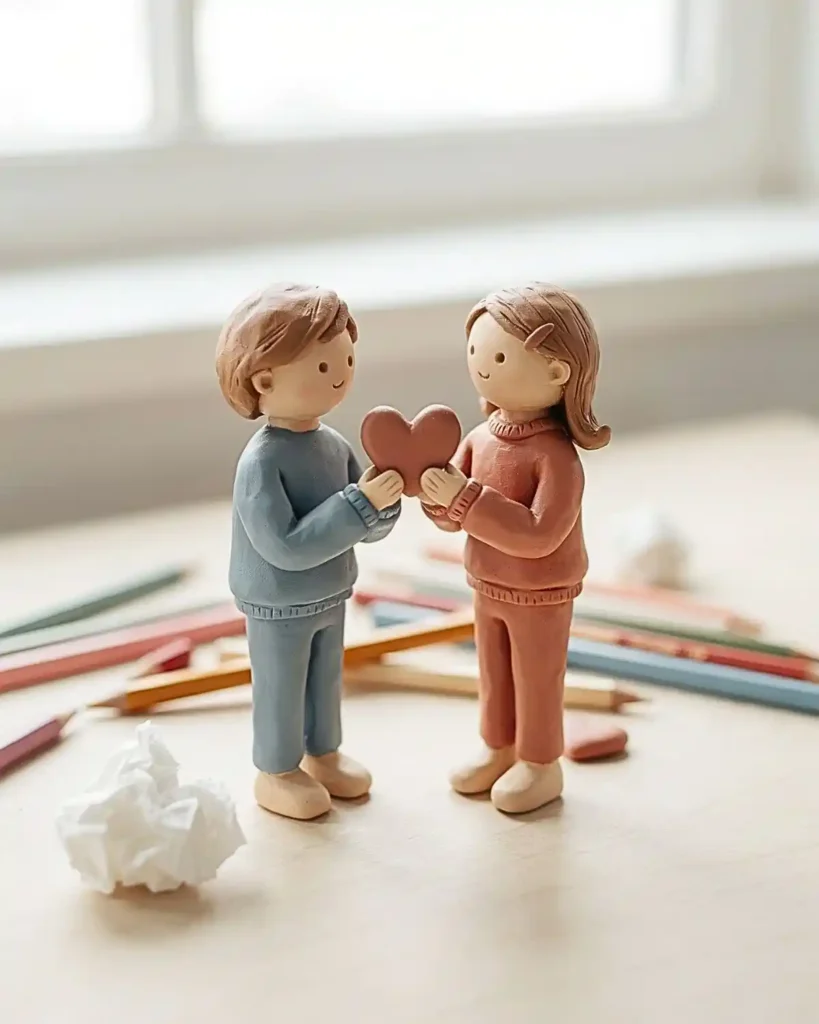
Instead of making one clay figure, create a matching pair with connected details. They could wear complementary sweaters, hold matching hearts, share a tiny umbrella, or each carry one half of a symbol.
The payoff is in the relationship between the two figures, not the complexity of either sculpture. If you have been wanting to try clay figures people, this is a sweet way to start because stylized proportions feel completely natural.
25. Tiny “You” Character
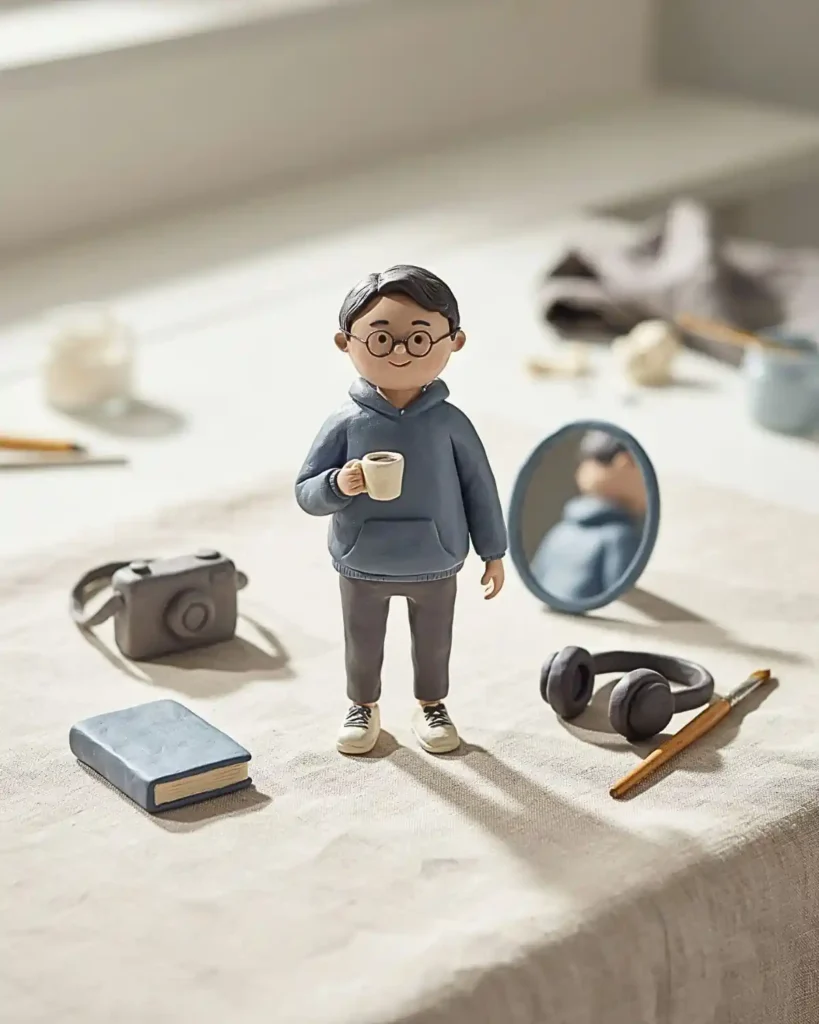
Finish the list by making a miniature version of yourself. Pick one recognizable detail, your hairstyle, glasses, favorite hoodie, headphones, coffee cup, camera, book, or pet and build the figure around that.
Trying to copy every feature will make the project frustrating, but one or two signature details can make a simple character feel surprisingly personal. This is the clay figure idea I would save for last because it uses everything you practiced in the other projects while still leaving plenty of room for your own style.
How Do You Make Mini Clay Figures Look Better?
Make mini clay figures look cleaner by simplifying their shapes, keeping repeated features consistent, emphasizing one focal detail, and allowing the clay to dry or cure fully before finishing.
At a Glance:
- Simplify the silhouette before adding details.
- Compare matching pieces before attaching them.
- Make one feature the visual focal point.
- Follow curing or drying instructions carefully.
The difference between a rough first attempt and a charming finished figure is usually not “talent.” It is a handful of small decisions.
First, simplify the silhouette. If the shape reads clearly before you add eyes, paint, or accessories, the figure will usually look stronger after the details go on.
Second, keep repeated features consistent. For two eyes, two ears, or two paws, roll both pieces before attaching either one so you can compare their size.
Third, avoid making every detail tiny. One oversized feature a scarf, mushroom cap, tail, sweater, flower, or prop gives the eye somewhere to land.
And finally, let the material fully dry or cure according to its own instructions before sanding, painting, sealing, or handling delicate parts. Different clay products use different processes, so the package directions should always win over a generic tutorial. If your material needs oven curing, our How to Bake Clay guide walks through the basic process.
How Can You Make Cute Clay Figures Without Complicated Faces?
You can get a surprising amount of personality from just three marks: two eyes and one mouth.
Move the eyes lower for a younger, cuter look. Put them farther apart for a softer expression. Use closed curved eyes for sleepy characters, tiny dots for classic kawaii faces, or one raised brow for something more mischievous.
Blush also helps, but keep it subtle. A tiny amount of pink paint or pastel on the cheeks can warm up a face without competing with the sculpture.
When I am not sure what expression to use, I test it on paper first. Drawing three or four face options takes a minute and can save you from repainting a tiny figure later.
Are Clay Figures Safe for Kids?
Clay crafts can be suitable for children when materials are age-appropriate, label instructions are followed, and adults supervise tools, small parts, curing equipment, and finishing products.
At a Glance:
- Check age and safety labels before starting.
- Supervise sharp tools and curing equipment.
- Keep miniature parts away from very young children.
- Choose appropriately labeled children’s art materials.
Clay crafting can be a great creative activity, but age-appropriate materials and supervision matter. Choose products according to their labels and keep blades, sharp tools, curing equipment, varnishes, and other adult-use materials out of children’s reach.
Small finished figures also deserve extra caution around very young children. The U.S. Consumer Product Safety Commission says products intended for children under age three can be hazardous if a part fits completely into the standard small-parts cylinder, because those pieces can present choking, aspiration, or ingestion risks. That makes miniature clay creations better treated as crafts or display pieces unless they are specifically designed, tested, and labeled for children’s use.
If you are choosing supplies for younger makers, ACMI recommends looking for its AP Seal on art materials for children in sixth grade or younger.
Why Is Making Small Clay Figures So Satisfying?
Part of the appeal is obvious: you start with a lump of material and end with a character that did not exist before. Small figures also give you fast visual feedback, which makes it easy to experiment without feeling like every attempt has to become a masterpiece.
There is some research suggesting art-making can be relaxing too. In a small 2016 study of 39 healthy adults, participants spent 45 minutes making art using materials that included modeling clay, collage materials, and markers; average salivary cortisol fell from 17.85 to 14.77 ng/mL after the session. The study was quasi-experimental and did not have a control group, so it should not be treated as proof that clay itself reduces stress, but it does support the idea that hands-on art-making can feel restorative for many people.
That matches what I like most about miniatures: there is enough detail to hold your attention, but the project is small enough to finish before it turns into homework.
FAQs About Clay Figure Ideas
What Is the Easiest Clay Figure to Make?
A tiny frog, mushroom, ghost, or food character is usually easiest because each can be built from only a few basic shapes. Choose a design with a large body and minimal unsupported details for your first project.
Is Air-Dry Clay Good for Mini Clay Figures?
Yes, air-dry clay can work well for mini figures, especially simple decorative designs. Drying time depends on the product, thickness, and environment, so follow the manufacturer’s instructions before painting or sealing.
What Can I Make With Small Amounts of Leftover Clay?
Use scraps for tiny mushrooms, frogs, fruit characters, charms, flowers, miniature accessories, or facial details. Leftover colors can also be mixed intentionally for marbled or muted shades or saved for a Clay Bead Bracelet project.
How Do I Stop Small Clay Pieces From Breaking?
Avoid making ears, tails, horns, or limbs extremely thin, and support delicate pieces against the body whenever the design allows. Also let the figure dry or cure fully before handling it aggressively.
Can Beginners Make Clay Figures People?
Yes. Start with stylized people rather than realistic anatomy: a round head, simple torso, short limbs, and one recognizable hairstyle or outfit detail are enough to make the character readable.
Final Thoughts
The best clay figure ideas are not necessarily the most complicated ones. A tiny frog with crooked eyes can have more personality than a perfectly smooth sculpture if the design feels intentional.
Start with one figure you genuinely want sitting on your desk, bookshelf, or craft shelf. Once you figure out how your clay behaves, the next character gets easier, and before long you will probably have a tiny collection staring back at you. If you want to branch into wearable clay projects after miniatures, Polymer Clay Earrings are a natural next project.
At CrochetMind.com, the goal is to make creative projects feel doable, not precious. Pick one of these 25 ideas, keep the first version small, and let the slightly imperfect details become part of its charm.

![The Best 30+ Free Crochet Cat Patterns [Beginner-Friendly Guide]](https://crochetmind.com/wp-content/uploads/2025/04/1-The-Best-30-Free-Crochet-Cat-Patterns-Beginner-Friendly-Guide.webp)