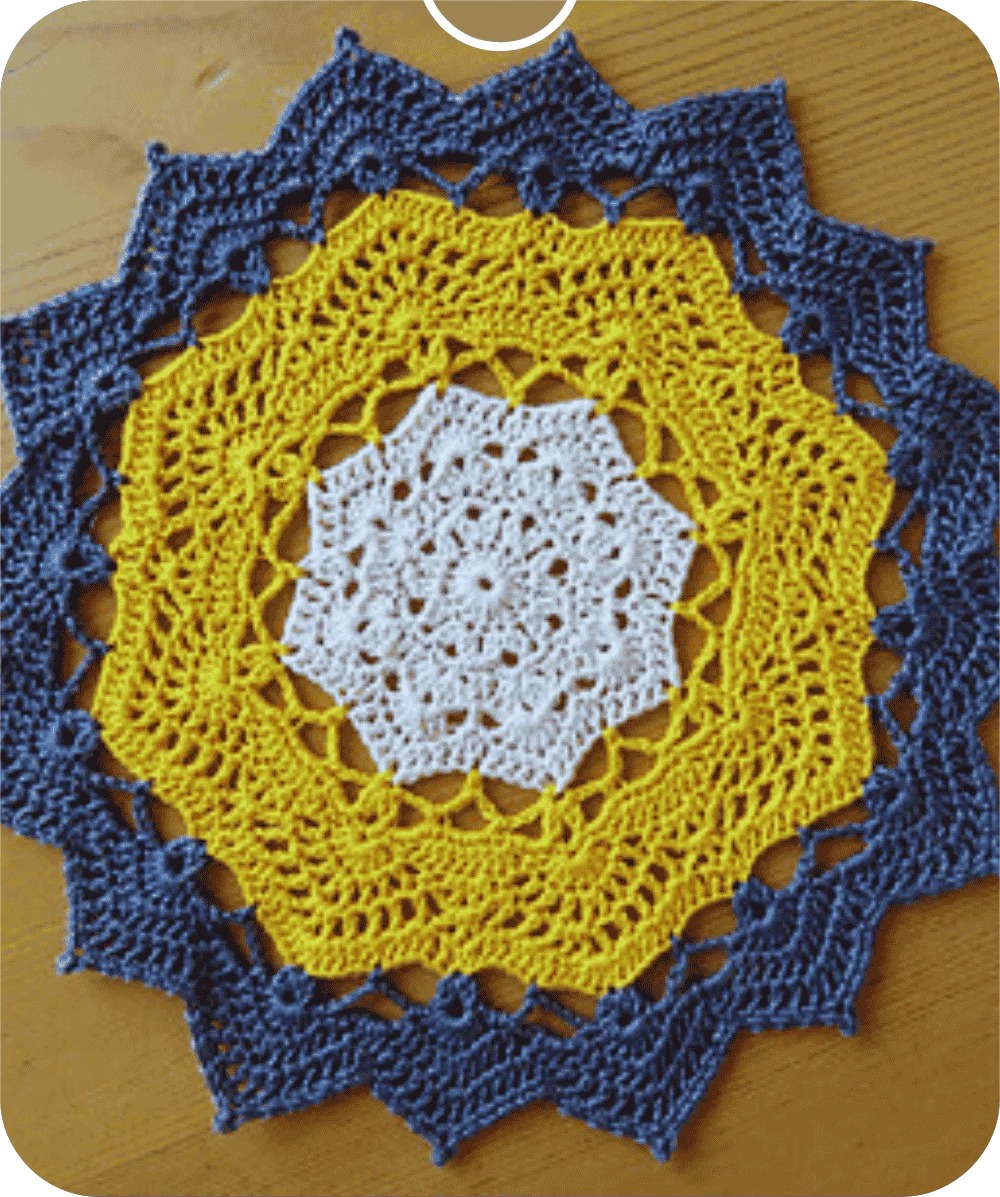
Hand Knitting Projects & Stitches Are you curious about hand knitting but unsure where to start or how it works? Hand knitting is a craft made using your hands and yarn. Instead of knitting needles, the yarn is looped and woven with fingers. However, getting started might feel a bit tricky. As you figure out the best type of yarn and techniques to suit your project.
Choosing the right yarn and understanding basic hand-knitting methods are crucial to creating beautiful and durable pieces. The wrong choice can lead to frustration or uneven results.
But don’t worry! This guide is here to simplify everything for you. By the end, you’ll know what hand knitting is, how to use it to make cool things, beginner-friendly yarns, hand-finger projects, and the best tips to get started. So grab your yarn, and let’s learn hand knitting together!
In This Post
- What Is Hand Knitting?
- What Materials Do I Need To Start Hand Knitting?
- What Are The Best Yarn Suggestions For Knitting For Beginners?
- The 10 Best Beginner Knit Stitches You Should Know
- 15 Super Fun Finger Knitting Projects
- Finger Knit Trivet
- Hanging Basket
- Twisted Rope Blanket
- So Twisted Mug Rugs
- Circular Crochet-Look Throw
- Finger Knit Cowl
- Namaste At Home Cardigan
- Finger Knit Pouf Cushion Cover
- Finger Knit Pillow
- Hugs and kisses blanket
- Finger knit hair tie
- Finger knit necklaces
- Slip and Slide Cable Blanket
- Finger Knit Hanging Plant Holder
- Finger Knit Beanie
- How to Choose the Right Yarn and Needles for Different Hand Knitting Projects?
- How to Knit A Sweater Using Hand-Knitting Techniques?
- How to Knit A Blanket Using Hand Knitting Projects & Stitches Techniques?
- In Closing
- Frequently Asked Questions(FAQ’s): Hand Knitting Projects & Stitches
What Is Hand Knitting?
As the name suggests, Hand Knitting Projects & Stitches means using hands to create designs. It’s done by moving needles or yarns through the hands.in knitting hand knitting is one of the oldest ways. Different types of yarn or needles are used in hand knitting to make amazing clothes and other cool things.

Hand Knitting Projects & Stitches is done with just hands, allowing for all kinds of patterns and designs. It’s a fun way to make scarves, sweaters, hats, and even toys. Favorite colors and yarn types can be chosen to make each project special! It’s a kind of skill that turns your simple yarn into something special.
What Materials Do I Need To Start Hand Knitting?
For hand-knitting, the right material changes the whole game. Choosing the right material makes your project easy, neat, and clean. Here are the materials that you need to start hand-knitting. Including-
1. Knitting Needles
Needles are the most important thing in knitting. So, for a perfect and beautiful knitting project, you need the perfect size of the needle. As a beginner, you can start with bamboo needles. They are lightweight, feel warm in your hands, and grip the yarn so your stitches don’t slip off easily.
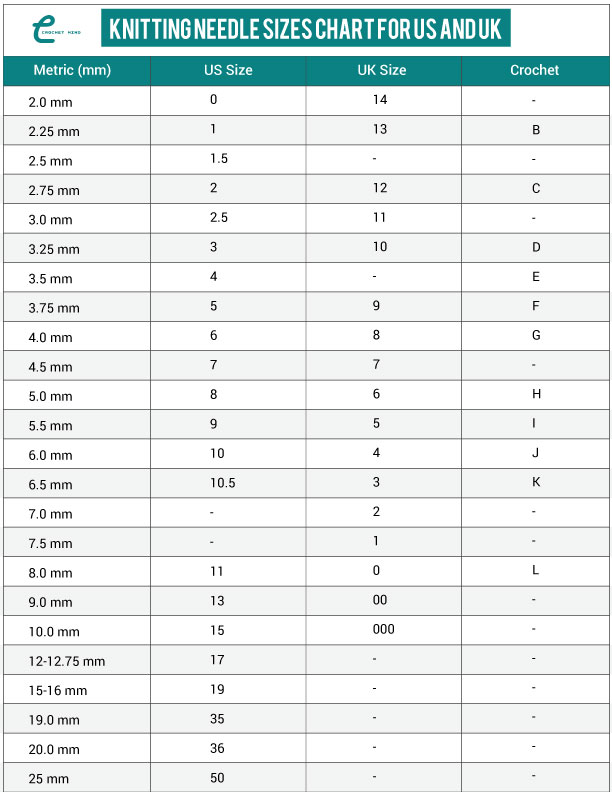
Besides 6 to 8 (4.00 to 5.00 mm) size needles or Single-pointed needles. These needles are the best choice for beginners.
Here are two needles that are recommended for beginners. Including :
- ChiaoGoo Knitting 9 inch US 8 (5mm)
- Knitter’s Pride Bamboo 10-inch Size US 8
In the beginning, you can start with something simple, and as you get better, you can explore more tools that fit the projects you want to make!

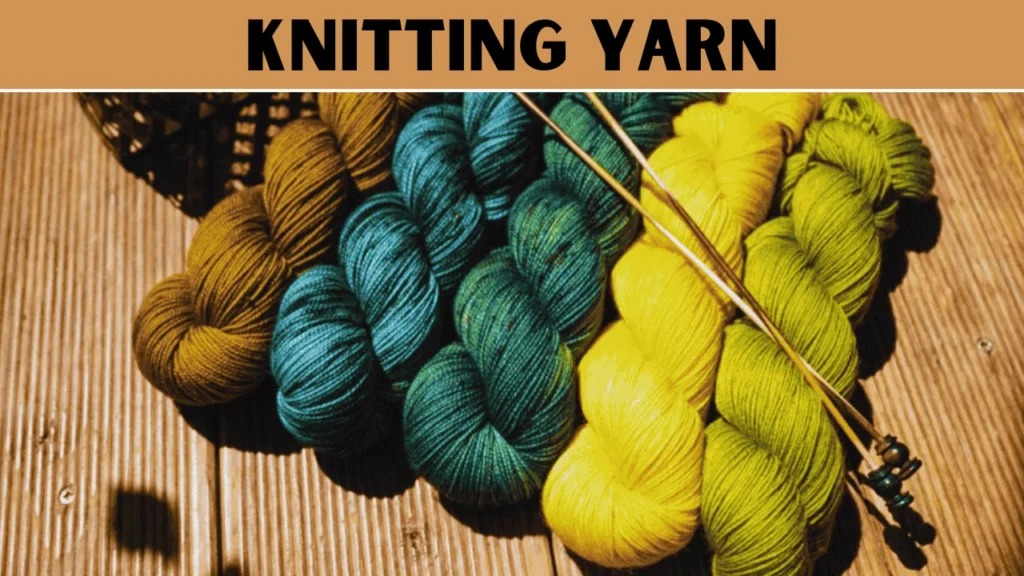
2. Knitting Yarn
The second thing you’ll need to knit is yarn. Always choose those yarns that are suitable for your project, easy to work with, and can withstand wear and tear.
Remember to always buy a skein of yarn, which is ready to use. Hanks needs to be wound into a ball before you can start knitting, which can be tricky for beginners. Besides, you also need to check the yarn label for the recommended needle size.
For example, if you’re using size 8 needles, choose a yarn that matches, like one with a label saying “8-10.” As a beginner, it’s better to stick to the smaller size in the range, as it makes your stitches more even.
Besides, as a beginner, you can choose Acrylic yarn. This yarn is cheaper but still works well with practice.
3. A tapestry Needle
A tapestry needle is a special sewing needle. It has a blunt tip and a big hole to make it easier to use with thick yarn. As a beginner, it’s a good idea to buy a set with different sizes. It might cost a little more, but it will be helpful for future projects.

4. Scissors
Scissors are another material that is used in Hand Knitting Projects & Stitches. They are needed for knitting to cut the yarn when you’re finished with a project or need to change colors. Besides help trim any loose ends to make your work look neat and clean.
You might already have scissors at home that can cut yarn, but if not, you can get some small, cute ones like stork embroidery scissors. They work great and look cool too!

What Are The Best Yarn Suggestions For Knitting For Beginners?
It’s best to start with yarn that is easy to work with. Try medium-weight yarn, like worsted weight, which isn’t too thick or thin. Cotton or acrylic yarns are great choices because they are easy to handle, affordable, and come in many colors.
Let’s dive into the best yarn suggestions for knitting for beginners. Including –
1. Easy Knit Cotton:
If you are a beginner and looking for the perfect yarn for starting. Then the easy knit cotton is the perfect choice for you. Because this yarn is forgiving, simple to use, and makes beautiful things!
The yarn is soft and easy to handle, so it won’t slip while you’re working, making it perfect for beginners to practice. It doesn’t stretch, which helps your stitches stay neat and in shape.
This yarn is also very durable, so your projects will last a long time, even with daily use. Plus, it comes in lots of fun colors, so you can pick the perfect shades for your creations!

2. Basic Merino Superwash:
This is another beginner-friendly yarn. Merino superwash comes from Mario sheep. The bread of this sheep offers the finest wool which gives luxury appeal.
The merino superwash is easy and soft which works well on knitting. The elastic and forgiving make it easier to fix mistakes. Besides this yarn is easy to care for and can be machine washable.
With this yarn, you can make warm and soft clothes like Gloves and Mittens, Hats, Beanies, Sweaters, or Cardigans.

3. Concept Cotton in Love
The Concept Cotton in Love is a perfect choice for making lightweight, soft, and breathable items. You can make items like lightweight sweaters, home decor, baby clothes, and blankets.
The yarn is super soft and feels nice to work with, which makes it great for delicate projects. It’s really easy to use because the yarn is smooth and doesn’t break apart.
Besides, The yarn is lightweight and lets air through, so it’s perfect for making comfy and light stuff. Plus, it comes in pretty colors you’ll love!

4. Concept Essential Alpaca
Concept Essential Alpaca is a soft and cozy yarn made from alpaca fibers, perfect for making comfy and warm items! This yarn is great for projects which need a little extra warmth. Besides, it’s best for knitting with 4-mm needles.
The concept of essential alpaca is super soft and makes you feel gentle and comfy against your skin. The yarn is warm and lightweight. It makes it perfect for wearable and cozy clothes. Moreover, this yarn is easy to wash and take care of.

5. Alaska:
Acrylic yarn is made of polyacrylonitrile which is a type of plastic. The yarn is durable, lightweight, and easy to care for. People often use acrylic yarn instead of wool. Because it’s cheaper, and it’s super easy to take care of, too!
With this yarn, you can make those projects that need warmth and comfort. You can make hats and beanies, scarves, cowls, blankets, and throws perfect for winter clothes and cozy items.

6. Big Merino: Virgin Wool
It is a popular choice for knitters and crocheters. Because it is easy to work with and produces beautiful results.
Basically, it is a seasonal yarn that is ideal for making warm blankets for the sofa and cozy cushions. Besides, this yarn comes in 30 different colors.
These colors are natural and have brighter shades. So, it’s a great chance to choose your favorite color for making your project our preference.

7. Chunky Wool
Chunky wool is another beginner-friendly wool. This yarn is mainly thick and fluffy. Perfect for making warm and cozy garments and accessories. Its yarn is typically made from wool fiber. But it also can be made from other materials like acrylic or cotton.
It’s perfect for making warm and cozy things like hats and scarves. The yarn feels soft on your hands and is comfy to wear. Since it’s thick, you can finish your projects faster!

8. Fair Cotton Mariner: 100% Cotton
Looking for a high-quality, sustainable yarn? Then the Fair Cotton Mariner is a great option for you. The yarn is famous for its environment-friendly production process and its short, comfortable feel.
Fair Cotton Mariner can be used for a variety of projects, including knitting, crocheting, and weaving.

9. Concept: Cotton-Cashmere Degrade
Concept: Cotton-Cashmere Degrade is a mix of super soft cotton and fancy cashmere that feels smooth and light. The yarn changes colors slowly, making your projects look pretty and special!
Because of its lightweight feature, beginners can easily handle it for both small and large projects. Plus The degraded effect of the yarn makes your projects look special without needing advanced techniques.
Shawls and wraps, baby clothes, sweaters, cardigans, and more are the best projects you can make with this yarn.

10. Concept: Veganette
The yarn is 100% plant-based fibers. Just like wool, this yarn is soft and spongy. Veganette yarn is specially designed for vegan knitters and crochets. Perfect for those who are looking for vegan-friendly options.
This is a seasonless yarn. Its warmth and weight make the yarn suitable to use all year round. Besides, Its Gorgeous colors make the yarn perfect for trans-seasonal and summer garments.

The 10 Best Beginner Knit Stitches You Should Know
Want to start Hand Knitting Projects & Stitches but not sure where to begin? Check out the 10 best beginner knit stitches you should know!
These easy stitches will help build skills and create beautiful patterns. Whether it’s your first project or your next, these stitches are perfect for beginners!
1
Rib Stitch

One of the easiest knits is Rib Stitch. It is a knitting pattern that makes stretchy lines, like vertical stripes. It is stitched by combining Hand Knitting Projects & Stitchesand purling in the same row.
To make the rib stitches start by knitting 2 stitches. Then bring the yarn forward and purl 2 stitches. Next, move the yarn back and knit 2 stitches. Repeat this pattern until the end of the row.
Rib stitches have a textured pattern that works for many things. This stitch is used in Cuffs on sweaters, cardigans, gloves, and socks, Bottom edges of sweaters or other clothing, Blankets, hats, mittens, and scarves for a stretchy and textured finish.
2
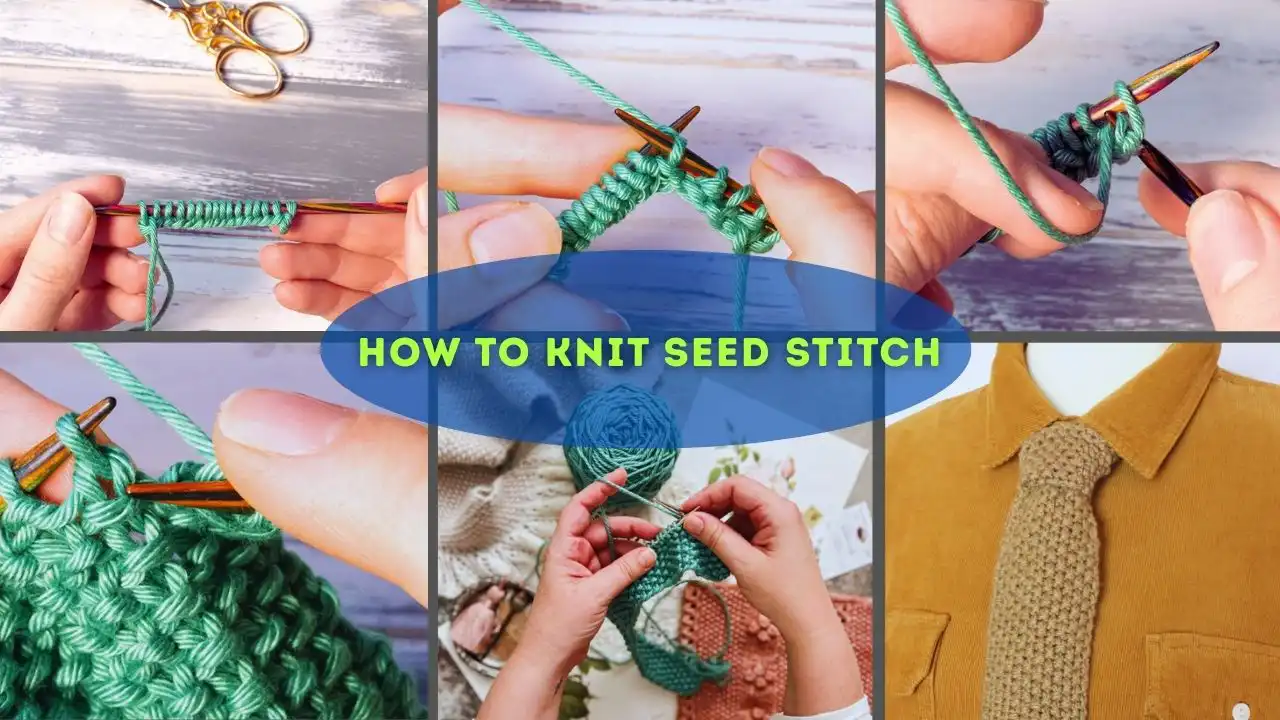
Seed Stitch

Seed stitches the another beginner-friendly stitch that is easy to use and handle. The pattern of this stitch is created by knit and purl stitch. It gets its name because the texture looks like tiny seeds scattered across the fabric.
You need to take turns doing knit and purl stitches across and up and down to make the seed stitch. It’s a popular stitch for knitting things like cardigans, shawls, blankets, scarves, and more.
In these stitches the fabric doesn’t curl at the edges, so it stays flat. The coolest part? The fabric looks the same on both sides. So it doesn’t have a “front” or “back.”
3
Moss Stitch

Most knitting-lovers consider moss stitch beginner-friendly crochet stitches. Moss stitch is also called the linen stitch because it looks like the texture of linen fabric.
The pattern creates a neat, textured design with a slightly woven appearance, similar to how linen fabric feels.
The moss stitch is a simple knitting pattern. With the moss stitches, you can make scarves, blankets, and dishcloths. This stitch creates a short structure and is quite light, so it works well in shawls, cowls, or slouchy beanies.
4
Garter Stitch

The garter stitch is an easy pattern that doesn’t need purling. It makes a thick, strong, and stretchy fabric. People use it to make borders or edges, and it doesn’t curl like other stitches do.
To knit a garter stitch, knit every stitch across each row. Keep repeating this, and the fabric will stay flat. For neat edges, start each row with a slip stitch.
With these snitches, you can make those projects that require textured fabric. Baby sweaters, dishcloths, scarves, blankets, and mitts can be made by garter stitch.
5
Double Woven Rib

The double woven rib has a complex look but the stitches are only two-row repeated. The stitches create a thick, stretchy, and durable fabric which makes the items warm, comfy, and strong.
This pattern is often used for warm, durable items like sweaters, blankets, or scarves.
To do the Double Woven Rib, knit one row and then purl the next. After a few rows, you’ll start knitting into the stitches below to make the fabric thick and stretchy. Keep repeating this pattern until you’re done!
6
Hurdle Stitch

Hurdle stitch is a bumpy pattern made with knits and purls. It’s like rib stitch, but with two rows of garter stitch in between. The bumpy lines look like hurdles that horses jump over, which is how it got its name!
Hurdle stitch is the easiest stitch to do. Start by knitting all the stitches for the first two rows. Then, for the next two rows, alternate between knit 1 and purl 1 across the row. Keep repeating these four rows to make the pattern!
This stitch is reversible and stretchy and lays flat, which makes it a good choice for blankets, scarves, sweaters, and socks. You can also make Tea Towels and curtain ties.
7
Purse Stitch

The Purse Lace Stitch is an easy lace Hand Knitting Projects & Stitches that makes tall, straight lines. It uses a mix of purl stitches, yarn overs, and decreases to make a thick fabric. This stitch is quick to learn and great for practicing!
Start by casting on an even number of stitches To knit the Purse Stitch. Then, purl 1, yarn over, and purl 2 together. Repeat this pattern until the last stitch, which you just purl.
Keep repeating this row until your fabric is as long as you want. Remember to work the yarn over at the start and end of each round.
The lacy texture of purse stitches is great for creating light and decorative pieces. Purses, shawls, scarves, blankets, sweaters, or cushion covers are the great things that can be made by purse stitching.
8
Open Honeycomb Stitch

The open honeycomb stitch is a knitting pattern that creates open spaces shaped like a honeycomb. It is a simple knitting pattern that’s good for beginner and more advanced knitters.
The stitches are made by combining slip stitches (to shape the pattern) and yarn over (to create the holes).
To do the Open Honeycomb Stitch, you use yarn overs to make loops and slip stitches to move stitches without knitting them.
These steps create little open spaces that look like a honeycomb pattern. Repeat the pattern and follow the steps for each row to keep it going.
With an open honeycomb, you can make a lot of projects. This stitch works well with lightweight scarves, shawls, and blankets. In this knit, the open spaces make the fabric breathable adding texture and an airy, decorative look to your fabric.
It also looks lovely in sweaters or even as a decorative pattern in other knitting projects like pillows or dishcloths.
9
Feather and Fan Stitch

The Feather and Fan stitch is a famous pattern from Shetland. It’s also called “Old Shell” or “Old Shale” because it looks like ocean waves on the sand. The stitch is easy to learn, so it’s great for both new and experienced knitters!
To do the Feather and Fan Stitch, first knit a few rows. Then, make a yarn over and knit stitches together to create a wavy design. Repeat this pattern across the row and knit or purl a few plain rows in between.
This stitch pattern stays flat and has a wavy edge that goes from the start to the end of the fabric. It also looks nice on the other side! Making perfect choices for projects like shawls, scarves, and light sweaters.
10
Indian Pillar Stitch

The Indian pillar stitch is a beginner-friendly stitch with beautifulHand Knitting Projects & Stitchespatterns. These stitches create vertical lines on the fabric like tall pillars. It is a simple two-row pattern that makes columns of small bumps and a pretty lace-like design.
To do the Indian Pillar Stitch, you knit one row, then make loops by wrapping the yarn around the needle in the next row. On the third row, you drop the loops to make the long pillars, and then you purl a row to finish the pattern.
The stitch stays flat and looks nice on both sides. It’s perfect for making scarves or adding a fancy design to sweaters, mittens, or socks!
15 Super Fun Finger Knitting Projects
Looking for fun ways to use finger knitting? Here are 15 super fun projects to try! From kitchen trivets to rope blankets, scarves, and necklaces, finger knitting is a great way to get creative.
All you need is some yarn and your hands to start making awesome things!
1
Finger Knit Trivet

Want to add a homemade touch to your kitchen? A finger-knit trivet makes your kitchen extra special.
Made with simple rope, these trivets are great for keeping your counters safe from hot pots and pans. They look pretty and are easy to make! This trivet is made by two-finger knitting.
You just finger-knit a long strand of thick yarn, roll it up into a flat circle, and sew it together. You can use fun yarn colors to match your kitchen, and it’s a quick project that makes a great gift too!
2
Hanging Basket

Want to make something with your finger knit that decorates your room and keeps things organized? Then the hanging basket is a fun and easy project that you can make by your finger knitting.
You finger-knit a long strand of yarn, make it into a strong net, and hang it on a hook. It’s great for holding small plants, toys, or other light things. You can pick your favorite yarn colors to make it look really cool!
3
Twisted Rope Blanket

Cozy up your living space with a warm Twisted Rope Blanket! It’s made by knitting thick yarn into long, twisty strands that look like ropes. These strands are then joined together to make a soft and warm blanket. To make it unique you can use any type of colors which you like.
You can use a twisted rope blanket on the bed or couch, an outdoor picnic, as a throw, or as decoration pieces. This blanket isn’t just comfy—it also adds a beautiful handmade touch to your home!
4
So Twisted Mug Rugs

Give your coffee table a fun update with some Twisted Mug Rugs! You can finger-knit them using thick yarn and twist the strands together. They’re great for placing under your mugs to protect your table from heat. You can make them in any color you like to match your kitchen or living room.
The Twisted Mug Rugs are great for bringing extra warmth and charm to any room!
5
Circular Crochet-Look Throw

Want to make a cool throw that looks like crochet but is way easier? Try the Circular Crochet-Look Throw! All you need is some yarn and simple stitches to make a cool, round design that looks like a pro made it.
To make a Circular Crochet-Look Throw, you’ll need soft yarn and a big crochet hook. Start by making a chain of stitches, then keep adding stitches in a circle to make the shape of the throw. You can use different yarn colors to make it fun, or just one color for a simple look.
This cozy throw is perfect for your couch or bed, and it’s a fun project that anyone can try—even beginners! You’ll love the comfy and stylish finish when you’re done!
6
Finger Knit Cowl
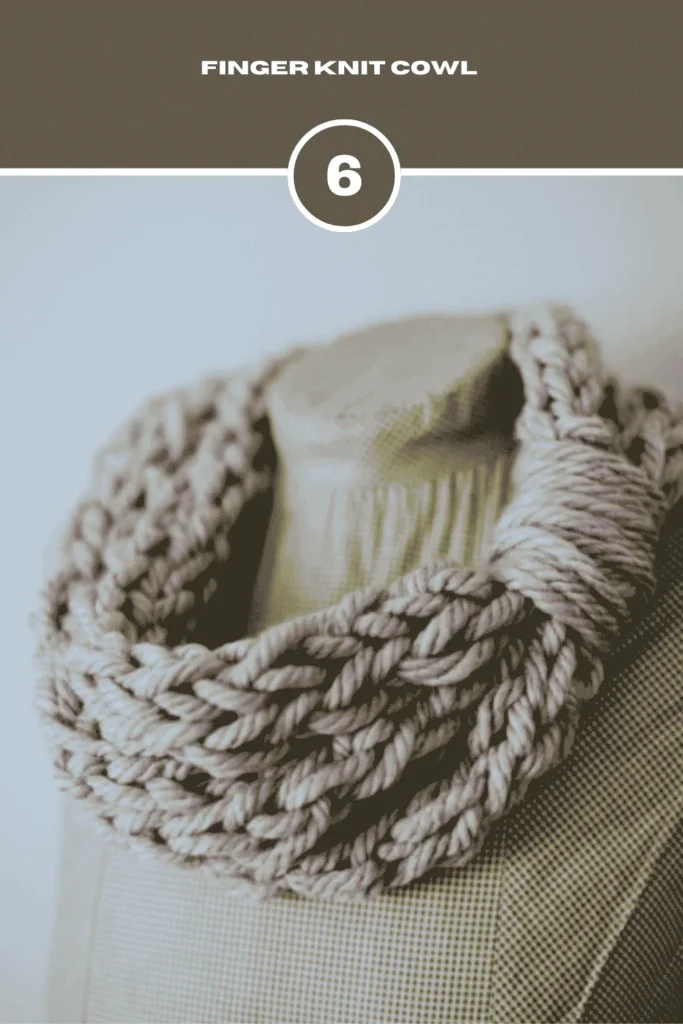
This winter you want to make a last-minute gift for your favorite one. Then the finger knit cowl can be the perfect gift.
The finger-knit cowl is an infinity scarf with layers of finger-knit chains. It was wrapped snugly around your neck to keep you warm. This cowl is stylish and easy to make. Finger-knit long chains, then layer them together.
Secure the ends of the layer together. You can use soft, chunky yarn in your favorite colors to match your style.
The finger-knit cowl is warm, stylish, ish and made with love. Perfect for handmade gifts and chilly days.
7
Namaste At Home Cardigan

The Namaste At Home Cardigan is a comfy and stylish project that’s perfect for relaxing days at home! You finger-knit long pieces of soft yarn and put them together to make a comfy cardigan.
Use thick yarn to keep you warm and choose colors you like best. This cardigan is great for wearing over your clothes or for staying comfy on cold days. It’s simple to make and feels like a warm hug!
8
Finger Knit Pouf Cushion Cover

If you’re a newbie to finger knitting, then the Finger Knit Pouf Cushion Cover can be the perfect choice for you. It is a fun and beginner-friendly project that adds a comfy and stylish touch to your room.
To make it, you use your fingers to knit long strands of thick, soft yarn. Once you’ve made enough, you weave or stitch them together to form a cover for a pouf cushion. You can choose bright colors to make it pop or stick to one color for a more classic look.
9
Finger Knit Pillow

With a Hand Knitting Projects & Stitches, want to Give your couch or bed a stylish upgrade! Then Finger Knit Pillow can be the perfect choice for you.
A finger-knit pillow is a cozy and stylish project made using finger-knitting techniques. It’s perfect for beginners and allows you to create a soft, decorative pillow cover without any tools—just your hands and yarn!
Easy for Beginners Simple and fun to make. Besides, you can Customizable the pillow with your favorite colors and yarn textures. Stylish and Functional it Adds a warm, handmade touch to your home decoration.
10
Hugs and kisses blanket

Making a blanket might sound like a big project. With thick, chunky yarn, you’ll finish it faster than you think!
This blanket has an Xs and Os pattern. That looks like hugs and kisses all over the blanket. Use big, chunky yarn in your favorite colors to make it special. This blanket is great for cuddling up or as a gift. It’s not just warm—it’s full of love, too!
11
Finger knit hair tie

Looking for a quick and fun finger-knit project to make as a gift? Then try out the finger-knit hair tie. It’s a super easy, cute project which only takes a little time.
You just finger-knit a small, stretchy strand and then tie it into a loop to use as a hair tie. For making you can choose any color yarns to match your style.
12
Finger knit necklaces
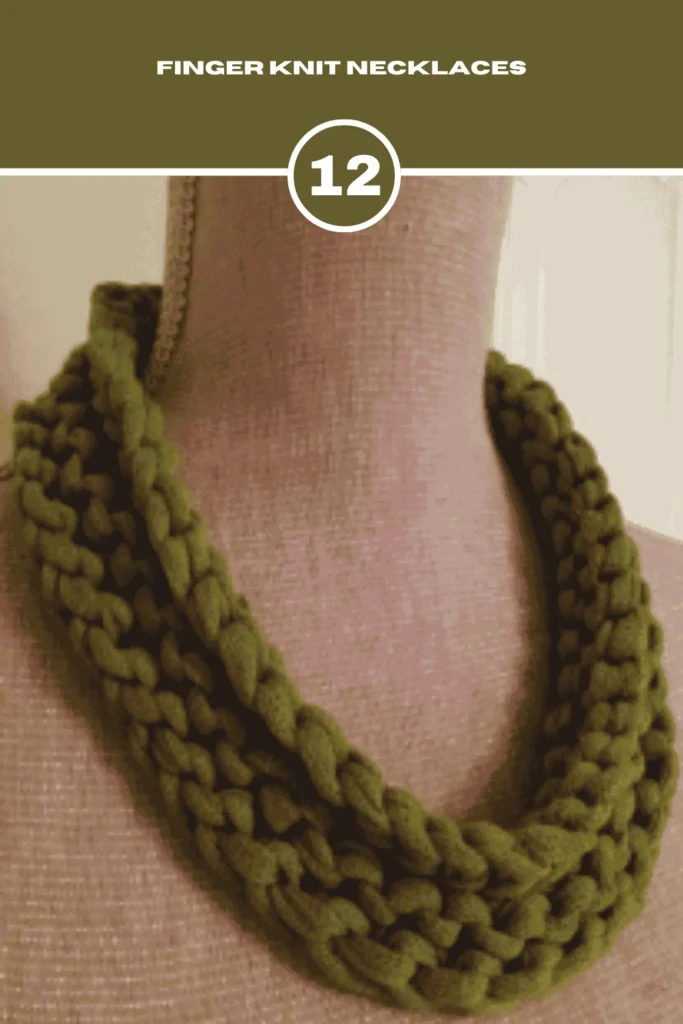
Want to make something special or unique with finger knitting? Then try to make finger-knit necklaces. It is a piece of jewelry made by using fingers and some yarn. You weave the yarn into a long, stretchy chain. Once it’s done, you can wear it around your neck like a colorful necklace.
For adding a unique design, you can add beads, or even mix different types of yarn. The result is a soft, stretchy necklace that’s fun to wear.
13
Slip and Slide Cable Blanket

Slip and slide cable blanket is another finger-knit project that you can make for your loved ones or your personal uses. This blanket has a pattern with big, chunky cable braids that repeat all through the blanket. The ends of the blanket have a ribbed design, making it look extra cool!
It’s a fun way to create something warm and beautiful with just your hands and some yarn. Perfect for snuggling up or decorating your home.
14
Finger Knit Hanging Plant Holder

This finger-knit plant holder is a perfect way to add some color to a sunny window! It’s an easy and fun project where you can use your hands and yarn to make something beautiful.
The knit is made by using thick, cozy yarn to create a beautiful, strong strand that holds your favorite plant. The yarn loops come together in a fun way, making a cool pattern that looks like a cute succulent. You can choose your favorite yarn colors to make it unique.
When it’s finished, everyone will be amazed at how you made something so cool with just your hands!
15
Finger Knit Beanie

Make your own cozy finger-knit beanie! You don’t need any special tools—just your hands and some chunky yarn. It’s an easy and fun way to make something cool.
By knitting in a circle, you can make your beanie fit just right. You can pick your favorite color or use lots of colors to make it unique. When you’re finished, add a fluffy pom-pom on top to make it extra fun!
How to Choose the Right Yarn and Needles for Different Hand Knitting Projects?
Choosing the right yarn and needles can make knitting a lot more fun and help the project turn out just right. Here’s a simple guide to help choose the best ones for any knitting project:
Think About What You Want to Make
Different projects need different yarns and needles. For example, if you are making a warm scarf, then thicker yarn and bigger needles work best. But for a light, soft hat, thinner yarn and smaller needles are better.
Look at the Yarn’s Thickness (Weight)
Yarn comes in many thicknesses—from very thin to super thick. Thicker yarn works fast and makes chunky, cozy things. Thin yarn is good for delicate, smooth projects like baby clothes or lace patterns.
Feel the Yarn
Touch the yarn before buying. Is it soft, scratchy, or smooth? Soft yarn is nice for things you wear close to your skin. Rough yarn might be better for things like rugs or bags.
Match Needle Size to Yarn
Yarn labels usually say what needle size fits best. Bigger needles with thicker yarn make bigger stitches and faster knitting. Smaller needles with thin yarn make tight, neat stitches.
Choose Needles That Are Comfortable
Needles come in wood, metal, or plastic. Wood feels warm and a bit sticky—good for beginners who don’t want stitches to slide off easily. Metal needles are smooth and fast but can be slippery.
Try Before You Buy
If possible, make a small test square with the yarn and needles. This helps see how the yarn looks and feels when knitted, and if you like the size of the stitches.
How to Knit A Sweater Using Hand-Knitting Techniques?
This winter, surprise your loved ones with a hand-knitted sweater! It will keep them warm and show how much care went into making something special just for them. It’s the perfect gift to make the season even cozier!
Let’s dive into how to make a handmade sweater step by step!
Required Materials:
- Yarn: Choose a yarn you like. Check the label for the recommended needle size.
- Knitting Needles: Pick needles that match the yarn size.
- Pattern: A beginner-friendly sweater pattern.
- Measuring Tape: To check your size.
- Stitch Markers: To keep track of sections.
- Tapestry Needle: For sewing pieces together.
Here are the steps of knitting a sweater using hand-knitting techniques. Including –
Step 1: Measure Yourself and Select a Pattern

Start with a simple pattern that’s easy to follow. Like a pullover or a cardigan. Then, measure around your chest, the length of your arms. Measure from your shoulder to your waist to choose the right size for your sweater.
Step 2: The Front And Back Panel
We will need to work on both the front and back panels before moving on to the other parts of the sweater. In this pattern, the back panel is mentioned first but you can knit in whichever order you choose. The great news is the steps for both panels are relatively the same.

Cast on the right number of stitches for your size using size 12 mm (US 17) needles. Use the long-tail cast-on method to start. Make sure you have the exact number of stitches you need on your needle.
Then you need to begin working one rib by one rib until you reach the end of the yarn. Make sure to hold the yarn tightly for the first few rows so it doesn’t come undone. Having a long tail is a good idea because it will help you sew the panels together later.
Once you reach the number of rows listed or even desired it’s time to change the needle. Change needles for a nice polish. Pay attention to the bottom of your ripped pieces on one side. There you’ll see a nice braid effect and that’s what we’ll use as our right side.
Step 3: Using Interchangeable Needles
So that means once you change out your needle you’ll knit this next row. For change, you can use interchangeable needles because it’s so easy to switch out the needle and keep on working.

Here are the steps on how to change your needle with interchangeable needles:
- First, finish the row that you’re working on.
- Then Hold the cord tightly and twist the old needle tip to unscrew it.
- Take the new needle tip and screw it onto the cord where the old one was. Twist it tightly so it doesn’t come loose while you knit.
- Gently tug the needle to make sure it’s secure.
Just connecting this one makes it easier to do all this. Now we are on our right side row, you can see the stitches right there like a little braid technique. That means, you are on the right side row so you need to knit the next row.
So the entire row you can knit with one needle is 12 millimeters and one is just 15. Move your left stitches. Once you switch out you’ll work back and forth in stockinette stitch.
From there on it’s just some meditative knitting until you reach your desired length. You can easily finish one panel in just a few hours.
Step 4: Shaping The Neckline
When you think your sweater is long enough, check with measuring tape. The cozy mock neck sweater is very customizable. If you prefer to lengthen or shorten the body that’s entirely up to you. So once you reach your desired length you can just cast off the back for the front panel.
For the front panel, knit until it’s the right length. Then it’s time to shape the shoulders. Start with the right row you’ll knit the number of stitches for the left shoulder. Place these stitches on a spare needle or string.

After that, cast off the Hand Knitting Projects & Stitches for the neck opening. To cast off knit the first two stitches. Then take the first stitch and lift it up over and off the needle. Be sure to check the knitting pattern for the correct number of stitches for your size.
After the neck is cast off, knit across the remaining stitches to start the right shoulder. For the right shoulder, you’ll need to decrease stitches at the start of each knit row. To decrease:
- Knit two stitches together to make one stitch.
- Keep following the pattern for the number of rows and decreases you need.
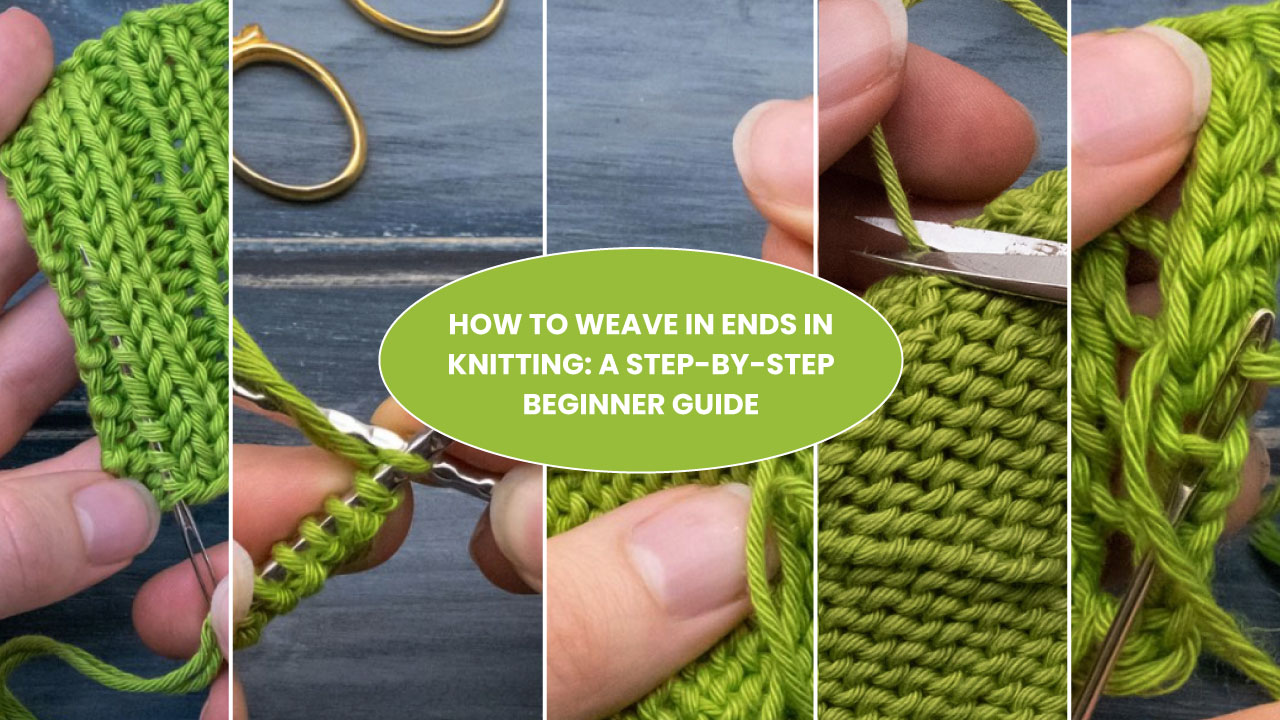
When you finish knitting and have extra yarn, thread it through a big needle and weave it under a few stitches on the back side of your sweater. Go back and forth a couple of times to secure it, then trim off any extra yarn!
Step 5: Seaming
Before moving knit the collar and sleeves. You need to sew together the front and back panels at the sides and shoulder. If you want you can start with the body panel. Feed your darning needles through your string.
You can use the tail of your cast to weave in your Hand Knitting Projects & Stitches. If your tail isn’t enough then you can use the string from your working yarn.

With both panels on the right side facing up insert the needle up through the first body panel. To secure it in place you need to weave this string back and forth between the two panels to sew them together.
Again to seam the two panels together, identify the V shapes on the side of the panel.
Insert your needle behind the bar between the next V and line and pull your yarn through. Continue back and forth up the sides leaving an opening for your sleeves.
Step 6: The Collar
Now, it’s time to knit the collar. To knit the collar you will be picking up stitches in the round using 12-millimeter us17 needles.
Insert your needle into the first stitch opening. Wrap your working yarn around your needle and pull it back through. This process to pick up Hand Knitting Projects & Stitches along the collar as recommended in the pattern.

Step 7: The Sleeves
For the sleeves, you need to pick up Hand Knitting Projects & Stitches in the round with 15-millimeter needles. But instead, you can work in stocking stitch the whole way through until you reach the cuff.
Once you’ve done you’ll switch from 15-millimeter to 12-millimeter needles. Work in one by one rib. Then you’ll cast off in ribbing or your preferred method. All you need to do is repeat these steps for the second sleeve.

Step 8: The Final Result
Once all the pieces are knitted, seamed together, and loose ends are woven in, your cozy sweater is complete! Try it on and admire your hard work—you’ve made a warm, stylish sweater that’s uniquely yours. Great job!

How to Knit A Blanket Using Hand Knitting Projects & Stitches Techniques?
Hand-knitting a blanket sounds so much Hand Knitting Projects & Stitches, but it’s actually fun and simple! With just your hands and yarn, a cozy blanket can be made in no time.
It might seem tricky at first, but once the steps are learned, it’s easy and enjoyable to create something special!
Materials:
- Chunky yarn or super bulky yarn (you’ll need about 6–8 skeins for a small blanket).
- A flat surface, like a table or clean floor.
- Measuring tape
- Scissors
- A needle and thread (totally optional, used to reinforce areas where you are tying on new pieces of yarn)
The yarn will needed for hand-knitting blanket: Here’s the size of yarn used for the blankets:
Chenille blanket: 6 balls of yarn (168 yards) were used to make a 48×52-inch blanket with loose stitches (2.5-2.75 inches). It’s a good size for your lap or the couch.
Tube yarn blanket: 10.5 lbs of yarn (250 yards) were used for a 50×54 inch blanket with
Smaller stitches (about 2 inches). Next time, it would be better to make it narrower (46 inches) for a longer, rectangular shape.
Steps of Making a Blanket Using Hand Knitting Projects & Stitches :
Here are the steps of making a blanket using hand-knit:
Step 1. Make a Slip Knot
Sit at a table with the yarn in front of you and the tail facing you. Tie a slip knot about 6 inches from the yarn’s end.
The loop should be the same size as your other Hand Knitting Projects & Stitches. To keep the loops even, pull the knot until it’s big enough to fit three fingers inside, about 2 inches. You can use cardboard to measure the loop size until you can keep them even without checking.

Step 2. Create a Chain for the First Row
For the first row of the blanket, you’ll make a chain. Start by pulling the working yarn through the loop you just made to create a new loop the same size (use your hand to check).
Keep pulling the yarn through each loop to make more loops until the chain is as wide as you want the blanket. Add one extra loop at the end.
To keep the loops the same size, use three fingers to measure each loop (about 2 inches). Check each loop as you go to make sure they are even. This helps the blanket look neat.

Step 3. Start the Second Row
Now it’s time to start making knit Hand Knitting Projects & Stitches, the simple stitch you’ll use to hand-knit the whole blanket. Begin your first row by working toward the left.
Always skip the first loop (the last one you just made) at the start of each row. This helps create neat edges on your blanket.
Look at the chain you just made and find the hole inside each loop. Skip the first loop and pull the working yarn from the back through the second hole on the right to make a vertical loop. Check the loop size with your hand to keep it even.
If the chain unravels, you might be pulling the yarn from the front instead of the back—make sure to pull it from behind.

Step 4. Continue Knit Stitching
Keep pulling the yarn from the back through each loop in your chain to make vertical loops that are the same size. When you reach the end, make a loop through the last hole and the knot to finish the first row.
Next, go back to the right. Skip the first loop (the one you just made) and start in the second loop. Keep making knit stitches across the row until you reach the end. At the end, pull up the skipped loop from the row before and make a loop through it.
Then, go back to the left. Skip the loop you just made and keep knit stitching. At the end of every row, stitch through the skipped loop from the last row. At the start of every new row, skip the last loop you made. This creates a braided edge on your blanket.

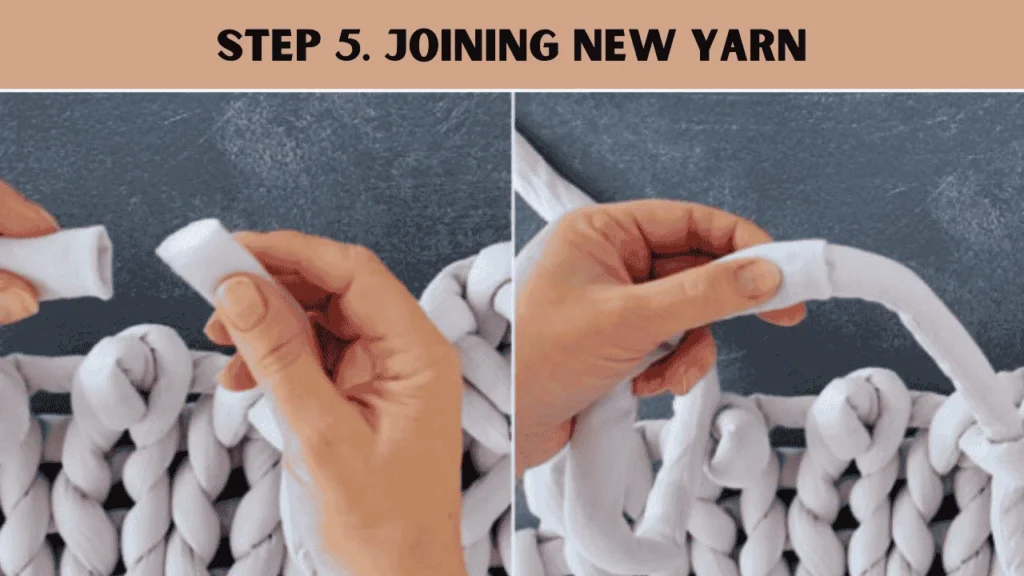
Step 5. Joining New Yarn
If you’re using yarn balls instead of one long piece, you’ll need to join them.
1. For chunky chenille yarn: Tie the old yarn and the new yarn together in a double knot. Pull it tight and cut off the extra yarn.
2. For tube yarn: Pull back the outside of the new yarn and take out about an inch of the stuffing. Fold the edge inside to make it neat. Place the old yarn into the new yarn and sew them together with a needle or thread
Step 6. Binding off the Top
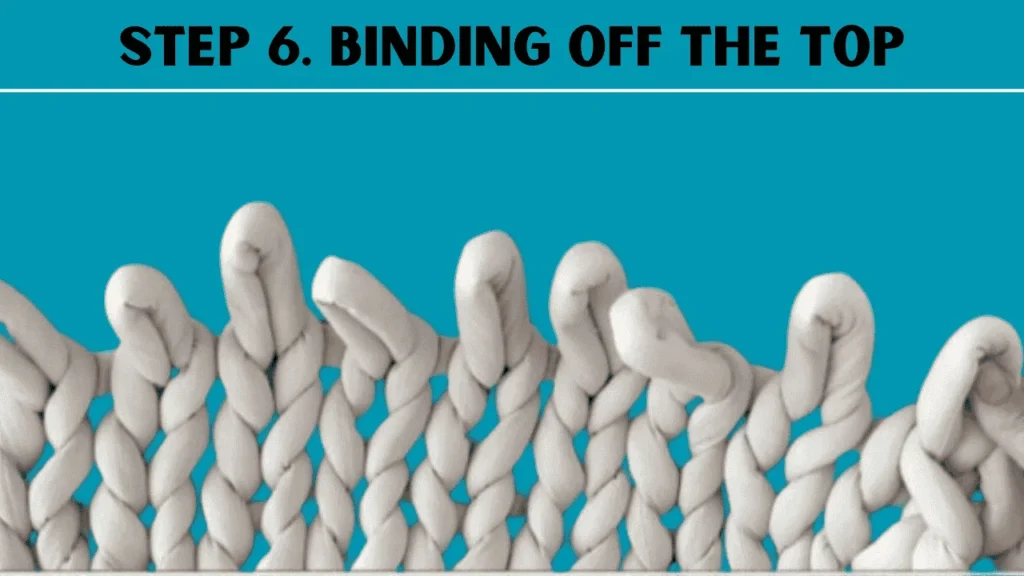
When the blanket is the right size, make the last row loops a bit bigger. Cut the yarn, leaving a 12-inch tail, then go to the other side and start binding off.
Take loop 2 and pull it through loop 1, then loop 3 through loop 2, and keep going. This keeps the braided look on the sides. When you reach the end, overlap the last loop with the skipped loop and pull the tail through both. Tie a knot to secure it.
Step 7. Securing the Tails
At this point, there will be a tail at both ends of the blanket. The last step is to hide and secure them. Some people suggest weaving the tails into the blanket. But they can come loose. It’s better to weave them in and then stitch them with a needle and matching thread.

Haven’t you cleared yet? Let’s watch this YouTube Video for your easy understanding.
In Closing
The right tools can make hand knitting way more fun! Now you know what hand-knitting is and how to get started, which materials are good, beginner-friendly hand-knitting projects. Take your time to choose what feels best for you.
If you’re just starting, try using soft yarn and easy patterns. Don’t rush—just keep practicing and you’ll get better.



![Select Crochet Clothing Ideas: [Best Crochet Fashion] Crochet Clothing Ideas](https://crochetmind.com/wp-content/uploads/2025/07/Crochet-Clothing-Ideas-Best-Crochet-Fashion-in-2025-1-1.jpg)

![The Best 30+ Free Crochet Cat Patterns [Beginner-Friendly Guide]](https://crochetmind.com/wp-content/uploads/2025/04/1-The-Best-30-Free-Crochet-Cat-Patterns-Beginner-Friendly-Guide.webp)
