Are you keen on creating beautiful designs through your hands? Are you looking for something easy to learn? Then punch needle embroidery would perhaps be ideal for you.
In this comprehensive guide, we are going to instruct you on how to punch needle. You will learn from basic instructions to the finishing of your project. Whether you are a beginner or want to refresh your old skills, this guide will help you learn everything.
In This Post
- What is a Punch Needle?
- History of Punch Needle
- What is Punch Needle Embroidery?
- How to Punch Needle? [Complete Guide]
- Is Punch Needle Easy to Learn?
- What Are the Different Types of Punch Needles?
- Key Factors to Consider When Choosing a Punch Needle
- Things Required for Punch Needle
- How Does a Punch Needle Work?
- Finishing Process of Punching Needle
- Tips for Better Punching
- Precautions While Punching
- Final Thoughts
- FAQ’s
What is a Punch Needle?
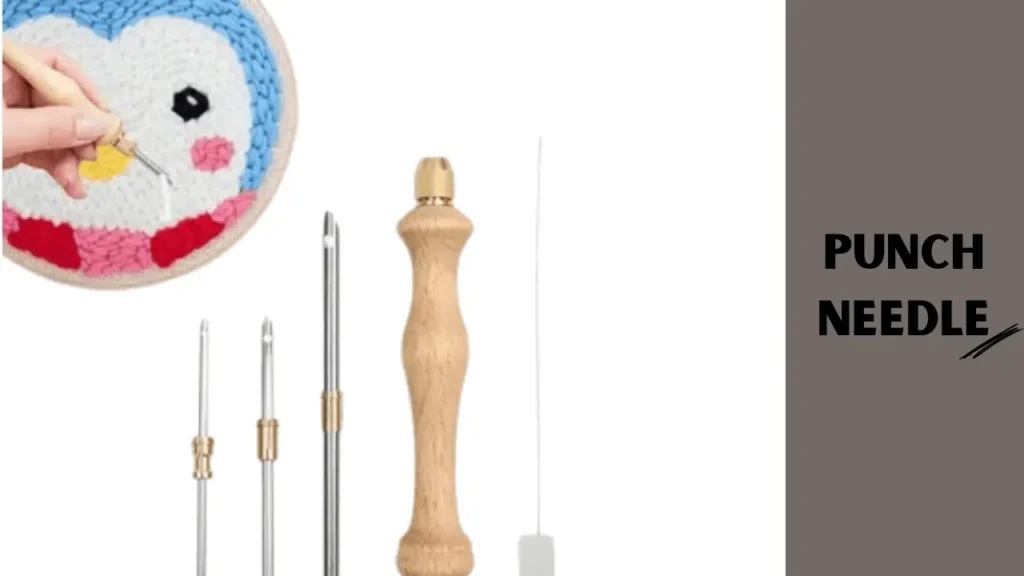
A punch needle is a tool that punches the loops of yarn into the material to make patterns on fabric. It’s just an enjoyable and easy-to-do craft in which you can create textured designs. It works like a pen, but instead of putting a drop of ink, you place yarn as the picture or the design on your Cloth.
A punch needle embroidery lets you “punch” the Thread through the Cloth and create small loops on the other end. These loops will give your design a three-dimensional look. Learning how to punch needle embroidery is easy so you can create fun and decorative pieces like wall art, cushions, and rugs with practice.
History of Punch Needle
The punch needle technique has existed for centuries. Some claim that some of these techniques are as old as ancient Egypt. However, others argue that they originated from Russian and Persian cultures. This embroidery became fashionable, especially during the 19th century, when people used it to make rugs and other home decor items.
Unlike today, punch needle art has always been practically applied. This was how many people made warm, thick pieces of items to use for home use. Current punch needle is a creative hobby well suited for people from all walks of life. Knowing how to punch a needle lets you connect to this rich history while making modern and unique art pieces.
What is Punch Needle Embroidery?
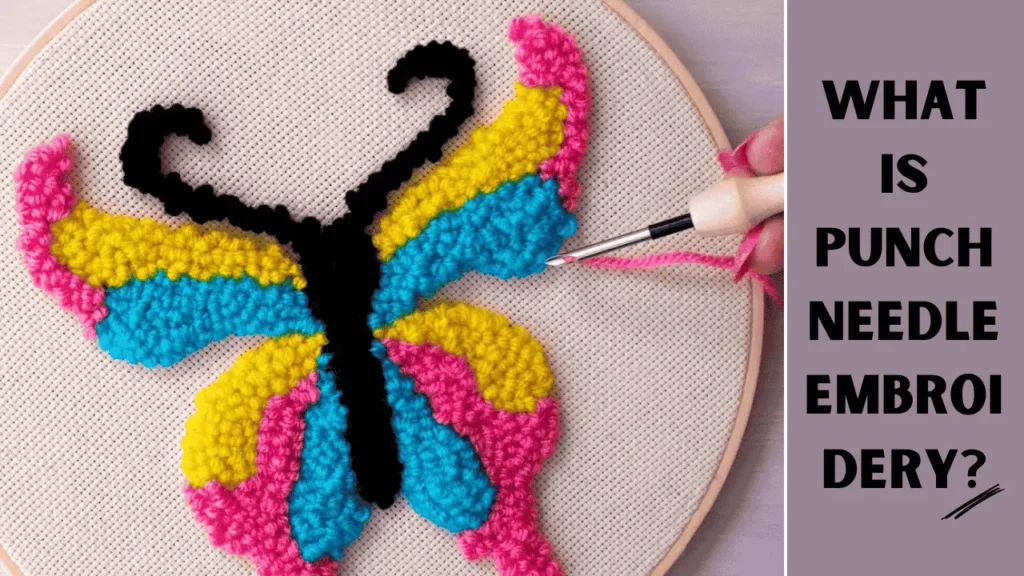
This embroidery is made with a particular needle-punching thread on the fabric to make patterns. It’s very much like regular embroidery, except instead of pulling the thread through the fabric, you punch it in and leave loops of yarn that make up a raised design.
When you begin working on punch needle embroidery, what will be the back side of your work for now will eventually be turned around to face out. This technique can create several textures using different types of yarns or threads. After learning how to punch needle embroidery, you can try various fabrics, yarns, and patterns to develop your style of art pieces.
How to Punch Needle? [Complete Guide]
It’s easy to learn how to punch needle. To get started on your punch needle project, just follow the steps below.
Step 1: Use a Large Cloth
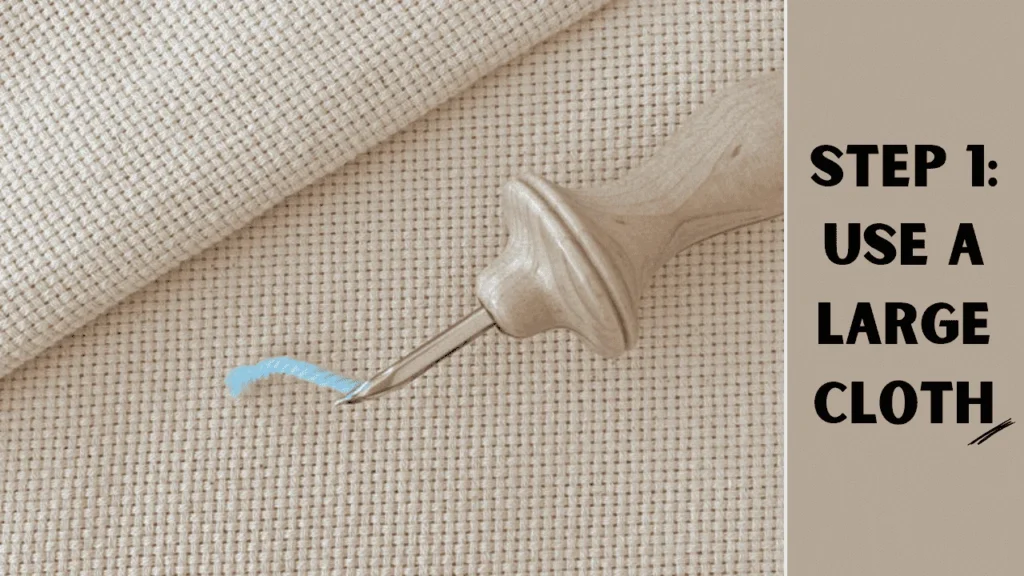
Your first step in learning this fascinating craft is choosing the fabric for your punch needle project. The kind of fabric selected for your punch needle embroidery shapes the outcome of your embroidery. It would help to have a large piece of Cloth for your design.
Monk’s Cloth is the best-recommended fabric for punch needle embroidery. It has a slack weave, so the Thread passes through it easily and holds your yarn loops nice and tight. It is very durable, too, making it ideal for making rugs, cushions, or wall art.
If you are new to punching needle embroidery, beginning with a large piece of Cloth is excellent. A larger size enables more room for practice and ensures you have enough space before completing a given design.
Measure the design before cutting the fabric and leave extra fabric around the edges for enough space to fit the fabric attaching to the embroidery hoop or frame. First of all, wear the river-sized Cloth. This is one of the primary tips while learning how to punch a needle.
Step 2: Stretch the Canvas
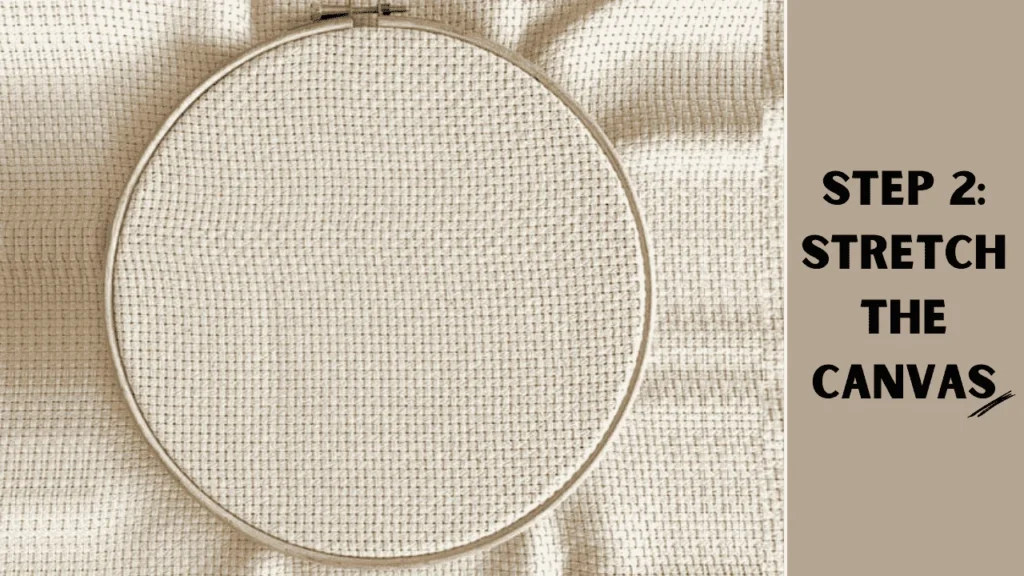
Now, you’re going to take this big piece of fabric and stretch it out snugly over an embroidery hoop or frame. It’s good to have the fabric tightly fitted over the hoop; otherwise, when you punch the needle, if it is loose or sagging, it makes it hard for your needle to penetrate as it should.
Spread it over the hoop or frame and stretch the fabric just like the head of a drum. Such tension in the fabric will allow you to push the punch needle throughout and ensure that stitches come out neatly.
If you pull it too loosely, the yarn may fall out, or the loops may not be even, preventing a neater finish. As you learn how to punch a needle, you will find how critical this act is to achieving neat results with a professional finish.
If using an embroidery hoop, tighten the screw at the top where it holds the fabric in place. An adjustable frame is a better bet for large projects as it gives far more support under the fabric. A tight surface is necessary to master the punching needle; ensure your fabric is tight every time you move on to the next step.
Step 3: Draw a Pattern on the Cloth
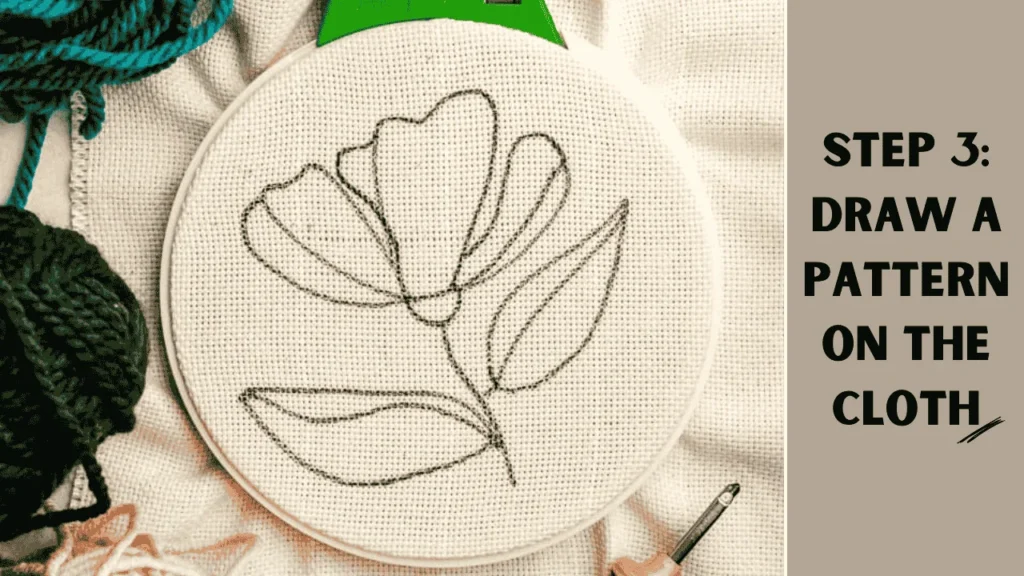
Now, it is time to add your design. While learning how to punch a needle, creating a design on your fabric is one of the most important parts of the process. It will serve as a guide when you are punching. If you are a beginner, then start with simple patterns like flowers, geometric shapes, or animals because they are easier to trace.
Sketch the design on the fabric using fabric-safe markers or pencils. Ensure that you draw them lightly so they will not be too visible and will be covered by the yarn. If you lack confidence in your drawing skills or need more confidence, print out a design and trace that onto the fabric.
You can place your printed design under your Cloth, trace the pattern with a lightbox or hold it against a window. Careful pattern drawing will make it easier to follow while punching, leading to a cleaner, more organized final result when punching the needle.
The better you plan the design before punching, the more balanced and beautiful the embroidery will be. Knowing precisely where each color and stitch will go makes punching a needle easier and more enjoyable.
Step 4: Thread the Punch Needle with Yarn
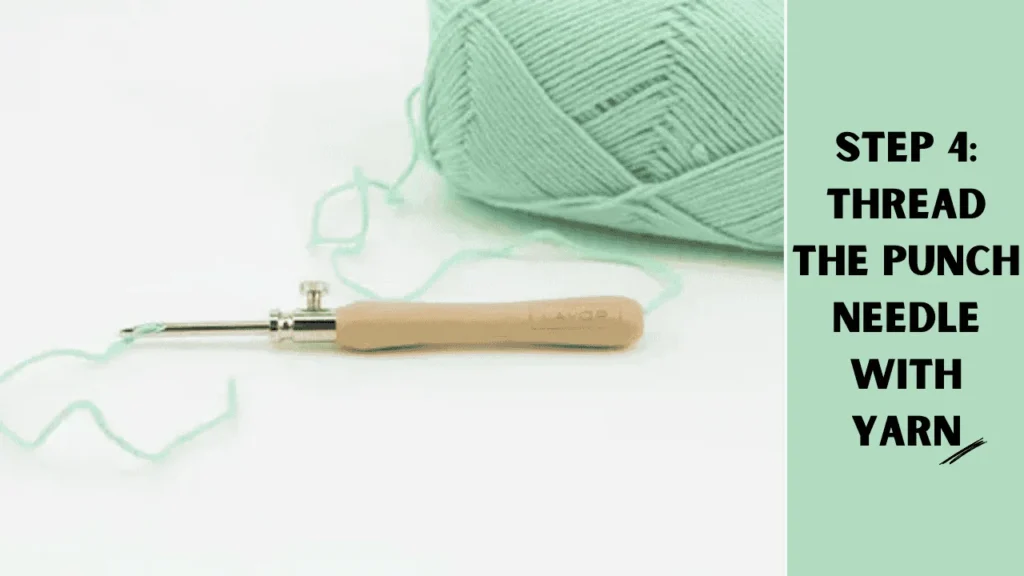
Now that your design is set, it is time to thread the punch needle. This is part of the process when learning how to punch a needle. That first step probably seems daunting at first but with practice, patience, and time, threading the punch needle will be as quick as knitting. First of all, you need to choose a yarn size to match the size of your punch needle.
To thread the punch needle, take the end of the yarn and pass it through the eye of the needle. For most people, the tools included with the punch needles provide a great advantage in threading the punch needle. Push the threading tool through the shaft of the needle, and you will have drawn the yarn through the eye, so there is a small tail of yarn dangling out the end of the needle.
The kind of yarn you choose determines the final look of your design. For beginners, a thicker yarn is recommended, easier to manage. Still, as you become more experienced in how to punch a needle, you might experiment and play around with different textures, types, etc., for an array of effects.
Step 5: Choose a Stitch
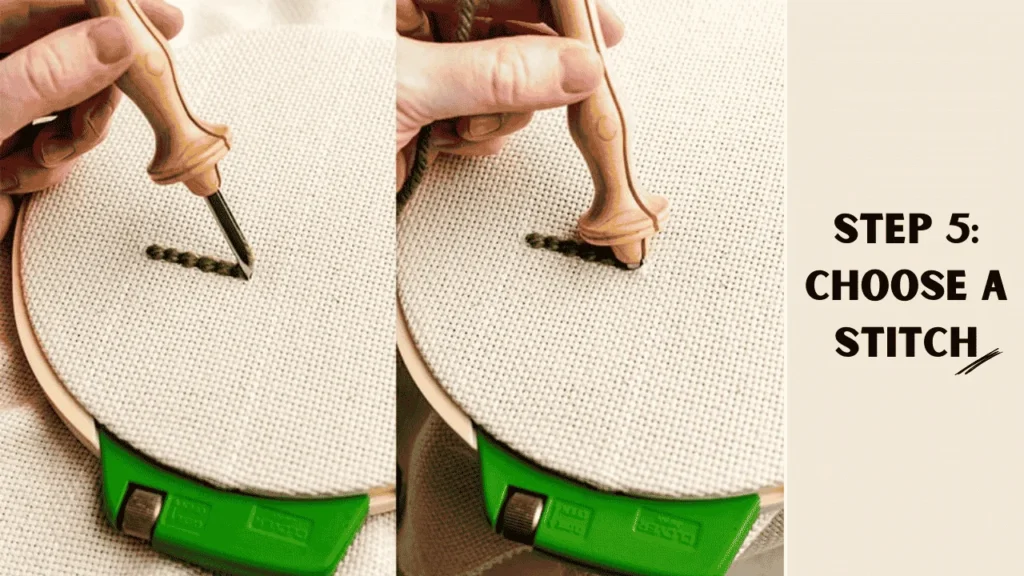
The easiest beginning stitch for an absolute beginner is a simple running stitch. It’s all about punches at consistent depths every time with the needle, which will make longer loops depending on how deep you push the needle and give your design a fluffier texture, as opposed to shallower punches that create shorter loops that lie flat against the fabric.
Once you have practiced punching the needle, you can begin experimenting with the length of the loops in one design to create a different texture.
Many punch needles allow the depth to be adjusted. This is fantastic for changing the height of your loops with just a twist. Do you want a flat, smooth design or a fluffy, textured one? Depth experimentation is part of mastering how to punch needle.
Step 6: Continue Punching
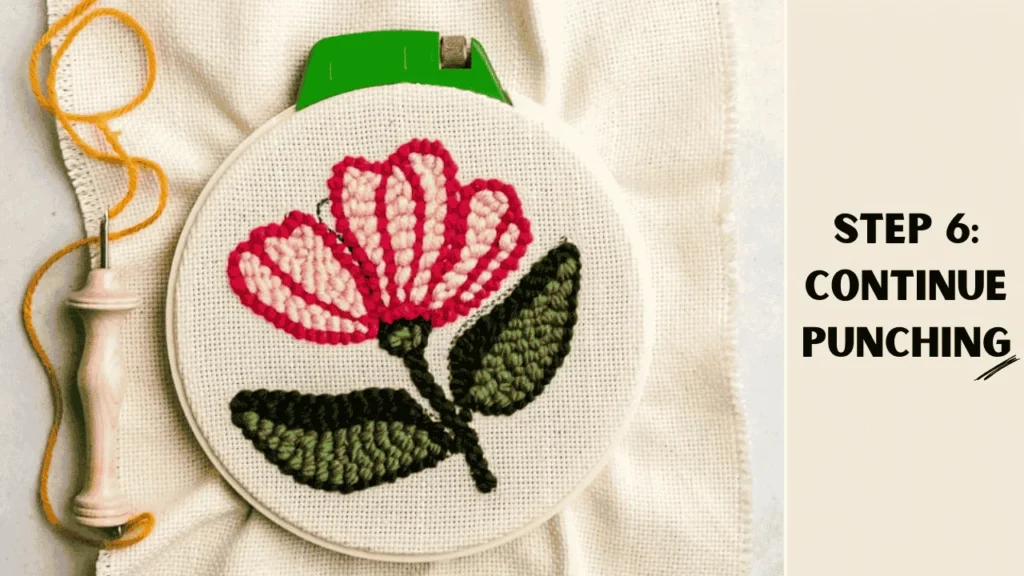
The final part is punching the needle through that fabric! This is where you enjoy the feeling that your design comes to life. Begin punching by holding the punch needle like a pen and pushing the tip through the fabric, ensuring the yarn tail stays on the fabric side because it will help form loops on the other side.
When you pull it back out, a loop of yarn is left behind. The front of the fabric will be flat stitches, and the back side will have loops. Most people like to put the loopy side forward as the front of the design. Punch across the fabric, keeping punches close together, makes for a dense, complete design. If it is too great then the gaps between the punches, your design might look spotty.
Keep the rhythm steady while punching. You want the needle to touch the fabric when moving to the next spot. Try to punch at a consistent depth, as opposed to punching too far or too shallow, so that it will have a neat-looking appearance. The more you do it, the faster and more confident you will become at punching, which will enable you to cover larger areas with fewer stitches.
Step 7: Fix the Mistakes
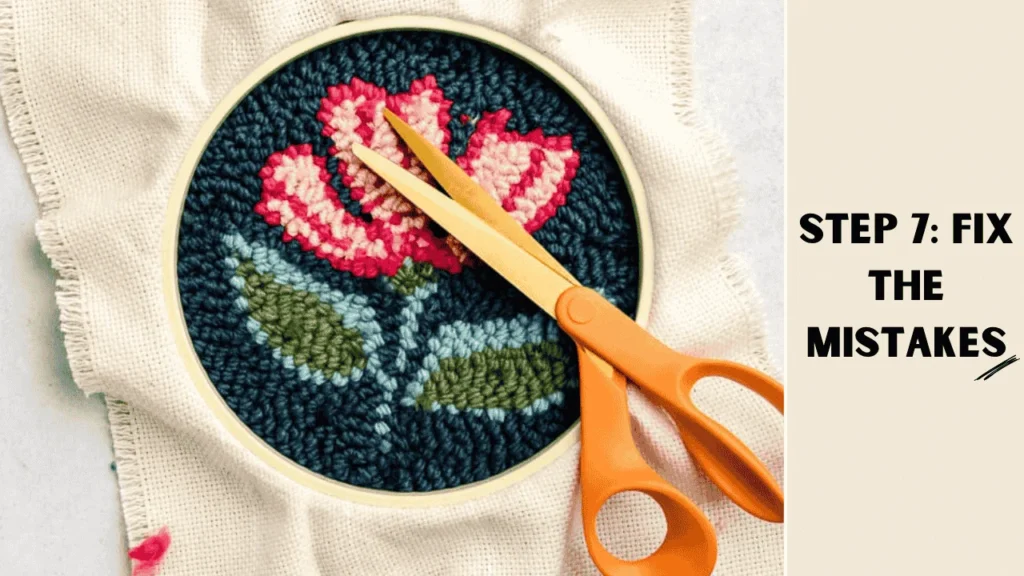
You’re going to make mistakes, especially when first learning to punch needle embroidery; happily, though, punch needle embroidery is quite forgiving. If you punch in the wrong spot or your loops don’t look right, it’s easy to fix. Just pull the yarn out of the fabric, and the loops will unravel. Then, you can re-begin without damaging the fabric or your design.
Since the yarn does not need to be tied like in traditional embroidery, errors are easily covered and require going back over the area with new punches to fill in holes. Well, make your mistakes as you learn how to punch needle. It’s all a great way to learn and improve your skills.
Step 8: Finalize the Design

Once you have completed most of your design, could you step back and look at it? Are there areas where it seems blank or needs a few more loops? Take your time filling in any holes or things that need touching up. Once you are pleased with how your design looks, you are done!
As one of your final touches, you should tack in your loops if your item will get a lot of use (like a pillow or rug). A little dab of fabric glue on the back of your design will ensure that those pesky loops do not work themselves out. The details will ensure your project remains beautiful for a very long time.
That’s it. You have just mastered how to punch needle and are ready to create even more beautiful projects.
Is Punch Needle Easy to Learn?
Punch needles are easy to learn. Most people know them quickly, even if this is the first time they have done embroidery. This technique has simple steps, and the materials could be more non-problematic. Once you get the hang of it, you will have fun, very beautiful designs in a snap.
Punch needle is quite popular. This is because it only requires a little skill or practice to get you started. You don’t need to know intricate stitches or techniques. Punch needle embroidery is considered the most accessible form of needlework.
What Are the Different Types of Punch Needles?
There are several types of punch needles. Each is designed for different types of fabric, thread sizes, or even specific types of projects. Tools are available in various sizes, shapes, and functionalities that will give you ample opportunity to create many great varieties of texture and effect with punch needle embroidery. Here are the main types of punch needles:
1. Adjustable Punch Needle

Interchangeable punch needles allow you to change the length of the needle, which creates loops of differing lengths in your fabric. This is convenient when you need some areas more raised than others to give you various textures in one piece.
Feature:
- It has several settings for lengths of loops.
- It can take any type of yarn.
Best For: Versatile projects that require different heights of the loop, such as wall hangings or rugs
2. Fixed-Length Punch Needle
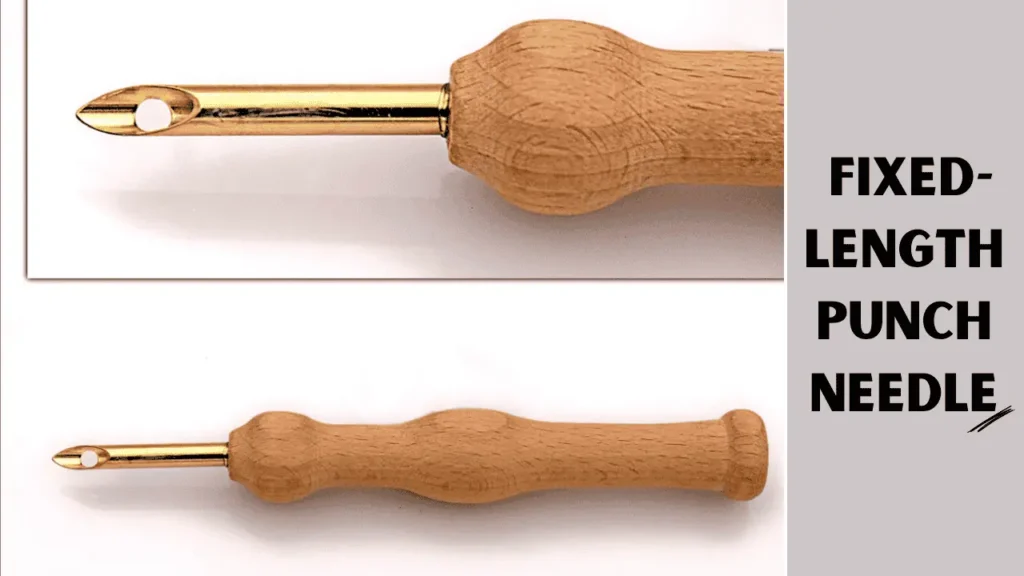
These needles are set and, therefore, will have an even height of the loop in your project. They usually come in different sizes, which are most often stated by the thickness of the needle.
Features:
- Easy to use.
- There are needles in different sizes for various thickness yarns.
Best For: A beginning crafter desiring to maintain a uniform loop height throughout the project or pillow or cushion projects.
3. Ultra-Punch Needle
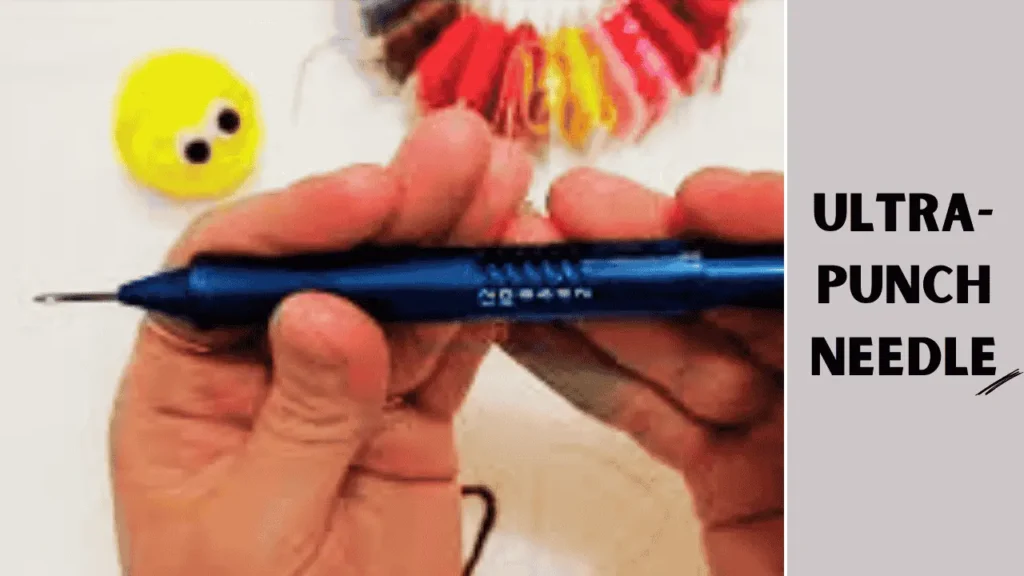
Ultra-punch needles are used to infuse thin threads like embroidery floss. They are very precise and ideal for delicate punch needle embroidery work.
Features:
- Fine needle that is used for tiny threads.
- It comes with adjustable depth settings for the creation of varied textures.
Best For: Fine, detailed work is best suited to small-scale projects, delicate fabrics, or intricate designs.
4. Oxford Punch Needle
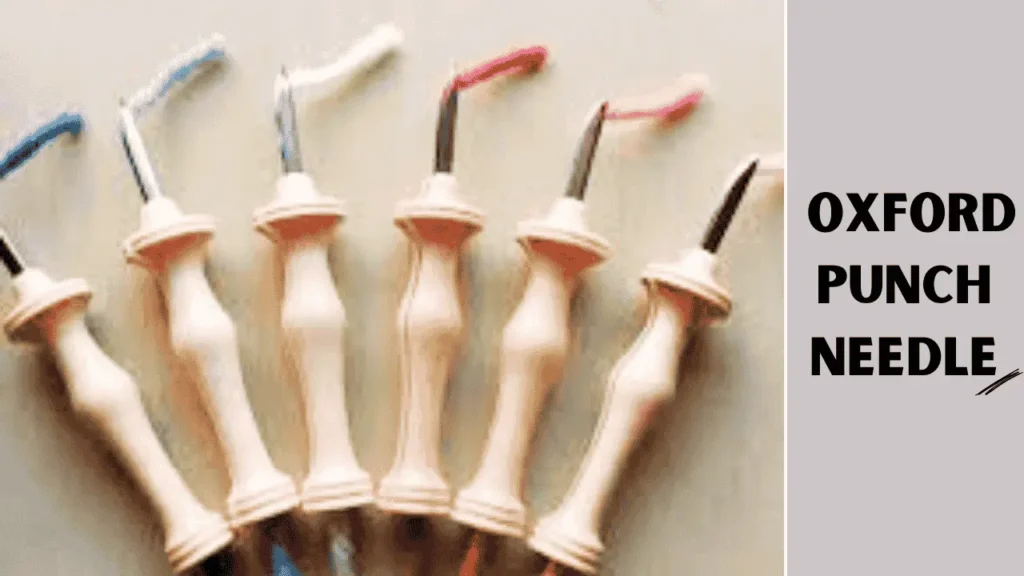
Oxford Punch Needle is a great tool designed especially for making rugs. It comes in different sizes, such as fine and regular, and is very durable.
Features:
- Ergonomic wooden handle.
- It also comes in various sizes to work with different types of yarn, from thin to bulky.
Best For: Bigger projects require strong materials like rugs or household decorations.
5. Latch Hook Punch Needle
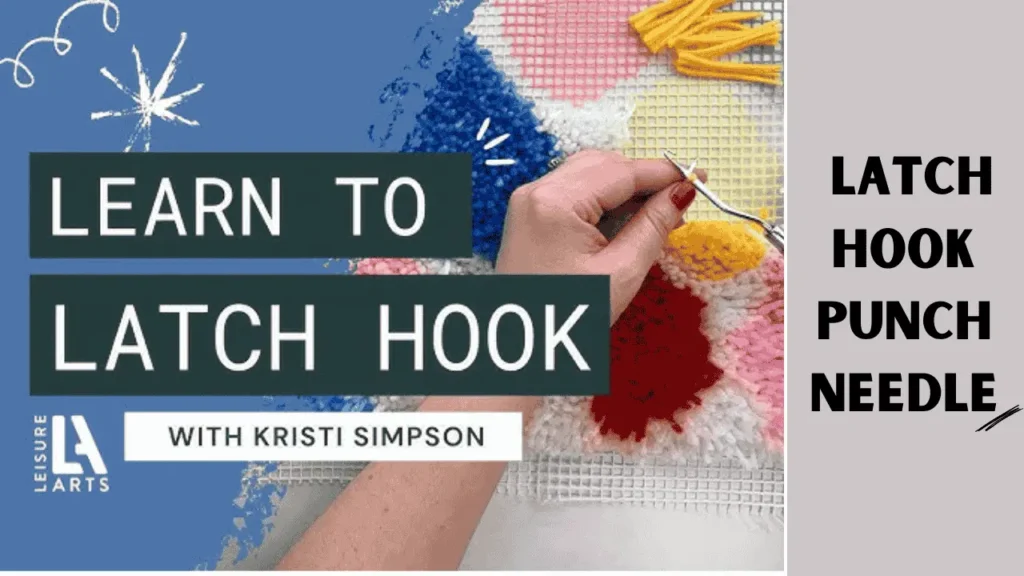
A latch hook punch needle uses a mechanism similar to latch hook tools, allowing you to create knots with each punch. This adds extra texture and holds the yarn more securely.
Features:
- Creates knotted loops for a more secure finish.
- Best for working with thicker yarn.
Best For: Textured projects with secure loops or knots, like rugs or tapestries, are needed.
6. Multi Punch Needle
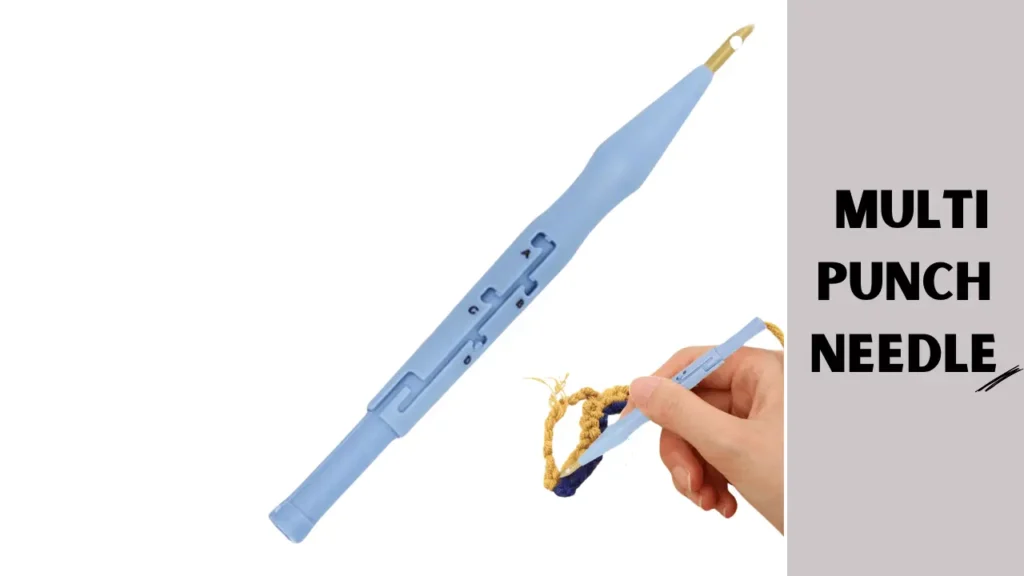
This punch needle has multiple needles attached to one tool, allowing you to have several stitches simultaneously. This is great if you want to fill large areas quickly or need uniform patterns.
Features
- Multiple needles attached to a single handle
- Covers larger areas with each punch
Best For: Projects that need to stitch large areas quickly, like wall hangings or background designs.
7. Adjustable Handle Punch Needle
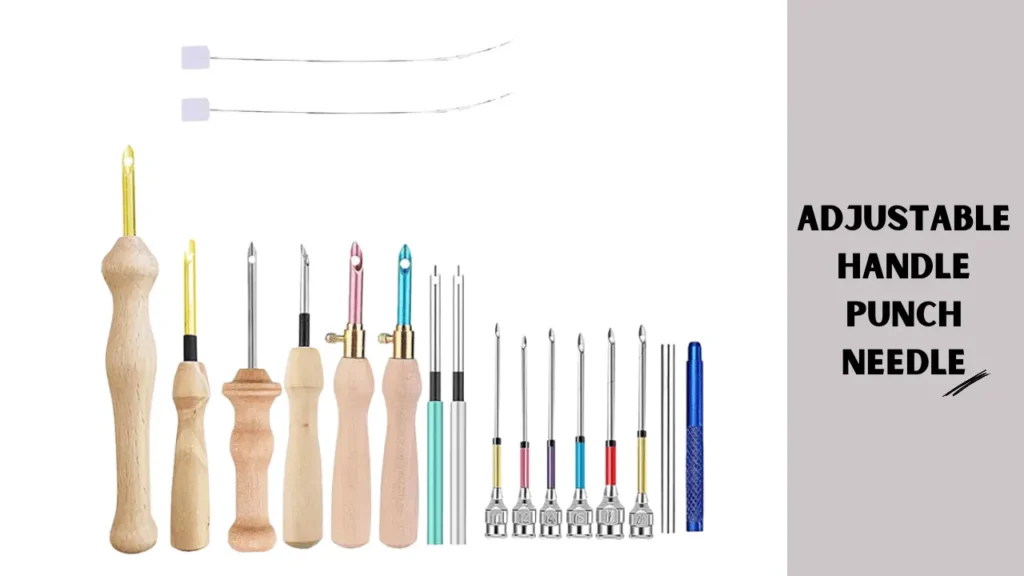
This one features a switchable handle that enables it to be used with different yarn sizes, making it easy to work with both thin and thick yarn.
Features:
- Ratchets to fit different types of yarns
- Ergonomic for long periods of working time
Best For: One-time projects in which you would want to alter between different kinds of yarns or thicknesses.
8. Spring Punch Needle
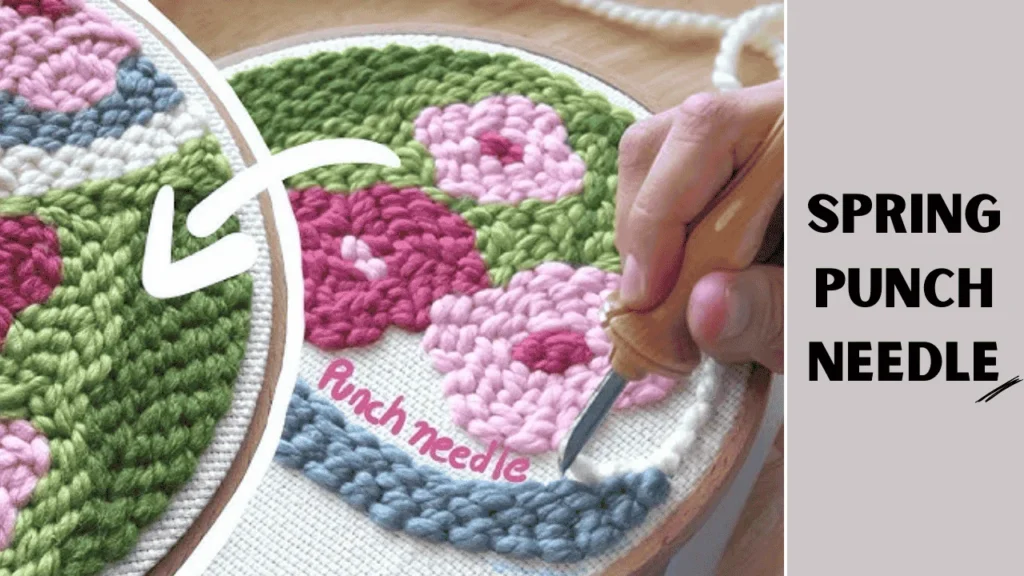
It is a spring-loaded punch needle that automatically bounces back after punching the fabric, making the task faster and easier.
Features:
- The spring mechanism enables easy punching
- Ideal for thick yarn and chunky works
Best for: Quickest pouncing of repeated stitches on large areas such as carpets or large wall paintings.
9. Embroidery Punch Needle

These punch needles are finer. They are suitable for using embroidery threads and more delicate fabrics in creating small, detailed designs of fine threads.
Features:
- Optimized for use with thin strands such as embroidery floss
- Fine, pointed tip for use in creating closely rendered designs
Best For: Small, detailer pieces like framed embroidery art or trims and embellishments on clothing.
Key Factors to Consider When Choosing a Punch Needle
- Needle size: Choosing a needle size that would fit the thickness of your yarn or Thread is essential. The smaller needles are perfect for slender threads, while the more significant needles can be used with chunky yarn.
- Adjustability: An adjustable punch needle is the best choice if you are working with various textures and loop heights.
- Handle Comfort: ergonomic handles make a big difference as you spend hours on larger projects.
- Project Type: The kind of project you want to work on; sometimes will result in good technique for that specific fabric and texture.
Knowing the different punch needle types will enable you to decide which tool to use for your application, resulting in the best outcome.
Things Required for Punch Needle
Before knowing how to punch a needle, you should prepare a few materials beforehand. Here’s a general list of things that you’re going to need:
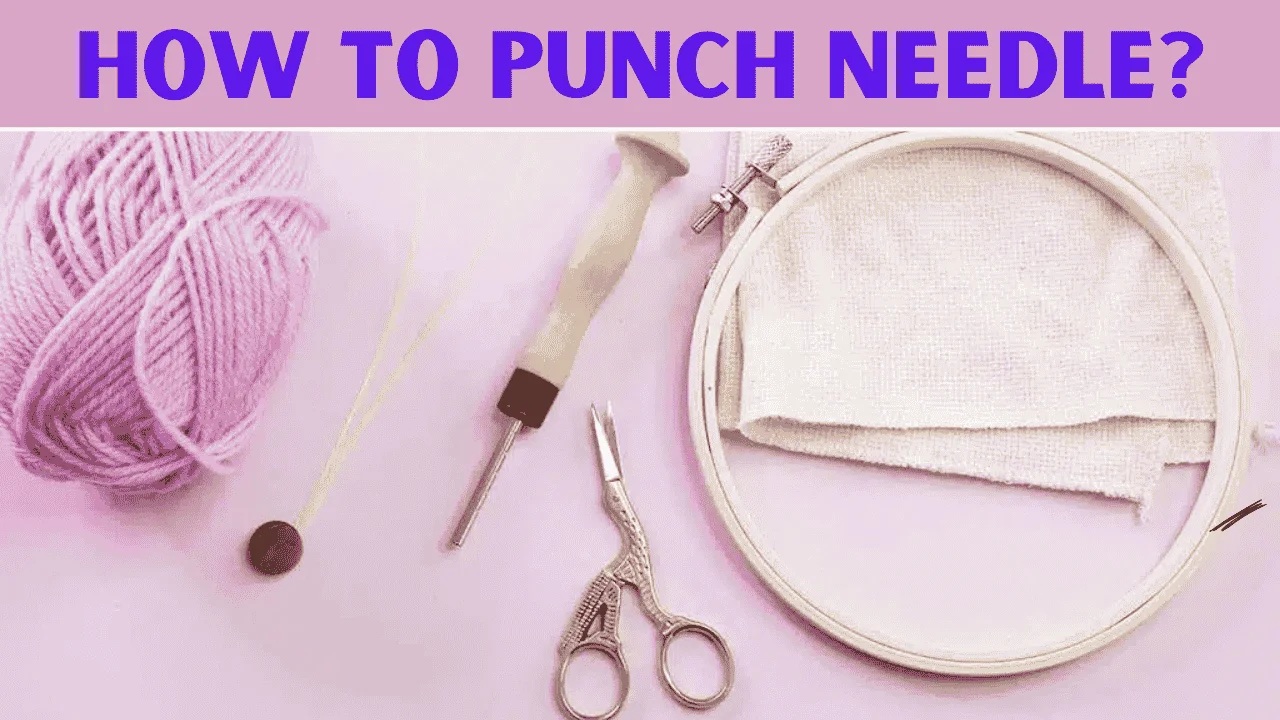
- The punch needle tool is your main puncher for punching the yarn through the fabric. Punch needles come in different sizes, and the size of the punch needle should suit the thickness of the yarn you may be using.
- Yarn or Thread—Yarn is better and thicker for the learner. You can also choose the colours you prefer for your design.
- Fabric or Cloth – for this project, you’ll need a piece of Cloth to pass the loops you’ll create. Traditionally, mons’ Cloth is what most embroiderers use because it holds well and has an even weft.
- Embroidery Hoop or Frame – this aid will tightly hold your fabric to be embroidered.
- Scissors – to cut your yarn as you go.
- Marker or Pencil – draw a design onto the fabric before you begin punching.
With that list of equipment out of the way, let’s get into some punch needle steps –
How Does a Punch Needle Work?
A punch needle forms loops of Thread or yarn on fabric, creating a textured, raised design. The needle itself is hollow, so the Thread or yarn passes through it, and each punch into the fabric develops a loop on the other side, holding it in place because of the tension across the fabric. Here are the steps and mechanics of how the punch needle works:
1. Threading the Needle
Yarn or thread is passed through the hollow body of the needle and emerges out through a small opening located near the pointed end before you start working with the punch needle.
Most punch needles come with a threader tool which can make this easier, particularly for thicker yarns.
2. Creating a Setting for the Fabric
A suitable fabric, which is fairly tight in weave like monk’s cloth or burlap, is tautly stretched on an embroidery hoop or frame.
The tightness of the fabric is very essential since it will retain the loops inside and give resistance to the point as it pierces the fabric.
3. Punching the Needle
A punch needle is used like a pen to push the needle through the fabric until it reaches the desired depth, at which point it can be stopped.
As you pull the needle out of the fabric, you retain a little loop of yarn on the other side. The yarn will feed through the needle for the remainder of the punches, so you don’t have to pull the yarn out after every punch.
4. Even Loops
Every time you punch the needle in the fabric, a new loop is formed and stays there due to the tension developed by the previous punch in the yarn.
The adjustable part of the needle’s depth gauge controls the loops’ lengths and hence different kinds of textures and effects, depending on the length of the loops created. For example, deeper punches create longer loops, giving a fluffier texture appearance, whereas shallower punches produce shorter, compact ones.
5. Movement of the Needle
And you keep going this way-thanking the needle with a little punch off to one side every time-punching a line of loops that will eventually form your design. Constant spacing between punches helps ensure an even texture, so you don’t get holes in the pattern.
Turning is pretty straightforward: pivot the needle a tiny bit and keep punching, filling in shapes or areas of your design.
6. Finishing the Design
Once you’ve made the design, you can just leave the loops as is for a raised, textured look, or you can clip them in for another dramatic effect.
This design, especially on items that will be used a lot, can be secured with fabric glue or even by applying some form of backing to keep the loops in place.
Finishing Process of Punching Needle
Once you have completed your design, there are some finishing steps that you can take to make your punch needle project look its best.
- Trim Loose Threads – Clip any loose yarn or Thread from the back of your project using scissors.
- Fix the Loops – If you are going to need the design to last for a reasonable amount of time, you can apply glue or fabric stiffener to the back of your project so that the loops will not unravel.
- Frame or Display – If you like to turn your project into art, you can frame it or sew it onto a pillow, a bag, or anything else.
Tips for Better Punching
Here are a couple of tips for getting the most from punch needle projects:
- Hold Your Cloth Tightly: Stretch your fabric tightly around the frame so it will not sag on you as you work.
- Use the Right Yarn: For beginners, use the thicker yarn because it’s easier to handle and produces fuller loops.
- Punch Consistently: Try to keep your punches similar in depth to create an even texture.
- Take Your Time: Do not rush. Taking your time and carefully working towards a good, tight, even loop is better.
Precautions While Punching
After all, one must be a little careful while learning how to punch a needle. But here are some things to watch out for.
- Don’t push too hard: Not to mention stretching the fabric or tearing it, if punched too hard.
- Use the suitable fabric: Not all kinds of fabrics work for punch needle embroidery. Make sure you have a tight cloth, preferably a monk’s Cloth.
- Check the Needle Size: Make sure you have a punch needle of your yarn thickness. I have warned you on several points that using the wrong size will probably induce errors.
Final Thoughts
You can now start making your art pieces as you know how to punch needle. Punch needle is one of the easiest and most enjoyable crafts for people of all ages and all skill levels. Practice and you can make different types of projects from home decor to personal gifts. Be patient, take your time, and most of all, have fun.

![Select Crochet Clothing Ideas: [Best Crochet Fashion] Crochet Clothing Ideas](https://crochetmind.com/wp-content/uploads/2025/07/Crochet-Clothing-Ideas-Best-Crochet-Fashion-in-2025-1-1.jpg)

![The Best 30+ Free Crochet Cat Patterns [Beginner-Friendly Guide]](https://crochetmind.com/wp-content/uploads/2025/04/1-The-Best-30-Free-Crochet-Cat-Patterns-Beginner-Friendly-Guide.webp)
