







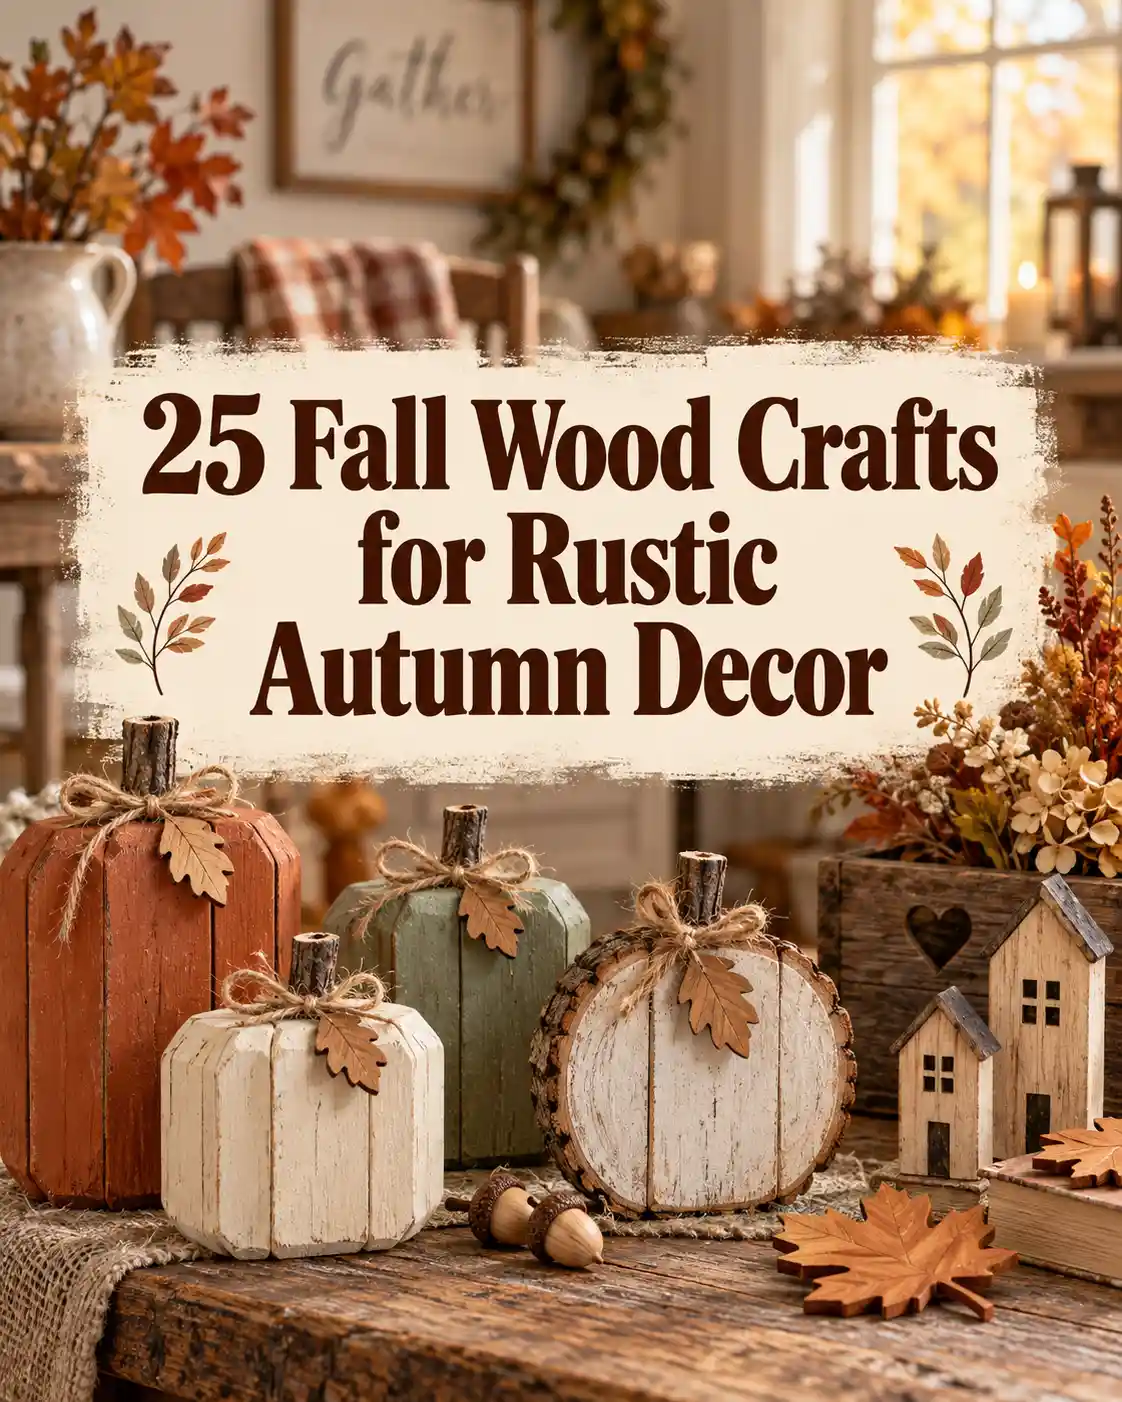
Fall wood crafts turn plain blocks, slices, and boards into pumpkins, woodland accents, porch signs, and Thanksgiving table decorations. These 25 ideas include easy projects using precut pieces and more involved builds for adults who enjoy cutting and assembly. For projects using other materials, explore our fall crafts for adults.
A little wood grain goes a long way when you want a room to feel ready for autumn. Add warm paint, a simple shape, and one thoughtful detail, and even a small offcut can earn a spot on the mantel.
Key Takeaways
- Choose a project that fits your tools and display space.
- Start with precut blanks for painting-focused crafts.
- Check bases, joints, and hanging hardware before displaying.
- Match finishes and lighting to indoor or outdoor conditions.
- Track materials, labor, and fees before pricing handmade sets.
- Use removable accents to refresh decorations between seasons.
Which Fall Wood Crafts Should You Try First?
Start with the space you want to decorate and the tools you can use comfortably. Precut blanks suit a painting afternoon, while lanterns and centerpiece boxes need a construction plan.
| Your goal | Projects to consider | Starting material | Main work |
|---|---|---|---|
| Easy painting | Block pumpkins, letter blocks, ghosts | Precut blocks or shapes | Sanding and painting |
| Small shelf accents | Acorns, mushrooms, harvest houses | Shaped blanks or components | Painting and assembly |
| Porch decorations | Pallet pumpkin, welcome sign | Suitable boards | Cutting, joining, finishing |
| Thanksgiving table | Card holders, coasters, napkin rings | Preslotted slices, rounds, rings | Decorating and finishing |
| Small sets to sell | Pumpkins, candy corn, ghosts | Consistent blanks | Batch preparation and packaging |
The project notes below are starting points for choosing a design. For builds requiring cuts or joinery, use a measured plan that matches your materials.
25 Fall Wood Crafts for Rustic Autumn Decor
1. How Do You Make Wood Block Pumpkins?
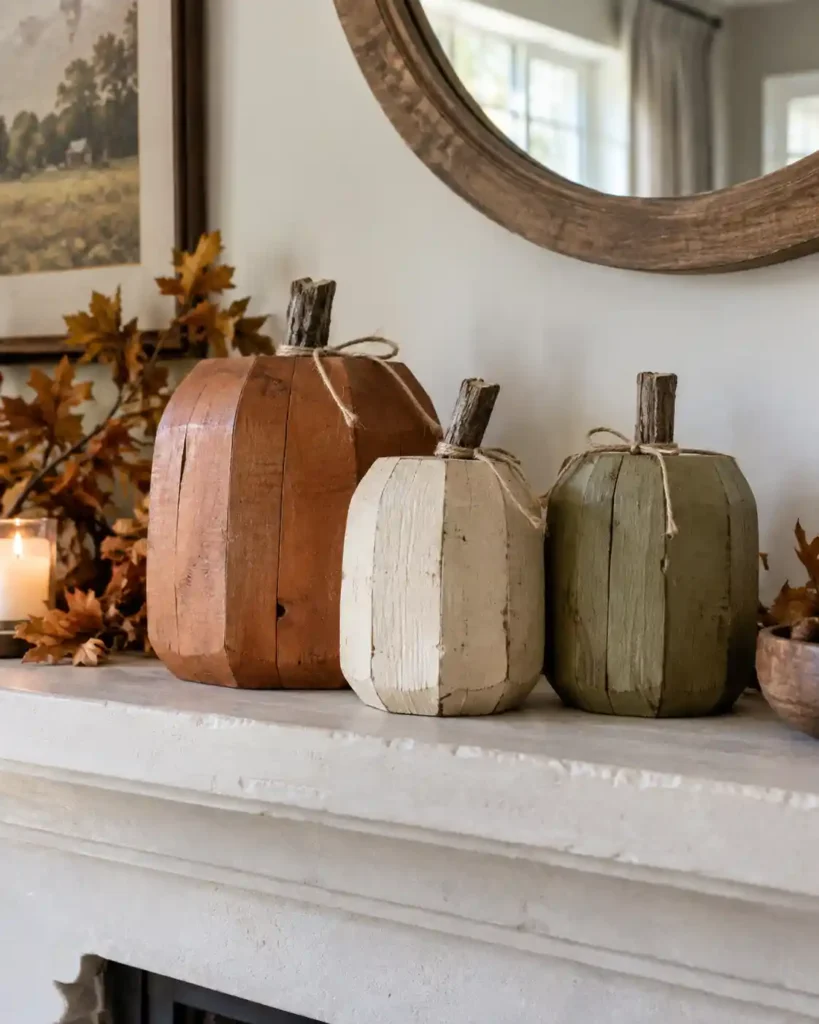
Wood block pumpkins get their charm from chunky shapes and twig stems. A block offers a broader display surface than a thin cutout, especially when you choose a substantial base. I’d place three different heights beside a basket of folded blankets. For a first project, precut blocks keep the work focused on color and simple details.
Sand the edges, paint the bodies, and attach stems with an adhesive suited to the surfaces. Choose terracotta, cream, and sage for a softer arrangement.
Measure your stock before planning: NIST explains that a nominal 2×4 typically measures 1.5 × 3.5 inches. The label is not its finished size.
2. What Makes Painted Wood Slice Pumpkins Look Rustic?
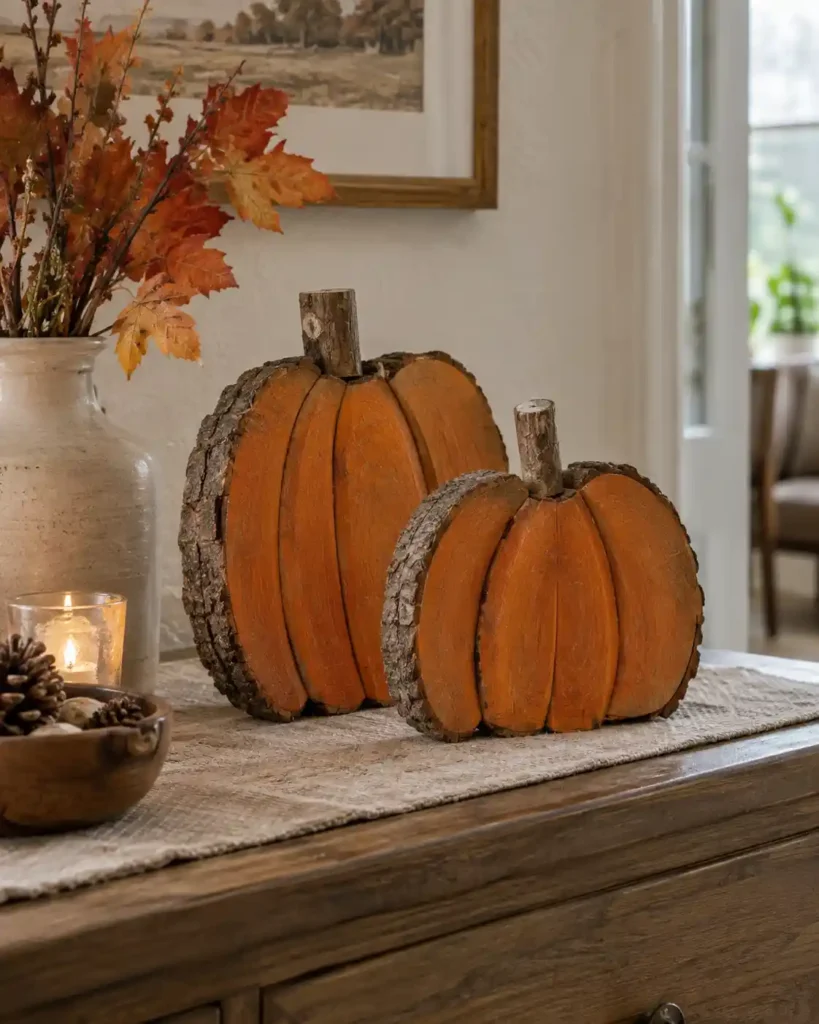
Painted wood slice pumpkins keep their bark edges on show. That natural border gives them texture without adding ribbon or artificial foliage. Picture a pair on an entry table beside a plain ceramic bowl. They suit anyone who prefers a little autumn color with plenty of visible wood. Pair them with other fall pumpkin crafts for a mix of textures.
Paint curved ribs inside the bark line and add a short stem. For an upright display, fit a discreet rear support; an uneven slice should not balance on its edge alone.
3. How Can You Build a Pallet Board Pumpkin Porch Display?
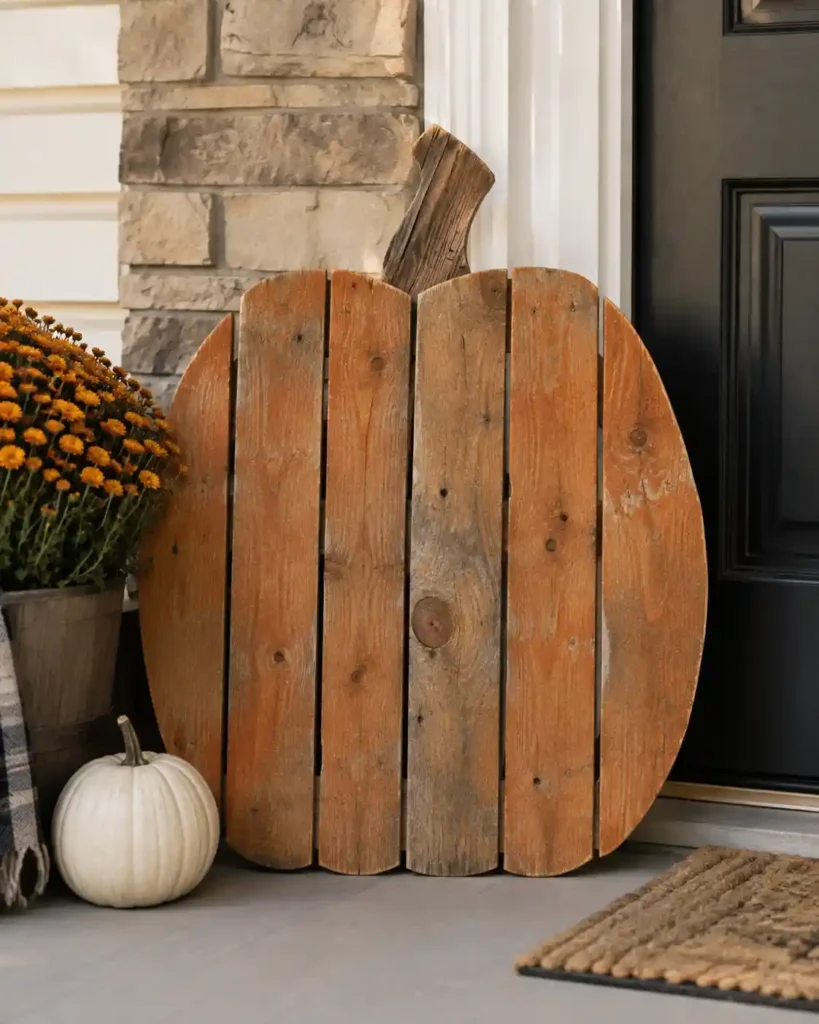
A pallet board pumpkin brings a bold silhouette to a sheltered doorway. The gaps between its boards make it feel more handmade than a solid painted panel. I’d keep the surrounding decorations simple so the shape remains easy to see. This is a satisfying choice for someone comfortable with a saw and basic assembly.
Arrange suitable clean boards, trace your shape, and use a measured cutting and bracing plan. Add a broad support and secure the display against tipping. Reject reclaimed wood with unknown contamination or questionable coatings.
4. Open Slat Tabletop Pumpkins
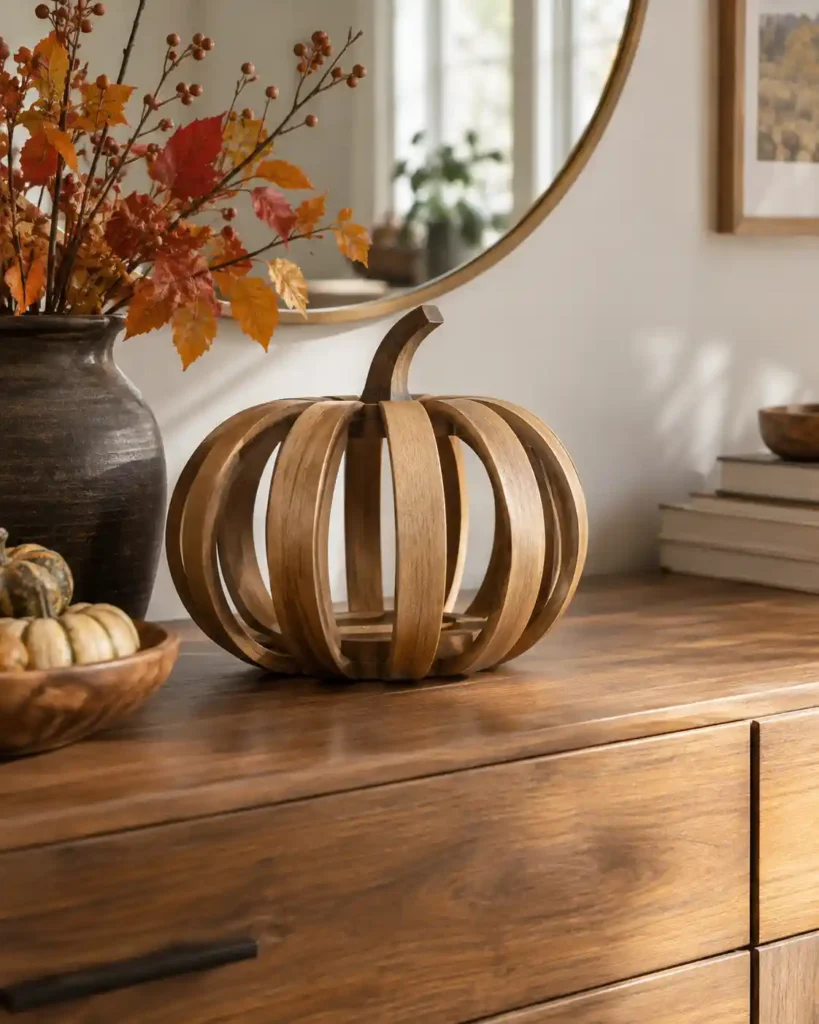
Open slat tabletop pumpkins let the background show through their curved ribs. That airy center works well where a solid ornament would crowd the surface. On a narrow sideboard, one could sit beside a framed photograph without hiding it. Choose this project when you enjoy careful fitting and want an understated wooden pumpkin.
Use a tested rib template or precut kit; ordinary straight slats will not simply bend into shape. Space the ribs around a stable base and finish hard-to-reach faces before assembly, keeping glue contact areas bare.
5. How Do You Make a Wooden Pumpkin LED Lantern?
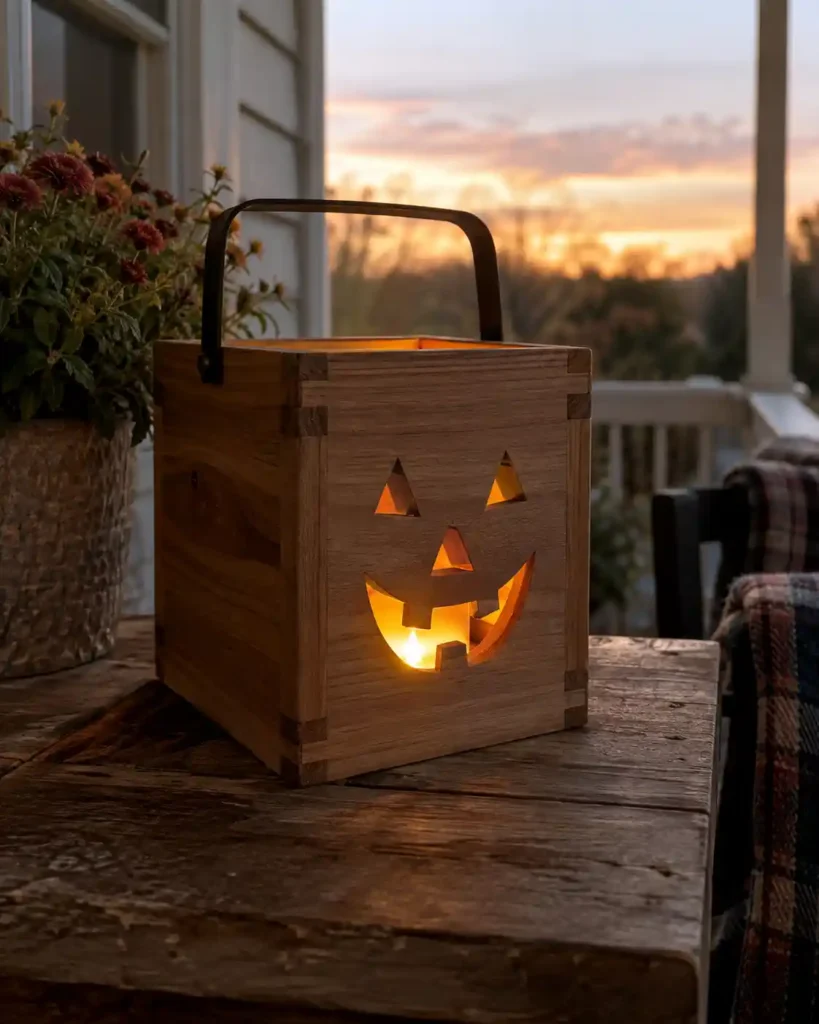
A wooden pumpkin LED lantern adds a warm face to a dusk display. Its glow gives it an evening role that an unlit pumpkin cannot provide. A sheltered porch table is a lovely place to enjoy it after dinner. For makers ready for a small box build, the removable light makes seasonal storage easier.
Plan the enclosure around a battery-powered LED and leave access to its switch and batteries. Cut the face openings before assembling the box. Use LED lighting only, and follow the light’s instructions for enclosure and outdoor suitability.
6. Stacked Fall Letter Blocks
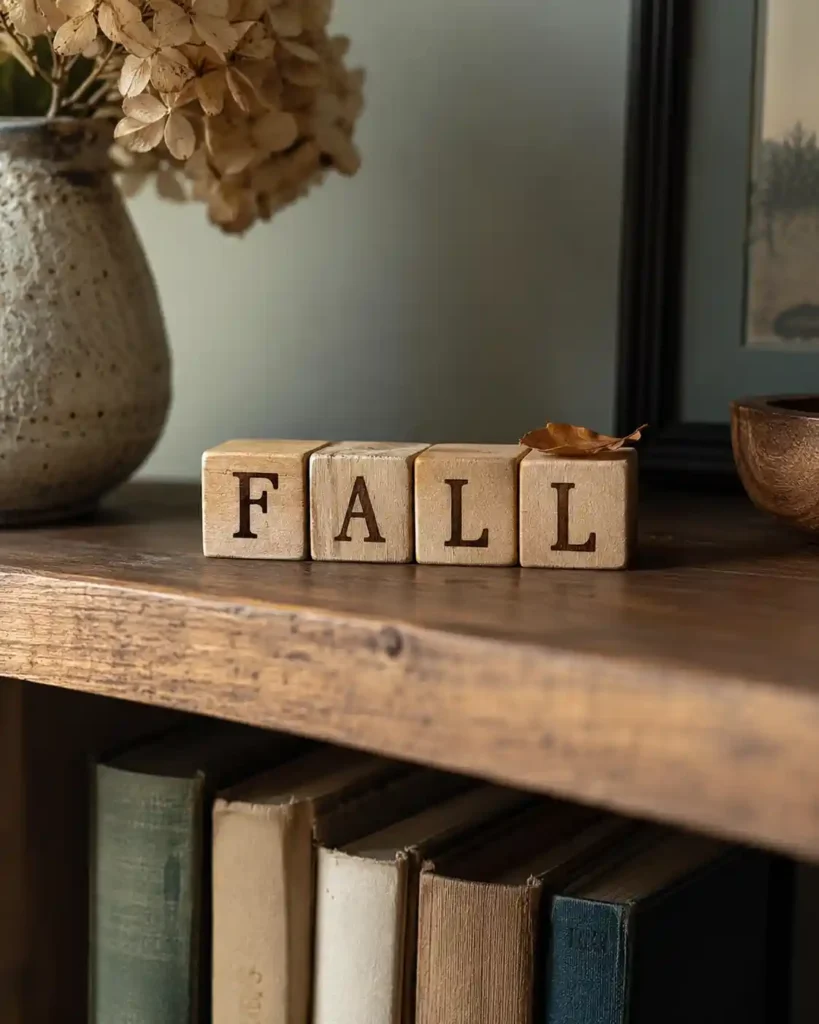
Four letter blocks can give an ordinary bookshelf a seasonal focal point. Separate pieces let you change the arrangement more easily than one long sign. I’d tuck them beside cookbooks, where the word FALL feels right at home. This is an approachable option if you like neat lettering more than detailed painting.
Lay out all four letters before applying paint or a stencil. Keep the bases level and leave the backs plain for a quieter display later. Stack only where the pieces remain stable.
7. How Can You Make a Tall Wooden Porch Welcome Sign?
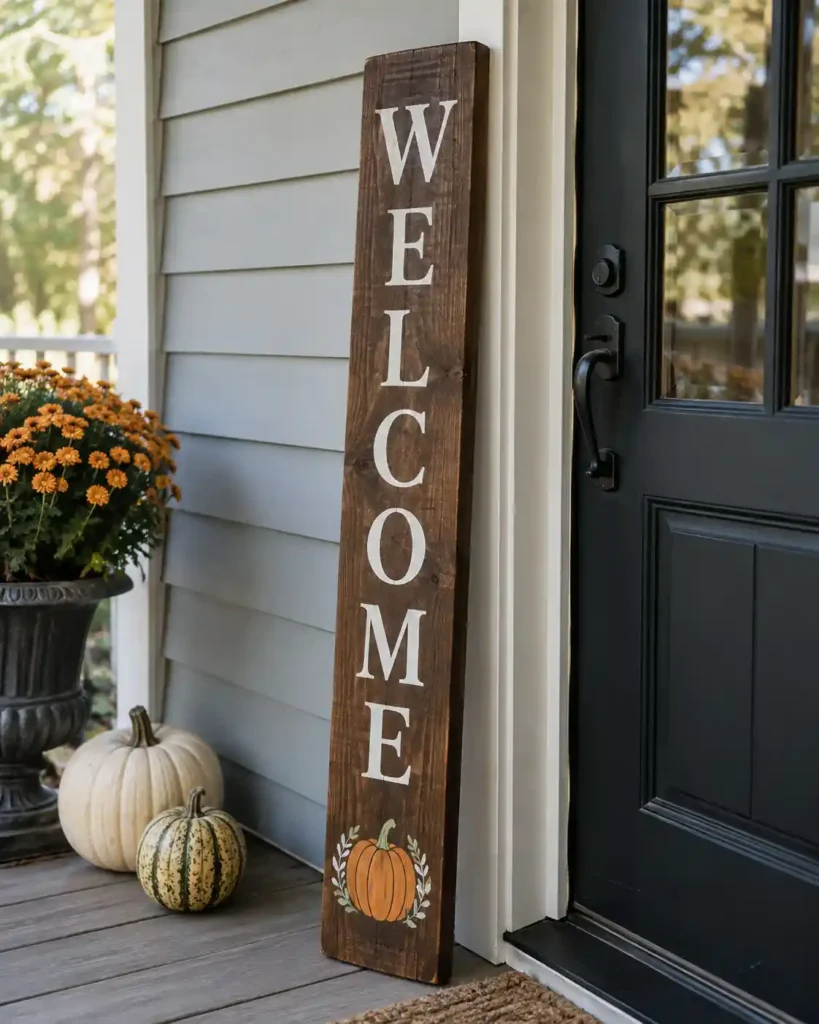
A tall wooden welcome sign uses vertical space beside the door. That makes it useful on a porch with little room for wide decorations. Imagine it next to one pot of chrysanthemums instead of several scattered ornaments. It suits a narrow entrance, provided you can secure it properly.
Mark the full lettering layout before painting so the last letter has enough room. Choose coatings appropriate to the exposure, protect the edges, and use a secure support. A board leaning loosely against a wall can fall.
8. Round Wood Pumpkin Door Hanger
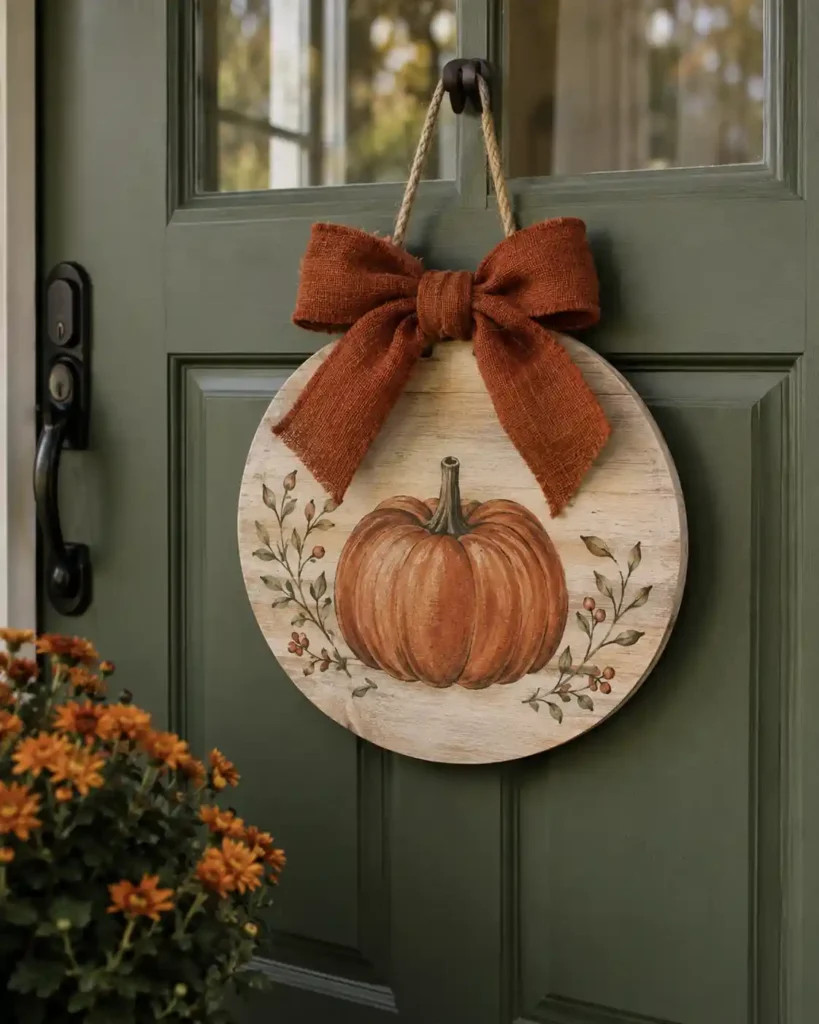
A round pumpkin door hanger keeps the decoration close to the door. Its flatter profile can be more practical than a bulky wreath near a storm door. A small fabric bow would be enough to soften the painted design. For an easy seasonal refresh, begin with a lightweight precut round.
Paint the pumpkin motif, fit secure hanging hardware, and check the finished weight against your hanger’s rating. Open and close the door before adding any projecting details.
9. How Do You Make a Wooden Leaf Garland?
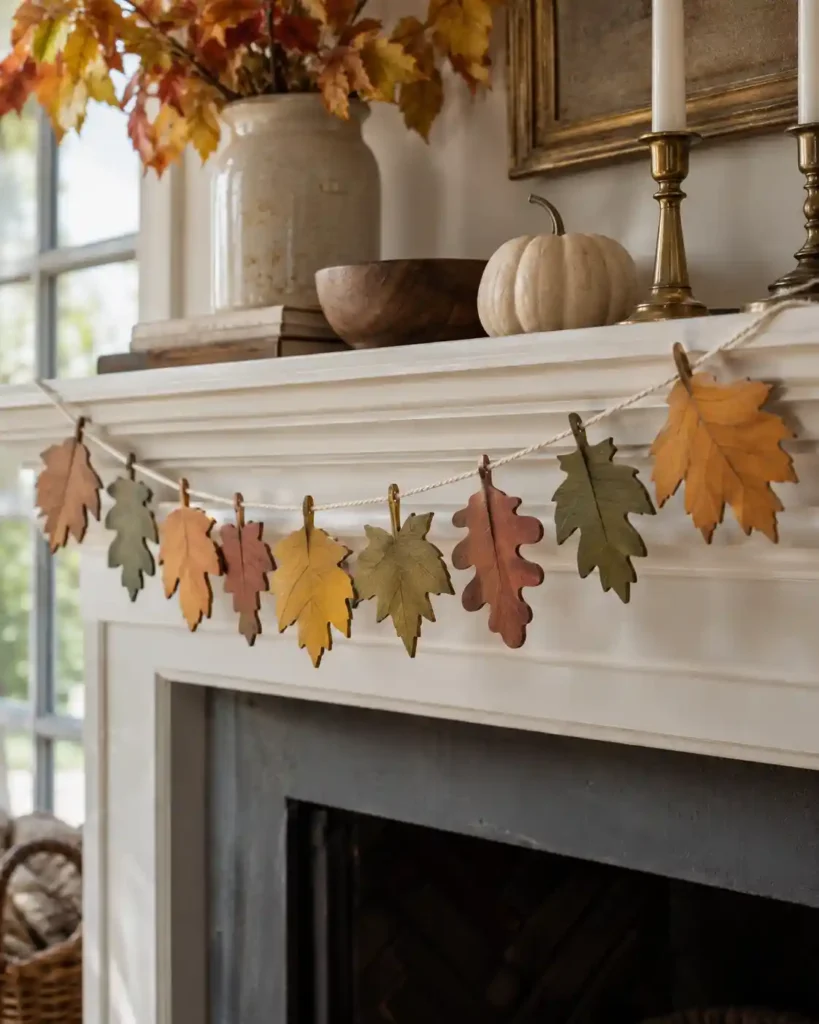
Wooden leaf garlands spread autumn color along a shelf or mantel. Individual leaves create a lighter outline than a thick foliage swag. I’d alternate ochre and rust with a few natural wood pieces above a sideboard. This is one of the easy fall wood crafts that works well for a shared painting afternoon.
Buy predrilled leaf blanks to avoid a drilling step. Arrange them before threading, leave room for a gentle drape, and knot them in place if they slide together.
10. Framed Scrap Wood Leaf Art
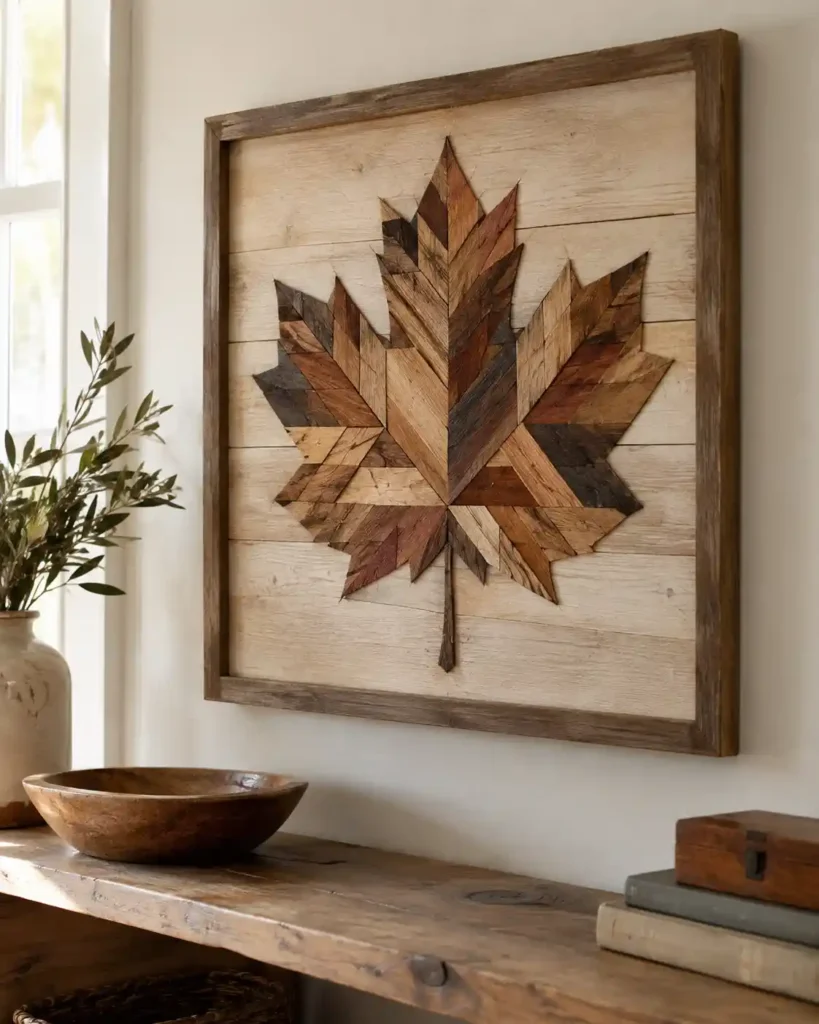
Framed scrap wood leaf art turns small offcuts into a textured picture. Changes in grain give it depth that a flat leaf print lacks. It would make a quiet seasonal accent above a reading chair. This project rewards patient makers who enjoy arranging pieces before committing to glue.
Sketch a clear leaf outline on a backing panel and dry-fit the mosaic. Keep the silhouette readable, then attach the pieces and frame the panel. Select hanging hardware for the completed weight.
11. How Can You Finish Chunky Wooden Acorn Shelf Sitters?
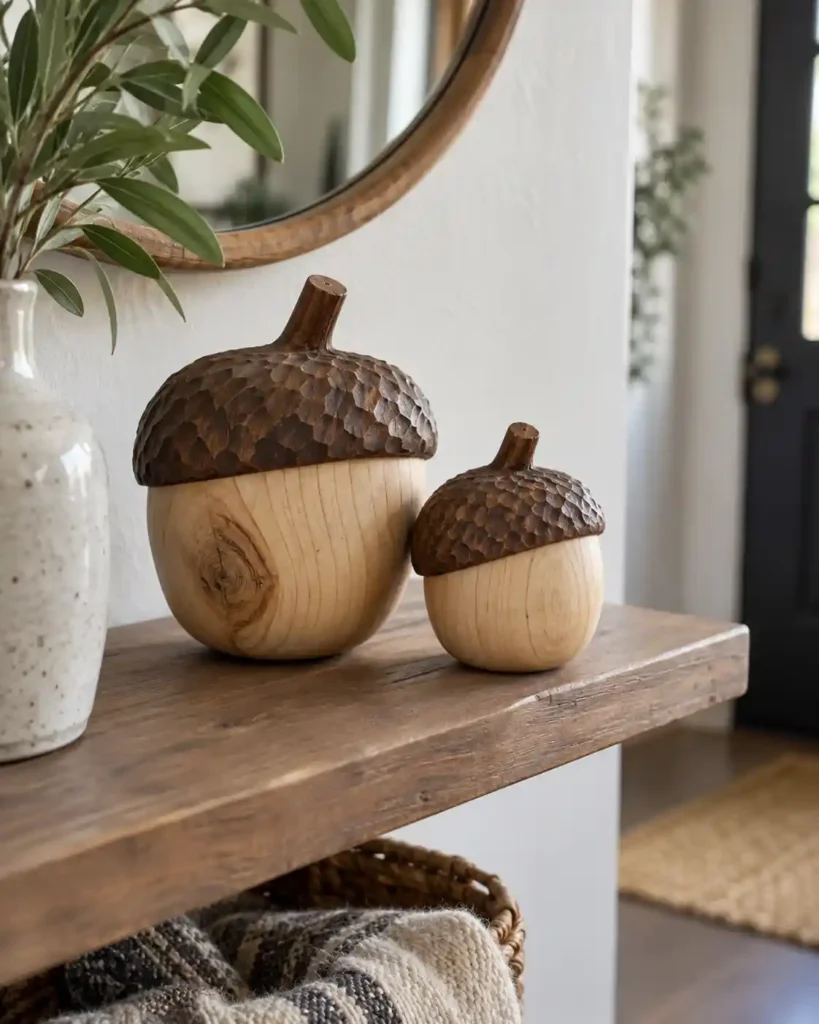
Chunky wooden acorns bring a woodland detail into an autumn display. A dark cap and pale body create interest without elaborate painting. I’d pair two on a small shelf where a larger pumpkin would feel crowded. Precut acorns are a good fit when you want a simple finish with a recognizable shape.
Choose blanks with flat bases. Stipple the cap with a nearly dry brush, then leave the body smooth. Check that each acorn stands securely before adding felt underneath.
12. Rustic Wood Mushroom Trio
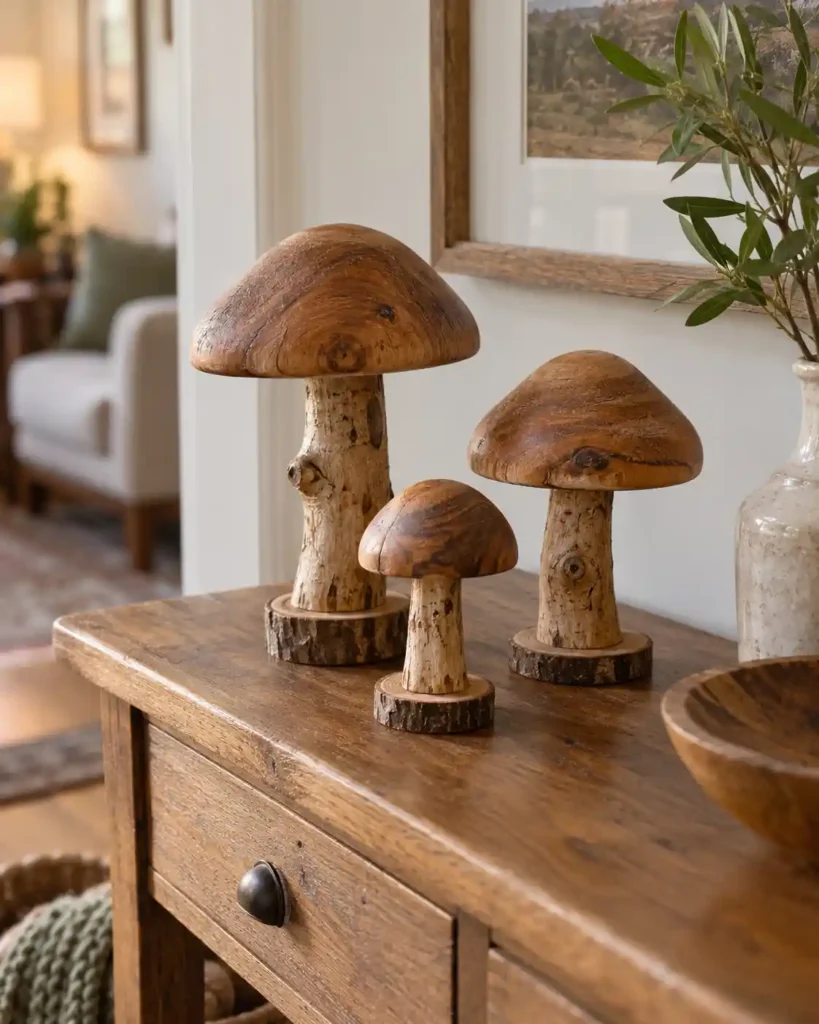
A rustic mushroom trio adds rounded shapes among all those pumpkins and leaves. The different cap heights create a small woodland scene without needing a large arrangement. These would look inviting beside a basket or a stoneware jug. Makers who prefer earthy wood fall decor can keep the colors close to natural brown and cream.
Use compatible precut caps and stems or follow a sound joinery plan. Broad bases and centered caps help stability; test every connection before placing the set on a shelf.
13. How Do You Make a Scrap Plank Scarecrow?
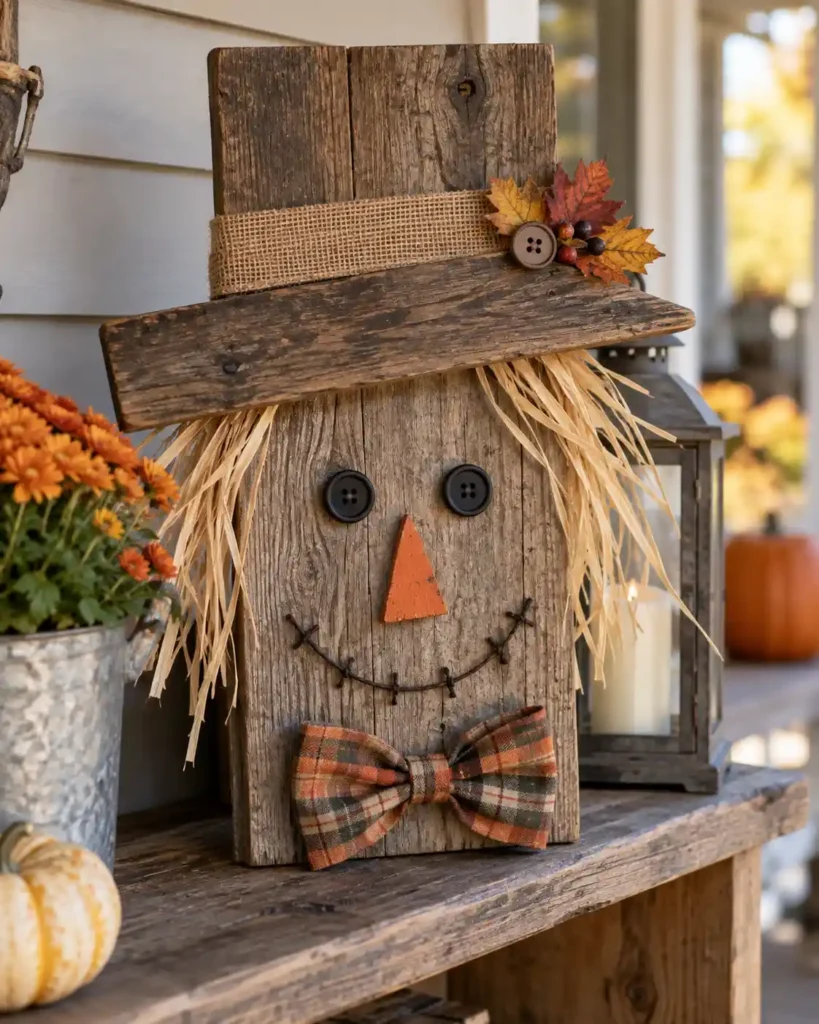
A scrap plank scarecrow turns one upright board into a friendly character. Its painted face offers more personality than a word-only sign. I’d hang a small version near a kitchen door with just a little raffia under the hat. Choose this design when you enjoy playful details but want to keep the construction modest.
Fit a separate hat brim across the plank and sketch the face before painting. Use secure wall hardware or a purpose-built stand. Trim loose accents so they do not obscure the expression.
14. Chunky Wood Candy Corn
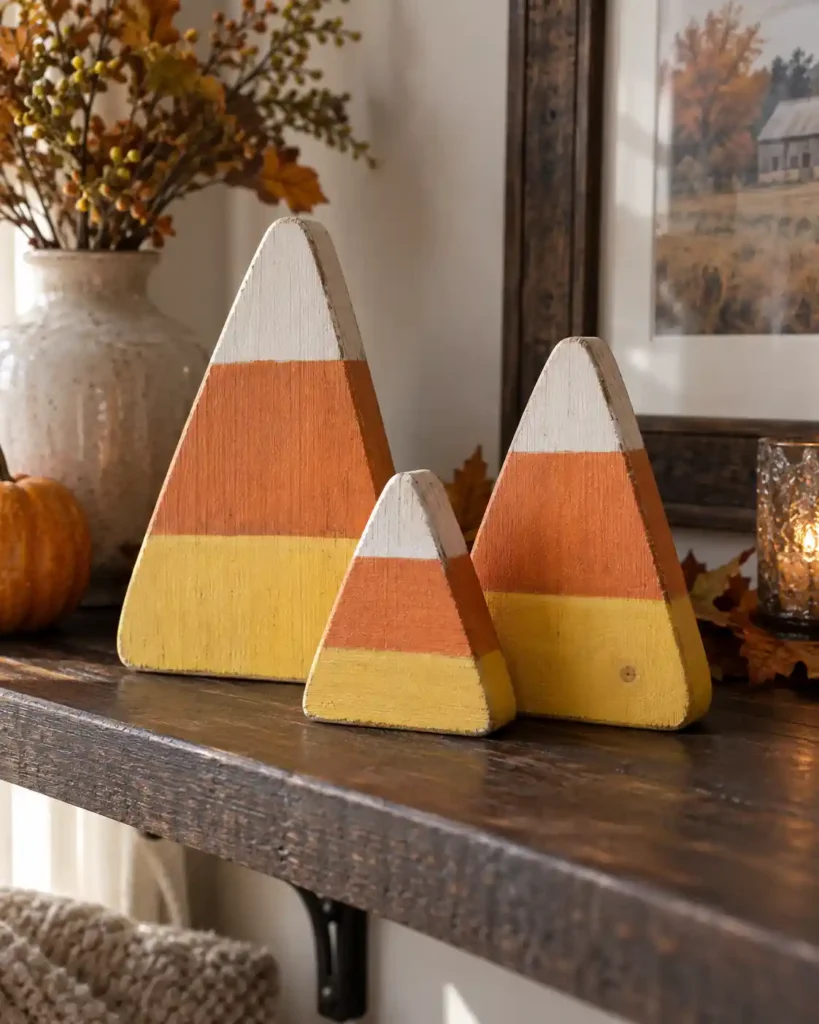
Chunky wood candy corn gets its effect from three familiar paint bands. The broad graphic pattern is less demanding than tiny lettering. A small group would brighten a shelf beside a black frame or bowl. It is a useful choice for batch painting when the triangular blanks are already cut.
Keep the traditional order: white tip, orange middle, yellow base. Soften sharp edges and retain a broad bottom. Present these as decorative objects, not toys or food accessories.
15. How Can You Make Wooden Ghost Shelf Sitters?
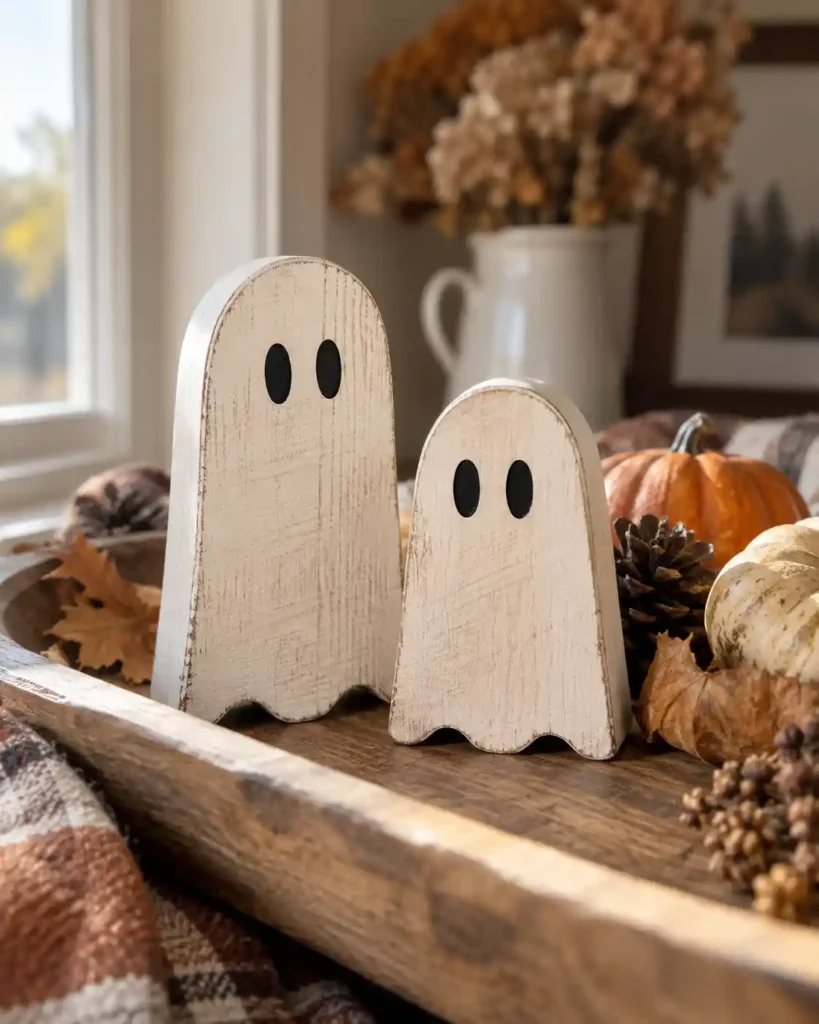
Wooden ghost shelf sitters can be sweet rather than spooky. Slightly different outlines give a group character without a separate costume for every ghost. I’d keep the faces small and let the creamy shapes stand out against dark books. Purchased standing blanks make this an easy introduction to Halloween decorating. For more pieces to display alongside your ghosts, explore our Halloween crafts for adults.
Check the bases first, then paint thin coats and add simple eyes. Keep the tallest ghost toward the back. A thin hanging cutout needs a stand before it becomes a shelf sitter.
16. Black Cat Wood Block Decor
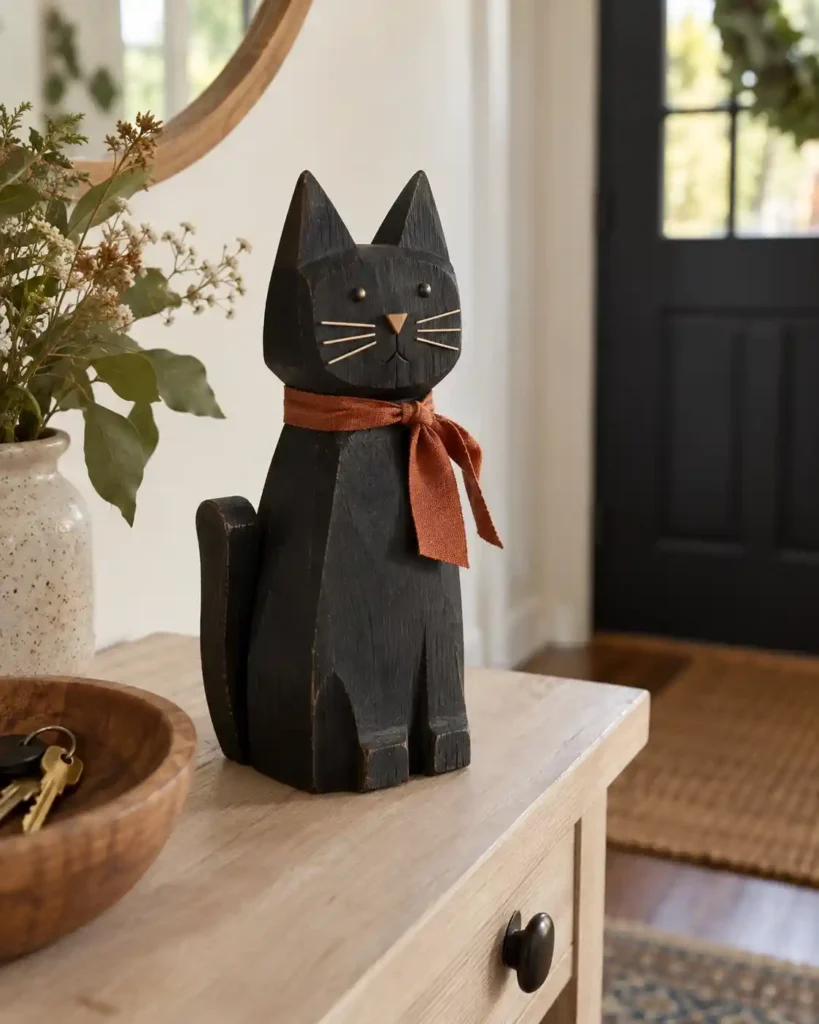
Black cat block decor brings a crisp dark accent to a pale autumn arrangement. The ear silhouette does much of the work, so painted details can stay minimal. Picture one beside cream pumpkins on an entry console. It suits anyone who wants Halloween woodworking projects with a restrained finish.
Begin with a precut cat blank or a properly planned shaped block. Paint fine whiskers and a small nose, avoiding loose embellishments. Confirm that the base supports the finished shape.
17. How Do You Assemble a Wood Slice Thanksgiving Turkey?
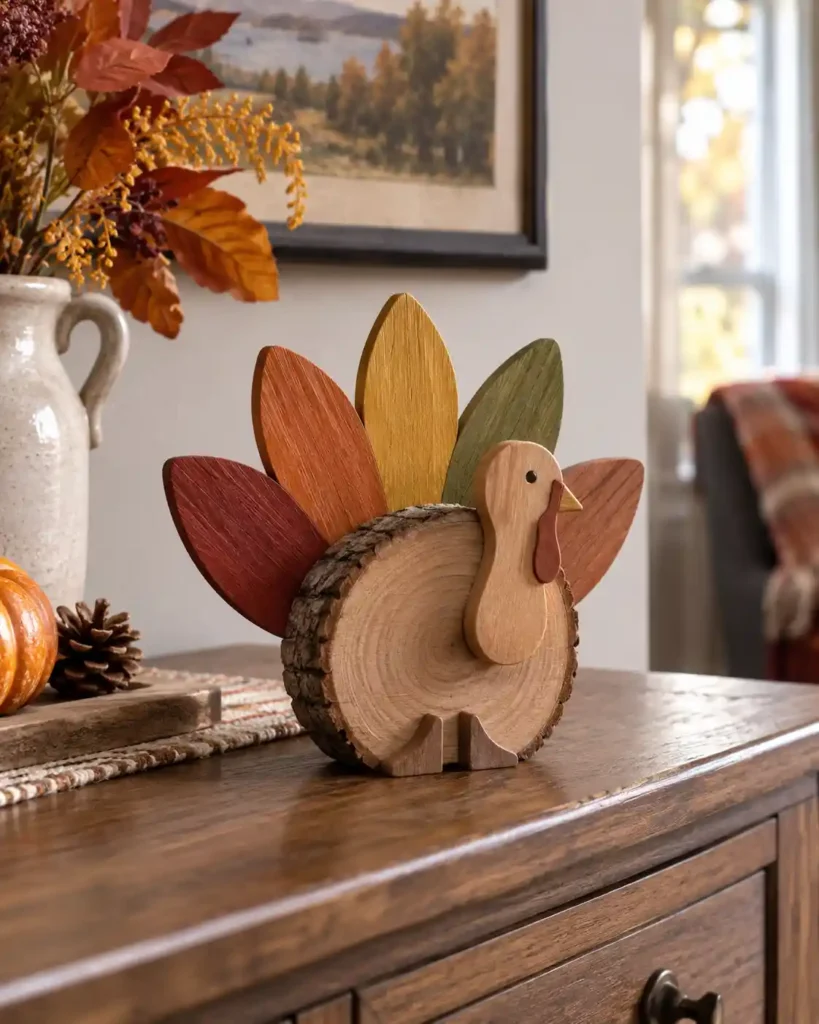
A wood slice turkey keeps the natural body grain visible beneath a fan of feathers. Separate wooden feathers add dimension that painted feathers alone cannot offer. It would be a cheerful detail on a Thanksgiving sideboard, clear of serving dishes. This suits a painting session with precut components and adult assembly.
Arrange the feather fan before gluing and reserve space for the face. Fit a stable base rather than expecting the slice to stand upright on its bark edge.
18. Thankful Scrap Wood Sign
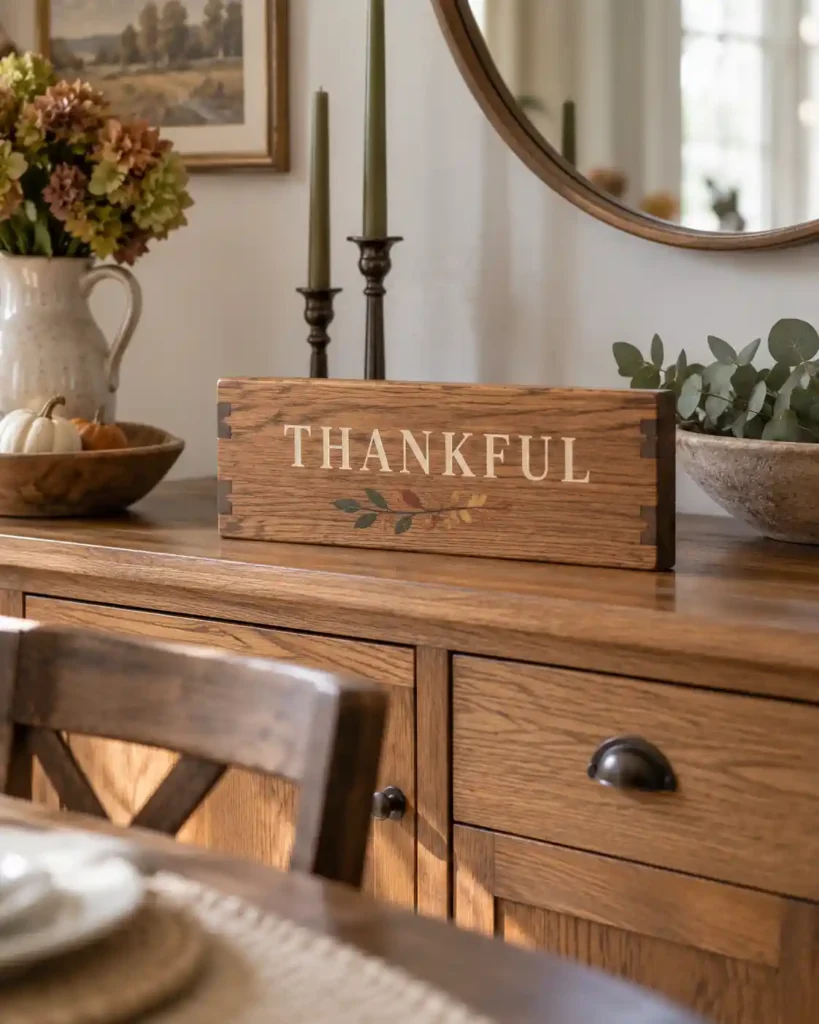
A thankful scrap wood sign gives one short message room to breathe. Its compact horizontal format fits places where a tall porch sign would not. I’d set it near a bowl of apples with no extra wording around it. Choose this when you want a small decoration that can stay out through Thanksgiving.
Center the stencil on paper first and transfer its position to the prepared board. Add a modest leaf motif at one end. Use suitable hanging hardware if the sign will be wall-mounted.
19. How Do Wood Slice Place Card Holders Work?
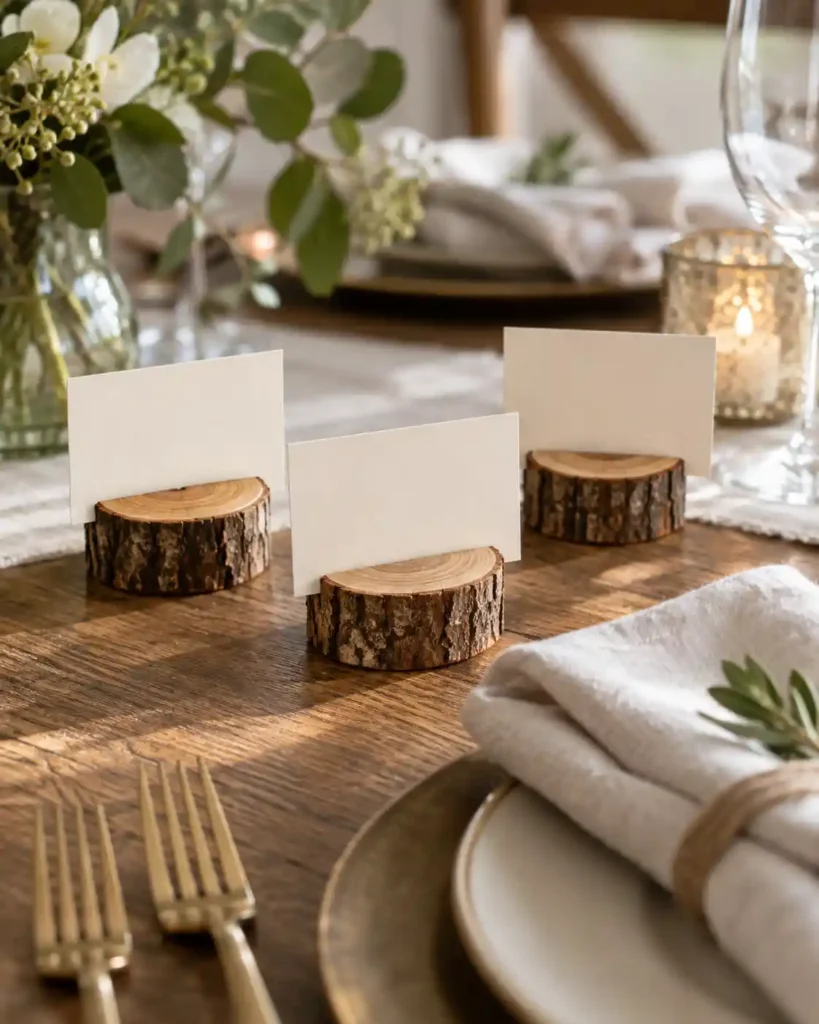
Wood slice place card holders support removable cards in narrow slots. Reusable bases make them more flexible than wooden pieces permanently painted with names. On a Thanksgiving table, plain cream cards would keep the setting relaxed. Preslotted blanks are the simplest route if you want the finished look without precision cutting.
Test the card thickness before decorating. Pick holders with flat bottoms and enough weight for the card size. A tall card should not make the holder tip.
20. Painted Autumn Wood Coasters
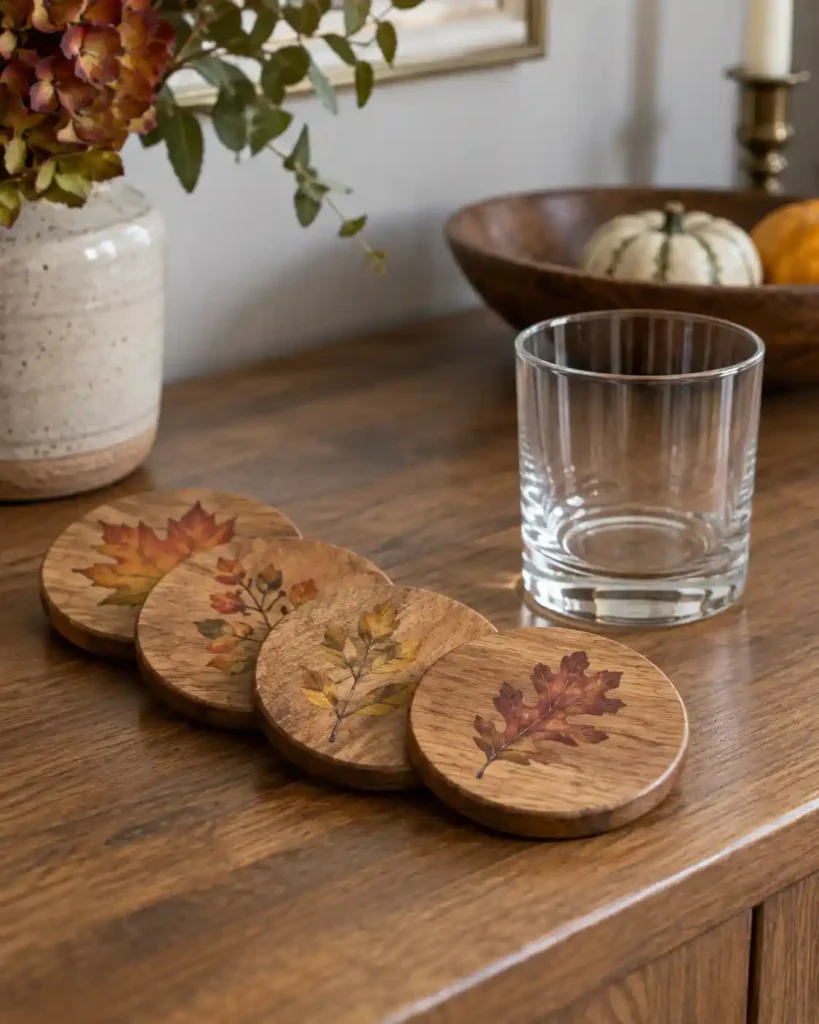
Painted autumn wood coasters put small leaf designs into everyday use. A restrained motif leaves more grain visible than a fully painted surface. I’d make a matching set for the coffee table, where one little leaf on each round is plenty. This suits patient painters who can allow the protective finish to cure properly.
Choose flat rounds, smooth the edges, and add backing pads. Use a compatible finish suitable for the intended drink exposure.
Drying schedules vary. For example, Minwax’s brush-on Polycrylic instructions specify three recommended coats, then three hours before light handling and 24 hours before normal use. Follow your product’s directions; those timings do not establish hot-mug suitability.
21. How Can You Make Wood Leaf Napkin Rings?
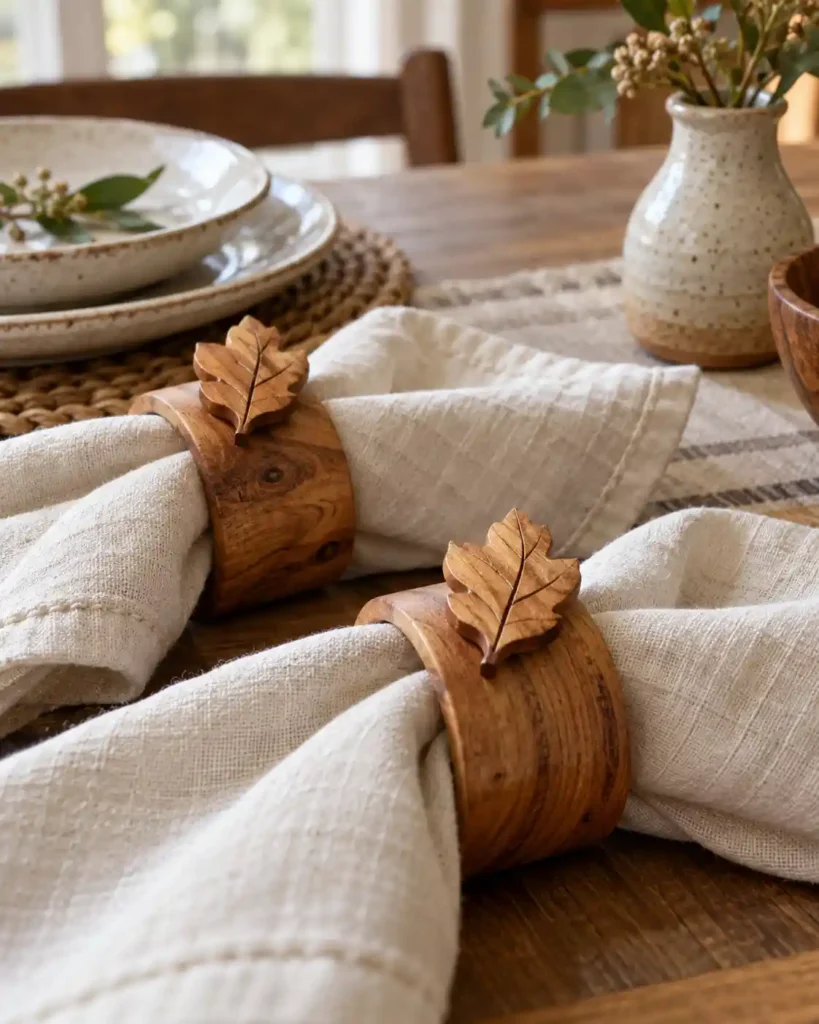
Wood leaf napkin rings bring the seasonal detail directly to each place setting. One small leaf is easier to arrange around plates than a loose scattering of decorations. They would look especially warm against cream linen and everyday white dishes. This is a manageable assembly project when you start with smooth rings and precut leaves.
Check for rough spots that could snag fabric. Paint the leaves, keep bonding areas compatible with your adhesive, and allow the joints to cure. For removable styling, tie each leaf to its ring with fine cord.
22. Rustic Wood Centerpiece Box
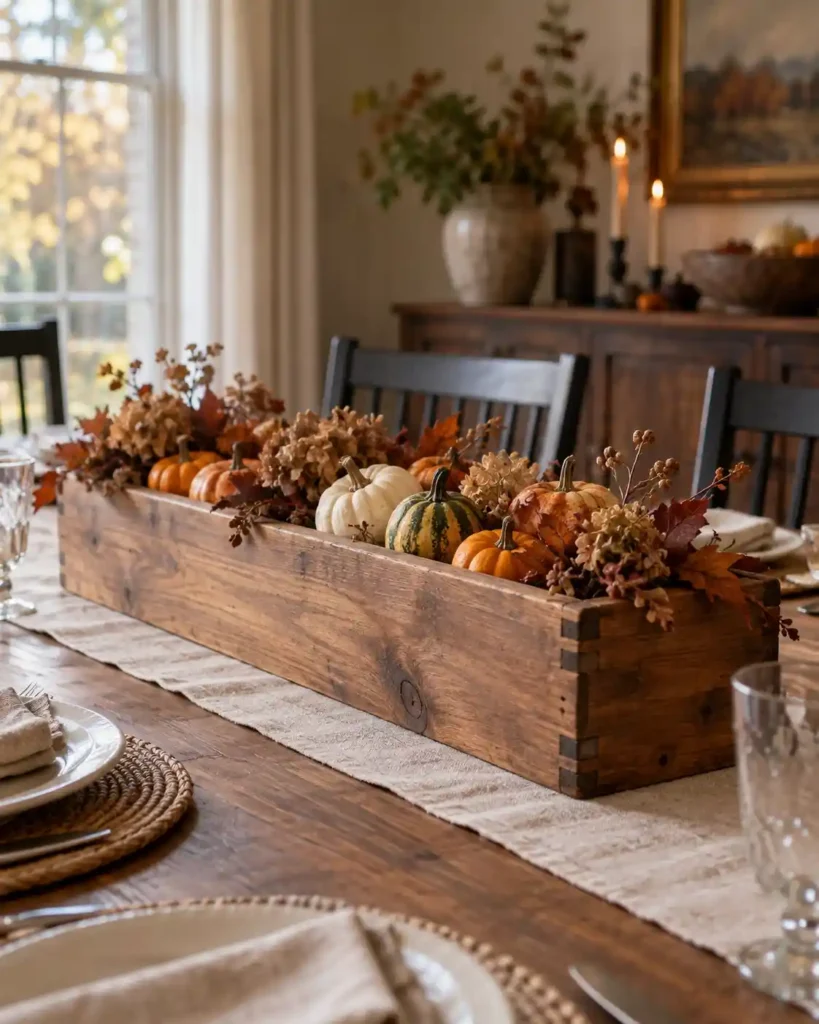
A rustic centerpiece box gathers several decorations into one movable arrangement. It makes clearing the table easier than lifting every small pumpkin individually. I’d keep the box low enough for comfortable conversation across dinner. This is a practical small build for someone ready to measure and assemble boards.
Plan the footprint around your table and use a fitted base with secure joints. Fill it with dry decorative materials in a removable insert. Keep fresh arrangements in separate watertight containers.
23. Faux Wood Book Stack
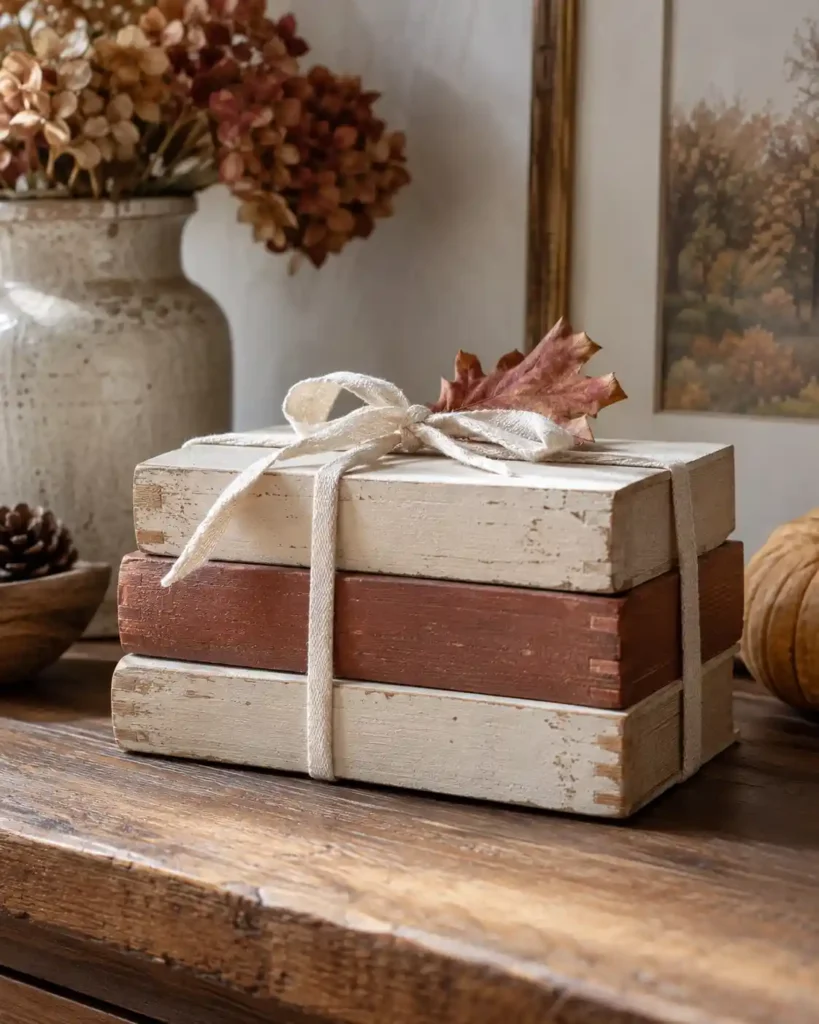
A faux wood book stack adds layers without using real books as craft supplies. Painted spines give you control over the colors and wording. It would sit neatly beneath a small autumn ornament on a console. Precut rectangular blocks make this a good choice when you prefer painting to construction.
Use slightly varied lengths while keeping the stack balanced. Paint the sides, add restrained spine lettering, and tie a removable cotton ribbon around the group. Let finishes cure before stacking painted surfaces together.
24. Wooden Sunflower Wall Art
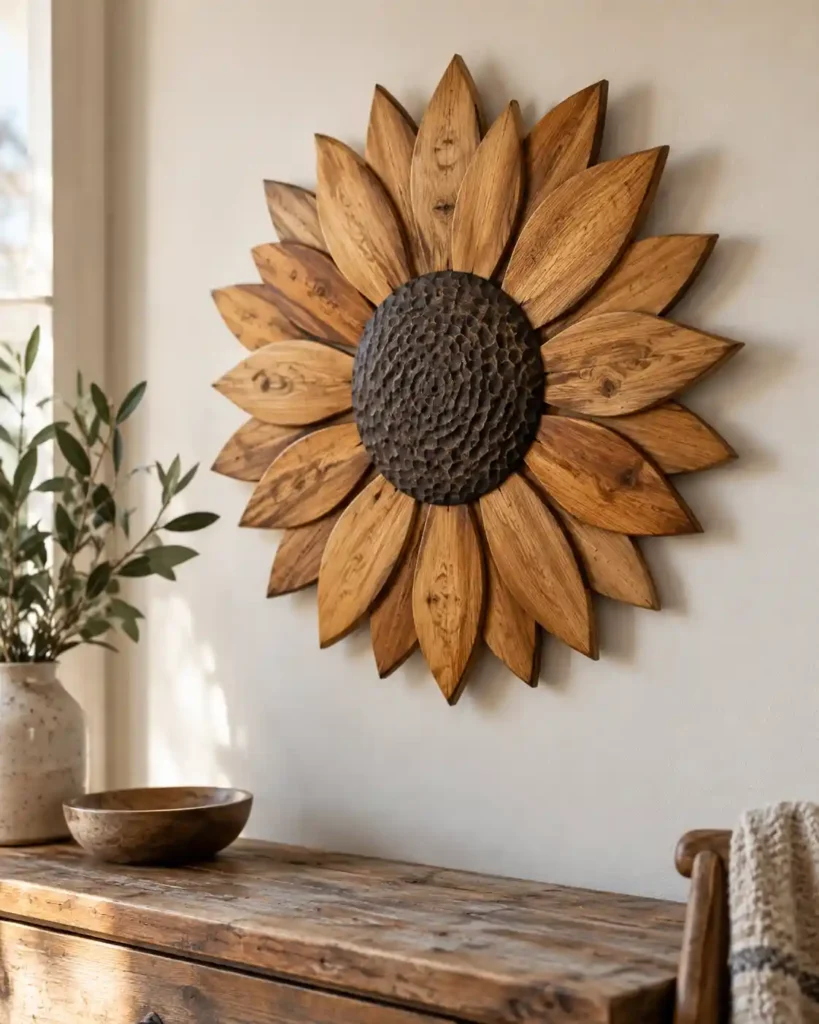
Wooden sunflower wall art carries warm color from late summer into fall. Layered petals create shadows that a flat painted flower cannot. I’d hang one on a plain cream wall and leave the surrounding space open. Choose precut petals for straightforward assembly or a template-based cutting project for more involvement.
Arrange the petals evenly around the center before attaching them to a backing. Leave bonding areas bare where required and fit weight-appropriate hardware. A secure backing matters more than adding another decorative layer.
25. Mini Wooden Harvest Houses
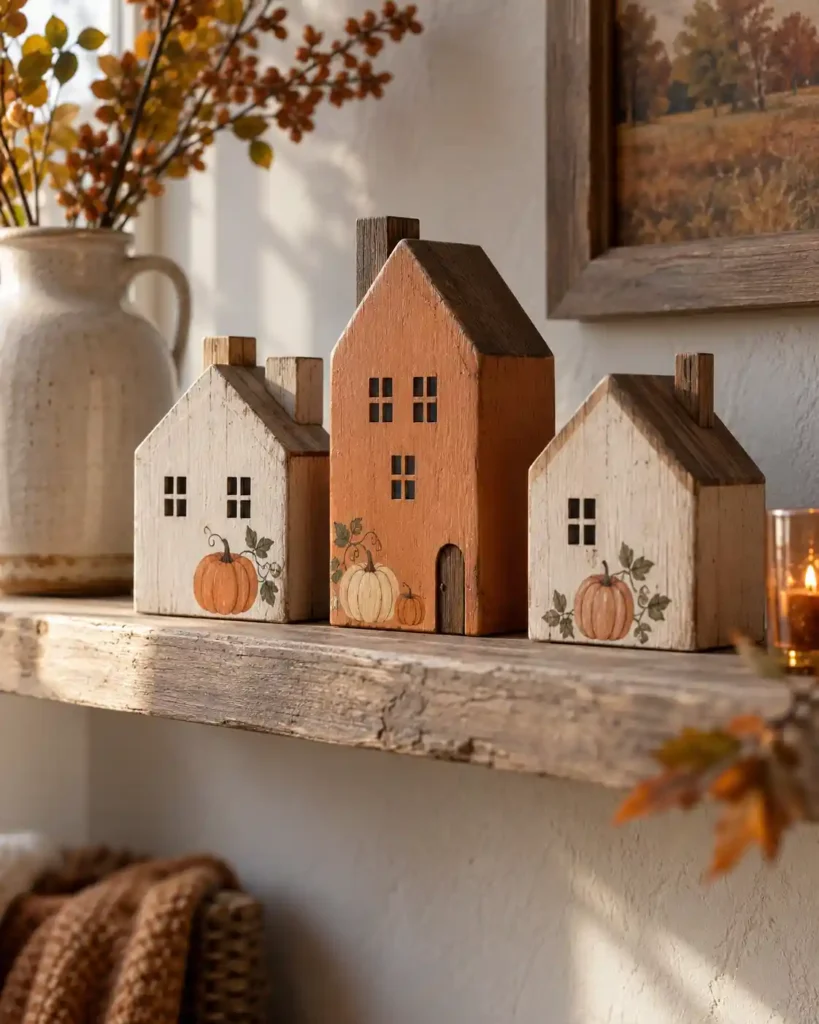
Mini wooden harvest houses create a village in very little space. Their simple facades give you more room for personal detail than another plain block. A row along a narrow shelf could echo the colors already used in the room. These suit small coordinated sets, particularly when matching house blanks are available.
Keep the bases level and use tiny painted pumpkin motifs instead of projecting attachments. Plain reverse sides can later become Christmas wood crafts with snowy windows and removable seasonal accents. Our Christmas crafts offer more ideas for building a handmade holiday display around them.
How Do You Choose Wood for Fall Crafts?
Choose wood by the project’s shape, required support, surface finish, and intended display location.
- Match blank thickness to standing or hanging use.
- Check slices for flatness and loose bark.
- Inspect reclaimed boards before cutting or sanding.
- Measure actual dimensions before planning joints.
Match the material to the job. Precut blanks remove shape-cutting from the project, while boards give you more control over size.
- Use blocks for pumpkins, letters, and compact shelf decorations.
- Choose flat slices for painted rounds and appropriately supported standing pieces.
- Pick smooth rings and preslotted blanks for table accessories.
- Reserve sound boards for signs, boxes, and braced displays.
For reclaimed material, inspect condition and provenance before use. Weathered appearance alone does not tell you whether wood is suitable for an indoor craft.
What Tools and Finishing Steps Do Beginners Need?
Easy fall wood crafts need basic painting supplies and suitable blanks, while assembled designs may also need clamps, drilling, and cutting tools.
- Read the full project before gathering tools.
- Prepare surfaces before painting or joining.
- Keep required glue contact areas bare.
- Allow the specified drying and curing time.
Painting projects usually need sandpaper, brushes, paint, a ruler, and a protected work surface. Construction projects may also require clamps, a drill, and an appropriate saw. Use eye protection and suitable dust control when cutting or sanding.
Dry-fit parts before adding glue. Titebond says most of its wood glues require 30–60 minutes of clamping for unstressed joints, and new joints should not be stressed for at least 24 hours. Its guidance also favors bare bonding surfaces over painted or sealed wood.
Match paints, adhesives, and finishes to the display location. An indoor clear coat does not make a decoration suitable for an exposed porch.
Which Fall and Halloween Wood Projects Could You Sell?
Consider repeatable, securely finished projects that you can price to cover materials, labor, packaging, and selling costs.
At a Glance
- Finish and time a sample before batching.
- Check demand with a small initial selection.
- Record costs for each piece or set.
- Include accurate dimensions and care information.
For repeatable small sets, consider block pumpkins, letter blocks, acorns, candy corn, ghosts, painted coasters, and harvest houses. These are production candidates, not promises of demand. For a wider mix of handmade products to consider, browse our fall crafts to sell.
When choosing Halloween wood projects to sell, time one finished sample before preparing a batch. Include sanding, detail painting, drying space, packaging, and any rework.
Record these costs:
- Wood and purchased blanks.
- Paint, glue, finish, and other consumables.
- Labor and overhead.
- Packaging and selling fees.
Compare similar local products, then check whether your price covers every cost and your desired profit. Photograph the actual finished pieces and state their dimensions and intended placement.
FAQs About Fall Wood Crafts
How Much Workspace Do You Need for Wooden Autumn Projects?
Fall wood crafts for adults need a stable work surface with room for the project, supplies, and drying pieces. A protected table can suit decorating precut blanks. Cutting and drilling require a suitable workbench, secure workholding, and the clearances specified for your tools; do not squeeze those tasks into a crowded painting area.
Which Colors Work Well for Rustic Wooden Fall Decorations?
For a softer rustic look, try terracotta, cream, ochre, sage, and natural brown together. Wood Fall Decor can feel coordinated when the same few colors appear across pumpkins, signs, and table accents. Test your palette on an offcut first, then leave selected areas unpainted to keep the grain visible.
How Can You Keep Paint From Bleeding Under a Stencil?
Use a smooth, clean surface, hold the stencil flat, and apply very little paint at a time. Dab gently rather than pushing a loaded brush toward the stencil edges. Test the technique on scrap wood, and follow the paint and stencil instructions before removing or repositioning the design.
Can You Combine Wooden Autumn Decorations With Crochet?
Yes, wooden autumn decorations can sit alongside crochet fall decor, including crochet pumpkins, small leaf motifs, or a textured table runner. Repeat a color across both materials to connect the arrangement. Keep textile accents removable where practical, and place them so they do not interfere with stable bases, hanging hardware, or access to LED batteries.
How Should You Store Painted Wooden Fall Crafts?
Store painted wooden fall crafts clean, dry, and fully cured, with padding between pieces that could rub together. Protect projecting stems, petals, and other delicate details from pressure. Remove batteries from stored lights according to their instructions, and label containers so you can find matching sets without unpacking every decoration.
Which Project Will You Make First?
Start with one corner of your home and one project you can comfortably finish. A pair of acorns, a painted pumpkin, or a leaf garland can bring in the season without filling every surface.
Save your favorite fall wood crafts from CrochetMind, gather the right blanks, and choose a small color palette before you begin. The nicest finishing touch may be leaving just enough wood grain uncovered.
Final Thoughts
A plain piece of wood can become the autumn detail that makes a corner feel warm and personal. These fall wood crafts give you plenty of ways to start, whether you choose painted pumpkins, a rustic porch sign, or small accents for your Thanksgiving table.
Pick one project that suits your tools, choose colors you enjoy, and give yourself time to finish it well. You don’t need to make all 25—a few thoughtful pieces can be enough. Save your favorites for later, and let that first little creation set the mood for the season.


![The Best 30+ Free Crochet Cat Patterns [Beginner-Friendly Guide]](https://crochetmind.com/wp-content/uploads/2025/04/1-The-Best-30-Free-Crochet-Cat-Patterns-Beginner-Friendly-Guide.webp)