

The right crochet blanket border can turn an ordinary finished blanket into something that looks polished, balanced, and intentional. Simple stitches such as single crochet work well when you only need a neat frame, while shells, ribbing, lace, bobbles, and textured finishes can make the edging part of the design itself.
The key is choosing a border that works with your blanket’s yarn weight, texture, shape, and overall style. The Craft Yarn Council classifies yarn weights from 0, or lace, through 7, or jumbo, and recommends treating its hook and gauge ranges as guidelines rather than fixed rules.
A finished blanket can feel surprisingly different once the border goes on, which is why I like to think about the edging before choosing the prettiest stitch. A delicate crochet blanket edging may suit a lightweight throw, while a wide ribbed frame can give a chunky blanket the structure it needs. The 21 ideas below range from simple beginner-friendly finishes to more decorative options, so you can compare texture, width, drape, and overall effect before committing. Whether you are looking for understated framing or more distinctive crochet blanket edges ideas, the goal is the same: choose a finish that complements the blanket instead of competing with it.
Key Takeaways
- Match border weight to your blanket yarn.
- Test corners before working the full perimeter.
- Use foundation rounds to stabilize uneven edges.
- Choose crochet blanket edging that complements texture.
- Check tension after every completed round.
- Compare width before choosing decorative crochet blanket edges ideas.
How Do You Choose the Right Crochet Blanket Border?
Choose a crochet blanket border by matching its width, texture, yarn weight, and visual style to the finished blanket.
At a Glance
- Use narrow borders for detailed blankets.
- Add wider borders when extra framing helps.
- Match solid edging to dense blanket textures.
- Choose openwork for lighter drape.
- Test decorative stitches before committing.
Before picking from these crochet blanket borders, decide what the edge actually needs. Is it uneven and in need of structure? Does the blanket need a little extra width? Or is the body already simple enough to handle a decorative finish?
A narrow border keeps attention on the blanket itself. A deep ribbed or lace border creates more visual weight, while textured stitches work especially well when you want the edge to become a design feature.
| Border style | Skill level | Overall look | Works especially well for |
|---|---|---|---|
| Single Crochet | Beginner | Clean and compact | Almost any blanket |
| Slip Stitch | Beginner | Very narrow | Minimalist finishes |
| Moss Stitch | Confident beginner | Woven and modern | Colorful blankets |
| Crab Stitch | Confident beginner | Rope-like | Structured edges |
| Ribbed | Intermediate | Thick and cozy | Chunky throws |
| Shell/Scallop | Confident beginner | Soft and decorative | Baby and gift blankets |
| Picot | Confident beginner | Delicate | Lightweight blankets |
| Filet Mesh | Intermediate | Airy and lacy | Cotton throws |
| Puff/Bobble | Intermediate | Textured | Statement blankets |
| Ruffle | Confident beginner | Playful and full | Decorative throws |
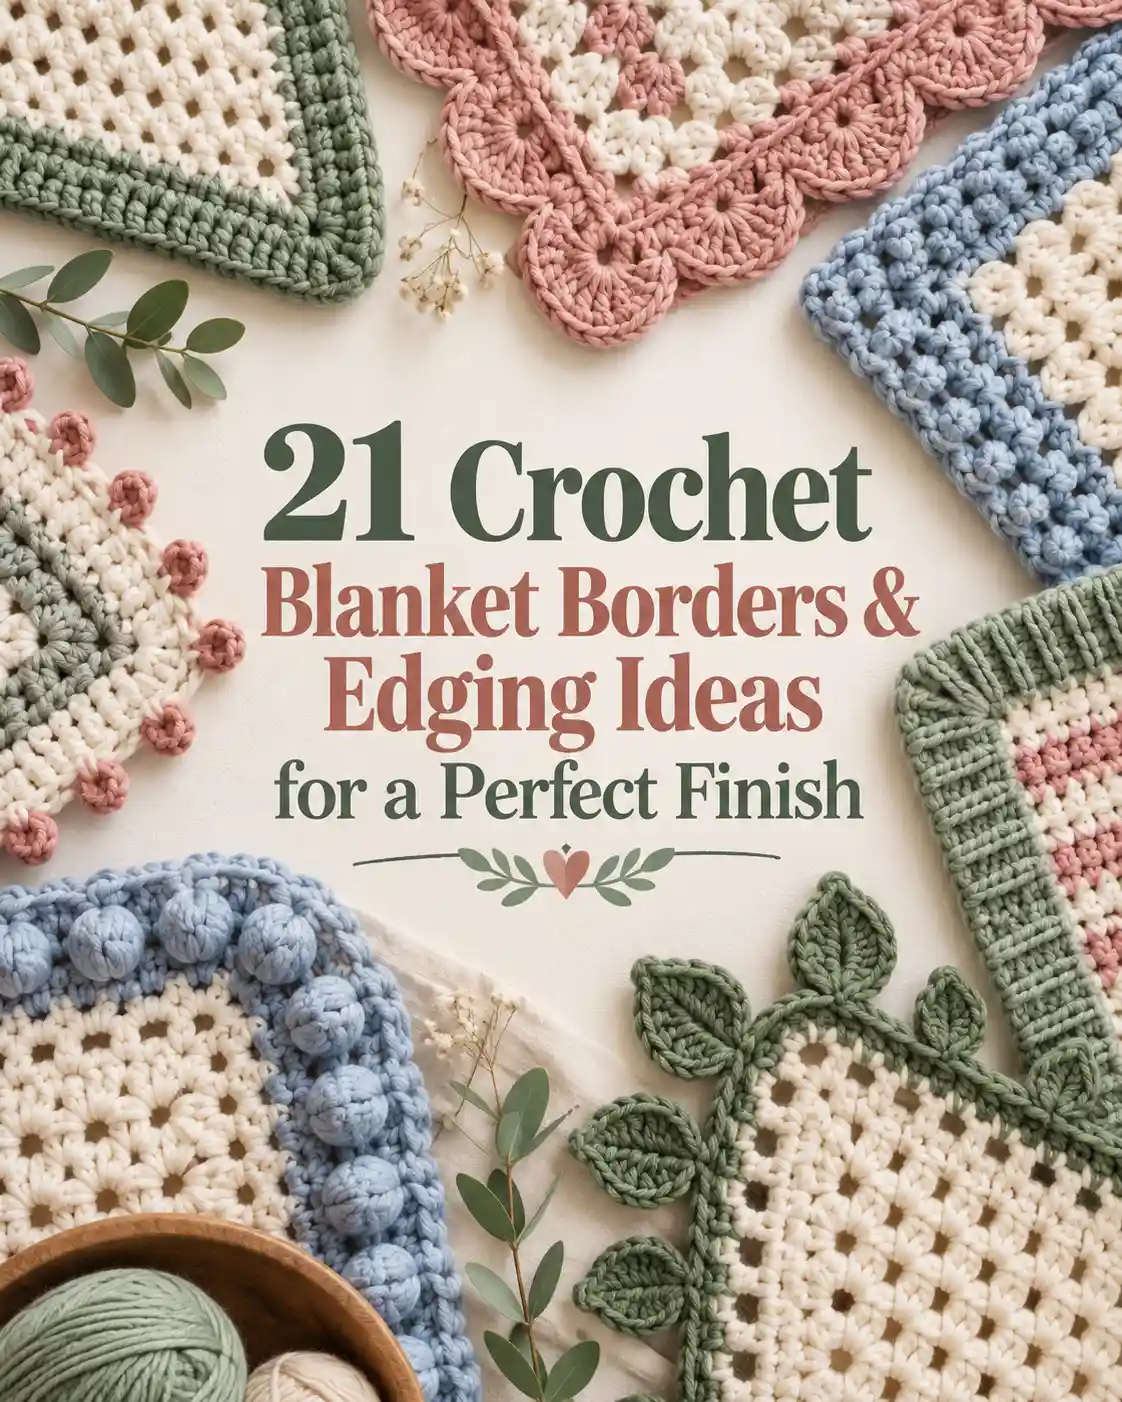
21 Crochet Blanket Borders & Edging Ideas for a Perfect Finish
Make & Do Crew recommends starting with yarn close to the weight used in the blanket because changing yarn thickness can affect how smoothly the border lies. Hook size and stitch distribution can then be adjusted if the edge begins to ripple or pull inward.
1. Why Choose a Single Crochet Border?
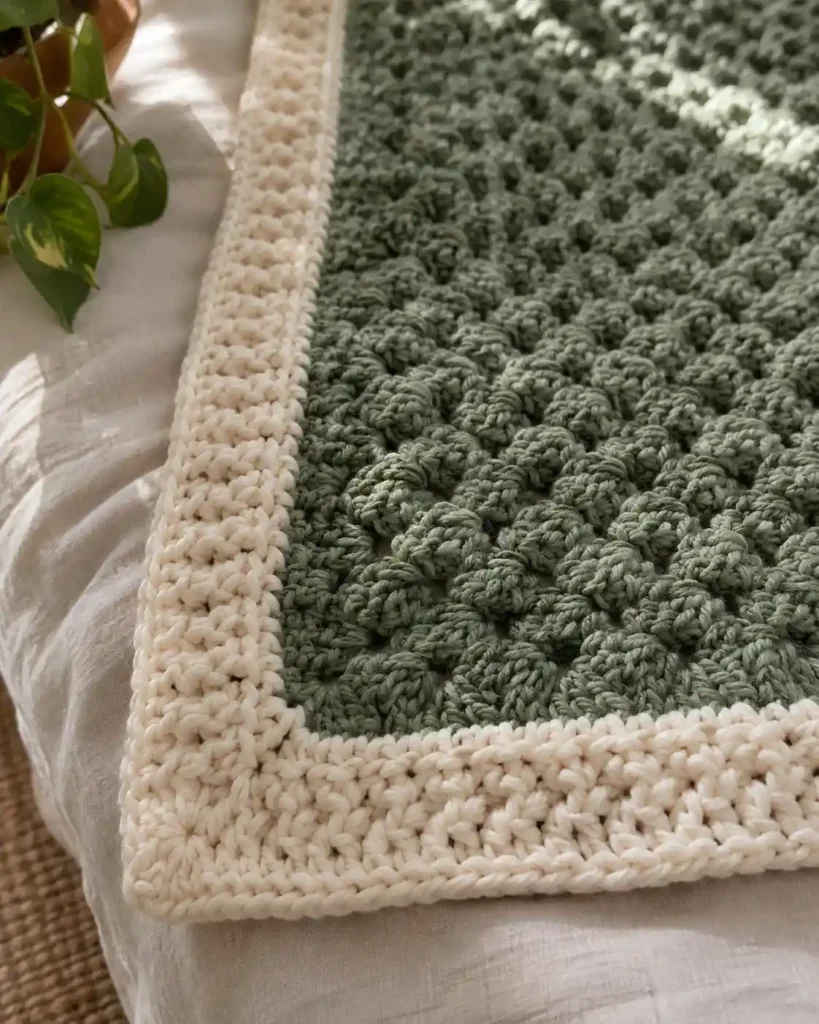
A single crochet blanket border is hard to beat when you simply want the blanket to look finished. The compact stitches form a firm frame without competing with stripes, granny squares, cables, or other texture in the body.
It is particularly useful as a foundation round because it creates a more predictable edge for decorative stitches added afterward. On a blanket with uneven row ends, taking time to distribute those first stitches evenly makes a noticeable difference.
For a clean everyday throw or a granny-square project, and especially if you are learning to crochet a baby blanket, this is one of the most versatile starting points.
Special Tip: Place stitch markers in the corners before beginning so you do not accidentally miss your planned corner increases.
2. When Does a Slip Stitch Border Work Best?
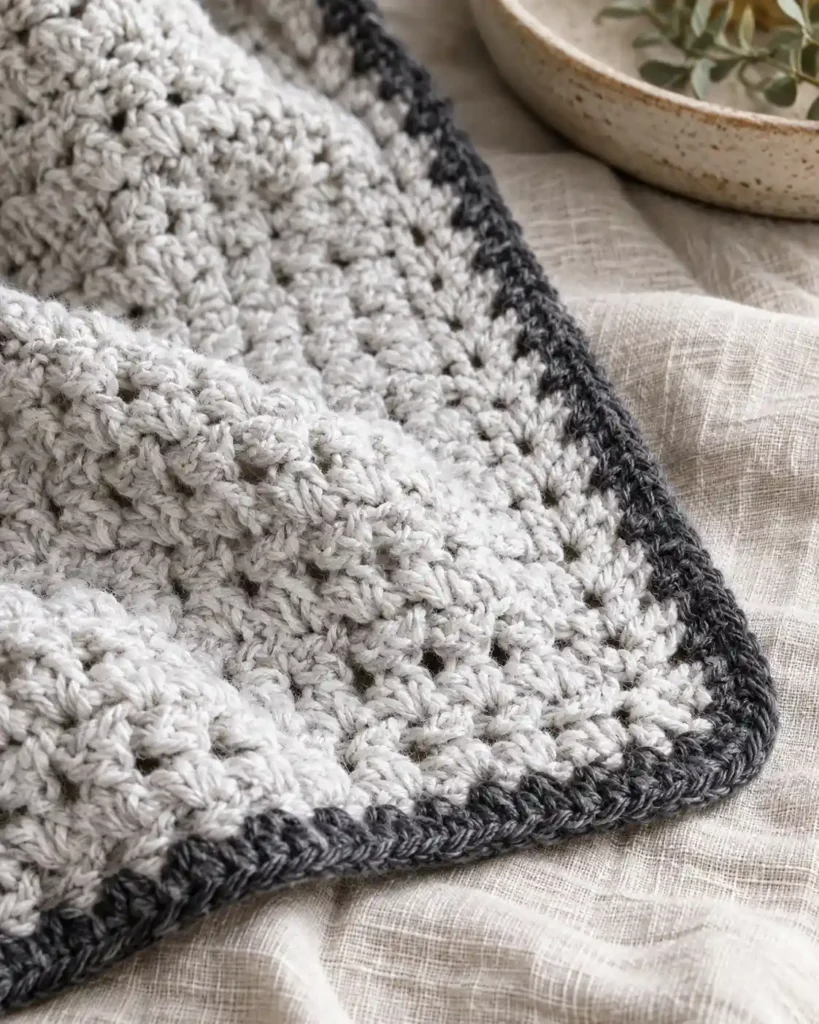
A slip stitch blanket border gives you perhaps the least intrusive finish in this list. Instead of adding a noticeable band around the blanket, it creates a thin line that tidies the perimeter while allowing the main stitch pattern to stay in charge.
That makes it especially appealing on detailed blankets where another inch of crochet would feel unnecessary. The main challenge is tension: overly tight slip stitches can pull the edge inward.
This is a smart option when your blanket already has enough size and visual interest but still needs a crisp final line.
3. Why Use a Half Double Crochet Border?
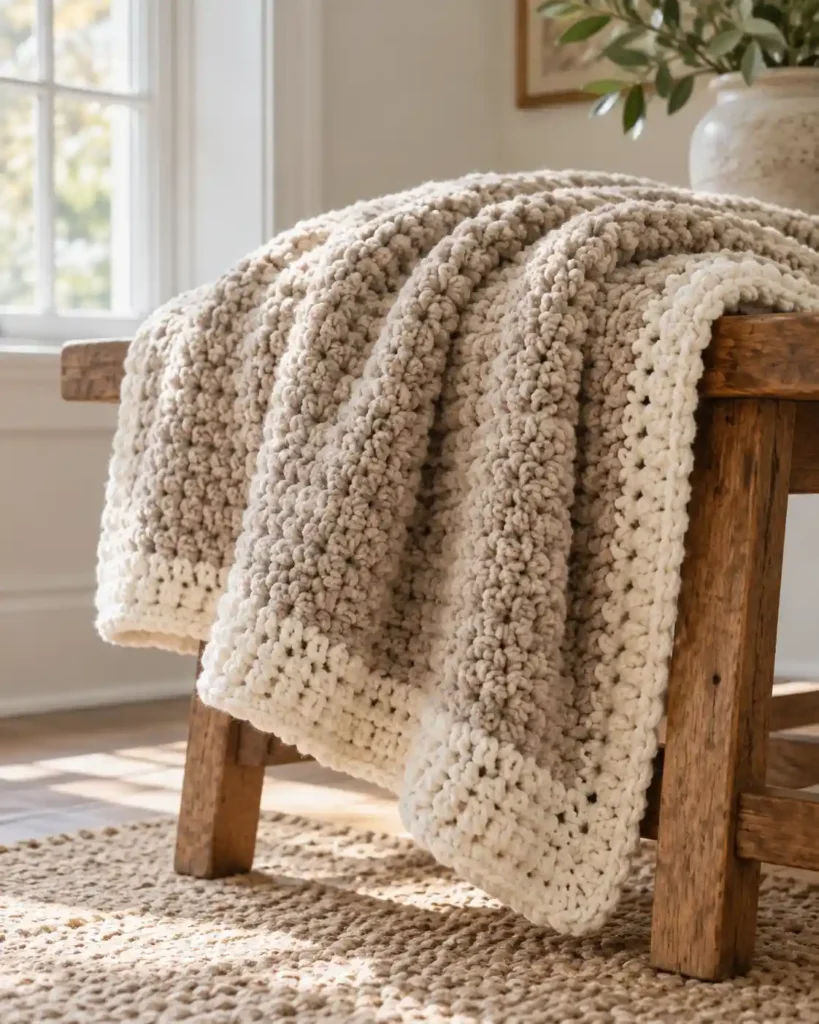
A half double crochet border has more body than single crochet without becoming as open or tall as double crochet. It creates a soft, substantial frame that feels especially natural around medium-weight and chunky blankets.
With plush yarn, the individual stitches may be less visible, but the extra depth of the edging still creates a clear outline. It is also easy to build several rounds when you need to increase the blanket size slightly.
For a cozy throw where a tiny border feels too delicate, half double crochet offers a useful middle ground.
4. When Should You Add a Double Crochet Border?
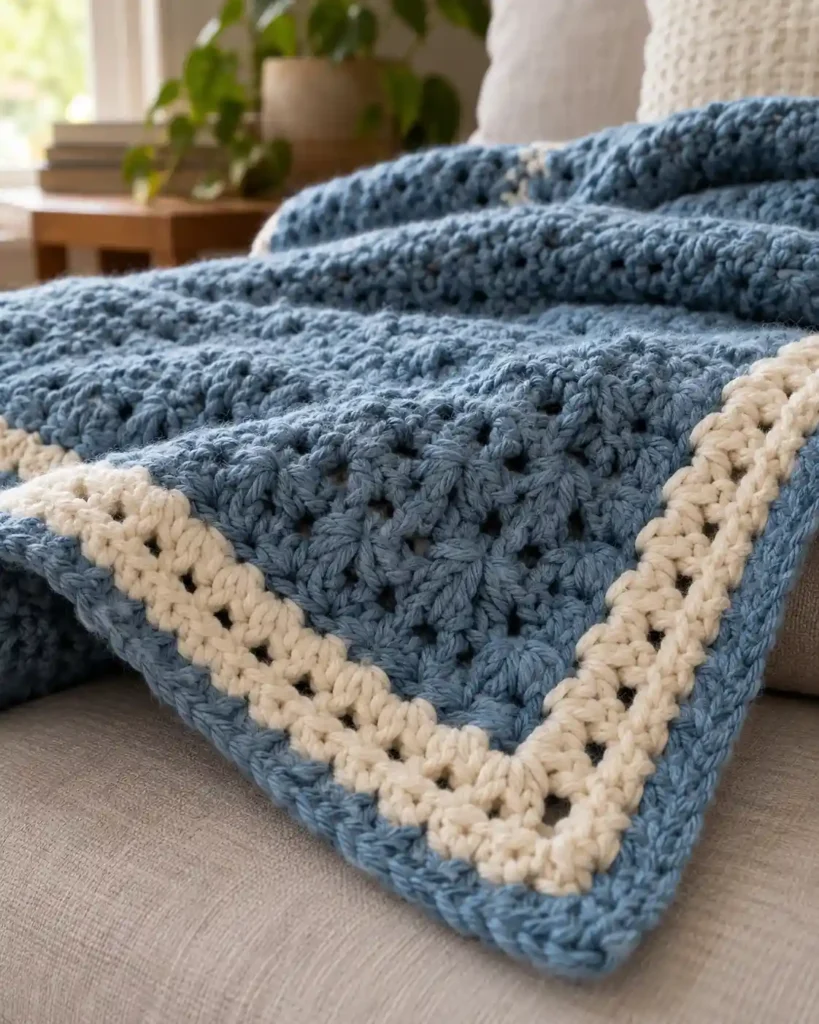
A double crochet blanket border builds width quickly. The taller stitches make it useful when you want the edging to have a stronger visual presence or when a finished blanket needs a little extra size.
Because double crochet creates more open space than single or half double crochet, the border can feel lighter even when it is fairly wide. On smaller blankets, however, several deep rounds can overwhelm the main design.
Try one or two rounds first, lay the blanket flat, and then decide whether the proportions need more.
5. Why Is a Moss Stitch Border So Versatile?
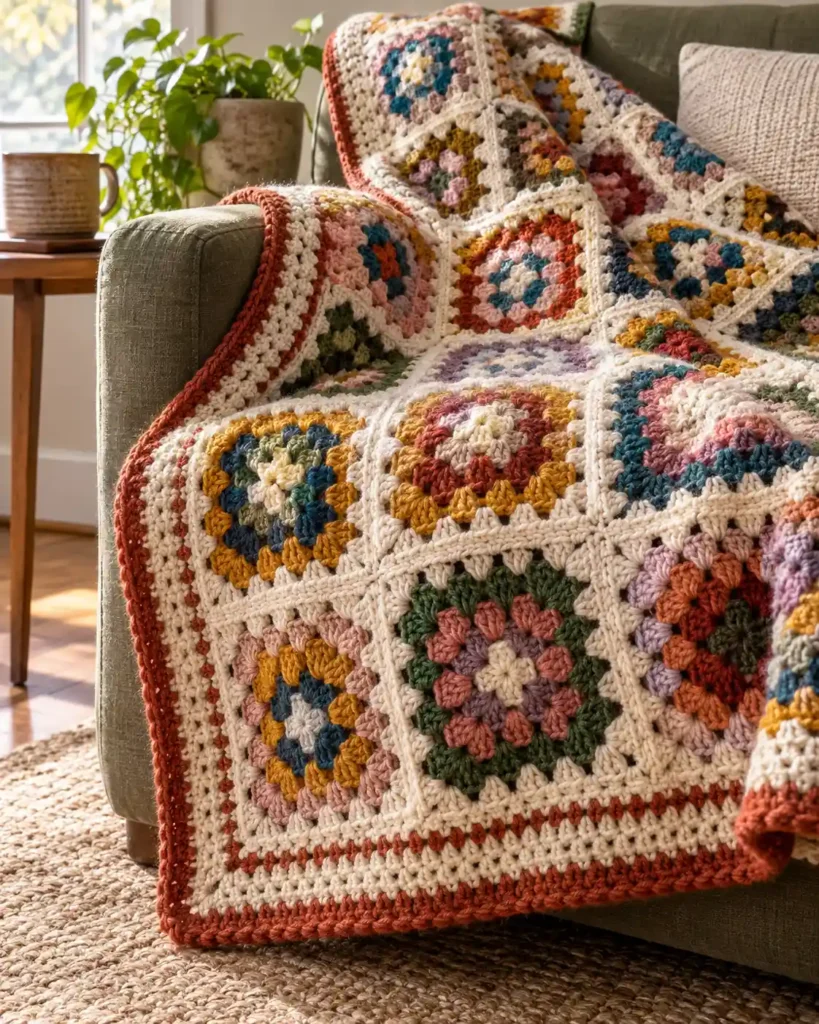
The moss stitch border, also called linen stitch, combines single crochet stitches and chain spaces to produce a tidy woven effect. It looks structured without feeling heavy, which makes it particularly useful around colorful granny squares and striped blankets.
Color changes are where this edging becomes especially fun. Two or three restrained shades can echo colors from the blanket without turning the border into another competing pattern.
Lucy Kate Crochet highlights both single crochet and linen/moss stitch as adaptable ways to finish blankets, including multicolor applications.
For modern crochet blanket edging, moss stitch crochet is one of the easiest ways to combine simplicity with a little extra detail.
6. What Makes a Crab Stitch Border Different?
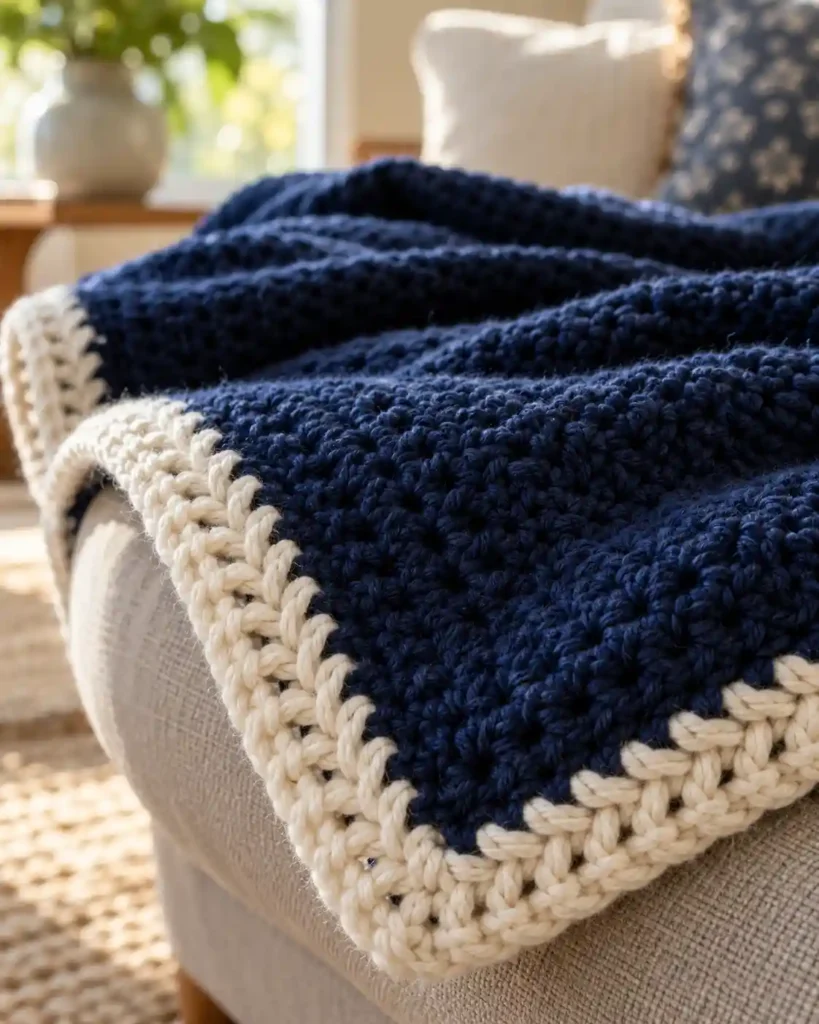
The crab stitch border, or reverse single crochet, creates a twisted line that resembles a small rope running around the blanket. You work in the opposite direction from ordinary crochet, so the first few stitches can feel unusual even if you already know single crochet well.
Its advantage is impact without bulk. One decorative pass over a prepared foundation can give a plain blanket a much sharper finished edge.
Make & Do Crew specifically recommends placing crab stitch over a single crochet foundation and describes the result as a twisted, rope-like finish.
It works beautifully when you want texture but do not want shells, lace, or a wide border.
7. Why Try a Camel Stitch Blanket Border?
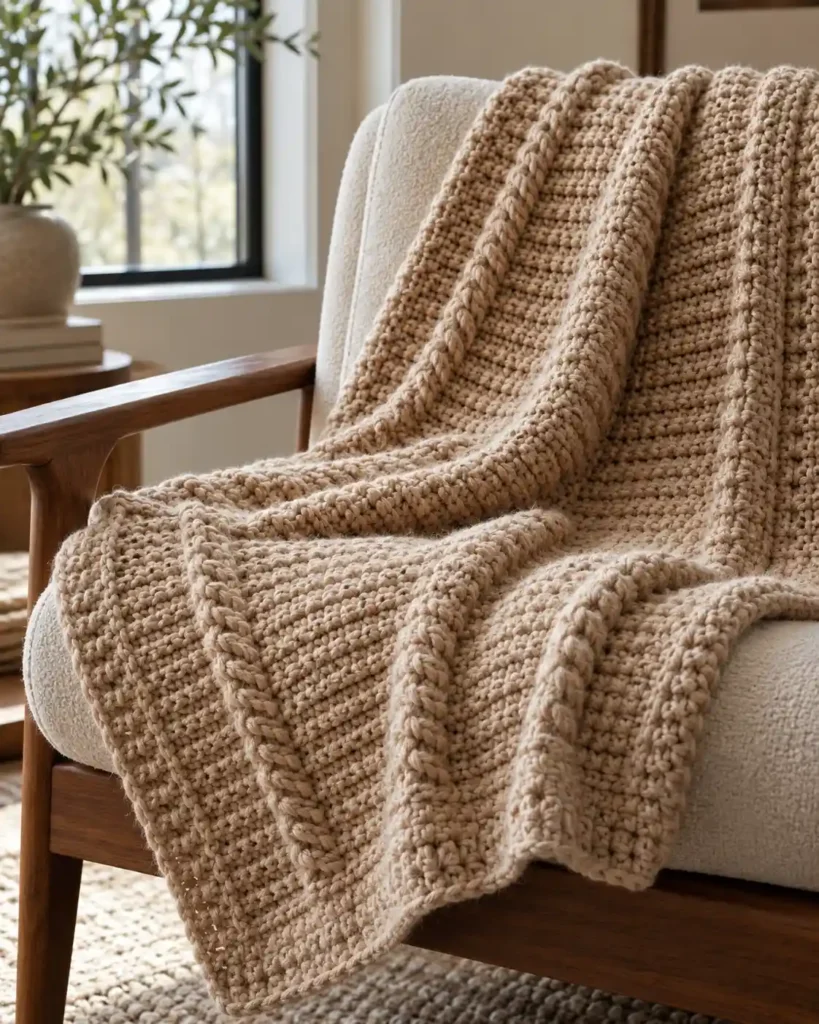
A camel stitch blanket border creates horizontal ridges with a subtle knit-like character. The texture is restrained enough for modern blankets yet distinctive enough to look more intentional than a completely plain frame.
Smooth yarn tends to show the ridge more clearly than heavily textured or fuzzy fibers. A contrasting color can emphasize it further, although a tonal shade gives a quieter result.
Use this border around contemporary throws, simple striped blankets, or geometric designs where scallops would feel too traditional.
8. When Does a Ribbed Crochet Blanket Border Look Best?
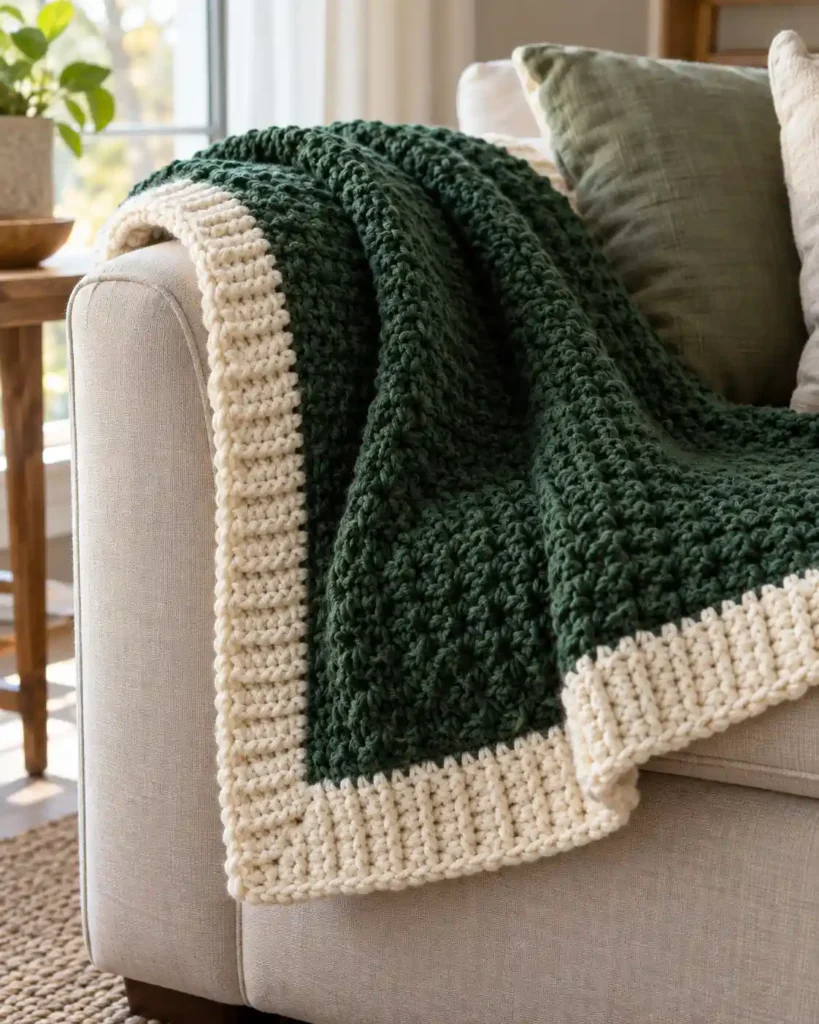
A ribbed crochet blanket border brings considerably more depth to the edge. Front-post and back-post stitches can create pronounced ribs that make a blanket feel framed almost like a piece of textile artwork.
This is particularly effective around chunky or solid-color throws, where the extra texture adds interest without requiring many different colors. Compared with camel stitch, post-stitch ribbing usually creates a stronger, deeper texture.
Because it can become quite substantial, plan the width before committing to several rounds.
Best use: cozy sofa throws, winter blankets, granny-square afghans, and projects that need a strong visual frame.
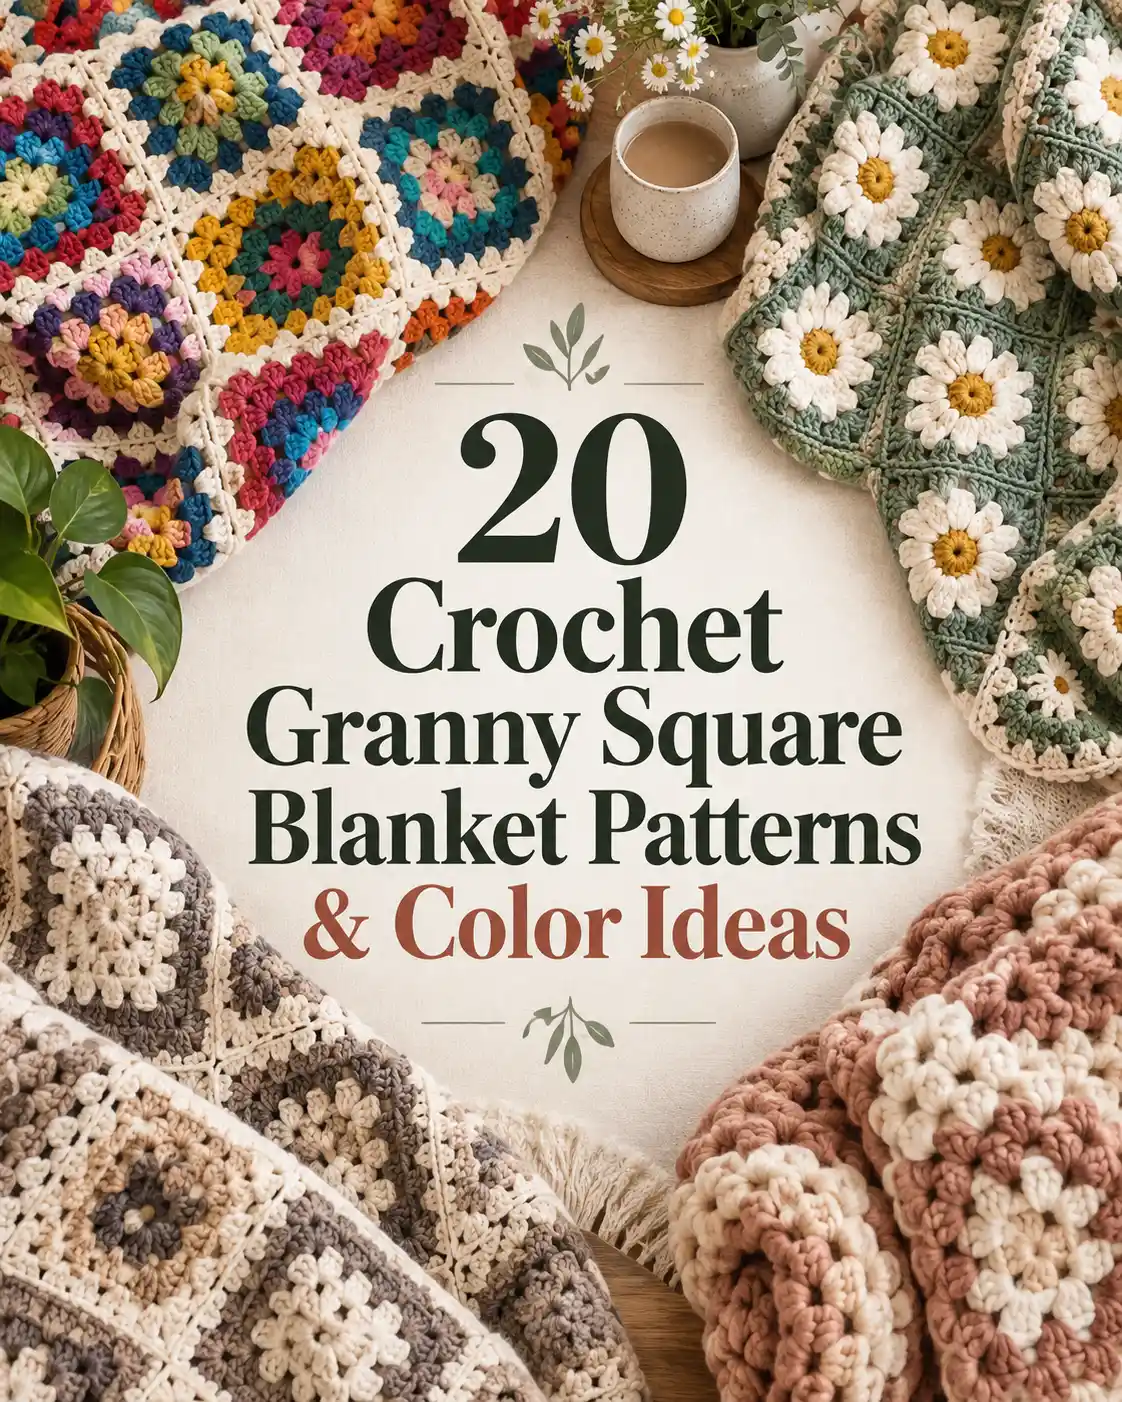
9. Why Continue a Granny Stitch Around the Border?
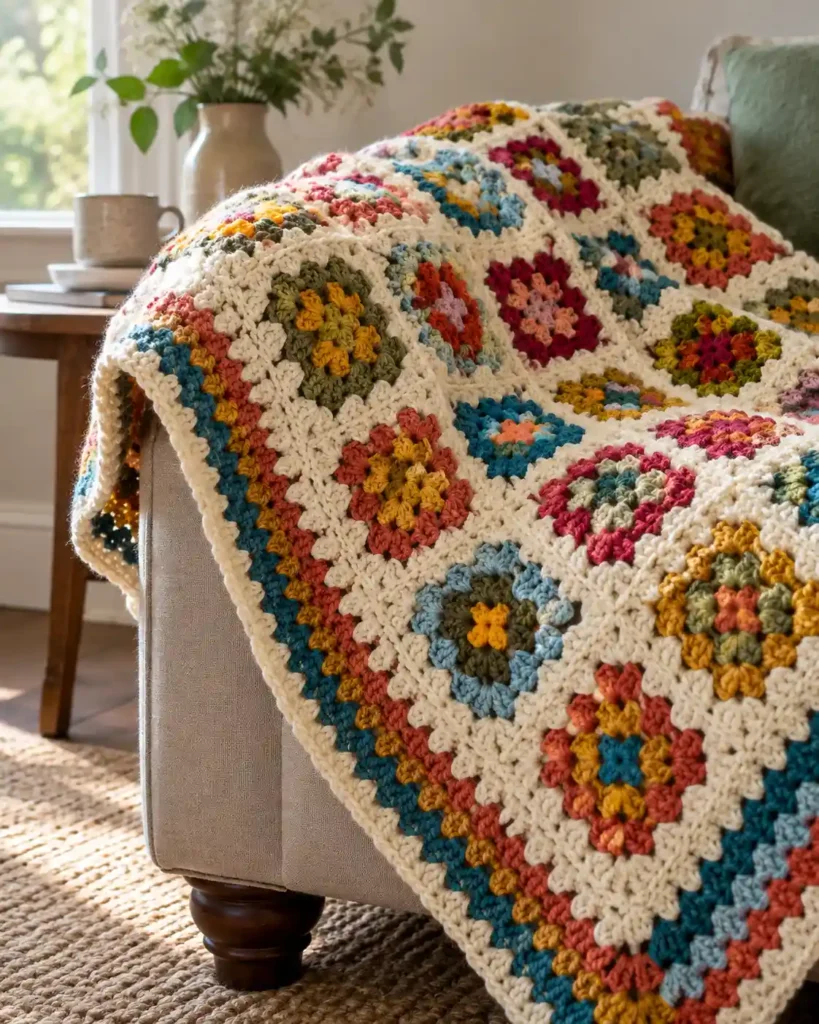
A granny stitch blanket border keeps the familiar cluster rhythm of a granny-square blanket moving right through the edging. Instead of suddenly switching to a dense solid frame, the border feels like a natural continuation of the main project.
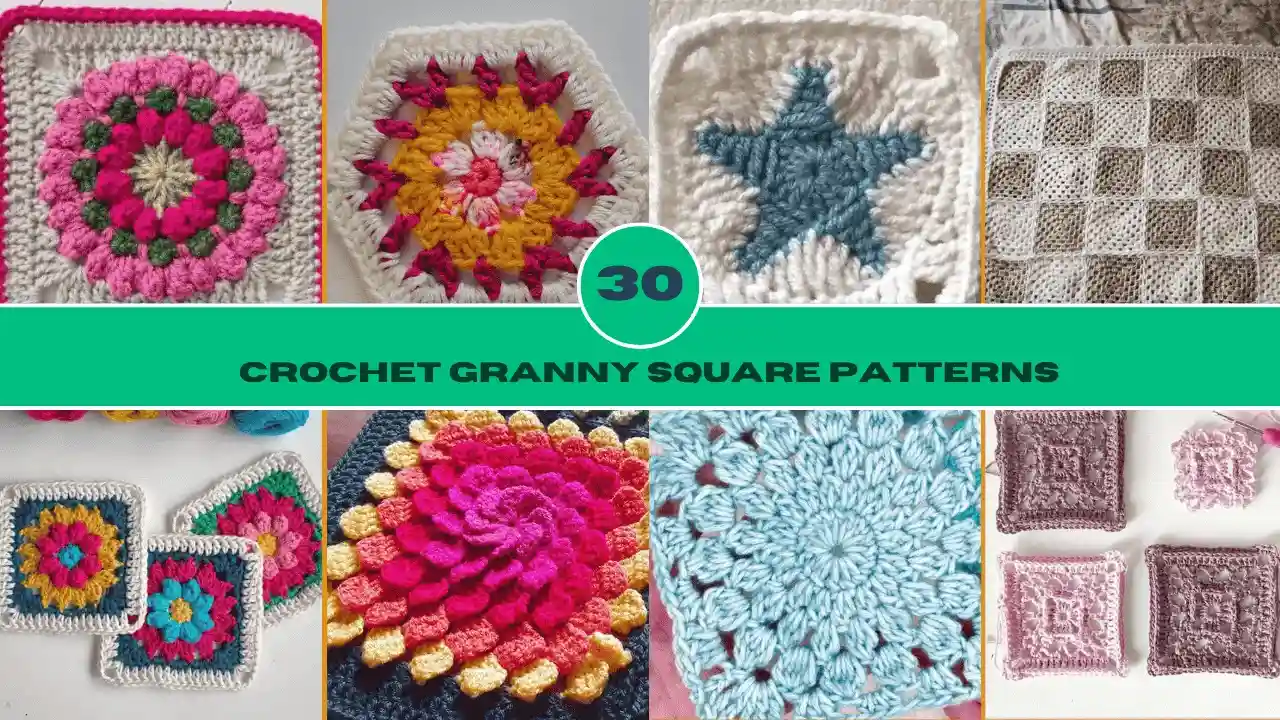
This works especially well when individual squares from crochet granny square patterns have already been joined into a colorful blanket. A neutral outer color can calm the palette, while repeating several colors creates a more playful finish.
The main job is aligning the clusters and corners cleanly so the edging looks deliberate rather than squeezed into the available space.
10. Why Choose a Shell or Scallop Crochet Border?
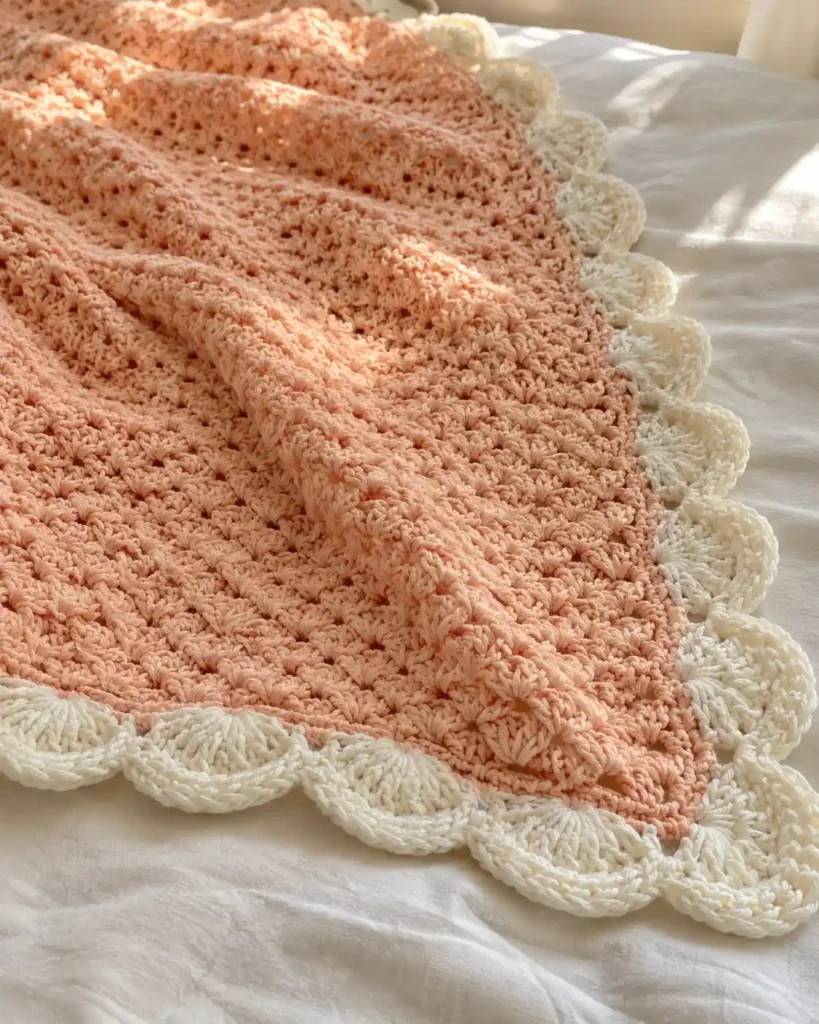
A shell crochet blanket border uses crochet shell stitch to add rounded curves to an otherwise straight edge. Several stitches worked into selected spaces create the familiar scalloped shape, making this one of the prettiest choices for gift blankets.
Compared with a plain double crochet border, shells create movement without requiring a complicated motif. You can also adjust the visual scale by choosing a pattern with smaller or deeper shells.
A peach, cream, pastel, or tonal scallop looks particularly soft around a baby blanket, while stronger contrast can make the same technique much more graphic.
Just check the repeat before starting, the spacing that creates beautiful scallops on one blanket may not fit another without adjustment.
11. When Is a Picot Crochet Border a Good Choice?
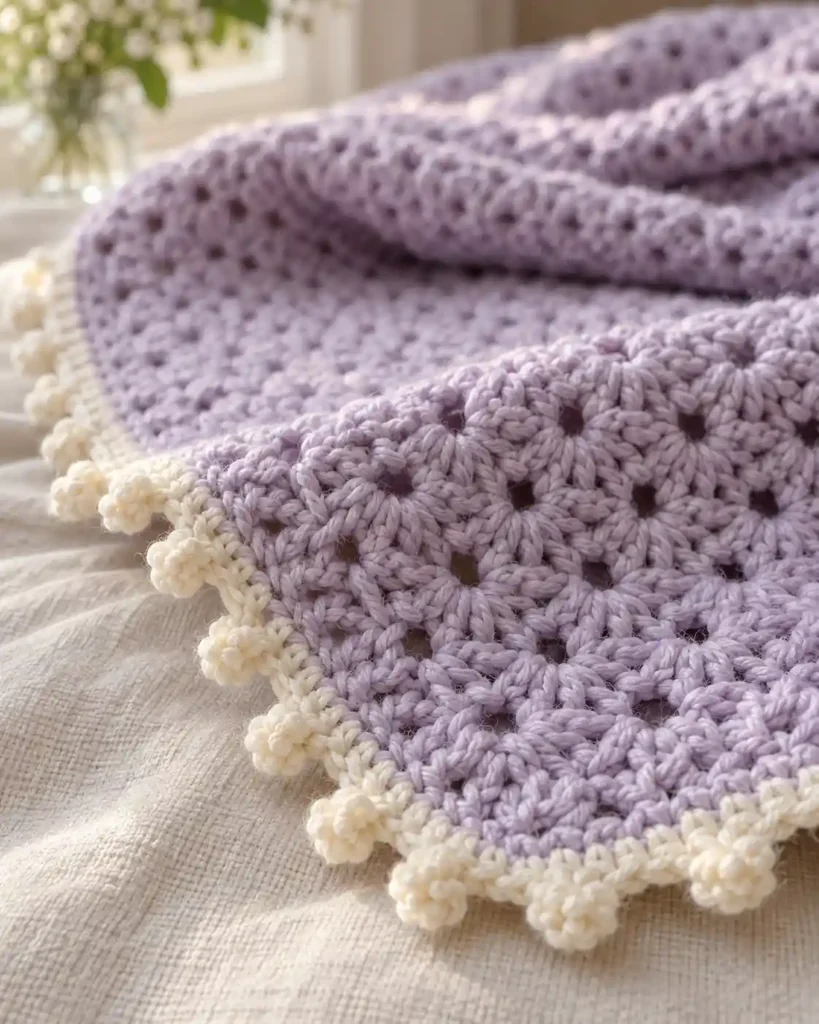
A picot crochet border adds tiny pointed details along an otherwise narrow edge. It feels more delicate than shells and much lighter than a thick ribbed frame.
That makes picot edging useful when the blanket already has an attractive body but needs one final decorative detail. Closely spaced picots create a dressier result, while wider spacing keeps the finish understated.
For lightweight blankets and handmade gifts, the small points can add charm without dramatically increasing the border width.
12. Why Use a Chain Loop Crochet Border?
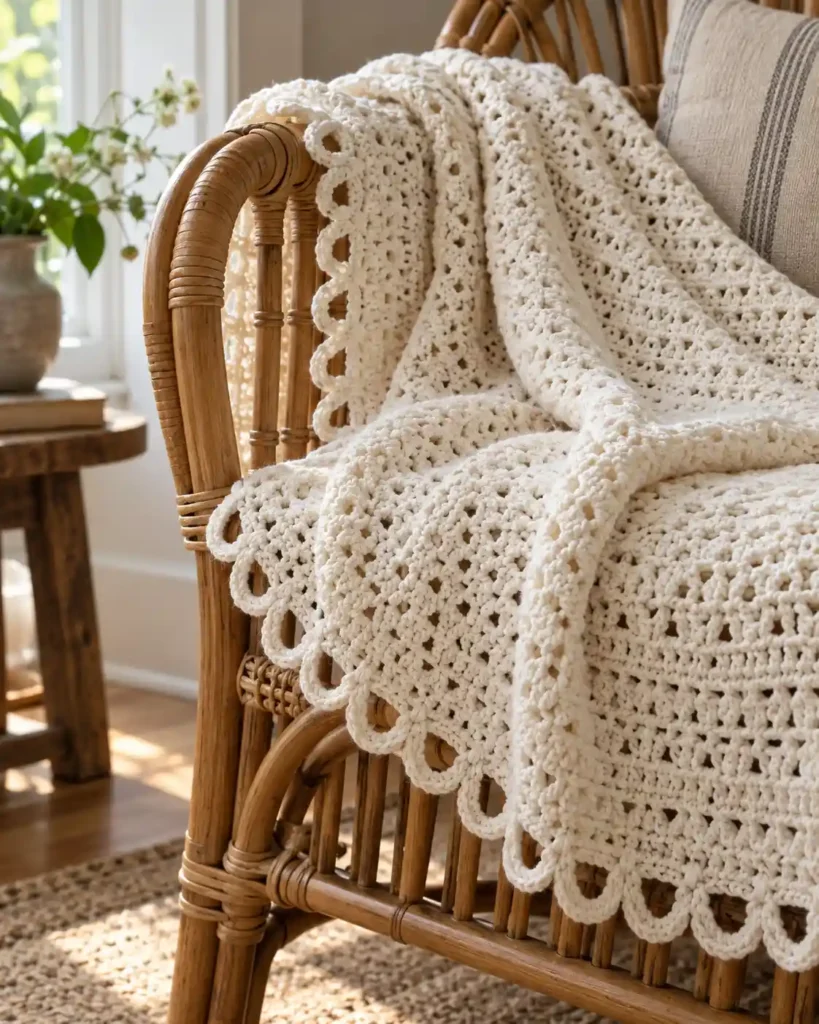
A chain loop crochet border creates an airy series of loops anchored at regular intervals. The open spaces give the blanket a softer, lighter outline than solid stitches can provide.
This is especially effective on lightweight adult throws where a dense border would change the drape. Larger loops look more decorative and dramatic; smaller loops feel neater and more restrained.
Because the loops themselves are part of the visual effect, consistent tension and spacing matter more here than they do with many solid borders.
13. What Makes a V Stitch Border Feel Lighter?
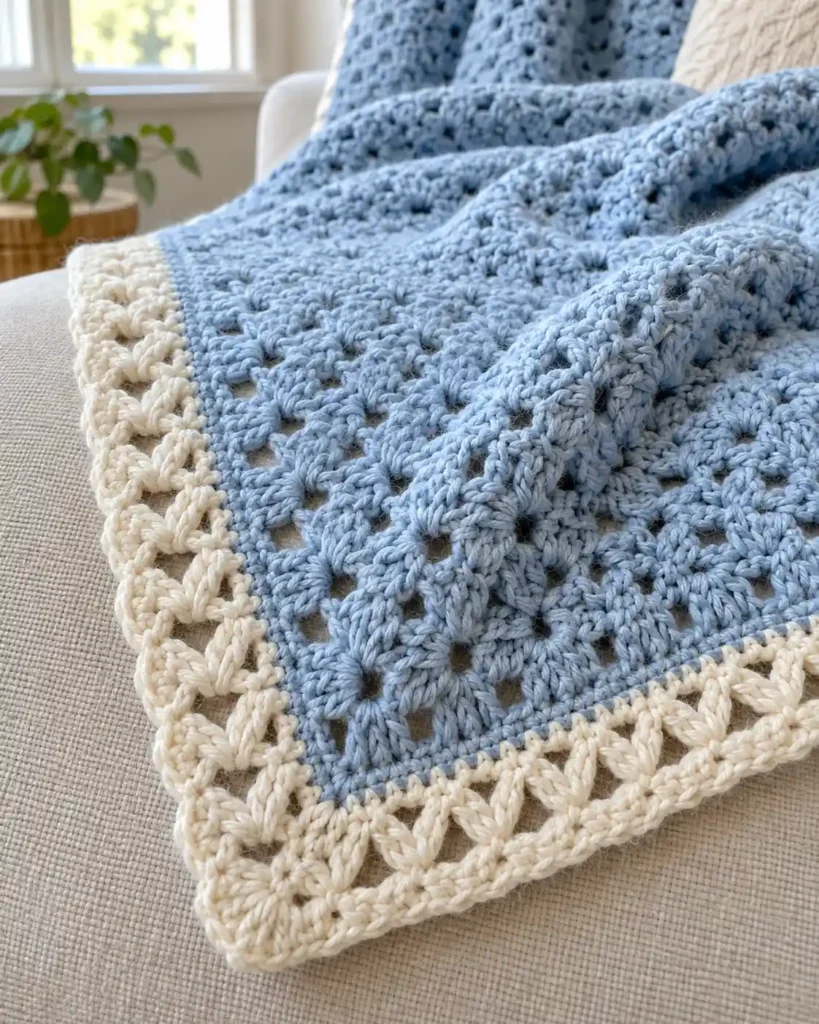
A V stitch blanket border uses repeated open V-shaped stitch groups to build a decorative frame without creating a heavy band of solid crochet. The negative space becomes part of the design.
It works particularly well with cotton, lighter acrylics, and blankets meant for warmer weather. Compared with a basic chain-loop edging, the V stitches create a more recognizable repeated structure.
Plan the stitch multiple and corner treatment before committing to the entire perimeter so the V shapes remain evenly spaced.
14. When Should You Choose a Filet Mesh Border?
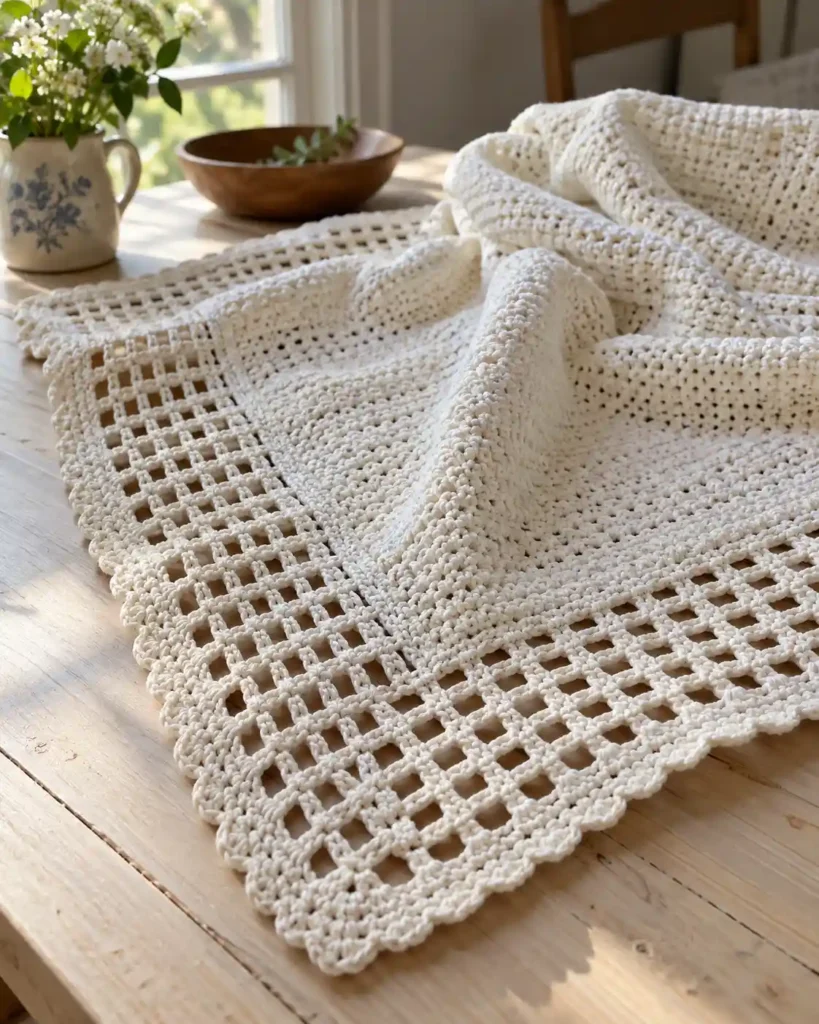
A filet crochet blanket border creates a grid of open squares around the blanket. The look is geometric, airy, and slightly more formal than simple V stitches.
A broad filet mesh edging can give a basic cotton throw the appearance of a much more elaborate project without covering the entire blanket in lace. It also gives blocking plenty of opportunity to sharpen the finished shape.
Choose this for lightweight throws, bed blankets, and projects where you want a wide border without the visual weight of dense stitches.
15. Why Add a Puff Stitch Border?
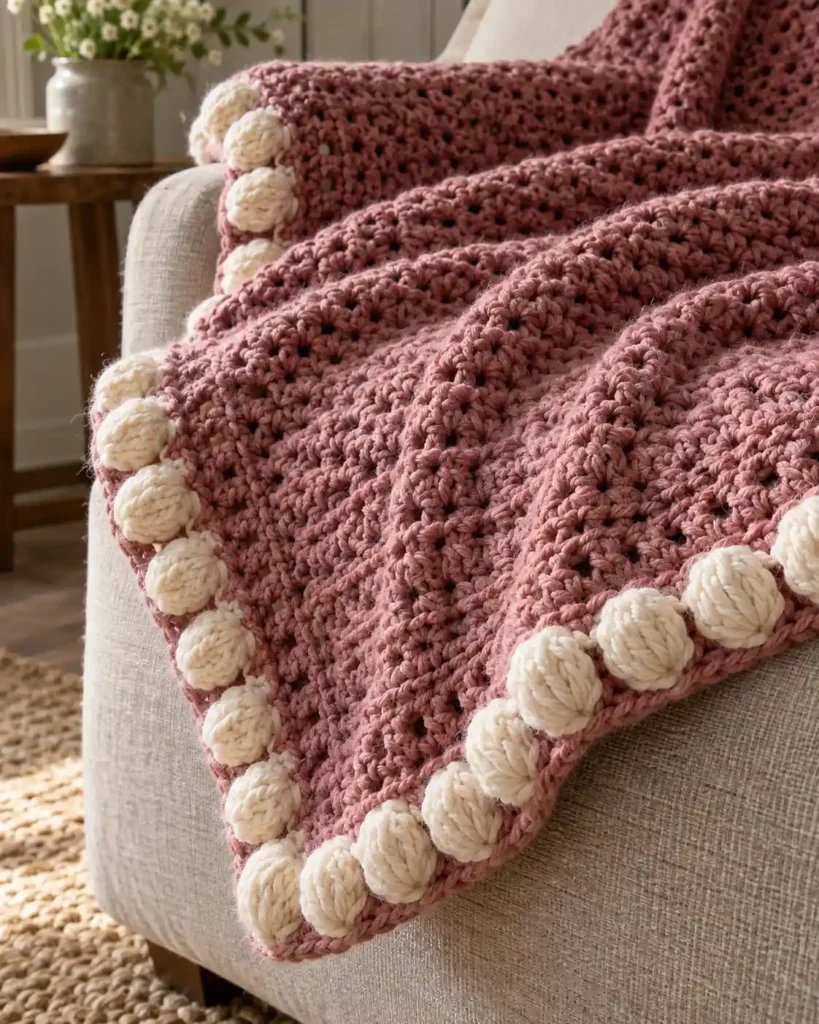
A puff stitch blanket border introduces softly raised texture. The grouped loops sit above the surface, catching light and giving the edge a tactile finish without becoming as dense as some bobble designs.
Spacing is important. A few well-positioned puffs can look elegant, while too many may make the edge feel crowded and use considerably more yarn.
Puff edging works especially well when the body of the blanket is fairly simple and could use one textured finishing detail.
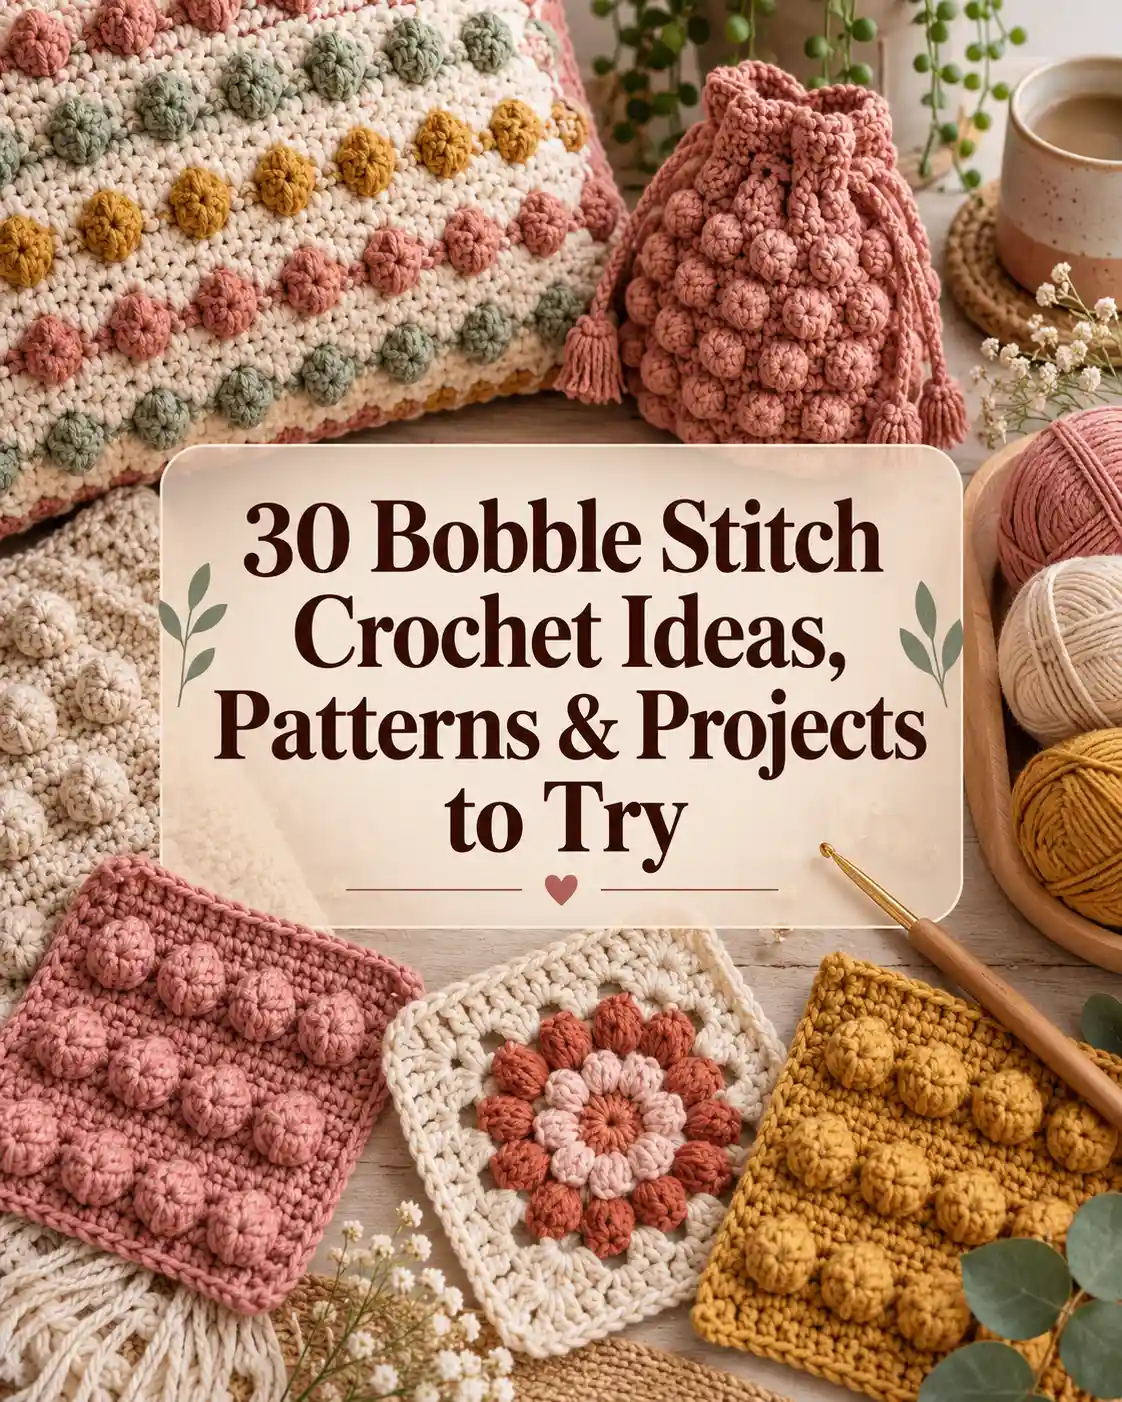
16. How Is a Bobble Stitch Border Different?
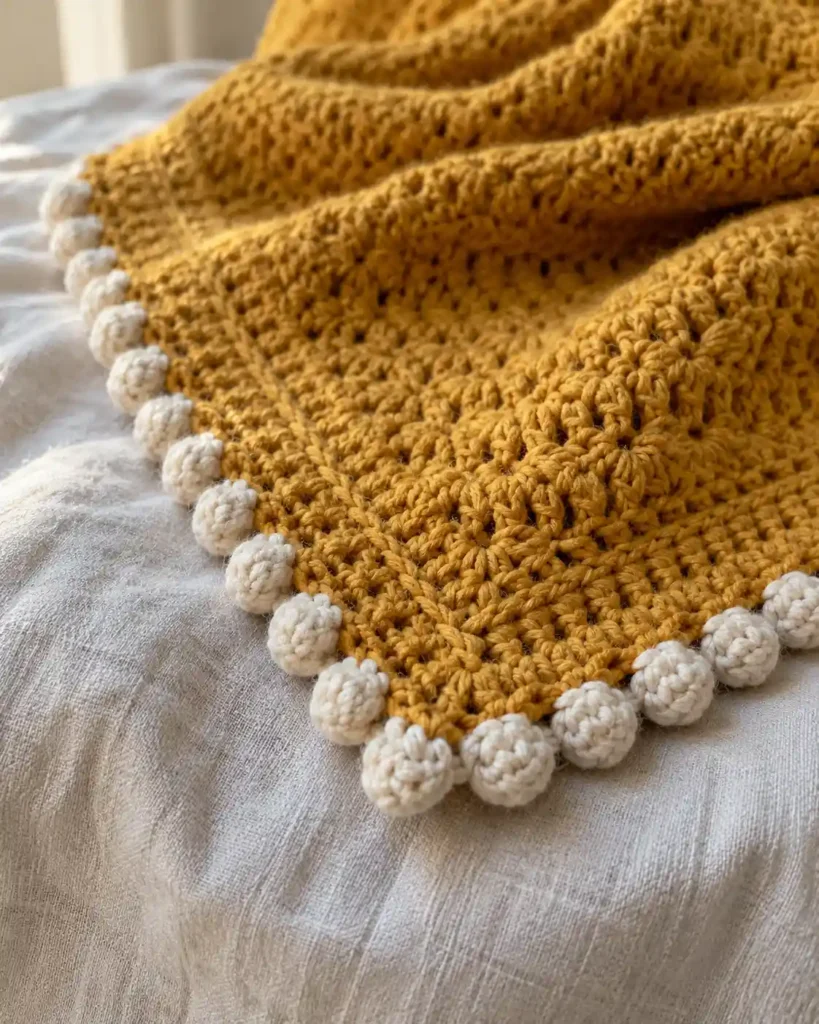
A bobble crochet blanket border creates firmer, more defined bumps than a soft puff stitch. Those compact raised shapes bring a playful rhythm to an otherwise straight perimeter.
Because bobbles have a noticeable right and wrong side, check the pattern direction before beginning. That matters when you want the texture to project toward the front of the blanket.
Use bobbles when texture is meant to be visible from across the room rather than discovered only when you look closely.
Lucy Kate Crochet demonstrates both bobble and mini-bobble approaches and notes that a single-crochet base can help when the blanket edge itself is very open.
17. When Does Crochet Pom Pom Edging Make Sense?
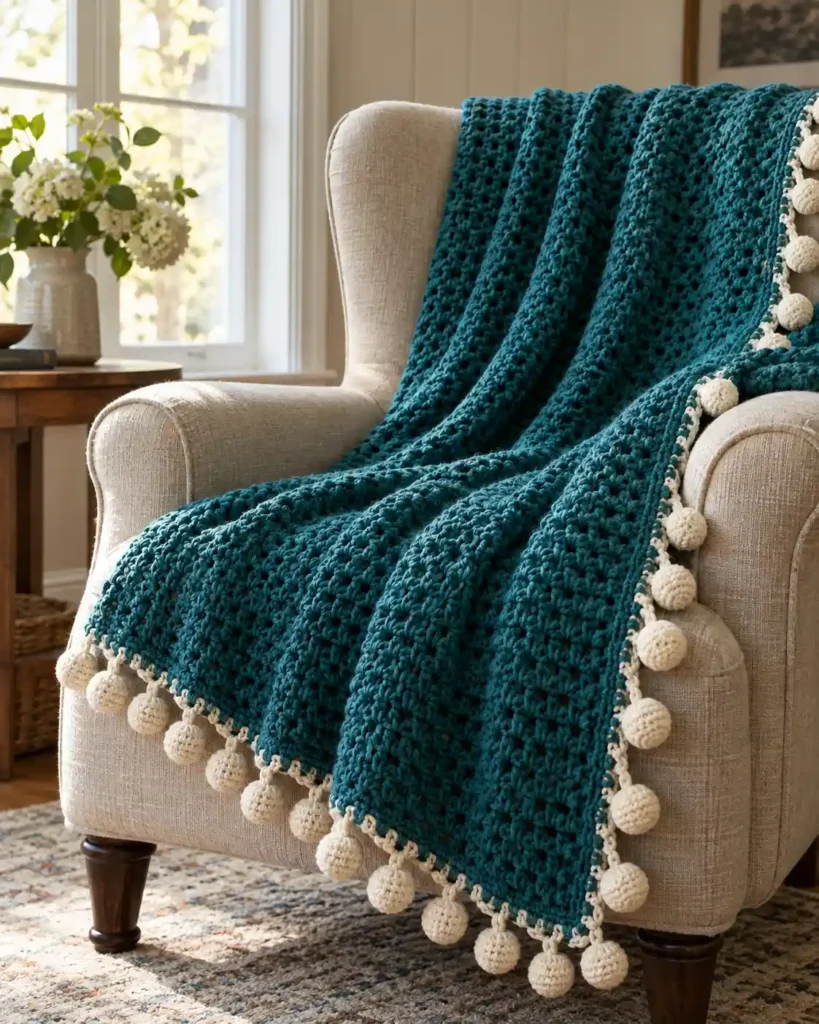
Crochet pom pom edging uses crocheted ball-like details to give an adult throw a much more playful silhouette. Compared with bobbles, the shapes sit farther away from the main edge and therefore create more movement.
It is best treated as a decorative statement rather than an invisible finishing technique. On a reading-chair throw or bedroom blanket, those little dimensional details can become the feature that makes the entire project memorable.
Because they extend beyond the edge, think about laundering and everyday use before choosing this finish.
18. Why Choose a Ruffle Crochet Blanket Border?
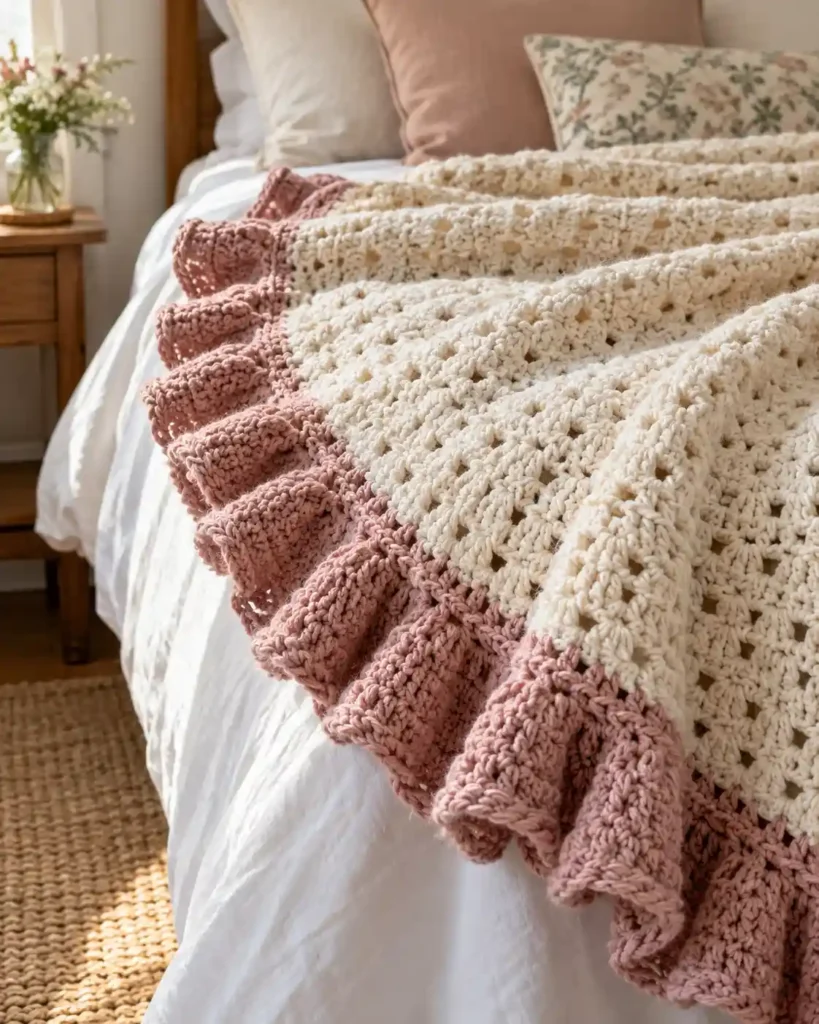
A ruffle crochet blanket border deliberately adds extra fullness so the edge flares and waves. That makes it completely different from accidental rippling caused by too many stitches.
The technique works particularly well when the blanket itself is understated. A neutral blanket with a dusty rose, cream, or contrasting ruffle instantly feels more decorative.
Ruffles can also use considerably more yarn than a narrow flat edging, so making a small test section helps you judge both fullness and proportion before working around the whole blanket.
19. What Makes a Rolling Fans Border Stand Out?
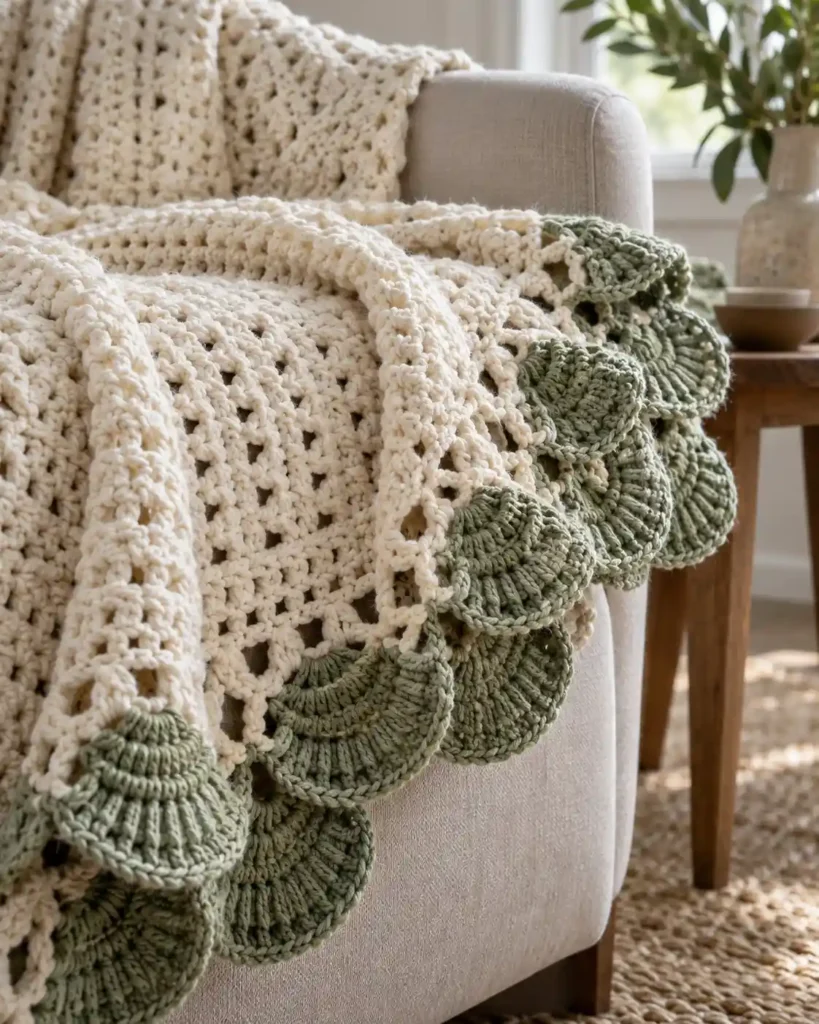
A rolling fans crochet border takes the familiar fan idea and gives it more dimension. Instead of a simple flat scallop, overlapping or layered fan shapes create a sculptural edge.
This is the sort of border that deserves space to be noticed, so pair it with a relatively quiet blanket rather than an already busy stitch pattern. Soft side lighting on the finished blanket will reveal the layers beautifully.
For an intermediate crocheter looking for unusual crochet blanket edge ideas, rolling fans offer something more distinctive than standard shells.
20. Why Try a Crochet Leaf Border?
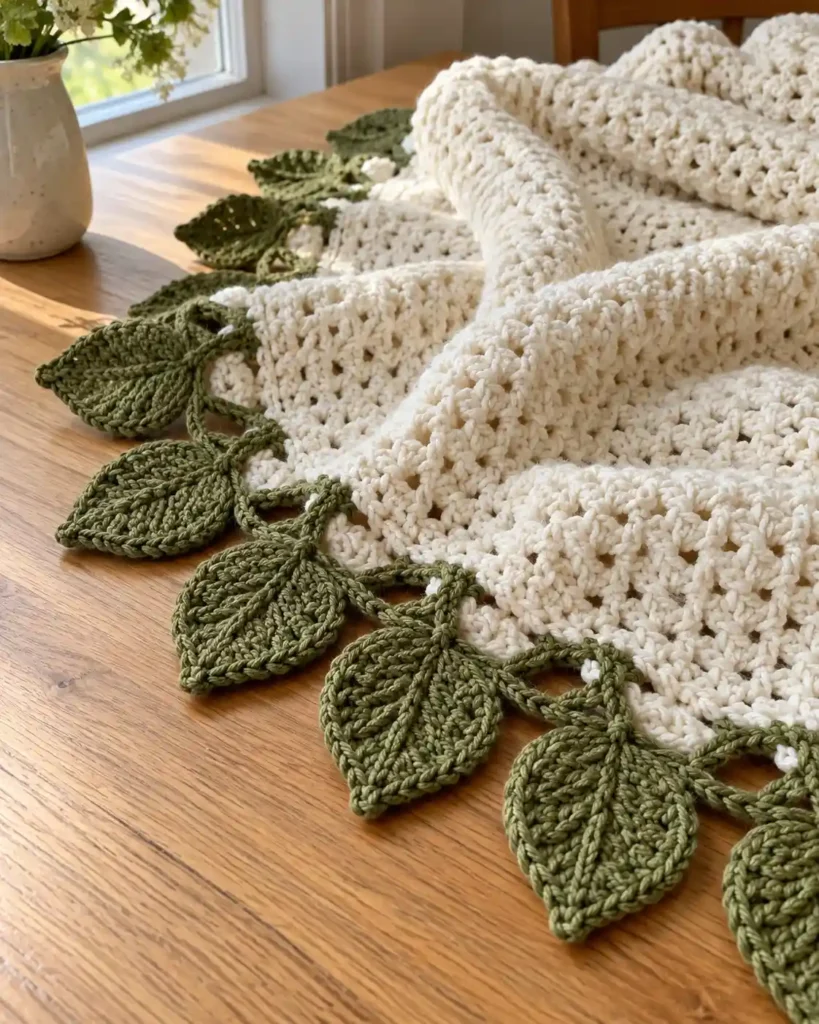
A crochet leaf border introduces connected botanical motifs around the perimeter. The result feels decorative and handcrafted in a completely different way from geometric mesh, ribbing, or bobbles.
An ivory throw with olive, sage, or forest-green leaves makes the nature-inspired structure especially clear. You can also use a tonal color if you want the motif to appear through texture rather than contrast.
Corners require planning because the leaf spacing needs to turn cleanly. This is one place where following a tested designer pattern is much better than guessing the repeat as you work.
21. Why Finish With a Spike Stitch Border?
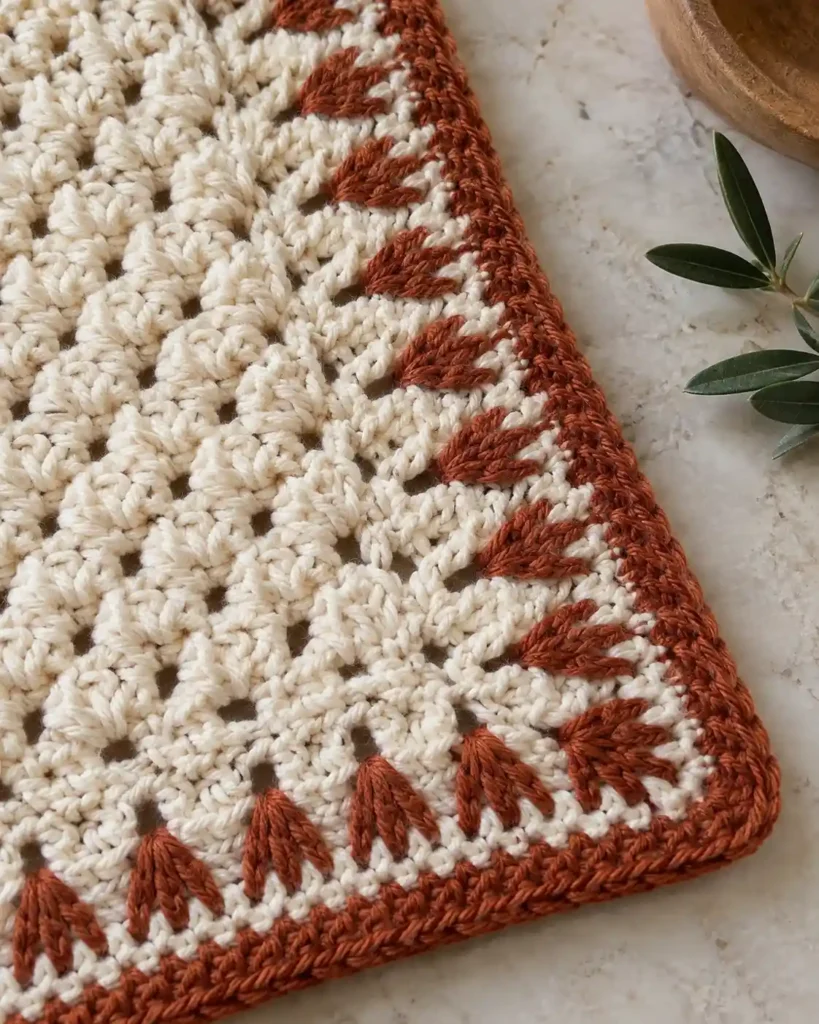
A spike stitch blanket border creates elongated stitches that reach into lower rows of the edging. Those longer stitches can produce a sharp geometric contrast, especially when two colors are involved.
Unlike a plain single crochet frame, spike stitches visually connect separate rounds and create a patterned band. Yet the construction can still feel relatively clean and modern.
Try cream with rust, charcoal with ivory, or two tonal shades when you want a border that feels graphic without becoming lacy or heavily dimensional.
How Do You Add a Crochet Border That Lies Flat?
A crochet border lies flat when foundation stitches are distributed evenly, corners have enough increases, and your border tension matches the blanket.
At a Glance
- Mark corners before beginning.
- Space foundation stitches evenly.
- Check flatness after every round.
- Reduce stitches if the edge ruffles.
- Add room if the edge cups.
A beautiful border can still look wrong if it ripples, cups, or pulls the blanket out of shape. The foundation round is often the most important part because it determines how evenly the later stitches are distributed.
Before beginning:
- Weave in loose ends.
- Lay the blanket flat and check the shape.
- Mark all corners.
- Distribute foundation stitches evenly along row ends.
- Work a short test area when the edge is irregular.
- Stop after each round and check whether the blanket still lies flat.
Make & Do Crew identifies two common problems: cupping can happen when the border has too few stitches, while unwanted ruffling can happen when it has too many. Hook size and first-round stitch distribution are two adjustments worth checking.
Do not confuse accidental waviness with the intentional fullness of a ruffle border. One is a tension or stitch-distribution issue; the other is the design.
What Yarn Should You Use for Crochet Blanket Edging?
Use a yarn weight and fiber that behave compatibly with the blanket so the border keeps a similar drape, stretch, and care routine.
At a Glance
- Match yarn weight when possible.
- Compare fiber and stretch.
- Check washing instructions.
- Use smooth yarn for visible stitch definition.
- Test different yarns on a short edge.
Matching the original yarn weight is usually the simplest starting point because it helps the border behave more like the blanket body. The Craft Yarn Council’s standardized yarn weight system runs from weight 0 lace yarn through weight 7 jumbo yarn, with suggested crochet hook ranges for each category.
You can absolutely change yarn, but compare more than color. Check:
- Yarn weight
- Fiber content
- Stretch
- Texture
- Washing instructions
- Finished drape
A smooth yarn shows camel stitch, ribbing, spike stitches, and other structural details clearly. Plush or fuzzy yarn gives a softer appearance but can hide intricate stitch work.
If the blanket is made from chunky yarn, a tiny delicate picot may feel visually out of scale. Half double crochet, ribbing, moss stitch, or another substantial border often creates a more balanced finish.
How Should You Read Crochet Border Patterns?
Check stitch multiples, corner instructions, terminology, yarn recommendations, and foundation requirements before starting any crochet blanket border pattern.
At a Glance
- Identify U.S. or U.K. terminology.
- Check required stitch multiples.
- Confirm corner instructions.
- Note foundation-round requirements.
- Review adaptation guidance.
If you are learning how to read a crochet pattern, always check which crochet terminology a tutorial uses before following its stitch instructions. The Craft Yarn Council notes, for example, that U.S. single crochet (sc) corresponds to U.K. double crochet (dc), while U.S. double crochet (dc) corresponds to U.K. treble (tr).
Before choosing a pattern, look for:
- Required stitch multiple
- Foundation-round instructions
- Corner directions
- U.S. or U.K. terminology
- Recommended yarn and hook
- Number of rounds
- Whether adaptation advice is included
A pattern does not have to provide exactly the same stitch count as your blanket. What matters is understanding its repeat and how that repeat is adapted to your perimeter.
Where Can You Find Free Crochet Blanket Border Patterns?
Look for free border tutorials that clearly explain stitch repeats, corners, foundation rounds, terminology, and adaptation options.
At a Glance
- Check corner instructions before starting.
- Confirm the stitch multiple.
- Verify U.S. or U.K. terms.
- Prefer tutorials with adaptation guidance.
- Match the example yarn to your project.
For a broad collection, Make & Do Crew maintains a roundup of free blanket edging patterns ranging from single crochet and crab stitch to puff, linen stitch, and more decorative finishes.
Lucy Kate Crochet is useful when you want to study a smaller selection of adaptable techniques including single crochet, moss/linen stitch, shells, and bobbles.
For more decorative inspiration, Crochetpedia collects examples of wavy, shell, floral, and other detailed edgings, including projects that handle corners in different ways.
Use these resources for technique and pattern guidance rather than assuming one stitch count or repeat will automatically fit every blanket.
Frequently Asked Questions
What is the easiest crochet border for a blanket?
Single crochet is one of the easiest places to start because the stitch itself is basic and the finished edge is compact. The trickiest part is usually distributing stitches evenly along row ends and increasing correctly at the corners.
How much yarn do I need for a blanket border?
There is no universal yardage because the amount depends on blanket perimeter, yarn weight, stitch type, and border width. Crochet a measured sample of the planned border, estimate its yarn use, and allow extra for corners and finishing.
Why is my crochet blanket border wavy?
A border often becomes unintentionally wavy when too many stitches are packed into the foundation round or when the border gauge is looser than the blanket. Check stitch distribution and hook size before adding more rounds.
Can I use a different yarn for the border?
Yes. Try to choose a yarn with compatible weight, stretch, care instructions, and drape, then test a small section before committing to the whole perimeter.
Does every blanket need a foundation round?
No. Some borders can be worked directly into an existing clean edge, while others behave much better over a prepared foundation round. Follow the repeat and foundation requirements of the specific border pattern you choose.
Final Thoughts
The best crochet blanket border is the one that feels like a natural extension of the blanket itself. A simple single crochet or moss stitch edge can give your project a clean, polished finish, while shells, ribbing, bobbles, lace, or leaf motifs can turn the border into a standout design feature.
Before committing to any crochet blanket edging, check the yarn weight, stitch repeat, corners, and overall proportion. Working a small test section first can help you catch tension problems and see how the finished edge will look.
With these 21 crochet blanket edges ideas, you have plenty of options for everything from baby blankets and granny-square projects to chunky throws and decorative afghans. If you are starting from a crochet blanket pattern, choose a border that complements the blanket, keep checking that it lies flat, and enjoy the final step that brings the whole project together.

![The Best 30+ Free Crochet Cat Patterns [Beginner-Friendly Guide]](https://crochetmind.com/wp-content/uploads/2025/04/1-The-Best-30-Free-Crochet-Cat-Patterns-Beginner-Friendly-Guide.webp)