


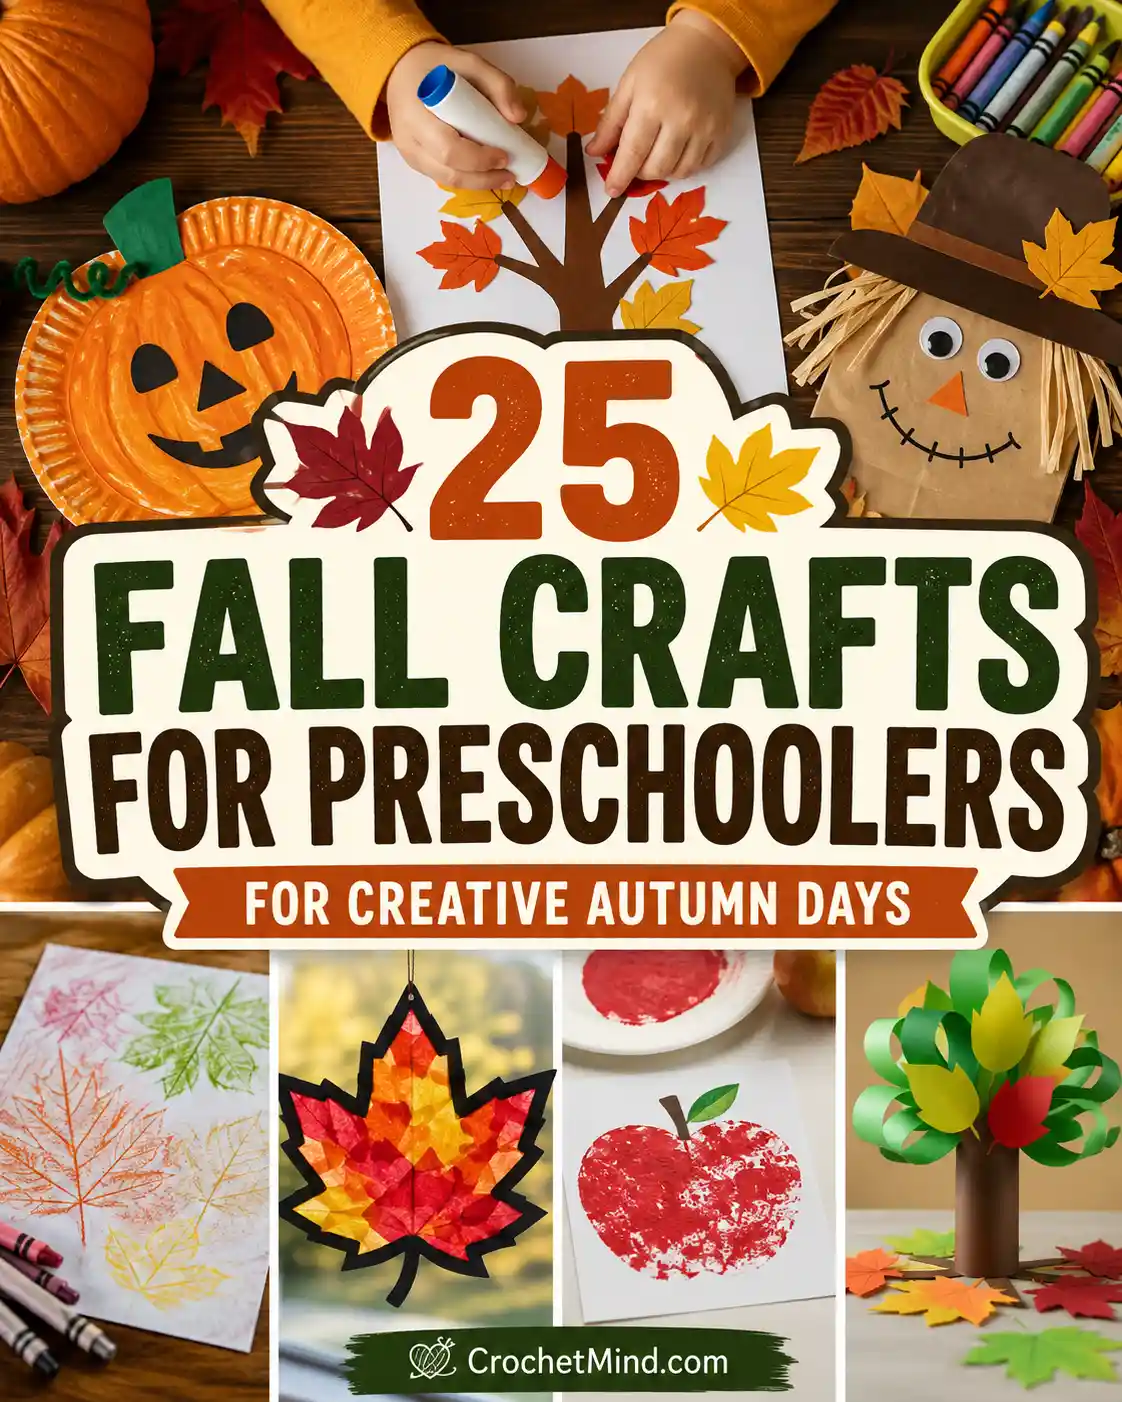
Fall crafts for preschoolers can be as simple as rubbing crayons over leaves, tearing paper into pumpkins, or turning a lunch bag into a scarecrow. These 25 ideas cover leaves, trees, pumpkins, apples, and harvest themes, with materials and adult preparation explained for each project.
A few sheets of autumn-colored paper can go a long way on a rainy afternoon. For more seasonal decorating ideas, explore our collection of fall crafts. This collection from CrochetMind helps you choose something that fits your supplies, your space, and what your child actually enjoys doing. Crooked stems and uneven petals are welcome here.
Key Takeaways
- Choose fall preschool crafts that match your child’s interests.
- Prepare large paper shapes before children start decorating.
- Offer dry materials for children who dislike paint.
- Help with cutting, folding, sealing, and display mounting.
- Leave room for drying, cleanup, and individual creativity.
Which Fall Crafts for Preschoolers Should You Try First?
Start with a technique your child already enjoys. Paper tearing suits children who like pulling things apart, while stamping gives paint enthusiasts a different way to make marks.
These activities are intended primarily for ages 3–5, with help adjusted to each child’s readiness. Folding, cutting frames, and assembling moving parts need more adult involvement.
| Craft | Main supplies | Adult preparation | Paint needed? |
|---|---|---|---|
| Crayon leaf rubbings | Real leaves, thin paper, crayons | Position leaves and tape paper | No |
| Leaf suncatcher | Tissue paper, card, adhesive film | Cut frame; seal finished craft | No |
| Rolled paper tree | Paper strips, cardstock, glue | Cut strips; help form loops | No |
| Paper plate pumpkin | Plate, orange paint, paper stem | Set up paint and drying space | Yes |
| Apple stamping | Apple, paper, washable paint | Cut apple and prepare tray | Yes |
| Paper bag scarecrow | Lunch bag, paper, crayons, glue | Prepare hat and hair strips | No |
| Thankful paper tree | Paper trunk, large leaves, glue | Cut shapes and write dictated words | No |
Choose supplies labeled for children and follow their directions. The U.S. Consumer Product Safety Commission recommends reading labels, selecting children’s art materials, and directly supervising their use. Its guidance also explains that “non-toxic” products can still cause harm when used incorrectly.For the projects below, adults handle sharp cutting tools, fruit preparation, and display mounting. Allow paint and glue to dry before handling finished pieces.
Which Leaf-Themed Fall Preschool Crafts Bring Autumn Indoors?
Leaf rubbings, tissue suncatchers, torn-paper collages, leaf people, and paper wreaths bring autumn shapes and colors into craft time.
At a Glance
- Use textured leaves for crayon rubbings.
- Try tissue paper for light-catching window decorations.
- Turn leaf shapes into characters or a wreath.
1. How Do You Make Crayon Leaf Rubbings?
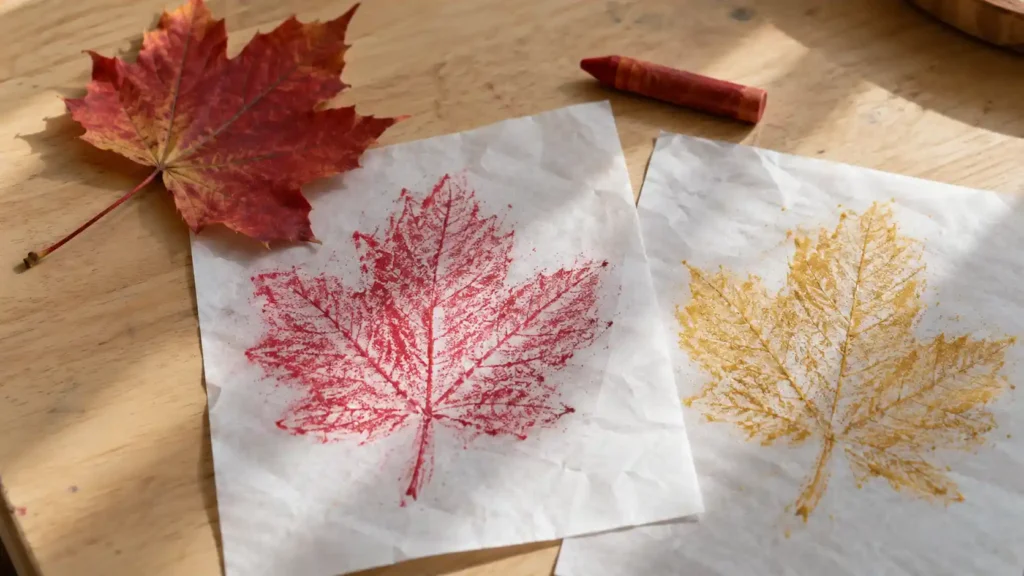
Crayon leaf rubbings reveal the little veins that ordinary leaf coloring misses. A leaf collected on a walk becomes the hidden pattern beneath the page. Set this up beside a window when everyone needs a quieter activity after being outdoors. Children who enjoy a surprise will appreciate watching the outline gradually appear.
You’ll need: Clean, dry leaves with raised veins, thin paper, chunky crayons, and tape.
- An adult places a leaf vein-side up beneath the paper and tapes the paper still.
- Your child rubs gently using the side of an unwrapped crayon.
- Move to another leaf and compare its edges and markings.
Helpful tip: Thick cardstock can hide the texture, so save it for collages.
2. What Makes a Tissue Paper Leaf Suncatcher Glow?
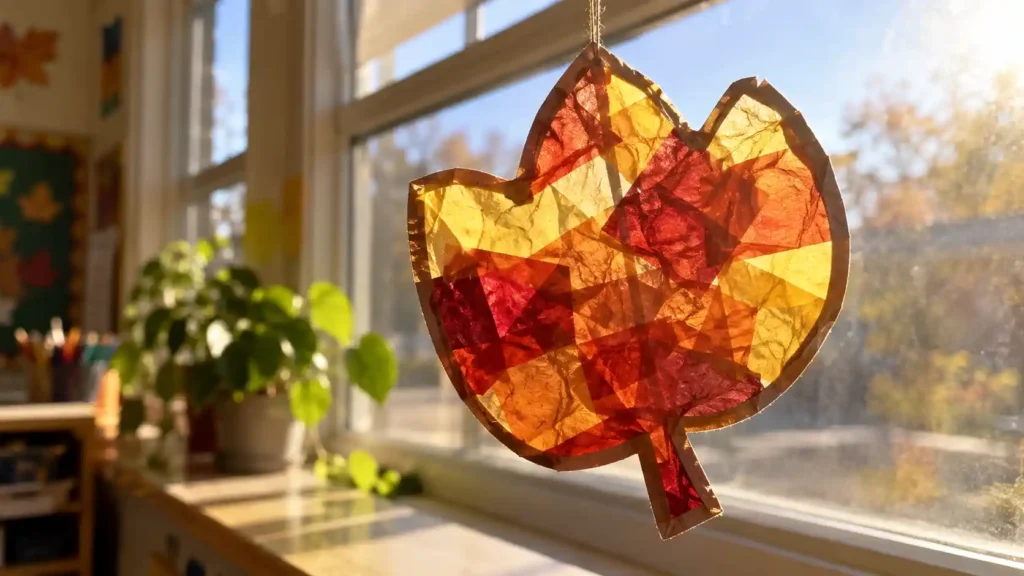
A tissue paper leaf suncatcher changes when you lift it into daylight. Overlapping tissue creates richer patches of color than a single flat paper leaf. It makes a cheerful addition to a kitchen window where your child can revisit their work. Choose this project for a child who enjoys arranging colors without using paint.
Gather: Red, orange, and yellow tissue pieces, cardstock, clear adhesive film, and adult scissors.
- An adult cuts a broad leaf frame and places it on adhesive film, sticky-side up.
- Your child presses large tissue pieces inside, leaving some exposed adhesive around the edges.
- An adult covers it with another film sheet, seals, trims, and mounts it.
3. How Can Torn Paper Become an Autumn Leaf Collage?
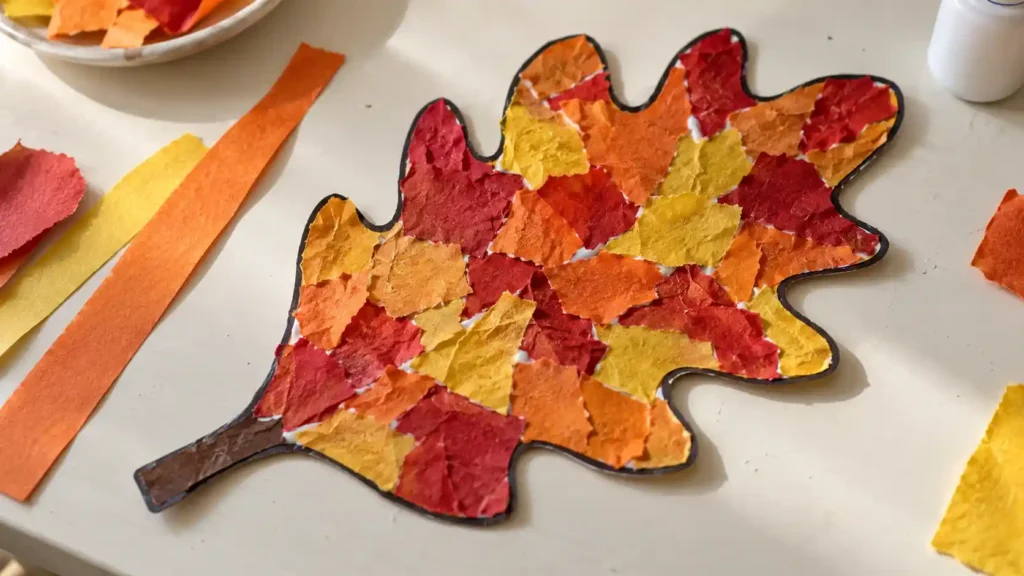
A torn paper autumn leaf collage gets its character from rough edges. Those irregular pieces give it a textured look that neatly cut shapes cannot quite match. Keep broad paper strips in a tray for a relaxed table activity. This is a useful choice when your child wants to make something without managing scissors.
Materials: Cardstock, a crayon, autumn-colored paper, and a glue stick.
- Draw a large, simple leaf outline.
- Let your child tear broad strips into manageable pieces.
- Spread glue over one part of the outline at a time and add the pieces.
There is no need to fill every gap. Larger scraps can make the activity easier to handle.
4. Who Will Your Nature Walk Leaf People Become?
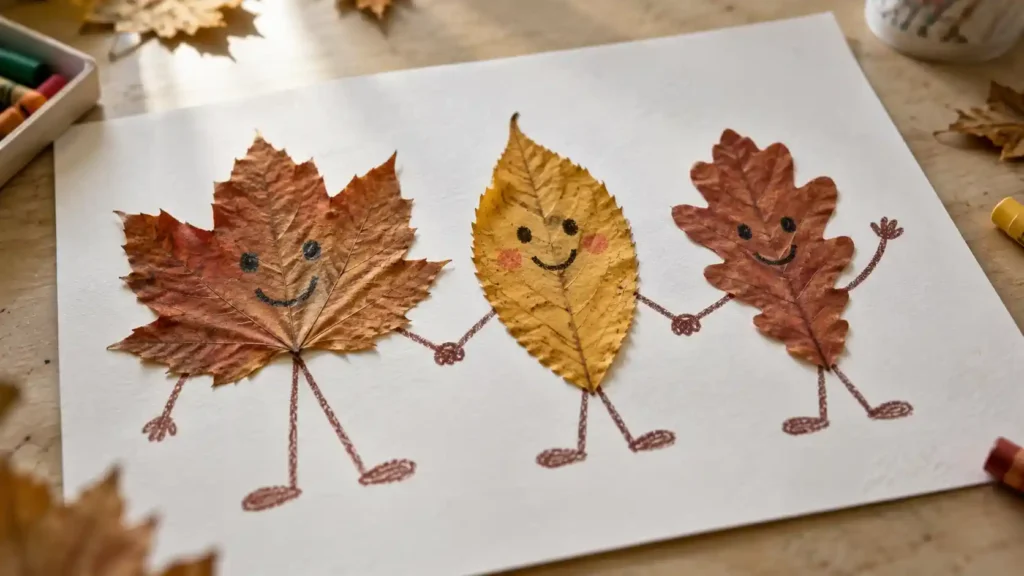
Nature walk leaf people turn a handful of leaves into little characters. Their different shapes suggest clothing, hairstyles, and personalities that a printed figure would already decide. Bring this out after a walk and ask who might live in your leafy neighborhood. Story-loving children can carry the activity well beyond the gluing.
Set out: Clean leaves, cardstock, child-appropriate white craft glue, and crayons.
- Arrange leaves as heads and bodies before adding glue.
- Help attach them to the card.
- Draw arms, legs, faces, and any scenery your child wants.
Ask, “Where is your leaf person going?” Draw eyes instead of attaching small loose decorations.
5. How Do You Make a Welcome-Fall Paper Leaf Wreath?
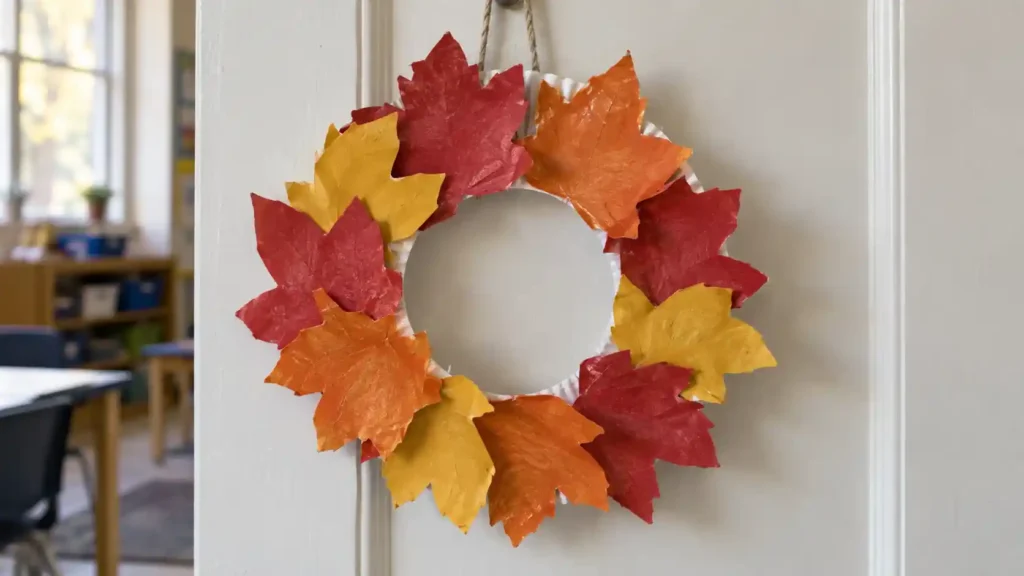
A welcome-fall paper leaf wreath gives children something they can help display at the door. Paper leaves stay flexible during assembly, while dried leaves may crumble with repeated handling. It suits a family craft afternoon because everyone can contribute a few pieces. Pick this for a child who likes making decorations with a clear place to go.
Supplies: A paper plate, large paper leaves, glue, and adult scissors.
- An adult removes the plate’s center, leaving a broad ring.
- Your child overlaps and glues leaves around it.
- Let the wreath dry flat before an adult hangs it.
Try alternating red and yellow, or let the arrangement stay wonderfully mixed.
How Can Preschoolers Make Colorful Autumn Trees?
6. Can Paper Loops Make a Rolled Paper Autumn Tree?
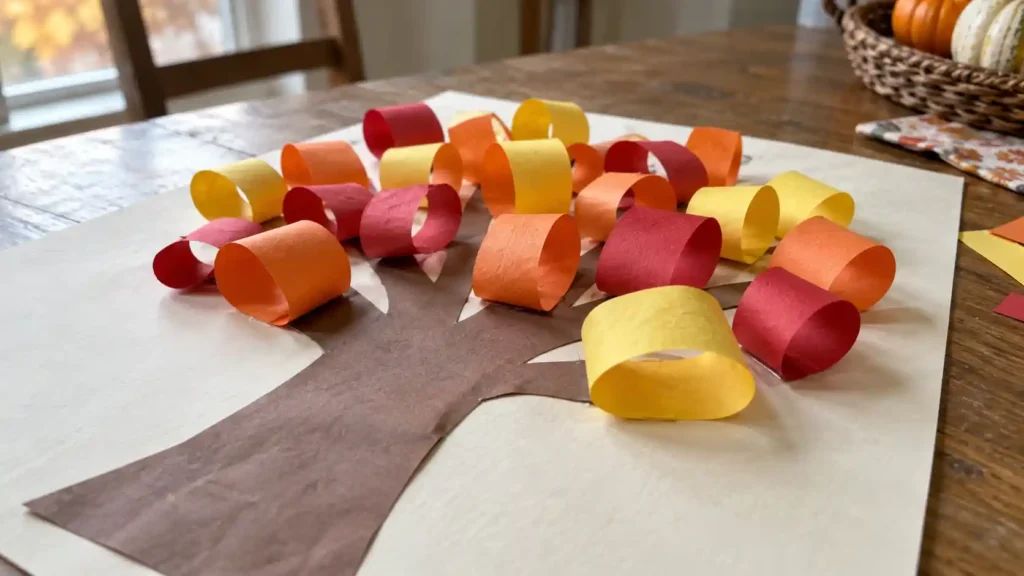
A rolled paper autumn tree lifts its leaves right off the page. Loose loops create shadows and depth that a flat collage does not have. Save this for a day when you can sit beside your child and help with construction. Children who enjoy bending and joining paper may find the raised canopy especially satisfying.
Prepare: Sturdy card, a brown paper trunk, broad colored paper strips, and glue.
- Glue the trunk onto the card.
- Curl strips into loose loops, overlap their ends, and glue the ends together.
- Attach the joined ends around the branches and let everything dry flat.
Adults can form the first few loops. Keep them loose rather than tightly rolled.
7. How Can You Make a Handprint Fall Tree Without Painting Hands?
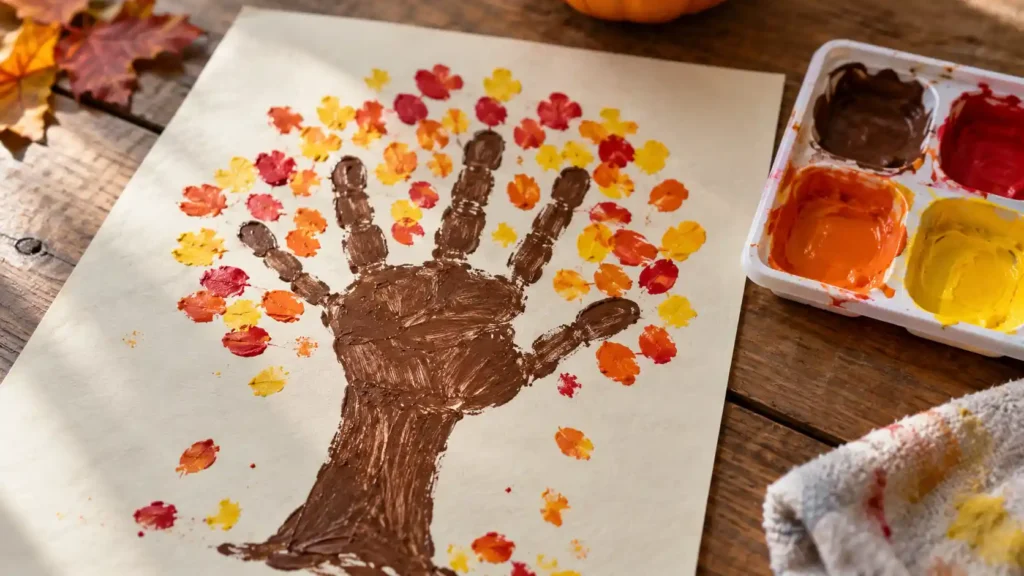
A handprint fall tree turns familiar fingers into branches. Tracing offers a personal keepsake without the slippery feeling of a painted palm. It works nicely for a seasonal memory folder with the date written on the back. For keepsake ideas for younger siblings, explore our baby and infant handprint crafts. Choose the paper version when your child likes drawing around their hand but dislikes wet textures.
You’ll need: Brown paper, cardstock, a pencil, glue, adult scissors, and colored paper or finger paint labeled for that use.
- Trace your child’s hand and part of their forearm; an adult cuts it out.
- Glue it upright as the tree trunk and branches.
- Add paper leaves or fingertip paint marks around the fingers.
Let painted work dry before storing it.
8. What Happens When You Sponge-Print an Autumn Tree?
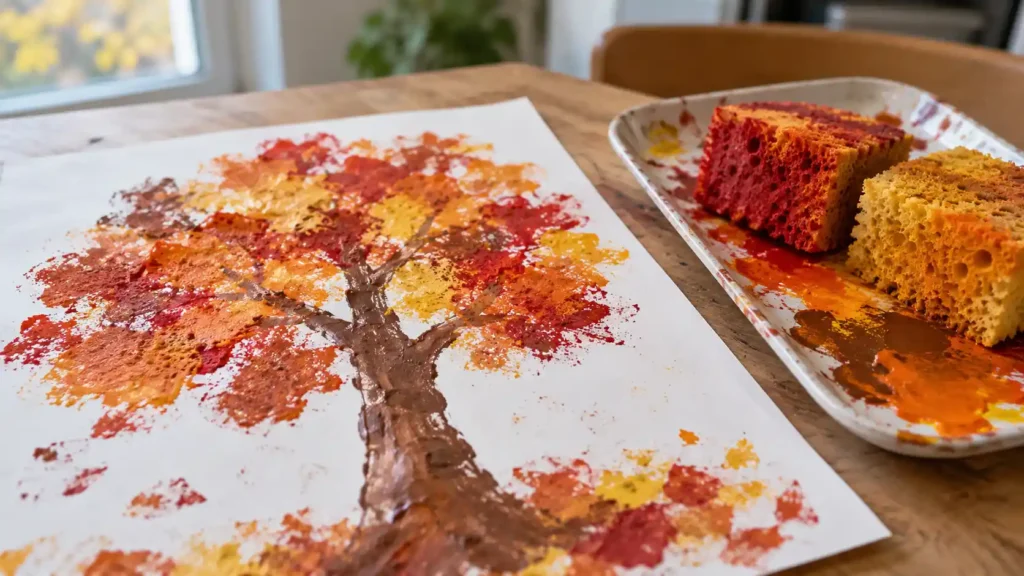
A sponge-printed autumn tree has speckled leaves and soft patches of color. Dabbing leaves a different surface from brushstrokes, making the tool itself part of the discovery. This belongs on the table when your child wants to experiment with paint. The payoff is a tree shaped by their own pressure, spacing, and color choices.
Set up: Heavy paper, a drawn tree trunk, large sponge pieces, shallow paint trays, and washable paint.
- An adult prepares the trunk and easy-to-grip sponge pieces.
- Your child lightly dips a sponge and dabs around the branches.
- Try gentle and firmer presses, then leave the picture to dry.
NAEYC encourages adults to allow exploration and individual results in process-focused art. Here, that means demonstrating a dab without expecting every tree to match an example.
Which Pumpkin Crafts Work for Little Hands?
Paper plate pumpkins and torn-paper patches offer broad decorating surfaces, while accordion people and name wagons add folding or letter arranging with adult help.
- Choose a paper plate for a large painting surface.
- Tear paper to build a textured pumpkin patch.
- Prepare folded limbs together for moving pumpkin characters.
- Use large letter pumpkins for a personalized wagon.
9. Paper Plate Pumpkin
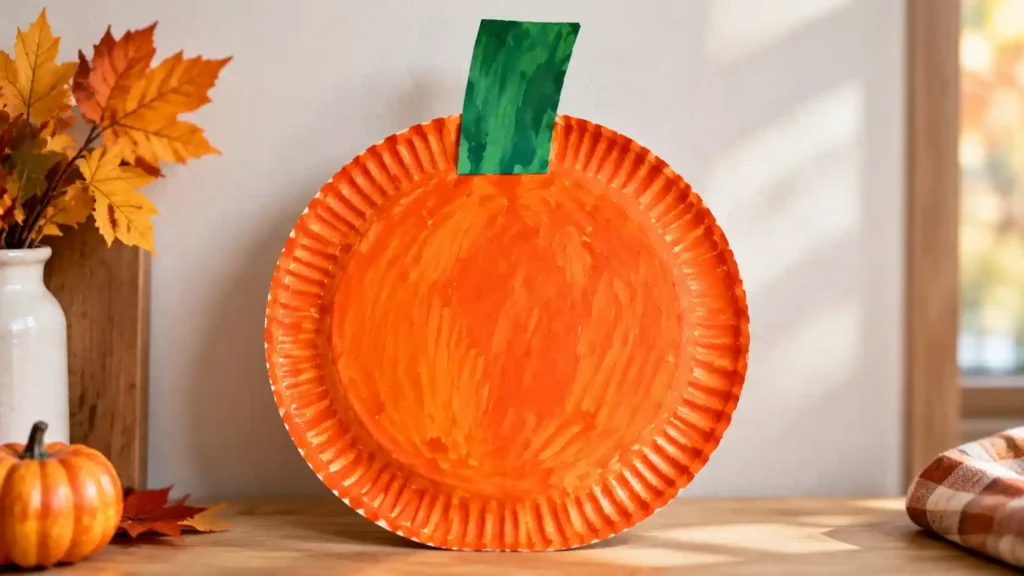
A paper plate pumpkin gives your child a generous surface to paint. Its ready-made circle removes the need to cut a pumpkin shape first. Make it after a pumpkin-patch visit while the colors are still fresh in everyone’s mind. For enthusiastic painters, the appeal is getting straight to the orange.
Materials: An uncoated paper plate, washable orange paint, a broad brush, a green paper stem, and glue.
- Paint the plate orange.
- Leave it to dry completely.
- Glue the stem behind the top edge.
A friendly crayon face can turn it into a Halloween decoration, but a plain pumpkin works throughout fall. Browse our halloween crafts for more seasonal decorating inspiration.
10. How Do You Build a Torn Paper Pumpkin Patch?
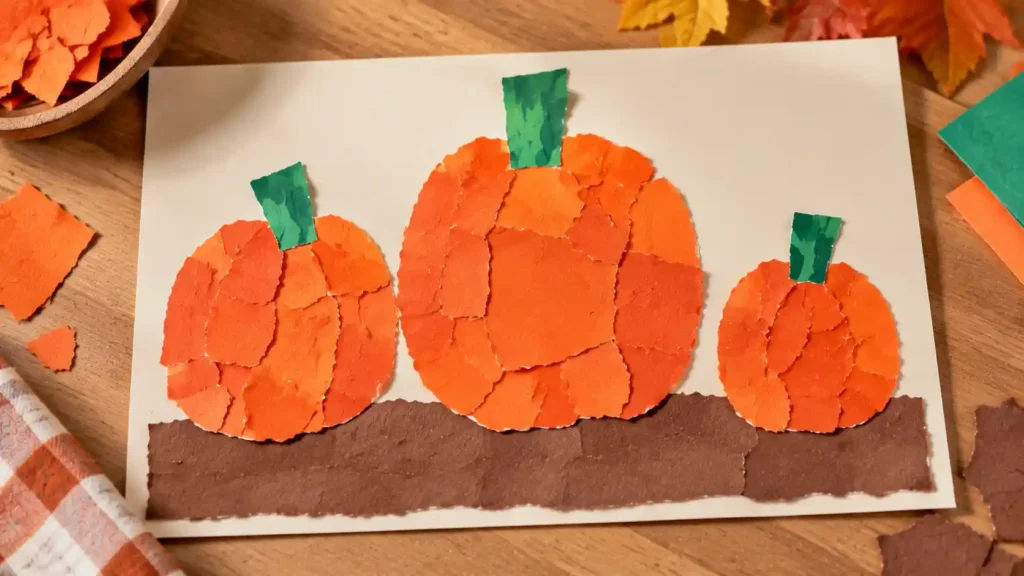
A torn paper pumpkin patch puts several pumpkins into one scene. Overlapping scraps create a bumpy surface rather than a smooth colored shape. Spread it across a sheet of card for a child who enjoys adding more and more details. Different pumpkin sizes make each patch feel like a small place of its own.
Gather: Cardstock, orange paper, green paper stems, a brown paper strip, a crayon, and glue.
- Draw two or three broad pumpkin outlines.
- Tear orange paper and glue it into the shapes.
- Add stems and the brown ground strip.
Leave room between pumpkins for drawn vines or a path through the patch.
11. Can Accordion Paper Pumpkin People Wiggle?
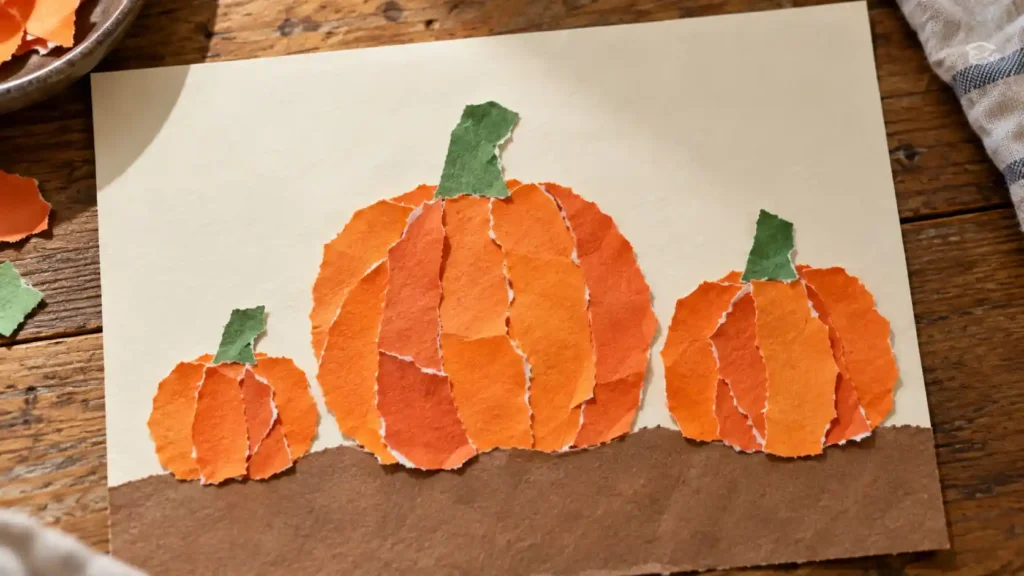
Accordion paper pumpkin people have springy arms and legs that move when lifted. The folded strips add something playful that a flat pumpkin picture cannot do. This is a sit-together project for children curious about paper construction. Once assembled and dry, the wobbly character is the reward for tackling the folds.
Prepare: An adult-cut pumpkin body, four broad paper strips, crayons, and glue.
- Show how to fold a strip forward and backward.
- Help your child make four folded limbs and glue them behind the body.
- Draw a face and let the joins dry.
Offer partly folded strips when starting from a flat piece feels frustrating.
12. How Does a Pumpkin Wagon Name Craft Work?
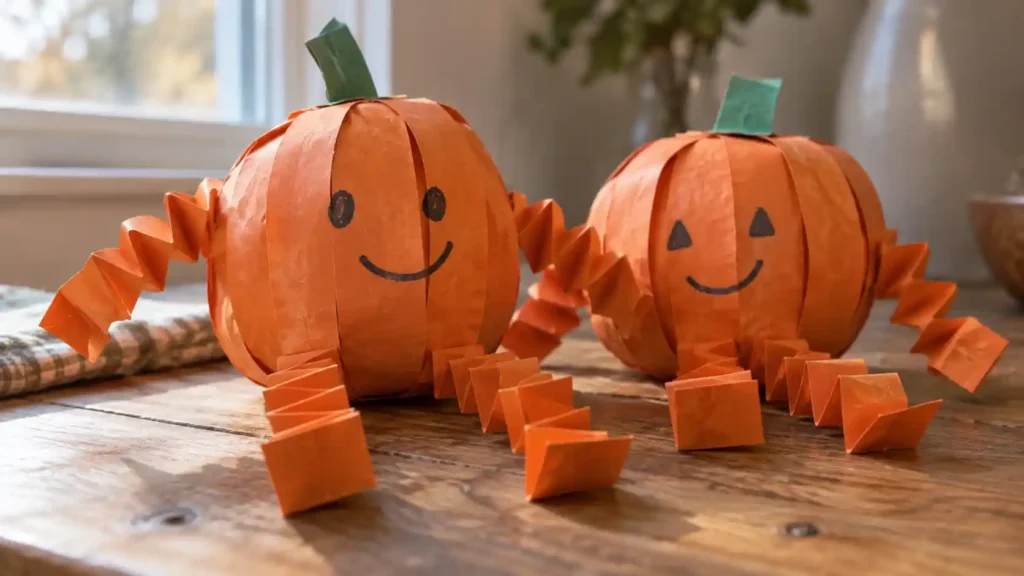
A pumpkin wagon name craft puts your child’s letters into a little harvest scene. Movable paper pumpkins allow rearranging before anything is glued down. It can become a personal bedroom-door picture or classroom cubby decoration. Children interested in their name get a reason to look closely at each letter.
Supplies: Cardstock, a paper wagon with wheels, large paper pumpkins, a marker, glue, and adult scissors.
- An adult prepares one pumpkin per name letter and writes a clear name model.
- Write one letter on each pumpkin and help your child arrange them.
- Glue the wagon and ordered pumpkins onto the card.
Make the wagon longer for longer names instead of shrinking the letters.
13. Paper Plate Pumpkin Pie Slice
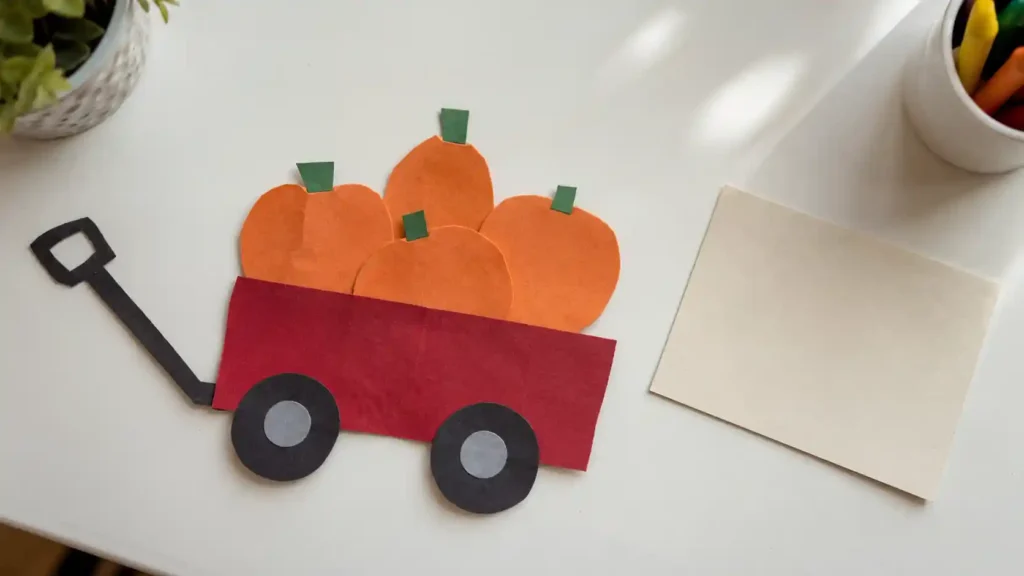
A paper plate pumpkin pie slice brings pretend bakery play to the craft table. Crumpled tissue topping adds a raised detail beyond simply coloring a triangle. Set it aside for a harvest-themed play café once the glue dries. Children who like serving imaginary meals can give their finished craft another job.
You’ll need: A paper plate wedge, orange and brown paper, white tissue, glue, and adult scissors.
- An adult cuts a broad wedge from the plate.
- Cover the center with orange paper and add a brown crust along the curved edge.
- Crumple one large tissue piece and glue it on top.
Explain that this pie is pretend food.
Which Apple-Themed Preschool Fall Crafts Should You Make?
14. What Shapes Can You Make With Apple Stamping?
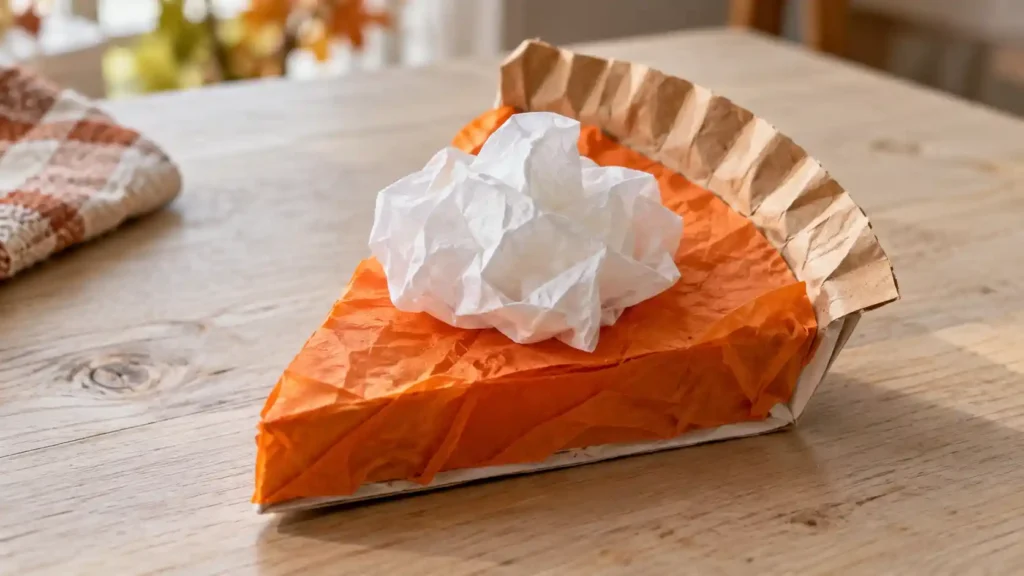
Apple stamping turns a familiar fruit into an unexpected painting tool. Each press leaves a slightly different print, unlike a uniform sticker. It fits naturally into a September apple theme at home or preschool. Choose it when the action of making repeated marks matters more to your child than a finished picture.
Gather: An apple, heavy paper, shallow trays, washable paint, and an adult-use knife.
- An adult cuts the apple in half and dries the cut surface.
- Your child dips the flat side lightly into paint.
- Press onto paper, lift, and repeat.
Painted apples are not for eating. A large foam apple stamp is an alternative if gripping fruit is difficult.
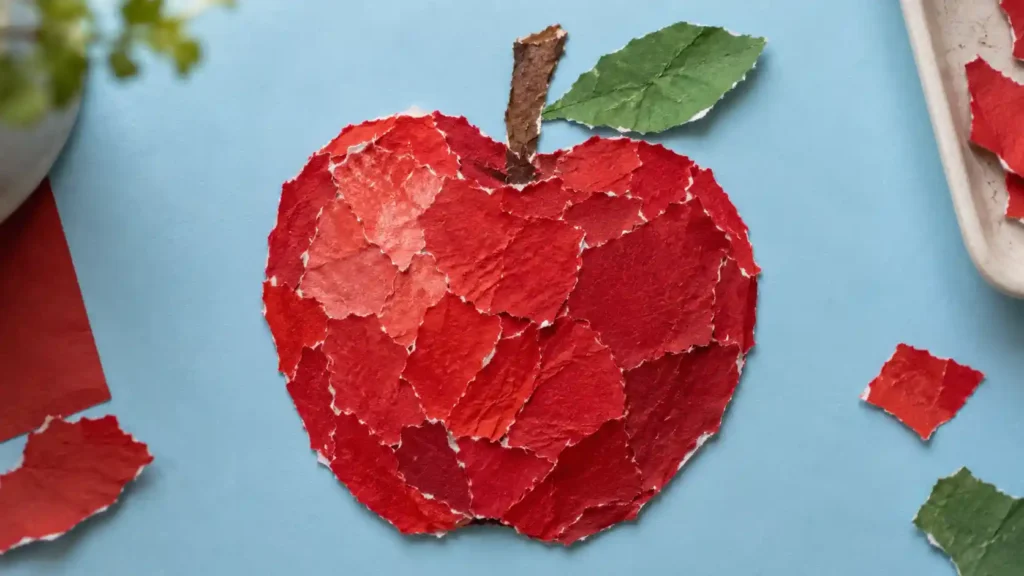
15. Torn Paper Apple Collage
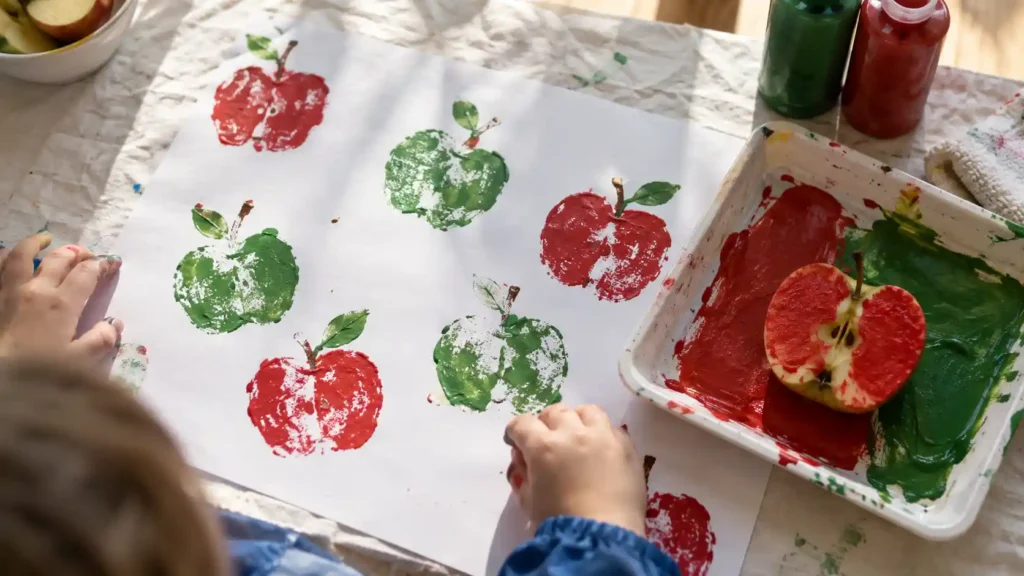
A torn paper apple collage offers a broad, recognizable shape with plenty of room for variation. Paper pieces keep the activity dry while still adding more texture than crayons alone. Keep it in mind when your child wants to join craft time but avoid paint. Red, green, or mixed-color apples all belong in this paper orchard.
Materials: Cardstock, red or green paper, a large paper leaf, a brown stem, a crayon, and glue.
- Draw a generous apple outline.
- Tear and glue paper pieces inside it.
- Attach the stem and leaf.
Start a tear in the edge of the paper if your child needs help getting a grip.
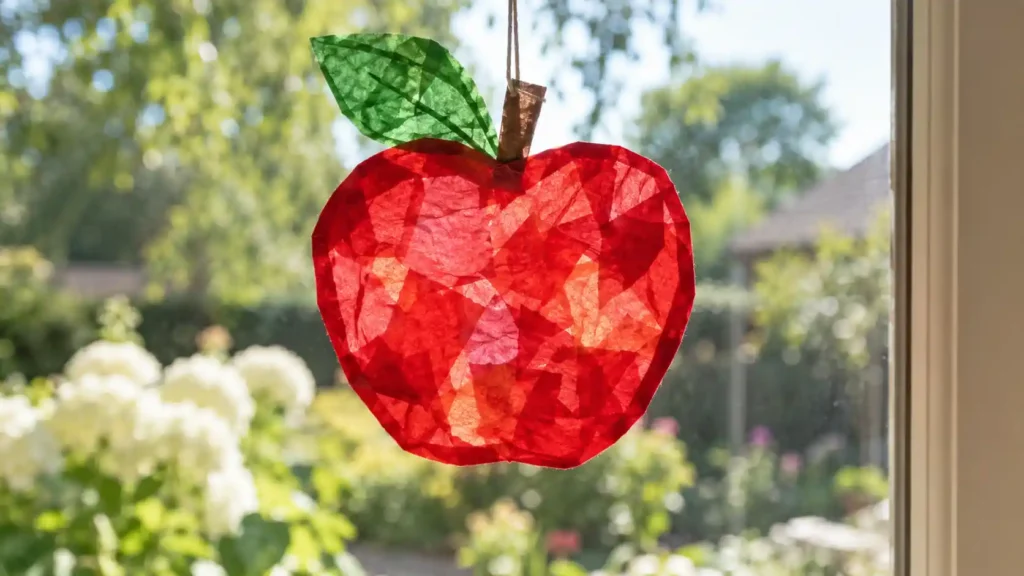
16. How Does an Apple Window Suncatcher Change in Daylight?
An apple window suncatcher gives tissue paper a second look when the light shines through. Its open center makes overlapping colors visible in a way that an opaque collage cannot. Place it where your child can compare it on a cloudy morning and a brighter afternoon. This is a good match for someone who enjoys placing each piece carefully.
Prepare: A broad card apple frame, red or green tissue, clear adhesive film, and adult scissors.
- An adult places the frame onto film, sticky-side up.
- Your child fills the center with tissue, leaving some adhesive exposed.
- An adult adds the covering film, seals, trims, and displays it.
Compare its appearance on the table and against the window.
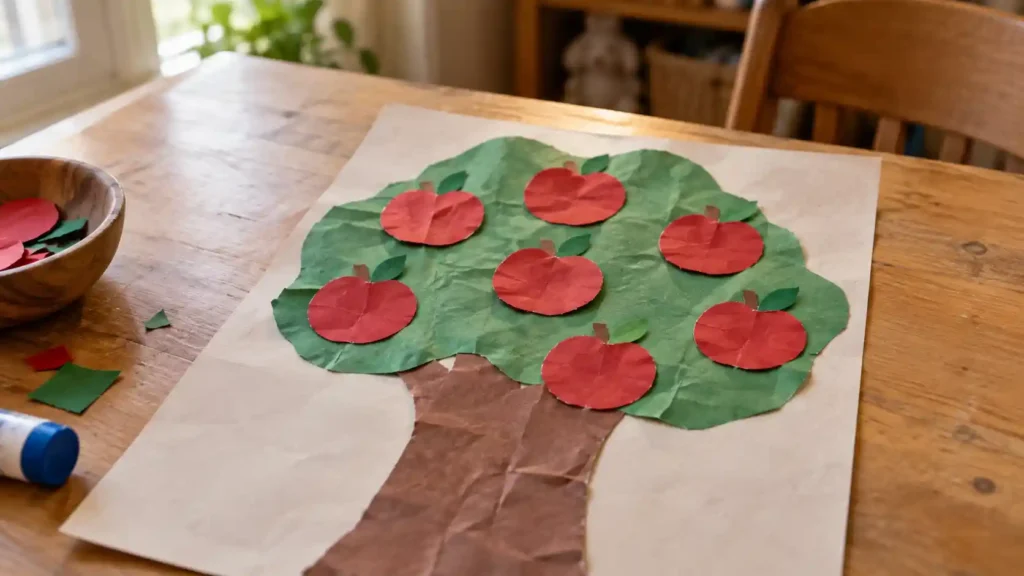
17. How Many Apples Will Your Paper Apple Tree Hold?
A paper apple tree lets children decide what a full harvest looks like. Separate apple circles can move around before gluing, so the picture stays changeable during planning. Try it after reading an orchard story or looking at fruit together. Children who enjoy counting can count their apples, while others can simply arrange them.
Set out: Cardstock, a brown trunk, a green canopy, large red paper circles, and glue.
- An adult cuts the main shapes.
- Your child glues the trunk and canopy onto the card.
- Arrange and attach the apple circles.
Ask whether any apples have fallen to the ground. Keep counting optional rather than turning the picture into a test.
What Harvest, Animal, and Learning Crafts Can You Make?
Paper acorns, harvest corn, scarecrow puppets, owls, turkeys, sunflowers, letter collages, and thankful trees offer autumn projects with opportunities for pretend play and conversation.
At a Glance
- Assemble paper acorns and corn for a harvest display.
- Make animal characters with plates, paper, or leaves.
- Turn a lunch bag into a storytelling puppet.
- Explore letters or gratitude through optional conversation.
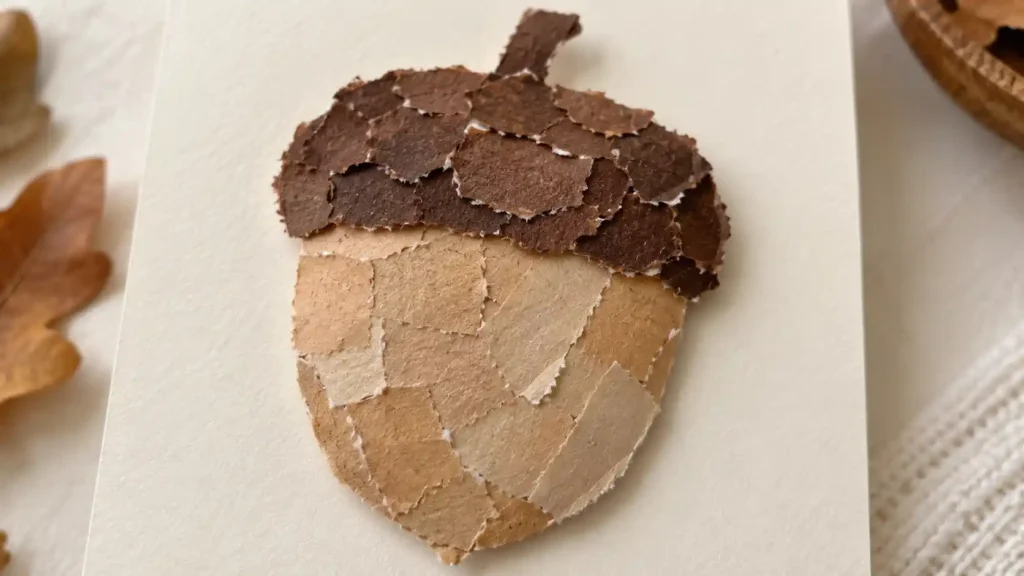
18. Torn Paper Acorn
A torn paper acorn combines a dark cap with a lighter body. Using paper lets children explore the familiar shape without collecting real nuts. It makes a quiet companion activity to a woodland picture book. Children who enjoy sorting can separate the two colors before making their own textured acorn.
Materials: Cardstock, tan and brown paper, a crayon, and glue.
- Draw a large acorn with a clearly marked cap.
- Tear the two paper colors into broad pieces.
- Glue brown pieces onto the cap and tan pieces onto the body.
A few overlapping scraps make the cap look pleasantly rough.
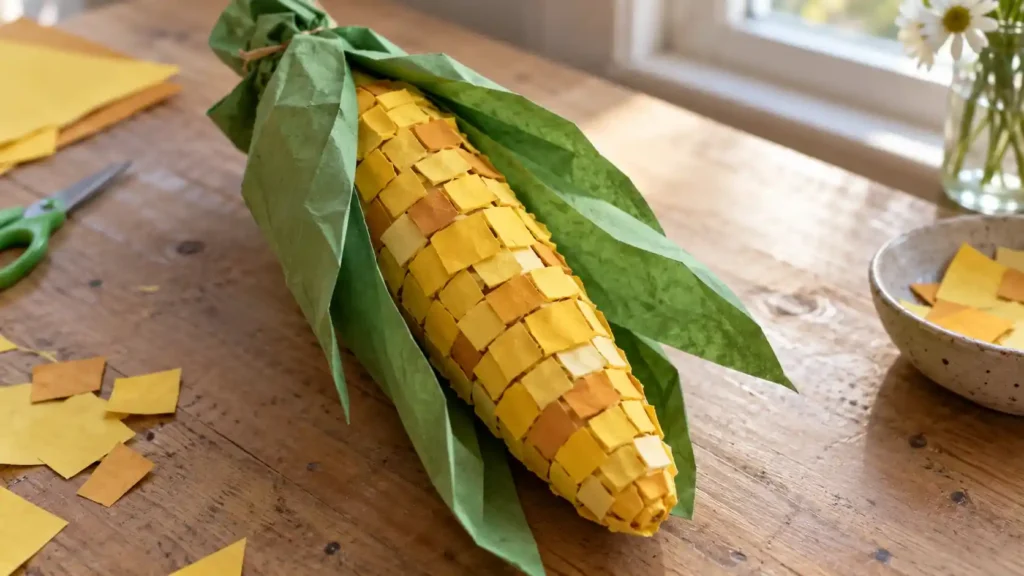
19. Paper Mosaic Harvest Corn
Paper mosaic harvest corn builds a cob from chunky paper kernels. Flat squares are easier to attach than rounded beads or cereal pieces. Lay out a small tray of yellow shades for a harvest-themed table activity. Pattern-loving children may enjoy rows, while others can scatter their kernels freely.
You’ll need: A cardstock cob outline, large yellow paper squares, two green paper husks, glue, and adult scissors.
- An adult prepares the cob and husks.
- Your child glues yellow squares across the cob.
- Attach the husks along the lower sides.
Show a row if your child is interested, then let their arrangement lead.
20. Who Will Your Paper Bag Scarecrow Puppet Meet?
A paper bag scarecrow puppet has a mouth that can open during a story. That moving flap gives it more play possibilities than a wall picture. Make one before a cozy afternoon of pretend farm adventures. A child who enjoys voices and characters can keep creating after the last paper strip is attached.
Gather: A plain paper lunch bag, paper hat, broad paper hair strips, crayons, and glue.
- Place the bag flat with its bottom flap facing upward.
- Decorate the flap as the face, keeping its opening free.
- Add hair and a hat without gluing the moving flap shut.
Once dry, invite the scarecrow to welcome a bird to the pumpkin patch.
21. Paper Plate Autumn Owl
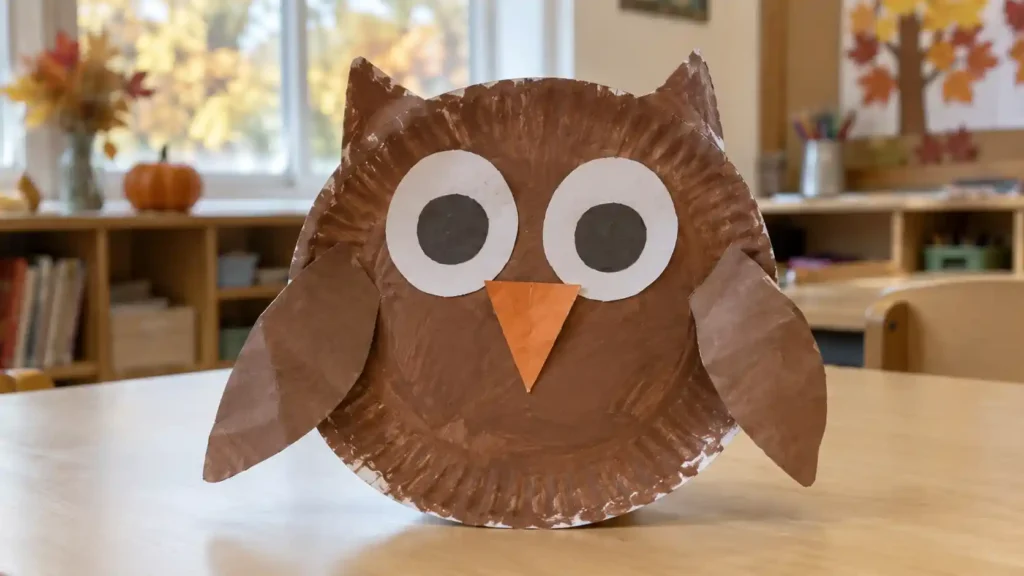
A paper plate autumn owl gets its expression from oversized eyes and folded wings. The curved plate provides a body without needing several separate pieces. It fits into an evening woodland theme or a shelf of homemade animal characters. Children who enjoy drawing faces can make theirs sleepy, surprised, or curious.
Prepare: A paper plate, brown crayons, large paper eyes, a paper beak, glue, and adult scissors.
- An adult folds the sides inward for wings and shapes the top into two ear points.
- Your child colors the owl brown.
- Glue on the eyes and beak, then draw pupils.
Use broad, flat paper shapes for the facial details.
22. How Can Leaves Become Turkey Feathers?
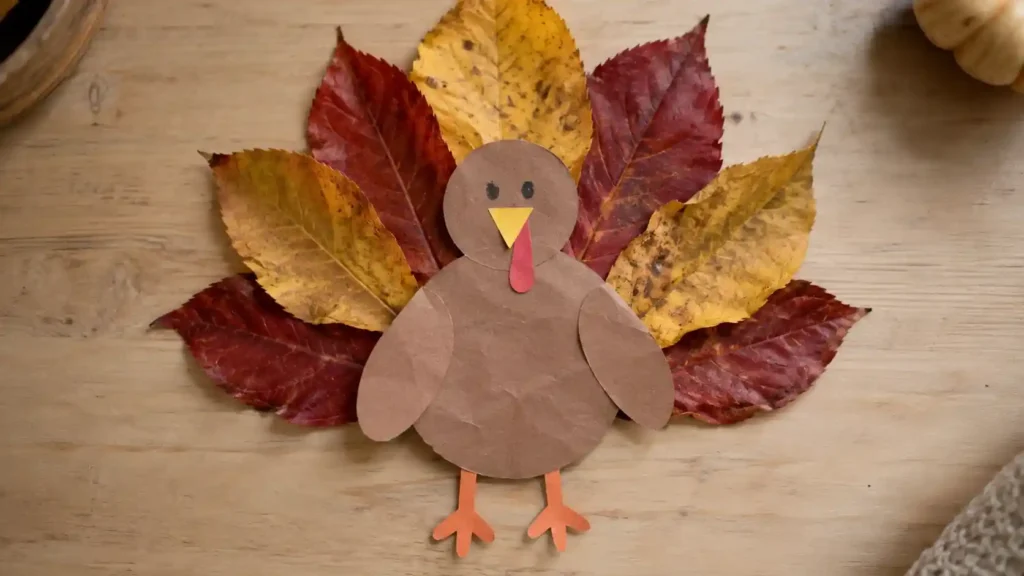
A leaf-feather paper turkey turns different leaf shapes into a spreading tail. Real veins and uneven edges give each feather more character than identical cutouts. Save a few suitable leaves after an autumn walk for a Thanksgiving craft afternoon. Children who like arranging collections can experiment with their fan before gluing.
Supplies: Clean, dry leaves, a paper turkey body, cardstock, child-appropriate craft glue, and crayons.
- Arrange the leaves in a fan on the card.
- Help glue them down, then attach the turkey body over their lower ends.
- Draw a face and feet.
Large paper leaves work too when natural leaves are unavailable or too brittle.
23. Paper Strip Fall Sunflower
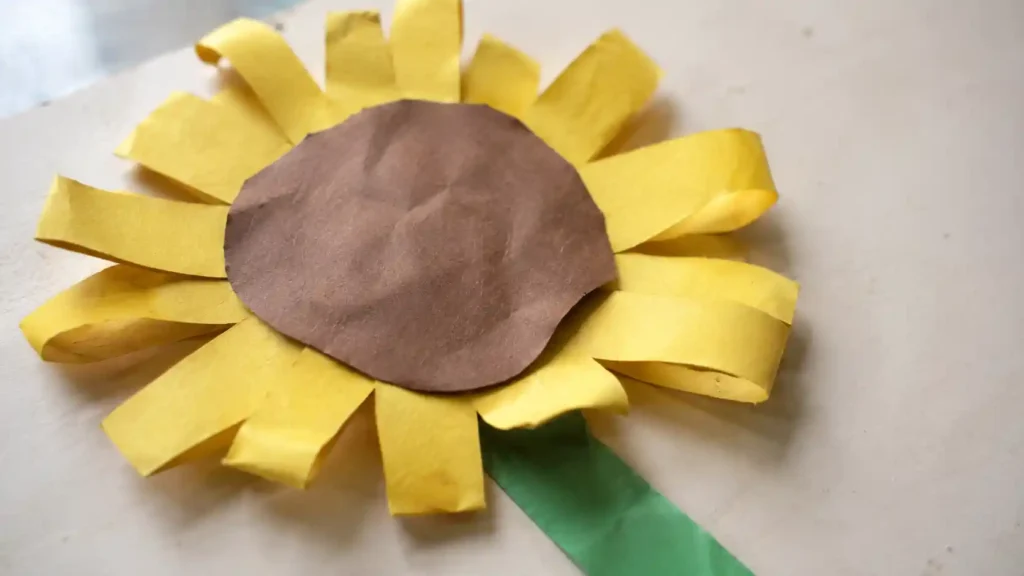
A paper strip fall sunflower spreads bold petals around a big brown center. Its long strips give the flower a different shape from a tissue-paper blossom. Make one for a bright spot beside a collection of darker autumn trees. Children who enjoy arranging pieces can try several petal lengths before choosing their favorite.
Set out: Cardstock, broad yellow strips, a brown circle, a green stem and leaves, and glue.
- Arrange the yellow strips in a circle and glue their inner ends.
- Cover the joins with the brown center.
- Add the stem and leaves underneath.
Adults can prepare shorter and longer strips for comparison. Loose seeds are unnecessary.
24. Where Do the Leaves Go on a Letter F Fall Collage?
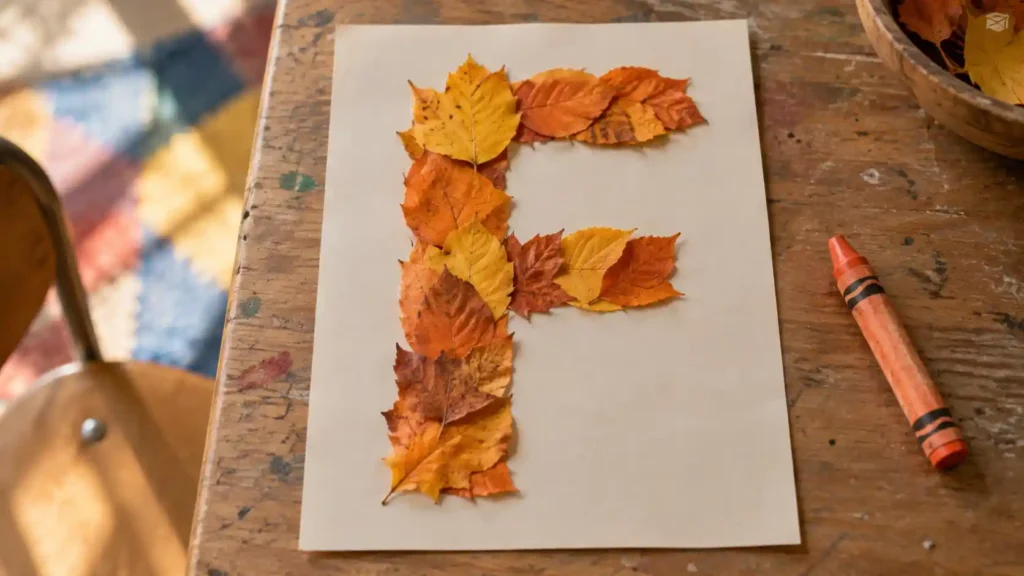
A letter F fall collage gives paper leaves a path to follow. The large letter offers a hands-on alternative to tracing a small printed worksheet. It belongs beside a fall book or a seasonal word display. Children beginning to notice letters can explore the shape without being expected to write it themselves.
Materials: Cardstock, a marker, broad paper leaves, and a glue stick.
- An adult draws a large uppercase F.
- Invite your child to follow its lines with a finger.
- Glue paper leaves along the vertical line and two horizontal strokes.
Say, “F is the first letter in fall.” Let decorating remain the main activity.
25. What Will Your Child Add to a Thankful Paper Tree?
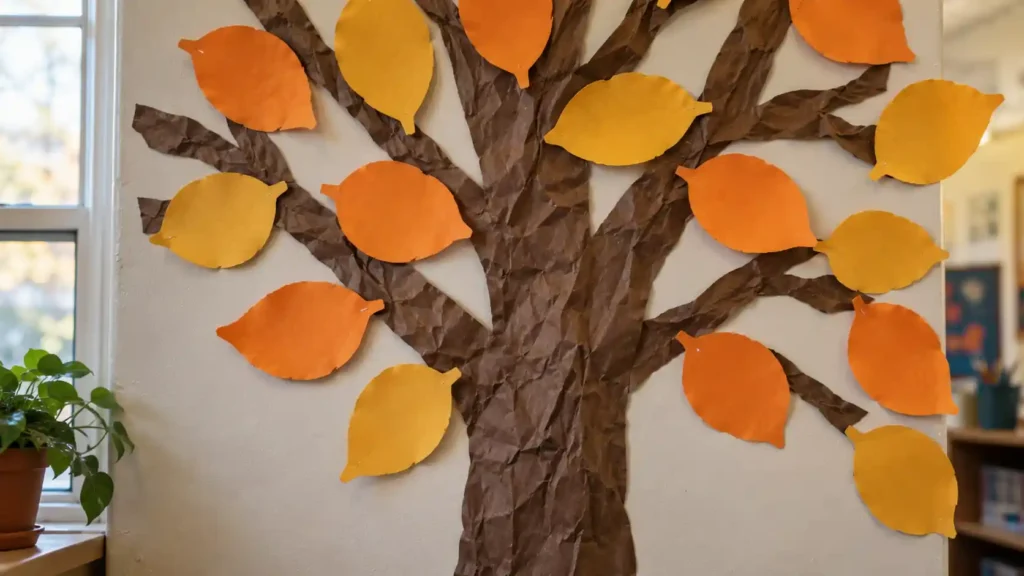
A thankful paper tree holds children’s own words among its autumn leaves. Dictating lets them contribute meaningful ideas without needing to write independently. Add to it during a family gathering or a preschool gratitude activity. For children who enjoy sharing stories, each leaf becomes a small record of something they appreciate.
Prepare: A large paper trunk, broad leaf cutouts, a marker, glue, and backing paper.
- Attach the trunk to the backing.
- Invite your child to name something they appreciate and write their words on a leaf.
- Let them choose where to glue it.
For Christian families or church preschool groups, an optional prompt is, “What would you like to thank God for?”
How Do You Choose Fall Preschool Crafts for Your Child?
Match the project to the child in front of you. A child who happily paints one day may prefer dry paper the next. If a younger sibling is joining in, browse our fall crafts for toddlers for more ideas to adapt with adult help.
For fall preschool crafts with minimal setup, begin with rubbings or torn-paper shapes. Choose loops and accordion folds when you have time to help with construction. Suncatchers need adult preparation, but children can take charge of the tissue arrangement.
The CDC recommends giving preschoolers a limited number of simple choices. At the craft table, you could apply that advice by offering two options: “Would you like to make an apple or a leaf?”
Keep the choice manageable. There is no need to show all 25 projects at once.
How Do You Set Up Preschool Fall Crafts for a Classroom?
Organize preschool fall crafts around four stages so preparation and cleanup have a place alongside making.
- Prepare: Cut adult-prepared shapes, check supplies, and set out manageable quantities.
- Make: Demonstrate the unfamiliar action, then allow different colors and arrangements.
- Dry: Reserve a labeled shelf or tray for wet work.
- Display: Ask children about their pictures and add names to the back before hanging.
Shared supply trays can work well, but leave enough space for individual pictures. Keep extra paper nearby for children who want to try again or add something unexpected.
For preschool fall crafts involving paint, plan washing and drying space before opening the bottles. Completing the background one day and adding details later is perfectly reasonable.
FAQs About Fall Crafts for Preschoolers?
What are the easiest fall crafts for preschoolers to start with?
Crayon leaf rubbings, torn-paper apples, and paper acorns have a small number of making steps. Adults can prepare the outlines and materials, then adjust help to the child’s grip and interest. These fall preschool crafts let you begin with familiar actions such as rubbing, tearing, and gluing.
Which fall crafts can preschoolers make without paint?
Paper wreaths, leaf rubbings, torn-paper collages, suncatchers, and scarecrow puppets all work without paint. Glue and paper scraps still need cleanup, so keep a tray or scrap bowl nearby.
What supplies should I keep for preschool fall crafts?
Start with cardstock, construction paper, crayons, glue sticks, white craft glue, paper plates, and large tissue pieces. Add adhesive film or washable paint only when your chosen project requires it. Keeping these materials together makes it easier to set up preschool fall crafts when your child wants to create.
How can I adapt crafts for children who dislike messy textures?
Offer traced paper hands instead of painted handprints and paper collages instead of stamping. Let children choose tools and materials they feel comfortable touching.
Can we make these crafts without real autumn leaves or printable templates?
Yes. Paper leaves work for wreaths, leaf people, and turkey feathers, while simple hand-drawn outlines can replace templates. Authentic leaf rubbings need a textured leaf or a suitable rubbing plate.
Which Fall Craft Will You Make First?
You do not need a cupboard full of supplies to enjoy fall crafts for preschoolers. Choose a leaf, pumpkin, apple, or woodland project that fits what your child wants to do today.
Save this CrochetMind collection on our website for your next craft afternoon. For now, pick one idea, gather its materials, and leave enough room for your child to make it their own.
Final Thoughts
Fall crafts for preschoolers do not need fancy supplies or perfect results to make an afternoon special. A few paper scraps, some crayons, and a little space to create are enough to get started. Whether your child chooses a colorful leaf wreath or a wobbly pumpkin person, let their ideas shape the finished piece.
Pick one project that matches the supplies you already have, lend a hand where needed, and enjoy making it together. When you want a seasonal project of your own, explore our fall crafts for adults. The crooked leaves and unexpected color choices might become your favorite details.

![The Best 30+ Free Crochet Cat Patterns [Beginner-Friendly Guide]](https://crochetmind.com/wp-content/uploads/2025/04/1-The-Best-30-Free-Crochet-Cat-Patterns-Beginner-Friendly-Guide.webp)