If you’re new to knitting, starting your project can be tricky. One of the most challenging factors right there would be learning how to cast on knitting. It can be frustrating when your edges aren’t neat, and you don’t have a clear idea of how much yarn to use. But don’t worry! You’re not alone.
The good news is, by following the right technique, casting on is a quite simple process. In this guide, we’ll show you step-by-step how to cast on using different methods. By following this guide, you can start knitting your projects with ease.
In This Post
What Is Cast On Knitting?
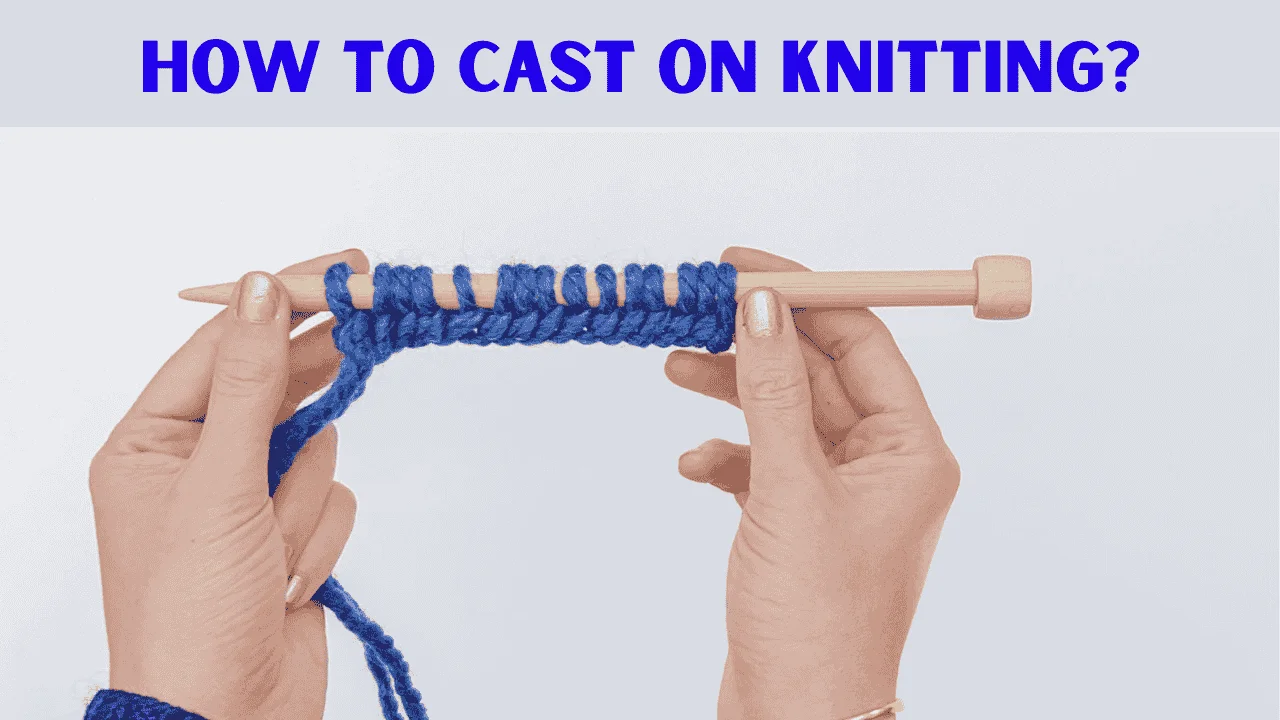
As the name suggests, cast on knitting is the first step of knitting. It’s how you create the first loop in your yarn that is stitched on your needle. The row that you make in the loops is known as the cast on. Most of the time it shows “CO” as an abbreviation.
However, there are various ways to cast on, each will give you a different look in your project. Some of the methods help you create a strong and sturdy look, while the other ones give you a stretchy vibe in the clothing where you are using it. What cast you will choose in this instance varies depending on your project.
As a beginner, you can start with a simple cast. As you practice, you will learn some complex techniques to be professional in it.
What Are the Types Of Cast-On Techniques Used In Knitting?
There are various types of casting methods you will find while knitting. Have a short glimpse of each one:
Single Cast On:
The single cast on is one of the easiest techniques used in knitting. This cast-on is perfect for beginners and is even quite quick and easy to complete. You just loop the yarn onto the needle using your fingers. It helps you make a basic edge. This small method is great to use in small projects. However, this knitting cast isn’t as strong as other cast-ons.
Longtail Cast On:
As the name suggests, the longtail cast gives your work a stretchy look. It is also a very popular choice for most knitters. Here you need to use both your thumb and needle to create stitches. This way, you will get clear and long stitches which is a great starting point to make scarves, sweaters, and other wearable items. You will have to leave a long tail of yarn before starting.
Knitted Cast On:
The knitted cast on feels like actual knitting. You will make each stitch by inserting the needle into the loop and pulling the yarn through. This method is effective for adding stitches on the needle of a project or if you need a strong and flexible edge.
Cable Cast On:
The cable cast is similar to the knitted cast. But here you will get a firmer edge that gives you a sturdier look in your project. Instead of inserting the needle into the stitch, you will place it between stitches. This technique is ideal to use in projects like bags or buttonholes where you will need a strong edge.
How To Cast On Knitting Single Easy?
It is quite easy to make the single cast on, and as a beginner, you must try it. Here are the simple instructions on how to start knitting cast on with the single cast:
Step 1: Create a Slipknot
Start by making a slipknot. For this, take your yarn, create a small loop, and pull the working yarn through it. Now gently place the slipknot onto your knitting needle and tighten it. This is your first stitch.

Step 2: Wrap the Yarn Around Your Thumb
When you have done the above, now hold the needle with the slipknot in your right hand. Now take your working yarn in your left hand. This time, you will have to wrap the yarn clockwise around your left thumb.

Note: In this step, you will have to keep the yarn slightly tight, but it should not be too snug.
Step 3: Insert the Needle Through the Thumb Loop
Using your right hand, insert the needle into the loop around your thumb. Gently go in and from the bottom of the loop. If you are careful, you will start making your next stitch.

Step 4: Transfer the Loop to the Needle
Once the needle is through the loop, slide the loop off your thumb and onto the needle. Now tighten the yarn slightly and secure your new stitch on the needle.

Step 5: Repeat the Process
Wrap the yarn around your thumb again, just like you have done in Step 2. Now repeat Steps 3 and 4 until you have the number of stitches you need.

Tips for Beginners: You need to keep your loops loose so it’s easier to knit the first row. As you see, the method is super easy but gives you a less tidy edge. So it is effective for practice projects to be successful.
How To Longtail Cast On Knitting For Beginners?
As suggested, the Longtail Cast On is a popular technique for making a strong, stretchy edge. Here is the simple guide you can follow to be a pro in it:
Step 1: Measure Your Yarn and Make a Slipknot
First up, you have to measure out your yarn tail. For the long tail, use 3-4 times the width of your project.
As an example,
If your project is 8 inches wide, you need to measure out 24-32 inches of yarn. When measuring, create a slipknot at the end of this tail and then place it on your needle. You will find the long tail facing you; leave it as it is. Also, place the original yarn against you. Hold the needle in your right hand.

Step 2: Position the Yarn
With the use of your left hand, grab both strands of yarn with your last three fingers. Just insert your thumb and index finger between the two strands. Here you will get a “Y” or slingshot shape. The palm should face upward, with one loop of yarn around your thumb. Also, the other one should be around your index finger.

Step 3: Make the First Stitch
This time, you will make your first stitch. For this, hold the slipknot on your right index finger. Now swing your needle tip down under the outer strand of your thumb. It will also be through the center of the loop. Now gently start moving the needle up and over the inner strand of yarn on your index finger.

Then pull the needle down through the center of the thumb loop. It will touch the edge of your sideways. Release the loop from your thumb and gently tug both strands. It will tighten the loop on the needle.
Step 4: Repeat the Process
When done, you need to repeat the above process. For this, rewrap the yarn around your thumb and index finger and create a “slingshot” position.
Follow the above steps and cast on more stitches. Repeat the process until you get the number of stitches you have planned for.

How To Knitted Cast On Knitting For Beginners?
This time, we will show you the knitted cast for your project. It is simple to do so. Follow the easy guide below:
Step 1: Make a Slip Knot
Start by measuring out a 6-inch tail of yarn. The extra yarn will be woven in later and used to secure your work. Next, make a slip knot.
For this, loop the yarn around your fingers and pull the tail end through to create a knot. Now place this slip knot onto one of your knitting needles. Make sure you are holding this needle in your left hand. Also, the tail will be hanging down.

Step 2: Insert the Right Needle
Take a knitting needle in your right hand. Insert its tip into the slip knot on the left needle. Now gently push the needle through from left to right. As you notice, you will get an “X” shape, with the right needle in front of the left.

Step 3: Wrap the Yarn Around the Right Needle
Now hold your working yarn in your right hand. Wrap this yarn counterclockwise around the tip of the right-hand needle. This step is often known as the “yarn over.” The yarn should be placed firmly over the right needle, and you are ready for the next move.

Step 4: Pull a Loop Through the Slip Knot
With the use of the tips of the right needle, now catch the yarn you just wrapped around it. Pull this yarn through the slip knot to make a new loop. Don’t slide anything off the needles yet. You just need to focus on making the loop now.

Step 5: Transfer the New Loop Back to the Left Needle
This time, take the loop you have just made and carefully slide it onto the left-hand needle. For this, keep the right-hand needle still and move the loop onto the left needle’s tip. Congratulations! This is your second stitch. If it seems loose to you, gently tug the yarn tail to tighten it.

Step 6: Repeat to Cast On More Stitches
Now that you have two stitches on the left needle, the time has come to just repeat the process. Insert the right needle into the most recent stitch just like you have done before. Repeat the above steps until you’ve cast on the number of stitches your pattern needs.
How To Cable Cast On Knitting For Beginners?
Here is the simple guide you need to follow to break cast on knitting as a beginner:
- Start by using the Knitted Cast On to cast on two stitches. Here the first two stitches are just like the ones you would normally cast on using the method you used in the knitted cast on above.
- Once you’ve cast on two stitches, now take your needle and insert it between the two stitches on the left needle. Now bring the right needle under the left needle and through the yarn. This is all about connecting the two loops.
- Wrap the working yarn around the tip of your right needle. Don’t worry, this is not a big step, and you just make a normal stitch.
- Bring the right needle back through the yarn loops. Pull the yarn with it to make a new loop on the right needle.
- Now turn the loop you created around and drop it onto the left needle. This time, you will leave the right needle from the loop you just made.
- Pull the yarn gently and tighten the new stitch on the left needle. Check and ensure you should have two stitches on the left needle.
- Repeat steps 2-6 and continue until you have the desired number of cast-on stitches on your needle.
In Closing
Okay, that’s all here about how to cast on knitting. Now you’re ready to start your knitting projects with confidence! No matter if you are using Single Cast On, Long Tail, Knitted, or Cable Cast On method, each one helps you make a strong foundation for your work.
Remember, you might need a little bit of time, but with practice, you’ll be casting on like a pro. Just make sure to use the right yarn and pattern to follow to ensure successful casting.







![Select Crochet Clothing Ideas: [Best Crochet Fashion] Crochet Clothing Ideas](https://crochetmind.com/wp-content/uploads/2025/07/Crochet-Clothing-Ideas-Best-Crochet-Fashion-in-2025-1-1.jpg)



![The Best 30+ Free Crochet Cat Patterns [Beginner-Friendly Guide]](https://crochetmind.com/wp-content/uploads/2025/04/1-The-Best-30-Free-Crochet-Cat-Patterns-Beginner-Friendly-Guide.webp)
