Crochet a magic ring or magic circle is more likely a fundamental skill for any crocheter, especially when you love making projects on rounds like amigurumi, hats, or doilies. As with the fun, is it so easy that anyone can easily get through it? I bet not!
While the traditional method may leave a hole in the center of your work, this method allows you to adjust the size to your own. Here is how to crochet a magic ring easily-
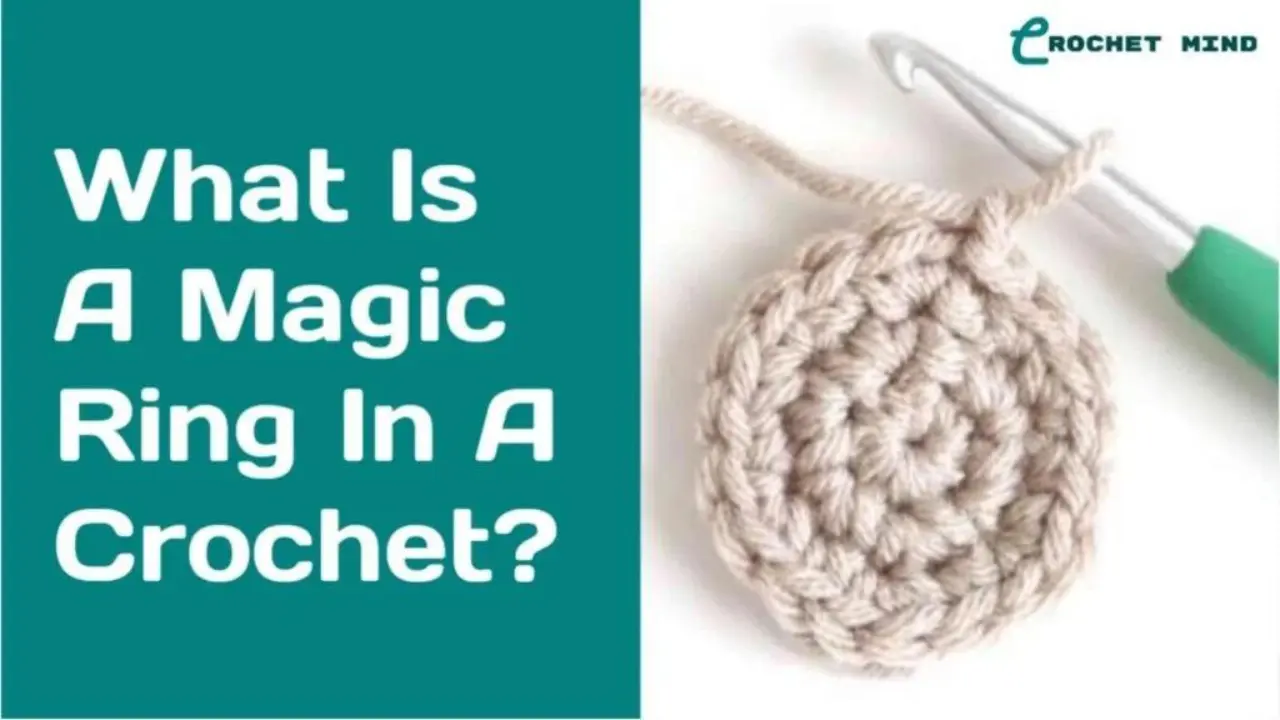
To crochet a magic ring, loop yarn twice around your fingers. Then insert your hook underneath the loops, yarn over, and pull through to form a loop on your hook. This creates chain 1. Work your first stitches into this magic circle. Lastly, pull the tail to close and adjust tightness for a perfect start!
This guide will walk you through the easy steps of creating a neat and adjustable magic ring. With our clear instructions and helpful tips, you’ll be a magic ringmaster in no time. Let’s start!
Key Takeaways:
- You need a medium-weight yarn and a right-sized hook to crochet a magic ring.
- Maintain consistent tension and proper tightness to ensure a flawless magic ring.
- Magic ring is ideal for amigurumi, hats, doilies, and any circular designs to create a tight, neat center.
In This Post
- What Is a Magic Ring In a Crochet?
- What Materials Will You Need to Crochet a Magic Ring?
- How Many Stitches Do You Need To Crochet A Magic Ring?
- How To Crochet A Magic Ring For Beginners? [3 Easy Methods]
- Is A Magic Circle The Same As A Magic Ring?
- Troubleshooting the Common Mistakes to Crochet a Magic Ring
- Conclusion
- FAQ’s
What Is a Magic Ring In a Crochet?
The technique is considered as magical as it is the only technique to begin a round piece with a guarantee of no gap in the middle.
Crochet a magic ring is a basic technique in crochet projects that is mostly used for amigurumi projects or anything that has a pattern crocheted in the circle. The main purpose of the magic ring in crochet is to create a closed center no matter what the project is.
What Materials Will You Need to Crochet a Magic Ring?
To crochet a magic ring, simply you will need yarn and a crochet hook. You can use the yarn that you’ve already for your project.
Have a detailed overview from the below listing:
| Material | Description |
| Yarn | You can use any yarn weight in this instance. But a light-colored, medium-weight yarn is ideal if you are a beginner as it makes your stitches easier to see. |
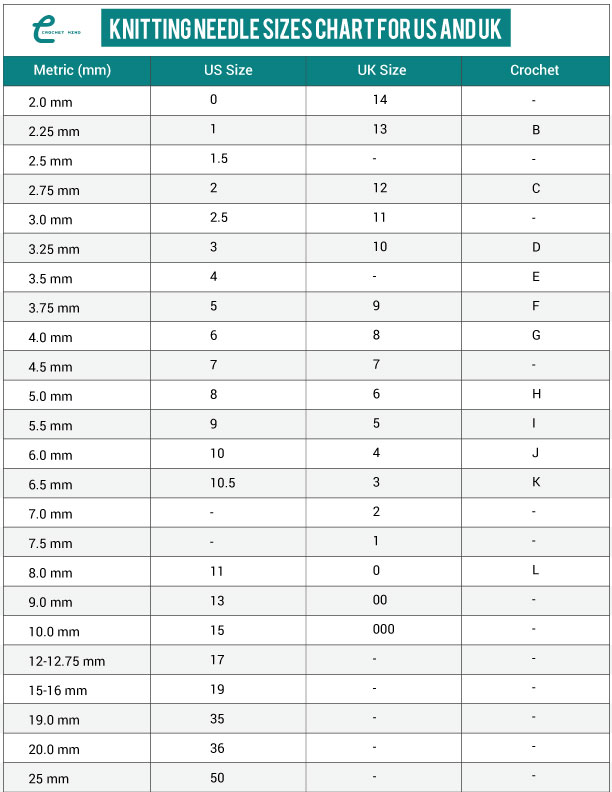
| Crochet Hook | Choose a hook size that is appropriate for the yarn weight you’ve selected. You can check out the yarn label to know the recommended hook sizes. |
How Many Stitches Do You Need To Crochet A Magic Ring?
To be exact, there is no fixed number of stitches to crochet a magic ring. You can increase the number of stitches per round by the number you started the circle with.
For instance,
- For the flat circle, it should be 6 sc, 8 hdc, or 12 dc. If you start the magic ring with 6 stitches, the second will be 12 sc, and then 18 sc. The same goes for the 8 hdc and 12 dc.
- However, most of the crocheters start off with a magic ring with 6 sc. That is because, with the 6 stitches, you can have a nice close-up of the magic ring and no hole in the middle. Moreover, it turns out flat fairly.
- If you start off with a small number like 3 stitches, it will make the start of your amigurumi pointy. At the same time, if you start off the magic ring with a larger number like 10 stitches, you may have a big hole in the middle.
- However, the number provided here will give you a reasonably flat circle though. Still, if you face any getting rippled or doming, you should try to increase or decrease the number of stitches in your starting round to get a fairly flatter circle.
How To Crochet A Magic Ring For Beginners? [3 Easy Methods]
You can crochet a magic ring using 3 different methods. Don’t be overwhelmed! Here is a well-proven step-by-step tutorial on all essential methods to make you a pro in it. Whether you’re right-handed or left-handed, you’ll find the instructions.
Let’s move on!
Method-1: Standard Magic Ring Method [Right-Handed Version]
Well, after having the preview, here is a complete step-by-step guide for you on how do you crochet a magic ring following the standard method:
Step -1: Start With A One Loop
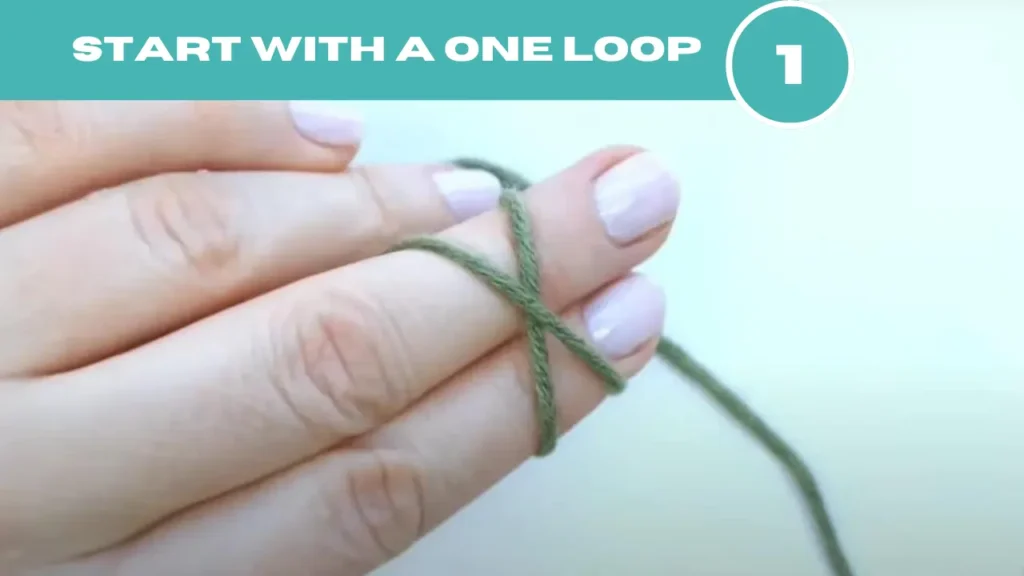
- Start by forming a loop with your yarn.
- Take the tail of your yarn and loop it around the two fingers of your open left hand.
- Use your index and middle finger twice a time for looping it.
- After making a circle, the working yarn or the end attached to the larger ball will be on the right.
- Once completed you’d have a yarn in the form of an “X” at your hand.
Step -2: Insert The Hook
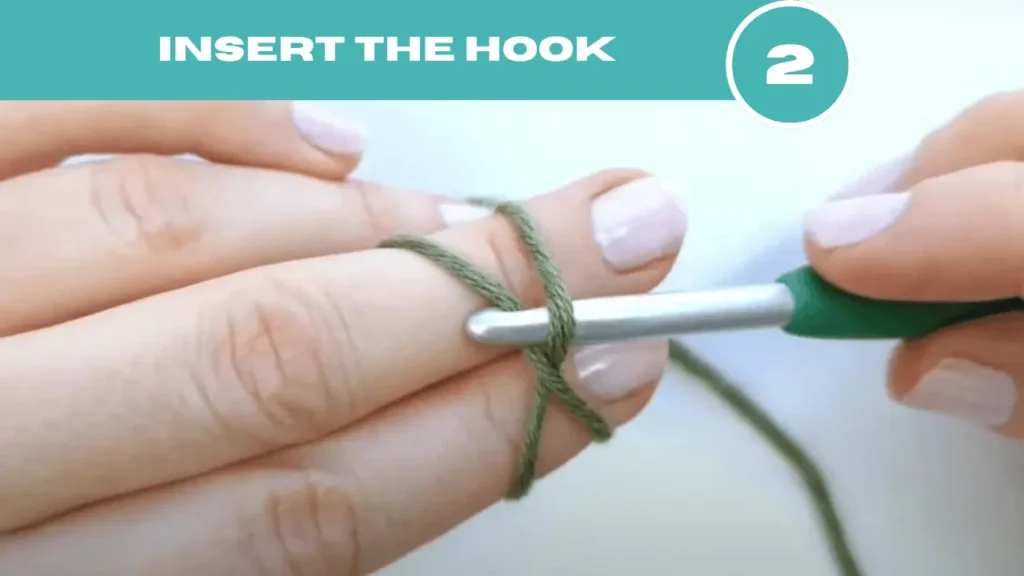
- Now this is the time to hold your crochet hook in your right hand and insert it underneath the yarn from right to left.
- Now use the hook tip and grab the working yarn that is attached to your skein.
- Then gently pull it through the right strand of the loop.
Note: This chain does not count as a stitch in most patterns but a good start to secure the yarn.
Step -3: Chain Stitches
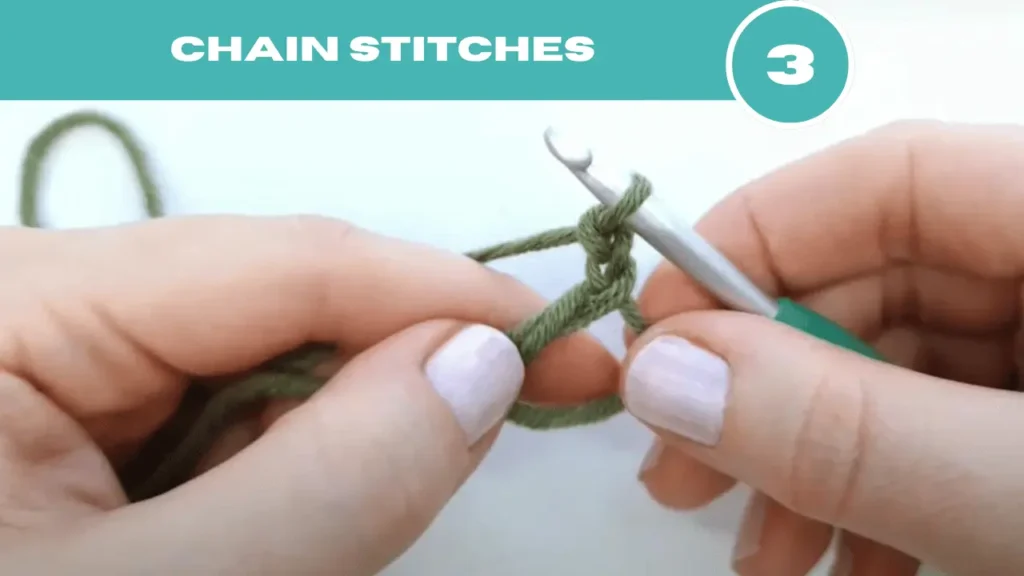
Have you pulled your hook through the loop? Good!
- Now the time is to make your first chain. Well, this will depend on how large you want to make your ring.
- For example: If you’re making a granny square or a similar project, a chain that measures around 2–3 inches (5.1 – 7.6 cm). In case, you want a larger ring or loop, you can chain more stitches.
Step -4: Work Stitches Into The Ring
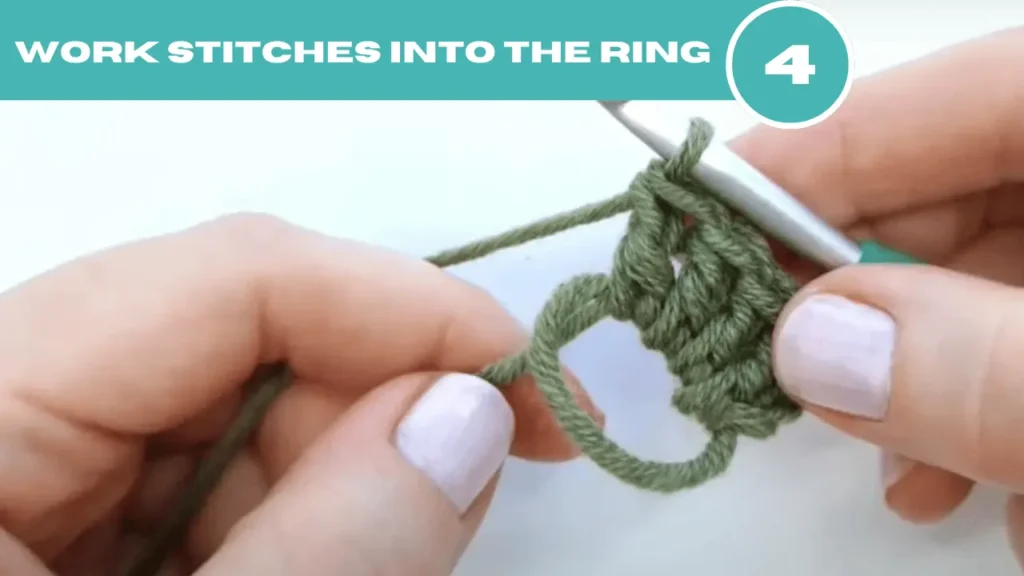
- In this step, you will work with your first-round chain stitches. You need to use it as the center of your magic ring.
- Insert your hook again on the center of the ring, yarn over it, and then pull through the loop.
- Yarn over again and now pull through both loops.
- Repeat crocheting with the required number of stitches into the loop. For example, if the pattern calls for six single crochets, you will make six single crochets into the loop.
Step -5: Close The Loop
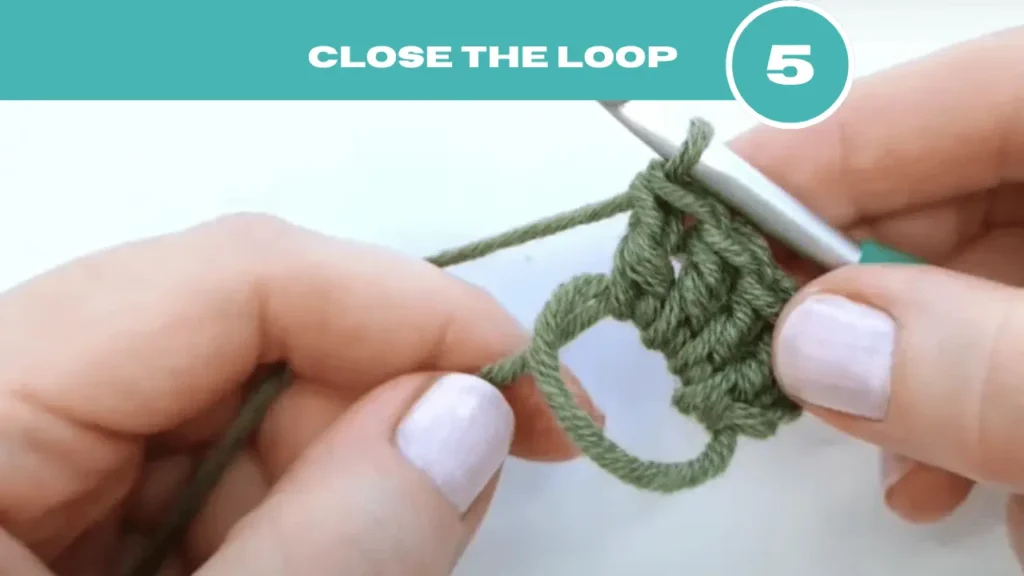
- Now you have to close the loop. Simply pull the yarn tail to tighten the loop and close the center hole. Make sure the stitches are snug but not too tight.
Step -6: Continue Crocheting
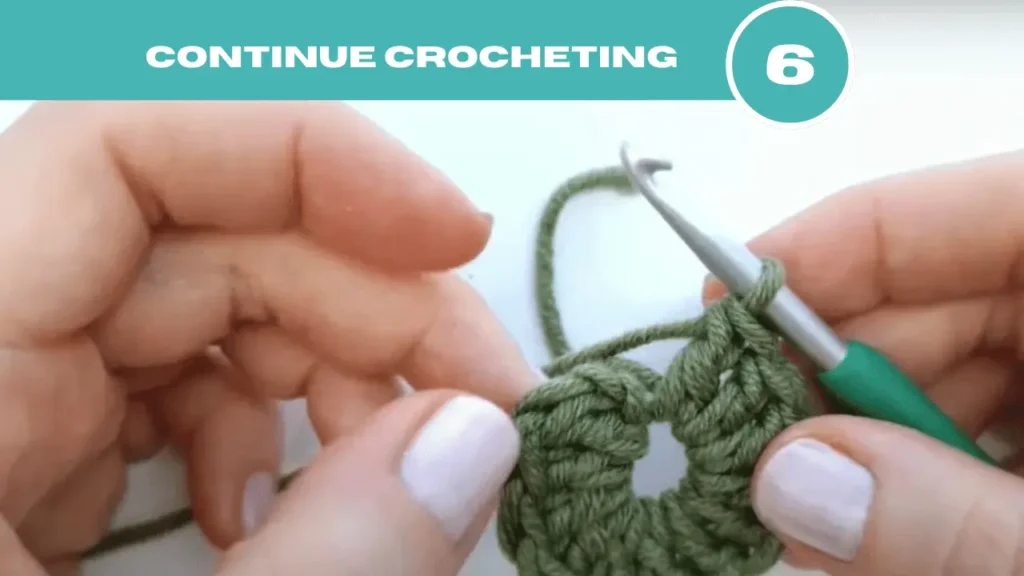
Now follow your pattern and continue crocheting in the round. As a reminder of your pattern, you can make an into the first stitch of the round. It is also simple to do that:
- Insert your hook into the top of the first stitch of the round. This is the stitch where you have begun the round.
- Yarn over, and pull the yarn through both the stitch and the loop on your hook. This will create a slip stitch, which joins the round and closes it off.
Well, after joining with a slip stitch, begin the next round in the first stitch of round 1 and continue crocheting.
For a better understanding, you can see this effective video on how to crochet a magic ring step-by-step tutorial:
Method-2: Double Magic Circle Crochet Method [Right-Handed Version]
Now coming to the next most popular double crochet method. This is basically a variation of the Standard Magic Ring method used in various crochet projects. In this method, you will mainly create an extra loop of yarn to make the circle sturdier and less prone to gapping.
Here is the complete guide to you can check to learn about this process:
Step -1: Wrap The Yarn
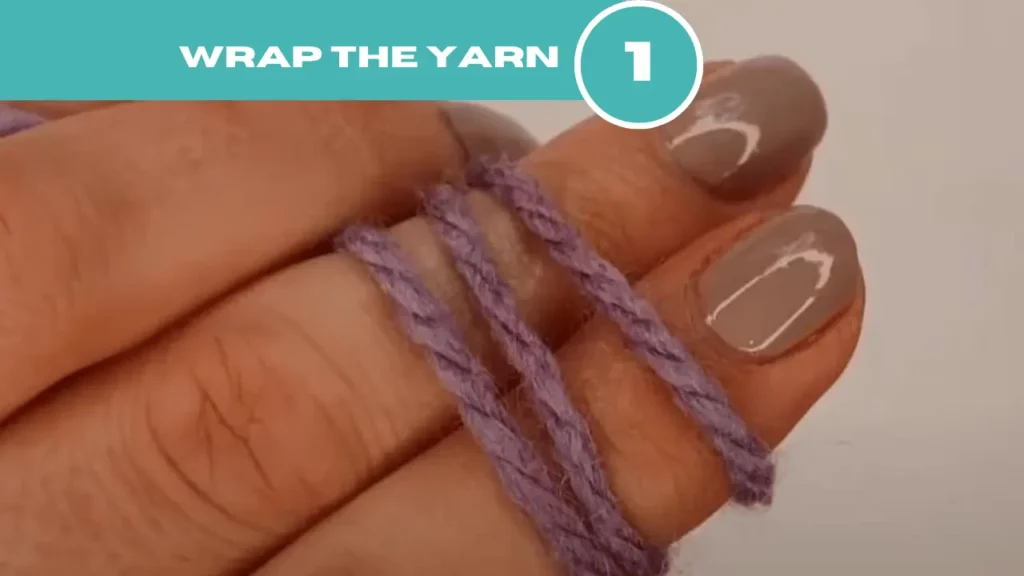
- Start by wrapping the yarn around your index finger.
- Wrap the yarn in the form of X as you have done before. The only difference is that you will have to create two loops instead of a single one as in the standard method.
- Hold the tail end of the yarn in your left hand while the working yarn (yarn attached to the skein) should be on the right.
Step -2: Pull Up A Loop
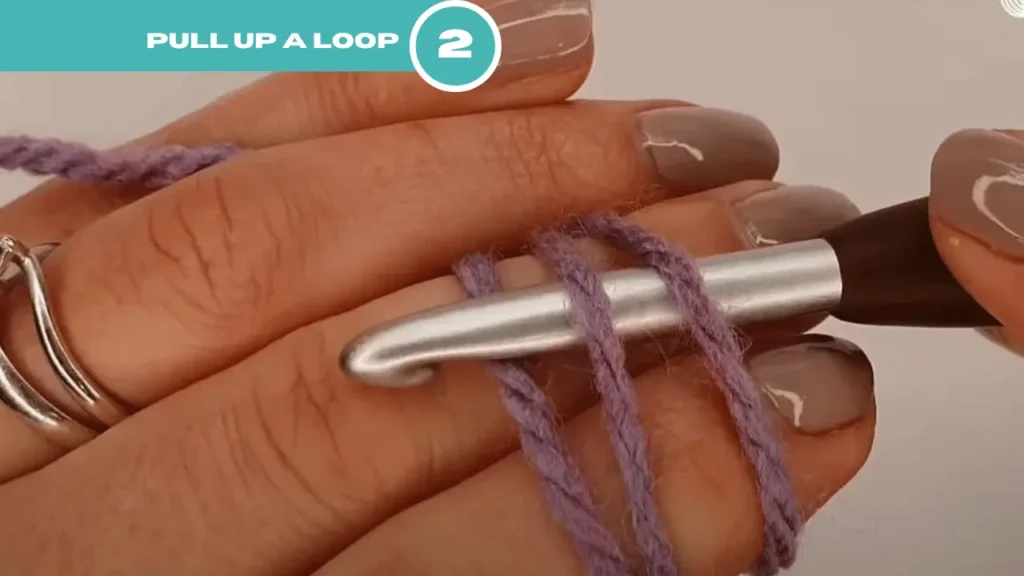
- Take your crochet hook and slide it underneath your front two loops.
- Now grab the last loop which is the working yarn attached to the skein.
- When done, gently pull it through both loops and create a new loop on your hook.
Reminder: This loop should now be on your hook, with the other two loops still forming a circle below.
Step -3: Stitch The Chain One
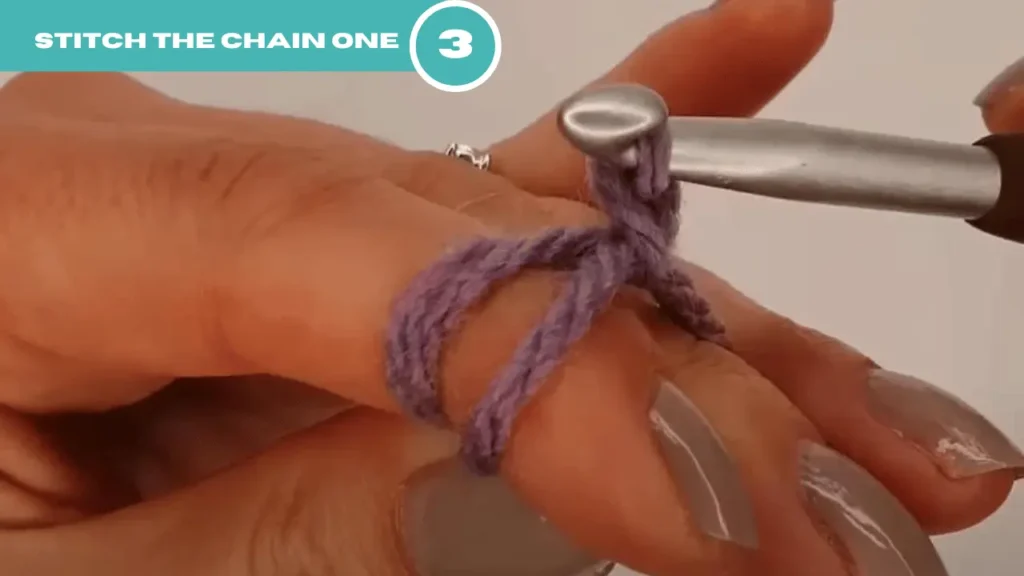
- This time grab the working yarn and pull it through the loop on the hook. This will create a single chain stitch or you might say it as the starting chain.
- Make chains as much as you want. The number of the chain will depend on the length of your desired magic ring.
Note: Ensure the loops are still flat and your chain stitch is secure. This is important for working your stitches into the double loops.
Step -4: Work Your Stitches
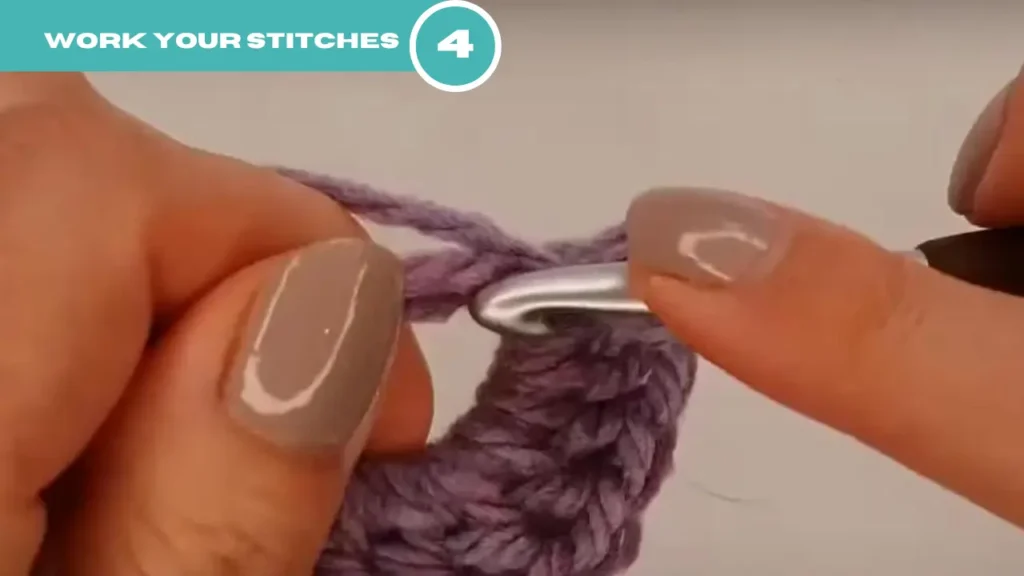
- Now at this step, pull the front of your index finger.
- Insert your hook into the double loop. Check and ensure you go again under both strands of the loop. Also, make sure the working yarn is on the left side and the tail is on the right side.
- Yarn over with the working yarn and pull up a loop through the double loop.
- Complete the stitch by making chains as much as you want.
- Just count the chains and make sure they are evenly spaced around the loop.
Step -5: Close The Ring
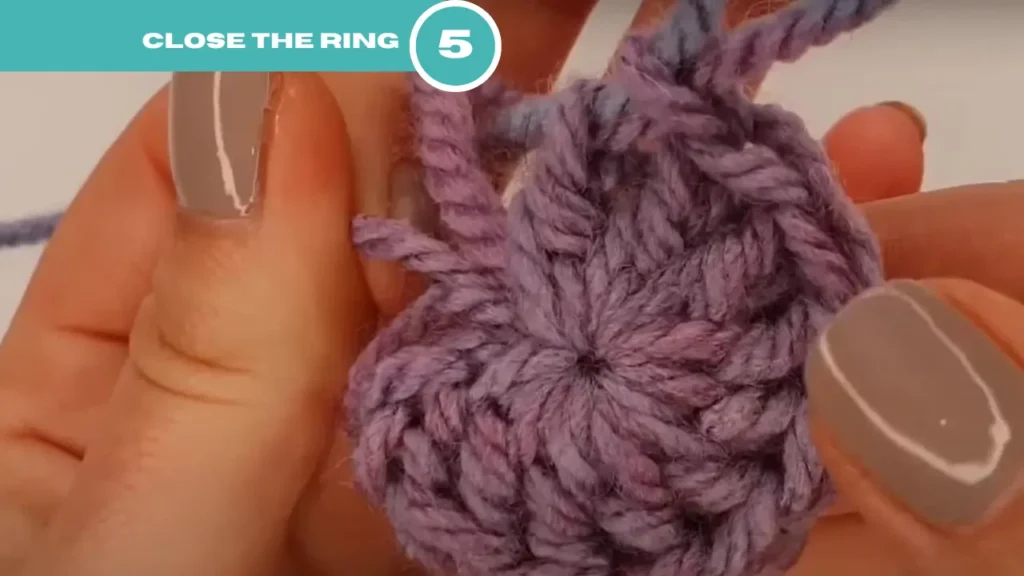
- Once you have done with your desired number of stitches, hold both loops and gently pull the yarn. This will close the loops and tighten the center of your stitches.
Step -6: Continue Crocheting
After closing the ring, follow your pattern instructions and continue crocheting in the round. You may need to join the round with a slip stitch as instructed above. After joining with a slip stitch, you can start the next round.
Still confusing? Here is an easy tutorial video you can check to crochet a magic ring:
Method 3: How To Crochet A Magic Ring? [Left-Handed Version]
Now that if you are left-handed, certainly the overall crocheting process will be different for you. Fret not! We’ve covered you here as well. Here are some essential tips and tricks you can follow for making a magic ring while crocheting left-handed:
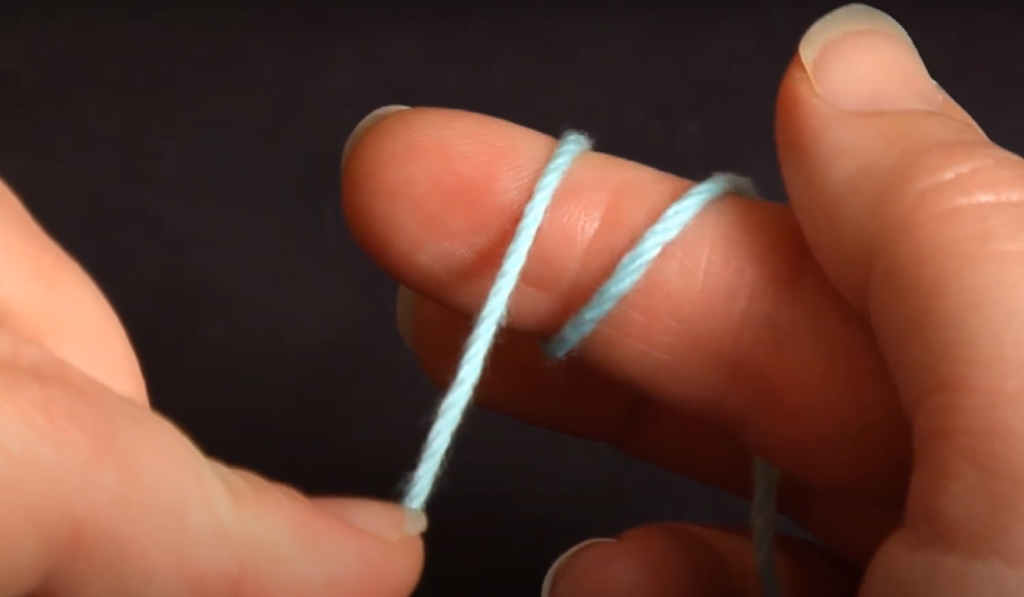
Step 1: Since you’re left-handed, you need to hold the yarn in your right hand. Warp the yard [single or double] around the index and middle finger of your right hand.
Step 2: Now take the crochet hook in your left hand with the hook facing towards you.
Step 3: Insert your hook from behind your fingers and grab the working yarn. Now gently pull a loop through the center of the yarn on your fingers.
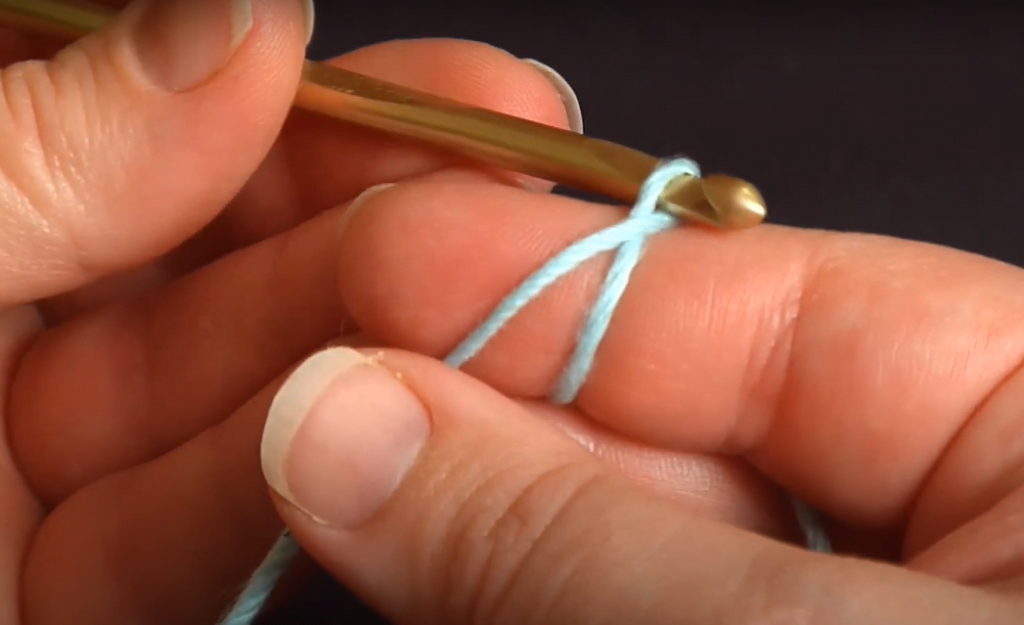
Step 4: Carefully remove your fingers from the loop while keeping the loop secured on the hook. Yarn over with the hook and pull a loop through the loop already on the hook. This will be your first stitch to crochet a magic ring.
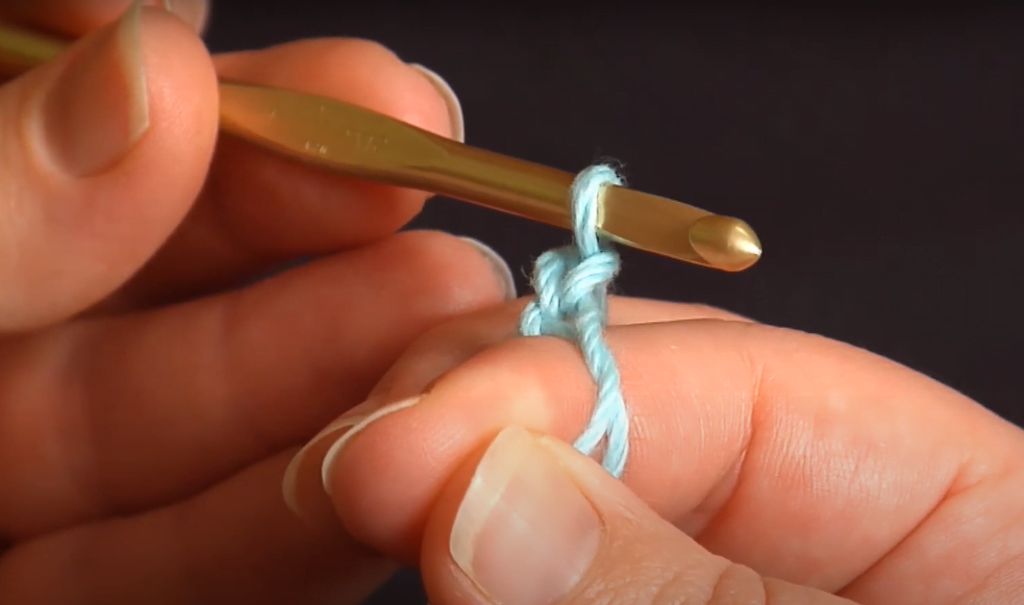
Step 5: Now continue making chains as much as you want and tighten them once you’ve done. Mainly Left-handed crochet is a mirror image of right-handed crochet. But you may require a few tries to get comfortable with the complete process.
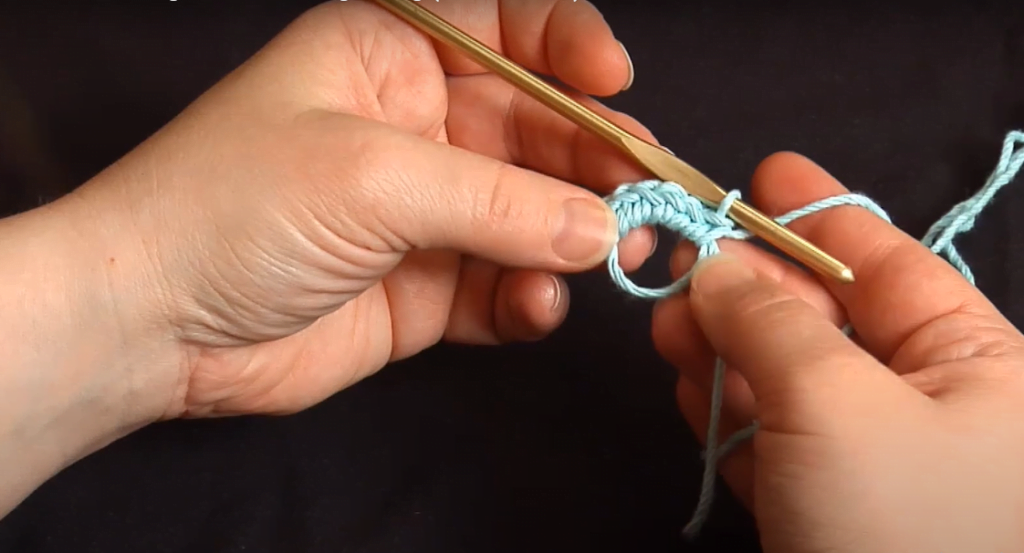
To get a detailed overview, here is a video on the crochet a magic ring tutorial for you:
Is A Magic Circle The Same As A Magic Ring?
Yes, the magic circle and the magic ring are the same technique in crochet which the crocheters use to create the close center of the projects that tends to be round. For instance hats, amigurumi, or mandalas.
Crochet a magic ring is not only the single method that allows beginning a round piece with no hole, but also it offers more flexibility and control over the size of the center space.
Besides the magic ring or magic circle, people know this technique as the magic loop or adjustable loop. So, ultimately both magic circle and ring are the same terms used in crochet.
Troubleshooting the Common Mistakes to Crochet a Magic Ring
As you move on to crochet a magic ring, it is possible that you may experience some hiccups along the way. Below are some troubleshooting tips for the common problems that you face when crocheting a magic ring.
Check it out to ensure your magic ring is flawless and a success every time.
i) Gap Or Hole In The Center
- While crochet a magic ring if the gap or hole is forming in the center just pull tightly again to close. The act will create a secure foundation and will prevent any loose stitches as you work on the remaining stitches of the magic circle.
- When you weave around the yarn tail, it will secure it further.
ii) Uneven Tension
- Uneven tension is another common problem to crochet a magic ring that most crocheters face. You have to maintain consistent tension throughout the stitches to achieve the desired result.
- But if you notice that your stitches for the magic ring are too tight or too loose, first try to adjust how tight you are holding the hook and yarn.
- Try to maintain the consistency as you move on. That’s because if you crochet the first round too tightly, it will be hard for you to do the second round with ease.
iii) The Magic Circle Is Not Closing
- If your magic ring is not closing, you may likely have not crocheted around the free ends and the trailing ends while you insert the hook in the center of the loop. It is the same reason for the magic circle not to be tight enough.
- To sort out the problem just crochet around the both free and trailing ends of the yarn when you insert it in the center of the loop. Now that you have done a single crochet, do not pull the trailing ends of the yarn to close up the loop. That is because it will not be adjustable.
iv) The Magic Circle Is Ruffling
- If you notice ruffling to crochet a magic ring, it means that you have too many stitches.
- Don’t worry as you can fix the problem very easily. Just modify your pattern as soon as you notice ruffling.
- Do one or two rounds without any increases. Follow it until the magic circle is flat again, and then you can continue your increases.
Conclusion
Well, that’s all here today about how you perfectly crochet a magic ring for any of your favorite rounded projects. Beyond any doubt, this is an essential skill that is enough to bring a neat and professional appearance to crocheted items.
So learning to crochet a magic ring process is a must, especially when you are enjoying such crocheting projects.
But remember your first attempt may not be as picture-perfect as you desire. But don’t get discouraged. Continue your tries following our easy tutorials to crochet a magic ring.











![How to Crochet a Bag? [6 Easy Steps with Pictures]](https://crochetmind.com/wp-content/uploads/2024/10/How-to-Crochet-a-Bag.webp)
