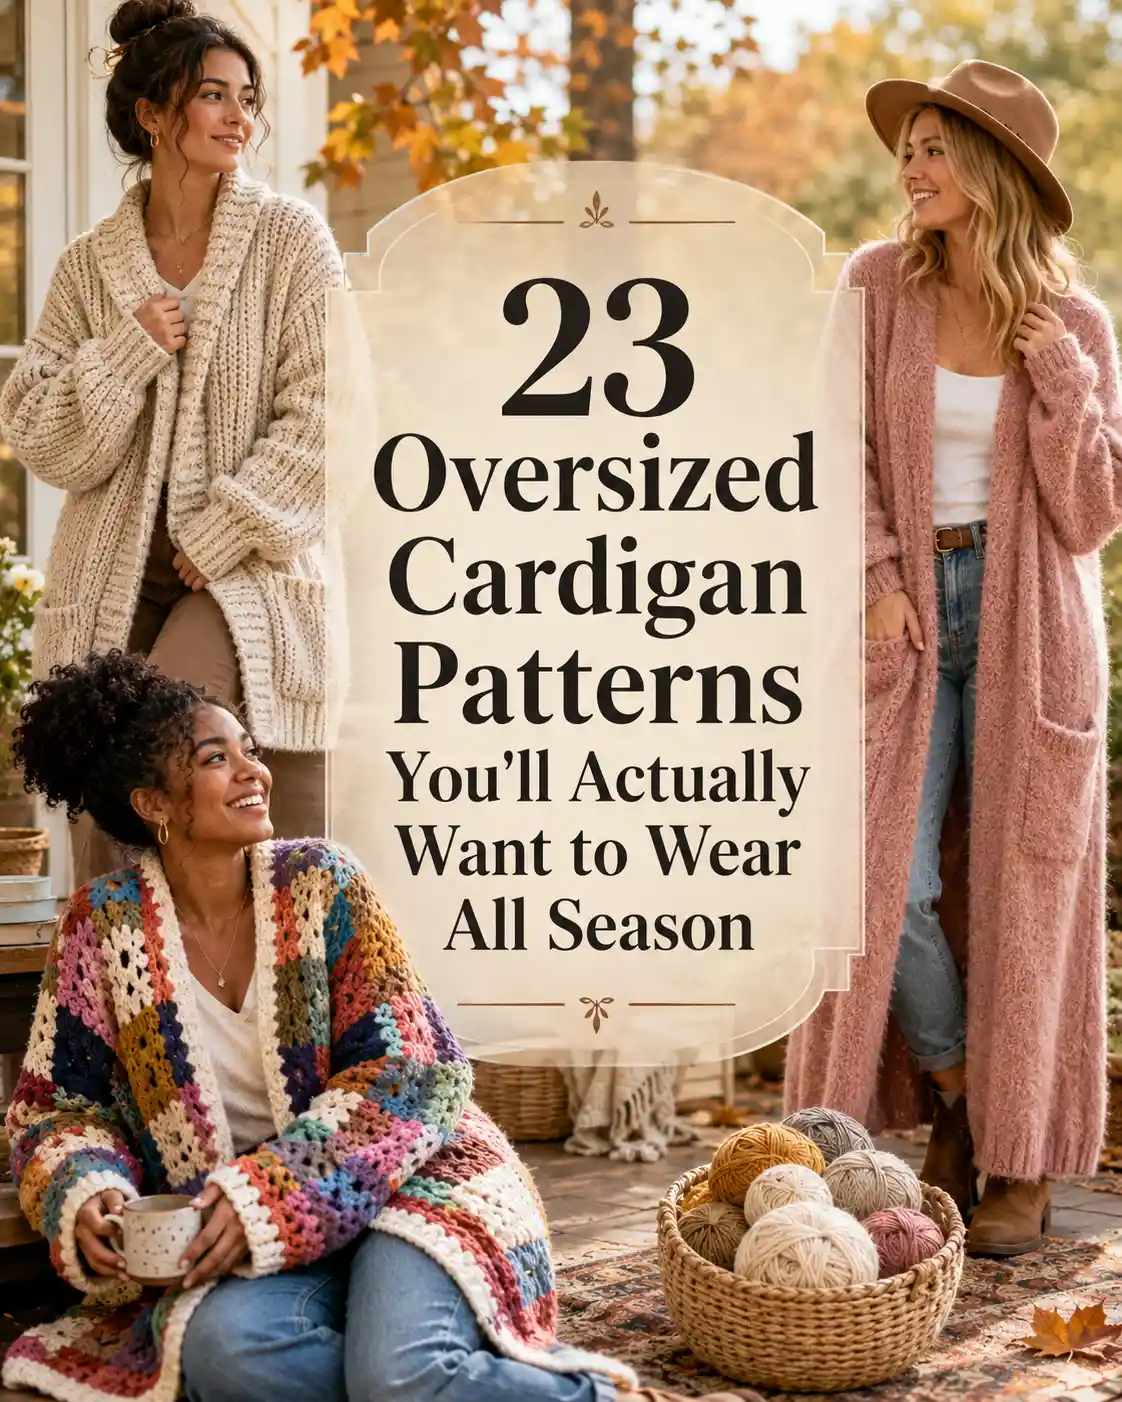
Looking for the best oversized cardigan patterns? Below are 23 free and beginner-friendly knit and crochet cardigan patterns, from chunky knit cardigans and wrap cardigans to long crochet cardigans and patchwork designs, organized by skill level, yarn weight, and finished style so you can pick the right one for your closet in under five minutes. Whether you’re looking for a simple knit cardigan pattern or an approachable crochet project, there’s a shape here for almost every skill level. The key is choosing a finished measurement, yarn weight, and silhouette that give you the relaxed look you actually want.
Oversized cardigan patterns are knit or crochet designs built with generous positive ease and relaxed proportions for a deliberately loose silhouette. They may use dropped shoulders, longer sleeves, extended body length, or wider shaping to create that look. Choosing the finished bust measurement and yarn weight carefully helps prevent an oversized cardigan from becoming simply too large.
Key Takeaways
- Choose your size by finished measurements, not labels.
- Check yarn weight before starting your cardigan.
- Look for shoulder drop to create intentional volume.
- Choose lighter yarn for longer cardigan styles.
- Try an easy crochet cardigan for a first garment.
- Match texture and color to your personal style.
Oversized Cardigan Patterns: What to Know Before You Cast On
The finished look of oversized cardigan patterns depends on positive ease, yarn weight, gauge, and construction.
At a Glance:
- Check the finished bust measurement.
- Compare yarn weight with the pattern requirements.
- Consider how much positive ease you want.
- Match the construction to your skill level.
Before you pick a pattern, it helps to know a few things that decide how “oversized” your finished cardigan actually turns out. Two cardigans made from the same knit cardigan pattern can fit completely differently depending on the yarn weight and how much positive ease the designer built in. According to the Craft Yarn Council, sweater fit is based on actual chest or bust measurements plus ease, either “negative ease,” which is less than the body measurement, or “positive ease,” which is more. Oversized cardigans are built almost entirely around generous positive ease, which is why sizing them by finished bust measurement (not just S/M/L) matters more here than with a fitted sweater.
Yarn weight is the other big variable. The Craft Yarn Council’s numbering system sorts yarn from 0 (lace) to 7 (jumbo) based on wraps per inch, giving crafters a shared standard for matching yarn thickness to hook or needle size, so when a pattern below calls for “chunky” or “worsted” yarn, that’s a specific, swappable category, not just a vibe.
| Cardigan Style | Craft | Yarn Weight | Skill Level | Best For |
|---|---|---|---|---|
| Chunky Knit Cardigan | Knit | Bulky (#5) | Beginner | Quick weekend makes |
| Easy Crochet Cardigan | Crochet | Worsted (#4) | Beginner | First garment project |
| Wrap Cardigan | Knit or Crochet | Worsted–Bulky | Beginner–Int. | Layering over dresses |
| Crochet Patchwork Cardigan | Crochet | Worsted (#4), scrap-friendly | Intermediate | Stash-busting |
| Long/Duster Cardigan | Knit or Crochet | DK–Worsted | Intermediate | Fall transitional layering |
| Cable Knit Cardigan | Knit | Worsted–Aran | Advanced beginner | Classic, textured look |
How Do You Make a Cardigan Look Oversized Instead of Just Baggy?
Make a cardigan look intentionally oversized by combining generous ease with deliberate shoulder, sleeve, body, and silhouette proportions.
At a Glance:
- Look for a dropped shoulder.
- Check the finished sleeve length.
- Compare body length with your wardrobe.
- Choose straight, boxy, or A-line shaping.
- Let the yarn contribute to the drape.
23 Oversized Cardigan Patterns You’ll Actually Want to Wear All Season
The short answer: intentional proportions, not extra fabric everywhere. A well-designed oversized cardigan drops the shoulder seam past your natural shoulder line, adds length to the sleeve and body, and keeps the overall silhouette straight or A-line rather than tapered, so it reads as “styled loose” instead of “too big.” Below, each pattern description notes where that oversized effect is actually coming from (shoulder drop, sleeve length, body length, or all three) so you’re not guessing.
1. Cozy Chunky Knit Cardigan
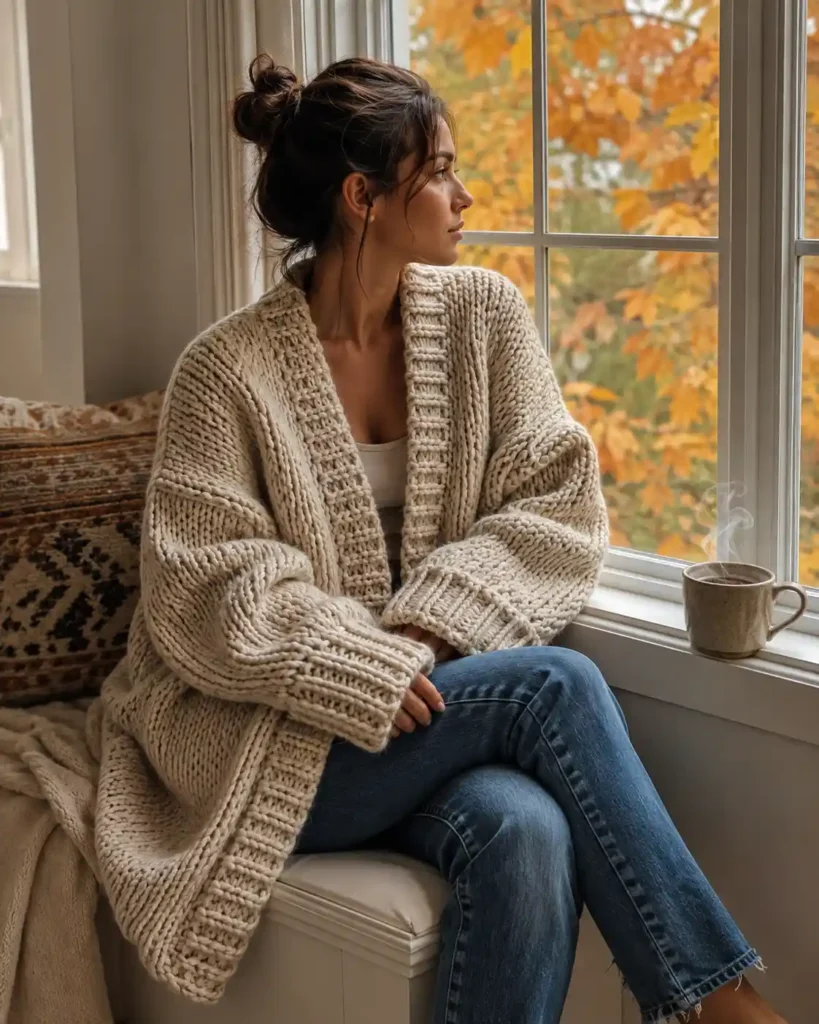
This is the pattern to start with if oversized, low-effort comfort is the whole goal. If you’re completely new to needles, review how to knit first, then come back to these basic rectangles. Built from basic rectangles on big needles, a chunky knit cardigan like this one grows fast, you can realistically finish a wearable version in a weekend instead of a month. Unlike a fitted cardigan where a stitch-count mistake shows immediately, the boxy shape here is forgiving of small errors, which makes it a genuinely good confidence-builder for a first sweater. I default to this pattern every October when I want something on the needles that I’ll actually be wearing by November, not still fighting with in February.
It’s the right call for anyone who wants maximum coziness for minimum technical stress, and the biggest payoff is how much drape you get from letting a bulky yarn do the work instead of complicated shaping.
- Yarn: Bulky (#5), roughly 900–1,100 yards for a medium
- Needles: US 15 (10mm), 36″ circular
- Finished bust: 49″–61″ depending on size (generous positive ease)
Special Tip: Block the panels flat before seaming, chunky knit stitches relax more than you’d expect, and blocking first keeps your seams from puckering.
2. Effortless Wrap Cardigan
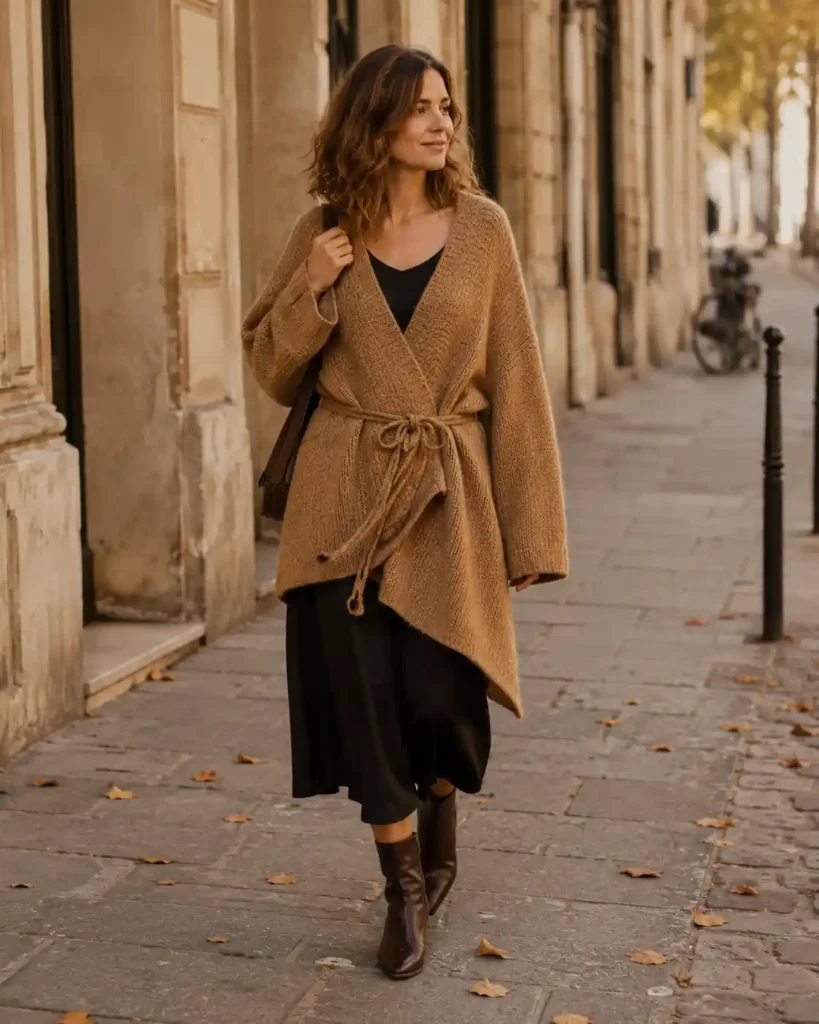
A wrap cardigan solves a specific problem: you want one piece that layers over almost anything without needing to match buttons or find the right dress underneath. There’s no fastening to fuss over, which is exactly what makes it more versatile than a button-front, you tie it once and adjust the drape to however loose or fitted you want that day. I keep mine in the car for exactly this reason; it goes over a sundress in June and over a sweater in October without ever looking wrong for the season. If you want one cardigan that pulls double duty from spring through fall, a wrap style earns its spot in rotation faster than almost anything else on this list.
- Yarn: Worsted to bulky, depending on drape preference
- Best worked in a lightly textured stitch so the front panels don’t gape
- Tip: add a fabric or crochet-chain tie rather than buttons for a cleaner wrap line
3. Beginner-Friendly Easy Crochet Cardigan
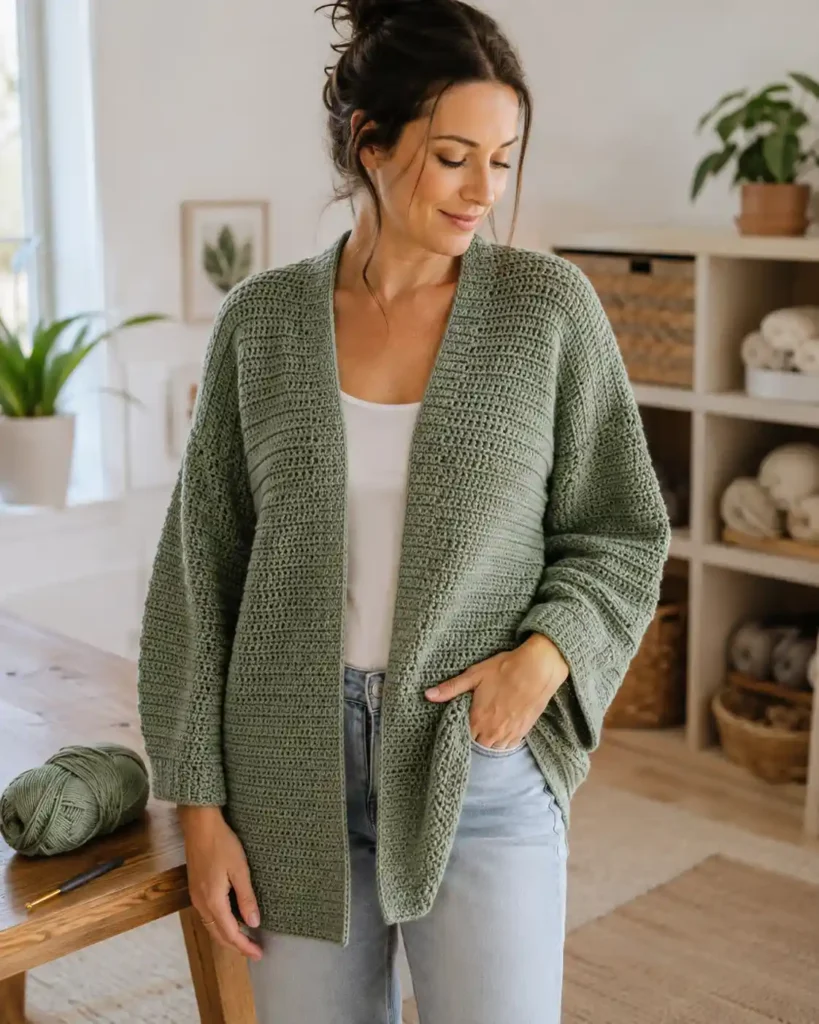
If you’ve never made a garment in crochet before, start here. If you want more options after this one, browse these easy crochet cardigan pattern ideas before choosing your next project. This easy crochet cardigan uses only single and double crochet worked in simple rectangular panels, so there’s no increasing math to track and no sleeve cap to set in. What makes it different from most “beginner” patterns is that it doesn’t feel beginner once it’s finished, the oversized shape hides any minor tension inconsistencies that would be obvious on a fitted piece. My first-ever garment was almost exactly this shape, made on a Sunday afternoon while half-watching a movie, and it’s still the piece I recommend to anyone who says crochet garments intimidate them.
Anyone newer to crochet who wants a real, wearable win (not another granny square) should make this their next hook project.
- Hook: 6.5mm–9mm depending on yarn weight
- Stitch: single crochet or half double crochet throughout
- Finished length: hip-length, roughly 24″–27″
4. Scrap-Busting Crochet Patchwork Cardigan
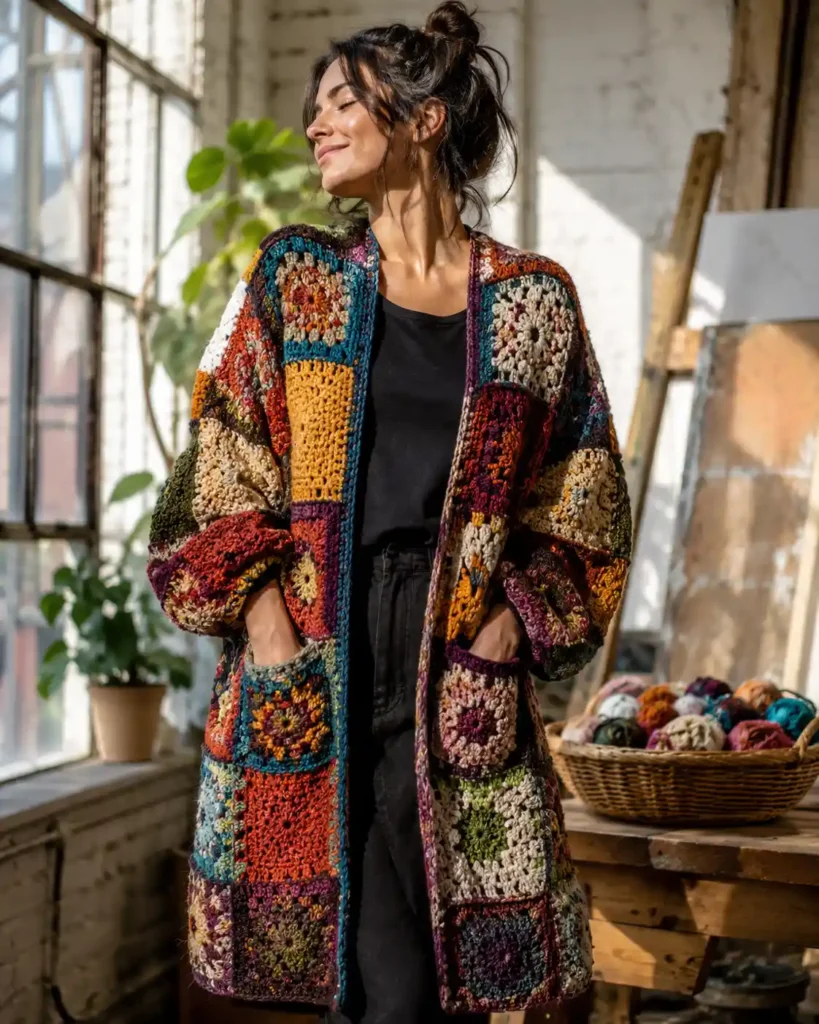
A crochet patchwork cardigan turns a basket of leftover skeins into the most complimented piece in your closet, and that’s really the whole appeal, it’s the one project where mismatched yarn is the design, not a mistake. Where a solid-color cardigan needs enough of one yarn to finish the whole piece, this one only needs enough of any worsted-weight yarn to finish one square or granny stripe at a time. I made mine over an entire winter, a few squares at a time between other projects, and by spring I had a genuinely one-of-a-kind coat that no pattern shop sells.
This is the project for anyone sitting on a yarn stash they can’t quite justify buying more to match, grab it if you want a cardigan that gets more interesting the more scraps you throw at it.
- Squares: 6″–8″ granny squares or crochet motifs, joined as-you-go
- Yarn: any worsted-weight scraps, mixed fiber is fine for a garment (not for baby items)
- Roughly 60–90 squares needed for an average adult medium, depending on size
Special Tip: Lay all your squares out on the floor before joining, arranging color placement ahead of time looks far more intentional than joining in the order you finished them.
5. Classic Button-Up Cardigan
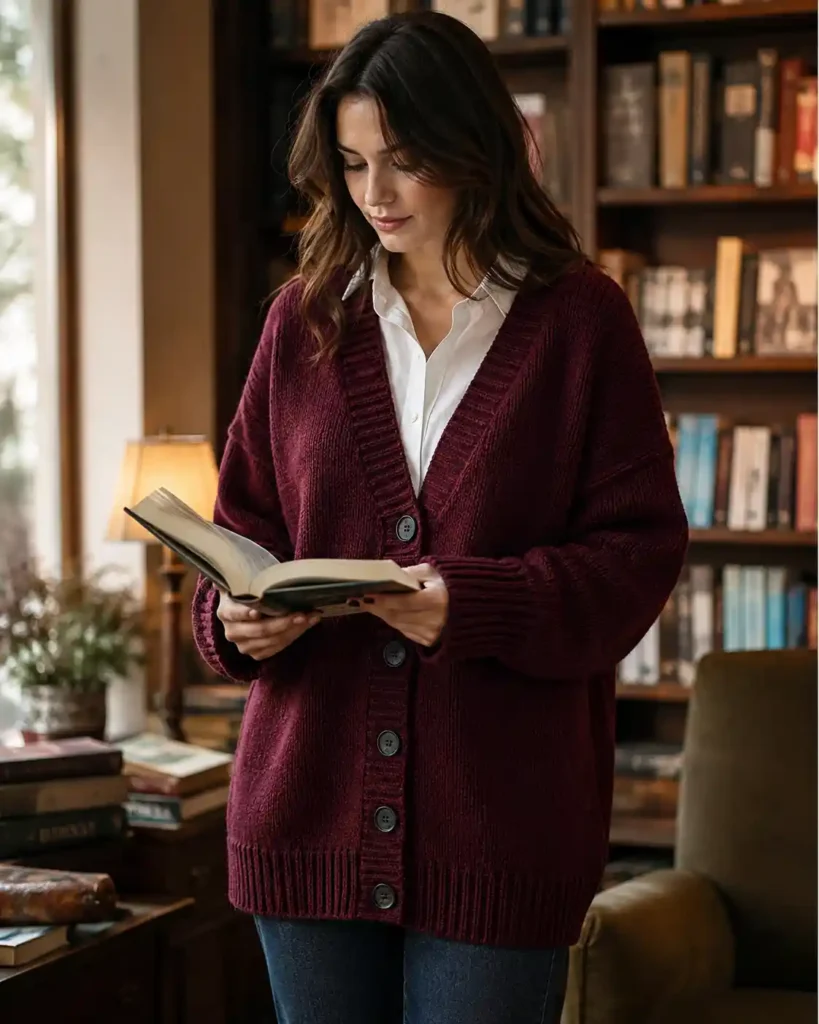
There’s a reason the button-up cardigan never really goes out of rotation: it’s the one style that reads as “put together” even when everything under it is a plain t-shirt. Compared to an open cardigan, buttons give you a defined front closure and a cleaner line when you actually do want it closed, for work, for layering under a coat, for anywhere a wrap style feels too casual. I add buttonholes as I go rather than cutting them in afterward, which keeps the front bands from stretching out of shape over time. Pick this one if your closet is missing a cardigan you can button all the way up and wear like a light jacket, not just throw over your shoulders.
- Button bands: worked in 1×1 rib or garter for stability
- Buttons: 5–7 large (1″–1.25″) buttons spaced 3″–4″ apart
- Best in a firmer worsted-weight yarn so the button bands hold their shape
6. Floor-Length Long Crochet Cardigan
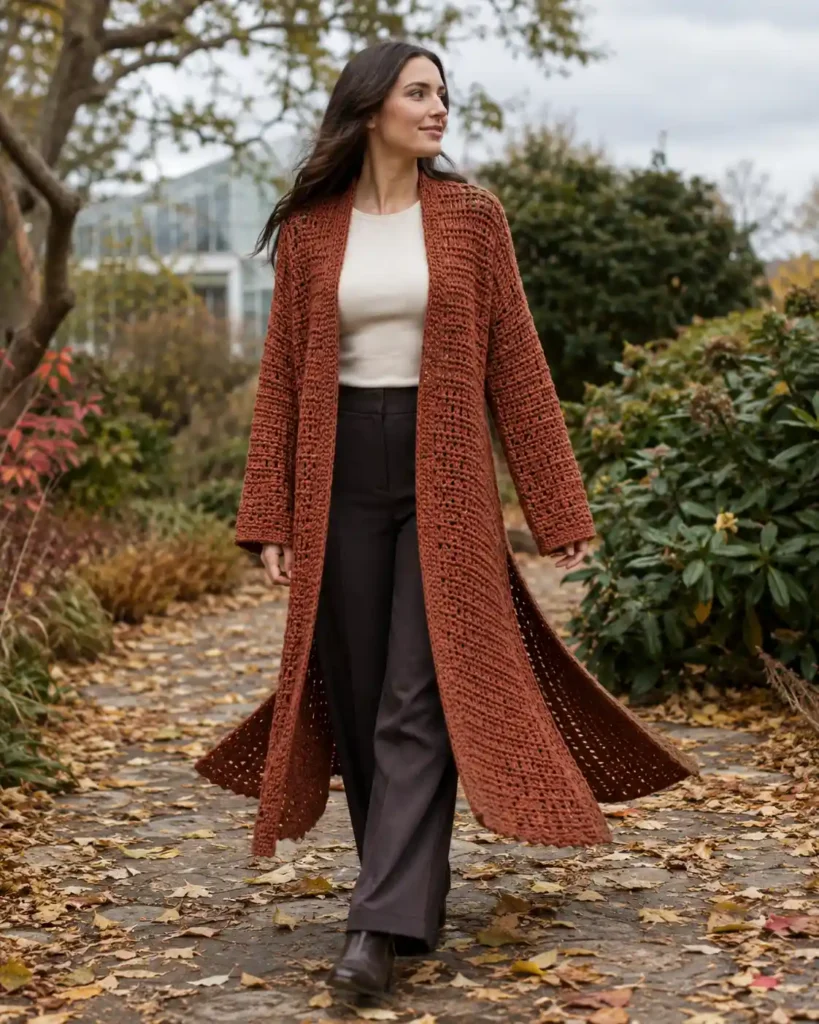
For genuine drama, nothing on this list beats a long crochet cardigan that hits mid-calf or lower. The length does most of the styling work for you, it turns jeans and a plain top into an outfit without you doing anything else. Unlike a hip-length cardigan, this one is closer to a duster coat than a sweater, so it wants a lighter worsted or DK yarn; a bulky yarn at this length gets heavy fast and pulls on the shoulders. I wear mine open over almost every fall outfit I own because it’s the fastest way to make a plain look feel finished.
If your wardrobe leans minimalist and you want one piece that instantly elevates it, this is the make.
- Yarn: DK to worsted weight (avoid bulky at floor length, too heavy)
- Finished length: 45″–52″ depending on height
- Add side slits from the hip down for ease of movement
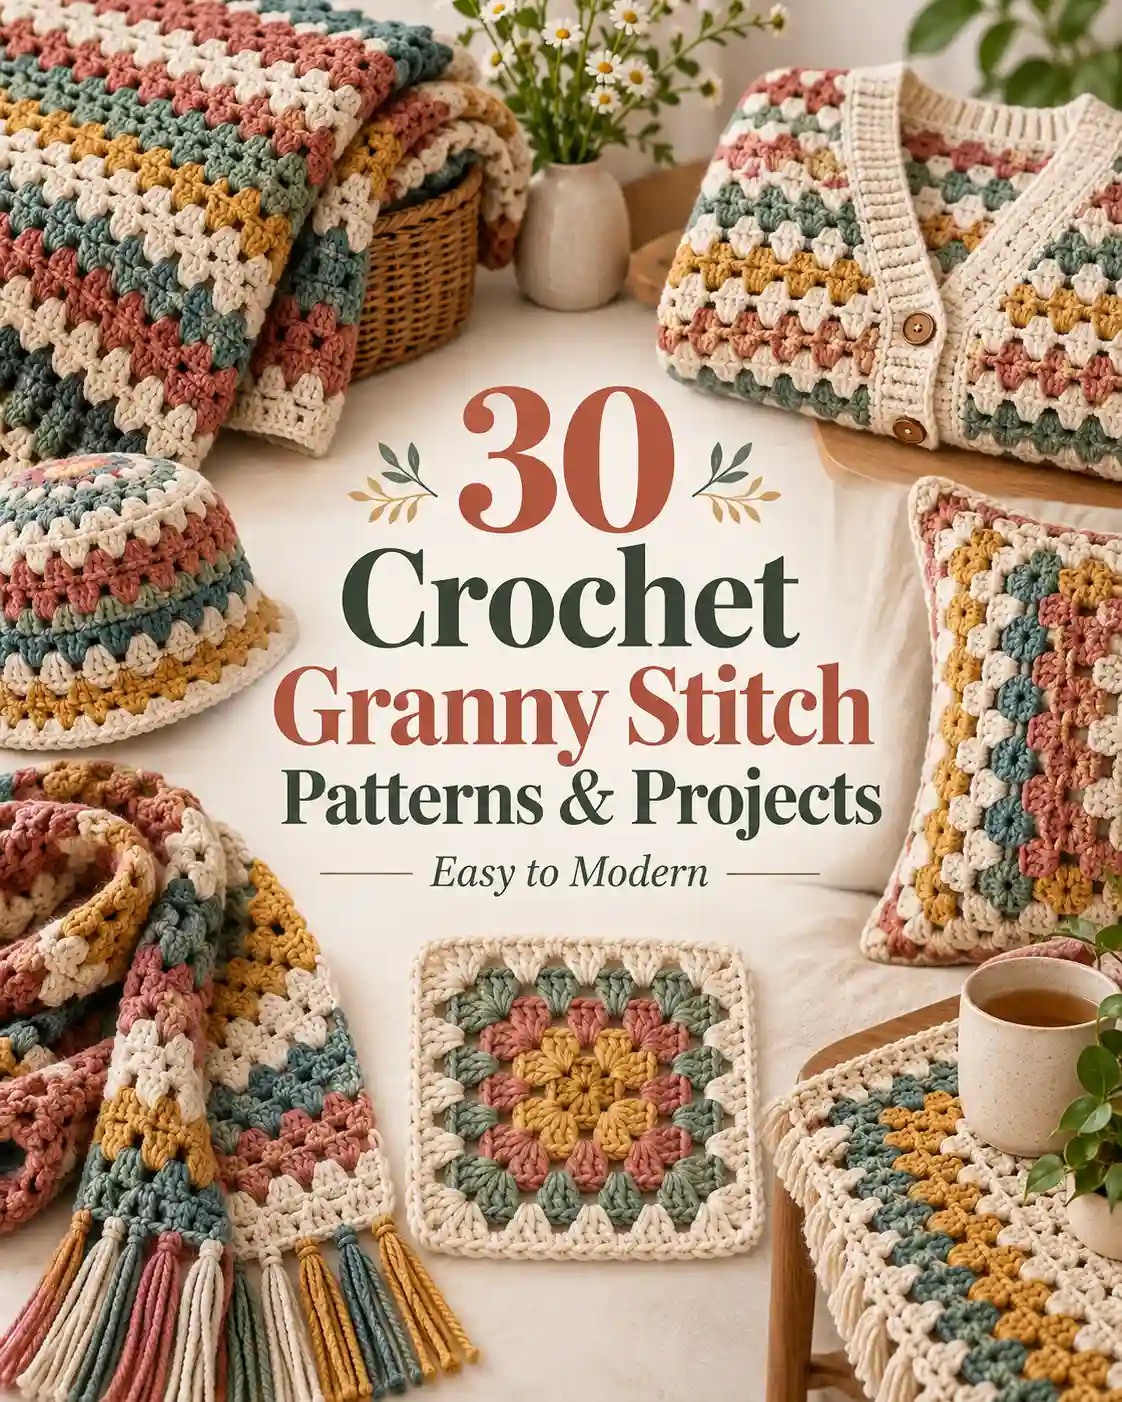
7. Stash-Friendly Granny Square Cardigan
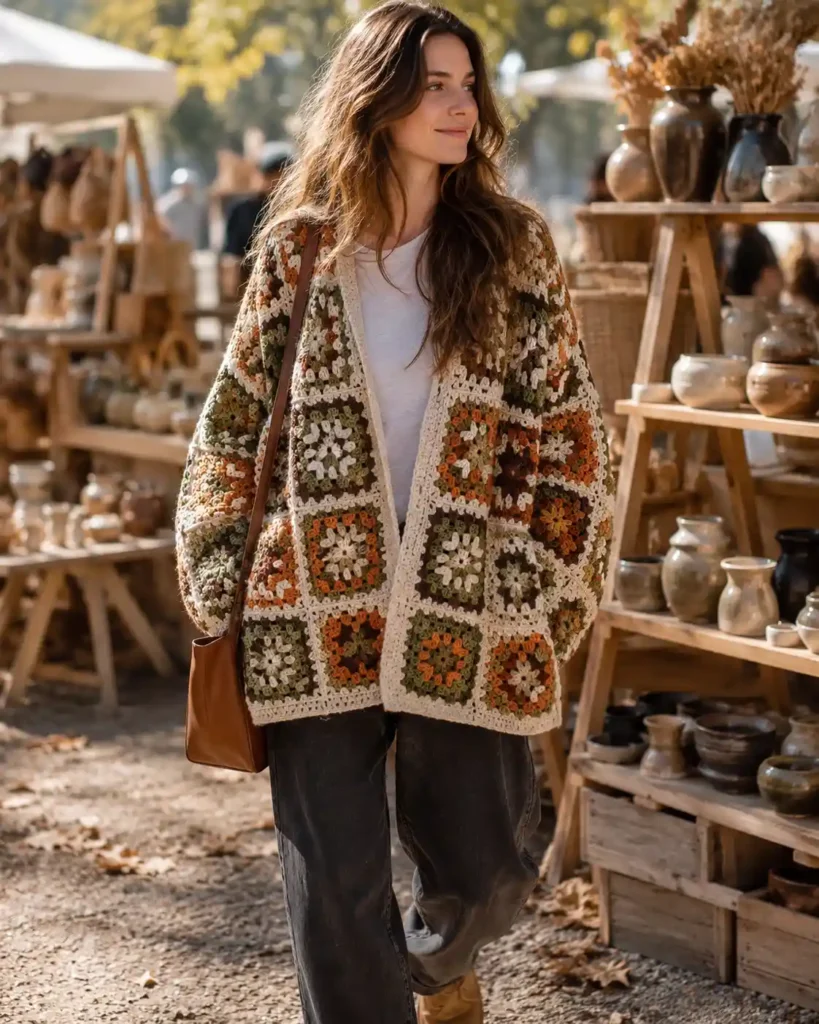
A granny square cardigan is the crochet equivalent of a patchwork quilt you can wear, and it’s genuinely one of the most forgiving garment shapes to size up or down; you simply add or remove rows of squares until it fits. Where the patchwork cardigan above mixes colors freely, this version usually sticks to a repeating two- or three-color palette, which makes it read as more intentional and less scrappy. I like starting mine at the back panel and working outward, so I can try it on my own shoulders as I go instead of guessing at gauge.
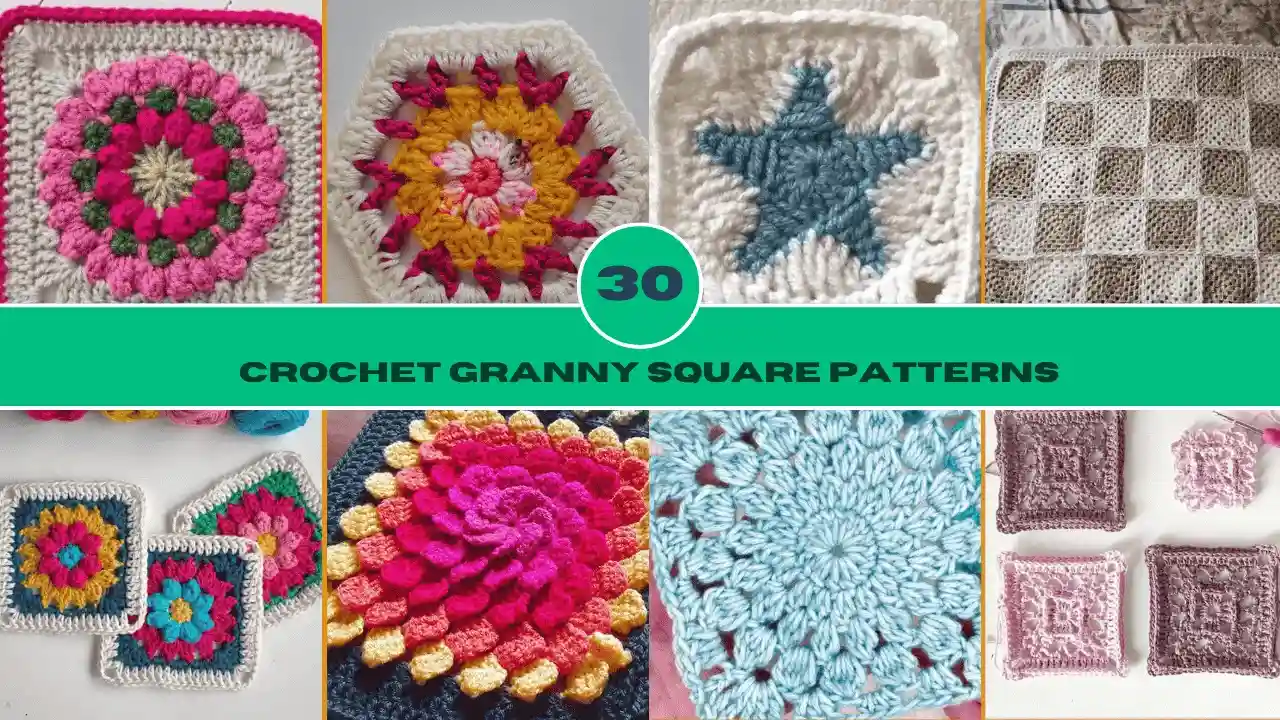
Anyone who loves the nostalgic granny-square look but has only ever made blankets with it should try scaling the same skill up to a garment, and these crochet granny square patterns give you more motif ideas to work from.
- Motif size: 4″–5″ squares in worsted weight
- No sewing required if joined-as-you-go with slip stitch or single crochet
- Great for using multiple coordinating skeins from one dye lot family
8. Textured Waffle Stitch Cardigan
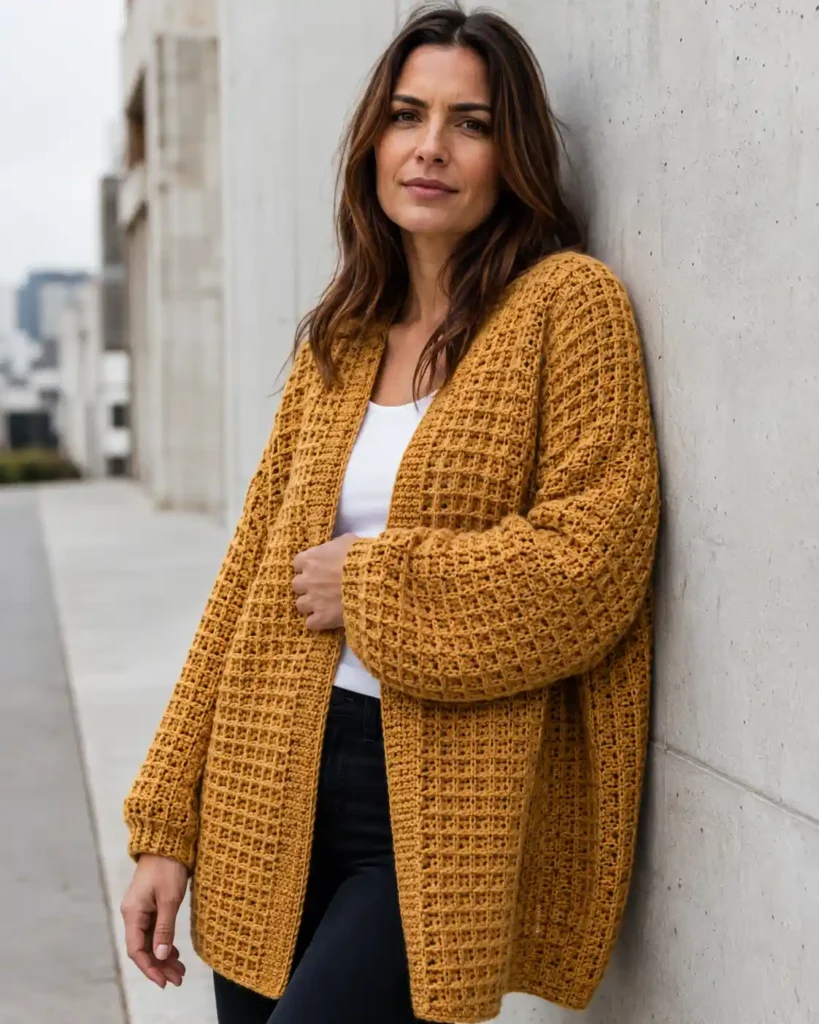
The waffle stitch, a raised, grid-like texture made from alternating front and back post stitches, gives an oversized cardigan visual interest without needing any actual color work. What sets it apart from a plain stockinette or single crochet body is the depth: the fabric has real dimension, so it photographs (and drapes) better than a flat stitch at the same oversized proportions. It took me two false starts to get the post-stitch rhythm memorized, but once it clicks it becomes almost meditative to work. This is the one to reach for if you want a textured statement piece but don’t want to commit to a full cable pattern’s stitch counting.
- Stitch: alternating front-post/back-post double crochet or knit, 4-row repeat
- Yarn: worsted weight shows the texture best
- Works up slightly denser than plain stitches, size up your hook or needle if it feels stiff
9. Ribbed Oversized Cardigan
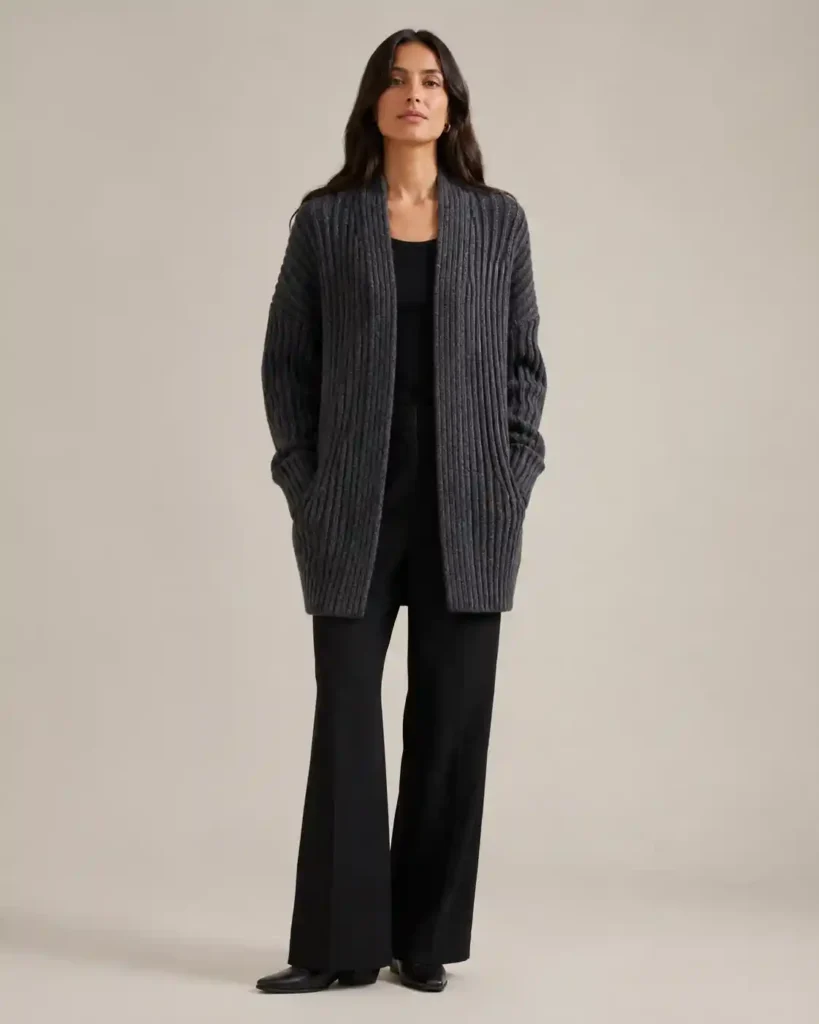
Working the entire body in 2×2 or 3×3 rib does something a flat stockinette body can’t: it lets the fabric stretch and recover, so the cardigan skims the body at the ribbing points (cuffs, hem) while still staying loose through the middle. That built-in stretch is what makes a ribbed cardigan feel oversized without feeling shapeless the way a straight rectangle sometimes can.
I reach for mine specifically on days I want “put-together loose” rather than “just rolled out of bed loose” the rib reads as more deliberate. If your other cardigans all feel a little sack-like, this is the fix.
- Stitch: 2×2 or 3×3 rib throughout body and sleeves
- Uses roughly 15–20% more yarn than stockinette at the same gauge
- Ribbing naturally tapers the cuffs and hem for a cleaner finish
10. Heritage Cable Knit Cardigan
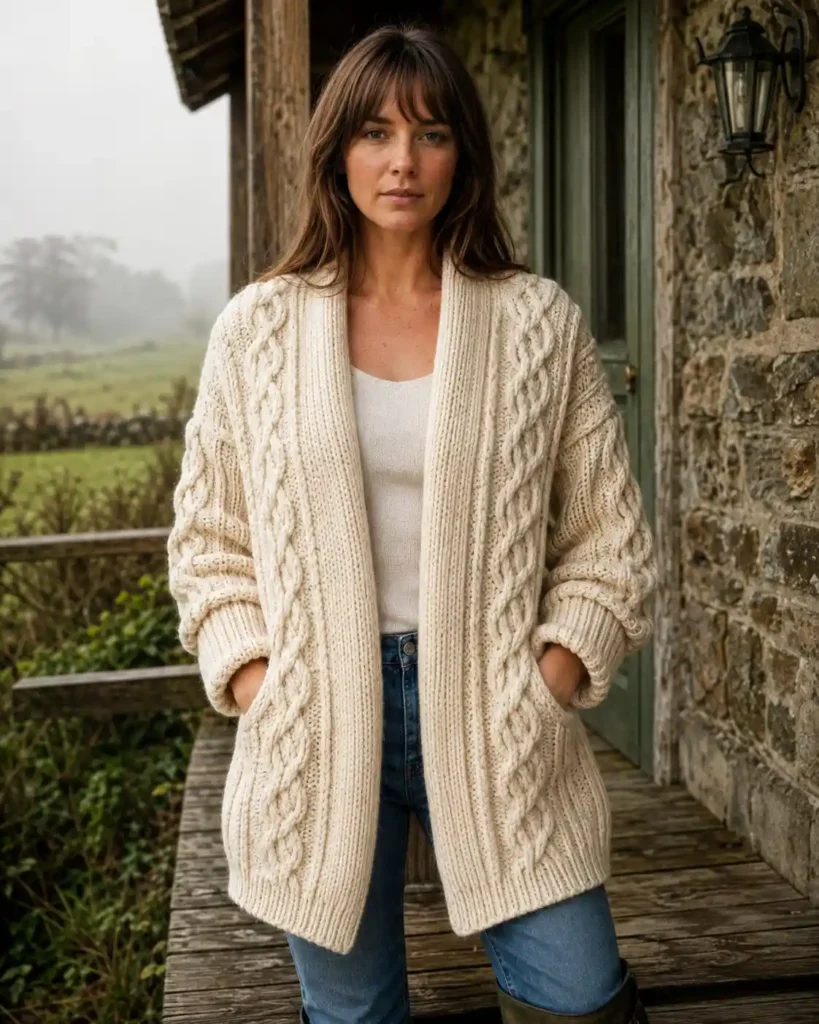
A cable knit cardigan is the pattern for anyone ready to move past basic stitches, the twisted cable panels running up the front and sleeves take real concentration, but they turn an otherwise simple oversized shape into something that looks like it came from a much higher price tag. Unlike the waffle or ribbed textures above, cables need a cable needle (or the confidence to work without one) and a chart you actually follow row by row.
I save cable projects for long flights specifically because the counting keeps my hands busy and my brain quiet in a way plain stockinette doesn’t. Grab this one once you’ve got a finished garment or two under your belt and you’re ready for something that’ll get complimented by name.
- Yarn: worsted to Aran weight (cables need stitch definition, so avoid fuzzy or highly variegated yarn)
- Uses roughly 20–25% more yardage than the same shape in stockinette
- A cable panel chart is essential, this isn’t a memorize-as-you-go pattern
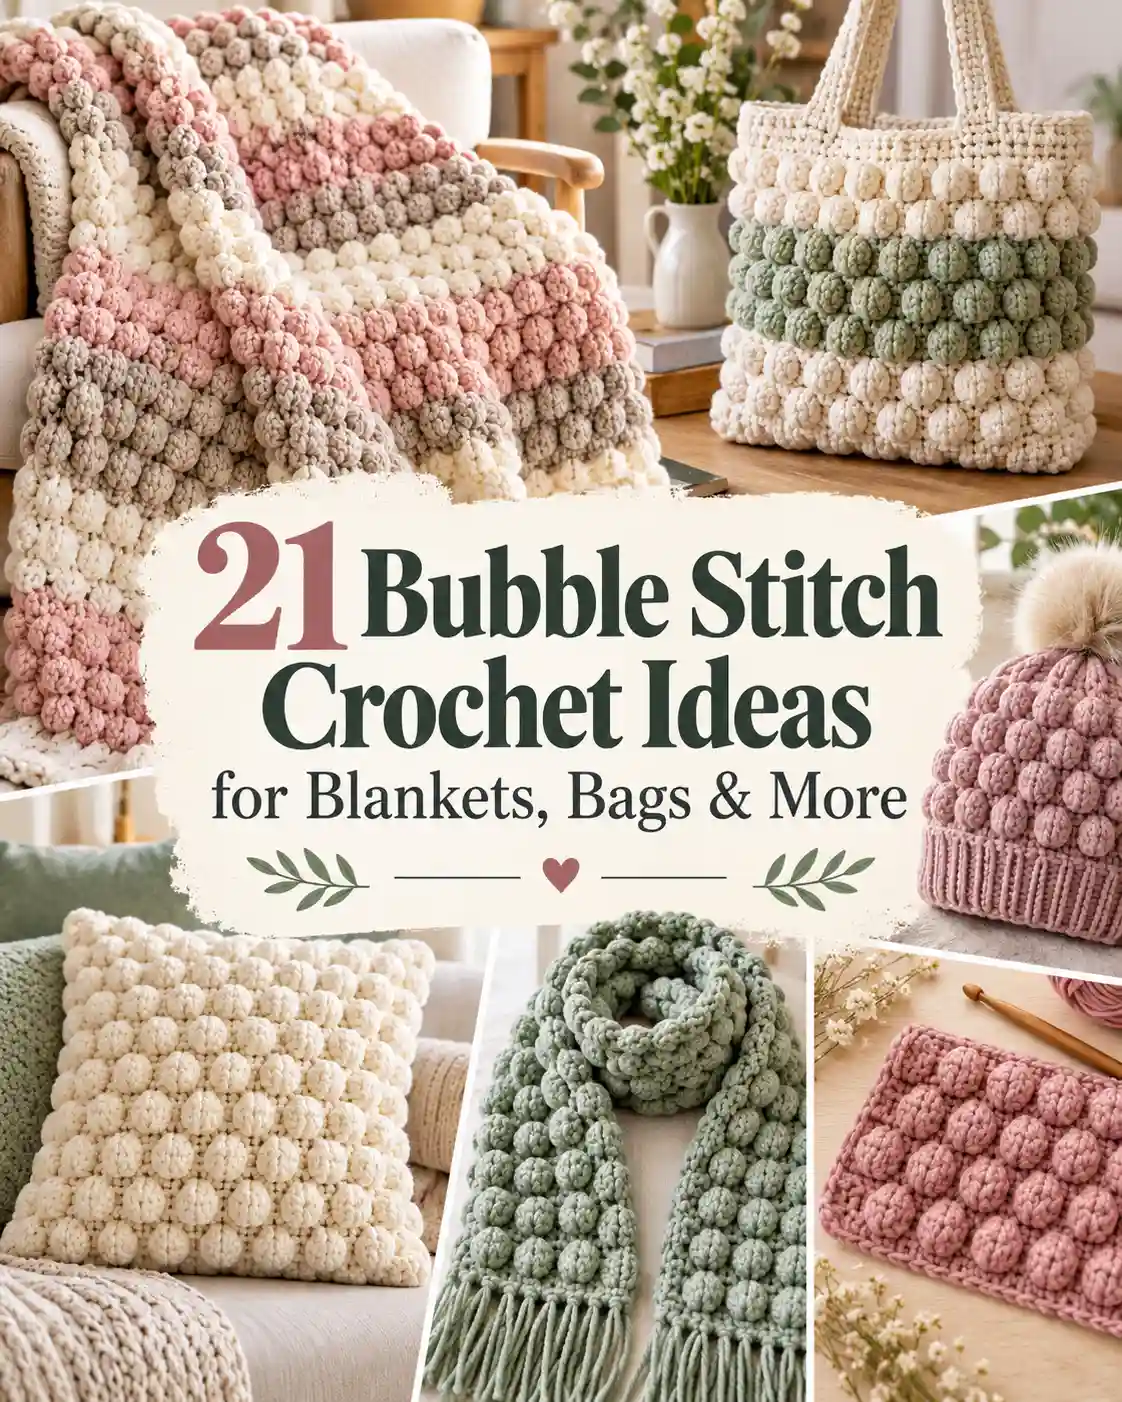
11. Bubble Bobble Stitch Cardigan
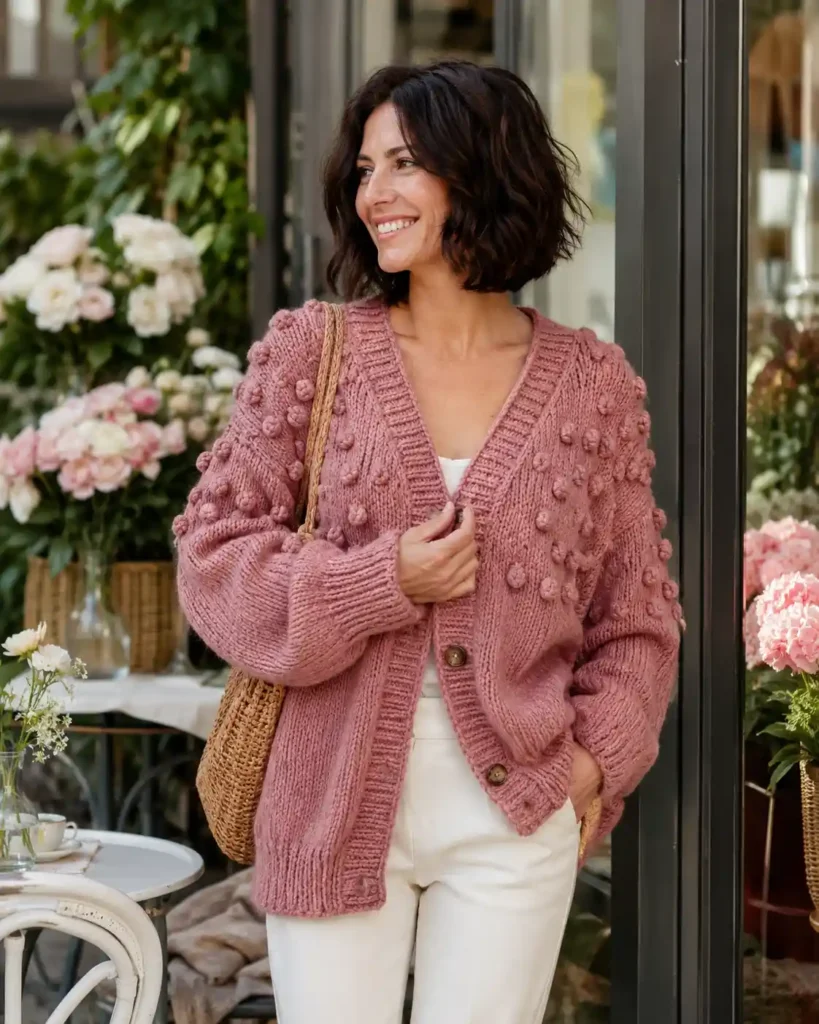
Bobble stitches, small clusters of stitches worked into one point and closed off, add texture in a completely different way than cables or waffle stitch: instead of a continuous pattern, you get scattered raised dots that break up a plain surface. If you’re new to crochet bobble stitch, practice the raised texture on a swatch before working it across the cardigan. It’s a fun option if you want something more playful than a heritage cable but still more detailed than plain stockinette. I scatter my bobbles randomly across the yoke rather than in a strict grid, which ends up looking more like an intentional design choice than a repeat I couldn’t finish evenly.
This is the pick for anyone who wants their cardigan to look handmade in the best sense of the word.
- Bobble placement: every 6th–8th stitch, staggered by row for a scattered effect
- Yarn: solid or semi-solid colors show bobble texture best (variegated yarn hides it)
- Best worked at a slightly looser gauge so bobbles don’t pull the fabric tight
12. Boxy Drop-Shoulder Cardigan
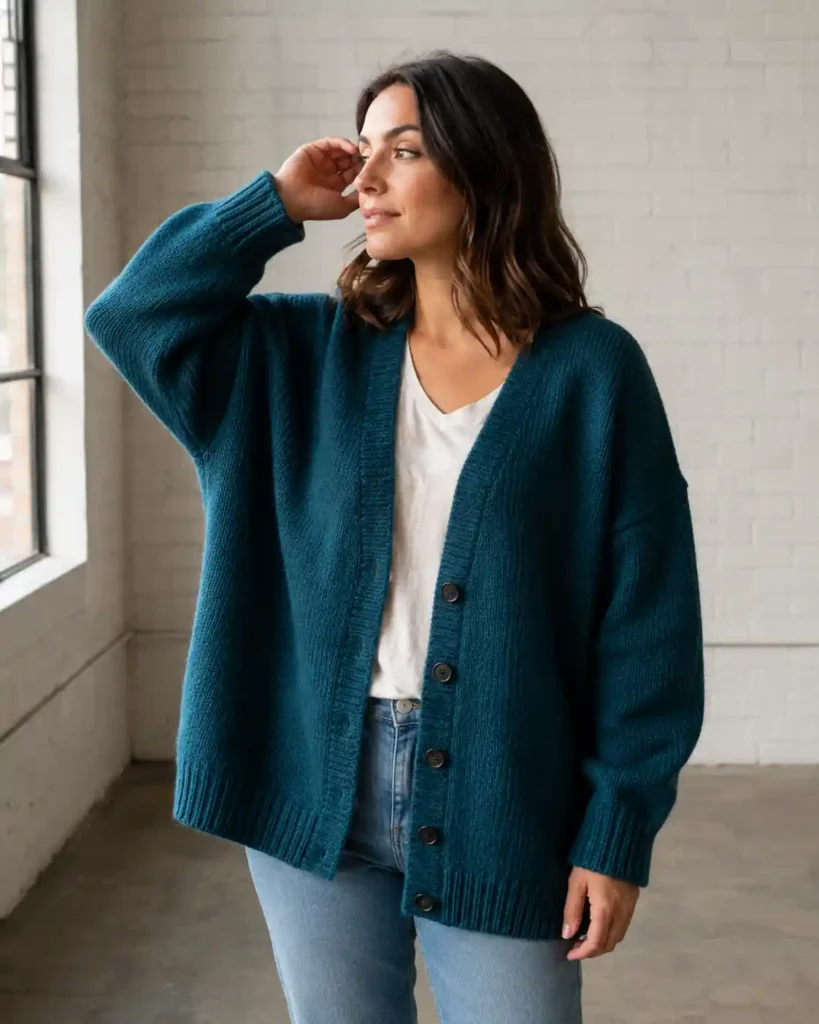
The drop-shoulder construction is what actually makes a cardigan look oversized in photos, the shoulder seam sits an inch or two down your upper arm instead of at your actual shoulder point, which is the single biggest visual cue for “intentionally loose” versus “just a big sweater.” Compared to a set-in sleeve, drop-shoulder is also dramatically easier to construct: no sleeve cap shaping, no easing extra fabric into an armhole.
I default to this construction whenever I’m designing something new because it’s genuinely hard to get wrong even when you’re improvising sizing. If you only take one styling lesson from this whole list, it’s that shoulder drop matters more than total volume for getting that oversized look right.
- Shoulder drop: 2″–4″ beyond natural shoulder point for a true oversized silhouette
- Sleeves worked flat and seamed, or picked up and knit down for a seamless finish
- Works in nearly any yarn weight, the shape does the styling work
13. Enveloping Cocoon Cardigan
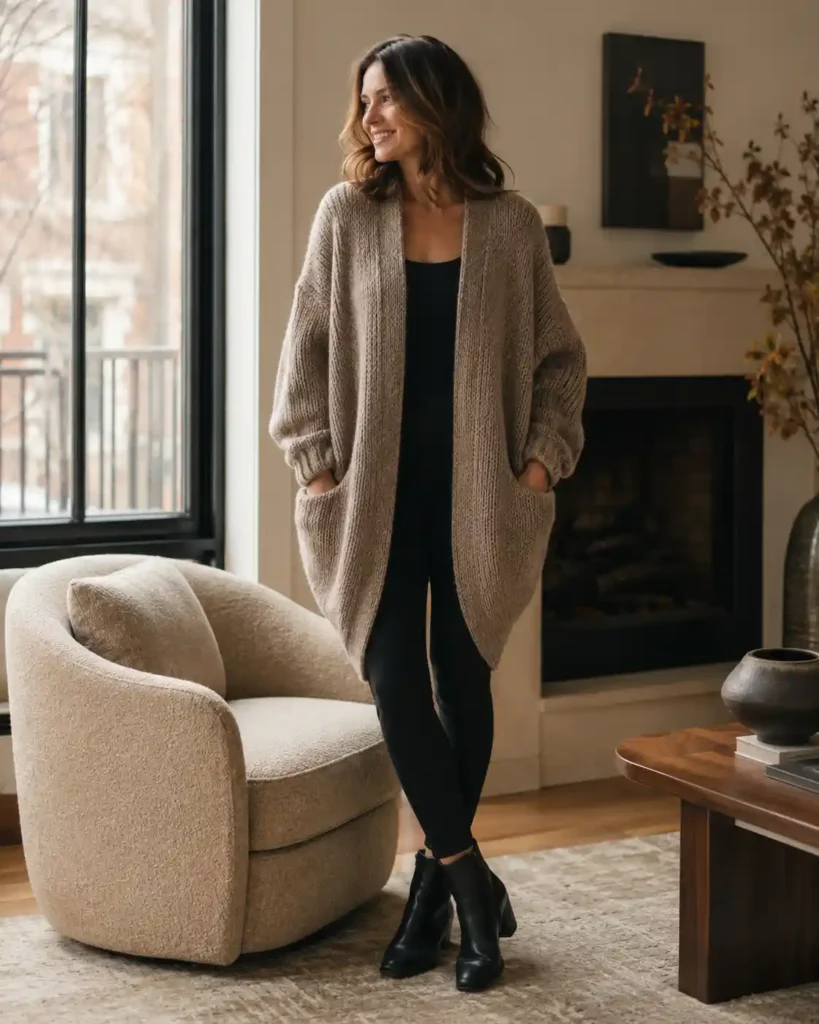
A cocoon cardigan tapers in at the hem while staying full through the body and shoulders, which gives it a rounded, enveloping shape unlike the straight-sided rectangles most of this list is built from. That taper is what keeps a genuinely oversized piece from looking like a blanket with armholes, it still has a defined silhouette, just a soft one.
I find this shape especially good over leggings or slim pants, since the narrower hem balances out the volume up top instead of doubling it. If you’ve tried an oversized cardigan before and felt like it swallowed your whole outfit, the cocoon shape is worth trying instead.
- Shaping: gradual decreases from underarm to hem, roughly 1 stitch every 4 rows
- Yarn: a yarn with good drape (not stiff acrylic) shows the cocoon shape best
- Finished hem circumference should be 8″–10″ narrower than the bust
14. Colorblock Striped Cardigan
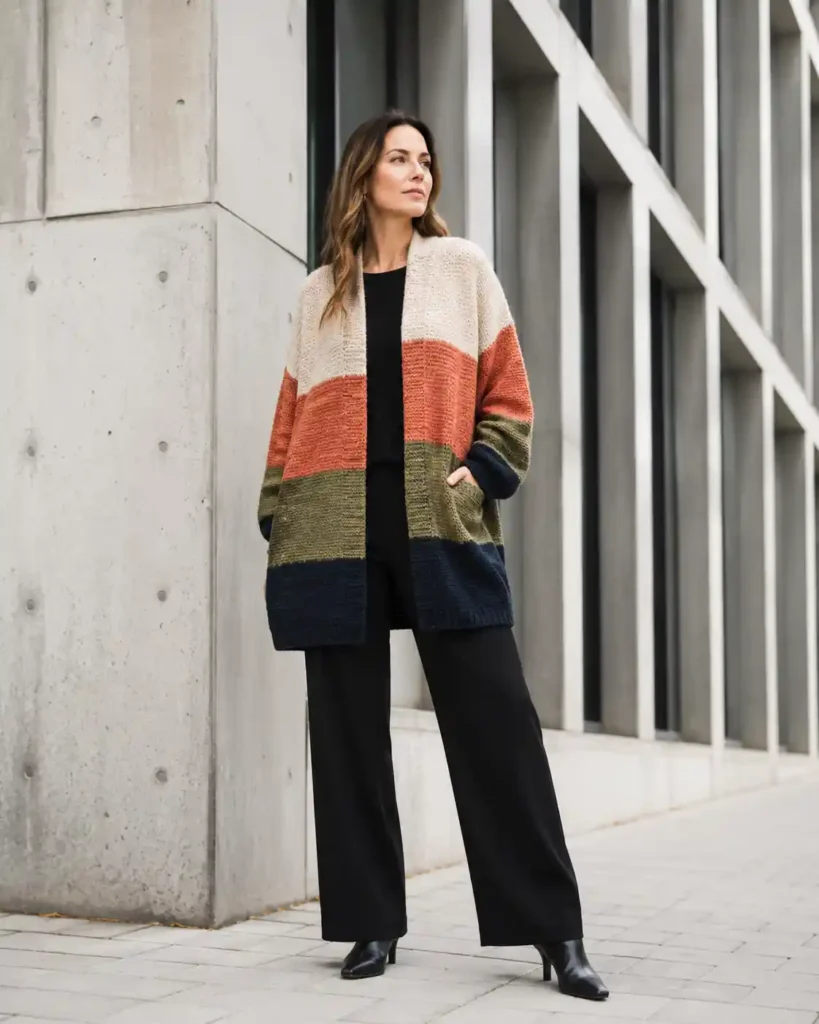
Working an oversized cardigan in blocks of color instead of one solid shade is the easiest way to make a beginner-shape pattern look designer-made, the color changes do all the visual work while the actual construction stays as simple as the basic rectangles from pattern #1. Unlike thin stripes, which read as “casual,” wide color blocks (6″+ sections) read as intentional and modern. I plan my color placement before casting on, usually putting the darkest block at the hem to ground the silhouette.
This is the move for anyone who wants a statement piece but isn’t ready to tackle cables or lace to get it.
- Color blocks: 3–4 colors in 6″–10″ sections, worked in stockinette or single crochet
- Carry yarn up the side edge between blocks rather than cutting, to minimize ends to weave in
- Works in any weight; bulky yarn makes the color blocking read even bolder
15. Pocketed Slouchy Cardigan
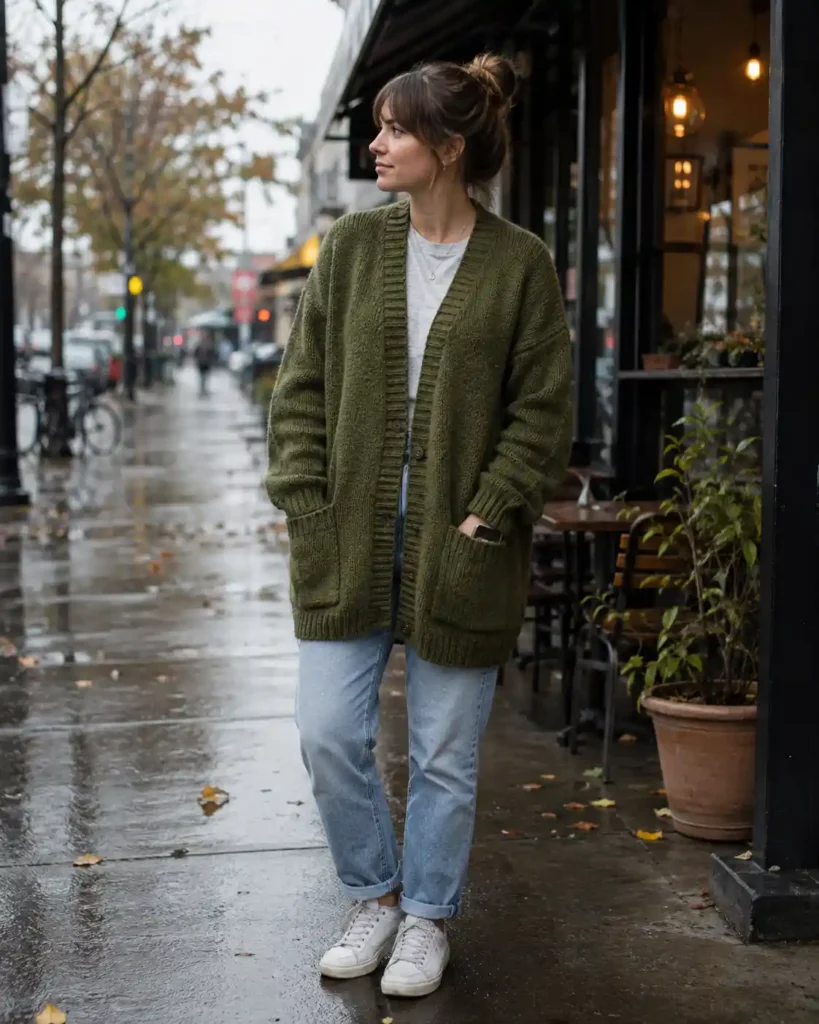
Deep patch pockets change how often you actually reach for a cardigan, mine gets worn on laundry days specifically because I can shove my phone in the pocket and not carry a bag. Beyond function, pockets also add visual weight low on the body, which balances out the volume of an oversized shape and keeps it from looking top-heavy. I always knit or crochet pockets as a separate flat piece and sew them on last, which makes placement much easier to adjust than building them into the body as you go.
If you’ve made an oversized cardigan before and found yourself wishing it did more, adding pockets is the upgrade that gets used daily.
- Pocket size: 6″ x 7″ minimum for phone/hand use
- Sew on after blocking, positioned 2″–3″ above the hem
- A garter or rib pocket edge matches most cardigan hem treatments
16. Open-Front Duster Cardigan
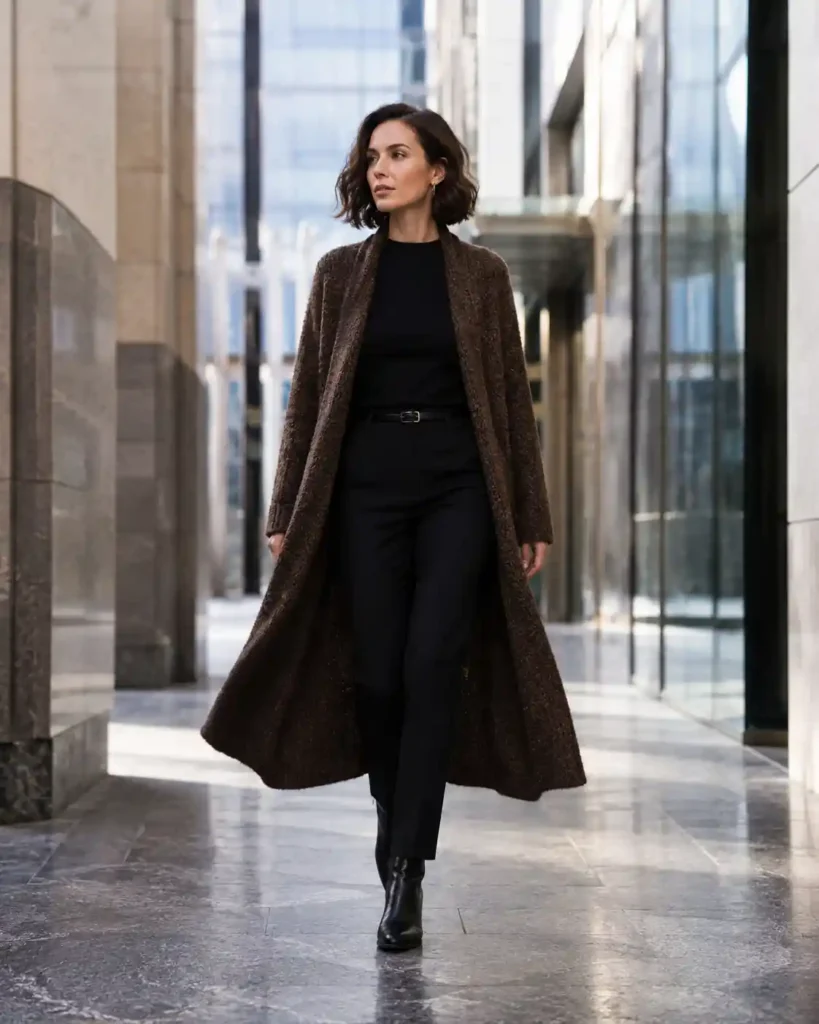
A duster-length open cardigan skips buttons and closures entirely and relies on length and drape to do the styling, it’s meant to be worn open, moving as you walk, rather than wrapped or buttoned closed. That’s a different design goal than the wrap or button-up styles above: this one is about movement and silhouette, not warmth or closure. I wear mine over fitted pieces specifically because the contrast between a slim base layer and a flowing duster on top is what makes the whole outfit work.
This is the pattern for anyone building toward a more editorial, less cozy-cabin aesthetic.
- Length: knee-length to floor-length
- No front bands needed, a rolled or garter edge keeps the front from curling
- A lighter DK or worsted yarn gives the best movement; bulky yarn drapes stiffly at this length
17. Hooded Oversized Cardigan
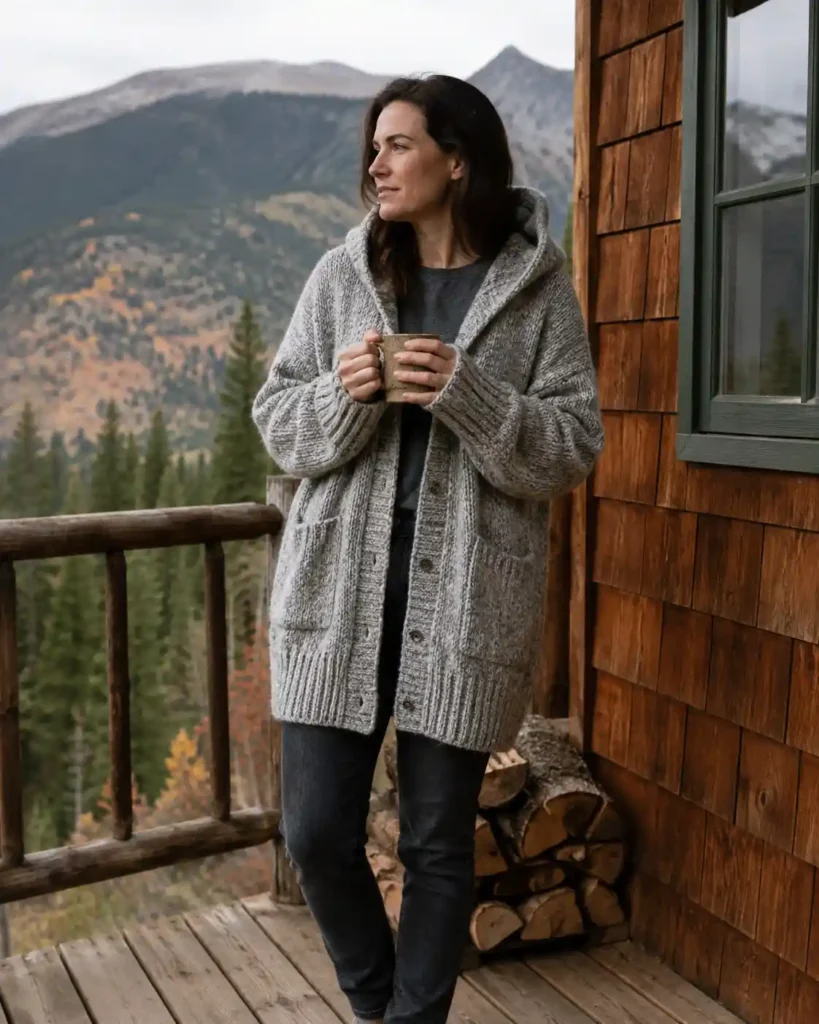
Adding a hood turns a basic oversized cardigan into something closer to a wearable blanket, and it’s the detail that gets the most “where did you buy that” comments of anything on this list. The construction challenge is picking up stitches evenly around the neckline so the hood sits centered instead of pulling to one side, worth practicing on a smaller project first if you’ve never done it. I size my hoods slightly larger than “fitted” on purpose, since an oversized cardigan with a snug hood looks mismatched.
Reach for this pattern if you’re making a cardigan for genuinely cold climates, not just indoor layering.
- Hood: picked up around neckline, roughly 24–30 stitches depending on gauge
- Add 1″–2″ extra hood depth for an oversized, slouchy hood to match the body
- Works especially well in bulky yarn for maximum coziness
18. Fringe-Trim Boho Cardigan
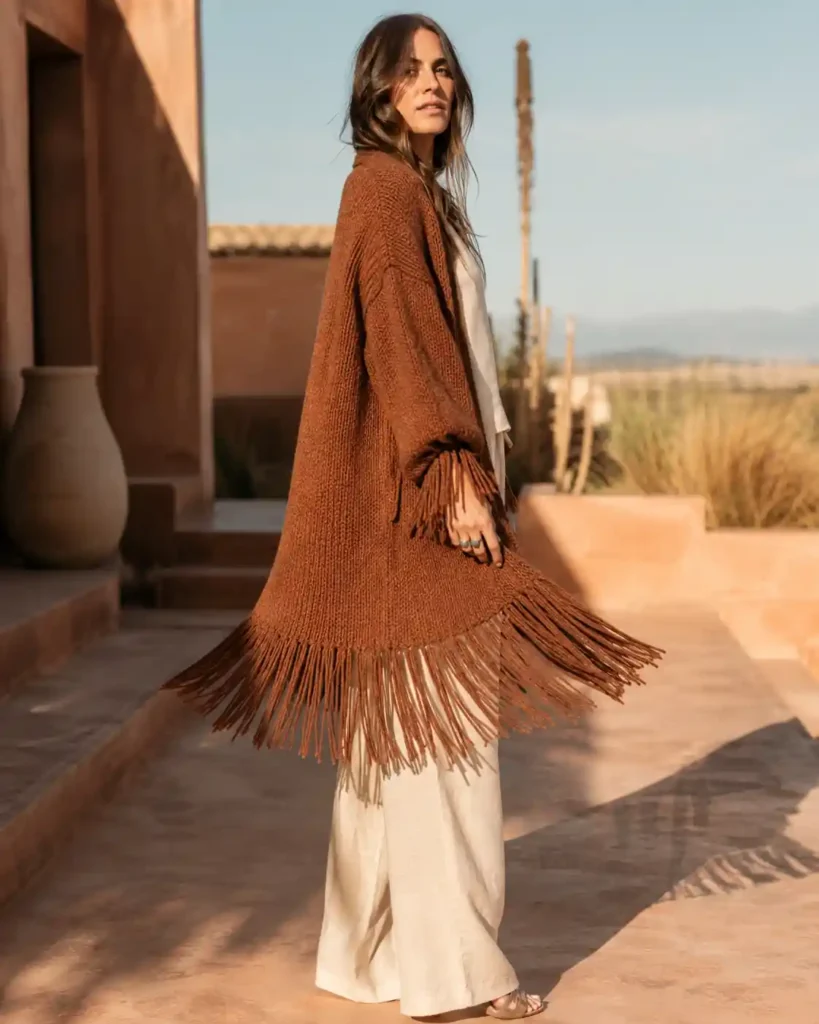
Fringe along the hem and cuffs adds movement and a distinctly boho edge to an otherwise simple oversized shape, it’s one of the few finishing details that changes the whole personality of a pattern without changing a single stitch of the construction. Unlike pockets or a hood, fringe is added entirely at the end, so you can make this decision after the cardigan is already finished if you’re not sure going in. I cut mine in batches of three strands per knot, which gives fuller movement than single strands without looking overdone.
This is an easy add-on for anyone who already has a finished oversized cardigan they want to update rather than a from-scratch project.
- Fringe length: 5″–7″ cut strands, folded and knotted through the hem edge
- Spacing: every 1″–1.5″ along the hem and cuff edges
- Works in any weight; contrasting fringe color adds extra visual interest
19. Basketweave Textured Cardigan
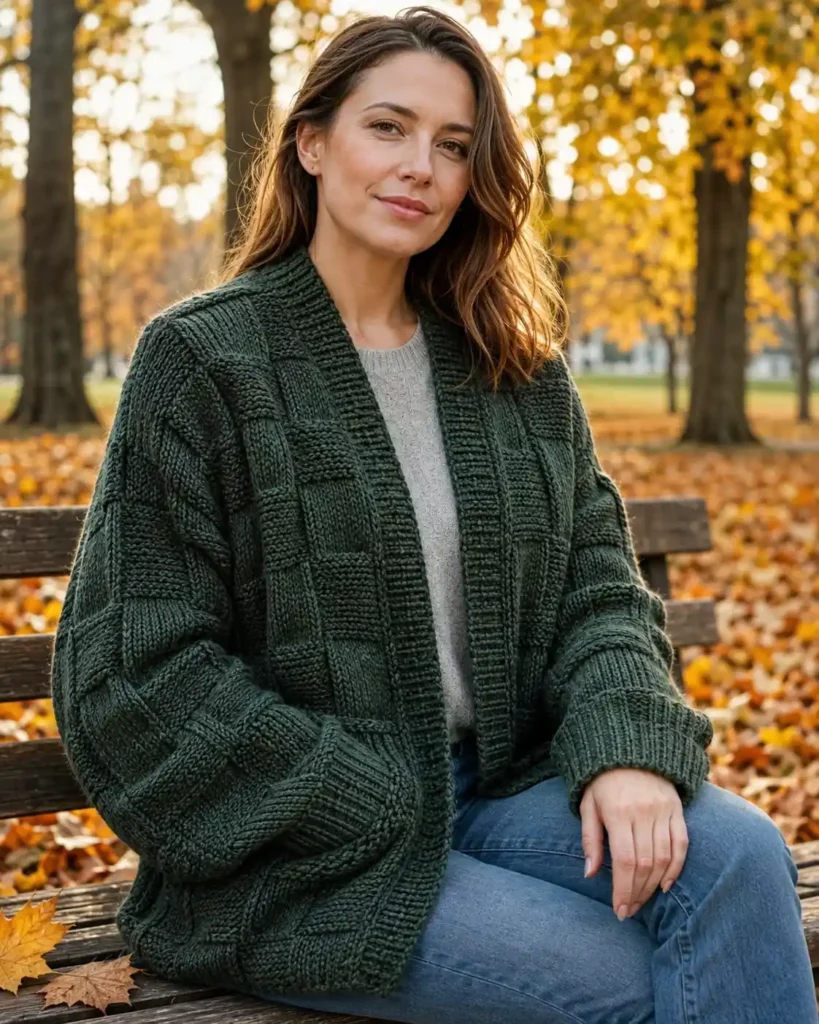
Basketweave alternates blocks of knit and purl (or front-post and back-post crochet stitches) to create a woven-looking checkerboard texture, which sits somewhere between the subtlety of ribbing and the boldness of cables. What makes it a good pick for an oversized cardigan specifically is that the texture reads clearly even at a distance, which matters when the whole point of an oversized silhouette is visual impact.
I find it far more forgiving to keep track of than cables since it’s just knit and purl blocks, no cable needle required. This is a strong middle-ground choice if waffle stitch feels too plain and cables feel like too much commitment.
- Stitch: alternating 4×4 knit/purl or post-stitch blocks
- Yarn: worsted weight, solid colors show the pattern best
- No cable needle required, making it more beginner-accessible than true cables
20. Meditative Moss Stitch Cardigan
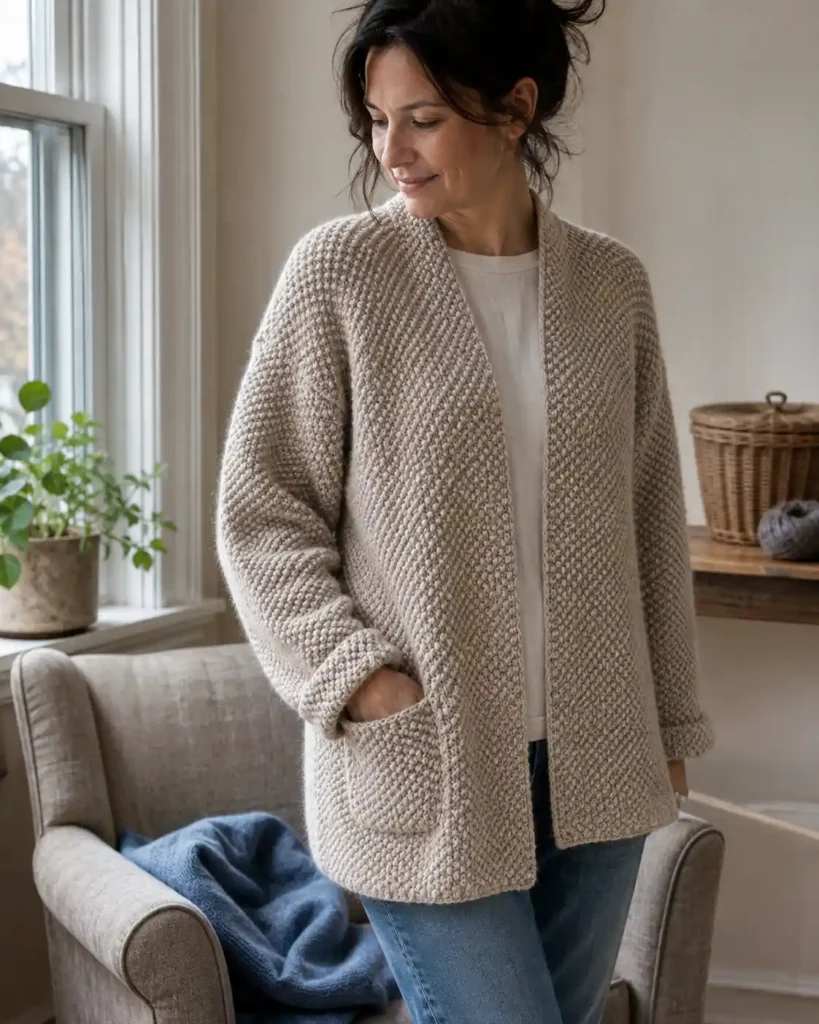
Moss stitch (also called seed stitch in knitting) creates a dense, bumpy, reversible texture that lies completely flat, no curling edges, which means less finishing work than plain stockinette. If you’re making the crochet version, review moss stitch crochet before committing to a cardigan-sized project. That flatness is genuinely useful on an oversized cardigan, since a heavy stockinette body can roll at the edges under its own weight over time. I use moss stitch specifically for the front bands and collar of other patterns on this list even when the body is a different stitch, just to keep those edges lying flat.
If you’re tired of blocking edges that curl right back up after washing, this stitch solves that problem structurally instead of fighting it every time.
- Stitch: alternating knit/purl every stitch, offset every row (k1p1 in knit; single crochet through back loop only in crochet for a similar effect)
- Naturally lies flat, no need for a separate garter or rib border
- Denser fabric means slightly less yardage-efficient than stockinette at the same size
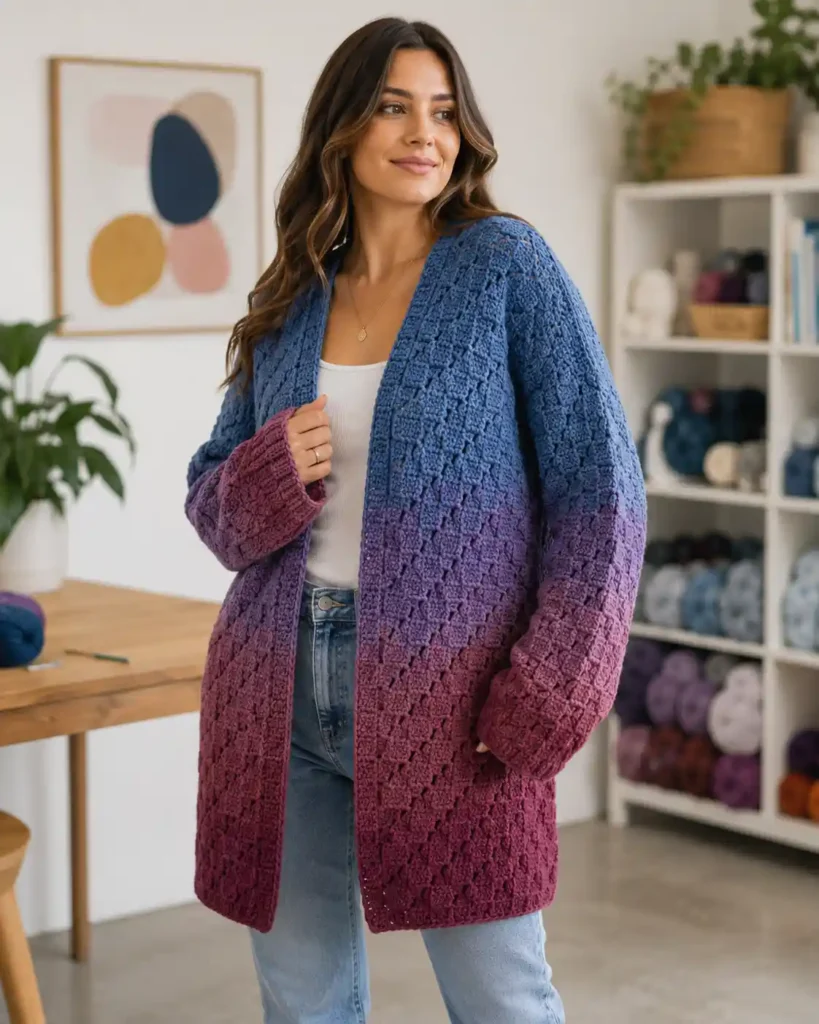
21. Corner-to-Corner (C2C) Crochet Cardigan
C2C crochet cardigan patterns are worked diagonally in growing and shrinking blocks rather than straight rows, which gives you a distinctive diagonal texture and makes color-blocking or gradient yarn look genuinely striking. It’s a different skill than the row-by-row patterns above, you’re building corner-to-corner triangles that combine into panels, so it takes a project or two to get comfortable with the increase/decrease rhythm. I like this technique specifically for gradient or self-striping yarns, since the diagonal structure makes the color transitions look intentional rather than random.
This is the pick for crocheters who already know C2C from blankets and want to graduate to a wearable version of the same technique.
- Technique: corner-to-corner double crochet blocks, joined into front/back/sleeve panels
- Gradient or self-striping yarn shows the diagonal structure best
- More yarn-intensive than straight rows, budget 10–15% extra yardage
22. Shawl-Collar Cardigan
A wide, folded shawl collar changes the whole neckline of an oversized cardigan from “crew-neck sweater” to something closer to a robe or coat, it’s a small construction change with an outsized effect on how finished the piece looks. Compared to a plain ribbed neckband, the shawl collar takes more yardage and more careful blocking to sit flat and fold correctly, but it’s what gives the cardigan its most elevated, “this looks store-bought” impression.
I always block the collar separately, pinned into its folded position, before I ever wear the finished piece, skipping that step is the difference between a collar that drapes and one that just flops. Make this your next project once you’ve got the confidence for a slightly more involved finishing process.
- Collar: worked as an extension of the front bands, folded back and tacked at the shoulder
- Needs a good 15%+ extra yardage over a standard ribbed neckband
- Best in a yarn with drape (wool blends, alpaca) rather than stiff acrylic
23. Vintage-Inspired Puff Sleeve Cardigan
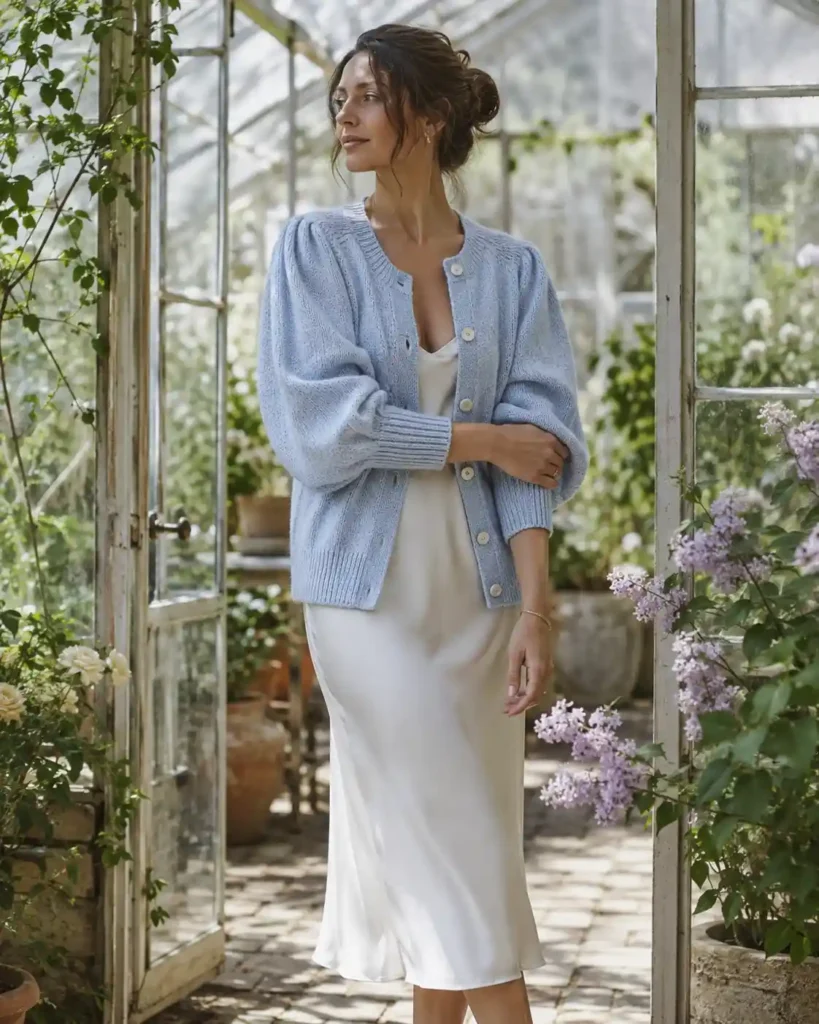
Puff sleeves, gathered and shaped at the shoulder before tapering into a fitted cuff, bring a vintage silhouette into an otherwise modern oversized shape, and the contrast between the fitted cuff and the loose body is what makes this pattern stand out from every straight-sleeve option above it. It’s a more involved construction than the drop-shoulder patterns earlier on this list, since you’re shaping and gathering rather than just knitting a straight tube. I made mine for a specific outfit in mind, a slip dress that needed exactly this kind of romantic, old-fashioned layer and it’s become the piece people ask about most when I wear it.
This is the one to save for when you want your cardigan to be the actual statement piece of a crochet cardigan outfit, not just the layer over one.
- Sleeve: gathered at shoulder cap, tapering to a fitted ribbed cuff
- Yarn: lighter worsted or DK weight keeps puff sleeves from feeling heavy
- Best paired with a fitted or semi-fitted body so the sleeve contrast reads clearly
Frequently Asked Questions
What’s the best yarn weight for an oversized cardigan?
Bulky (#5) yarn gives the fastest, coziest oversized cardigan for beginners, while DK or worsted weight (#3–#4) works better for longer, duster-style cardigans that need drape instead of bulk.
How much positive ease should an oversized cardigan have?
Most oversized cardigans use 6″–10″+ of positive ease beyond your actual bust measurement, compared to the 2″–4″ a standard “relaxed fit” sweater typically uses.
Are free crochet cardigan patterns for women usually beginner-friendly?
Many are, patterns built from simple rectangular panels (like the easy crochet cardigan and granny square cardigan above) skip complex shaping entirely, making them approachable even for a first garment.
Can I substitute crochet for knit in these patterns, or vice versa?
Not directly stitch-for-stitch, but the overall shapes (rectangles, wraps, ponchos) translate well between crafts, you’ll need to recalculate gauge and stitch counts for your chosen hook or needle size.
How do I know what size to make?
Measure your actual bust, decide how much positive ease you want (see above), and choose the pattern size whose finished measurement matches your body measurement plus that ease, not just your usual clothing size.
Final Thoughts
The best oversized cardigan patterns are the ones that balance comfort, drape, and intentional proportions rather than simply adding extra fabric. Whether you prefer a chunky knit cardigan, an easy crochet cardigan, a granny square design, or a long duster style, pay close attention to finished measurements, positive ease, yarn weight, and construction before you start. Those details will have a bigger impact on the final fit than the size label alone.
If you’re making your first cardigan, start with a simple rectangle-based or drop-shoulder design and build your confidence from there. Once you’re comfortable with garment construction, textures like cables, bobbles, moss stitch, waffle stitch, and C2C crochet can make an oversized cardigan feel completely unique. With 23 different styles to choose from, there’s plenty of room to find a pattern that fits both your skill level and the way you actually want to wear it.
![The Best 30+ Free Crochet Cat Patterns [Beginner-Friendly Guide]](https://crochetmind.com/wp-content/uploads/2025/04/1-The-Best-30-Free-Crochet-Cat-Patterns-Beginner-Friendly-Guide.webp)