


![Select Crochet Clothing Ideas: [Best Crochet Fashion] Crochet Clothing Ideas](https://crochetmind.com/wp-content/uploads/2025/07/Crochet-Clothing-Ideas-Best-Crochet-Fashion-in-2025-1-1.jpg)
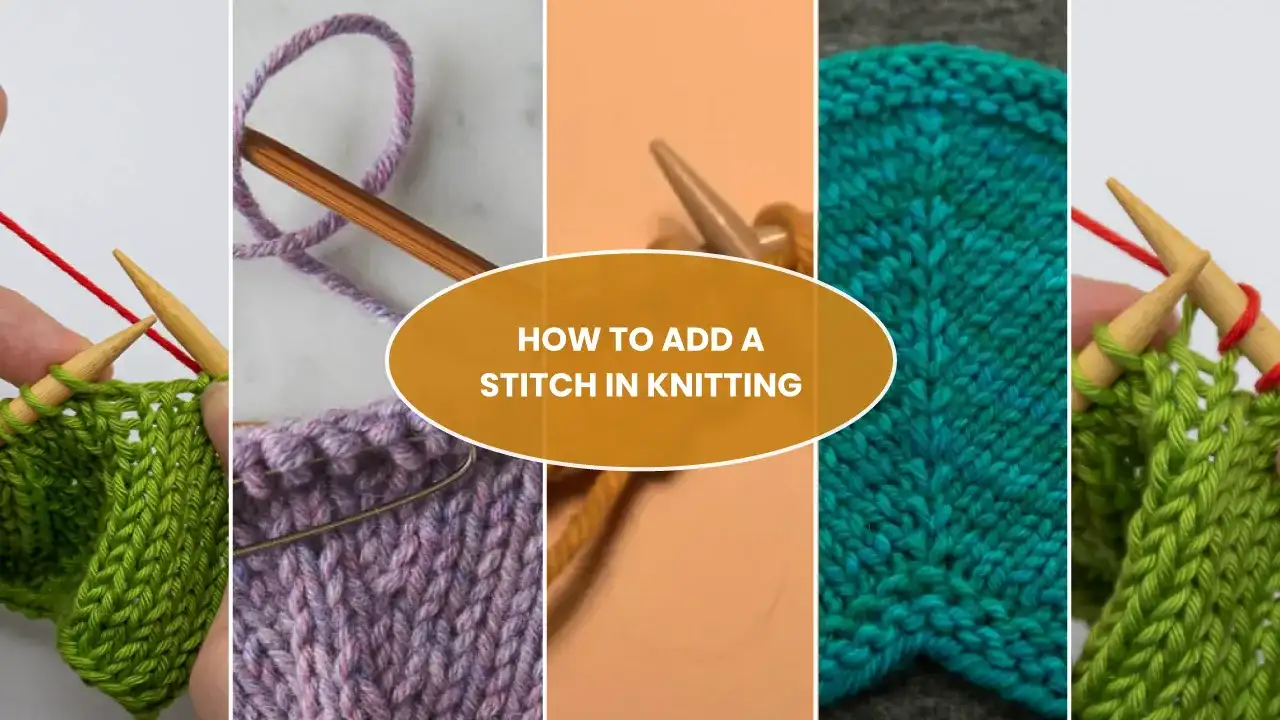
Have you ever wanted to learn how to increase a stitch in knitting? Of course, you have, and that’s exactly why you’re here! Increasing stitches is a must-know skill that helps shape your work, whether you’re making cozy sleeves, stylish shawls, or decorative lace patterns.
The best part? It’s simpler than it sounds. There are a few easy ways to do it, like KFB, M1, and yarn overs, and each one adds something special to your project. Once you learn the basics, you’ll see how versatile and useful these increases can be.
Continue reading! This guide will lead you through the simplest and most efficient methods to add a stitch in knitting, ideal for any task.
Learn in this Article:
How to Increase in a Stitch In Knitting
Comparison Chart Between Different Types of Increases
In This Post
What Does “Increase a Stitch” Mean in Knitting?
To increase a stitch in knitting is to add a stitch to your row or round. It assists in defining your project—such as broadening sleeves, creating a flare, or sculpting curves. Rather than focusing on a single stitch, you’ll employ unique methods to incorporate additional ones. No need to stress—it’s easy! After you grasp a couple of straightforward techniques, you’ll find it easy to manage the dimensions and form of your knitting.
How to Increase in a Stitch In Knitting [ 6 Easy Methods]
There’s no one-size-fits-all when it comes to increasing stitches. Below are some of the most common and beginner-friendly methods, each with its own look and purpose—perfect for shaping, detailing, or adding flair to your knitting.
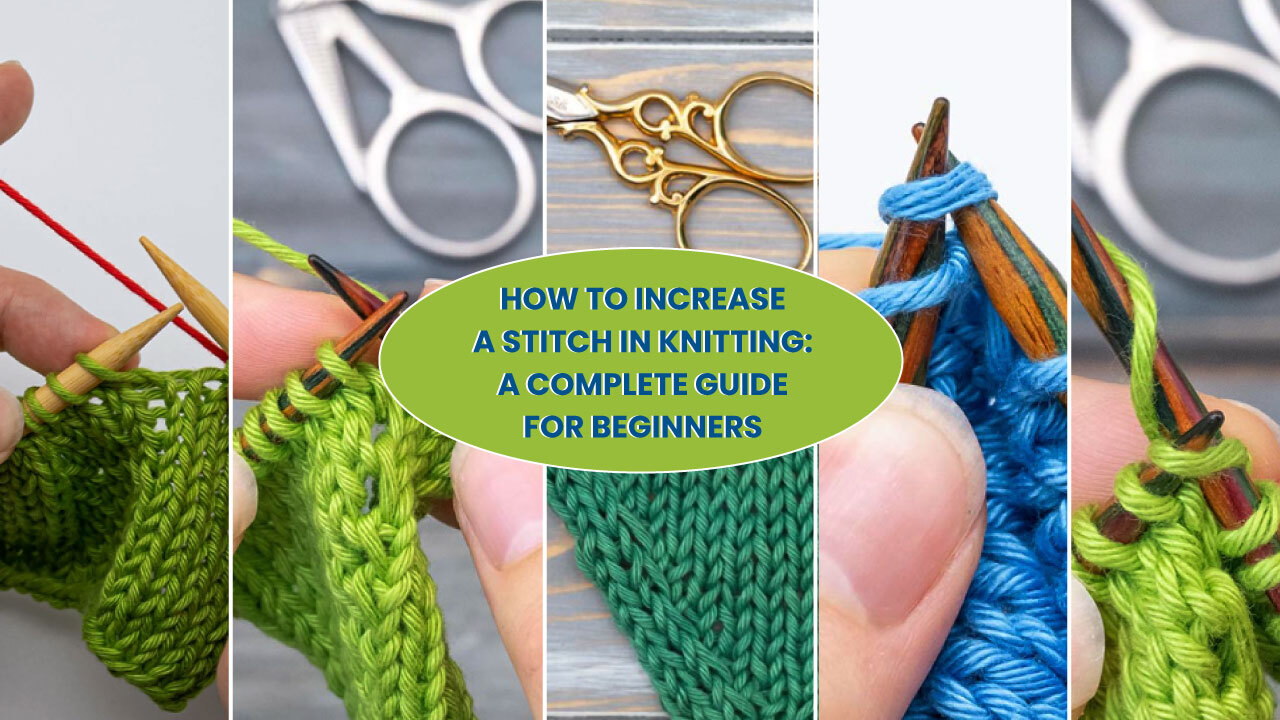
Method 1: Yarn over knitwise and purlwise
A yarn over is the easiest method to introduce a stitch in knitting, forming delicate eyelets that stand out in lace designs. By looping the working yarn around your needle before the subsequent stitch, you create a new stitch that features a decorative hole.
Numerous novices incorrectly assume that the yarn over comprises the subsequent knit or purl stitch, but it is merely the wrap itself, existing alone as a stitch

Here’s how to do a stitch increase with the yarn-over knitwise and purlwise method. Including –
Step 1: Hold the yarn behind your work and ready for knitting.

Step 2: Now, carefully wrap the yarn around your right needle in a counterclockwise direction. You can also consider it as transferring the yarn from the front to the back.
Step 3: Hold the yarn over with your index finger. Next, insert the needle into the following stitch to proceed.

Step 4: Work a knit stitch as you usually do. You’ll notice a small extra loop on your right needle, running from left to right and back to front.
The next stitch you knit secures the yarn over, but it isn’t part of it. The yarn over is simply the act of wrapping the working yarn around the right needle.

Note: A yarn over creates an extra stitch and a small eyelet. This method is often used for decorative patterns. You can reduce the hole by twisting the yarn over when knitting the next row.
Beginners sometimes mistakenly think a yarn over includes the next knit or purl stitch, but it doesn’t. It’s simply the yarn wrapped around the needle between stitches, shown as a separate stitch in knitting charts.
Method 2: Make one (m1)
The Make One (M1) increase is one of the simplest ways to add a stitch, forming a small eyelet that resembles a yarn over after a few rows, but with a slightly tighter appearance. Often called an “afterthought yarn over,” it’s just as easy to execute.

Here’s how to do it in four clear steps:
Step 1: Keep knitting until you arrive at the spot in your row where the pattern needs an increase.

Step 2: Lightly pull your two needles apart. You’ll see a tiny yarn loop connecting the stitches from the row below.

Step 3: Pick up the yarn loop with your left needle, inserting it from the front side. This positions the strand for a Make One Left (M1L) increase.

Step 4: Insert your right needle into the yarn loop you grabbed on the left needle, approaching from the front side. This prepares the stitch for a Make One Left (M1L) increase.

Step 5: Wrap the working yarn around your right needle in a counterclockwise direction. This creates the new stitch for your Make One increase.

Step 6: Slip the lifted loop off the left needle. You’ve now completed your Make One (M1) increase, adding a new stitch.

Note: The fundamental Make One (M1) increase is the easiest variation, forming a visible eyelet or opening in your knitting while moving along the row.
Method 3: M1L and M1R

M1R knitting Incresses Step By Step Instruction. Including-
Let’s see how to knit the M1r increase. Including –
Step 1: Use your left needle to lift the yarn strand between two stitches, inserting it from the back side. This sets up a Make One Right (M1R) increase.

Step 2: Slide your right needle into the lifted yarn strand from left to right.
Note: This part can feel a bit tricky, so go slow and work close to the needle tips. A quick trick? Loosen the loop a little with your right needle first—it makes slipping in much easier.

Step 3: Move the yarn around the needle from front to back. Then pull it through the loop to make your stitch.
M1L Knitting Incresses Step By Step Instruction. Including-
Let’s see how to knit the M1l increase. Including –

Step 1: Pick up the strand between the two stitches with your left needle, coming in from the front. You’re setting up for a smooth increase.

Step 2: Now insert your right needle into that lifted strand from back to front, going right to left. You’re working through the back of your project here.

Step 3: Wrap your yarn around the needle counter-clockwise and pull it through to the front. Then just slip the stitch off your left needle—you’re done.

Method 4: KFB – knit front and back

Step 1: Work a regular knit stitch into the next loop on your left needle. But instead of sliding it off, keep the stitch on the left needle.

Step 2: Insert the needle from the back of that same stitch. Ensure it enters from right to left to get ready for the following step

Step 3: Wrap the yarn around your needle in a counter-clockwise manner. Next, pull it through the stitch and allow the original stitch to slip off the left needle.

Method 5: Backward loop Increase (M1Bl) – left & Right

Here are the step-by-step instructions about how to knit Backward loop Increase (M1Bl) – left & Right. Including –
Step 1: Use your right hand to wrap the working yarn around your left thumb in a clockwise motion. This creates a loop that will form the new stitch when placed on the needle.

Step 2: Push the right needle up through the loop from below.

Step 3: Gently pull your thumb from the loop. Pull the yarn a bit to tighten it and continue your knitting.

Method 6: KLL (LLI) & KRL (RL)

Knitting KLL – Step by step instructions:
Step 1: Knit one stitch the usual way to prepare for the increase.

Step 2: Insert your left needle into the stitch two rows below the one just created on your right needle. Make sure to place it from the rear to maintain the stitch untangled.

Step 3: Now, take only the left leg of that stitch and transfer it to your left needle.
Step 4: Work into this lifted stitch by inserting your needle through the back loop.

Step 5: Let the stitch fall off the needle, then just keep knitting like usual.

FaceBook – Instagram – Pinterest – Twitter – Youtube
KNITTING KRL STEP BY STEP:
Step 1: Look one row below the first stitch on the working needle. From behind, insert the right needle into the right leg of that loop. Make sure to catch only the right leg as you go in.

Step 2: Move this stitch to your working needle.

Step 3: Knit the following stitch as you normally would. Then, go on following the rest of your pattern.

How to Increase a Stitch in Knitting: Comparison Chart Between Different Types of Increases
| Method | Ease (Beginner-Friendly) | Creates a Hole? | Leaning Direction | Best For |
|---|---|---|---|---|
| Yarn Over (YO) | Very Easy | Yes (large) | None | Lace, decorative |
| Make One (M1) | Easy | Slight | Neutral | Subtle shaping |
| M1L | Medium | No | Left | Paired increases |
| M1R | Medium | No | Right | Paired increases |
| KFB | Easy | Small bump | Neutral | Quick shaping |
| Backward Loop | Very Easy | No | Neutral | Loose sections |
| KLL (LLI) | Medium | No | Left | Invisible shaping |
| KRL (RLI) | Medium | No | Right | Invisible shaping |
FAQs About Increasing Stitches in Knitting
What is the easiest way to increase a stitch in knitting?
The easiest method is the yarn over (YO). Simply wrap the working yarn over the needle between stitches. It adds one stitch and creates a small hole, often used decoratively. It’s quick to learn and perfect for lace patterns or beginner projects needing simple shaping.
How do I increase without leaving a hole?
Use methods like Make One (M1), Knit Front and Back (KFB), or lifted increases (KLL/KRL). These techniques add stitches more discreetly without creating noticeable holes, making them ideal for smooth shaping in sweaters, hats, and other garments where a clean fabric look is preferred.
Which increase should I use for symmetrical shaping?
For balanced shaping, pair directional increases like M1L (left-leaning) and M1R (right-leaning). Use M1L on the left side of the fabric and M1R on the right. This gives a mirror-image effect, great for shaping sleeves, necklines, or fitted garments with a polished appearance.
What’s the difference between M1L and M1R?
Both are “make one” increases, but they lean in opposite directions. M1L leans left and is made by picking up the bar from front to back. M1R leans right and is picked up from back to front. Using them together creates clean, symmetrical shaping.
Can I use different increase methods in one project?
Yes, different increase techniques can be combined in a single project, depending on the pattern’s design and desired effect. Just ensure that paired increases match in style and direction to keep shaping even. Always follow the pattern’s instructions unless experimenting with texture or structure.
In Closing
Increasing stitches is an essential skill in knitting that allows for shaping, structure, and design flexibility. Whether creating curves, expanding fabric, or adding decorative eyelets, there’s an increase method suited for every project. Understanding the purpose, appearance, and direction of each technique helps produce polished results. With a little practice, knitters can confidently choose the right increase and add style and functionality to their creations with ease.


![The Best 30+ Free Crochet Cat Patterns [Beginner-Friendly Guide]](https://crochetmind.com/wp-content/uploads/2025/04/1-The-Best-30-Free-Crochet-Cat-Patterns-Beginner-Friendly-Guide.webp)


