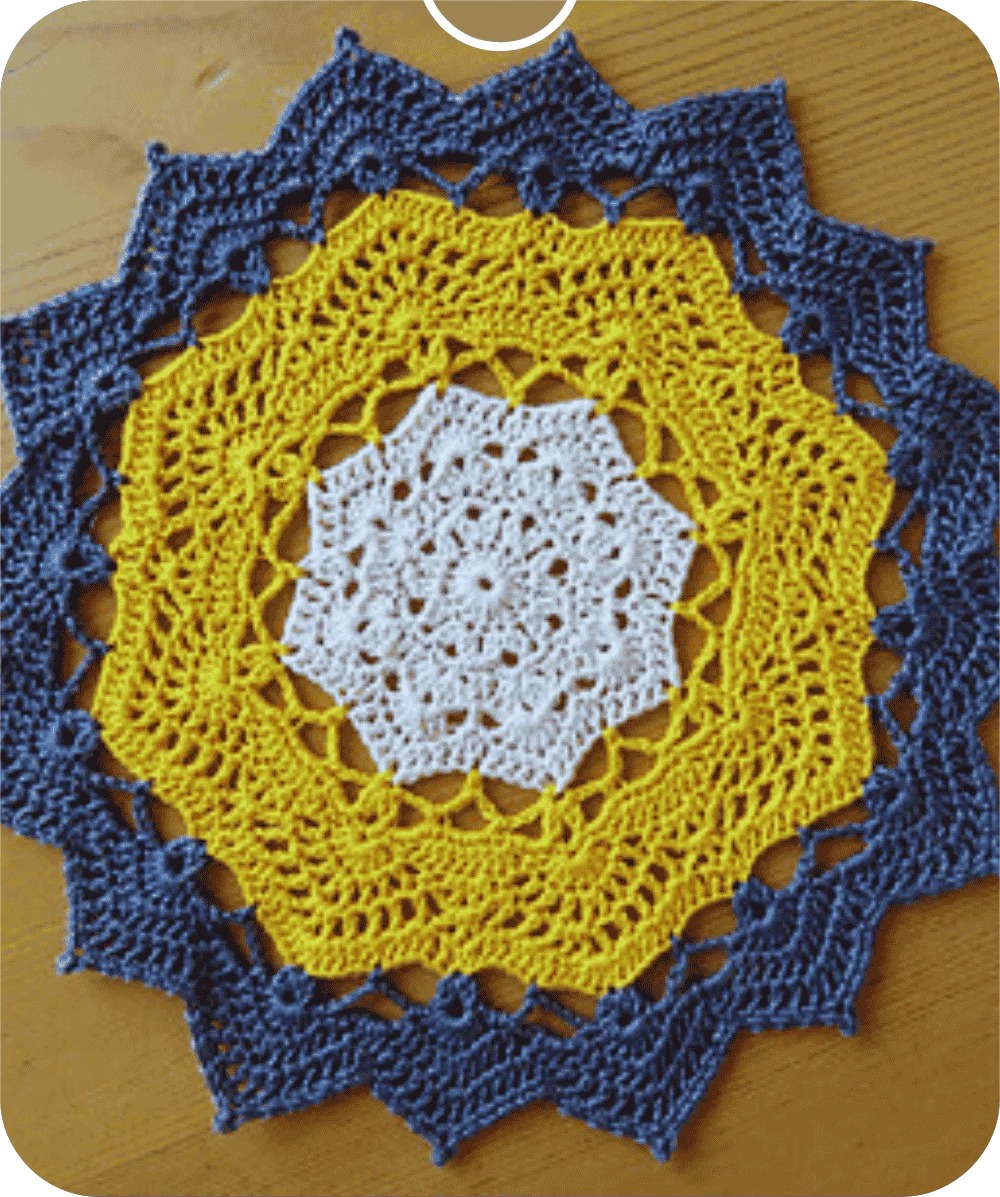
Crocheting a doll can be fun. It is a creative endeavor to make a unique toy, gift, or decoration. This guide walks you through every single step of how to crochet a doll.
You will learn it from choosing the right tools to finishing your doll with clothing and accessories. Whether you are crocheting the doll for a child or yourself as a hobby, this article will guide you through the initial steps. So, let’s start-
In This Post
- What is a Crochet Doll?
- What Skill Levels Are Required to Crochet a Doll?
- What Are Crochet Dolls Made Of?
- What Tools Are Required to Crochet a Doll?
- Number of Stitches for Doll Crocheting
- How to Crochet a Doll? [ Step-by-Step Guide]
- How to Increase Doll Size?
- Which Is the Best Stitch to Crochet a Doll?
- Which Is the Best Yarn for the Doll?
- How Much Time Is Required to Crochet a Doll?
- What Is the Approximate Cost to Crochet a Doll?
- Tips for Better Doll Crocheting
- Final Thoughts
- Frequently Asked Questions (FAQs)
What is a Crochet Doll?
A crochet doll is something made by hand. It is one figure produced using the crochet technique. Crochet refers to one of the types of needlework. In this, a hook is used to loop yarn into interconnected stitches. Crochet dolls are usually soft, cute, and highly customizable.

They can be animals, people, or purely imaginary creatures, and are often stuffed to have a 3D shape. These are often referred to as “amigurumi,” which is Japanese for crocheting small, stuffed yarn creatures.
A doll can be crocheted and, in the process, you shall be exercising your creativity as to size, shape, clothes, and facial expression, among others. The craft makes for an exciting and fulfilling project in which every crafter can immerse himself or herself no matter the age.
What Skill Levels Are Required to Crochet a Doll?
A crocheted doll may seem so intricate, but it’s something both beginners and experts would like to do. Most of the dolls, though some are really that intricate, can easily be broken down into simple steps.
If it is your first time working on a crochet, it is perhaps ideal to begin with a simple doll pattern, once you become great at all these skills you can get to be very specific and customize your dolls.
Even with fewer experiences in crocheting, you can still be able to produce a beautiful crochet doll. You only need to take your time and follow the procedure step by step.
What Are Crochet Dolls Made Of?
From the point of view of the raw materials used, crochet dolls are primarily made of yarn; however, several other materials come into play to produce the end product. Here is a list of some of the common materials that are used to crochet a doll:
- Yarn: This is used for the body and decorative features of the doll. The type of yarn may make all the difference because it makes the doll look soft and feel cuddly.
- Stuffing: Some crochet dolls need stuffing with fiberfill to give the dolls a shape while making them soft and huggable.
- Safety or plastic eyes: Tiny little plastic pieces you can add to the face to help the doll look as if it has real eyes. Some people sew on the eyes.
- Embroidery thread: Then, to draw a nose, mouth, and other face lines, this is perhaps used more regularly.
- Wire (optional): More skilled crocheters also use a wire inside the doll which one can bend the arms and legs.
- Buttons and Beads: You can use these for ornament purposes. You can also use them to attach movable joints to the doll.
What Tools Are Required to Crochet a Doll?

If you want to crochet a doll, you must have the right tools. The process flows very smoothly if you have the right tools. In addition, you will be able to get the best results for your project.
Let’s see the table in detail:
| Tool | Use | Best to Use |
|---|---|---|
| Crochet Hooks | For creating stitches; hook size depends on yarn thickness | Smaller hooks (2.5 mm to 4 mm) are ideal for amigurumi |
| Yarn Needle | Weaving in loose ends and sewing doll pieces together | Large needle with a blunt tip |
| Stitch Markers | Helps track stitch count and placement, especially in rounds | Essential when working in rounds |
| Scissors | Cutting yarn at the end of each piece | Small, sharp scissors for precise cuts |
| Measuring Tape | Measures body parts to ensure proportion | Flexible measuring tape |
| Pins | Holds pieces in place before sewing them together | Straight pins or safety |
Number of Stitches for Doll Crocheting
The number of stitches that a person will need to crochet a doll depends strictly on the size and complexity level of the doll. To crochet a simple doll, maybe three stitches will do. On the other hand, more detailed, larger dolls may demand hundreds, even thousands, of stitches.
Ordinarily, a doll will commence with minimal stitches, mainly that of the head or limbs. You can add those stitches to enlarge parts and further reduce stitches to shape the body parts. Normal stitches in crocheting dolls include;
- Single crochet (sc): It is one of the most frequently used stitches for making amigurumi.
- Increase (inc): Add more stitches to make parts of the doll bigger.
- Decrease (dec): De-stitching to make the doll smaller in certain areas such as the neck or waist.
How to Crochet a Doll? [ Step-by-Step Guide]
Let’s get started with the step-by-step process of how to crochet a doll. This guide will guide you from the idea to the final stitches on your crochet doll. Let’s see the steps:
Step 1: Begin with Crocheting the Face
Start your doll with crocheting the head in a circular pattern. You need to begin using single crochet stitches and gently increase in pattern as you continue to create the head to resemble a face.

Incorporating eyes, nose, and mouth into this work will cause you to add additional features to this structure. Many hobbyists do this with safety eyes for a very realistic aspect. Make sure that you set in the eyes before finishing the head so it is properly set.
| Round No. | What to do |
|---|---|
| 1 | Make a magic ring with 6 single crochet stitches. |
| 2 | Make a round with increased stitches. |
| 3 | Create 18 stitches by increased and single-crochet stitches. |
| 4 | Make 24 stitches by 2 single crochet and 1 increased stitches. Repeat it 5 times. |
| 5 | Make a round by 3 single crochet and 1 increased stitches. |
| 6 | Make 6 rounds with single crochet stitches. |
| 7 | Crochet the complete round. Do it into the front loop only. |
| 8 | Fill this rounded bag. Stuff it with cotton or polyfill. |
Step 2: Make the Arms

The doll’s arms are mostly made from crocheted pieces. You start making small circles for hands, then you make your way upward towards the shoulder. The length and shape of the arm can be adjusted according to the style.
After completing the arms, attach them to the sides of the doll’s body. Ensure that the arms are equally placed for a balanced appearance.
| Round No. | What to do |
|---|---|
| 9 | The circle of 42 stitches has been created. These will be separated into 3 parts. Two smaller parts with 9 stitches. One larger part with 24 stitches. |
| 10 | Smaller parts will make the arms of the doll. |
| 11 | Each arm will be of 9 stitches. So, separate the 9 stitches from the round ball by pulling the 10th stitch. |
Step 3: Crochet the Body

Then, crochet the body. The body usually works out to be cylindrical using the increases and decreases to give the shape representing the chest, waist, or hips of a doll. As fancy as you want, you can have an elaborate body, but mainly because of how complicated the design turns out to be.
For most simple dolls, a cylindrical shape will do, but if you want your doll to have some sort of definite physique, add more details.
Step 4: Make the Legs

Crochet doll legs like you did the arms. Start at the bottom. Work your way up to the thigh. Some people prefer to crochet the legs and sew them on after they are complete, while others crochet the legs right into the lower part of the body. It all depends on which pattern you are working with.
| Round No. | What to do |
|---|---|
| 12 | Start crocheting by using single crochet stitches. |
| 13 | Each leg consists of 12 stitches. |
| 14 | Divide 1st leg from 2nd one. |
Step 5: Join Doll Parts

Now you have crocheted all the parts-the head, body, arms, and legs. So, it is time to assemble the doll. Using a yarn needle, sew each part in place securely. Attach the head first, attach the arms, then the legs. Make sure that everything is tightly sewn so that no part easily falls off during play or handling. Double-check if limbs are perfectly positioned for an equally balanced and finished look.
In the end, cut the yarn. Leave some yarn to crochet 6 stitches to close the round.
Step 6: Stuff the Doll

Once the doll is assembled, you can start stuffing it with fiberfill or your preferred soft material. Stuff each part of the doll to give it shape and volume.
Be sure all the parts are filled evenly so that the doll will hold up to its shape without appearing too stiff or soft. Avoid overstuffing because it may stretch the crochet stitches and make some holes. Lightly press the doll to ensure it feels smooth.
Step 7: Make the Doll’s Hair

Your doll’s hair can be done in almost any way imaginable. You can use yarn strands directly attached to the head by using loops and securing them with a crochet hook or you could knit a wig cap upon which you could sew the yarn. Style your hair: you could have long, short, curly, or braided hair; this will give your doll its personality and character.
Step 8: Create Clothes for the Doll
With the body of the doll, you can proceed to crochet or sew clothes for it. Crochet simple things such as dresses, shirts, or pants and stitch them up in a contrasting yarn color to the doll’s body. You might even want to get fancier with sewing on some accessories like hats or scarves.
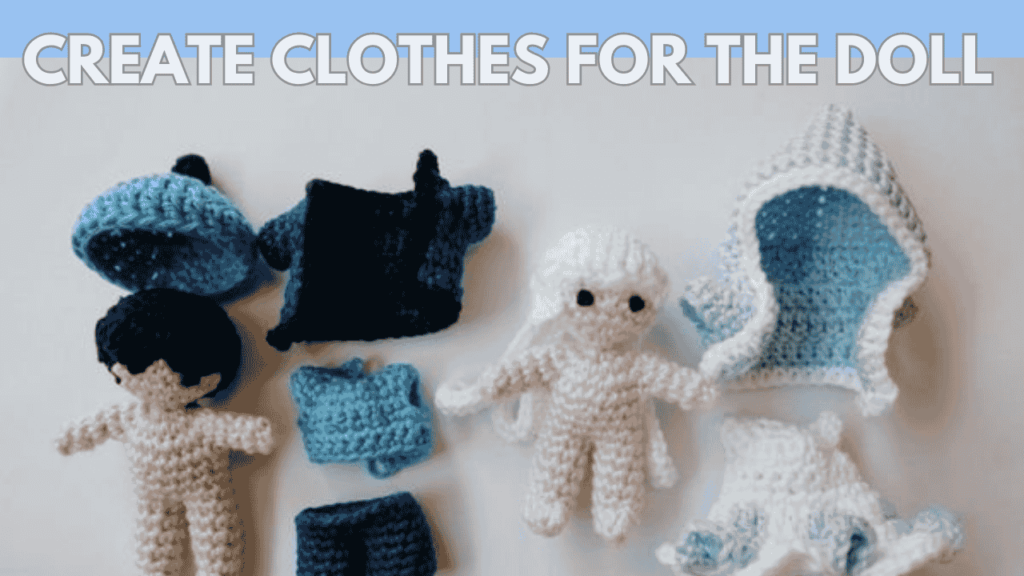
One can apply permanent stitching adhesion of clothing to the doll or even sew so that anything this would provide an added flexibility in using or displaying the doll in whichever fashion you might desire.
Final Step: Make Shoes for the Doll

Finish off your doll by creating a pair of shoes that would fit the theme of your doll. Make small-sized boots, sneakers, or sandals in the same procedure you followed in making the other parts of the doll.
Typically, the shoemaking is done separately and then attached to the doll’s feet. Depending on what you want to make, you can add little details such as buttons and laces with other shades of yarn. You can see 30+ crochet doll patterns and choose on your preference.
How to Increase Doll Size?
Well, how can you make it a large doll? Then the simple answer is by using thicker yarn and a bigger hook. This can add more stitches in every round and make large body parts. Adding more rounds or stitches adjusts the pattern and so the doll, therefore, becomes larger.
Which Is the Best Stitch to Crochet a Doll?
The single crochet stitch is great for crocheting a doll because it gives a tight and dense fabric. This tightness is a must for the stuffed dolls covers the stitches and makes the interior appearance polished. Additionally, single crochet stitches are quite easy to learn and work with. So, they are suitable both for beginners and experienced crocheters.
Which Is the Best Yarn for the Doll?
From the yarn, you can choose by looking at texture and thickness. The cotton yarn is very soft and firm and comes in a wide variety of colors. Acrylic is a widely used yarn as it is inexpensive and easy to work.
How Much Time Is Required to Crochet a Doll?
The amount of time that is required in crocheting a doll is influenced by the factors described below and therefore determines the period that it will take to complete the project.
Size of the Doll
The more extensive the doll, the longer it will take in terms of crocheting. Small dolls might take a few hours to complete while bigger dolls could take days because of many stitches and materials required.
Ease or Difficulty of the Pattern
Basic simple dolls will require fewer working hours while including the very simplest models of designs with just basic shapes and very minimal details, yet the longer it is to make when facial expressions and additional items are added or if a particular part can be moved.
Skill Level
Experience and skill also contribute to the period taken. A novice will take a longer period since they are getting used to the patterns and stitches; an experienced crocheter takes relatively a shorter time and can complete a doll with ease.
Type of Yarn Used
The type of yarn also dictates time. Thicker yarns and larger hooks generate larger stitches, so the doll will be finished more quickly. The finer the yarn, the smaller the stitches, so it takes much longer to work through.
Clothing and Accessories
The addition of clothes or accessories, including hoods, shoes, and scarves, will extend the completion time. Elementary to advanced changes in the accessories will influence total completion time.
Stitch Type
The process will be slower if using complicated stitches like the bobble or puff since they require a lot of care and time. The faster stitches will be the simplest ones, including the single crochet, and this would hasten things thereby giving one a faster project.
Modification
Including modification features on a doll will also take additional hours in the process. Hand-embroidered faces and hairstyles and any elaborate designs on clothes will take longer to work on since they require more care and energy and therefore extend the project.
Knowledge of Pattern
If it is something completely new, or a very complex design, it will take you a little more time to figure out how to work through it, however, if you are well aware of the pattern, you will crochet it faster, feeling much more confident.
All these factors make your doll crocheting take any amount of time from a simple hour project up to several days for intricate and elaborate designs.
What Is the Approximate Cost to Crochet a Doll?
This chart displays the cost of crocheting a doll: the amount you will be using for materials and tools.
| Material | Estimated Cost |
|---|---|
| Yarn | $3 – $15 |
| Stuffing (Fiberfill) | $2 – $8 |
| Safety Eyes | $1 – $5 per pair |
| Crochet Hook | $2 – $10 |
| Yarn Needle | $1 – $5 for a set |
| Stitch Markers | $1 – $5 |
| Embroidery Thread | $0.50 – $2 per color |
| Pins | $1 – $3 |
| Scissors | $2 – $7 |
Tips for Better Doll Crocheting
Doesn’t matter whether you are a beginner or a professional. Let’s see some special tips from my experience:
Use Stitch Markers to Track Rounds
When you are in rounds, you need to work along with the amigurumi dolls. You will have to use stitch markers. They will help keep track of your rounds so that you do not lose where to count in each round and misplace any stitches. Such a simple tool will keep your work all neat and ensure to get the right shape and proportions for your doll: head, body, or limbs.
Practice Your Stitches Before Starting the Doll
If you are a beginner to crocheting or looking to try out some stitches for the first time, then practice this beforehand by crocheting a good number of test dolls. You will get immaculate and uniform results with your doll with perfect mastering of stitches like SC, increase, and decrease. Practicing ahead also builds up muscle memory and makes it easy to follow the pattern for easy and smooth crocheting throughout the doll-making process.
Use Multiple Yarn Colours To Make Unique Dolls
Don’t get afraid to try out some colorful yarns while making a doll. Using different shades for the body, clothes, and accessories can make your doll striking in one or the other way. You can make bold and contrasting tones or subtle colors; the choice is yours depending on what look you want to achieve. This creative touch gives the doll a unique touch, and thus, it’s different.
Use a Smaller Hook Size for Tighter Stitches
It uses a smaller crochet hook, which makes the stitch tighter; this is especially crucial for amigurumi dolls. Tight stitches avoid poking out the stuffing and make the doll look more finished. It also gives you more control over how to shape things like the head, arms, or legs in little detail.
Begin with Simple Patterns if You’re a Beginner
For a beginner, it would be best to start with simple patterns. Simple patterns that target the basic shapes of a sphere and cylinder are easier to follow and create that sense of confidence. When you become comfortable crocheting dolls, you can proceed into advanced and complex patterns that will include color changes, shaping, and finer details.
Final Thoughts
Crocheting a doll is a fun hobby that translates the creativity of man into the creation of something from the absolutely blank, that is, from scratch. Clearly outlined processes drafting ideas designing choosing the material and assembling the doll will help you create something unique and personalized.
Whether you are just starting with crocheting or have some experience, every new project you make is a better application of your skills, increases your confidence, and makes you happy. Do not forget to have fun by trying one alternate pattern or color now and then it does take some time to get that which you are aiming for. It will eventually be a piece of handiwork that represents your hard work and creativity.



![Select Crochet Clothing Ideas: [Best Crochet Fashion] Crochet Clothing Ideas](https://crochetmind.com/wp-content/uploads/2025/07/Crochet-Clothing-Ideas-Best-Crochet-Fashion-in-2025-1-1.jpg)


![The Best 30+ Free Crochet Cat Patterns [Beginner-Friendly Guide]](https://crochetmind.com/wp-content/uploads/2025/04/1-The-Best-30-Free-Crochet-Cat-Patterns-Beginner-Friendly-Guide.webp)
