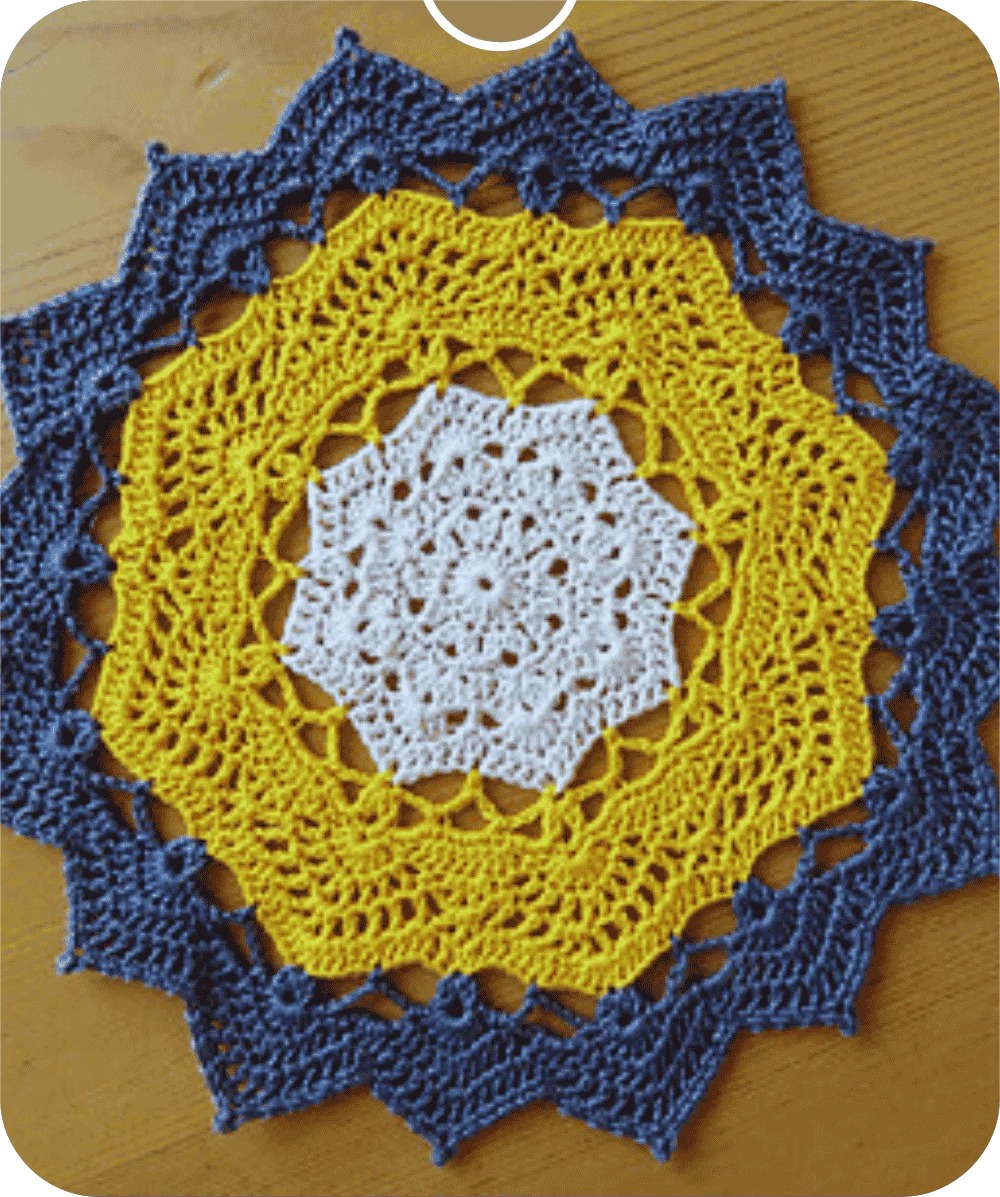
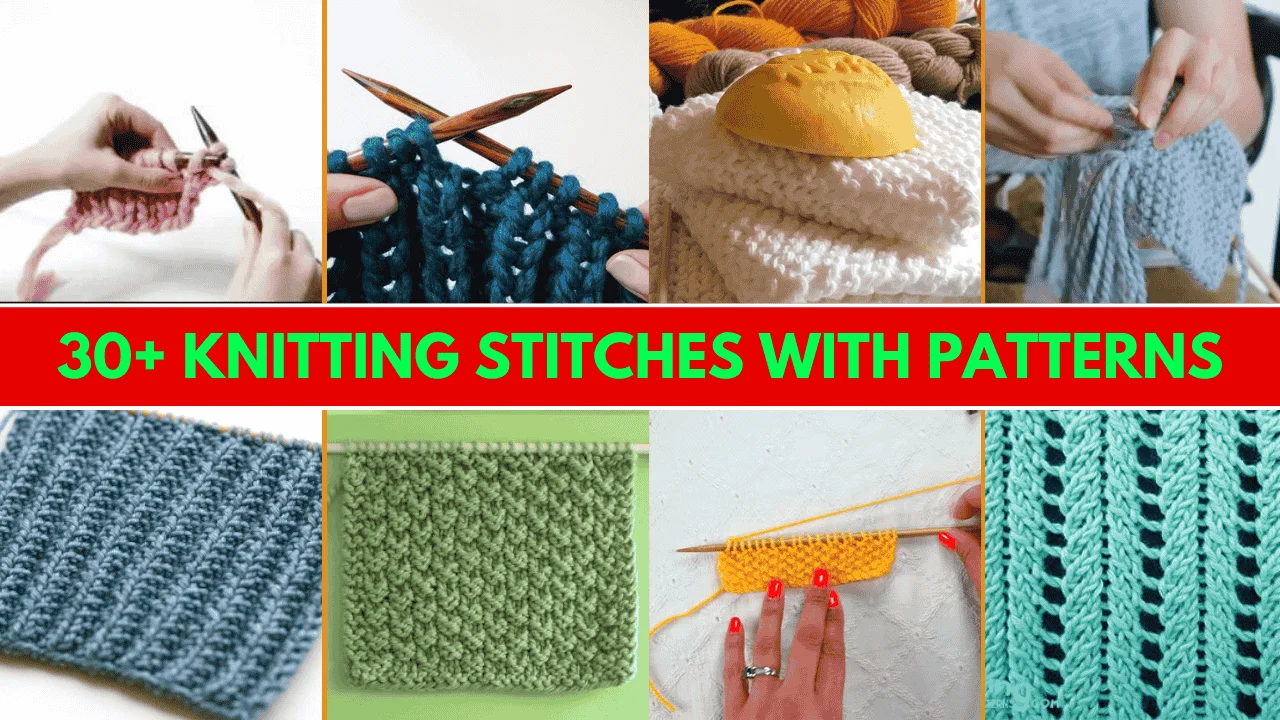
Knitting Stitches Pattern: Knitting stitches are the foundation of any knitting project that transforms yarns into beautiful and creative clothing. So, knowing and understanding different knitting stitches is essential for every knitter, regardless of skill level. And, it is utterly fascinating how many knitting stitches you can create with just two needles and some yarn!
Although the knit and purl stitches are two of the most common knitting stitches, there are many more to discover for you. You can work with combined stitches like garter stitch, Stockinette Stitch, or some advanced patterns like cable stitch, rib stitch, etc. You can even make garments like sweaters or knitted tops by combining different knitting stitches. Above all, you just need to practice these stitches and you will master them in no time.
So, without delay, let’s roam around the world of these 30+ knitting stitches collection.
In This Post
- What Are Knitting Stitches?
- Necessary Materials To Work Knitting Stitches
- When to Use Which Stitch
- 30+ Knitting Stitches For Beginners With Pictures And Written Patterns
- Abbreviations:
- The Knit Or Plain Stitch
- Purl Stitch
- Garter Knitting Stitch
- Stockinette Knitting Stitch
- Reverse Stockinette Knitting Stitch
- The 1×1 Rib Knitting Stitch
- The 2×2 Rib Knitting Stitch
- Mistake Rib Knitting Stitch
- Fisherman’s Rib Knitting Stitch
- Seed Knitting Stitch
- Broken Rib Knitting Stitch
- Moss Knitting Stitch
- Double Moss Knitting Stitch
- Purse Knitting Stitch
- Seeded Rib Stitch
- Twisted Rib Knitting Stitch
- Half-Twisted Rib Knitting Stitch
- Hurdle Knitting Stitch
- Linen Knitting Stitch
- Basket Weave Knitting Stitch
- Tiles Knitting Stitch
- Chinese Wave Knitting Stitch
- Lace Rib Knitting Stitch
- Netted Knitting Stitch
- Sand Knitting Stitch
- Garter Rib Knitting Stitch
- Andalusian Knitting Stitch
- Purl Ridge Knitting Stitch
- Reverse Ridge Knitting Stitch
- Diamond Brocade Knitting Stitch
- Flag Knitting Stitch
- Final Words
- Frequently Asked Questions (FAQ’s)
Key Takeaways: Knitting Stitches Pattern
- Most of the basic and advanced stitches are different combinations of the two basic knitting stitches, the knit stitch, and the purl stitch.
- To create thick and cozy clothes like a blanket, a woven sweater, a thick scarf, etc., use knitting stitches like classical rib stitch, moss stitch, Fisherman’s knitting stitch, etc.
- To make lacey and breezy pattern cloths like a poncho, a lace for your dresses, or a table runner, use knitting stitches like the Chinese wave lace stitch, lace rib stitch, purse stitch, etc.
What Are Knitting Stitches?
Knitting Stitches Pattern are like the bricks of a building. They are one of the main parts of knitting. Based on their types, your knitted fabric’s appearance will change. Although, in simple words, knitting stitches are just some loops and techniques created by the knitters with the help of the needles, these stitches showcase your skill.

So, knowing these knitting stitches and choosing the right one for your desired project is essential. You can make plain fabric or ribbed fabric or create some unique designs on plain knitted cloth using these knitting stitches. So, let’s get to know them from a more closer angle.
Necessary Materials To Work Knitting Stitches
Let’s make a list of the necessary supplies you will need to work any knitting stitches so that you can focus on work without any interruption.
| Material Name | Functions |
|---|---|
| Yarn | Choose a chunky-weight yarn. Because, if you are trying a knitting stitch for the first time or are comparatively new to knitting, chunky yarns are the best choice as they are easy to deal with and you can easily spot the stitches. |
| Knitting Needles | To work any knitting stitch, you will need a pair of needles. You will find many different sizes and materials needles in the market. But, go with something that has a better grip like a pair of wooden needles. Also, make sure the needles are not edgy as the yarn could get stuck to it. |
| Scissors | Use a small and sharp scissor to trim the end of the yarn after knitting. |
| Tapestry Needle | Use a tapestry needle to weave the last ends and sew knitted pieces together. |
| Stitch Markers | To keep track of your stitch, use the stitch markers. |
When to Use Which Stitch
From smooth and stretchy to chunky and decorative, discover the perfect stitch for every creation. Below is a concise overview of popular stitches, their best uses, and the distinct textures they bring to your knitting.
| Stitch Name | Best For | Look / Texture |
|---|---|---|
| Knit / Plain Stitch | All basic projects | Smooth “V” texture on front |
| Purl Stitch | Paired with knit for patterns | Bumpy texture; used for contrast |
| Garter Stitch | Scarves, edges, and beginner practice | Thick, squishy, lies flat |
| Stockinette Stitch | Sweaters, hats, mittens | Smooth on front, curls at edges |
| Reverse Stockinette Stitch | Texture contrast | Bumpy front, smooth back |
| 1×1 Rib Stitch | Cuffs, edges, stretchy fabric | Narrow vertical ridges |
| 2×2 Rib Stitch | Sweaters, waistbands | Wider vertical ridges, elastic |
| Mistake Rib Stitch | Scarves, textured stretch | Irregular rib look, doesn’t curl |
| Fisherman’s Rib Stitch | Chunky scarves, sweaters | Deep squishy texture, very stretchy |
| Seed Stitch | Blankets, dishcloths, scarves | Bumpy, evenly textured, and lies flat |
| Broken Rib Stitch | Scarves, warm textures | Subtle rib effect with bumps |
| Moss Stitch | Washcloths, textured blocks | Granular and firm |
| Double Moss Stitch | Cushions, blankets | Dense texture with small bumps |
| Purse Stitch | Bags, lace projects | Lightly open, decorative look |
| Seeded Rib Stitch | Hats, warm panels | Ribbing with texture from purls |
| Twisted Rib Stitch | Hats, stretchy edges | Ridges with a twist, more defined |
| Half-Twisted Rib Stitch | Cuffs, fitted edges | One twisted column for subtle texture |
| Hurdle Stitch | Baby blankets, soft texture | Blocks of garter and stockinette |
| Linen Stitch | Bags, kitchen cloths | Woven look, dense and flat |
| Basket Weave Stitch | Throws, pillows, scarves | Woven boxy texture |
| Tiles Stitch | Decorative panels, baby blankets | Repeating squares, firm texture |
| Chinese Wave Stitch | Textured scarves or borders | Subtle wave pattern |
| Lace Rib Stitch | Light scarves, spring wear | Airy ribbing with lace holes |
| Netted Stitch | Shawls, airy summer accessories | Large openwork, very light |
30+ Knitting Stitches For Beginners With Pictures And Written Patterns
Let’s take a look at the collection of 30+ knit stitch patterns suitable for every skill level. Most of them are different combinations of the two most basic knitting stitches, knit, and purl stitches. Thus, you can easily master them and move into more advanced stitches.
Before starting to learn the knitting stitches, let’s take a look at the abbreviations related to their written patterns.
Abbreviations:
- k – knit
- p – purl
- RS – Right Side
- WS – Wrong Side.
- () – Repeat.
- K2tog – Knit two stitches together
- P2tog – Purl two stitches together
- Tbl – Through the back loop.
- Wyif – With yarn in front.
- Wyib – With yarn in behind.
- Slst – slip stitch.
1
The Knit Or Plain Stitch

This is the first stitch that every knitter starts with. You need to master this knit stitch to become a veteran in knitting. Many of the advanced and complicated knitting stitches use this knit or plain stitch as the foundation. Though, it is the most basic among the knitting stitches, you can practically make almost every type of garment (sweaters, scarves, stockings, etc.) using it. However, it is more popular to make basic clothes like washcloths.
Written Pattern: Knitting Stitches Pattern
- Cast on your desired number of stitches.
- Hold the needle with the cast-on stitches in your left hand and the empty needle in your right hand in case you are right-handed (Do the opposite in case you are left-handed).
- Now, insert the tip of the empty needle from front to back through the first stitch on the needle with the cast-on.
- Wrap your working yarn around the empty needle counterclockwise and pull a loop through the stitch on the other needle.
- Slide the original stitch off the left-hand needle.
- Repeat these steps for each stitch across the row.
2
Purl Stitch

This is the same as the knit stitch only the needle insertion position is different. If you work the purl stitch alone, the result will be the same as the knit stitch. However, you will see a clear difference when you work these two stitches together.
Written Pattern: Knitting Stitches Pattern
- Grab the needle with cast-on stitches on the left hand and the empty needle with the right hand.
- Now, insert the tip of the needle on your right hand into the first stitch on the needle on the other hand. Remember, you need to move the needle on the right hand from back to front.
- Wrap your working yarn around the empty needle and pull the loop of yarn through the first stitch. It will make a new stitch on the needle on the right hand.
- Finally, slide the original stitch off the cast-on needle and you will see the new stitch resting on the needle on the right hand.
Reading More about: Knitting Stitches Pattern
3
Garter Knitting Stitch

This stitch is a combination of knit and purl stitch. It is one of the most basic stitches and even if you are completely new to knitting stitches, you will hear about it. You can make scarves, bags, blankets, or any other accessories using this garter stitch.
Written Pattern: Knitting Stitches Pattern
- Cast on your desired number of stitches.
- Knit the whole project if you use a straight needle.
- Row 1 (RS) (for a circular needle): Knit all stitches.
- Row 2 (WS) (for a circular needle): Knit all stitches. (as it is the wrong side, it is the purl stitch)
- Repeat this RS and Ws till you reach the desired length.
4
Stockinette Knitting Stitch

This stitch is the opposite of the garter stitch. This stitch also works by alternating between knit and purl stitches. You will see a beautiful “V” shape appearing when working this stitch. You can make almost every accessory with this stitch.
Stockinette Knitting Stitch Watch Video
Written Pattern: Knitting Stitches Pattern
- Cast on as many stitches as you want.
- Row 1 (RS) (For straight needle): knit all stitches.
- Row 2 (WS) (For straight needle): Knit all stitches (in case you work on the right side, work purl stitches)
- If you are working on a circular needle, knit all stitches.
5
Reverse Stockinette Knitting Stitch

This stitch is just the reverse of the stockinette stitch like its name. You will work as purl one row and knit one row. So, the front side becomes more bumpy and the back side stays smooth. That is, you will see a textured design on the fabric.
Written Pattern: Knitting Stitches Pattern
- Cast on.
- Row 1 (RS): Purl all stitches
- Row 2 (WS): Knit all stitches
- Continue repeating row 1 and row 2 till you reach the desired length.
6
The 1×1 Rib Knitting Stitch

If you want to create a stretchy fabric with ridges, rib knitting stitches are the perfect choice. This 1×1 rib stitch is the most basic ribbing technique in this sector. You will work with knit and purl stitch alternately to make this stitch.
Written Pattern: Knitting Stitches Pattern
- Cast on some stitches.
- Row 1 (RS): (k1, p1) Repeat till you reach the end of the row.
- Row 2 (WS): (k1, p1) Repeat till you reach the end of the row.
- Continue working as row 1 and row 2 to finish the project.
Continue Reading Knitting Stitch
7
The 2×2 Rib Knitting Stitch

This stitch is almost similar to the 1×1 rib knitting stitch. The only difference is that you will work 2 knit stitches and 2 purl stitches simultaneously for all the rows. And, this stitch also creates stretchy fabrics. So, it is a great choice for making the hem of a dress or the cuffs of a shirt.
Written Pattern: Knitting Stitches Pattern
- Cast on several stitches that are divisible by 4.
- Row 1 (RS) (for straight needle): (k2, p2) Repeat till you reach the end of the row.
- Row 2 (WS) (for straight needle): (k2, p2) Repeat till you reach the end of the row.
- For the circular needle, work (k2, p2) repeatedly for all rows, no need to consider the RS and WS.
8
Mistake Rib Knitting Stitch

This stitch is a perfect choice for beginners who want to make a textured fabric. You will work with the knit and purl stitch and this pattern is identical to the 2×2 rib stitch. However, this stitch not only creates an elastic effect but also gives a fluffy feeling.
Written Pattern: Knitting Stitches Pattern
- Cast on several stitches following a multiple of 4+3 (you will take any multiple of the number 4 and add 3 to that number).
- Row 1 (For straight needle): (k2, p2) Repeat till you have only the last 3 stitches left for the row. For the last 3 stitches, work k2 and p1.
- Continue working like row 1 for the rest of the rows.
9
Fisherman’s Rib Knitting Stitch

If you are looking for a knitting stitch that creates stretchy yet thick fabric, then this Fisherman’s Rib stitch is a good option for you. Due to its thick and fluffy nature, you can easily make winter clothes like sweaters, scarves, or beanies using this knitting stitch.
Written Pattern: Knitting Stitches Pattern
- Cast on (make sure the number of stitches is an even number)
- Row 1 (RS): (k1, k1 below), for the last stitch, k1.
- Row 2 (WS): k2, (k2 below, k2) repeat till you only have the last stitch left, k1.
- Continue working like row 1 and row 2 repeatedly till you complete the project.
10
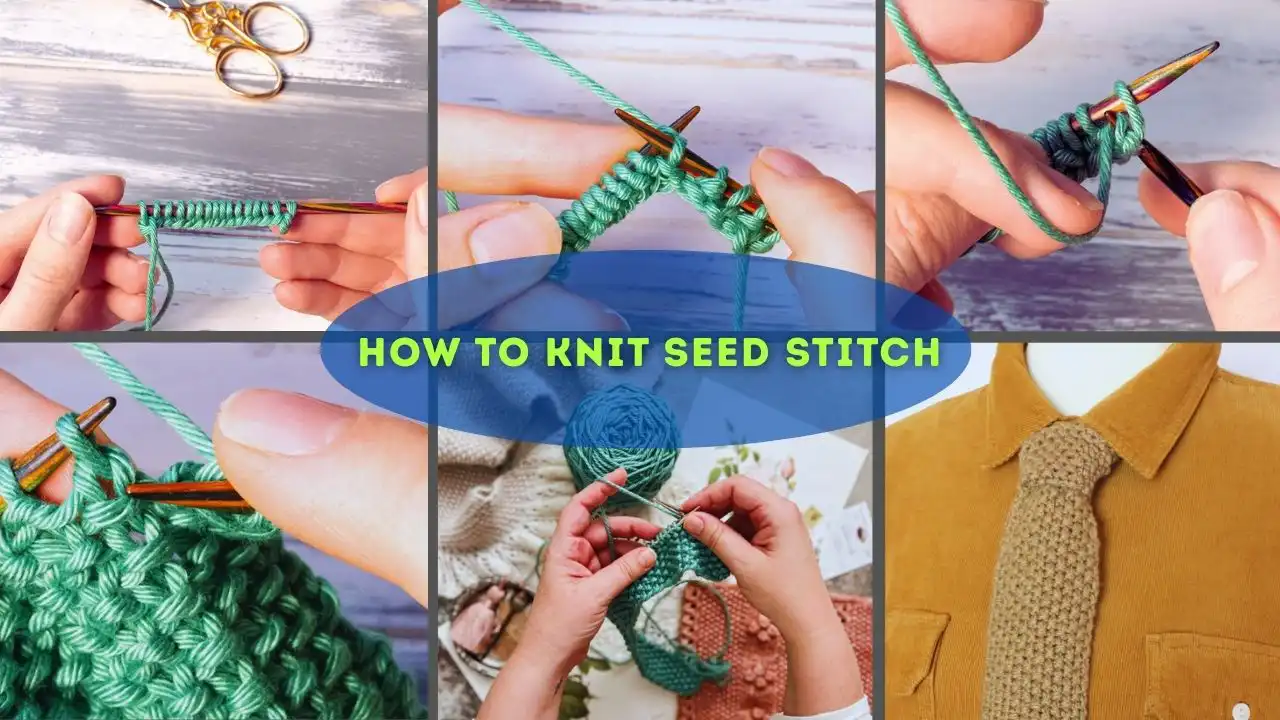
Seed Knitting Stitch

This stitch is also a variety of knit and purl stitch. You will work alternating between knit and purl to make this seed stitch. And, the most remarkable point of this stitch is that it is a reversible stitch. So, both sides of the fabric will look the same. This stitch is pretty simple so you can easily make a scarf or a washcloth using it. Also, it creates a textured look and hence, it is also a widely used knitting stitch for creating the border of a project.
watch video Seed Knitting Stitch
Written Pattern: Knitting Stitches Pattern
The seed knitting stitch does not require any particular number of cast-on stitches. So, you can cast on either an even number of stitches or an odd number.
For an even number of cast-on stitches, work like this;
- Row 1 (RS): (k1, p1) Repeat till you reach the end of the row.
- Row 2 (WS): (p1, k1) Repeat till you reach the end of the row.
- Continue repeating row 1 and row 2 for the rest of the project.
For an odd number of cast-on stitches;
- Row 1 (RS): (k1, p1) Repeat till you reach the end of the row.
- Continue repeating row 1 for the rest of the project.
11
Broken Rib Knitting Stitch

If you have fabrics with a lot of texture yet are moderately stretchy, this broken rib knitting stitch is the right choice. Although it is not reversible like the rib stitch, it offers a more weave look. You can make any kind of clothing like a sweater, tops, etc. with this knitting stitch.
watch video Broken Rib Knitting Stitch
Written Pattern: Knitting Stitches Pattern
- Cast on (odd number of stitches).
- Row 1: knit all of the stitches.
- Row 2: (k1, p1) Repeat till you reach the end of the row.
- Continue knitting by repeating row 1 and row 2.
- Finally, work like row 2 for casting off.
12
Moss Knitting Stitch

This is also another variation of our basic two knitting stitches, knit and purl stitch. It is almost similar to the seed knitting stitch. The only difference is that, in seed stitch, you will alternate the knit and purl stitch in every row while in moss stitch you will do it in every other row. This stitch is also easy to work and if you face a problem counting the stitch, you can always use a marker. And the interesting fact is that moss stitch is completely reversible.
watch video Moss Knitting Stitch
Written Pattern: Knitting Stitches Pattern
- Cast on any even number of stitches.
- Row 1 And Row 2: (k1, p1) Repeat this pattern to complete the two rows.
- Row 3 And Row 4: (P1, k1) Repeat this pattern to complete row 3 and row 4.
- Now, continue repeating Row 1 to Row 4 to finish your project.
13
Double Moss Knitting Stitch

This is a modified version of the moss stitch. While in moss stitch, you repeat one knit and one purl stitch, in double moss stitch, you will repeat two knit stitches and two purl stitches. It is a more dense stitch and so a great choice for making a blanket.
Written Pattern: Knitting Stitches Pattern
- Cast on any number of stitches that is multiple of 4+2.
- Row 1: (k2, p2) Repeat till you have only one stitch left, k2.
- Row 2: P2, (k2, p2) Repeat to complete the row.
- Row 3: (P2, k2) Repeat till you have only one stitch left to finish the row, p2.
- Row 4: K2, (p2, k2) Repeat to complete the row.
- Continue repeating rows 1 to 4 to finish your project.
14
Purse Knitting Stitch

Want a breezy scarf for the pre-winter time or a nice tote bag? This purse stitch is a great choice for your then. It is an easy and beginner-friendly knitting stitch. With only purl and knit stitch combinations, you can easily work this stitch.
Written Pattern: Knitting Stitches Pattern
- Cast on any even number of stitches.
- Row 1 (RS): P1, (yarn over, p2tog) Repeat till you only have one stitch left, p1.
- Continue repeating row 1 till you finish the project.
15
Seeded Rib Stitch

This stitch is a mixture of seed and rib stitch. It is very chunky and has a nice textured look like the rib stitch. This stitch is a good alternative to the classical rib stitch and is also pretty easy to make.
Written Pattern: Knitting Stitches Pattern
For straight needles,
- Cast on some multiple of 4 +3.
- Row 1 (RS): (K3, P1) Repeat till you have only one stitch left, K3.
- Row 2 (WS): K1, P1, K1, (K2, P1, K1) Repeat to complete row 2.
- Continue repeating row 1 and row 2 to finish your project.
For a circular needle,
- Cast on a multiple of 4.
- Round 1: (K3, P1) Repeat this pattern to complete the first round.
- Round 2: (P1, K1, P2) Repeat this to complete the second round.
16
Twisted Rib Knitting Stitch

This stitch is used to make sturdy and firm edges like the cuff of a sweater or socks etc. It is also a mix of knit and purl stitch. But you will work through the back loop a lot to make this knitting stitch.
Written Pattern: Knitting Stitches Pattern
For straight needles,
- Cast on an even number of stitches.
- Row 1 (RS): (K1 tbl, p1) Repeat till you reach the end of the row.
- Row 2 (WS): (K1, p1 tbl) Repeat till you reach the end.
- Continue repeating row 1 and row 2 to finish knitting.
For circular needles,
- Round 1: (K1 tbl, p1) Repeat to the end.
17
Half-Twisted Rib Knitting Stitch

This stitch is a moderate version of the twisted rib stitch. The use of this half-twisted rib stitch is the same as the normal twisted rib stitch. This knitting stitch is also very easy to work and suitable for beginners. Usually, you will work in round to make this stitch, and make sure to work all the knit stitches through the back loop while the purl stitches through the front loop.
Written Pattern:
For a straight needle,
- Cast on any number of stitches.
- Row 1 (RS) : (K1 tbl, p1) Repeat till you complete the first row.
- Row 2 (WS): (P1 tbl, k1) Repeat to complete the second row.
- Continue repeating row 1 and row 2 to finish the knitting.
18
Hurdle Knitting Stitch

This is another member of the textured stitch group. You will work knit and pul stitches to create this beautiful knitting stitch. It is a combination of rib and garter stitches. The pattern is created by combining one row of rib and 2 rows of garter stitch. It is also a beginner-friendly stitch.
Written Pattern:
For the straight needles,
- Cast on any even number of stitches.
- Row 1 and Row 2: knit all the stitches.
- Row 3 and Row 4: (k1, p1) Repeat till you complete the rows.
- Continue repeating row 1 to row 4 to finish the knitting.
For circular needle,
- Cast on any even number of stitches
- Round 1 (RS): knit all the stitches.
- Round 2: purl all the stitches.
- Round 3 and Round 4: (K1, P1) Repeat till you complete the two rounds.
- Continue repeating round 1 to round 4 to finish the knitting.
19
Linen Knitting Stitch

Linen stitch is an excellent choice to make a flat fabric that creates a beautiful woven look. This fabric made using this stitch is very durable yet comfy. So, you can make a top for a mild cold time or a beautiful sweater using this linen knitting stitch. Also, though this stitch is not reversible, it has a unique pattern for both sides. The front side shows the linen stitch pattern while the back side shows a pattern similar to the seed stitch.
Written Pattern:
- Cast on an odd number of stitches.
- Row 1: (K1, Wyif, Slst 1, Wyib) Repeat till you complete the row.
- Row 2: (P1, Wyib, Slst 1, Wyif) Repeat till you complete the row.
- Continue repeating row 1 and row 2 to finish the knitting.
20
Basket Weave Knitting Stitch

If you love the woven appearance yet are still a beginner, this basket weave stitch is a great choice for you. Despite its delicate and elegant appearance, this stitch is just another combination of the knit and purl stitch. So, you can easily work it and make pretty clothes like scarves, tops, etc. with this.
Written Pattern:
- Cast on any number of stitches that is a multiple of 6
- Row 1 (RS): Knit all the stitches.
- Row 2 (WS): Purl all the stitches.
- Row 3: (K1, P4, K1) Repeat this pattern to reach the end of the row 3.
- Row 4: (P1, K4, P1) Repeat till you complete row 4.
- Row 5: (K1, P4, K1) Repeat till you complete row 5.
- Row 6: (P1, K4, P1) Repeat till you complete row 6.
- Row 7: Knit all the stitches.
- Row 8: Purl all the stitches.
- Row 9: (P2, K2, P2) Repeat till you complete row 9
- Row 10: (K2, P2, K2) Repeat till you complete row 10.
- Row 11: (P2, K2, P2) Repeat till you complete row 11
- Row 12: (K2, P2, K2) Repeat till you complete row 12.
- Continue repeating row 1 to row 12 to finish the project.
21
Tiles Knitting Stitch

It is a variation of the basket weave stitch. With great texture, this Tiles knitting stitch is a good choice for a cozy blanket. As you will only work with different combinations of knit and purl stitches, this stitch is also a very easy one. Also, despite being a non-reversible stitch, both side of the knitted fabric with these Tiles stitch looks beautiful.
Written Pattern:
- Cast on any number of stitches, a multiple of 6 + 4.
- Row 1 (RS): k4, (p2, k4) Repeat till you complete row 1.
- Row 2: P4, (k2, p4) Repeat till you complete row 2.
- Row 3: k4, (p2, k4) Repeat till you complete row 3
- Row 4: p4, (k2, p4) Repeat till you complete row 4
- Row 5: k4, (p2, k4) Repeat till you complete row 5
- Row 6: p4, (k2, p4) Repeat till you complete row 6
- Row 7: p4, (k2, p4) Repeat till you complete row 7
- Row 8: k4, (p2, k4) Repeat till you complete row 8
- Continue repeating row 1 to row 8 to finish the project.
22
Chinese Wave Knitting Stitch

This is a lacey pattern stitch and the biggest flex of this Chinese wave stitch is that it does not curl up like most other lacey stitches. You will only work knit stitches to make this pretty knitting. That is, no purl stitch is used, so the fabric’s structure stays flat. Although it has a breezy pattern, this stitch creates thick and textured fabric.
Written Pattern:
- Cast on any odd number of stitches.
- Row 1 (RS): Knit all of the stitches.
- Row 2: K1, (Slst 1, k 1) Repeat till you complete row 2.
- Row 3: Knit all of the stitches.
- Row 4: K2, (Slst 1, k1) Repeat till you are only one stitch away from completing this row, k1.
- Continue repeating row 1 to row 4 to finish the project.
23
Lace Rib Knitting Stitch

Looking for a knitting stitch that can maintain the ribbed texture yet has a lacey appearance? Then, try this lace rib stitch. Due to its unique and elegant appearance, you can use it for table runners, shawls, scarves, and many more fashion icons.
Written Pattern:
- Cast on any number of stitches that is a multiple of 6.
- Row 1: ( k2tog, k1, 2 yo, k1, Slst k) Repeat till you complete row 1.
- Row 2: (p3, p1 tbl, p2) Repeat till you complete row 2.
- Continue repeating row 1 and row 2 to finish the project.
24
Netted Knitting Stitch

Want to make a mesh bag or a lace to make your dress prettier? This netted stitch is the right choice for such projects. Above all, you will only work with the knit stitch to work this. Also, this stitch is a reversible one.
Written Pattern:
- Cast on any number of stitches that is a multiple of 2 + 2.
- Row 1: k1, (wrap your working thread around the empty needle, k2tog) Repeat till you are only one stitch away from completing this row, k1.
- Continue repeating row 1 to finish your knitting.
25
Sand Knitting Stitch

This is an easy and perfect stitch to practice for beginners. It creates a beautiful texture with minimum effort and is very suitable for garments. You can also use it to make different accessories for the home.
Written Pattern:
For the straight needles,
- Cast on any number of stitches that is a multiple of 2 + 1.
- Row 1 (RS): Purl all the stitches of this row.
- Row 2 (WS): K1, (P1, K1) Repeat till you complete row 2.
- Continue repeating row 1 and row 2 to finish your knitting.
For the circular needle,
- Cast on any number of stitches that is a multiple of 2.
- Row 1 (RS): Purl all the stitches of this row.
- Row 2: (P1, K1) Repeat till you complete row 2.
- Continue repeating row 1 and row 2 to finish your knitting.
26
Garter Rib Knitting Stitch

This stitch is a variation created from garter stitch and ribbed stitch. Being only two repetitive rows, this pattern is a perfect project for beginner knitters. Although this knitting is not a reversible one, it has a great texture on the wrong side too. So, you do not have to worry about whether it will look pretty on both sides or not.
Written Pattern:
- Cast on any number of stitches that is a multiple of 4 + 2
- Row 1 (WS): k2, (p2, k2) Repeat till you complete row 1.
- Row 2 (RS): knit all of the stitches of row 2.
- Continue repeating row 1 and row 2 to finish your knitting.
27
Andalusian Knitting Stitch

This stitch gives out a vintage vibe and it is a moderated version of the stickinette stitch. It has a dense appearance and a very cozy feeling. So, you can make a nice blanket or elegant sweater using it.
Written Pattern:
For the straight needles,
- Cast on any number that is a multiple of 2 + 1
- Row 1 (RS): Knit all of the stitches of this row.
- Row 2 (WS): Purl all of the stitches of row 2
- Row 3: (K1, P1) Repeat till you have only one stitch left to complete this row, K1.
- Row 4: Purl all the stitches.
- Continue repeating row 1 to row 4 to complete the knitting project.
For the circular needles,
- Cast on any number that is a multiple of 2
- Round 1: Knit all of the stitches of this round.
- Round 2: Knit all of the stitches of this round too.
- Round 3: (K1, P1) Repeat to complete this round.
- Round 4: Knit all of the stitches of this round too.
- Continue repeating round 1 to round 4 to complete the fabric.
28
Purl Ridge Knitting Stitch

Want a knitted scarf with a pop texture? Then, try this purl ridge stitch. It is also a modified version of the stockinette stitch. So, you will mainly work with knit and purl stitches to create it and hence, it is a very suitable stitch for beginners too.
Written Pattern:
- Cast on your desired number of stitches.
- Row 1 (RS): Knit all of the stitches of this row.
- Row 2 (WS): Purl all of the stitches of this row.
- Row 3: Knit all of the stitches of this row.
- Row 4: Knit all of the stitches of this row.
- Continue repeating row to row 4 till you reach the desired size and length.
29
Reverse Ridge Knitting Stitch

This reverse knit stitch aka horizontal welts creates a unique rib stitch pattern. The catchy part is that, while most rib stitch has a vertical texture, this stitch makes a horizontal texture. This is also a beginner-friendly knitting stitch as you will work with only the two basic knitting stitches.
Written Pattern:
- Cast on your desired number of stitches.
- Row 1 (RS): Knit all of the stitches of this row 1.
- Row 2 (WS): Purl all of the stitches of this row 2.
- Row 3: Knit all of the stitches of this row 3.
- Row 4: Knit all of the stitches of this row 4.
- Row 5: Purl all of the stitches of this row 5.
- Row 6: Knit all of the stitches of this row 6.
- Continue repeating row 1 to row 6 to complete your knitted fabric.
30
Diamond Brocade Knitting Stitch

This stitch creates a diamond-shaped pattern that is both pretty and elegant. So, if you want a moderate and elegant sweater for this winter, use this diamond brocade stitch. Also, this stitch gives an aesthetic vibe. So, to give your house a new look, you can make some table runners, pillowcases, etc. with this stitch. It is also a suitable stitch for beginners as it only requires the knowledge of knit and purl stitches.
Written Pattern:
- Cast on any number that is a multiple of 8 + 1.
- Row 1 (RS): (K4, P1, K3) Repeat till you are only one stitch away from completing this row, K1.
- Row 2 (WS): P1, (P2, K1, P1, K1, P3) Repeat to complete this row.
- Row 3: (K2, P1, K3, P1, K1) Repeat till you are only one stitch away from completing this row, K1.
- Row 4: P1, (K1, P5, K1, P1) Repeat to complete this row.
- Row 5: (P1, K7) Repeat till you are only one stitch away from completing this row, P1
- Row 6: P1, (K1, P5, K1, P1) Repeat to complete this row.
- Row 7: (K2, P1, K3, P1, K1) Repeat till you are only one stitch away from completing this row, K1
- Row 8: P1, (P2, K1, P1, K1, P3) Repeat to complete this row.
- Continue repeating row 1 to row 8 till you reach the desired size of your project.
Remember, if you work in the circular needle, cast on only a number that is multiple of 8, no need to add 1. So, you will only follow the repetitive pattern on rows 1 to row 8, no need to work the 9th stitch on these rows.
31
Flag Knitting Stitch

Flag stitch creates a beautiful reversible fabric that has a unique pattern. Though this knitting stitch looks a bit complicated, it only requires basic knitting and purling. So, you can easily make a pretty knitted piece using this stitch. The triangular patterns throughout this stitch make it look elegant. Give it a try to make a sweater or scarf for this winter.
Written Pattern:
- Cast on any number multiple of 7 + 1.
- Row 1: (K1, P1, K5) Repeat till you are only one stitch away from completing this row, K1
- Row 2: P1, (P4, K2, P1) Repeat to complete this row.
- Row 3: (K1, P3, K3) Repeat till you are only one stitch away from completing this row, K1
- Row 4: P1, (P2, K4, P1) Repeat to complete this row.
- Row 5: (K1, P5, K1) Repeat till you are only one stitch away from completing this row, K1
- Row 6: P1, (K6, P1) Repeat to complete this row.
- Continue repeating row 1 to row 6 and complete your knitting.
If you wish to use a circular needle, you need to cast on only a number multiple of 7, no need to add 1. So, you only need to work the repeating stitches across all the rows. Such as, for row 1, work (K1, P1, K5) repeatedly to complete the row, no need to stop before you have one stitch left. And finally continue repeating row 1 to row 6 to reach your desired length.
Final Words
My dear fellow knitters! It is time to say goodbye for now! We have learned 30+ amazing and cool knitting stitches today. And above all, even a beginner can try out these stitches. Practice them to master those stitches and make your favorite piece of cloth with them. However, I will suggest making washcloths, scarves, table runners, etc. cute and small fabrics as your initial projects.
Hope to hear from you soon about your experiences and I am eagerly waiting to see your creation using these stitches. Also, never hesitate to reach out if you have any questions about knitting stitches. See you soon with another amazing and interesting article.

![Select Crochet Clothing Ideas: [Best Crochet Fashion] Crochet Clothing Ideas](https://crochetmind.com/wp-content/uploads/2025/07/Crochet-Clothing-Ideas-Best-Crochet-Fashion-in-2025-1-1.jpg)

![The Best 30+ Free Crochet Cat Patterns [Beginner-Friendly Guide]](https://crochetmind.com/wp-content/uploads/2025/04/1-The-Best-30-Free-Crochet-Cat-Patterns-Beginner-Friendly-Guide.webp)
