Have you ever looked at a lovely crochet project? And have you wondered how it was created? Maybe you’ve always wished to make your own crochet pattern. However, you felt it might be too complicated. You Don’t need to worry. You can easily learn how to make your own crochet pattern. Very little creativity is required for this. You just need to know a few basic tools. You must have a plan on how to create your own crochet pattern.
In this guide, you will see how to make your own crochet pattern. You could be a newbie crocheter or one who has been stitching for years. You will see something unique and special in this guide.
Let’s start by knowing what a crochet pattern is. Also, explore why it’s important.
In This Post
What Is Crochet Pattern?
A crochet pattern is a set of instructions. It shows you how to achieve a specific design. It is done by using a crochet hook. Yarn is used in this. It breaks down the design into easy-to-follow steps.

Any crochet pattern will contain the following:
- Stitches: The specific stitch kinds. It includes chains, double crochet, slip stitch, etc.
- Rows/Rounds: The number of rows and rounds to create.
- Yarn Type: The specific type of yarn used in the pattern
- Measurements: The final size of the completed piece
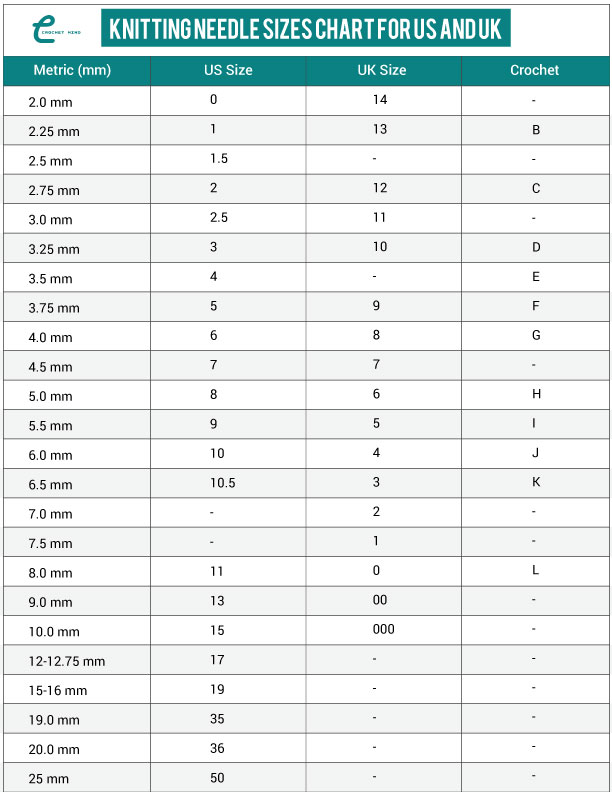
- Tools: The size of the crochet hook or any other stuff to be used.
It will guide you when you start creating your own crochet pattern. You may then arrive at the best choice about the most suitable stitches, yarn type, and tools for your project. We have now covered the basics.
How to Make Your Own Crochet Pattern?
Let us learn how to make your own crochet pattern. Here is a step-by-step guide:
Step 1: Get an Idea

The first step in how to make your own crochet pattern is idea generation. What do you want to make? Are you looking for a scarf or a hat? Do you want to make a blanket or even something decorative like a toy? Possibilities are infinite! Take inspiration from things around you, perhaps from nature, favorite colours, or patterns you’ve seen before.
Pro Tip: Just getting started? Make your first very simplest idea. This will make the process of how to make your own crochet pattern much easier to follow.
Step 2: Refine Your Idea
Once you have an idea, it’s time to refine it. Ask yourself questions such as:
- How big should the item be?
- What type of yarn will work well?
- Should it be easy, or do I want it a bit more complex?
For example, you are creating a scarf. Determine if it is meant to be long or short, wide or narrow. Creating your design will help you along the way as you eventually begin crocheting the actual pattern.
Step 3: Draw a Sketch

Before attempting to do any crochet work, it is helpful to sketch out simply what you wish your creation to be. Remember, you don’t have to be an artist – just a little scrawny drawing will do. Here you will try to picture how it would look in the end. This phase makes it much clearer for someone who wishes to make their own crochet pattern.
For instance,
If you are creating a hat, you will draw an initial circle to indicate the top and a few lines indicating the sides. This will guide you as you move forward.
Step 4: Calculate Measurements

Once you have a sketch, calculate the measurements. Determine how big or small your design should be. Use measuring tape to take the desired size.
For example,
If you’re making a blanket, you should determine whether it’s for a baby or an adult because obviously, the size will vary. But measuring accurately is essential when you learn how to make your own crochet pattern.
Step 5: Material and Tools

Nothing can be started without these proper materials. So for this step, you will need:
- Yarn-make sure to pick the color and type that fits your design
- Crochet hook (the size will depend on the yarn)
- Measuring tape
- Scissors
- Stitch markers (optional, but useful for tracing patterns)
- Obtain all of these things before crocheting.
Step 6: Choose a Stitch

Then you will need to determine which stitches will go into your pattern. This is one of the most important aspects of how to make your own crochet pattern. Basic crochet stitches include:
- Chain stitch
- Single crochet
- Double crochet
- Slip stitch
If you are doing something simpler like a scarf, a simple single or double crochet may be the way to go. A complication to the design may be incorporating some stitches though.
Step 7: Make Your Crochet Pattern Grid

With a crochet pattern grid, you kind of know where your stitch will go by following it on the graph as if it were a map. You can use graph paper or do a digital grid to plot your design, and each square represents a stitch.
For example,
If you want to design a square pattern, each square of the grid illustrates one crochet stitch. Color in rows and columns to see how many stitches you will have to make to obtain the shape you want.
Crocheting on a grid makes it much easier to find and complete how to make your own crochet pattern.
Step 8: Crochet a Swatch

Before starting to work on the whole project, it would be great to crochet a small swatch-a small sample of your pattern. That way you’ll get to see how the stitches come out and whether the measurements are proper or not. Then with a successful swatch in place, you can go ahead with confidence. If not then you better correct your pattern before proceeding.
This way, you can ensure that your final product comes just as envisioned and that your design makes sense at least from a practical point of view.
Step 9: Crochet the Parts of Your Design

Once you are happy with your swatch, you can begin to crochet the actual parts of your design. It is a good idea to break your project into more manageable parts, for example, splitting a sweater between the front and back or, if you are making a truly complex garment like a sweater, breaking it up into sleeves, body, and neck.
As you crochet each section of your swatch, follow the steps outlined for you in your pattern to guide you through this process. Remember, part of how to make your own crochet pattern involves adjusting as you go. If something doesn’t look quite right, it’s perfectly fine to rip a few stitches and fix it.
Step 10: Finalize the Design by Attaching the Parts

The last step in how to make your own crochet pattern is to put everything together. Once you are working on a project that consists of several parts- like the hat with a brim or the toy with differently shaped body parts attachment will be necessary.
Sew pieces together using a tapestry needle, or crochet them together if that fits your design. Once all parts have been assembled, look over your finished piece and make any tiny adjustments you need to.
That’s it! You now know how to make your own crochet pattern and have just successfully made your very first crochet project.
Tips for Creating Your Crochet Pattern
Here are some in-depth tips guiding you as you learn how to make your own crochet pattern. Follow these simple instructions by now making your design smooth and enjoyable:
1. Begin Simple
At first, one might find it easy to start with something a little simpler if it’s the first time they are doing something like making a crochet pattern. It may just get too hard or overwhelming trying to create a large, complicated piece, such as a sweater or a very detailed stuffed animal. However, some good starting points are a scarf, a coaster, a dishcloth, or an elementary hat.
These types of projects are faster to complete, easier to troubleshoot and will give you a great sense of accomplishment. Once you have mastered some simpler designs, you can start gradually towards more intricate patterns.
2. Take Notes
As you start crocheting, make sure you note everything you do as you go along. It may seem useful to you again later in the project, especially if you want to share or sell it. Try to count how many stitches you have each row or round, including versions in what stitches you used or if you changed things up.
Secondly, produce detailed notes when monitoring changes so that the design can be corrected at any time to save much-needed time during mistakes.
3. Color Combination Test
One of the pleasures of crochet is playing around with colour and having a unique, very personal design. Don’t be afraid to test out a multitude of colours when planning your own crochet pattern. For example, you can include stripes, blocks of colour, or even gradient yarns that change colour as you stitch them.
Colour experimenting adds depth and interest to your design and may even spark a new pattern. Consider how finer yarns will make intricate stitches pop and darker yarns lend a sleek, minimalist look.
4. Check Your Tension
In crochet, tension means how tightly or loosely you pull the yarn. It is a very critical factor in how your finished project turns out. You can be working with the smallest stitches ever if your tension is so tight, and the finish might end up stiff. In contrast, if you have a very loose tension, the fabric may be too floppy, and the stitches end up quite loose and fuzzy.
When you make a pattern for your crochet project ensure that your tension is even at the start and even till the end. You can make a comparison using a sample swatch or by following some guidelines on the recommended use of that very yarn.
5. Be Patient
Probably takes a little time and patience to learn how to make your own crochet pattern. Don’t take it quite so fast -crocheting is about the ride almost as much as the prize. When you come to a problem or a stitch isn’t working as you want it to or a measurement seems wrong, just stop for a second and assess how to adjust what is going wrong.
Let yourself commit errors and learn them all once again. Patience will gradually yield confidence and skill, and you will enjoy creating patterns.
Safety Measures While Crocheting
As with any creative activity, there are precautions to be taken in crochet, which, especially while learning how to make your own crochet pattern, might help you avoid common mistakes and keep your projects enjoyable and stress-free.
1. Be Loose on Stitches
When crocheting, avoid tightening your stitches. Tight stitches make it hard to work into them, especially when crocheting multiple rows or rounds. They can also stiffen your fabric a bit, which doesn’t make it too flexible, so it may not work well with scarves or clothing you’d like to drape nicely. If you feel as if you’re pulling the yarn too tight, try relaxing your hands and doing the crochet in a smooth flow of yarn. This will be easier on your hands while crocheting, and your design will turn out soft and smooth.
2. Take Breaks
It may strain your hands, wrists, and shoulders while doing a big project or crocheting for a long time. Always take breaks to avoid causing you strain or injury. Stretch out your hands, fingers, and arms to remove tension, letting the blood flow well. In this case, breaking for some time will not only make you avoid being uncomfortable but also allow your eyes to rest. You will, therefore, be fresh on coming back to your project with a fresh focus and energy.
3. Check Your Yarn Supply
Running out of yarn in mid of the project is the worst thing. It may happen to any unskilled crocheter. You would rather be prepared before starting to crochet by ensuring enough yarn in hand. Take some time to research the pattern’s recommended yardage versus how much you have on hand.
If you are creating your crochet pattern, you should estimate how much yarn you will need. Estimate by crocheting a sample swatch first. Then multiply the yarn used in the swatch by how big your project is going to be. It is far better to have extra yarn than to run out of it halfway through!
4. Read Through Patterns
Always read through any pattern you download off the internet or get in a book before starting the project. In this way, you’ll know exactly what’s in the pattern and what’s in store for you when working on that project. Thus, you won’t face any surprises later on.
The more you know about the pattern, the better you’ll have a sense of what to watch for in advance. In this way, you are better prepared to face any unknown stitches or techniques. Even in design, this gives you a vision of the complete project and keeps your instructions clear and easy to follow.
With these tips and precautions in mind, you are most likely to win the game of making your crochet patterns. These tips, together with practice and fine-tuning your skills, will give you the utmost self-confidence in making lovely and unique crochet projects.
Conclusion
Learning how to make your own crochet pattern is quite a creative process in itself that could prove so fulfilling to do patiently and experimentally. The motivation to make something, whether it’s simple or complicated, requires careful step-by-step guidelines that bring your ideas into reality. It is less intimidating to experiment using stitches, colours, and types of yarn because that’s what makes your design unique.
It comes over time, too, and you’ll have become proficient in creating lovely, unique patterns that bring out your individuality. Remember, true beauty in crochet takes place not in what’s being made but in the act of making it.








![Select Crochet Clothing Ideas: [Best Crochet Fashion] Crochet Clothing Ideas](https://crochetmind.com/wp-content/uploads/2025/07/Crochet-Clothing-Ideas-Best-Crochet-Fashion-in-2025-1-1.jpg)

![How to Make Your Own Crochet Pattern? [10 Easy Step with Image]](https://crochetmind.com/wp-content/uploads/2024/11/How-to-Make-Your-Own-Crochet-Pattern-10-Easy-Step-with-Image.png)


![The Best 30+ Free Crochet Cat Patterns [Beginner-Friendly Guide]](https://crochetmind.com/wp-content/uploads/2025/04/1-The-Best-30-Free-Crochet-Cat-Patterns-Beginner-Friendly-Guide.webp)
