Crocheting is a fun, painless activity that could provide you with functional yet beautiful designs for your home. Among the most accessible and helpful crochet projects for beginners, one that tops the list is the potholder. You can make it for yourself to keep at home. Moreover, this is best to give it as a gift.
Here’s an easy guide on how to crochet a potholder for beginners. By the end of this article, you will learn how to make a simple potholder.
In This Post
- What Is a Potholder?
- What Supplies Will You Need to Crochet Potholder?
- What Is the Size of Most Potholders?
- Which Is the Best Yarn to Crochet a Potholder?
- How to Crochet a Potholder for Beginners?
- How do I Put a Loop on a Crochet Potholder?
- What Size Crochet Hook Do I Need to Crochet a Potholder?
- Which Crochet Stitch Is Best to Crochet a Potholder?
- Tips on How to Crochet Potholders
- Double Thick Crochet Potholder Pattern
- Be Aware of the Warning When You Crochet Potholders
- Conclusion
- Frequently Asked Questions (FAQs)
What Is a Potholder?
A potholder is a square or round piece of fabric, usually about an inch thick. It is designed to protect hands and countertops from hot pots, pans, or dishes.
Crochet Potholders are made from heat-resistant material like cotton yarn to withstand the sweltering conditions in which people prepare food. They are essential in every kitchen because they protect against burns and damage from hot objects.
The best thing about crocheting your potholder is that you’re bound to enjoy its project in terms of color, size, and shape adaptation according to your kitchen’s décor or personal preferences. Plus, it will always practice a bit on your crochet skills as a beginner.
What Supplies Will You Need to Crochet Potholder?
Before explaining how to crochet a potholder for a beginner’s journey, you must have all the needed materials. You will have an easier time if you already have everything set.
Tools:
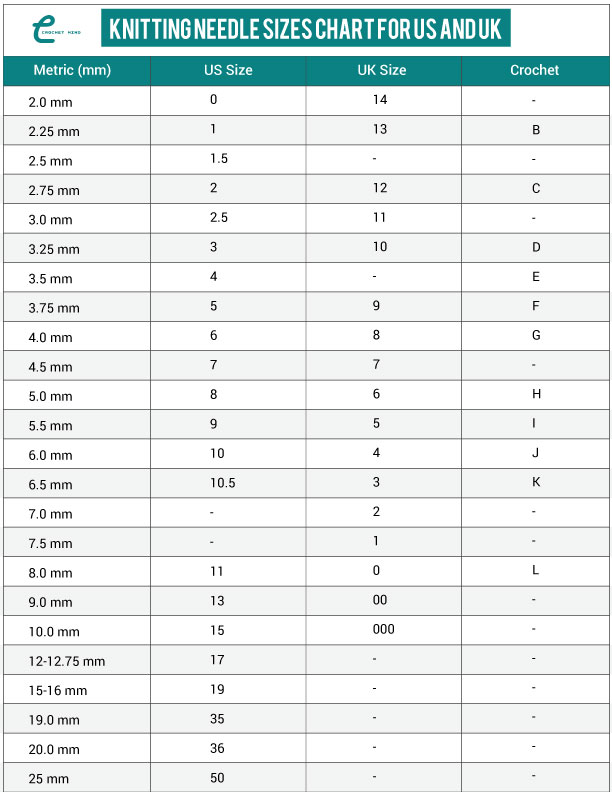
- Crochet Hook: A Crochet Hook is required. Its size depends on the type of yarn you use. Most potholders are finished using medium-weight yarn. You may need a size G-6 (4.0mm) or H-8 (5.0mm) crochet hook for such jobs.
- Scissors: When you’re done with your potholder, you will use scissors to cut the yarn.
- Tapestry Needle: The tapestry needle is used for weaving in those ends of yarn on your completed potholder.
Materials:
- Cotton Yarn: Use 100% cotton yarn on a potholder. Cotton is resistant to heat. So, it will not melt if placed over a direct flame like acrylic. Acrylic melts when exposed to heat and presents a danger in the kitchen.
- Measuring Tape: This is crucial because it will help you accurately measure your potholder as you crochet.
- Stitch Markers (optional): Stitch markers help tell you where you are in your project. This is especially useful if you use more complex stitches or patterns.
What Is the Size of Most Potholders?
Most potholders are 7 to 8 inches square. However, you can adjust the size according to your choice. A square potholder is easiest to crochet for beginners. You can make it smaller or larger by changing the number of chains in your foundation row and adding or subtracting rows of single crochet stitches.
You can add rows of square knitted patterns to achieve the desired size for a giant potholder. Measure every row to keep your potholder neat and square.
Which Is the Best Yarn to Crochet a Potholder?
When beginners learn how to crochet a potholder, it is very important to select a suitable yarn. Cotton yarn is the best material for potholders, mainly because it’s heat-resistant and durable. Moreover, it can be easily washed. Among the best cotton yarn brands for potholders are:
- Lily Sugar’n Cream: 100% cotton yarn that is economical and available in many colors.
- Peaches & Crème: Very soft yet firm cotton yarn
- Lion Brand 24/7 Cotton: Mercerized material is more resistant to wear and tear, making the potholders more resistant and attractive.
How to Crochet a Potholder for Beginners?
Now, let’s understand how a beginner can crochet a potholder. This is a step-by-step guide. You will be learning from scratch. Let’s see in details:
Step 1: Start with a Chain

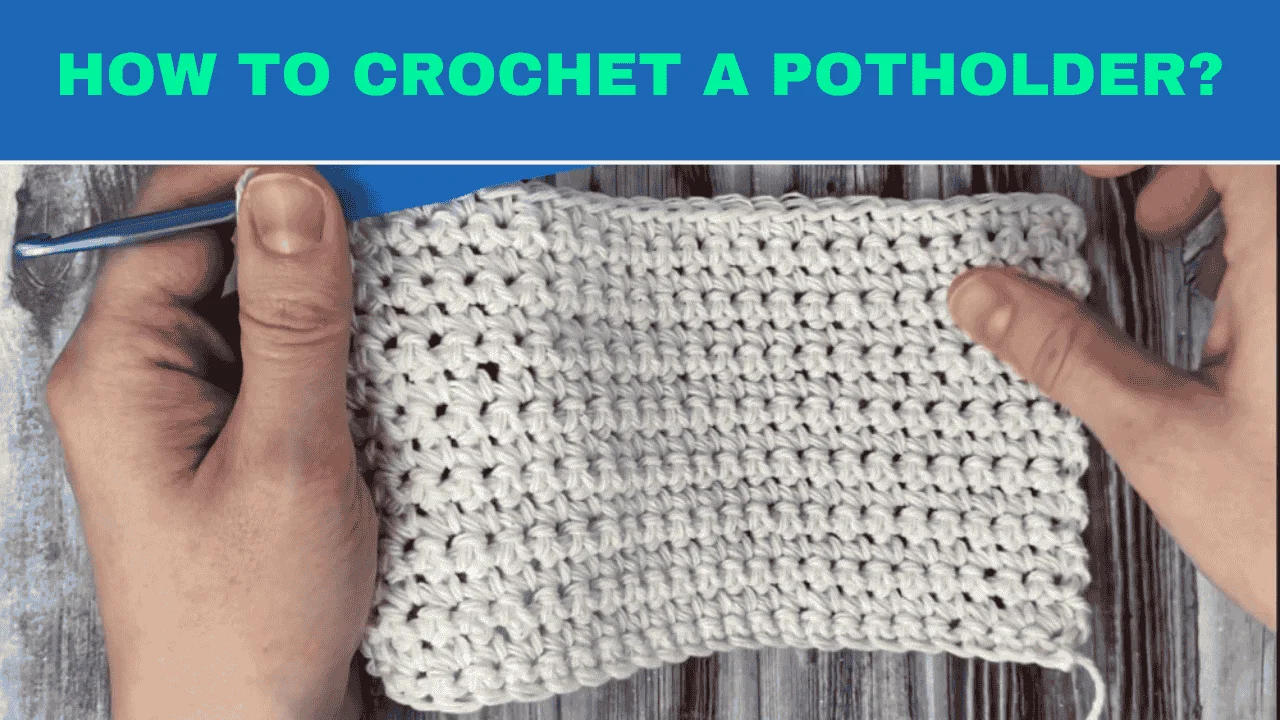
With a slip knot on your hook, begin your crochet by chaining 20-25 for a regular potholder. The size you desire for your potholder depends on how much you chain. This chain is what forms the foundation of your potholder.
Step 2: Make Single Crochet Stitches

After you have created your chain, hook your hook under the second chain off the hook. Yarn over and pull through that loop. Yarn over again and pull through both loops on your hook. You have made your first single crochet. Continue making single crochet stitches across the row.
Step 3: Turn Your Work and Continue

At the end of your first row, chain one, turn your work. Then, begin making single crochet stitches into every stitch of the row from which you started. Repeat this process several times until you find your square potholder coming out.
Step 4: Finish Your Potholder

When your potholder is the size you like, cut the yarn with a 6-inch tail. Pull the tail through the loop on the hook. Then, pull it tight to close up the yarn. Use the tapestry needle to weave in the ends.
You did it! You just learned how to crochet a potholder for beginners. Your new potholder is ready to go in your kitchen.
How do I Put a Loop on a Crochet Potholder?

Adding a loop to your potholder is a helpful way it does not easily dangle in your kitchen. Here is how you can do it:
- Chain 10 stitches when you reach the final corner of your potholder.
- Sew in the end, which is the same as slip stitch, into the same corner stitch to create a loop.
- Insert the yarn tail into the work and pull it through the last loop you left to secure it.
- Tie the ends with your tapestry needle.
And there you have it! Your potholder now has a convenient loop to hang. If aren’t cleared yet, Watch this YouTube video for easy understanding.
What Size Crochet Hook Do I Need to Crochet a Potholder?
When making a potholder as a beginner in crochet, choose the proper size of a crochet hook. This will result in the needed tension and thickness. Beginners usually use either G-6, which is 4.0mm, or H-8, 5.0mm, crochet hooks using medium-weight cotton yarn for their projects. These sizes produce a thickish potholder to guard your hands from heat without being too expansive for a fresh beginner.
If your yarn label recommends a hook size, use that as an approximation. You know right away when stitches seem too tight or too loose, and you can sometimes remedy this by changing to a smaller or larger hook.
Which Crochet Stitch Is Best to Crochet a Potholder?
The best stitch to use while crocheting potholders is the single crochet stitch. This gives a dense and tight fabric ideal for hand-handling heat. More complex stitches, like half double crochet or double crochet, can be attempted by skilled individuals further down the crochet learning journey. However, from the start, you will find that the single crochet stitch is straightforward, strong, and uncomplicated to learn.
Tips on How to Crochet Potholders
1. Crochet Tightly
This is done while making potholders. It is an essential rule while crocheting, as tighter stitches keep the holes out. Loosely crocheted stitches may permit holes to form and gaps, which could let heat pass through them and, therefore, burn your hands.
Tighter stitches will create a solid, dense potholder that protects your hands from burns when you hold hot pots and pans. A closely woven potholder will produce a denser fabric, which is required to make the item practical and safe enough for use in the kitchen. Beginners should also learn how to crochet stitches tightly to make a firm item.
2. Use Right Yarn
The yarn you will use in crocheting the potholders is of high value. For this particular project, you should always use 100% cotton yarn. Cotton is also heat-resistant, so you can safely apply it to hot dishes. It also does not melt as synthetic fibers would because of a higher temperature.
Cotton is also extremely resistant, easy to clean, and long-lasting, so your potholder will serve you for quite some time with frequent use and washing. Some popular cotton yarn brands include Lily Sugar’n Cream and Peaches & Crème, both of which are readily available and affordable.
3. Practice Consistent Tension
Consistent tension is the difference between an even, well-shaped potholder and one that is lopsided or bumpy. Uneven tension can cause the stitches to be too tight or too loose in some places, making it difficult for the potholder to lie flat or even function. Therefore, spare that time and practice attaining the right balance for your stitches.
Crochet a little sample or swatch before starting your project is always a good idea. This will help you get a feel for your tension and catch any problems before you work with the finished potholder. The more experience you get, the less likely you will have inconsistent tension.
Double Thick Crochet Potholder Pattern

A double-thick potholder gives extra insulation against heat. This is how you can create a straightforward pattern for a double-thick crochet potholder:
- Chain 30 stitches.
- Work in a single crochet for 30 rows to make a long rectangle.
- Fold the rectangle in half so that the edges match.
- Crochet around the edges and join both sides, leaving one side open.
- Finally, close the last edge with sewing and attach a loop.
This pattern gives you a thick, firm potholder for heavy kitchen use.
Be Aware of the Warning When You Crochet Potholders
1. Don’t Use Synthetic Yarn
The biggest safety hazard with crocheting potholders is what kind of yarn you use. Never use synthetic yarn, like acrylic, to make a potholder. Acrylic and other synthetic fibers melt under high temperatures. This can be hazardous in the kitchen.
When one uses acrylic yarn and makes a potholder that is exposed to hot cookery ware, the yarn might melt through, causing burns or even posing a danger of fire. In extreme cases, the use of synthetic yarn may pose a serious fire hazard in your home. Stick with natural fibers like cotton.
2. Adequate Thickness
The potholder also has to be enough in terms of thickness. If the potholder is too thin, it will not provide enough protection from the heat. So, you might get burnt while handling it. An increase in the rows of stitches on your pattern or a double-thick design where two layers of fabric are crocheted together helps ensure the adequacy of your potholder’s thickness.
If you are unsure if your crochet potholder is thick enough, it’s safer to have more rows or use the double-thick pattern for it. This makes sure that your potholder can carry the high heat from the pots and pans and even from baking dishes.
Conclusion
Learning how to crochet a potholder for beginners is a fairly simple yet gratifying project. You will end up with a useful, pleasurable thing in your kitchen using only a few basic tools, materials, and stitches. Having followed along on this tutorial, you now know which yarn to select, what stitch to try, and how to attach a hanging loop to make it just that little bit easier to hang on.






![Select Crochet Clothing Ideas: [Best Crochet Fashion] Crochet Clothing Ideas](https://crochetmind.com/wp-content/uploads/2025/07/Crochet-Clothing-Ideas-Best-Crochet-Fashion-in-2025-1-1.jpg)



![The Best 30+ Free Crochet Cat Patterns [Beginner-Friendly Guide]](https://crochetmind.com/wp-content/uploads/2025/04/1-The-Best-30-Free-Crochet-Cat-Patterns-Beginner-Friendly-Guide.webp)
