Are you thinking about making a new scarf and getting stuck on where to start? Stop right here, as we are here for you with a complete guide on how to crochet a scarf for beginners.
Generally, crochet is a new thing and can be tricky. But when you have the right materials, guidance, and step-by-step instructions, you can make the complete process so much easier. Plus, you should know the right tips to avoid mistakes during the process.
So just sit back and learn how to perfectly crochet a scarf. Starting from the first loop and finishing off the scarf, we will be right there for you. Let’s get started!
In This Post
How to Crochet a Scarf for Beginners? [Step-by-step Instructions]
Crochet a scarf is super easy if you can go in the right direction. Here is the complete guide to crochet a scarf you can follow from first to last:
Materials:
| Material | Description |
|---|---|
| Yarn | A medium-weight yarn or worsted weight in your color choice. It would be about 200-300 yards. |
| Crochet Hook | Size H (5.0 mm) or size recommended for your yarn. |
| Scissors | It is needed to cut the yarn at the end. |
| Darning Needle | For weaving in the yarn tails. |
| Tape Measure | To measure the length of your scarf. |
| Yarn Needle (optional) | To help with weaving in ends if you prefer. |
Let’s see the steps to crochet a scarf for beginners:
1. Make Your First Loop
Firstly, to crochet a scarf you will have to start making the slipknot. Through this knot, you will get the first loop of your scarf. Well, this is so simple; just follow the instructions below and complete your first loop:

Step 1: Prepare the Yarn:
Hold your yarn and leave a few inches of yarn at the end of it. It should be enough through which you can easily work. Hold it in your left hand, and the loose point should point towards you.

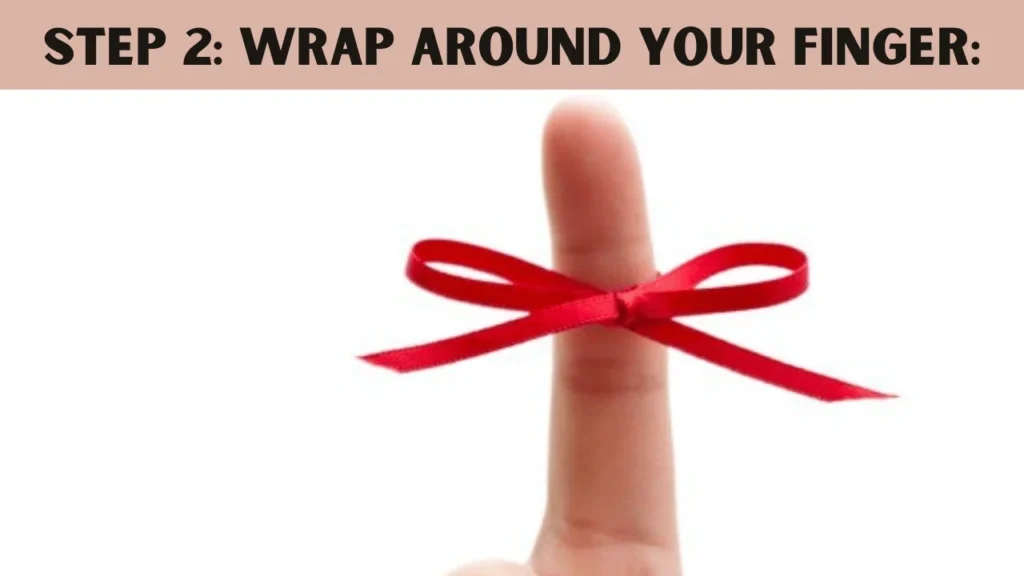
Step 2: Wrap Around Your Finger:
Take the loose part and wrap it around your finger. Make a circle or loop around your left index finger. The yarn should have a cross over itself to make a full loop. While doing so, check and ensure that your loose end is in front of your finger and the longer end is just behind that.
Step 3: Create a Second Loop:
Pick the longer end and grab a small part of it. Pull it through the first loop you have just made around your finger. That’s all; you should have your second loop.

Step 4: Remove the Loop from Your Finger:
When you have the above part, the time comes to carefully slide the loop off your finger. Make sure you hold onto it with your other hand. Check once you should now have a small knot with one loop on top.

Step 5: Tighten the Slipknot:
Now gently pull the loop at the top to tighten the knot. Wait! Don’t pull too hard, as you want the loop to be snug, but it should still be able to move.

Step 6: Place It on Your Hook:
Finally, take the slipknot you have just made and place it onto your crochet hook. You can adjust how tight or loose the loop is. For this, pull on the ends of the yarn. Make sure the loop is sliding easily on the hook but isn’t too loose.

Now, you’ve successfully made your first loop!
2. Chain 13 plus three Stitches
Now that you have the first loop in your hand, this is the time to start making your chain. This will be the foundation of your scarf. Let’s start:
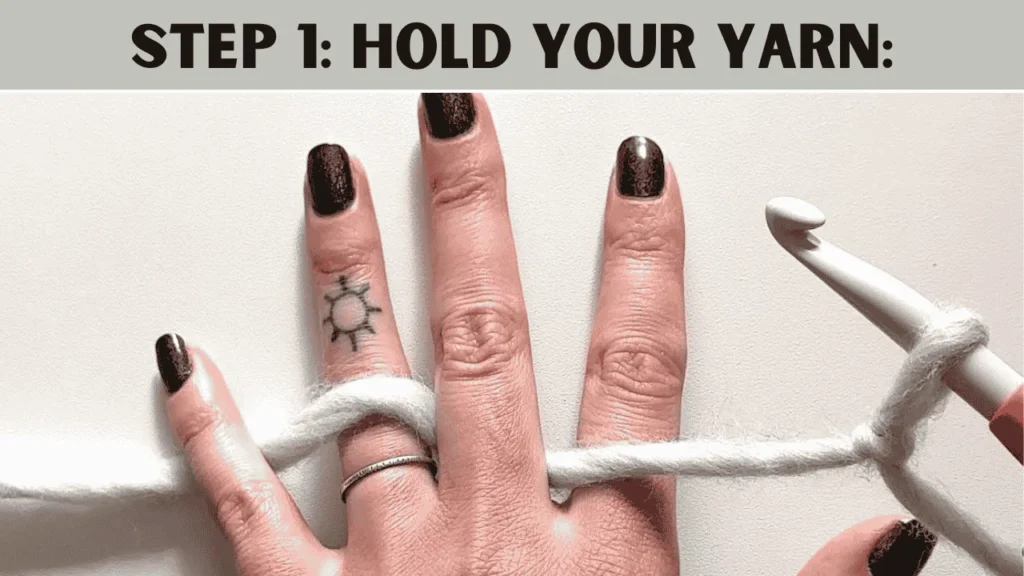
Step 1: Hold Your Yarn:
Hold the crochet hook in your right hand and yarn in your left hand. Check once that the longer end is between your fingers. This will basically help you to control the loop, like how tight or loose the yarn is.
Step 2: Make the First Chain Stitch:
To do the first chain, take the yarn from behind the hook and wrap it over the top of the hook. This is called “yarn over.” When done, pull the hook down through the loop. Just look, it is already on your hook.

Congratulations, You’ve just made your first chain stitch!
Step 3: Continue Making Chains:
Now keep repeating this process. Wrap the yarn over the hook. Are you done? Now pull it through the loop.
Each time you do this, you will make another chain stitch. But you will need 13 of these stitches to make the perfect width of your scarf.

Step 4: Chain Three More for the Turning Chain:
So when you are done with making 13 chains, make three stitches more. These extra three chains are like the “turning chain.” The chain will give you space to start the next row.

Step 5: Check Your Chains:
Concentrate as you are making your chain. Don’t pull too tight as it will make your scarf too stiff. But also, don’t leave the loops too loose. It will make your scarf look uneven. Each of your stitches should be the same size.

3. Double Crochet Stitches for the First Row
When you have the foundation chain, the time comes to make the first row. This is how you will make it. Just go with us and make your row today!
Step 1: Count Back to the Fifth Chain:
Before you begin, look at your chain. Start from the hook and count backward to the fifth chain. This is just the place where you’ll start your first double crochet stitch. You can skip the first few chains as they are the turning chains and give the row some height.

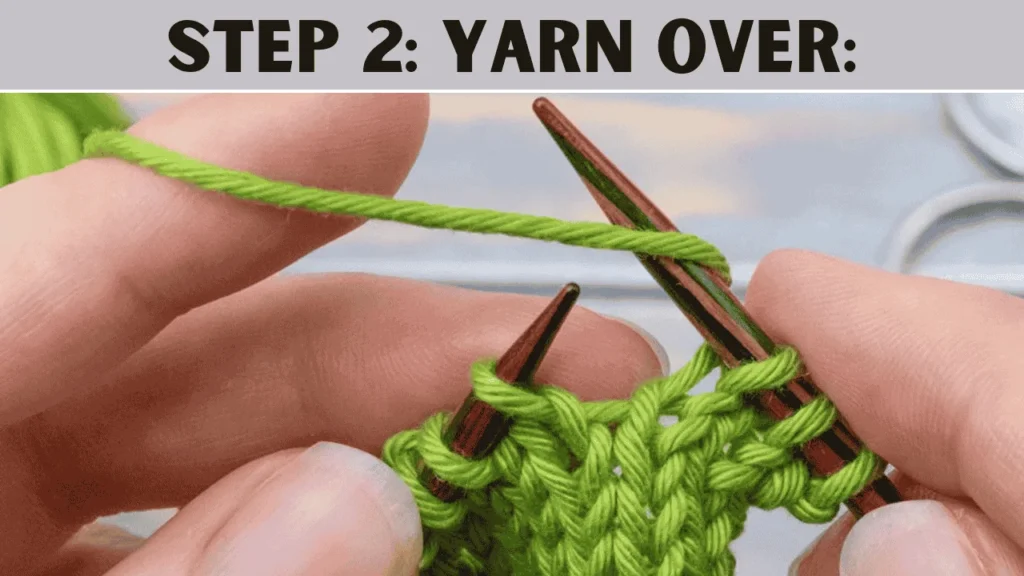
Step 2: Yarn Over:
The time is to make a double crochet. To do so, wrap the yarn over your hook from behind. The yarn should now be wrapped around your hook. And now get ready for your next step.
Step 3: Insert the Hook into the Chain:
Now insert the hook into the fifth chain. Check and make sure the hook goes under both loops of the chain. It just makes your stitch stay strong.

Step 4: Yarn Over and Pull Through:
Yarn over again. This time, pull the yarn through the chain stitch. You should now have three loops on your hook. After completing, yarn over again. Then you have to pull the yarn through the first two loops on your hook. This is the time when you have two loops left on your hook.
Finally, yarn over one more time, and now you will pull through the last two loops on your hook. Well, this will complete your first double crochet stitch.

Step 6: Continue Double Crocheting:
Don’t stop. Keep doing the same steps for each chain stitch and complete it across the row. Yarn over, and insert the hook into the next chain. Then yarn over again and pull through two loops. After that, yarn over. Now simply pull through the remaining two loops. You have to repeat until you are in the end row.

4. Chain three, skip one, and double crochet
When your first row is done, this is the time to make your second row. Though the steps seem different, don’t worry! Follow the below instructions.
Step 1: Turning Chain:
First, you have to make a turning chain. To do so, yarn over and pull through the first loop on your hook. Do it up to three times. That means you should chain three stitches again, just like at the start of the scarf.

Step 2: Skip the First Stitch:
When your turning chain is done, look at the first double crochet stitch in your previous row. Here, you need to skip this first stitch and move to the next one. Remember, this step is important as it will give perfect spacing between your stitches.

Step 3: Double Crochet into the Next Stitch:
Well, yarn over again. Insert your hook into the top of the next double crochet stitch just like before.
Make sure you are going under both loops of the stitch. Then yarn over again. Pull through the stitch to get the three loops on your hook.

Once again, you have to yarn over and pull through the first two loops. Repeat the same process. Pull through the last two loops. Congratulations! This is your second double crochet stitch!
Step 4: Continue Across the Row:
This is super easy. You just have to chain three, skip the next double crochet stitch, and make the double crochet into the following stitch. You have to just continue this until you are at the end of the row.

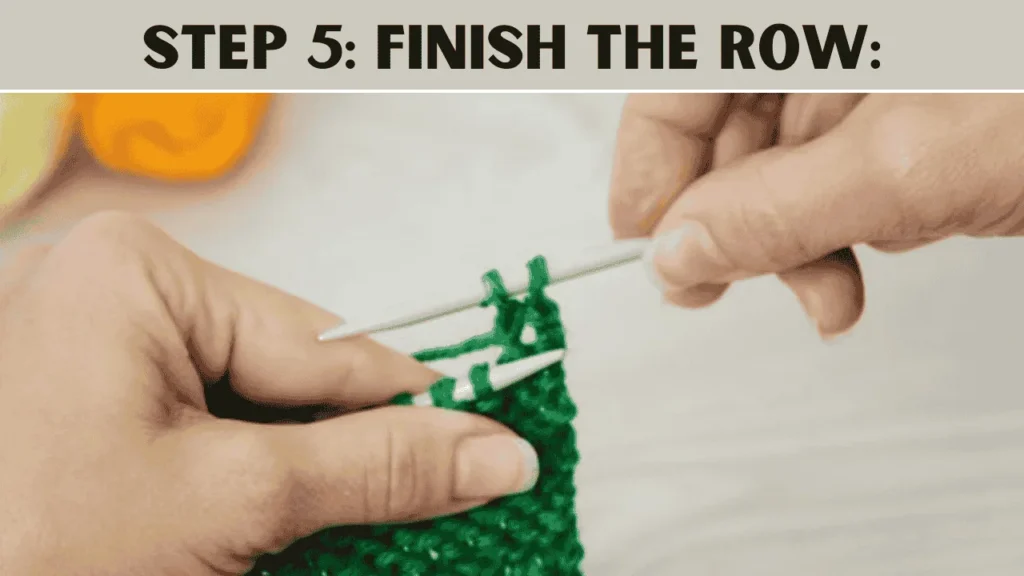
Step 5: Finish the Row:
When you reach the end of the row, you should have a double crochet into the last stitch. Follow this for the next row as well.
Step 5: Finish the Scarf
When you reach the desired length of your scarf, it’s time to finish it off. First, check and make sure you’ve completed your last double crochet stitch and it’s looking neat. Then, pull the loop on your hook for a few inches and make it wide.

Done? Take your scissors cut the yarn in the center of the loop and make a tail. Now just pull this tail and tighten the knot that forms. You can make it more secure.
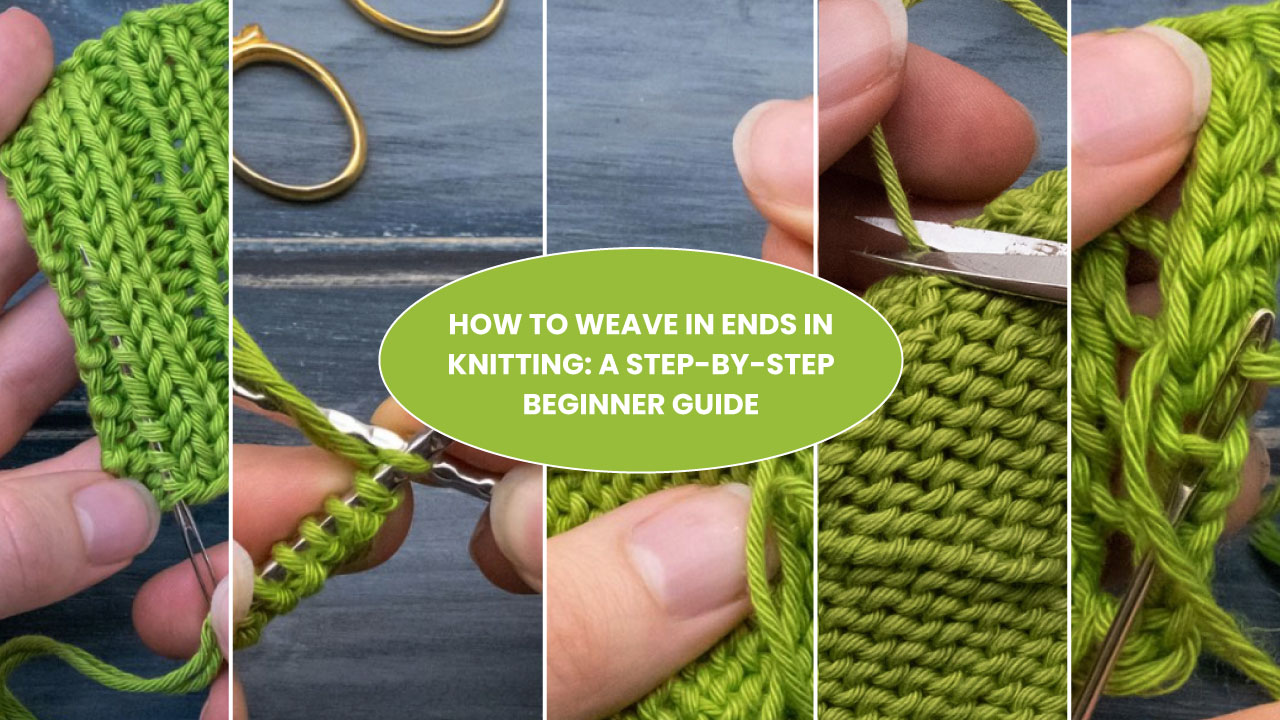
To do so, tie a second knot through the last stitch. You can hide the tail. For this, thread it through darning or use a crochet needle to weave it into the edge of the scarf.
Congratulations! You’ve completed your beautiful scarf!
Haven’t you understood yet? Let’s the YouTube Video:
How to Add Fringe to a Crochet Scarf
Here are the steps on how you can fringe or edge a crochet scarf. Including –
Step 1: Measure and Cut the Yarn
If you want to add fringing to the end of the crochet, it’s quite a nice little final finish to your project. You want to pull out a stand that is roughly very, very roughly the length of the fringe that you would like. It’s always worth pulling out a little bit extra because we trim this up at the end. So, once you have roughly the length of your fringe that you like. Double that stand. So, we have pulled out a nice long stand of yarn, which is roughly double the length that you would like your fringing to be, and then you can cut that off.
Now we need to pull out some more pieces. We need all the fringes to be the same length as this one you’ve just cut. You just need to line up my next strand of yarn, pull it along. You need to keep doing this until you have pulled out quite a length of yarn. For my fring, I like to use three strands of yarn per little fringe section, but how many you use is entirely up to you. You can use more, you can use less. This is your entirely personal preference.
Step 2: Prepare the Strands
Group three strands together. Also, fold the fringe strands in half. This creates a small loop at one end.
Step 3: Attach the Fringe
So, I have separated out three of these long strands, and I am just going to loop them over my finger. Then, with your hook, going to loop them over your finger.
Then, with your hook working into the scarf part that you like. For my personal project, I worked on the last little chain between one gap.
Step 4: Insert Hook and Pull the Loop Through
So, if I start over here with this chain, one space next to that very last stitch that I made. So, I am looking upside down at my scarf. This is where we just finished off. Then you need to loop the start into the hook. Pull them through the hook.
Step 5: Tighten and Finish the Fringe Knot
Then you need to put your finger through that loop and grab the ends of the yarn. Pull the end yarn through the loop. Then you can go ahead and very gently pull on this yarn to tighten up that knot.
At this time, you will have little tails in your hand. This time, you need to finish off. Tighten them up, and your first fringe piece is ready. You need to work this way, by the link, as per your preference.
Step 6: Repeat Across the Edge
Continue adding fringe sections evenly along the scarf edge. Try to keep the spacing consistent for a neat and balanced look.
Step 7: Trim the Fringe
Once all fringe sections are added, lay the scarf flat and trim the fringe ends evenly to your desired length.
Pro Tips To Avoid Mistakes While Crocheting Your Scarf?
Crocheting a scarf can be a lot of fun and a time to show your creativity. But one problem is that a small mistake during your work can destroy all your efforts. For this, we have listed some pro tips to crochet a scarf that you should keep in mind while you are doing this:
- Always count your stitches after each row. This will help you notice whether you have skipped any row mistake.
- Before you do anything, make sure your crochet hook size matches your yarn. If your hook is very big and too small, it may just make your stitches uneven.
- Try to keep your yarn at the same height during the making process. If your stitches are too tight, it will seem very hard to work with. On the other hand, if it is too loose, it will not bring the exact look you want.
- While making the scarf, we recommend taking a break in the middle; it will give you a fresh start after the break.
- Take a stitch marker from the beginning and use it in each row. This will help keep track of where your row starts.
- If you’re new to double crochet, we recommend practicing on a small piece of yarn before you start on your scarf.
- Enjoy the process. Crocheting is all about relaxation. So don’t stress and bring out your own creativity.
In Closing
There is how to crochet a scarf for beginners. So, well, you’ve completed your very first scarf, and hopefully, you have enjoyed the process. As you see, crocheting something new is challenging, but in the right direction, it’s relaxing as well. Isn’t it?
I just have one suggestion for you: try different patterns for your scarf. Also, try to use different yarn and add fun details to your scarf. When you can do it, you can make matching hats or even mittens! So just keep practicing and take your time.







![Select Crochet Clothing Ideas: [Best Crochet Fashion] Crochet Clothing Ideas](https://crochetmind.com/wp-content/uploads/2025/07/Crochet-Clothing-Ideas-Best-Crochet-Fashion-in-2025-1-1.jpg)



![The Best 30+ Free Crochet Cat Patterns [Beginner-Friendly Guide]](https://crochetmind.com/wp-content/uploads/2025/04/1-The-Best-30-Free-Crochet-Cat-Patterns-Beginner-Friendly-Guide.webp)
