

To make a single crochet stitch, insert your hook, yarn over and pull up a loop, then yarn over and pull through both loops. Start a flat practice piece in the second chain from your hook; on later rows, work under both top loops of each stitch. These 21 lessons take you from that first stitch to textured swatches and four practical projects.
If your starting chain feels awkward to hold, review how to start a crochet chain, give yourself room to work slowly, and watch what happens on the hook. You can begin with a small square and return to the other techniques whenever you feel ready.
Key Takeaways
- Start in the second chain from your hook.
- Count stitches after every row.
- Work under both top loops unless instructed otherwise.
- Practice increases and decreases before shaping projects.
- Check US and UK terminology before following patterns.
- Finish a small swatch before starting a larger project.
How do you learn the single crochet stitch from the start?
Begin with a short foundation chain, practice the insert–pull up–pull through sequence, and keep the same stitch count across each row.
At a Glance
- Chain 13 for a 12-stitch practice piece.
- Begin in the second chain from the hook.
- Chain 1 and turn between rows.
- Mark the first and last stitches.
One hook, a little yarn, and a small swatch are enough to begin. You do not need to master every variation today.
This CrochetMind guide uses US crochet terminology. The Craft Yarn Council identifies US single crochet as UK double crochet, while US double crochet corresponds to UK treble crochet. Check the terminology before following any pattern.
Keep these basics beside you:
| Skill | What to remember | Practice goal |
|---|---|---|
| First row | Begin in the second chain from the hook | Chain 13 to make 12 stitches |
| Later rows | Chain 1, turn, work into the first stitch | Keep 12 stitches across |
| Standard stitch | Work under both top loops | Make consistent fabric |
| Increase | Make 2 stitches in one stitch | Add 1 stitch |
| Decrease | Combine 2 stitches into one | Remove 1 stitch |
| Working in rounds | Mark the first stitch | Track where each round begins |
21 Lessons and Projects to Build Your Skills
1. How do you make your first single crochet stitch?
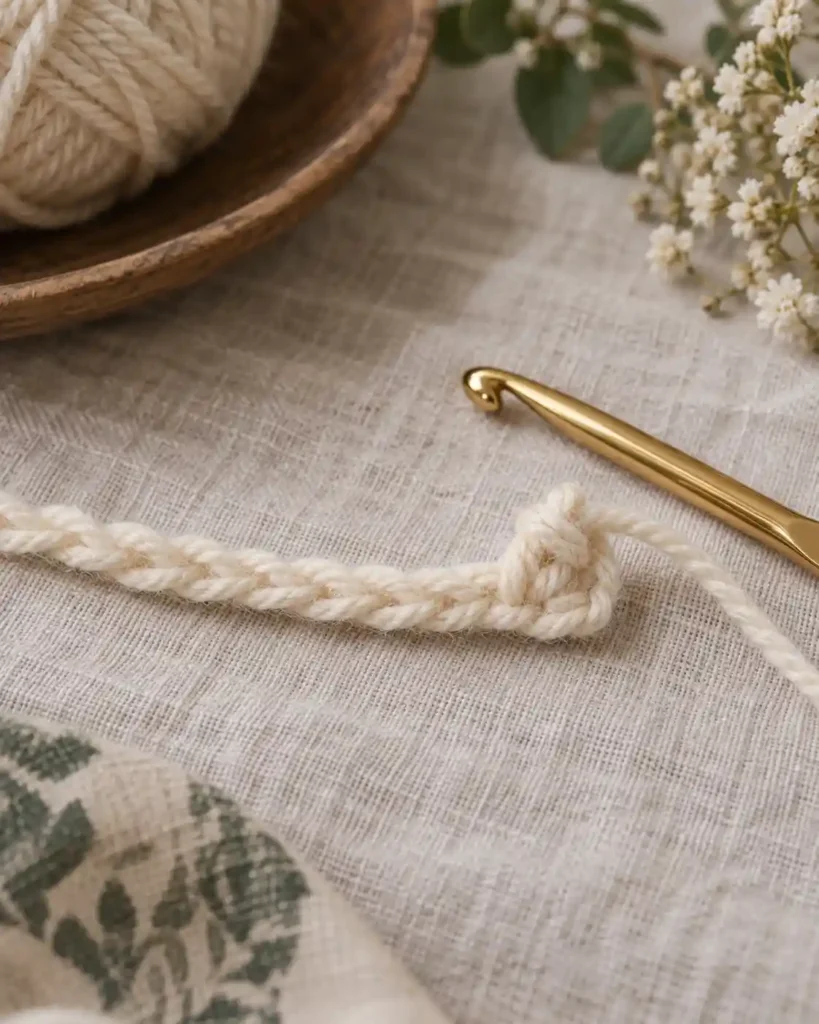
Your first single crochet gives the foundation chain a little substance. Compared with learning on a large blanket, a narrow swatch keeps the stitches easy to inspect. Set it on your lap and work slowly enough to see each loop form. For a complete beginner, that clear view matters more than speed.
Make a slip knot by forming a yarn loop, pulling a small loop of working yarn through it, and placing that loop on your hook. Tighten gently. To chain, catch the working yarn with your hook and draw it through the existing loop; repeat until you have 13 chains.
Then:
- Insert your hook into the second chain from the hook.
- Wrap the working yarn over the hook and pull it through the chain.
- Check that you have two loops on your hook.
- Yarn over again and draw through both loops.
- Work one single crochet in every remaining chain.
You should finish with 12 stitches. The live loop on your hook does not count as a chain or completed stitch.
2. How do you work the single crochet stitch second row?
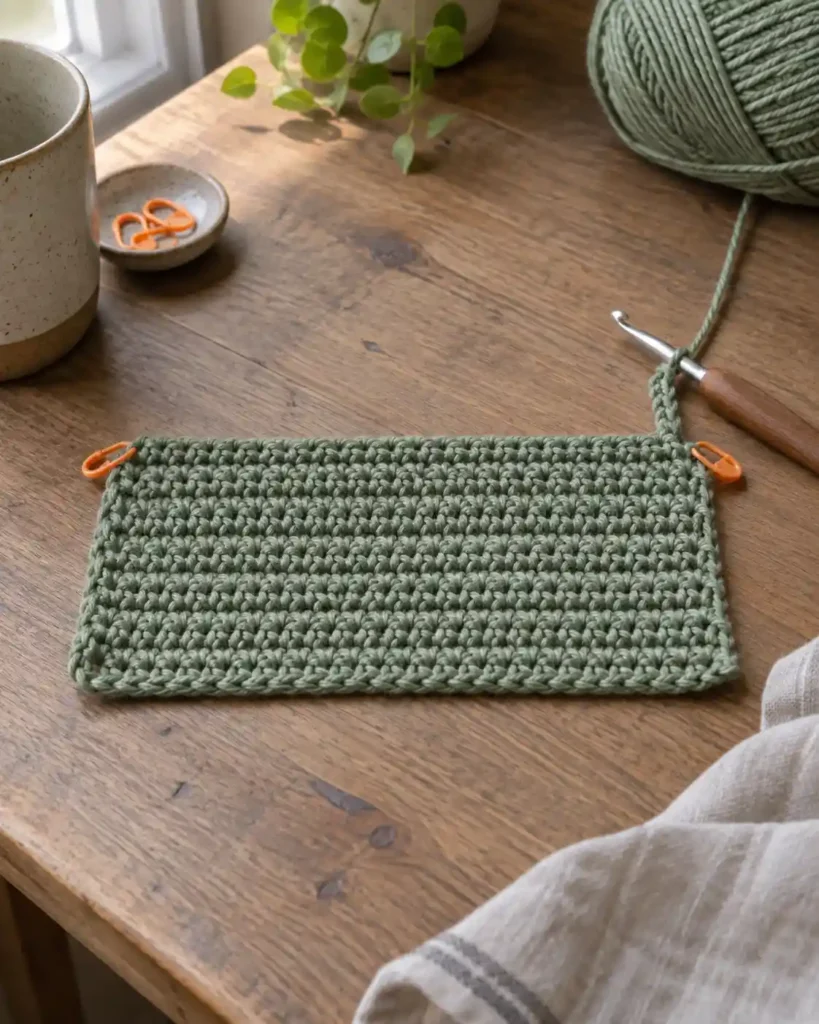
The second row is where your little chain starts becoming fabric. You now work into recognizable stitch tops instead of searching through the starting chain. This is a useful stopping point for a short evening practice session. Beginners who struggle to hold a narrow chain often find the wider piece easier to manage.
Chain 1 and turn. Insert your hook under both loops of the first stitch, then make one single crochet in each stitch across.
Keep the count at 12. For this swatch, the turning chain does not count as a stitch; Clover’s beginner tutorial uses the same chain-one, first-stitch approach.
3. How can you count stitches and rows accurately?
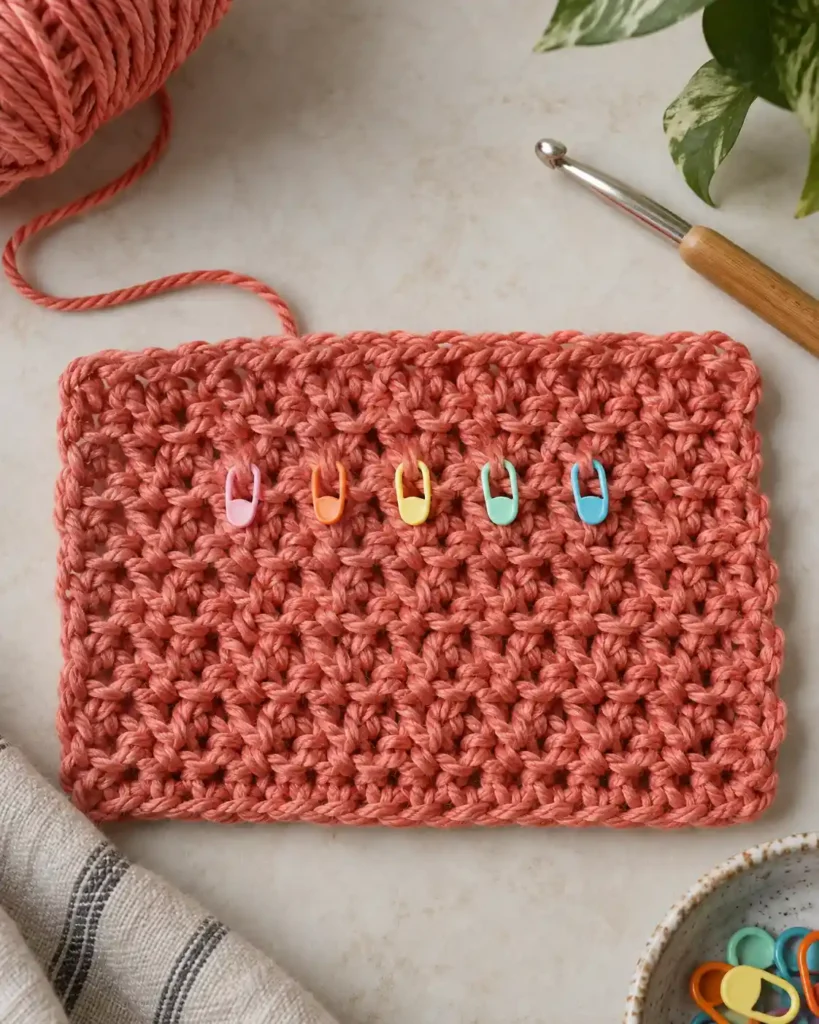
Counting gives you an early warning when your fabric changes width. Checking every row catches a missed stitch much sooner than measuring the finished piece. Before putting your work away, count across once and record the row number. That small habit makes restarting tomorrow much less confusing.
Each completed stitch has a V-shaped top. Count those tops across the row without including the loop on your hook.
Rows alternate in appearance when you turn your work. The Woobles explains that front-facing V shapes and the bars visible from the reverse both represent rows, and suggests keeping a written tally.
4. Why are your stitches tight or uneven?
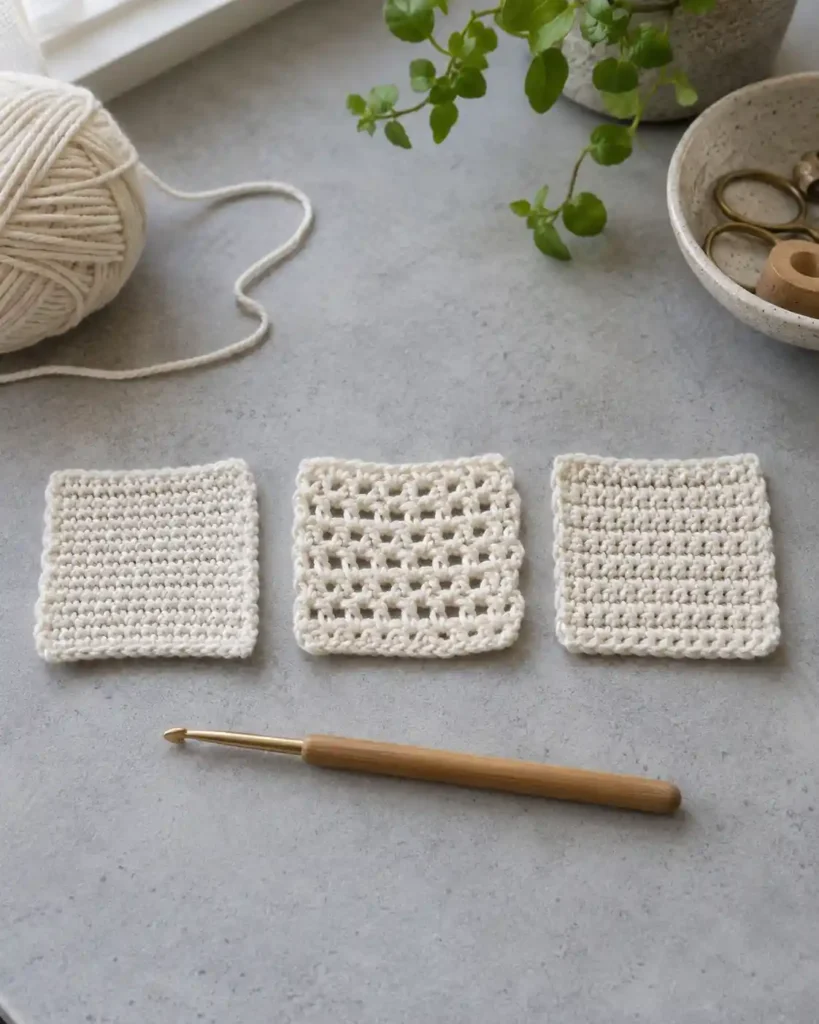
Tension controls how easily your hook moves and how the fabric feels. Pulling harder after every stitch can make the next row more difficult instead of tidier. When your hands begin gripping tightly, pause and loosen your hold. Anyone fighting the hook should solve that discomfort before starting a bigger project.
Try three adjustments:
- Let the loop sit around the hook’s full shaft.
- Feed yarn steadily instead of tugging each stitch closed.
- Check whether your hook has caught only part of the yarn strand.
The Woobles also recommends loosening loops and checking for snagged fibers when the hook sticks.
5. How do you increase with two single crochet stitches?
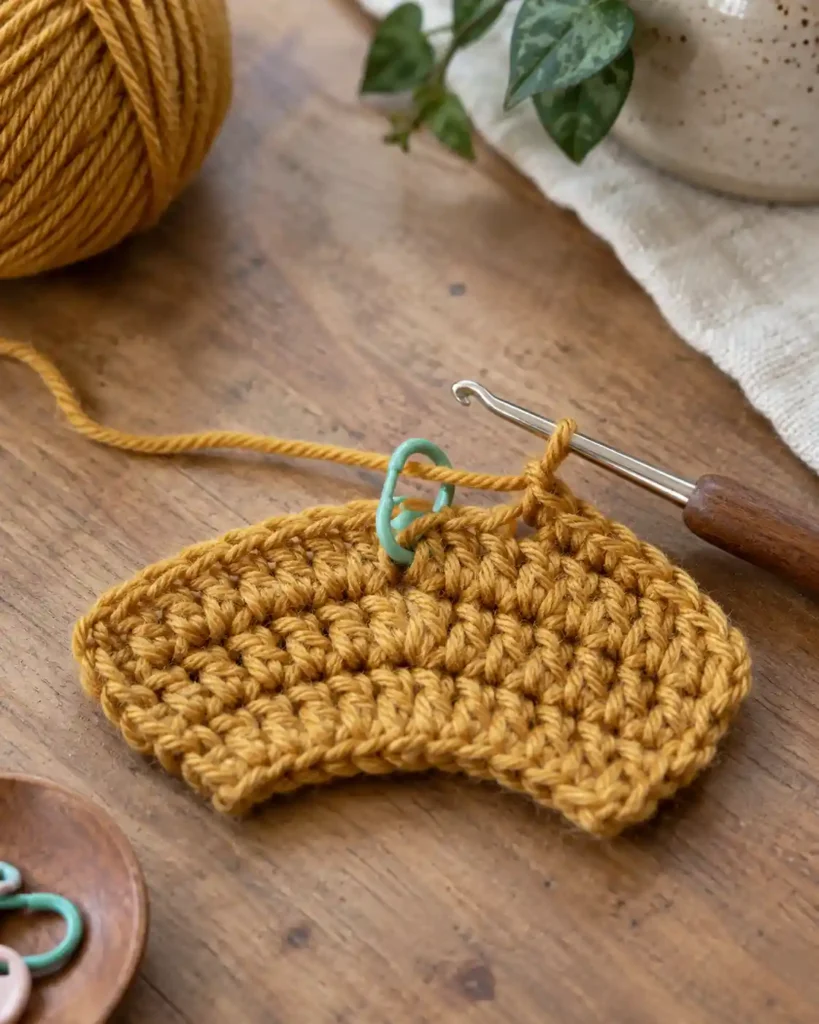
An increase makes the fabric wider without changing the basic stitch. Instead of placing one stitch in each available space, you place two in the same base stitch. Think of widening a little circle for a soft toy. This is the next useful skill when straight rectangles start feeling familiar.
Make one single crochet, then return to the same base stitch and make another. Working into one stitch has produced two stitches, so your total increases by one.
Mark the shared base while practicing. It helps you distinguish an intentional increase from accidentally using the same stitch twice.
6. How do you decrease with single crochet two together?
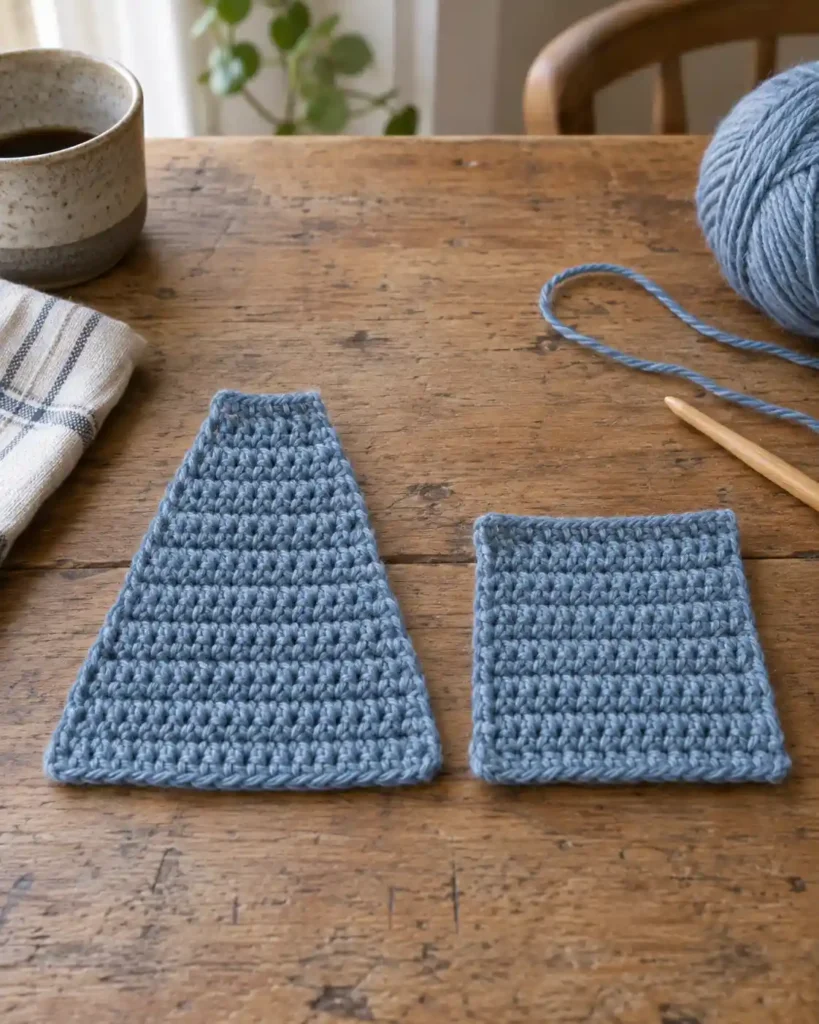
A decrease brings two stitches together to narrow your work. Skipping a stitch also reduces the count, but can leave a more noticeable opening. For a rounded practice piece, joining stitches gives you more control over the shape. Learn this alongside increasing so you can widen and narrow deliberately.
For sc2tog:
- Insert into the next stitch and pull up a loop.
- Insert into the following stitch and pull up another loop.
- Yarn over and pull through all three loops.
An invisible decrease uses the front loops of two stitches and is useful for many amigurumi projects. Keep that method separate from the standard decrease while learning.
7. How do you do a single crochet stitch in a magic ring?
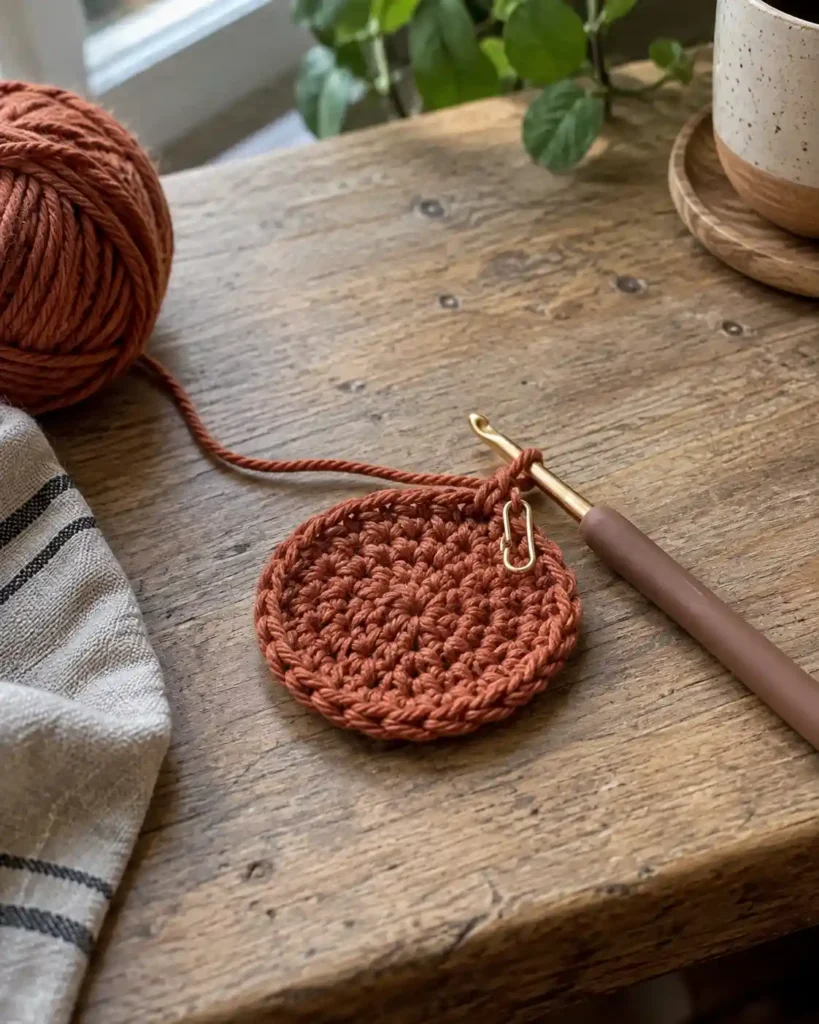
A magic ring lets you close the center of a round piece. A fixed chain ring leaves an opening that cannot tighten in the same way. It is handy when the bottom of a practice ball needs a neat center. Try learning how to crochet a magic ring once you can complete ordinary stitches without losing your loops.
Form an adjustable yarn loop and pull working yarn through it with your hook. Chain 1 to secure the working loop, then crochet six single crochets into the ring, working around both the ring and its tail.
Pull the tail to close the center. Mark the first stitch; for continuous rounds, continue directly into it without joining.
8. How can you single crochet left handed with one hook?
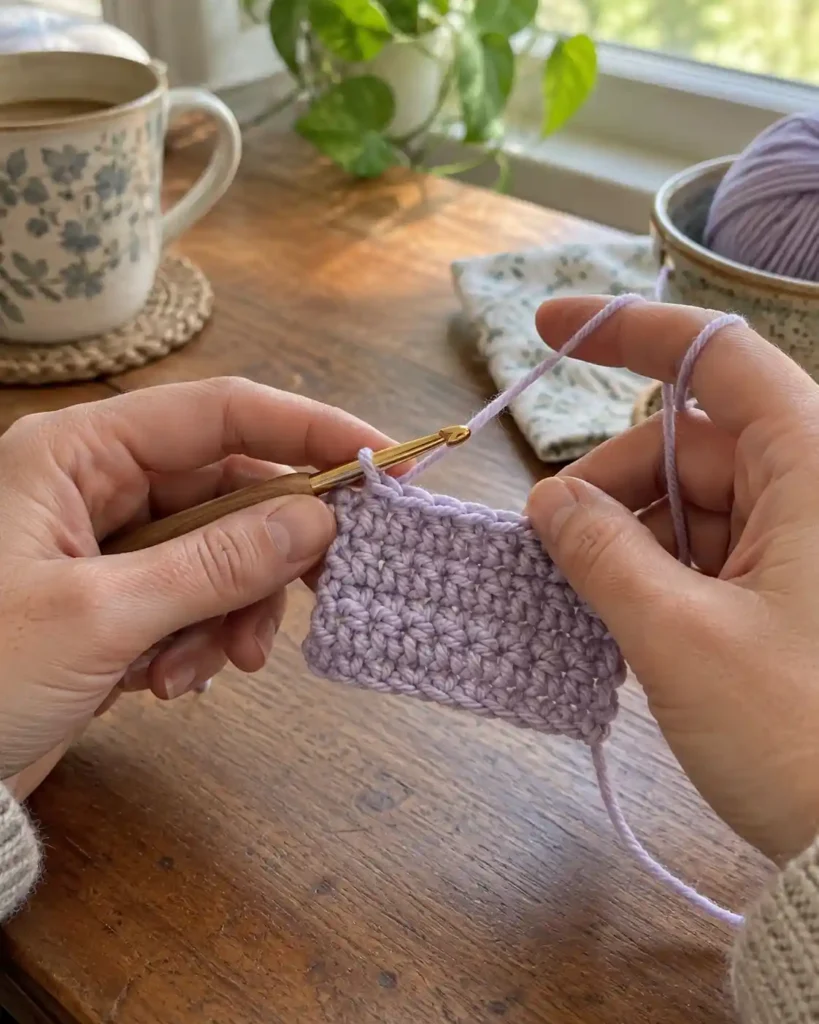
Left-handed crochet uses the same stitch sequence with a different working direction. Following a left-handed demonstration saves the effort of mentally reversing every movement. Hold the hook in your left hand and manage the yarn with your right. This makes practice easier to follow when right-handed photos feel backward.
Flat rows generally progress from left to right before you turn. Insert, pull up a loop, and draw yarn through both loops just as before.
If you are wondering how to single crochet with one hook, that is the standard setup. Your other hand supports the fabric and controls the yarn.
Which single crochet variations should you try next?
Try back loop single crochet for a simple texture change, then explore variations that alter stitch height, insertion points, or the starting edge.
At a Glance
- Use foundation stitches to combine the chain and first row.
- Work back loops for a ribbed surface.
- Add an extra pull-through for extended single crochet.
- Compare each variation in a small swatch.
Change one feature at a time: the starting edge, insertion point, or way you finish the stitch. Use the same yarn for comparison swatches so the texture differences are easier to see.
9. When should you try foundation single crochet?
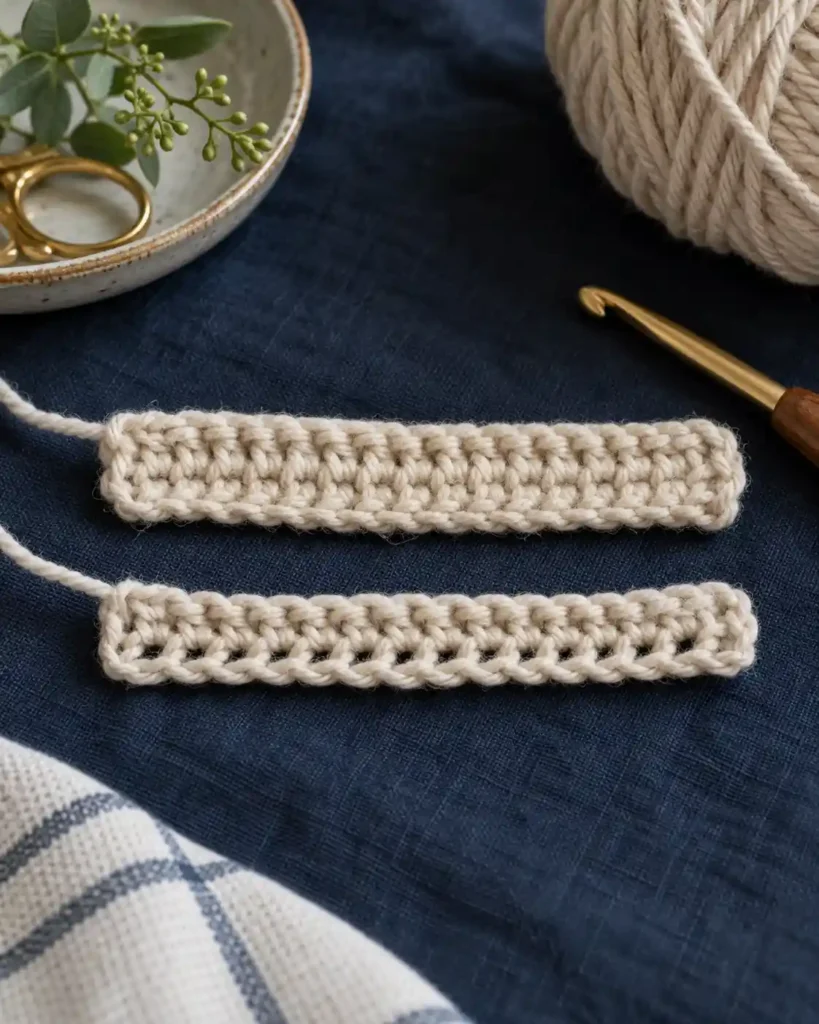
Foundation single crochet builds the starting chain and first row together. It replaces the separate task of crocheting back along a long chain. For a scarf started along its length, that can make the beginning easier to adjust. Confident beginners can use it when they want a more flexible starting edge.
Chain 2, insert into the second chain, and pull up a loop. Yarn over and pull through one loop to create the base chain, then yarn over and pull through both remaining loops.
Insert into that new base chain for the next foundation stitch. The Unraveled Mitten recommends converting patterns by their required stitch count, not their starting-chain count.
10. How does back loop single crochet create ribbing?
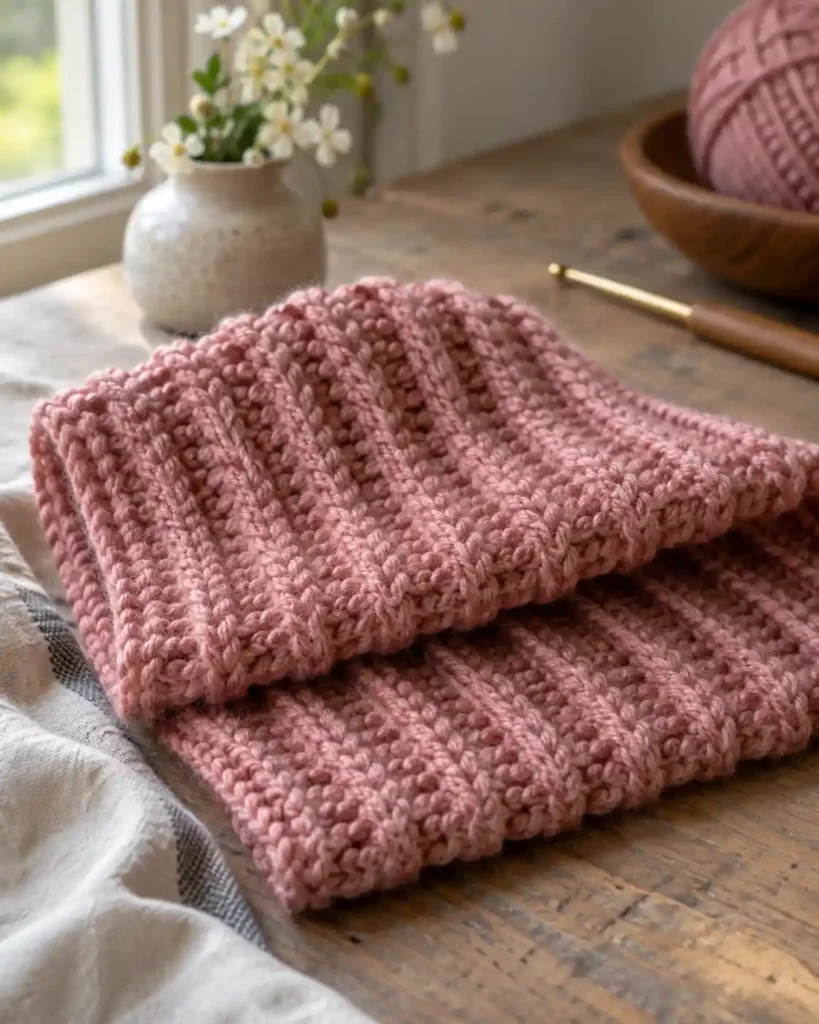
Back loop single crochet leaves one top loop unused, producing a different surface. Repeating it in turned rows creates visible ribs instead of the usual plain texture. Picture a narrow scarf with ridges running across it. This is an approachable variation when you want texture without learning a completely new stitch.
Look at the top V: the loop farther from you is the back loop. Insert under that loop only and complete a normal single crochet.
Chain 1, turn, and repeat. Keep the stitch count unchanged, and compare the stretch with your original swatch.
11. What changes with extended single crochet?
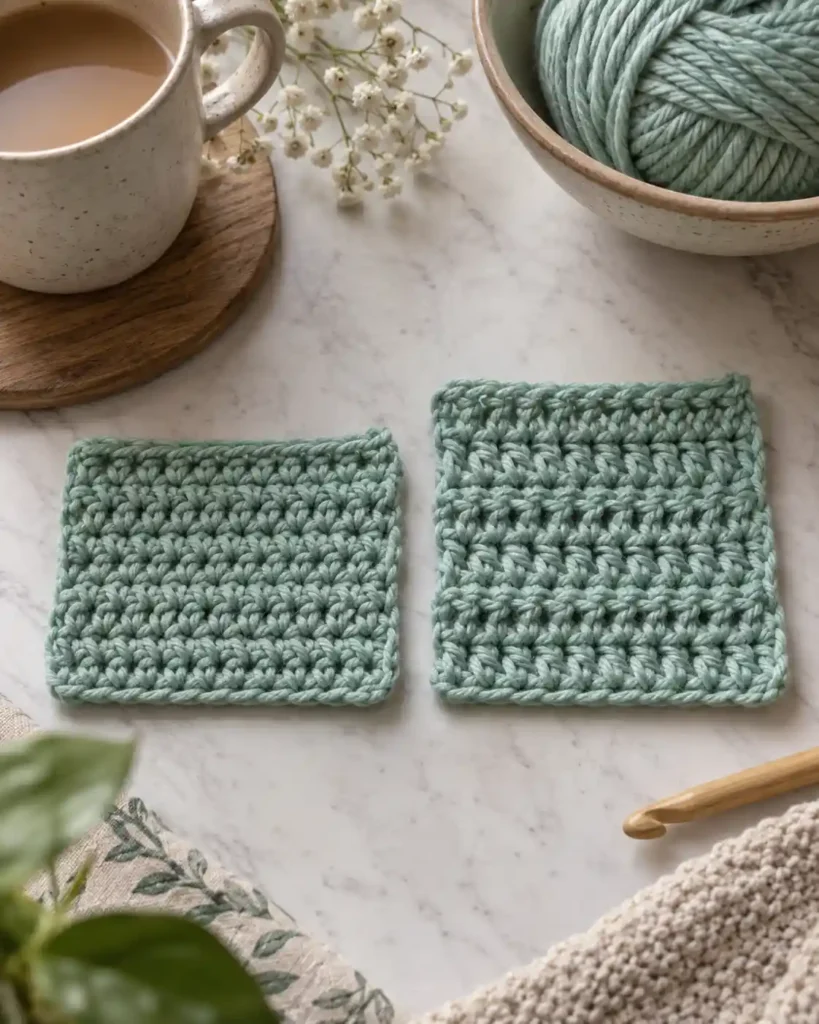
Extended single crochet adds an extra pull-through before the stitch finishes. That extra movement creates a taller stitch than ordinary single crochet. A scarf sample is a good place to compare how the fabric hangs. Choose this variation when you want to explore height while staying close to familiar movements.
Insert into the next stitch and pull up a loop. Yarn over and pull through one loop, leaving two loops on the hook.
Yarn over again and pull through both. Work a few rows, then compare the height and feel with a regular single crochet sample.
12. How does split single crochet get a knit look?
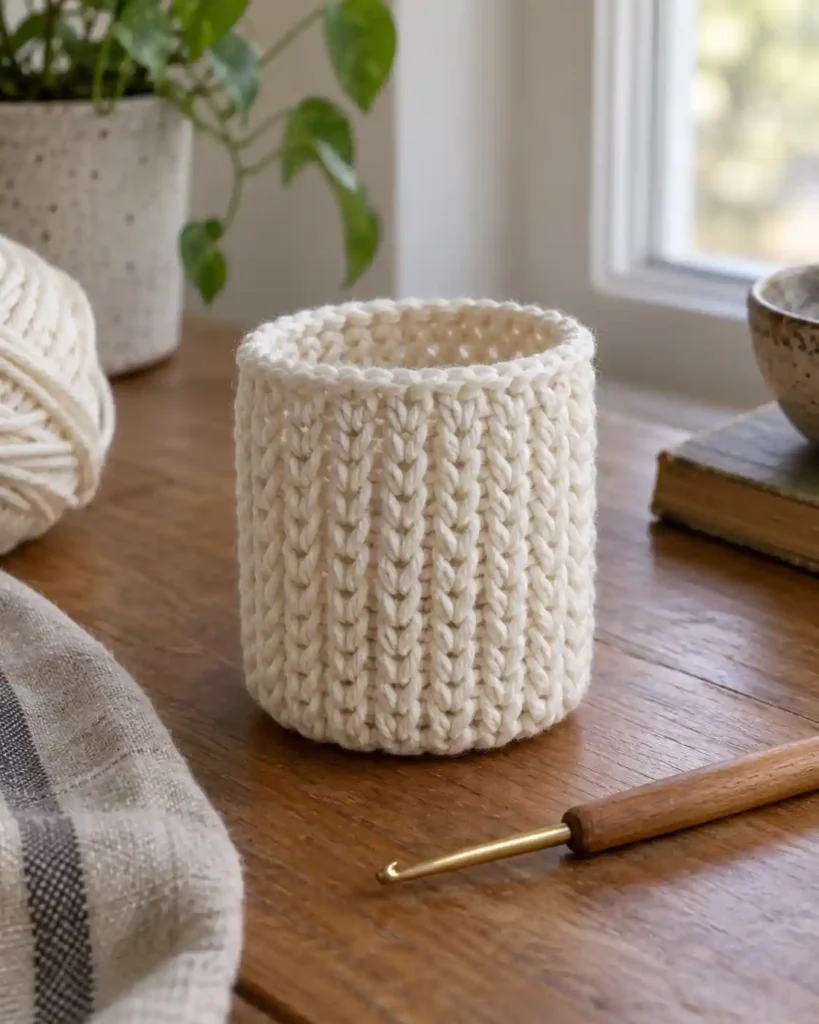
Split single crochet, often called waistcoat stitch, forms recognizable V-shaped columns. The hook enters the body of the stitch rather than passing beneath its top loops. On a small cylindrical sample, the difference becomes easy to spot. It suits crocheters who enjoy the appearance of knitted fabric but prefer using a hook.
Start with an ordinary single crochet round. On the next round, insert through the center V on the face of the stitch, pull up a loop, and finish a single crochet.
Keep your tension relaxed enough to enter the next stitch without forcing the hook. For a closer look at the insertion point, follow the waistcoat stitch crochet guide.
13. Explore herringbone single crochet
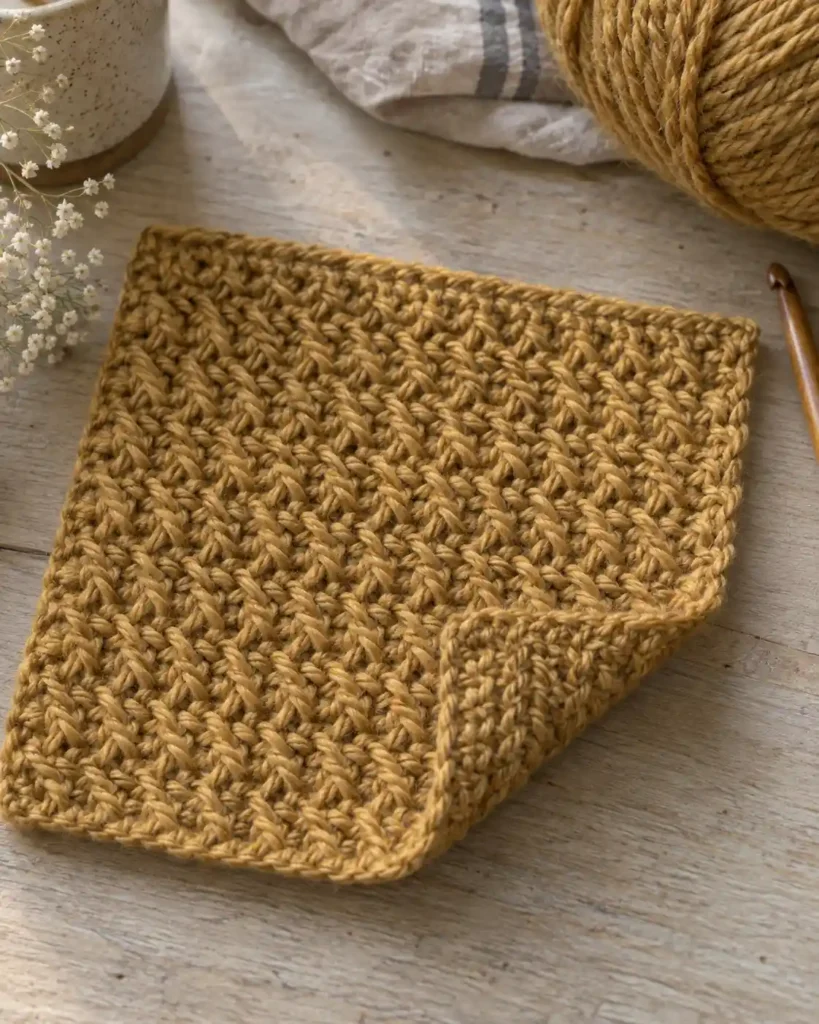
Herringbone single crochet introduces a slanted texture that changes the appearance of a plain yarn. It offers more visual movement than a standard single crochet surface. Imagine using that texture on a simple pouch where the stitches provide the decoration. Save this variation for a session when you can concentrate on unfamiliar hook placement.
Choose a tutorial specifically labeled herringbone single crochet. Herringbone half double crochet is a different method.
Make a small sample before adapting a project. Pay attention to the demonstrated row direction and insertion points; the stitch name alone is not enough to reconstruct the repeat.
14. How do spike stitches add a color accent?
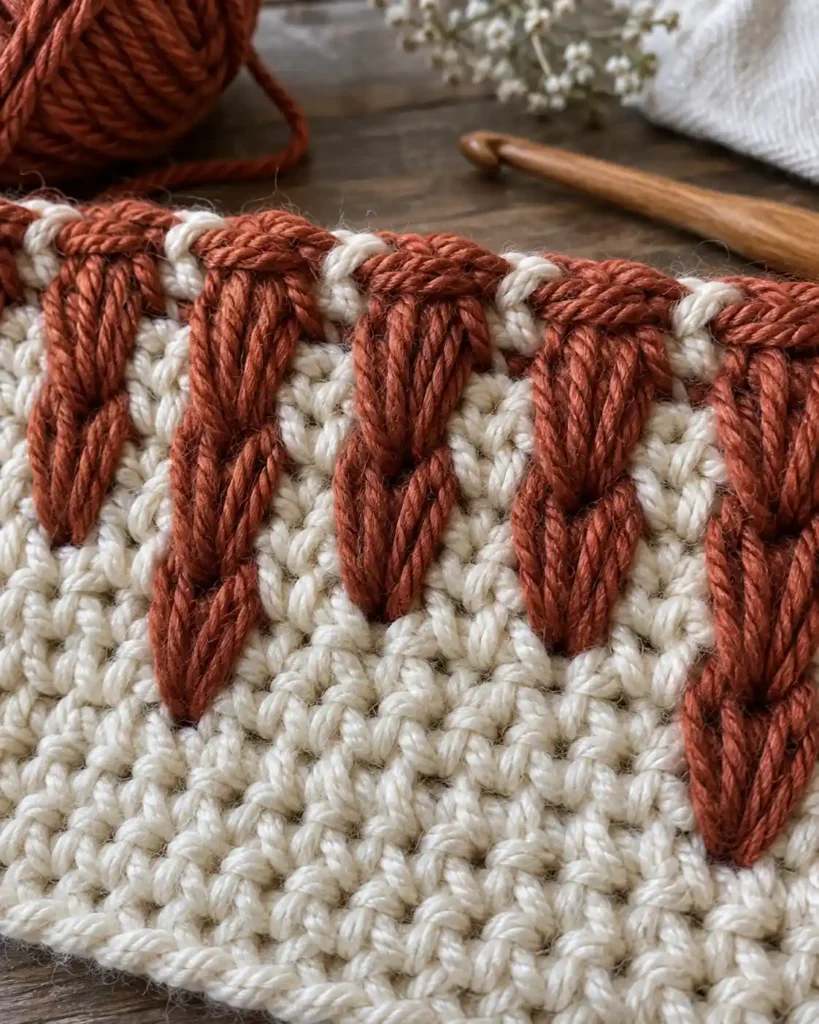
Spike stitches reach into a lower row, creating long strokes across the fabric. Ordinary color stripes change the shade horizontally, while spikes carry that color downward. A rust accent over cream makes a small practice square easy to study. This technique suits anyone ready to try colorwork without managing a complicated chart.
After several plain rows, introduce a contrasting color; review how to change colors in crochet if you need help joining the new yarn. Insert below the next stitch, pull the new loop up to the current working height, and finish a single crochet.
Let that spike replace the next ordinary stitch. Do not also work into its top, or you will accidentally increase.
15. Finish an edge with reverse single crochet
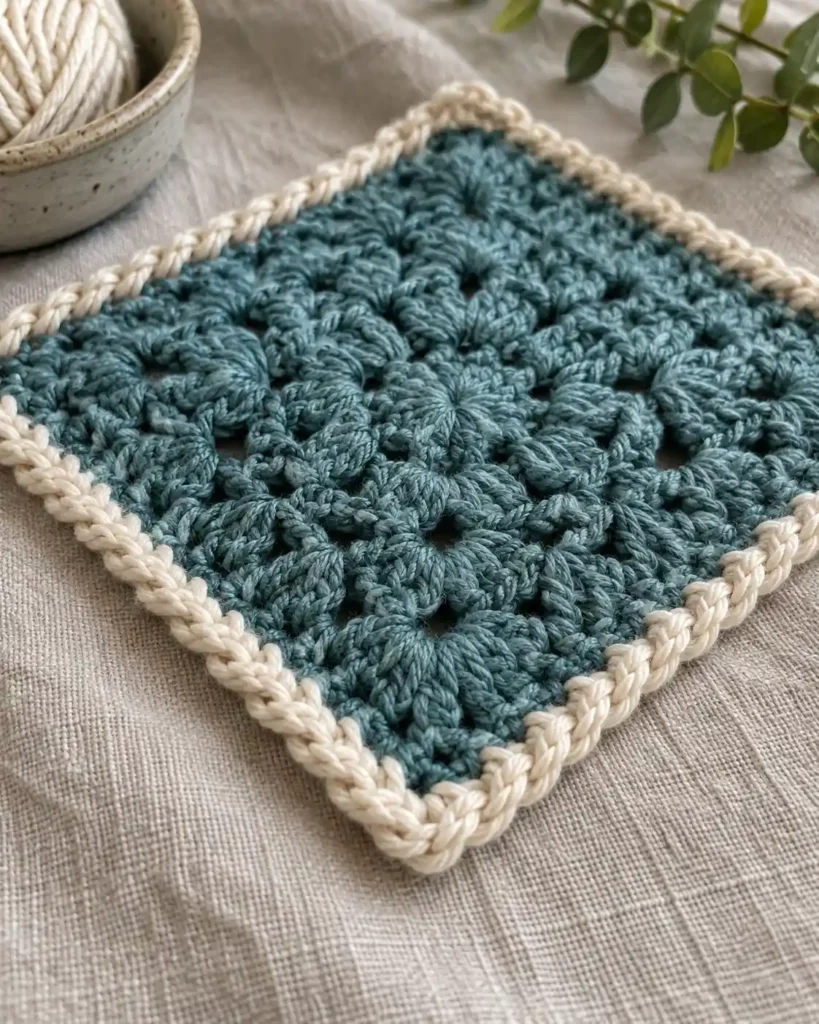
Reverse single crochet creates a corded border, also called crab stitch. Its raised edge looks different from another flat row of ordinary stitches. Around a small cotton square, it adds definition without a wide decorative trim. Try it when you want a finished edge that keeps the project simple.
Right-handed crocheters work toward the right; left-handed crocheters work toward the left. Insert into the adjacent stitch in that reverse direction, pull up a loop, and draw yarn through both loops.
Start on a straight edge. Keep the border relaxed enough that it does not pull the fabric inward.
16. How can single crochet make an open mesh?
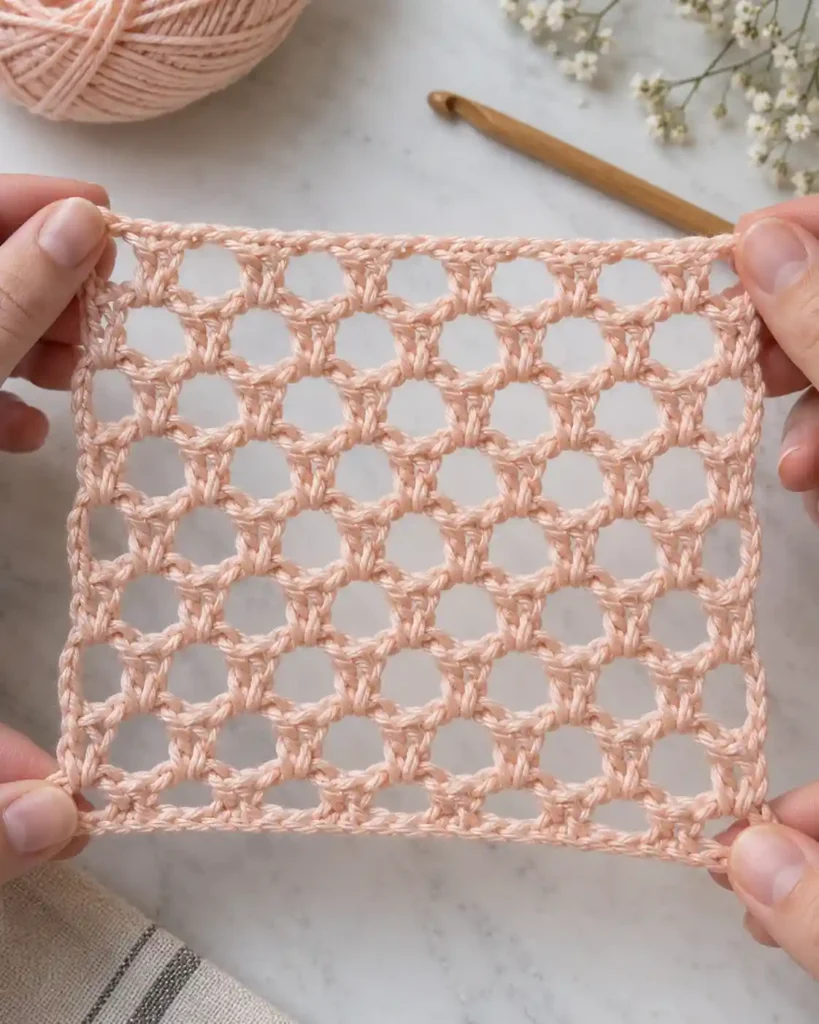
Single crochet mesh combines short stitches with deliberate chain spaces. The gaps make the fabric more open than the dense surface you started with. Hold a sample against a contrasting tabletop to see the repeat clearly. It is a useful next step for learners curious about airy fabric.
Try this simple practice repeat:
- Chain 12. Single crochet into the second chain.
- Repeat chain 1, skip 1 chain, single crochet into the next chain.
- For later rows, chain 1, turn, and single crochet into the first stitch.
- Repeat chain 1, skip the chain space, single crochet into the next single crochet.
You should retain six single crochets and five spaces across each row.
17. Explore thermal single crochet
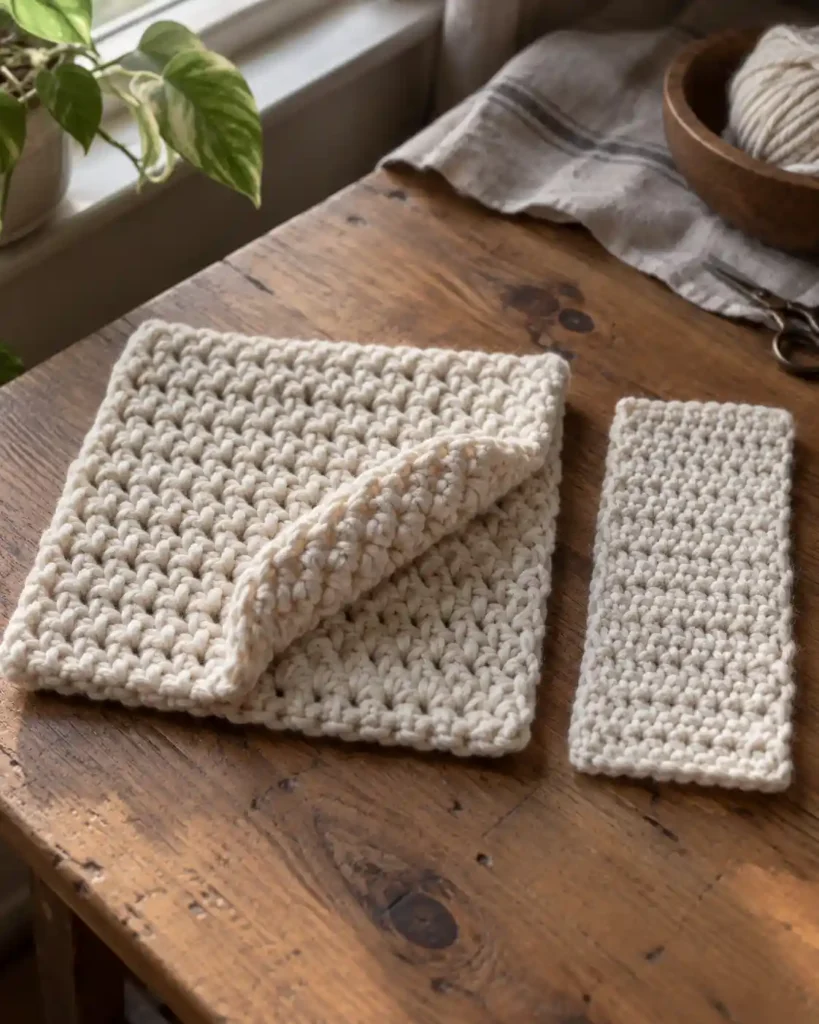
Thermal single crochet connects loops across adjacent rows to build a thicker fabric. The result has more substance than an ordinary single-layer swatch. Fold a cotton sample and compare its edge with your first practice rectangle. This is worth exploring when fabric thickness matters more than drape.
The method works through a current back loop and a corresponding unused loop below. Identifying that lower loop is the part that needs a clear close-up demonstration.
Practice the setup and finishing row from one consistent tutorial. A thick handmade swatch is not automatically a heat-rated potholder.
What can you make with your new stitch?
Make a dishcloth or scarf with straight rows, plan a blanket using your gauge, or combine increases and decreases to shape a practice ball.
At a Glance
- Start with a small square to practice straight edges.
- Check drape before continuing a scarf.
- Calculate blanket width from a measured swatch.
- Use a stitch marker when shaping in rounds.
These four projects put the lessons to work. The measurements below are suggested practice targets; finished size and yarn requirements depend on your own gauge.
18. Make a single crochet dishcloth
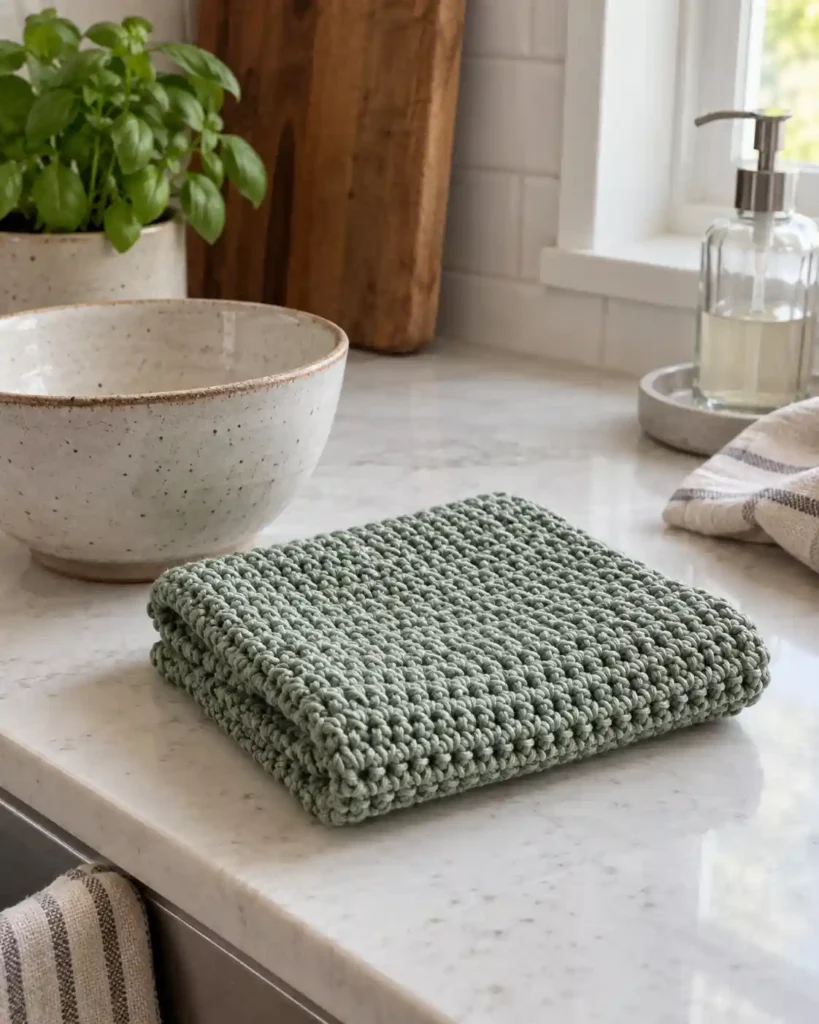
A dishcloth turns repeated rows into something useful beside the sink. It asks for less yarn and patience than a blanket while giving you plenty of edge practice. Choose a washable cotton you would enjoy using in your kitchen. For a first finished piece, the manageable size is its biggest advantage.
Aim for an 8-inch square. Measure your stitches per inch, multiply by eight, and add one chain to the resulting stitch count.
Work the first row from the second chain. Continue with chain 1, turn, and one stitch in each stitch until the cloth measures about 8 inches tall. Fasten off and weave in the ends. If finishing is new to you, follow the guide on how to fasten off crochet.
19. Crochet a simple scarf
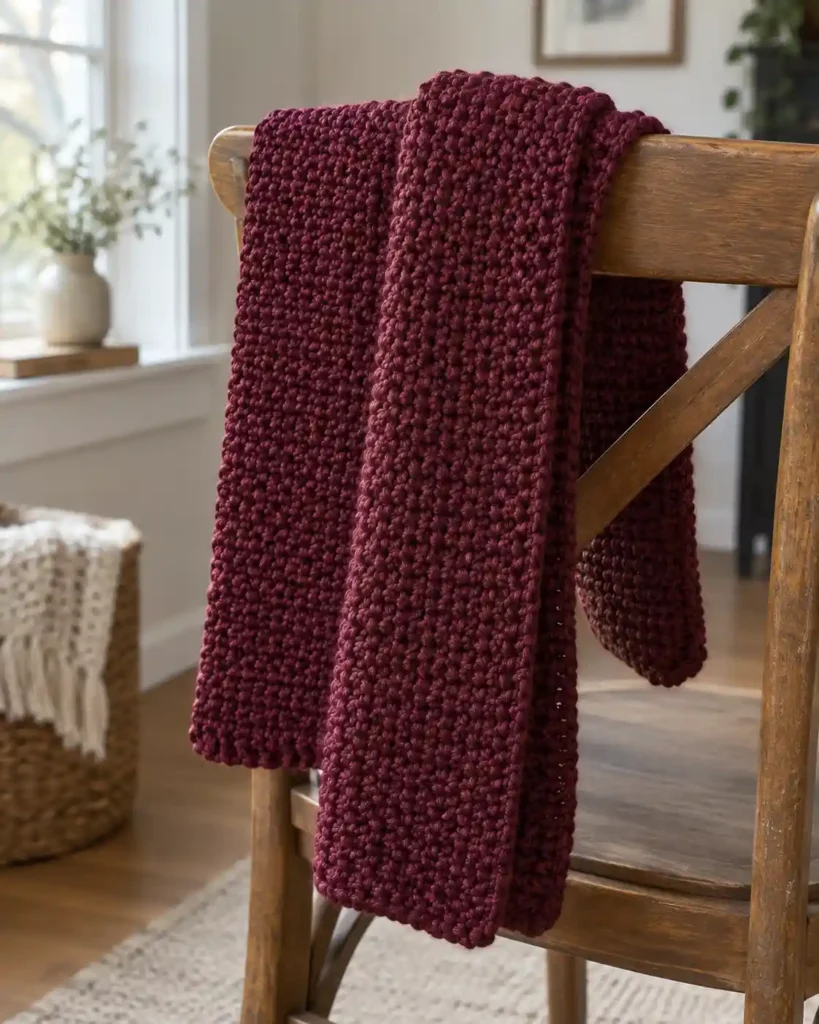
A plain scarf gives you room to settle into a steady rhythm. Its repeated rows require fewer decisions than a shaped accessory. Keep it beside your favorite chair and add a few rows when you have time. Once your edges stay consistent, this becomes a practical project for longer practice sessions.
Try a target of 6 inches wide and 60 inches long, adjusting it to the wearer. Calculate the starting chain from your gauge, then work plain rows to the desired length.
Check the drape after a few inches. A fabric that feels stiff now will not become softer simply because you make more of it.
20. How do you plan a single crochet blanket?
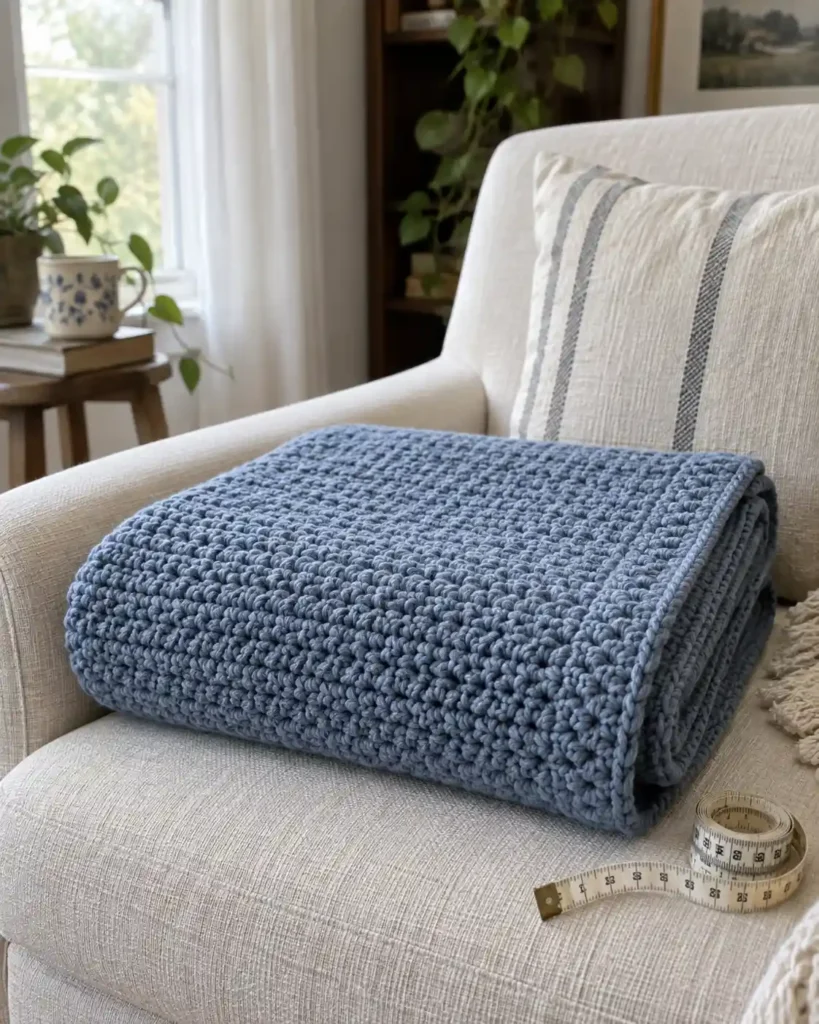
A single crochet blanket shows how one uncomplicated stitch can cover a much larger area. Planning a swatch first gives you better control than guessing a starting chain. For a lap blanket kept on the sofa, choose dimensions that suit the person using it. This project rewards crocheters comfortable with counting and steady repetition.
Suppose your swatch measures 3 stitches per inch. A 36-inch-wide blanket would need 108 stitches, so a plain chain start would contain 109 chains.
Those numbers are an example, not a universal gauge. The Craft Yarn Council labels its hook-size and gauge ranges as guidelines and says to follow the pattern’s gauge.
21. Shape a small amigurumi practice ball
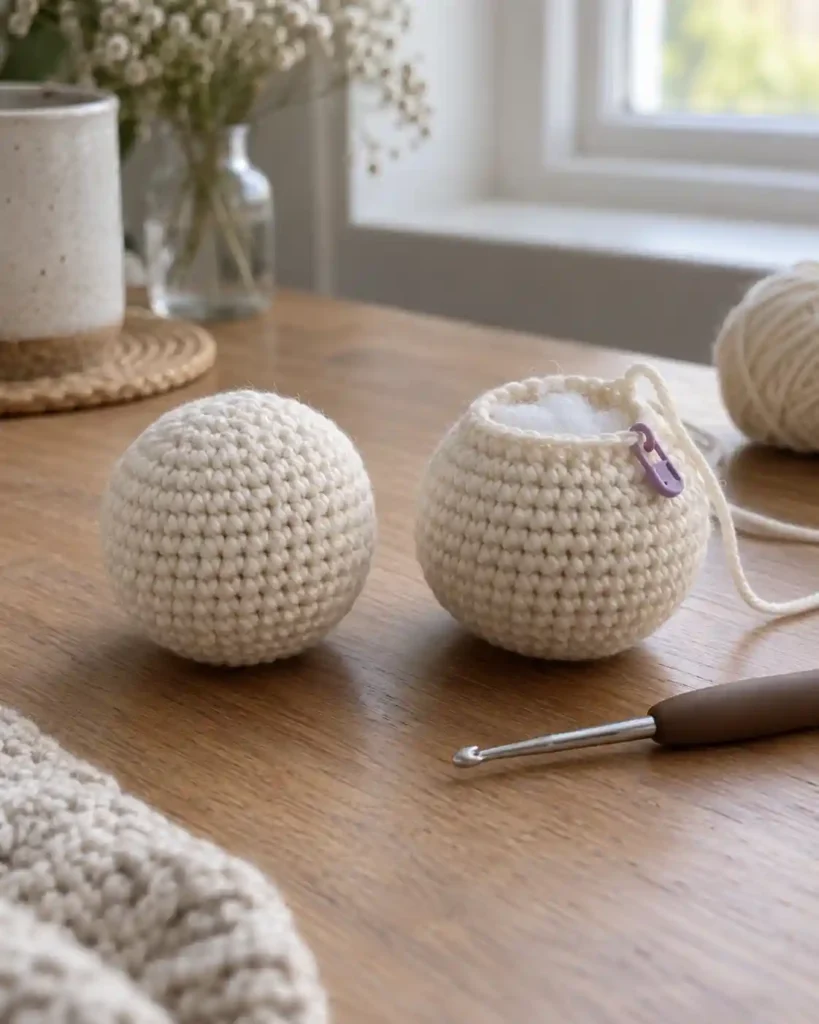
A plain crochet ball combines increasing, even rounds, and decreasing in one small object. It teaches three-dimensional shaping that a flat swatch cannot show. Keep the first one undecorated so you can concentrate on its construction. For a confident beginner, watching a circle become a rounded form is a satisfying next step.
Use a marker and work continuously. In the outline below, inc means two single crochets in one stitch, and dec means one decrease across two stitches.
| Round | Instructions | Stitches |
|---|---|---|
| 1 | Make 6 single crochets in a magic ring | 6 |
| 2 | Increase in every stitch | 12 |
| 3 | Repeat 1 single crochet, increase | 18 |
| 4–6 | Single crochet in every stitch | 18 |
| 7 | Repeat 1 single crochet, decrease | 12 |
| 8 | Decrease around | 6 |
Add stuffing before the opening becomes too small. After round 8, fasten off, thread the tail through the remaining front loops, draw the opening closed, and secure the end.
This is a practice construction, not a safety-tested toy pattern.
What supplies and stitch terms will help?
Gather smooth yarn, a compatible hook, stitch markers, scissors, and a yarn needle, then check whether your instructions use US or UK terminology.
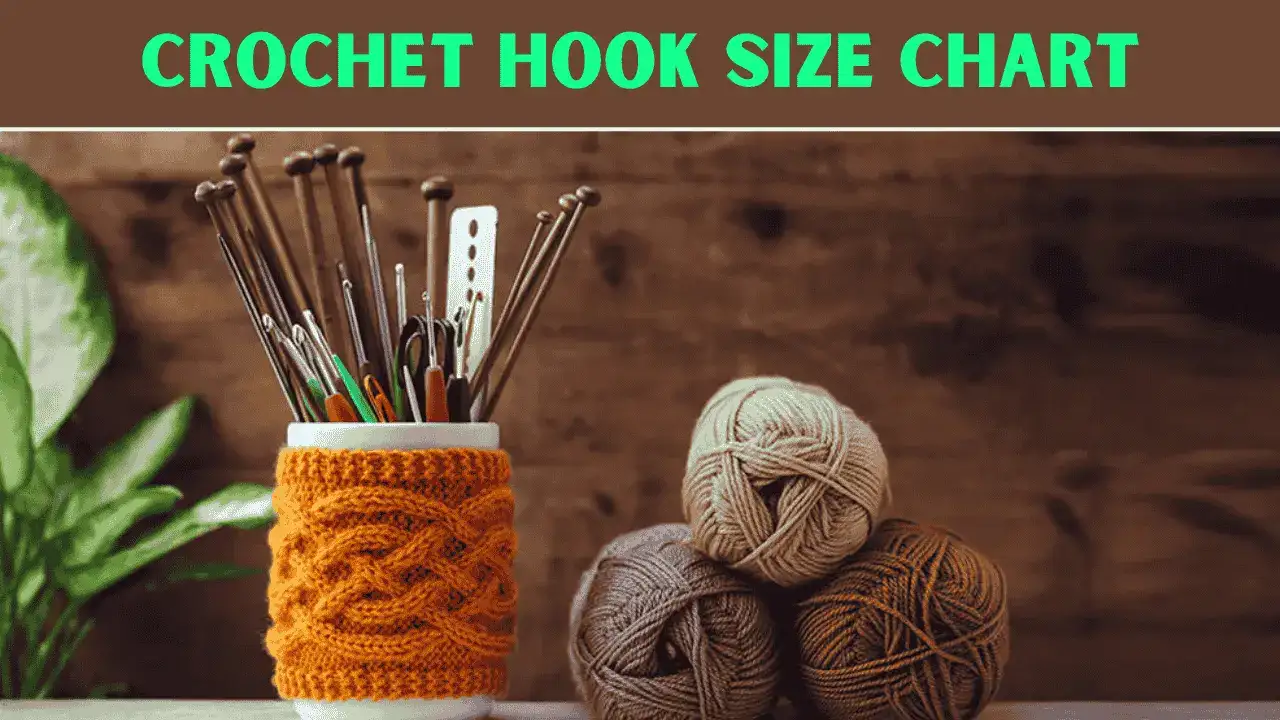
Choose smooth, light-colored yarn so you can see individual loops. Add a compatible hook, checking the crochet hook size chart if needed, plus two stitch markers, scissors, and a yarn needle.
Clover’s beginner lesson uses medium-weight yarn and a 5.5 mm hook; treat that as one workable example rather than a rule for every yarn.
A US double crochet stitch starts with a yarn over before insertion and finishes with two pull-through movements. It is taller than US single crochet. Remember that UK double crochet means the stitch taught in this guide.
For a single crochet stitch illustration, compare your hook position with the step photos in The Woobles tutorial. Look for the two-loop stage followed by one loop after completion.
Frequently asked questions
Does the turning chain count as a single crochet?
For the practice rows here, it does not. Chain 1, turn, and work into the first actual stitch; follow different instructions when a specific pattern gives them.
Is single crochet the same as a slip stitch?
No. Single crochet pulls up a loop before the final pull-through, while a slip stitch draws the yarn through the fabric and the existing hook loop in one movement.
Why is my single crochet getting narrower?
You may be missing the first or last stitch. Mark both edges and count each row before continuing.
How much yarn does a single crochet blanket need?
The amount depends on its dimensions, yarn, gauge, and finishing. Use a pattern’s yardage or estimate from a washed swatch, allowing extra for borders and ends.
Can a complete beginner make amigurumi?
Yes, after learning the stitch, increases, decreases, and round counting. Begin with a simple shape before adding separate limbs or decorative details.
Final Thoughts
Learning the single crochet stitch starts with a few simple movements and a little patience. Your first rows may look uneven, but counting stitches, relaxing your grip, and practicing on a small swatch can help you spot what needs adjusting.
You don’t need to master all 21 techniques at once. Finish a dishcloth, try a textured sample, or practice shaping a small ball, choose whatever keeps you curious. Save this CrochetMind guide so you can return to the next lesson when you’re ready.
![The Best 30+ Free Crochet Cat Patterns [Beginner-Friendly Guide]](https://crochetmind.com/wp-content/uploads/2025/04/1-The-Best-30-Free-Crochet-Cat-Patterns-Beginner-Friendly-Guide.webp)