


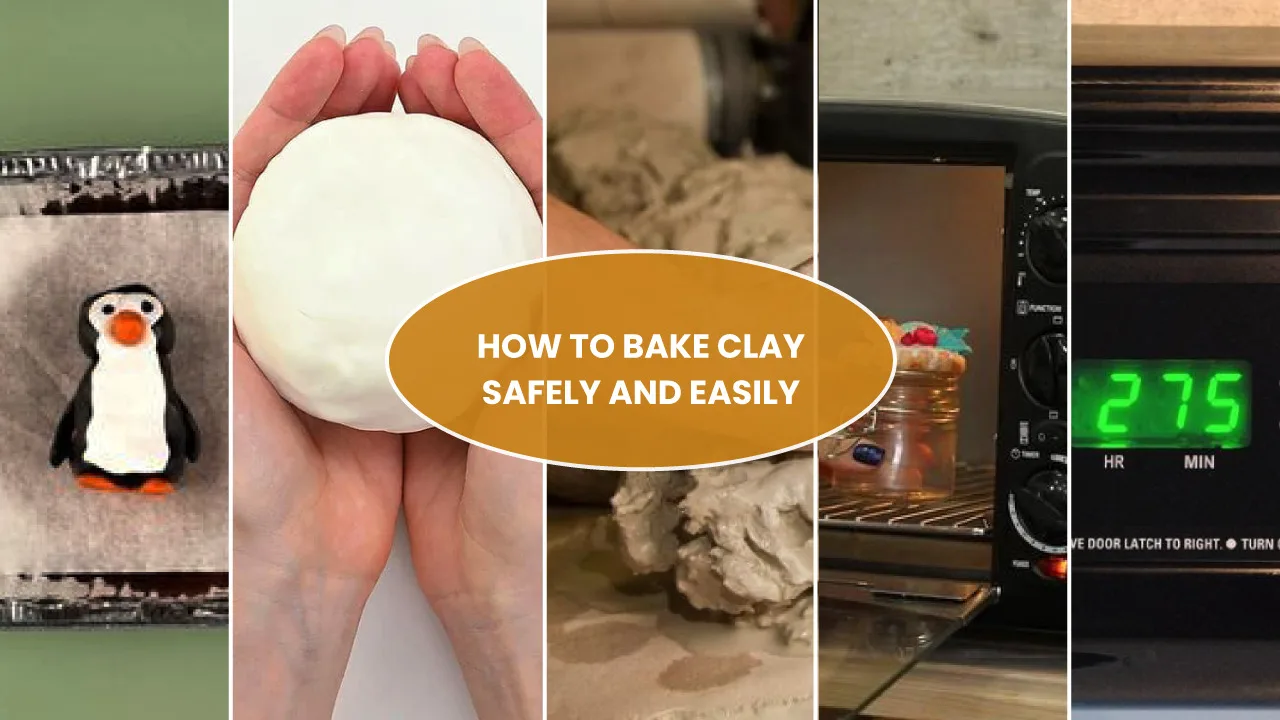
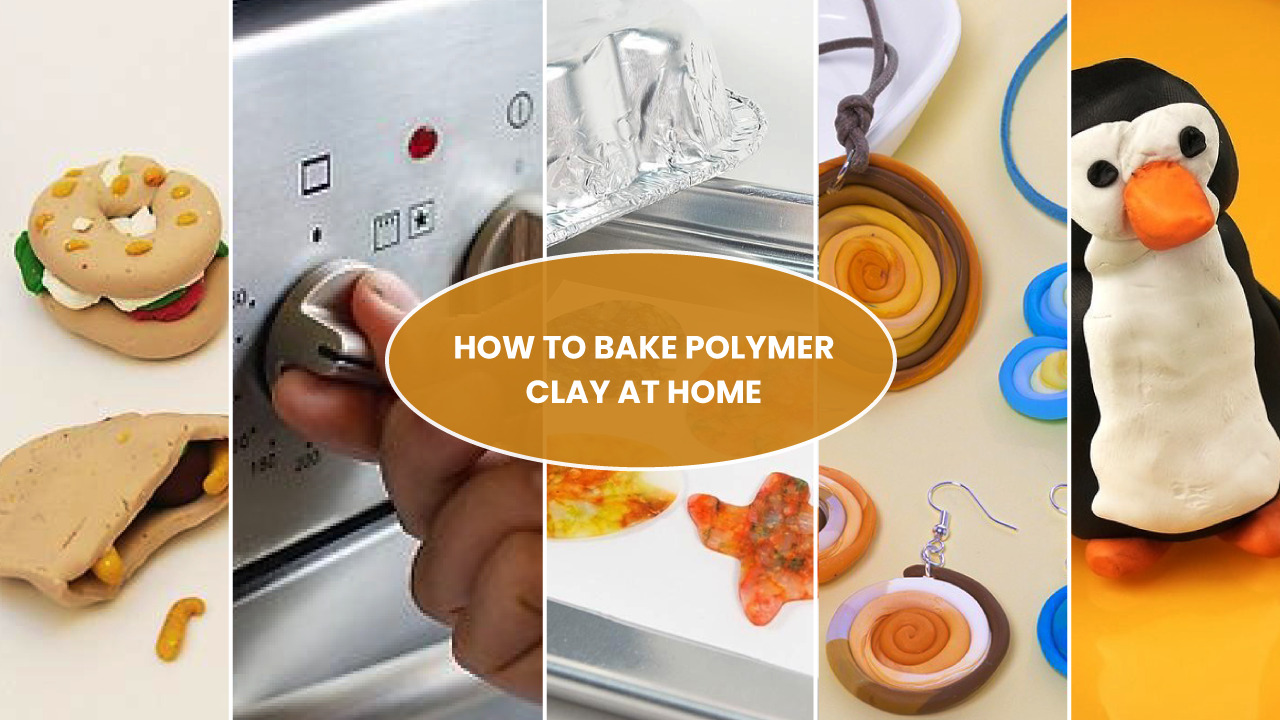
How to bake polymer clay is something every beginner should know when working on clay crafts and DIY projects. Polymer clay is a nice, colourful, soft substance that you can mold into shapes of earrings, beads, key chains and even different stuff for fun. So that you would make your designs sturdy and durable, you have to bake the clay in an oven.
One can easily bake polymer clay at home. First, you shape your clay. Then you put it on a tray of foil or paper. Once that is done, you put it in the oven at the appropriate temperature. Lastly, you allow it to cool and then touch it. By following a few easy steps, you can make beautiful and solid pieces of clay out of the soft ones.
This article will teach you how to bake polymer clay in a step-by-step manner. We will demonstrate to you the equipment, temperatures, hints and techniques to get your creations powerful, safe and ready to go or share with loved ones. You may be baking clay jewellery or little figures, with these tips, you will be able to bake with confidence.
In This Post
- What is Polymer Clay Baking?
- Essential Supplies for Baking Polymer Clay
- How to Bake Polymer Clay in the Oven [Step-by-Step Instructions]
- Alternative Baking Methods: How to Bake Polymer Clay Without an Oven?
- How to Bake Polymer Clay Jewellery
- Post-Baking Finishing Techniques
- Frequently Asked Questions (FAQs)
- How to Bake Polymer Clay at Home if I’m just starting?
- What’s the Best Way to Bake Polymer Clay in a Toaster Oven?
- Is it Possible to Bake Polymer Clay Without an Oven?
- How to Bake Polymer Clay in an Air Fryer Properly?
- Why Can’t I Bake Polymer Clay in a Microwave?
- How to Bake Polymer Clay Beads Without Losing Their Shape?
- What Temperature Should I Use to Bake Polymer Clay in Celsius?
- How to Bake Polymer Clay Rings and Keep the Shape Round?
- Final Thoughts
Key Takeaways:
- Baking polymer clay is an easy and fun part of making clay crafts. It helps your clay turn from soft to solid and keeps your creations strong.
- You can use different tools like an oven, a toaster oven, or even an air fryer (with care).
- Make sure you bake at the right temperature and time so your project doesn’t break or burn. This is a great activity for both kids and adults who enjoy crafting at home.
What is Polymer Clay Baking?
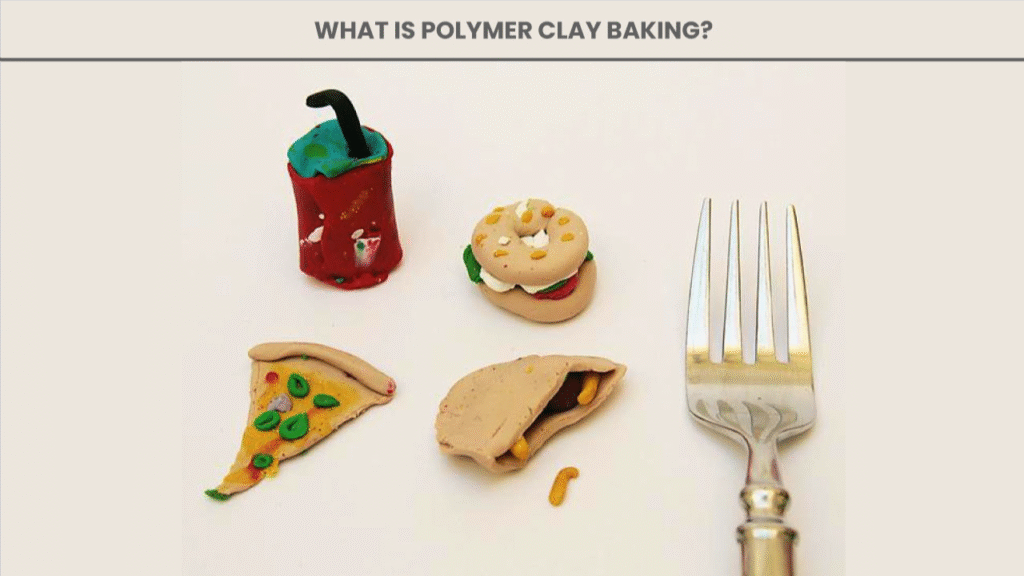
Polymer clay baking is the process of hardening soft modelling clay using heat. The clay is shaped first, then placed in an oven to cure it. Once baked, the clay becomes firm, turning your handmade creations into lasting pieces.
This type of clay is different from air-dry clay because it needs heat to finish. Many people use polymer clay to make jewellery, figures, or small gifts. Baking makes your design stay in shape and last longer. You can create fun items like earrings, keychains, or even tiny animals, then bake them so they don’t break. It’s a simple process that beginners love because it’s easy and fun to do at home.


Essential Supplies for Baking Polymer Clay
You will begin with a few basic items. First, get some polymer clay in your favourite colours. Next, you need an oven or toaster oven to bake it. You should also have a baking tray and tin foil. Then, keep a timer nearby. Once you have everything ready, you’re all set to start your clay baking craft.
| Item | Why You Need It |
|---|---|
| Polymer clay | Main material for your craft |
| Oven or toaster oven | To bake and harden the clay |
| Tray or tile | Surface to place your clay on |
| Tin foil or parchment | Keeps the tray clean and avoids shiny spots |
| Timer or alarm | To bake for the correct time |
| Oven thermometer | Helps check if the oven is the right temperature |
These tools help you learn how to bake polymer clay safely and make your DIY crafts strong and ready to enjoy.
How to Bake Polymer Clay in the Oven [Step-by-Step Instructions]
Baking polymer clay is the most important part of finishing your craft. If you skip steps or rush, your clay may crack, burn, or stay soft. This section shows how to bake polymer clay in the right way—from softening it to cooling it down safely. Each step helps your creations turn out strong, smooth, and long-lasting.
Step 1: Prepare Your Clay
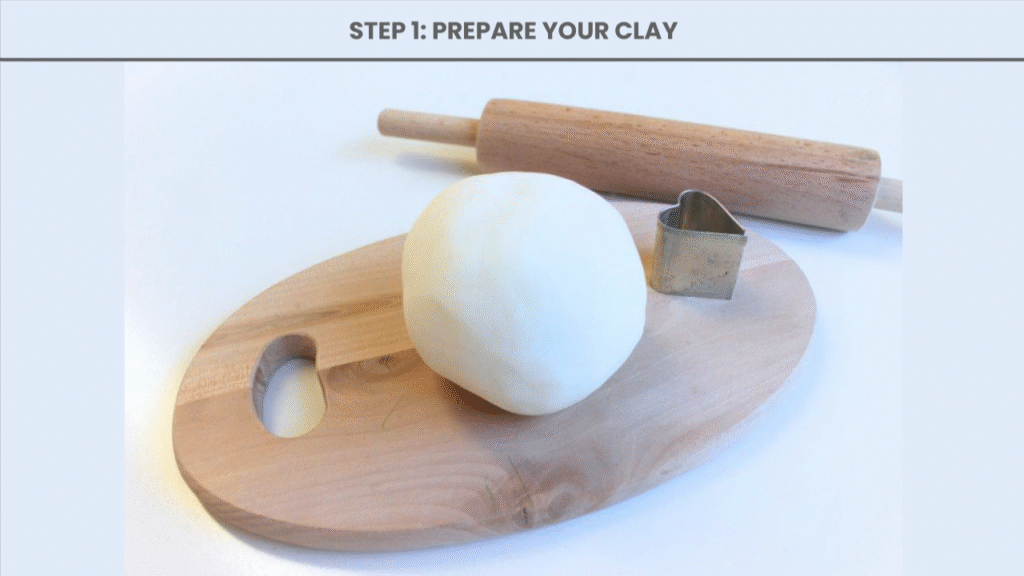
Before you bake, your clay needs to be soft and smooth. Roll it between your hands or use a roller to condition it. This makes it easier to shape and removes cracks or lumps. If the clay feels dry or stiff, use a drop of baby oil or clay softener to help. Once it’s soft, shape it into your design—like clay earrings, small animals, or hearts.
Step 2: Preheat the Oven
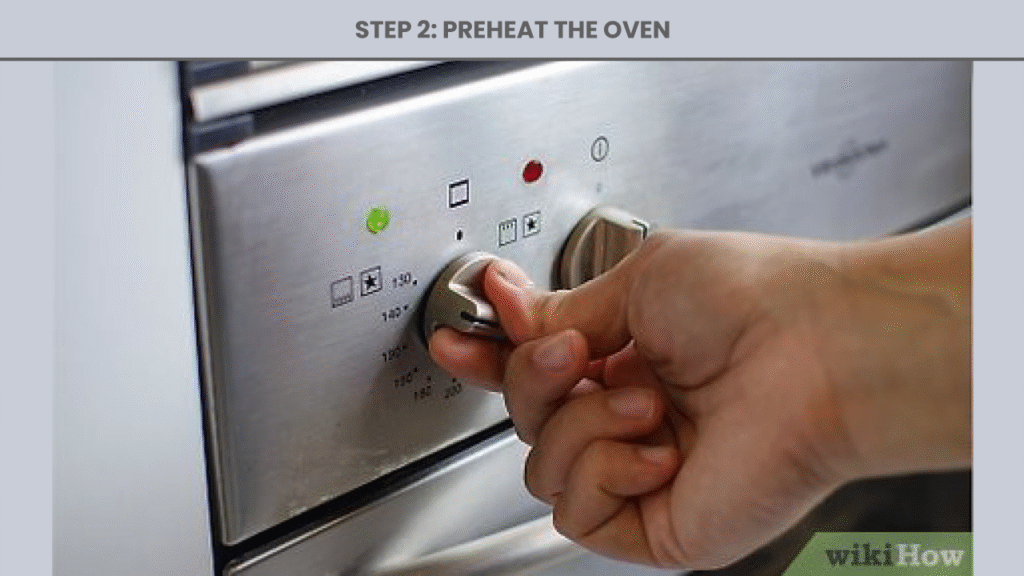
Polymer clay must be baked at the correct temperature. Turn on your oven and set it to 130°C (275°F). Always let the oven fully preheat before you place your clay inside. It’s a good idea to use an oven thermometer to make sure the temperature is right.
Step 3: Set Up Your Baking Surface
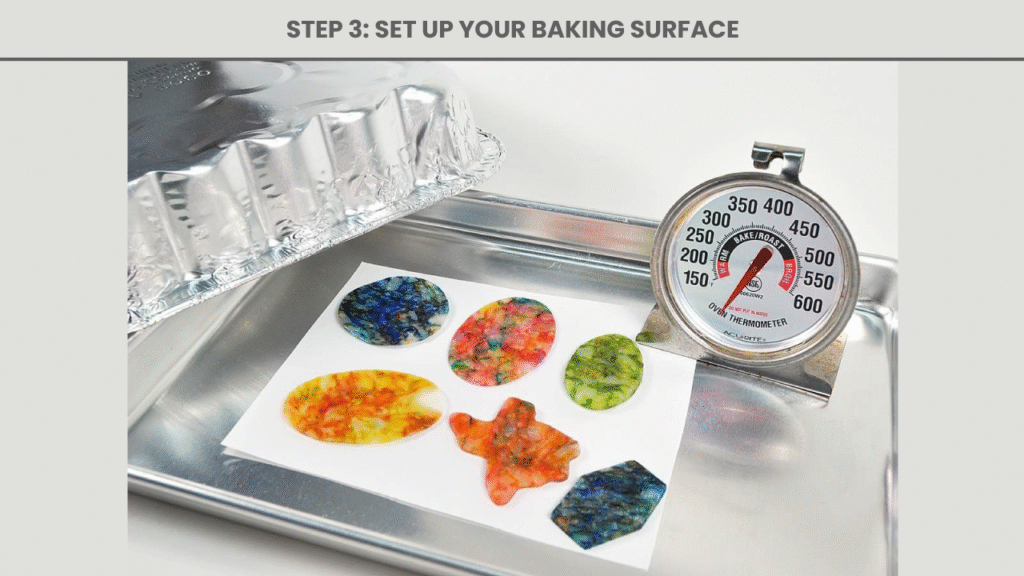
The way you set up your baking surface affects how your clay turns out. Use a ceramic tray, a tile, or even a piece of glass to place your clay on. Underneath your clay, put some tin foil or parchment paper. This keeps the bottom of your piece clean and helps it bake evenly. If your clay item is thin or fragile, cover it with a loose foil tent.
Step 4: Bake According to Thickness
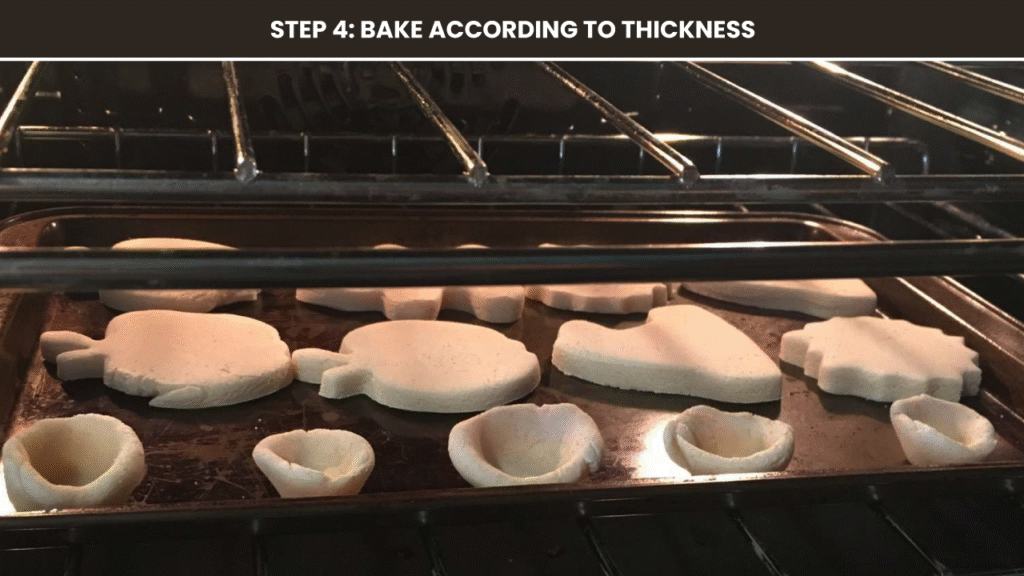
Baking time depends on how thick your clay is. Thinner pieces need less time, while thicker ones need more. Always follow a time guide and set a timer. For example, a 1/4 inch thick piece should bake for 15–30 minutes, while a 1-inch piece might need 45–60 minutes. Don’t open the oven door during baking, as that can let heat escape and ruin the result.
Step 5: Cool Properly
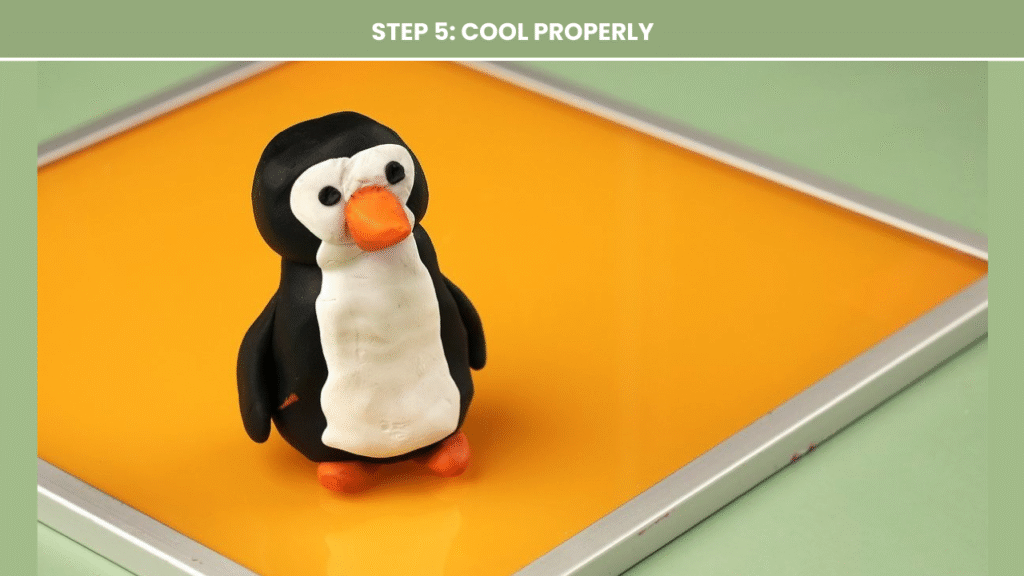
Once the baking time is done, don’t pull the clay out right away. First, turn off the oven and let the clay sit inside for about 10 minutes. This helps prevent cracks from sudden temperature changes. After that, take your piece out and place it on a flat surface to cool completely. Don’t touch or bend it while it’s still warm—it may feel soft but will harden as it cools. This final step locks in your hard work and gives your piece a strong finish.
Alternative Baking Methods: How to Bake Polymer Clay Without an Oven?
If you don’t have a regular oven, you can still bake polymer clay using other tools at home. But it’s very important to be careful and follow safety steps. Some methods work better than others. The goal is to make sure the clay cures fully without burning, cracking, or staying soft. This section explains safe ways to try, along with methods you should completely avoid.
How to Bake Polymer Clay in an Air Fryer
- Some air fryers can be used, but not all are safe for polymer clay.
- Choose an air fryer that allows you to set the exact temperature, around 120–130°C (248–266°F).
- Always wrap your clay in tin foil or place it inside a foil container to protect it from direct hot air.
- Bake only for short times, checking every few minutes to avoid overheating or burning.
- Keep your project small and simple for the best results.
How to Bake Polymer Clay in a Microwave
- Never try baking polymer clay in a microwave.
- Microwaves do not heat evenly, which makes the clay burn, bubble, or melt.
- It can release strong smells or smoke that are unsafe to breathe.
- Even if you try water or a cover, it is still dangerous.
- Microwaves are not made for baking modelling clay—this method should always be avoided.
How to Bake Polymer Clay in a Toaster
- A toaster oven can be a great option for small polymer clay crafts.
- Set it to the correct temperature, around 130°C (275°F), and use an oven thermometer to be sure.
- Never let your clay touch the hot metal walls—it may burn or melt.
- Line the tray with parchment paper, foil, or even a ceramic tile for even heat.
Always monitor the baking process and avoid crowding the toaster oven.
How to Bake Polymer Clay Jewellery
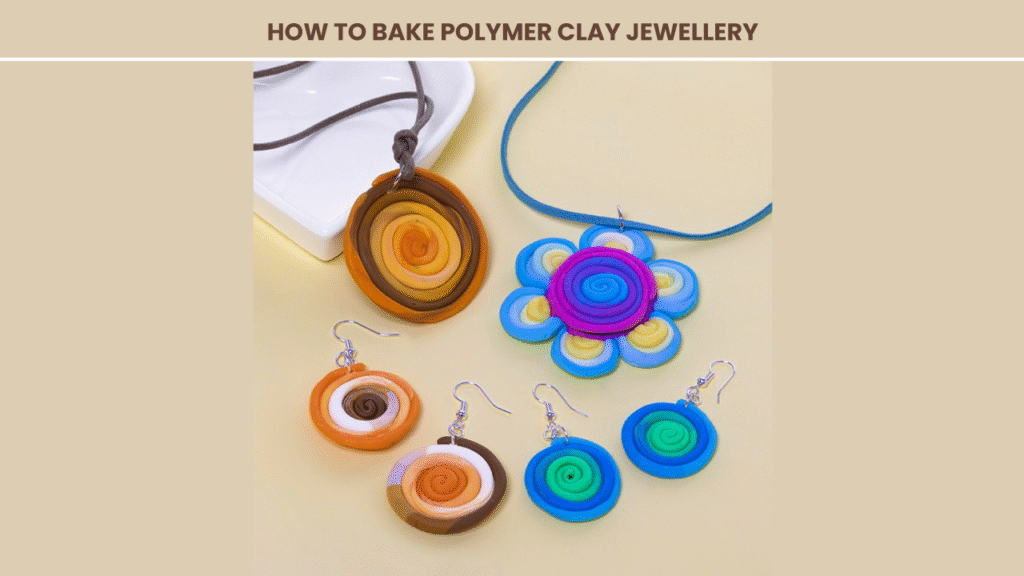
Baking polymer clay jewellery is an important step to make sure your designs are hard, smooth, and ready to wear. When you shape clay into earrings, rings, or beads, baking them correctly helps them stay strong and not break.
Each piece needs the right temperature, surface, and time in the oven. Whether you’re learning how to bake polymer clay earrings in the oven or finishing tiny beads, careful baking will give your jewellery a professional look.
Clay Earrings
When baking polymer clay earrings, it’s best to flatten them a little so they don’t puff up or change shape. Place the earrings gently on tin foil or parchment paper to protect the bottom and prevent sticking. Bake them at 130°C (275°F) for about 15 to 20 minutes.
This is the standard method when you want to learn how to bake polymer clay earrings in the oven. Don’t move them when they’re hot. Let them sit on the tray until they’re completely cool. This way, they won’t bend or warp, and they’ll stay looking just like you shaped them.
Clay Rings
Polymer clay rings need support while baking so they don’t lose their round shape. You can wrap them around a piece of rolled-up foil or use a metal ring mold. Bake the rings at the same temperature as earrings—130°C (275°F)—and for about the same time, 15 to 20 minutes.
After baking, turn off the oven and let the ring stay inside for around 10 minutes. This gentle cooling step keeps the clay from cracking. Once the ring is fully cool, you can remove it and admire your handmade jewellery piece.
Polymer Clay Beads
Beads are a fun part of polymer clay jewellery, but they need to be baked carefully. Slide each bead onto a skewer, toothpick, or long needle so they don’t roll around while baking. Balance the skewer across a baking tray, using foil to raise the ends if needed.
Bake the beads for 20 to 25 minutes at 130°C (275°F), depending on how thick or large they are. Leave the beads to cool completely before removing them. This process helps you master how to bake polymer clay beads in a way that keeps them smooth, round, and free of flat spots.
Post-Baking Finishing Techniques
Once your polymer clay has been baked and fully cooled, you can make it look even better by adding a few finishing touches. It also helps protect the surface from scratches or damage over time.
- Sanding: Sanding is used to smooth out any rough spots or sharp edges on your baked clay. To do this, use wet/dry sandpaper, which works well when slightly damp. Rub the clay gently in a circular motion. Start with a rougher grit and move to finer ones for the best results.
- Buffing: After sanding, buffing helps bring out a soft shine on your clay surface. You can use a soft, clean cloth and rub the clay by hand, or use a machine buffer if you want a quicker shine. Buffing smooths the surface even more and can make the clay look like polished stone or glass, depending on how much you shine it.
- Sealing: To protect your baked clay and give it a nice finish, you can apply a sealant. It’s best to use a clear, water-based varnish, especially if your piece will be touched a lot or worn as jewellery. Sealing adds a slight gloss and helps protect painted designs or fine details.
- Drilling: If you want to turn your clay into earrings, charms, or pendants, you might need to drill holes. Only drill into clay after it is fully baked and cooled. Soft clay can crack or lose its shape. Use a small hand drill or a rotary tool and work slowly to avoid damage.
Frequently Asked Questions (FAQs)
How to Bake Polymer Clay at Home if I’m just starting?
To bake polymer clay at home, start with a small project, such as beads or a flat shape. Just preheat the oven to 130°C (275°F) and place your clay items on a tray lined with parchment or foil and bake according to thickness,15 – 30 minutes.
What’s the Best Way to Bake Polymer Clay in a Toaster Oven?
The toaster oven can be used to bake polymer clay if it holds the heat consistently. Set the oven heat to 130° Celsius (275°F) and put your goods on a piece of tile or foil-lined tray, and ensure they are not too close to the metallic walls.
Is it Possible to Bake Polymer Clay Without an Oven?
Yes, there are other ways too. You can bake polymer clay in an air fryer or a toaster, but never in a microwave. Microwaves are not the most ideal option for drying clay as they heat unevenly.
How to Bake Polymer Clay in an Air Fryer Properly?
To run an air fryer, place the temp at 120–130°C. Wrap your clay items in foil so they dont get direct heat and bake for a little bit, keeping a watchful eye on them.
Why Can’t I Bake Polymer Clay in a Microwave?
It is not safe to microwave baking polymer clay. It does not heat evenly, and it can ruin the clay by burning it, give off fumes, or melt it. Only use ovens, toaster ovens, and air fryers for precision baking.
How to Bake Polymer Clay Beads Without Losing Their Shape?
Put extracts of a tiny metal skewer as well as a needle before shaking them in the oven. This keeps them round and gives them even baking time. Bake at 130°C for 20–25 minutes.
What Temperature Should I Use to Bake Polymer Clay in Celsius?
Polymer Clay is often baked at 130 °C; most brands recommend this temperature to fuse the polymer, so ensure you check the label. Other varieties, such as Super Sculpey or Shuttle Art, may differ a bit. An oven thermometer will prevent overcooking or undercooking foods.
How to Bake Polymer Clay Rings and Keep the Shape Round?
Wind your rings of clay around a tiny metal tube or a foil form, bake in the pan at the usual temperature for 15- 20 minutes. Allow it to cool down and then remove it so that the dish does not lose its circular shape.
Final Thoughts
Polymer clay is a very fun, practical activity through which it is possible to implement one’s ideas in life. No matter what you are making, charms, beads or earrings, in bright colours, or handmade, the process is very simple and can be done by inexperienced people. You can mold your clay and bake your clay safely, and then complete it with your finish, so that it’s something special which you will complete with your hands.
Thus, get your materials, fire your kiln and start shaping your new work of art with the clay. A little time and carefulness will make pieces of baked clay so strong, smooth and fit to be used or given as a gift. Filled with creative, colourful fun is the world of polymer clay, and it all begins with just one simple bake.


![The Best 30+ Free Crochet Cat Patterns [Beginner-Friendly Guide]](https://crochetmind.com/wp-content/uploads/2025/04/1-The-Best-30-Free-Crochet-Cat-Patterns-Beginner-Friendly-Guide.webp)


