


Ever spotted a stunning blanket with a cool diagonal vibe or a pixel-perfect design and wondered, “How’d they do that?” It’s all about corner-to-corner C2C crochet! At first, C2C might seem tricky with its slanted style, but here’s the best part—it’s simpler than you think. All you need is a hook, some yarn, and a bit of practice. Even if your first blocks look wonky, don’t sweat it every crochet champ started somewhere.
C2C crochet is way easier when you’ve got the right gear and a few handy tips. Grab some smooth yarn and a comfy hook, learn the basic chain-and-double-crochet combo, and you’re off! Keep your hands relaxed for loose stitches, and use little markers to track your rows. Start small with a coaster or scarf, and if you goof up, just unravel and retry. Soon, you’ll be whipping up blankets or cute graphgans like a pro.
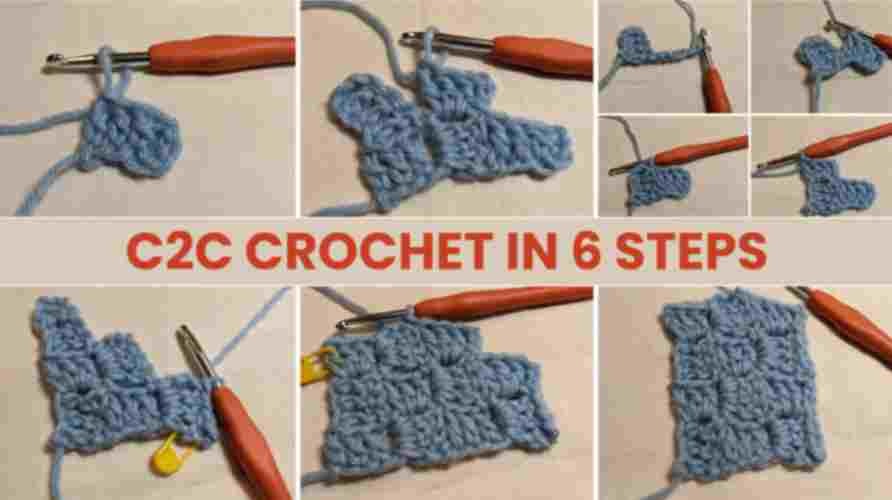
So, are you ready to dive into C2C? This guide’s got simple steps, easy stitches, and clever tricks to help you avoid slip-ups. Keep reading, and soon, you’ll be crafting awesome projects in no time. Let’s start it.
In This Post
- What Is C2C Crochet?
- Why Learn C2C Crochet?
- Basic Stitches You Need To Know First For C2C Crochet
- Essential Tools for C2C Crochet
- The Basics of Corner-to-Corner Crochet
- Key Learnings Of C2C Crochet
- 1. Increasing squares
- 2. Regular Squares
- 3. Decreasing Squares
- 4. When To Change Colors In C2C Crochet
- 5. How To Deal with Multiple Colors In C2C
- 6. Reduce Yarn Changes In C2C Crochet With Yarn Carrying
- 7. When To Cut Your Yarn In C2C Crochet
- 8. How to Weave in Ends for C2C Crochet
- 9. Borders for a C2C Blanket
- 10. Reading C2C Crochet Patterns
- C2C Crochet Pattern To Try
- Final Thoughts
- Frequently Asked Questions (FAQs)
What Is C2C Crochet?
C2C crochet, short for corner-to-corner crochet, is a neat stitching trick that builds your project diagonally, starting at one corner and heading to the other. It’s got this bold, blocky texture and only asks for basic moves like chains and double crochets to make things like blankets or scarves.
In C2C crochet, each block is a tiny square, so you can mess around with colors and sketch out anything—Star Wars, Pokemon crochet pattern. You can even crochet different types of anime characters and animal patterns, like a tiger or a mouse. It’s fast and chill. C2c crochet doesn’t care if you’re new or a pro. It’s crochet with a wild, creative twist.
Why Learn C2C Crochet?
C2C corner-to-corner crochet is a popular technique that’s worth learning for several reasons. Especially if you enjoy crafting or want to expand your crochet skills. Here’s why:
C2c crochet is versatile. It works by building diagonal rows from one corner to the opposite. They use small blocks of stitches, typically double crochet in clusters. This method lets you create everything from baby blankets and scarves to pillows. Even C2C intricate pixel-art-style designs.
If you’re into customizing projects, C2C crochet will be a great option. This is because you can easily follow graph patterns to make images or text. It is like a geeky Mario blanket or a personalized name throw. You can create Minecraft C2C crochet afghans using graph patterns that show characters or blocks from the game.
It’s beginner-friendly yet scalable. The basic stitch repeat is simple. First, you need to do chain, then double crochet, and lastly crochet slip stitch. Once you get the rhythm, it’s almost meditative. But it also grows with you—add color changes or texture. With this crochet, you’ve got a technique that keeps challenging you as your skills improve.
Unlike traditional row-by-row crochet, C2C’s diagonal growth means you’re often working smaller sections at the start, so projects feel like they build momentum quickly. A c2c baby blanket pattern might take just a weekend if you’re focused.
Finally, c2c crochet is practical. The resulting fabric is dense and comfortable, perfect for warm items. Moreover, the blocky structure means you can tweak sizes on the fly without unraveling everything—just stop when it’s big enough.
Basic Stitches You Need To Know First For C2C Crochet
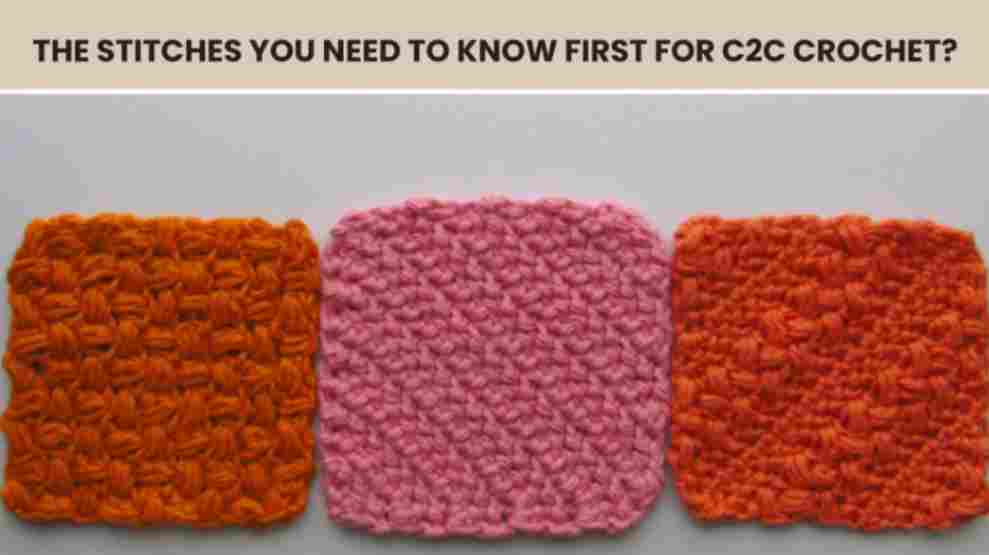
For corner-to-corner (C2C) crochet, the key stitches to master first are the chain stitch, double crochet, and slip stitch. These form the foundation of C2C’s diagonal block structure.
Here are the basic stitches that need to be learned first for C2C crochet. Including –
1. Chain (ch): This is the starting stitch used to build the foundation of each block. It helps create height and connect the blocks diagonally.
2. Slip Stitch (sl st): Slip stitch is used to join blocks or move across stitches cleanly. They keep transitions neat without adding height.
3. Double Crochet (dc): This is the main stitch used in standard C2C patterns. Each block in C2C is usually made of 3 double crochet stitches.
Optional Variation
Among the above stitches, there are more different types of stitches that you can use for crochet C2C crochet. Here are some of them. Including –
4. Half Double Crochet C2C: Used in some patterns for a tighter and shorter block. In C2C, they are good for smaller or more detailed designs.
5. Tunisian Simple Stitch C2C: Tunisian C2C crochet combines the unique technique of Tunisian crochet with the diagonal shaping of C2C construction. As a result, the fabric often looks woven. But it gives a distinct texture compared to traditional C2C. Typically, this variation is worked using a regular or short Tunisian hook, making it more accessible than full-length Tunisian projects.
Each version uses the same corner-to-corner method, increasing and decreasing diagonally. But the stitches inside each block change. That affects size, texture, and design clarity.
Essential Tools for C2C Crochet
Excited for C2C crochet? Initially, gather a crochet hook and yarn. Then, pick a pattern. Lastly, scissors and a yarn needle complete your essentials, setting you up for success.
Here are the materials that you need for crocheting C2C crochet. Including –
Crochet Yarn
For crocheting C2C crochet, choose a yarn weight suited to your project. Worsted weight medium, category 4, is a popular choice for C2C because it’s easy to work with and shows the stitch blocks clearly. The amount of yarn depends on size. For a small blanket, I need 1,000 to 1,500 yards of yarn. Go for acrylic or cotton blends if you’re a beginner. They’re forgiving and widely available.
Crochet Hook
Like the traditional system in c2c, you also need to match the hook to your yarn. For worsted weight, a 5.0 mm (H-8) or 5.5 mm (I-9) hook is standard. C2C isn’t super picky about gauge. But a slightly larger hook than the yarn label suggests can keep the fabric from getting too stiff. Ergonomic handles are a bonus if you’re hooking for hours.
Pattern or Graph
C2C shines with graphs. You can think of it as a pixel grade and can grab free crochet patterns online, like a simple heart or star. You can even create custom patterns and unique pixel-style designs by using tools like Stitch Fiddle. For plain projects, you just need to decide your the finished size that you want to crochet. No graph? No problem—just wing it and count blocks.
Yarn Needle
Essential for weaving in ends, especially if you’re switching colors. A blunt-tipped needle with a big eye works best. Metal or plastic material, whichever you like to use.
Scissors
In C2C crocheting, scissors are another material that you need while crocheting. Sharp and small ones are for clean yarn cuts. You don’t need to choose fancy, just functional, that’s comfortable to use.
Stitch Markers (optional): Handy for marking corners or tracking row ends, especially on big projects. You can improvise with scrap yarn or safety pins if you don’t have proper markers.
Row Counter (optional)
C2C grows diagonally, so keeping track of rows helps. Use a clicker, an app, or tally marks on paper—whatever keeps you sane. I personally prefer to use a clicker.
That’s it! The bare minimum is yarn, a hook, and something to cut with—you can start a basic square with just those. Add the extras as you get into colorwork or larger pieces. It’s a low-barrier setup, which is part of why C2C is so approachable.
The Basics of Corner-to-Corner Crochet
Curious about corner-to-corner crochet basics? First, start with a hook and yarn. Next, work diagonally in blocks. Finally, create stunning patterns with this simple, versatile technique!
Here are the basics of C2C crochet that you need to know to learn this C2C crochet technique. Including –
Step 1: Starting Square – 1 Square
Beginning with Chapter 6, start by counting to the 4th chain from the hook.
Then, proceed to make 1 double crochet (dc) into each of the remaining chains (3 dcs) before turning your work.
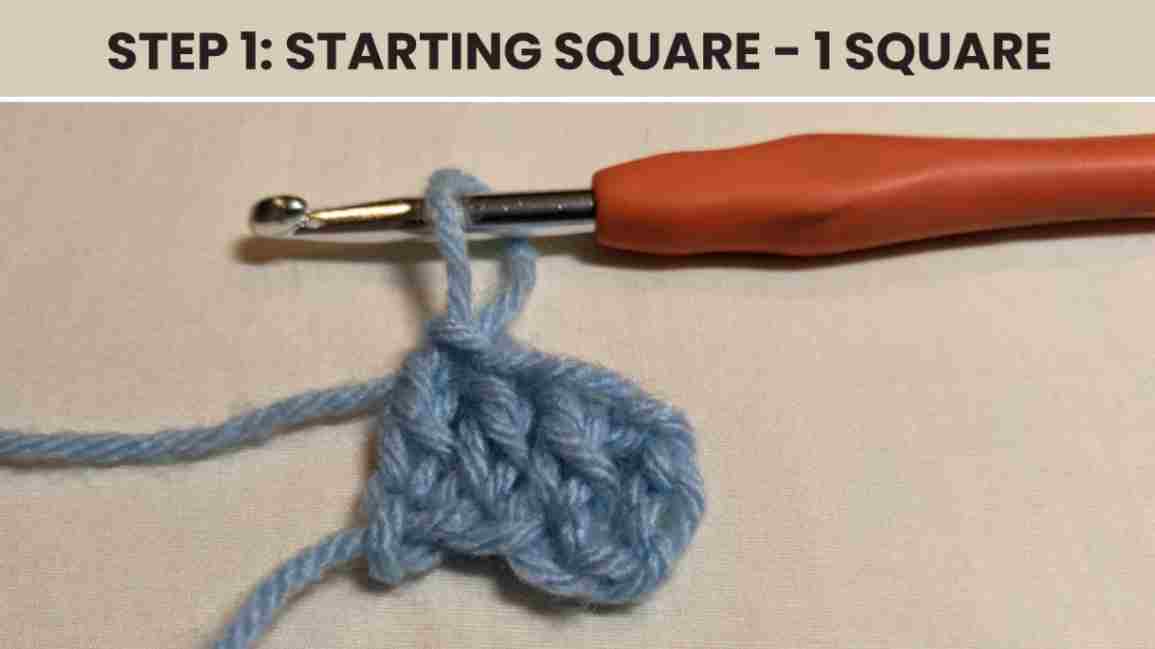
You’ve now created your first square and finished your initial row. Additionally, take note of how the first 3 chains form a small loop on one side. This detail will become significant shortly.
Step 2: Increasing – 2 Squares
Flip your work over. Row 2 is on the wrong side (WS) and has two tiles. To start, we’ll add one extra tile for this row.
First, make a chain of 6. Then, do a double crochet (dc) in the 4th chain from your hook, and put a dc in each of the last two chains. This creates the initial tile for Row 2. That’s your first tile for Row 2.
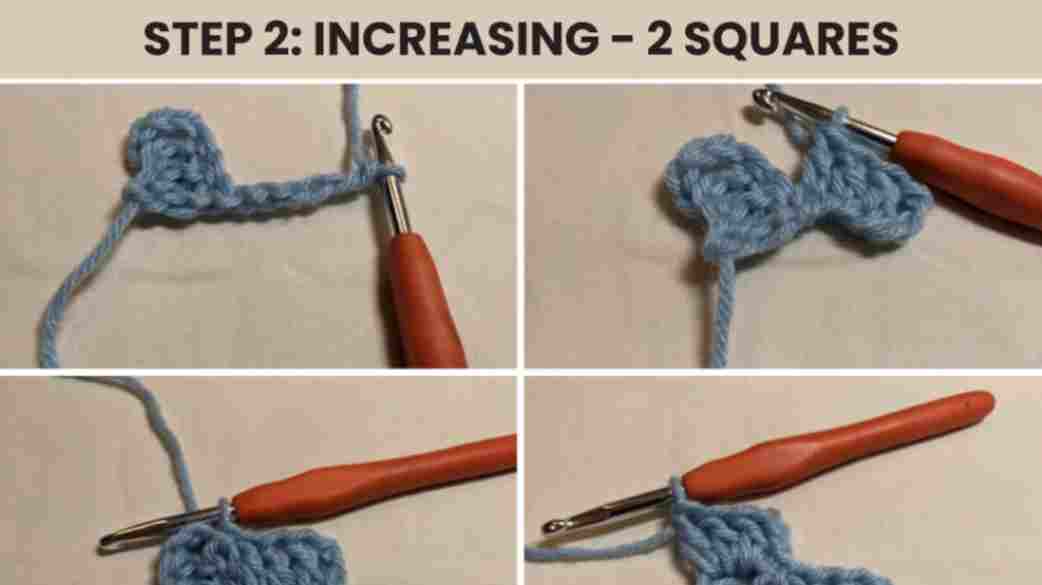
Now, let’s connect it to the tile from Row 1. Look for the little chain-3-space (ch-3-sp) made by the turning chain on the first tile. When you find it, slip stitch into that space to join them.
Afterward, move on to forming the second tile. Chain 3, and then work 3 double crochets (dc) directly into that same ch-3-sp.
Step 3: Increasing – 3 Squares
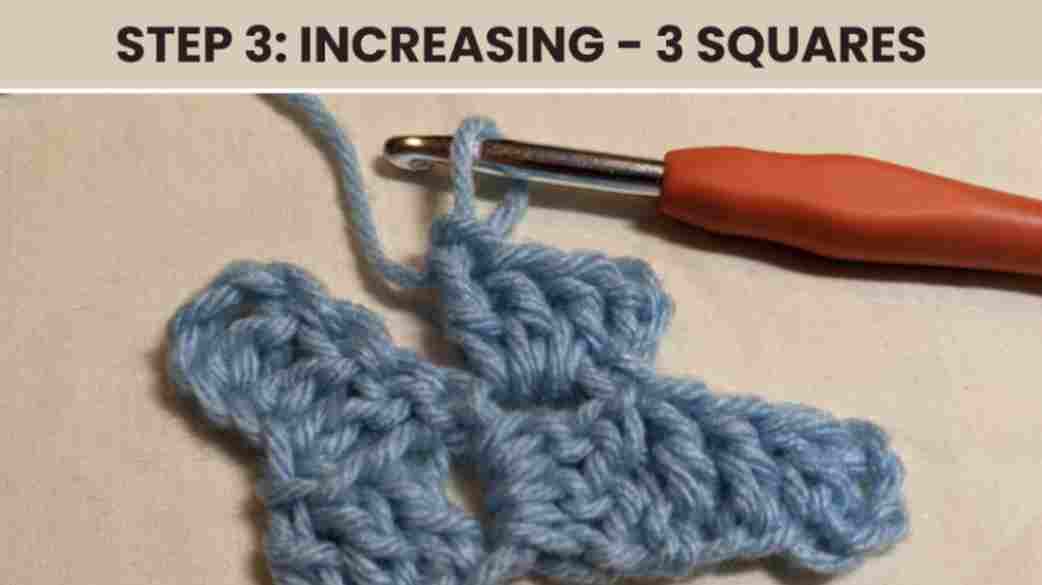
Flip your work over. For Row 3, follow the same steps as you did for Row 2. This time, Row 3 is a right side (RS) row and will have 3 tiles. To begin, you’ll start with a corner-to-corner (C2C) increase.
Start by chaining 6. Then, beginning with the 4th chain from your hook. Crochet 1 double crochet (dc) into each of the remaining chains. Next, slip stitch into the top of the chain-3 loop from the previous square to ‘anchor’ your new square. That will be your first title of row 3.
Now, move on to joining it. Slip stitch into the chain-3-space (ch-3-sp) from the row before. After that, chain 3 and place 3 double crochets into that same ch-3-sp to complete the second title.
Finally, connect the last tile. Slip stitch into the next chain-3-space from the previous row. Then, chain 3 and work 3 double crochets into that same ch-3-sp to finish the row 3 titles.
Note that this row mirrors Row 2 exactly—the only change is that we’ve added more regular squares. Consequently, you can now see this as a standard increasing row, where we’re growing the piece on both sides. So, this brings us to a new question: how do we decrease and shrink our swatch?
Step 4: Decreasing – 3 squares
Instead of chaining, turn your work and slip stitch into the 3 double crochets you just finished. As well as you also need to crochet into the top of the chain-3 loop. Next in chain 3, work 3 double crochets into the chain space, and then slip stitch into the top of the chain-3 loop.
After that, chain 3 again, place 3 double crochets into the next chain space. Crochet slip stitch into the top of the chain-3 loop.
Then, chain 3 once more, add 3 double crochets into the following chain space, and turn your work.
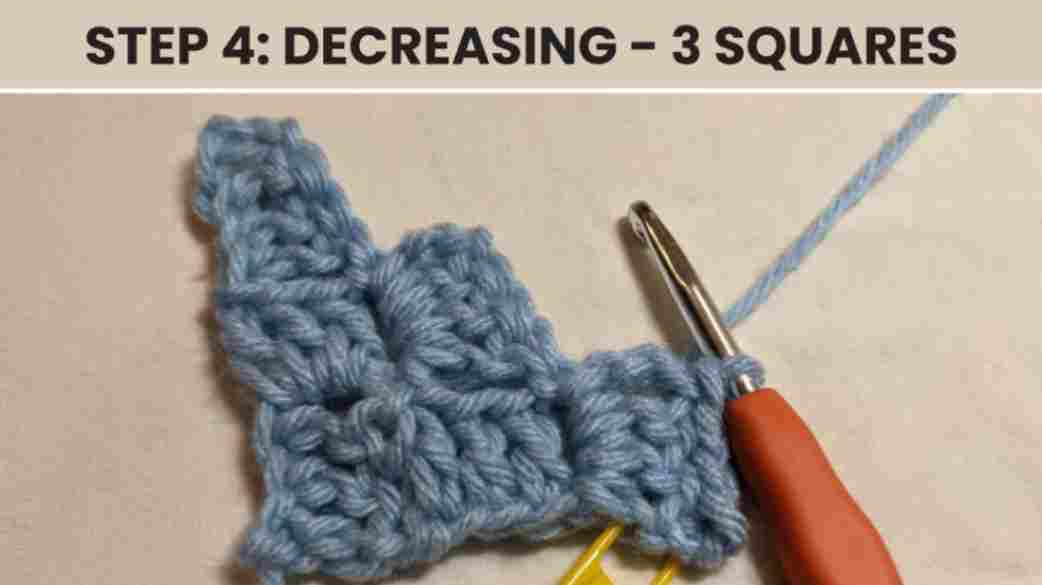
For this row, we’re reducing the size on just one edge of the rectangle. In the photo, I’ve tagged that side with a stitch marker. While it’s not essential for a tiny swatch like this, popping a marker there is a smart trick when you’re crocheting a larger rectangle without much focus. Just don’t forget if it’s marking the ‘decrease-only side’ or the ‘increase-only side
Step 5: Decreasing – 2 squares
Skip the chain—just turn your work and slip stitch into the 3 double crochets you just finished, plus the top of the chain-3 loop. Next, chain 3, work 3 double crochets into the chain space, and then slip stitch into the top of the chain-3 loop.
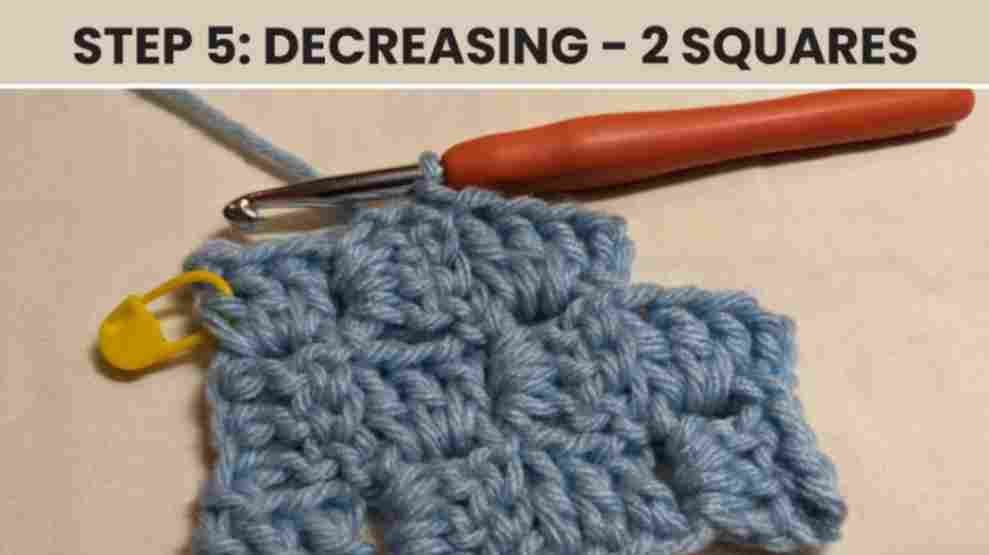
After that, chain 3, make 3 double crochets into the next chain space, turn your work, slip stitch into the top of the chain-3 loop, and turn again.
Here, in this row, we’ve shrunk it on both sides. So, to easily decrease at the end of a row, simply stop after completing and anchoring your last regular square, and then turn your work.
Step 6: Decreasing – 1 square
Don’t bother with a chain—simply turn your work and slip stitch into the 3 double crochets you just created, along with the top of the chain-3 loop. Then, chain 3, place 3 double crochets into the chain space, and slip stitch into the top of the chain-3 loop. Finally, bind off.
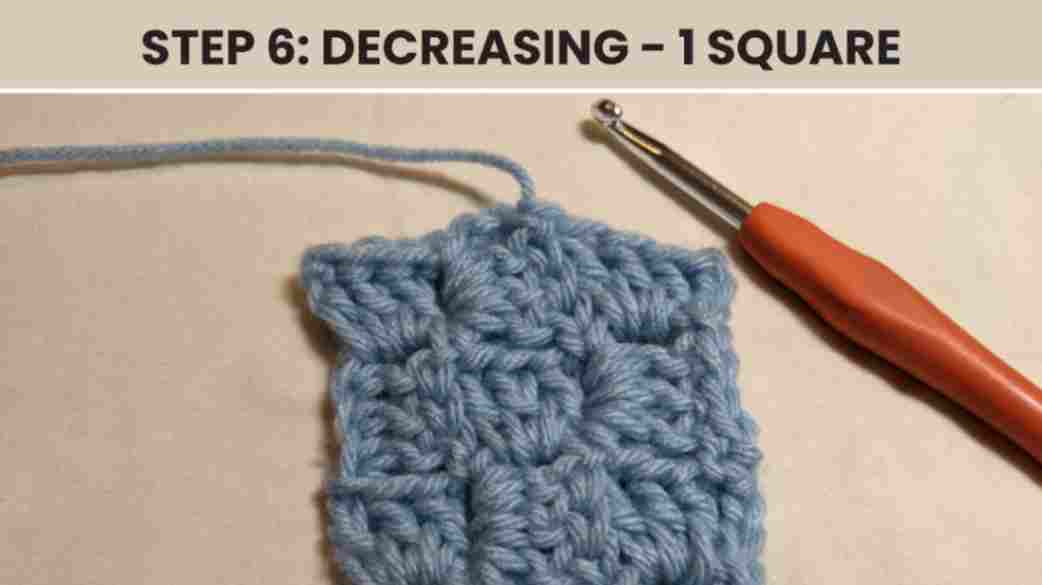
And that’s all! You’ve now made a 3 x 4 rectangle of C2C crochet squares. Next, let’s go over a few important tips below before jumping into some fun patterns to try out.
Key Learnings Of C2C Crochet
Exploring key learnings of C2C crochet? First, master diagonal block stitching. Then, understand color changes for patterns. Finally, perfect increasing and decreasing to shape your project beautifully.
Here are the key learnings of C2C crochet. Including –
1. Increasing squares
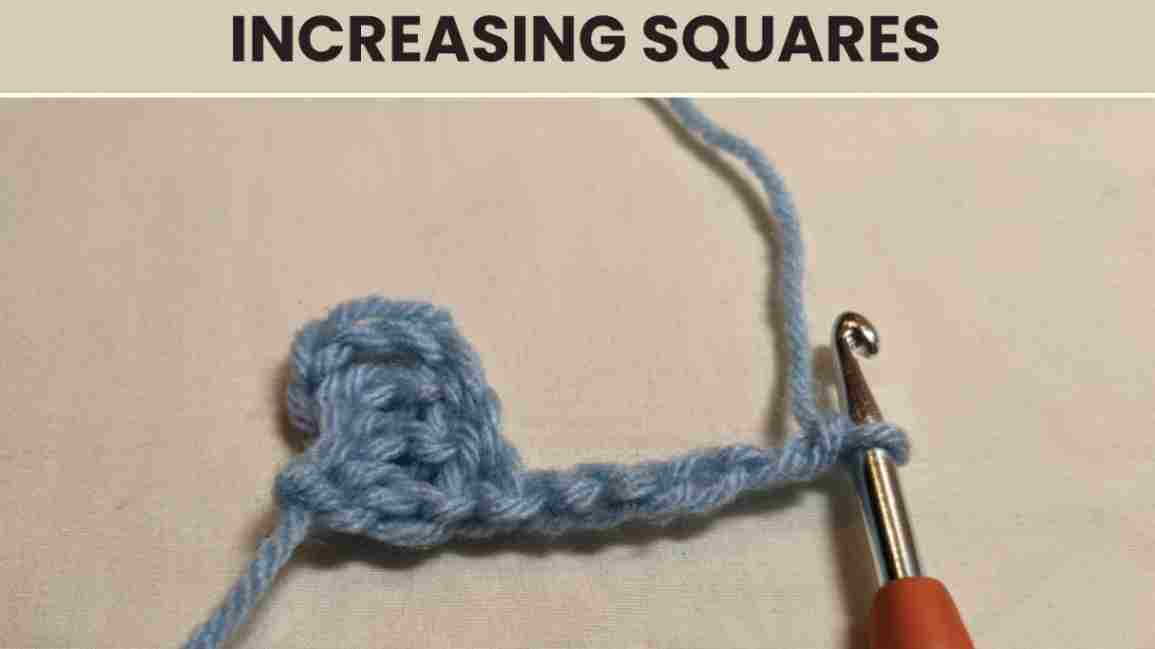
These squares start with a row where you’re adding more squares to that side. To create them, first chain 6. Then, starting at the 4th chain from your hook, put 1 double crochet stitch into each of the remaining chains. After that, slip stitch into the top of the chain-3 loop from the square before to ‘anchor’ your new square.
2. Regular Squares
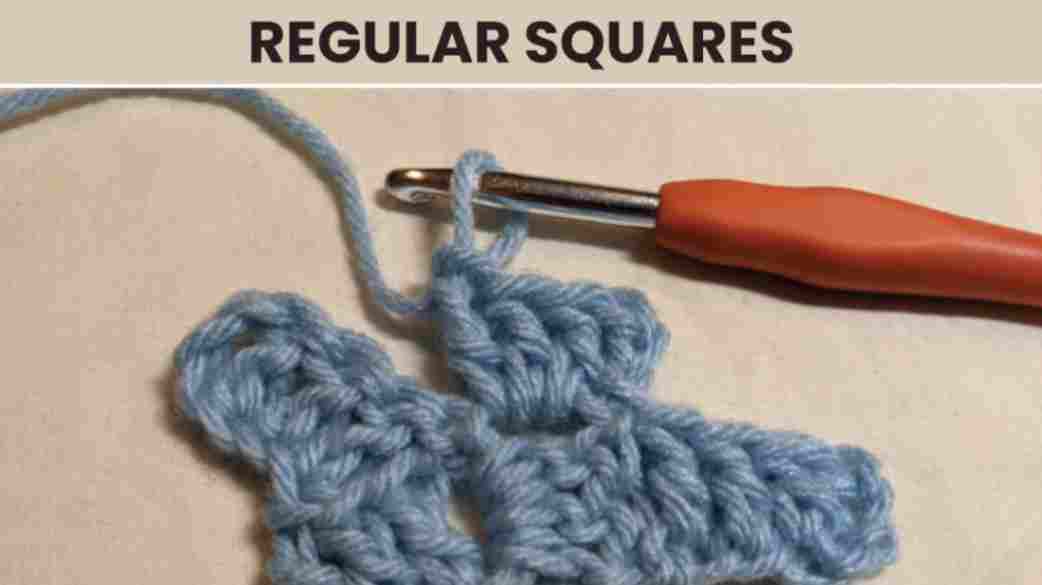
These squares move step-by-step up the row, like climbing a staircase. To create them, first chain 3. Next, work 3 double crochets into the chain space, and then turn your work. After that, slip stitch into the top of the chain-3 loop. Just remember, you need to already be connected to the square below before you can make a regular square.
3. Decreasing Squares
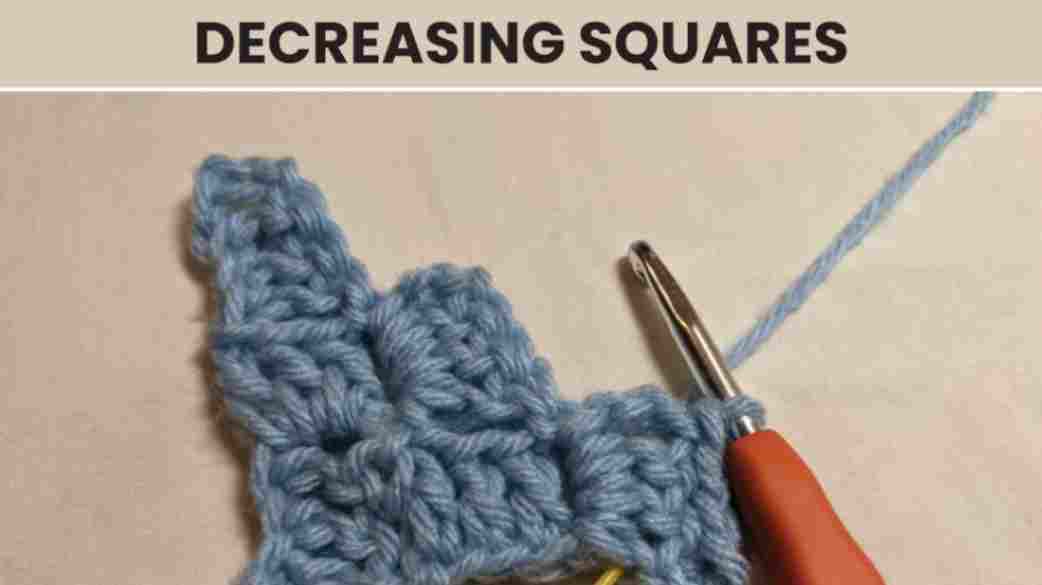
These squares begin a row where you’re reducing the number of squares on that side. To start, skip the chain, turn your work, and slip stitch into the 3 double crochets you just finished, plus the top of the chain-3 loop. Then, go ahead and create a regular square.
Note: Every square is just a chain-3 loop and 3 double crochets tied to the square next to it. The only thing that changes is how you start. First, for an increase, you chain 6 and work into that chain. Next, for a regular square, you’re already connected from the square before, so you just keep going. Or, when decreasing, you slip stitch over to set up the new anchor. That’s it. C2C is easy once you get the hang of it.
4. When To Change Colors In C2C Crochet
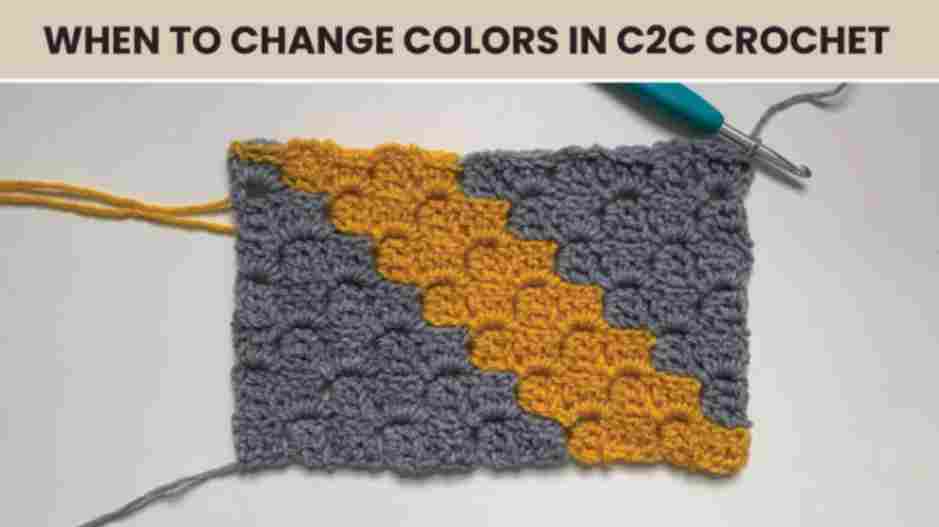
Just like in all crochet, adding colors makes C2C way more exciting. First, decide where you want the new color to begin—usually at the start of a square. Next, finish the last stitch of the square before the switch with your current color, but don’t complete the final slip stitch.
Instead, grab your new color and pull it through to finish that slip stitch. Then, keep going with the new color for the next square. After that, just follow your pattern as usual. This way, you can easily add bright stripes or cool designs whenever you like.
5. How To Deal with Multiple Colors In C2C
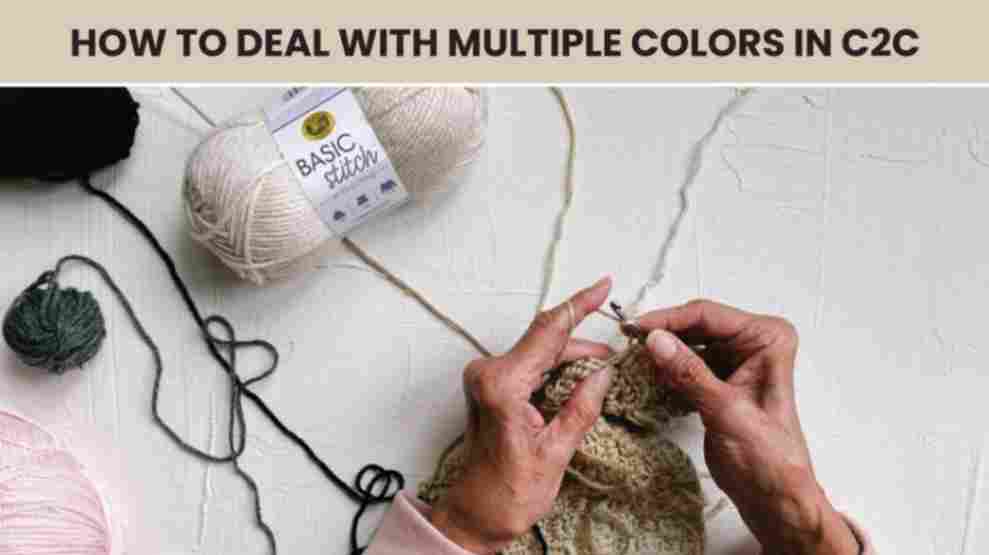
In many C2C designs, large color blocks stretch over several rows. There’s no need to cut the yarn each time the color changes. Instead, leave the yarn attached where it ends. When returning to that color in the next row, simply pick it up again using the usual color-change method. This approach keeps the yarn ready for reuse and avoids extra ends to weave in. It also helps to maintain a cleaner and more efficient workflow.
6. Reduce Yarn Changes In C2C Crochet With Yarn Carrying
Another way to streamline your c2c crochet projects and avoid the headache of constant yarn changes is to carry the yarn.
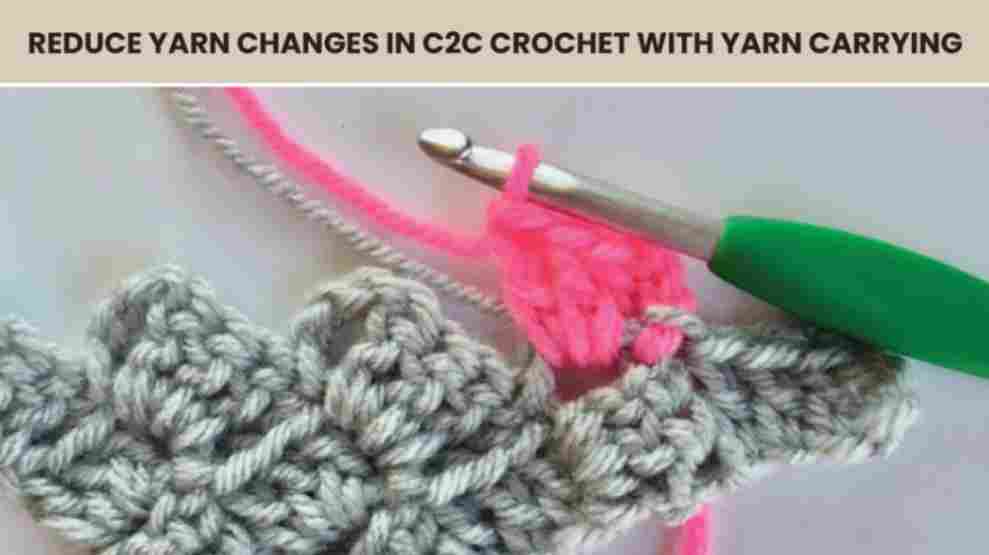
Instead of cutting your yarn at every color switch, lay the unused color along the top of the row you’re working on. As you crochet your double crochet stitches, work directly over this strand to encase it within your project. This method hides the yarn securely and positions it perfectly for when you need it next, reducing loose ends and saving time.
7. When To Cut Your Yarn In C2C Crochet
If your C2C pattern involves multiple colors, you’ll typically cut the yarn at the end of a tile or block when switching to a new color. This keeps the colorwork clean and prevents unwanted strands from showing through. But when you finish a color in the middle or end of a C2C row, you’ve got three main choices.
If you want, you can cut the yarn and reattach it later. They are perfect for large color blocks or when a color won’t return for a while. You can also use it if you prefer a minimalist setup.
Another way is to leave the yarn attached and pick it up later. This method is best for those patterns with frequent color switches in close proximity, like small motifs or stripes. Moreover, they also work well if you’re comfortable managing a few active skeins.
One of the last ways is to carry the yarn underneath the new color. These are ideal for small color changes or when colors are similar in tone. But remember, you need to avoid this method for high-contrast combos like black and white.
8. How to Weave in Ends for C2C Crochet
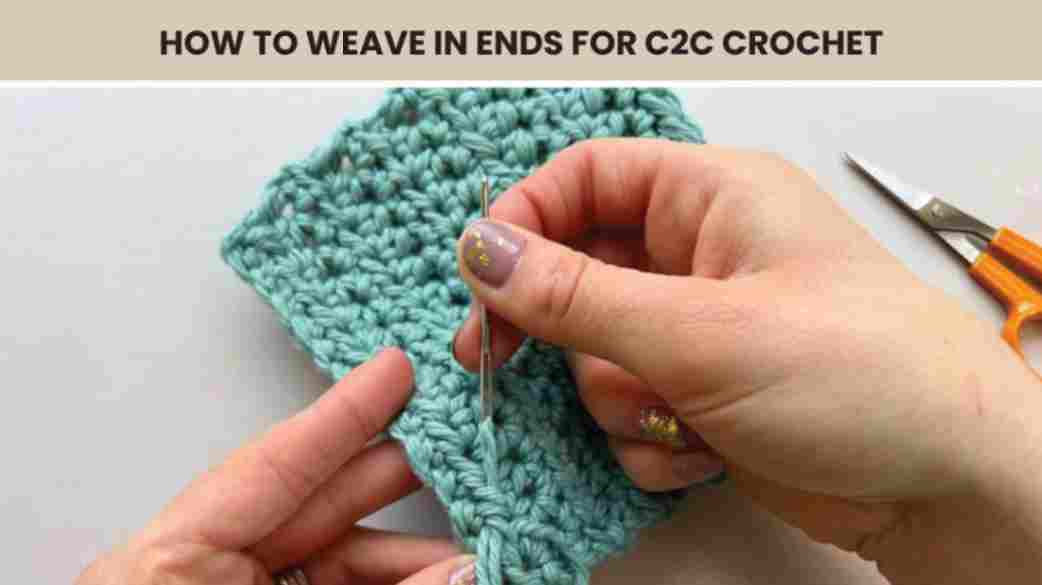
For waving in the end, take a tapestry needle or a small crochet hook. This hook can be 2-3 mm smaller than your project hook. Then thread your yarn tail and weave it through the back of nearby stitches for 2-3 inches. To secure it, change the direction from up to down or diagonal. Once locked in, carefully snip the excess yarn close to the project. Obviously, make sure it won’t pop out.
Here are a few approaches to keep it manageable:
- Tackle them as you go: Weave in ends every few rows or after each color block. This spreads the task out and keeps your workspace tidy.
- Daily wrap-up: Set aside a few minutes at the end of each crochet session to weave in that day’s tails.
- Big finale: Prefer to focus on crocheting first? Save all the ends for one epic weaving session at the end.
Weaving in ends isn’t just about hiding tails—it’s a chance to finesse your project. Use those tails to close tiny gaps between tiles or reinforce loose stitches. If you’re working with multiple colors, weave each tail into stitches of the same color for a cleaner finish. And if you’re feeling fancy, try weaving in a way that mimics the C2C texture for a flawless blend.
9. Borders for a C2C Blanket
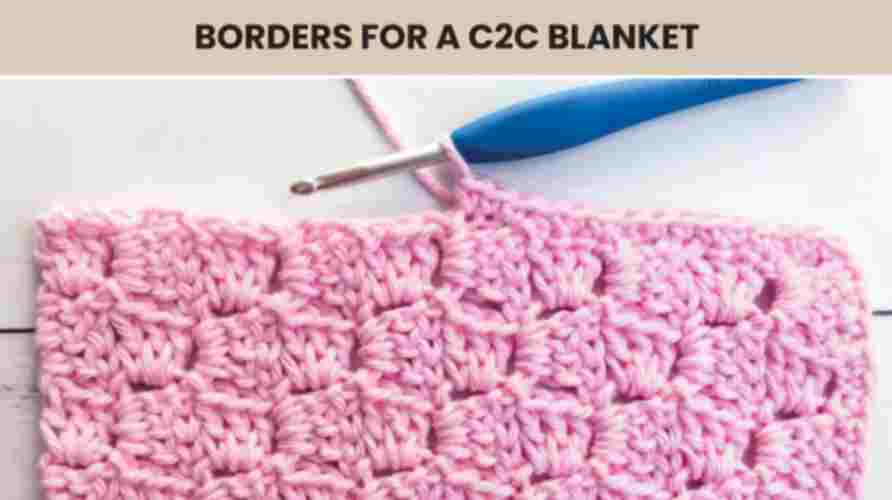
Now that you’ve woven in all those yarn ends, it’s time to give your C2C crochet that polished, professional look with a beautiful border. A well-chosen border not only frames your project but also adds durability and charm.
Let’s walk through some easy, versatile border options that’ll make your C2C crochet stand out. Including –
- Single Crochet Border: When you are talking about a beginner-friendly C2C border that time nothing beats a single crochet edge. They are quick and work with any C2C project.
- Double Crochet Border: A double crochet edge is a fantastic choice for a border with more presence and texture. It adds height and a sturdy frame. In C2C, these borders are perfect for blankets or larger projects.
- Scalloped Shell Border: A scalloped shell border adds a lacy and elegant finish that’s easier than it looks. It’s perfect after a single crochet base round.
10. Reading C2C Crochet Patterns
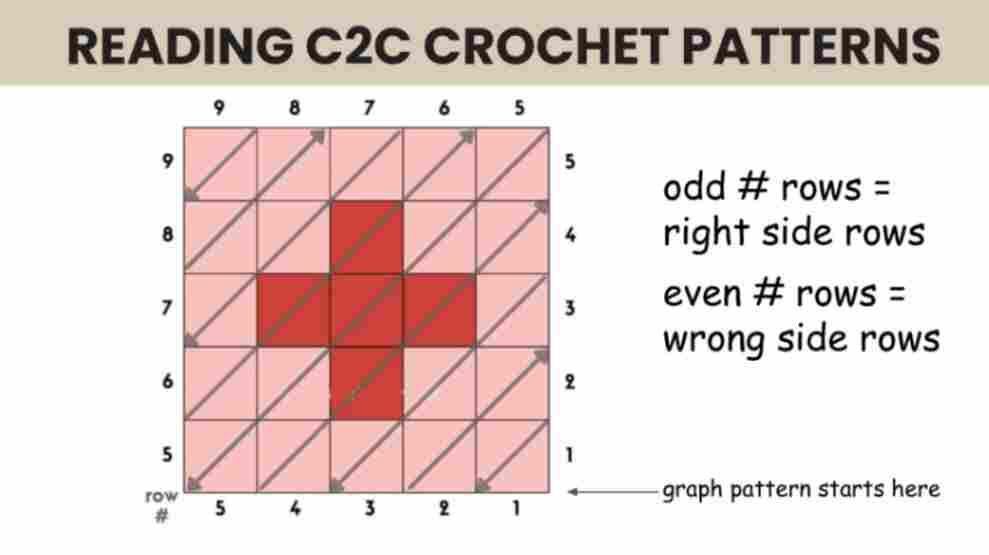
Reading C2C crochet patterns is easier than it looks! First, know that C2C crochet stands for corner-to-corner, so you’ll work diagonally from one corner to another. Next, look at the pattern—it’s usually a chart or written steps showing squares. Each square means a block of stitches, like 3 double crochets. Then, start at the bottom corner and follow the rows, increasing or decreasing as the pattern says. After that, keep an eye on any color changes or special notes. Finally, just take it step by step, and soon you’ll be crocheting cool designs like a pro.
C2C Crochet Pattern To Try
Ready for the C2C crochet pattern? Start with a cozy blanket. Next, try a stylish scarf. Finally, create a detailed graphghan to highlight this versatile, diagonal technique!
Here are the C2C crochet project ideas that you can try. Including –
1. C2c Crochet Scarves
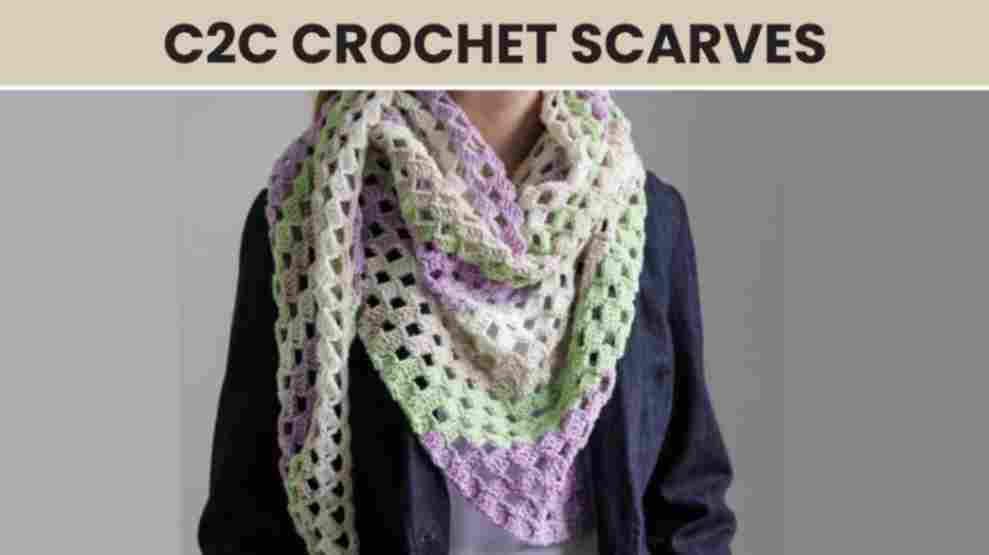
C2C crochet scarves are perfect for anyone starting out, and I’d absolutely suggest trying this pattern. To begin, you’ll enjoy crafting a soft, diagonal design with the corner-to-corner method. Next, start things off with a straightforward row—chain 6 and toss in some double crochets. Then, keep stacking those squares until the scarf feels just right. After that, taper it down with decreases. Finally, switch colors if you want a fun look.
- Skill Level: Intermediate
- Designer: Nana’s Crafty House
- Crochet Yarn: Caron Cotton Cakes, Weight 4/Medium
- Crochet Hook: H/8 (5.0 mm)
- Finished Size: 50” x 38.5” x 60”
2. C2C Crochet Graphgan
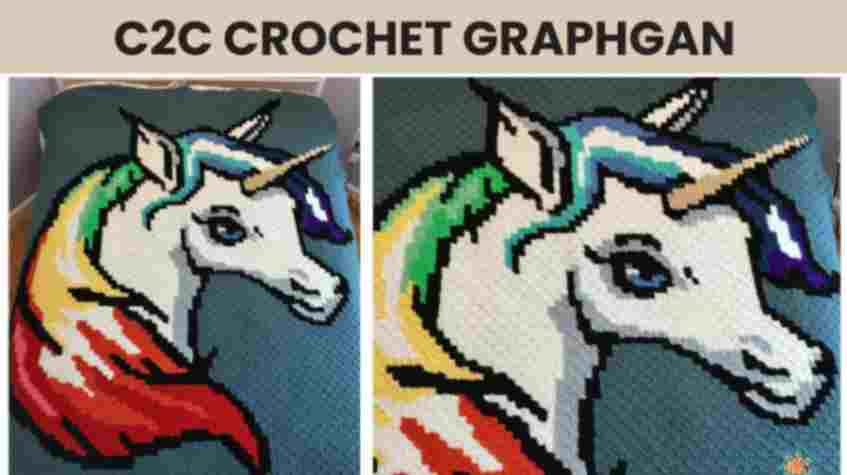
Graphgan is another C2C crochet project that you can try. In a graphgan, each square on a graph chart shows where to place a colored block of yarn. This lets makers create letters or shapes with yarn. You can crochet many types of pictures, like a Rainbow Giraffe or Unicron to an Elephant, whatever you want.
C2C is great for crocheting graphgans because it turns simple stitches into colorful squares that follow a graph pattern easily. It works diagonally, making it fast and fun to create detailed designs!
- Skill Level: Intermediate Designer: Nana’s Crafty House
- Crochet Yarn: Caron Cotton Cakes, Weight 4/Medium
- Crochet Hook: H/8 (5.0 mm)
- Finished Size: 50” x 38.5” x 60”
3. C2C Crochet Blanket
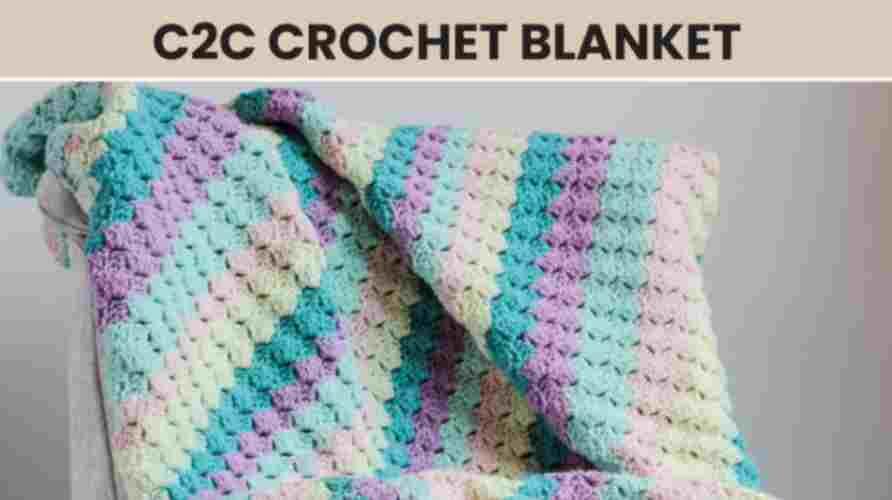
In c2c crochet, the blanket is one of the most famous projects. A C2C rectangle blanket is a warm, pretty piece that adds a special touch to any spot. First, its cool diagonal look makes it different from regular blankets, giving it a fresh vibe. Then, the soft, comfy feel is just right for curling up when it’s cold. You can create C2C Halloween and Christmas designs that are fun to crochet for making holiday borders, blankets, and decorations.
Moreover, you’ll often see them with bright colors or neat designs, so they really liven up a room. All in all, a C2C blanket is an easy, lovely way to cozy up your place.
- Skill Level: Intermediate
- Designer: Nana’s Crafty House
- Crochet Yarn: Caron Big Cakes, Weight 4 Medium (100% acrylic)
- Crochet Hook: H (5.0 mm)
- Finished Size: 70” x 90” (88 x 113 blocks)
Final Thoughts
C2C (corner-to-corner) crochet is a fun and creative way to make blankets, pillows, and pictures using small blocks. It starts at one corner and grows diagonally to the other. This method is great for adding shapes, letters, or images into crochet projects.
Many free patterns are easy to find online. C2C is perfect for beginners and experienced makers who want to try something new and make colorful, personal designs with simple stitches.
Frequently Asked Questions (FAQs)
What Stitches Are Used In C2C Crochet?
Corner-to-corner (C2C) crochet uses chains, double crochets, and slip stitches to make small squares. You start at one corner, building diagonally with these simple stitches!
How Do I Read A C2c Crochet Graph?
To read a C2C graph, start at the bottom-right corner. Each square shows a color and stitch. Work diagonally, row by row, following the colors left to right, then up, like climbing stairs!
Is C2c Crochet Hard?
C2C crochet isn’t hard once you get the hang of it! It uses basic stitches—chains and double crochets—worked diagonally. Practice with a small, simple graph to build confidence fast!
Where Can A Free C2c Crochet Pattern Be Found?
Free C2C crochet patterns can be found on websites like Ravelry, Yarnspirations, and Pinterest. Many blogs also share patterns with step-by-step guides. Just search “free C2C crochet pattern” online to find designs for blankets, animals, or shape


![The Best 30+ Free Crochet Cat Patterns [Beginner-Friendly Guide]](https://crochetmind.com/wp-content/uploads/2025/04/1-The-Best-30-Free-Crochet-Cat-Patterns-Beginner-Friendly-Guide.webp)


