How to tie a ties: Every man faces a defining moment when he must learn to tie a necktie, a skill that elevates him from commonplace to distinguished. This guide is your trusted mentor, revered by those who seek the artistry of a perfect knot.
It’s a pursuit that demands focus, refines patience, and bestows timeless confidence. Each loop and pull not only creates a well-tied necktie but also contributes to your legacy, as Cary Grant once noted: “A tie well-knotted is a man’s mark of grace.” Learning to tie a tie adds polish to any formal or professional look. A nicely tied tie makes a person look neat and classy. It’s great for things like job interviews, weddings, or business meetings. Four-in-Hand and Half-Windsor can look good in different places.
So, step into this journey, and let the art of tying a necktie shape you into a gentleman of enduring elegance.
Table of Contents
- Understanding what Is Tie a Tie
- Comparing the Most Commonly Used Necktie Knots
- How to Tie a Tie : [ 5 Easy Methods]
- Different Types Of Tying Knots
- The Fundamentals Tie Knot
- 1. Skinny Tie Knot
- 2. 10 Second Knot
- 3. Simple Knot
- 4. Nicky Knot
- 5. Plattsburgh Knot
- 6. Knitted Tie Knot
- The Timeless Tie Knot
- 9. Prince Albert Knot
- 10. St Andrew Knot
- 11. Murrell Knot
- The Flamboyant
- 12. Cross Knot
- 13. Merovingian Knot
- 14. Trinity Knot
- 15. Van Wijk Knot
- 16. Balthus Knot
- The James Bond
- 18. Diamond Bow Tie
- 19. Velvet Bow Tie
- How To Choose The Perfect Tie For Your Suit
- How to Dimple a Tie
- In Closing
- Frequently Asked Questions (FAQs)
Understanding what Is Tie a Tie
Tying a tie is the process of creating a knot to secure a necktie around your collar. It makes the suit or dressy clothes look cleaner and sharper. This adds a nice touch to the whole outfit. Common knots like the four-in-hand or Windsor vary in size and style. Every knot gives a special look to the way a person dresses. Practice makes it easy.
Comparing the Most Commonly Used Necktie Knots
In today’s world, 4 types of necktie knots are widely used. These can include the Four-in-hand Knot, which is the easiest knot. In there, Half-Windsor Knot and Windsor Knot are known for giving a professional look. Their necktie knots are classic tie knots, whereas the Pratt Knot is the more recent knot.
The table below compares these four necktie knots alongside the bow tie, offering a quick guide to help you decide which knot fits your needs. Want to learn how? Then read on:
| Necktie Knot | Advantage | Disadvantage | Suitable Outfits / Occasions |
|---|---|---|---|
| Four-in-hand Knot | Out of the four most popular necktie knots, this one is the simplest to learn. | The uneven design doesn’t pair well with wide collar shirts. | This compact knot complements shirts with narrow collar gaps and works well for various occasions. |
| Half-Windsor Knot | It’s a tidy knot that looks equal on both sides and is classier than the four-in-hand knot. It is ideal for professional settings. | Tying it is slightly more challenging compared to the four-in-hand knot. | It works well for a wide range of occasions.” |
| Windsor Knot | This symmetric knot exudes nobility, with a bold and elegant structure. Its substantial size pairs perfectly with wide-collar shirts. | Using a tie with thick fabric can create an oversized knot. This makes it unsuitable for shirts with narrow collars. | It looks best with a wide collar shirt. This presents a sharp look for business and political settings |
| Pratt Knot | This knot is even on both sides and medium in size, not too big or too small. It looks tidy and nice. | The skinny end of the tie faces up in the back, and it doesn’t look nice if it’s not hidden well behind the wide part. | It works well with most shirts. This knot is the perfect choice for many occasions. |
| Bow Tie | It looks more formal and gives a polished appearance. | Compared to the regular tie, a bow was a little bit harder. It takes more practice to get the shape right. | It can be worn to a wedding or on fancy occasions. |
How to Tie a Tie : [ 5 Easy Methods]
Here are the different types of most commonly used neckties with step-by-step instructions. Including –
Method 1. Four-in-hand Knot
This timeless knot is simple to learn and versatile for most occasions, though some style guides suggest switching to a half or full Windsor knot for the most formal settings.
Here’s how to tie a tie using the front-in-hand knot. Including –
Step 1. Start With The Tie Around Your Neck
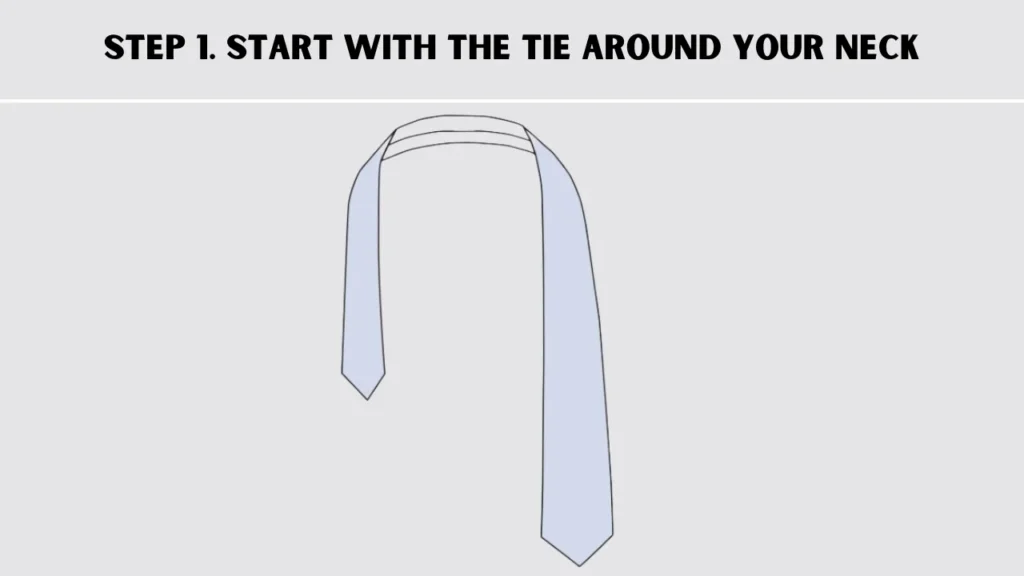
Put the tie around your neck. Place the wide end on your dominant side. It should be about a foot lower than the small end.
Step 2. Cross The Wide End Over:
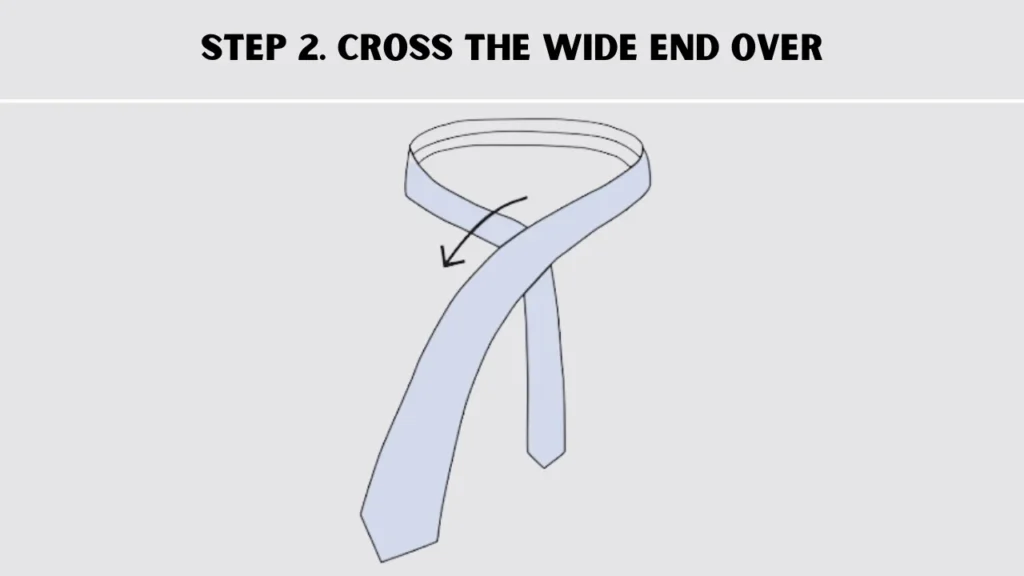
Take the wide part of the tie and cross it over the narrow part. Do this close to your neck.
Step 3. Wrap It Around:
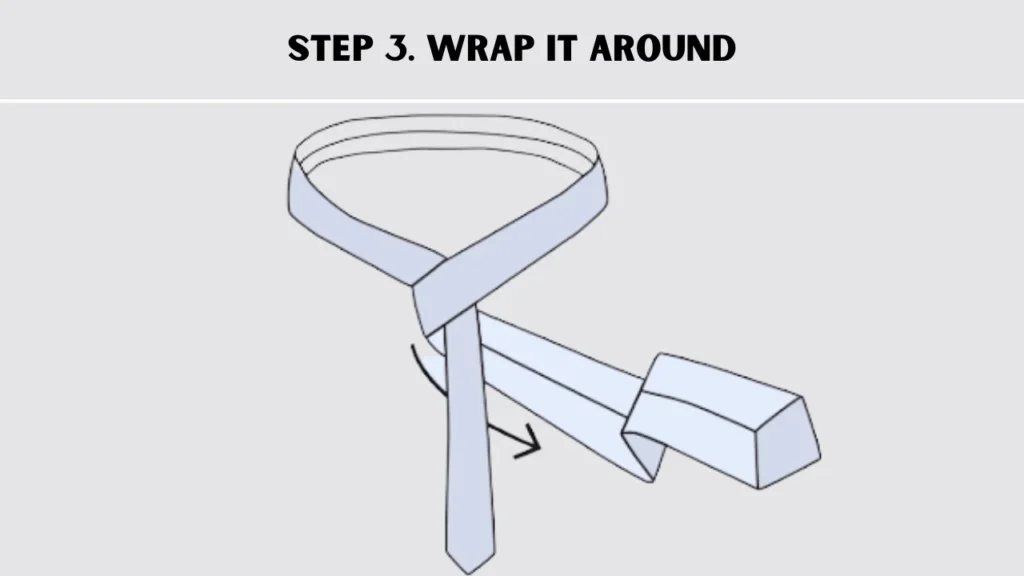
Take the wide end. After that, you need to slide it behind the narrow end. Then bring it across the front.
Step 4. Loop through the neck:
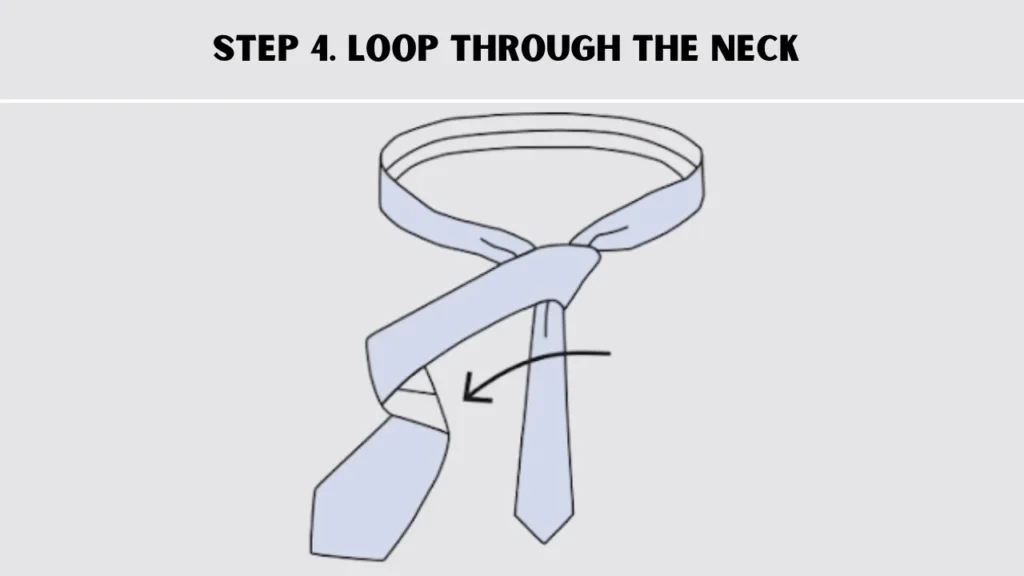
Lift the wide end and bring it up through the space around your neck from below.
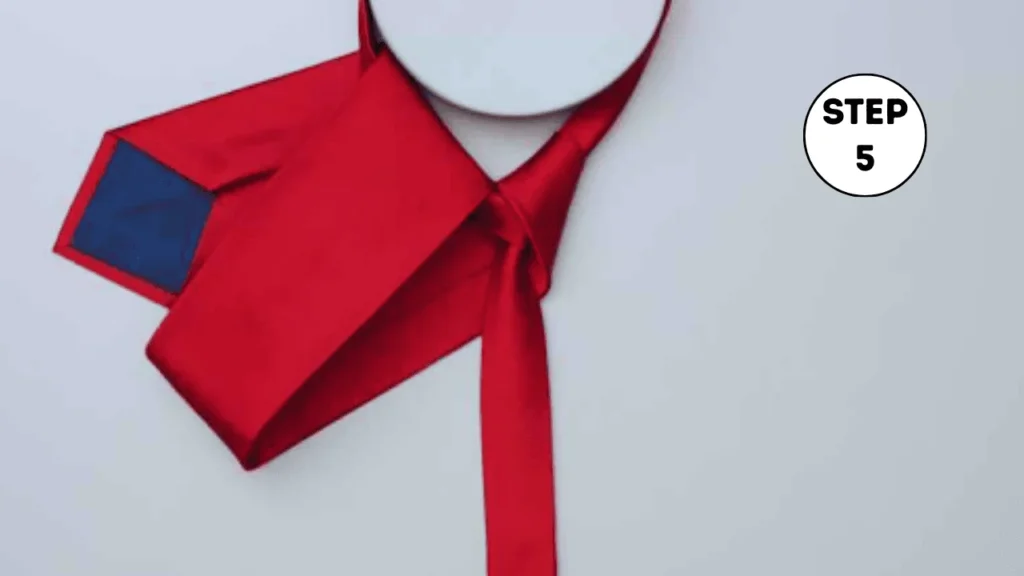
Step 5. Thread the knot:
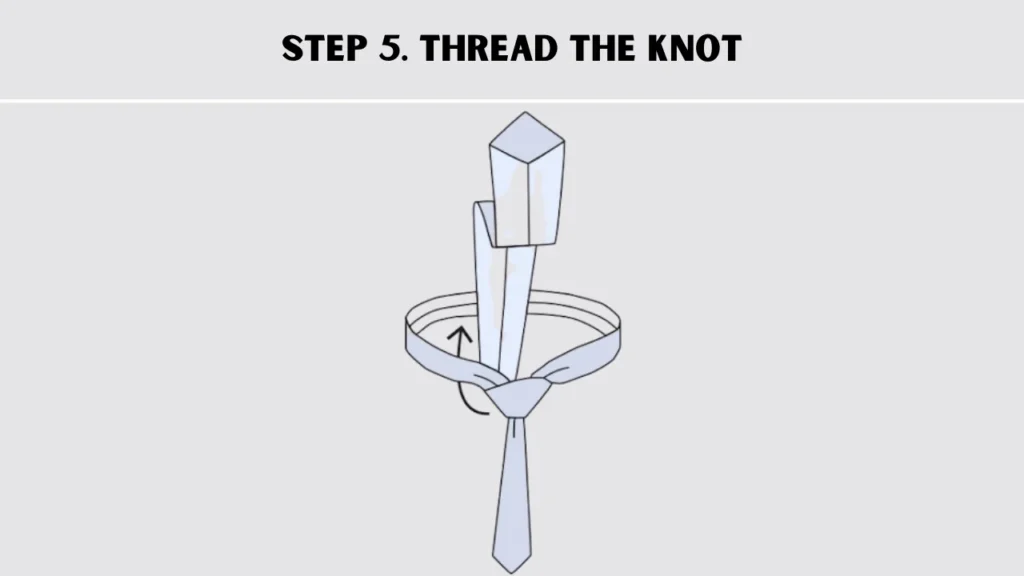
Slip the wide end down through the front loop of the knot you’ve formed.
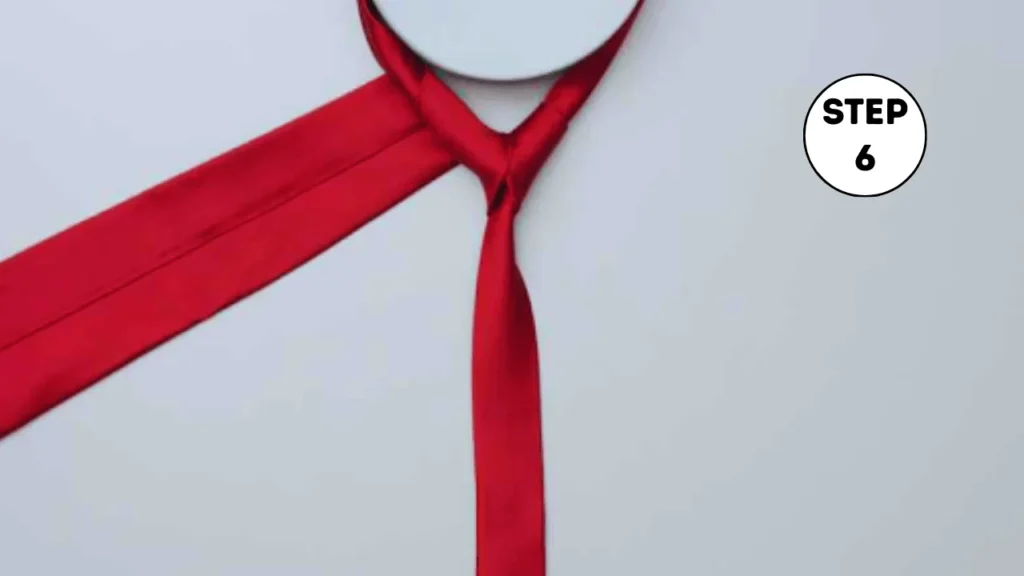
Step 6. Tighten and adjust:
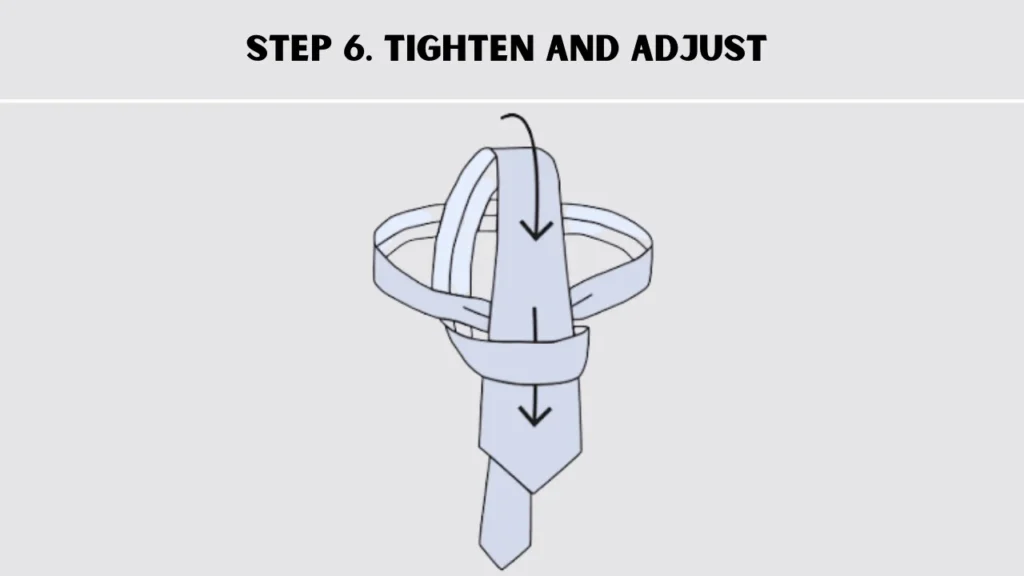
Hold onto the narrow end of the tie. Gently pull the knot up toward your collar. Make sure the knot is even on both sides. Center the knot. Ensure the tie hangs evenly.
Method 2. How to Tie A Tie Using the Pratt Knot
Here’s how to tie a tie using the Pratt Knot. Including –
Step 1. Start with the tie reversed
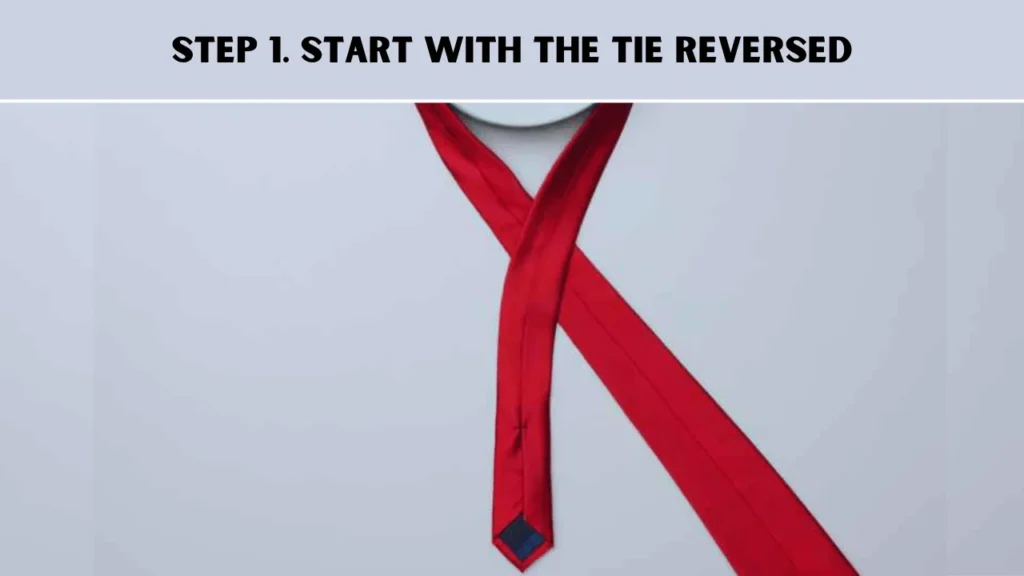
Place the tie around your neck with the backside facing outward. The wide end should hang on your dominant side, about 12 inches lower than the narrow end.
Step 2. Cross the wide end under
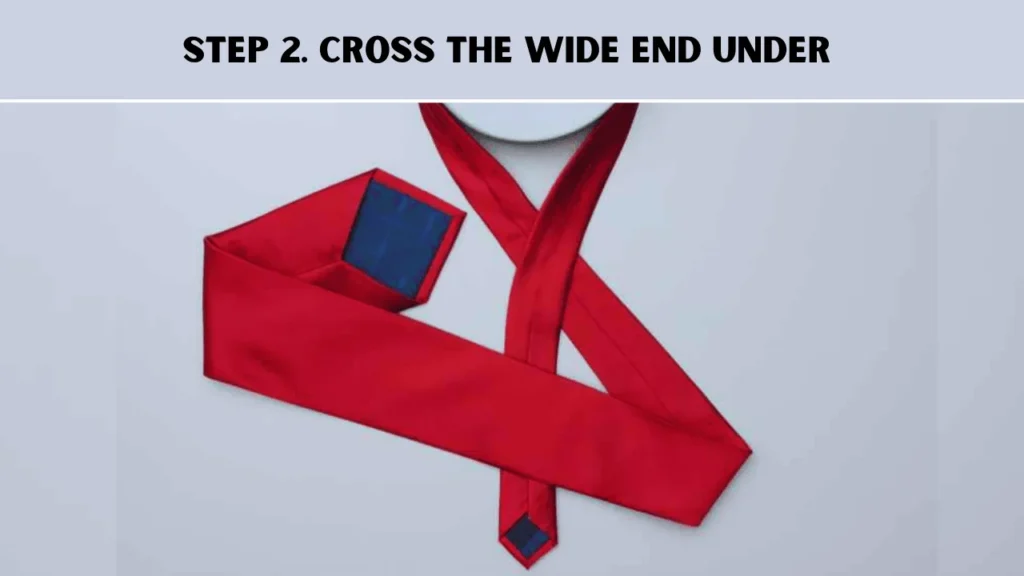
Move the wide end below the narrow end. Bring it close to your neck.
Step 3. Loop over the neck
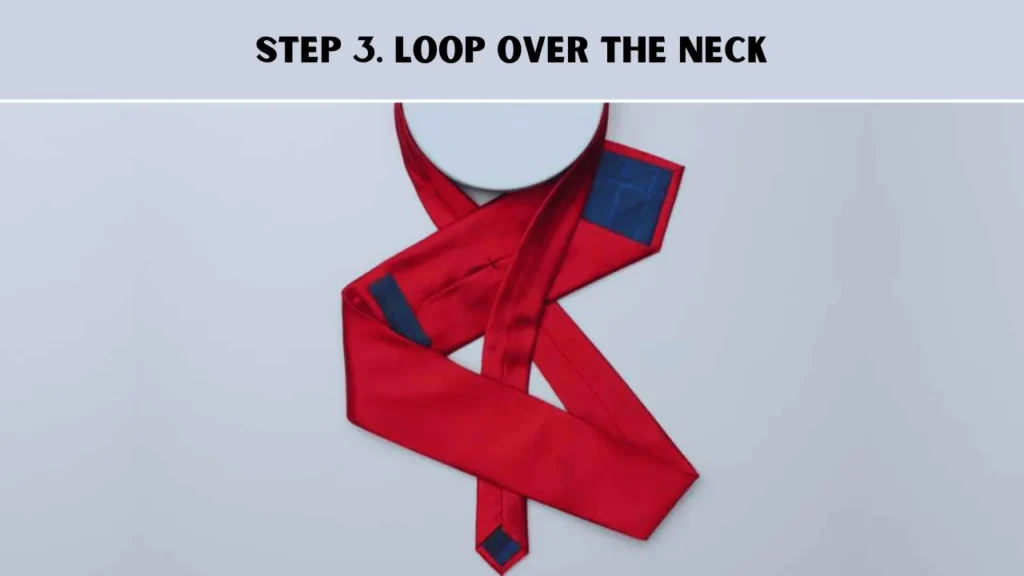
Bring the wide end up and pull it down through the loop around your neck, from the top.
Step 4. Cross over the front:
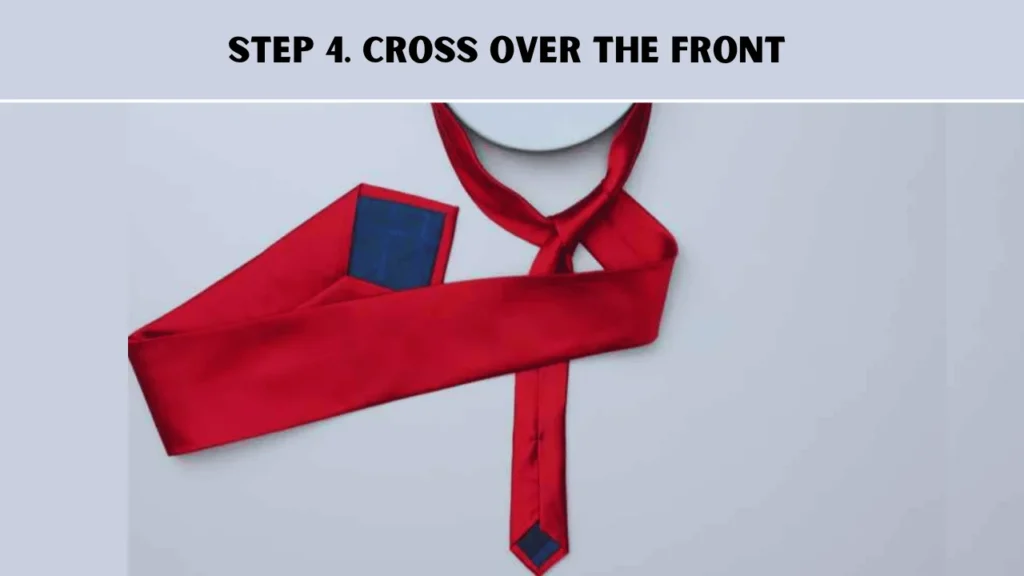
Take the wide end and cross it over the front of the narrow end, forming the start of the knot.
Step 5. Thread through the neck loop:

Pass the wide end up through the neck loop again, from underneath.
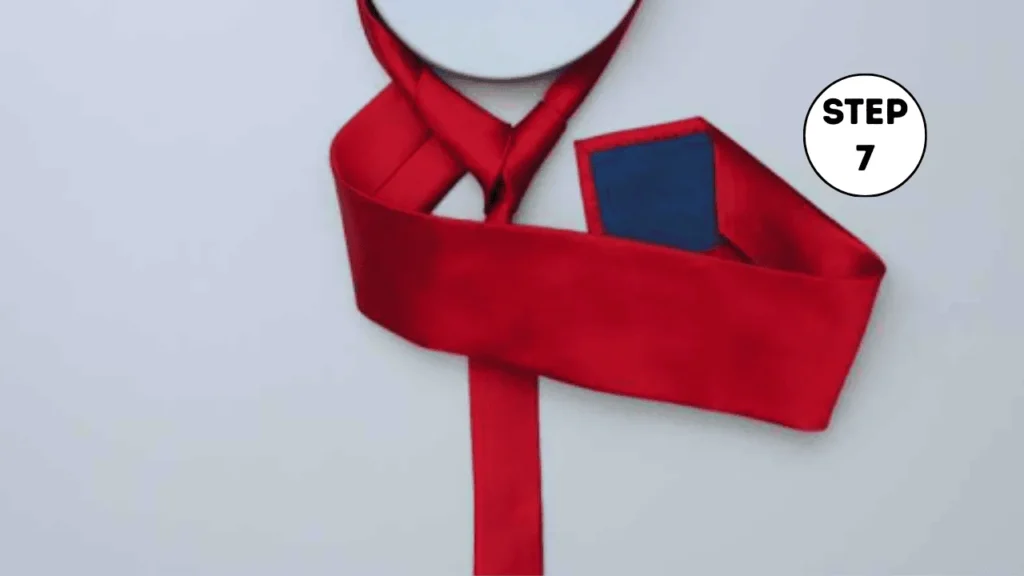
Step 7. Tuck into the knot:
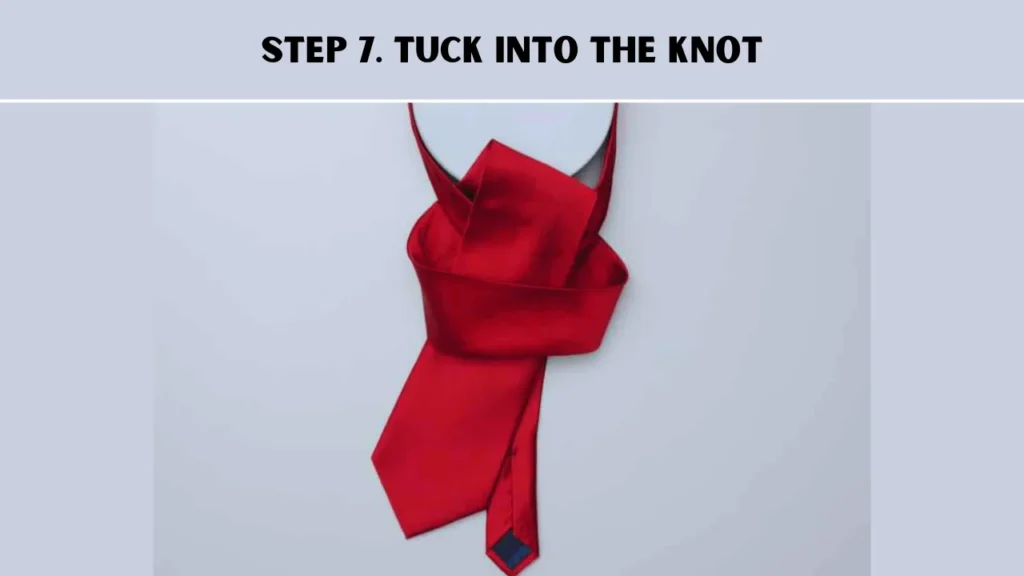
Slip the wide end down through the front loop of the knot you’ve formed.
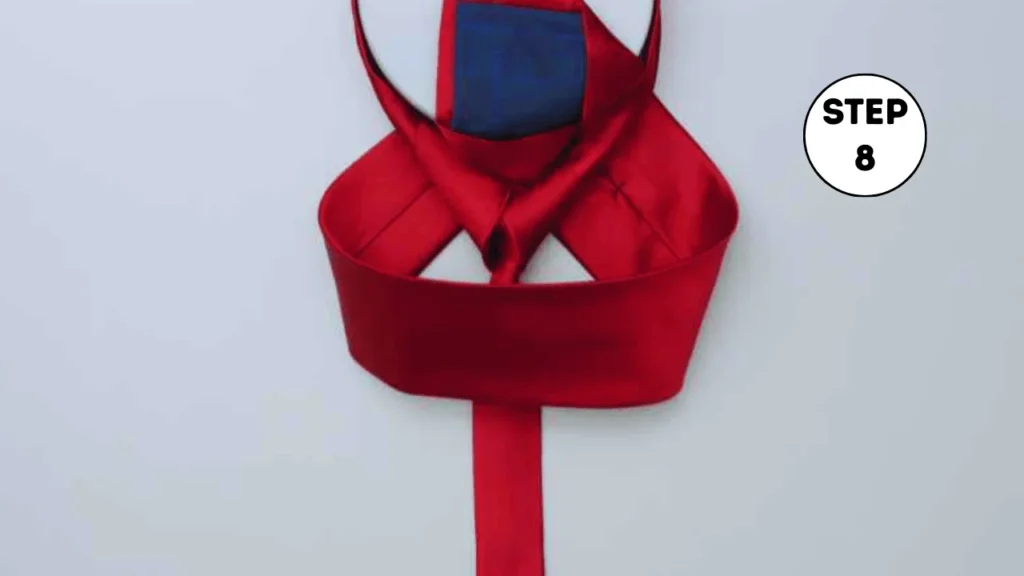
Step 8. Tighten and adjust:
Hold the narrow end, gently pull the knot up to your collar, and adjust for symmetry. Center the knot and create a slight dimple under it by pinching the sides.
Method 3. How To Tie A Tie With a Half Windsor Knot
The Half Windsor Knot is a simpler take on the Full Windsor. This creates a slightly smaller knot that’s still highly valued for its ease. When tied, it forms a nice dimple in the fabric and looks just as elegant as the larger version.
Here are the step-by-step instructions about how to tie a tie with half-Windsor knot. Including –
Step 1. Place the tie:
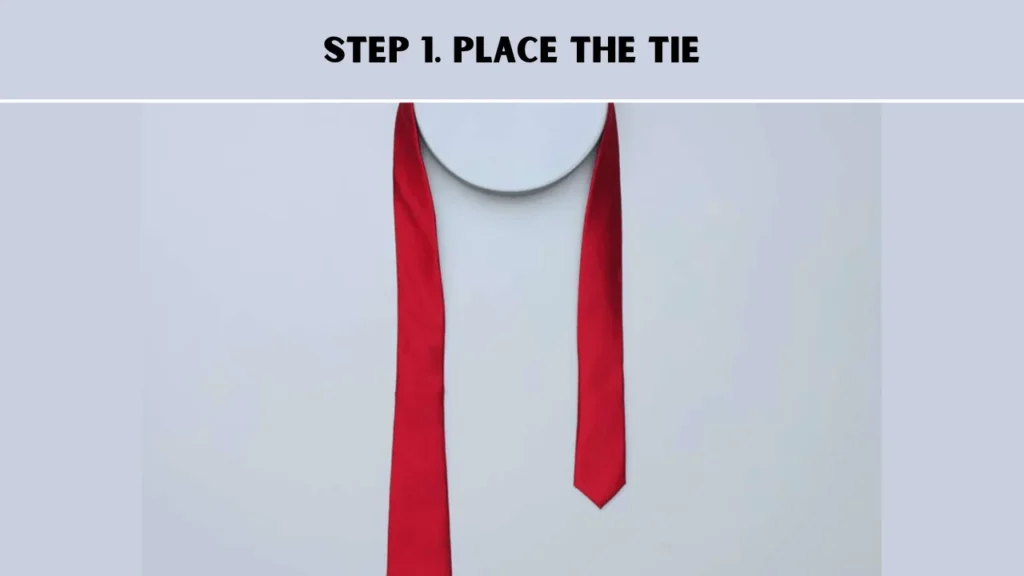
First, place the tie around your neck. Let the wider part hang on the side you use most. It should be a bit longer than the skinny part, about the length of your hand.
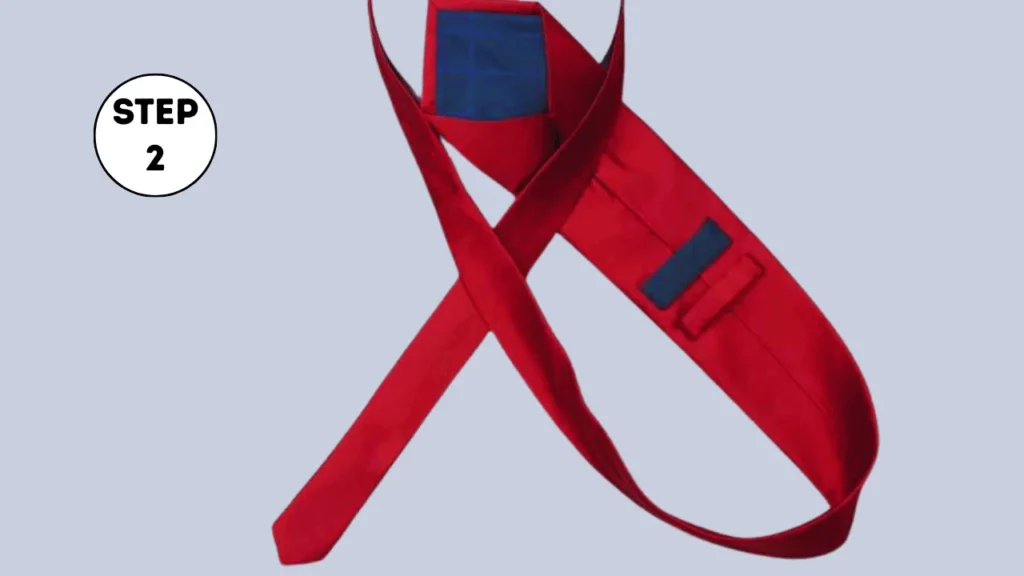
Step 2. Intertwine the ends:
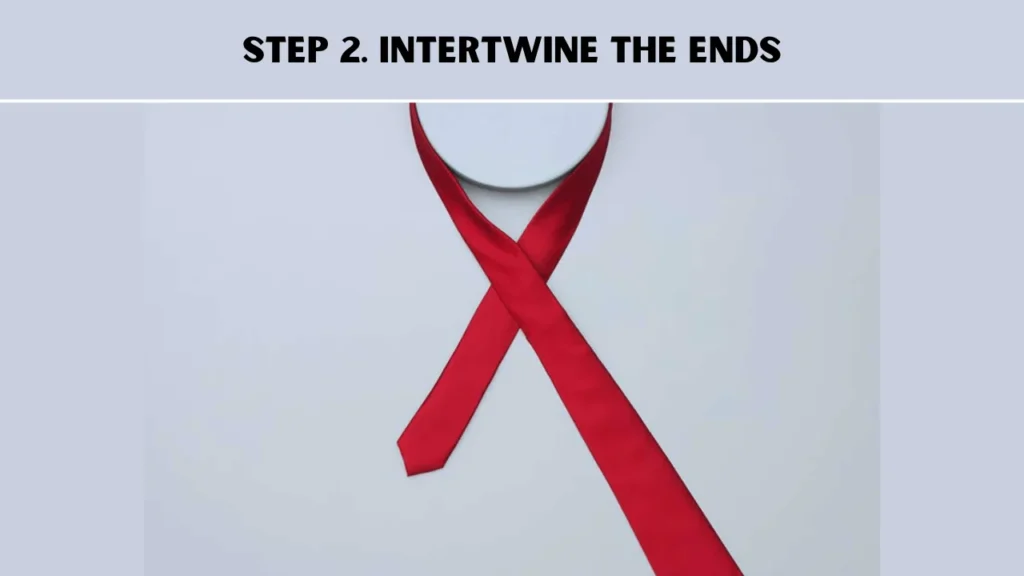
After that, you need to take the wider part and lay it over the skinny part. This should be like an X in which side you cross.
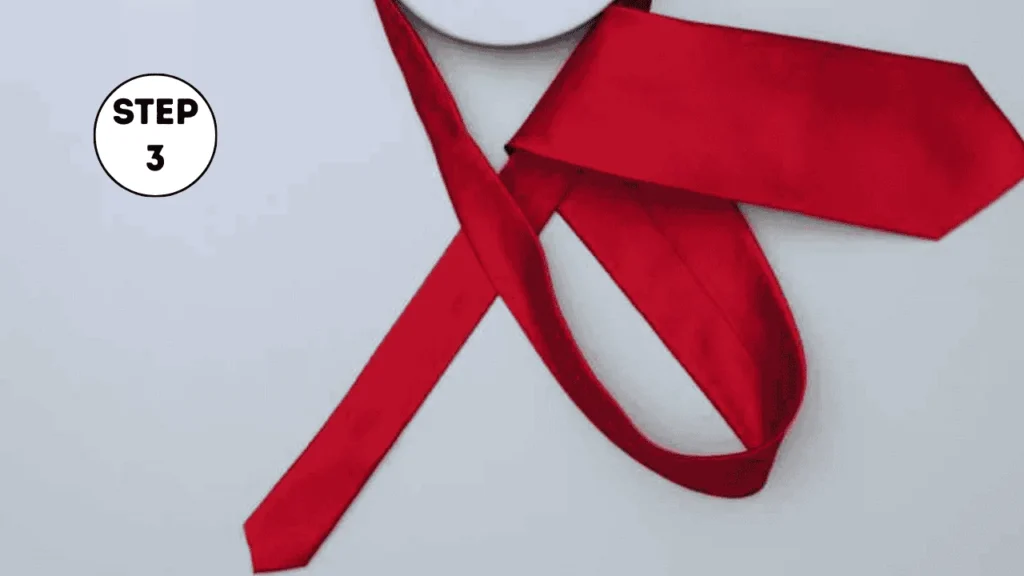
Step 3. Slip upward:
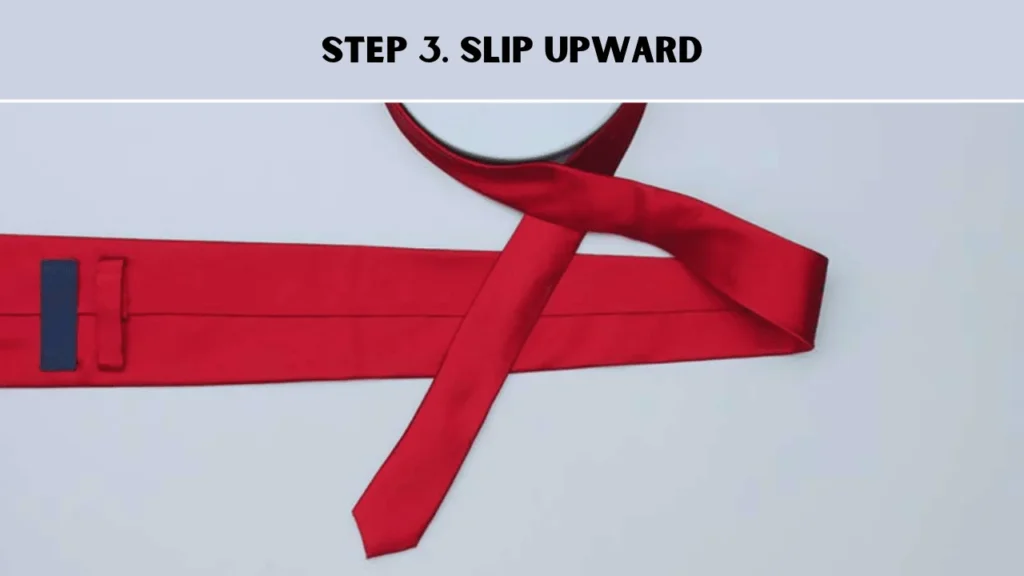
Now, you need to bring the wider part of the tie behind the skinny part. This should go around back to make a loop.
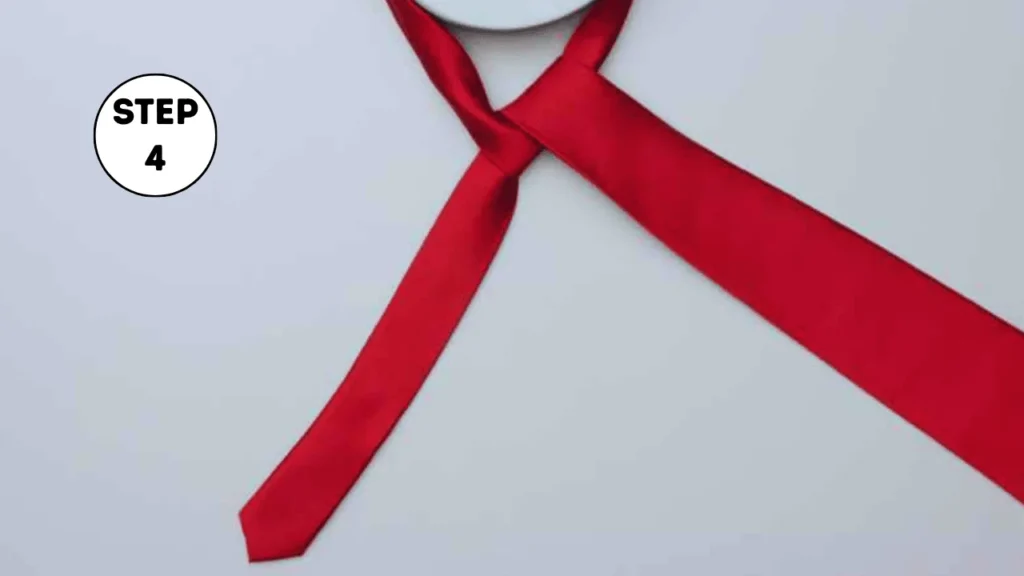
4. Passing Through the Loop
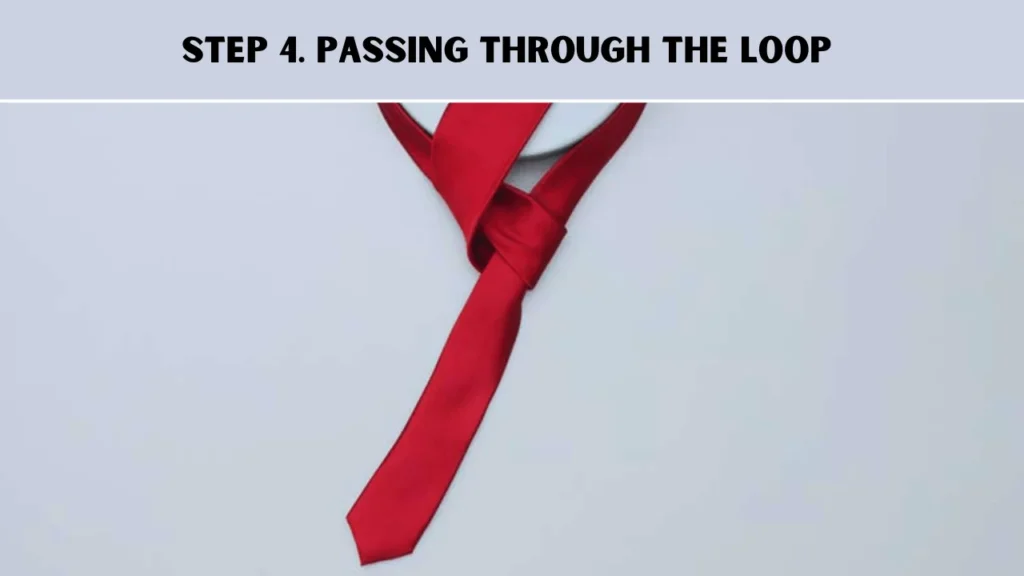
Next, you need to grab the wide part of the tie and slide it up through the space between your collar and the tie. It should come out near your neck.
5. Drape across the front:
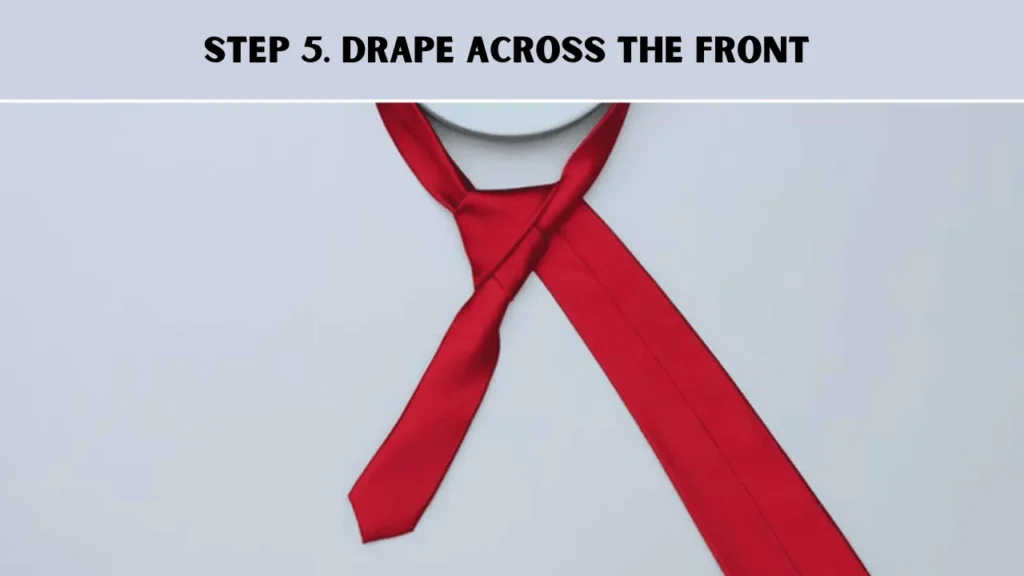
Now, take the wide part of the tie and wrap it over the skinny part. It should cover the front like you’re making another X.
6. Ascend again:
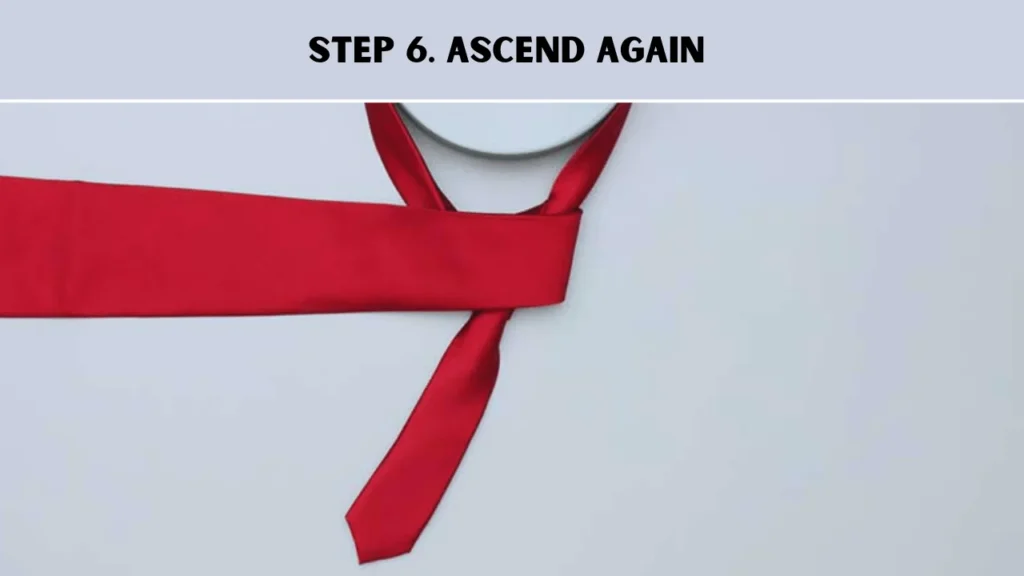
Next, grab the wide part of your tie and pull it up through the space between your collar and the tie. It should pop out near your neck again.
7. Tuck into the knot:
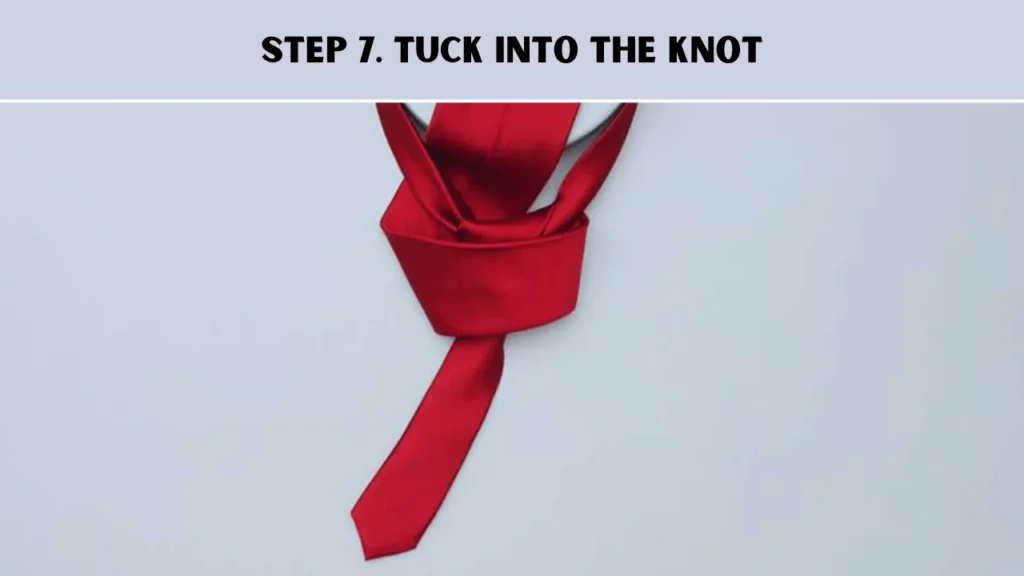
Don’t pull the tie super tight yet. You need to leave some space so there’s a little loop on top of the knot.
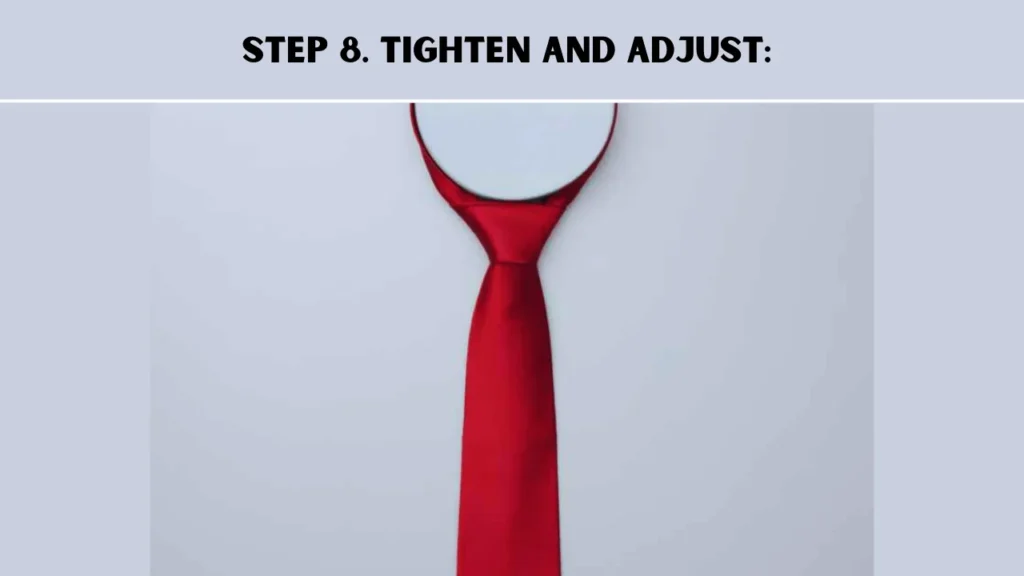
8. Perfect the finish:
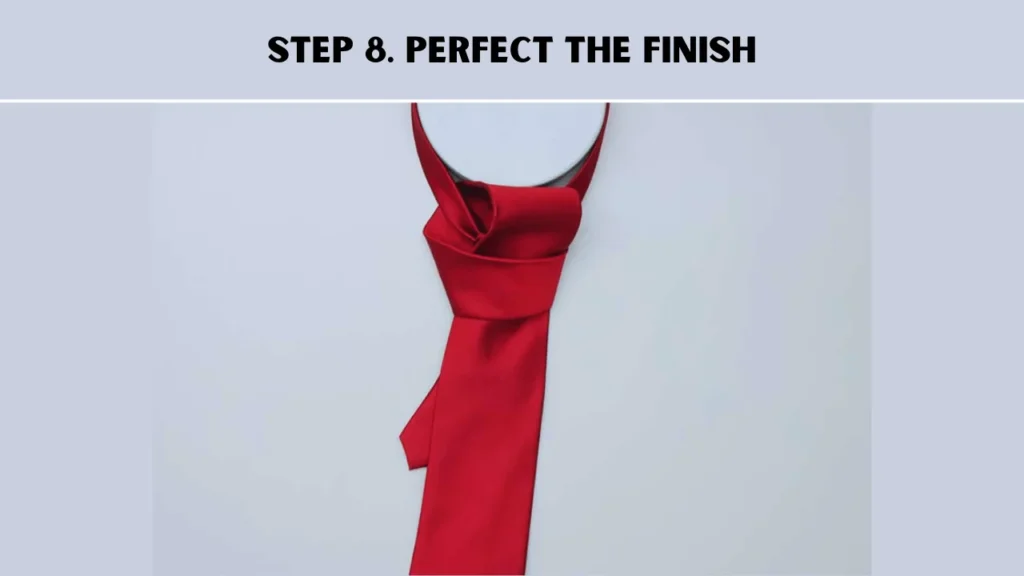
Now, you need to take the wider part of the time. Slowly slide it through the loop on the top of the knot. This loop will go through the little space that you left. Pull the tie snug and wiggle the knot so it sits right in the middle of your collar.
Note: The Half Windsor Knot is simple to tie. For a nice dimple in the fabric, pull the knot tight and slide it snug against your collar.
Method 4. How To Tie A Tie With a Windsor Knot
The Full Windsor is a bold and striking knot. This knot is perfect for making a strong impression in professional environments. It suits both slim and regular neckties, adding volume to thinner ones. Due to its assertive look, pair it with understated styles and patterns for the best effect.
Here are the instructions on how to tie a tie with a Windsor knot. Including –
Step 1:

Step 2.
Take the wide part of the tie and pull it up through the space between your collar and the tie. It should come out near your neck.
Step 3.
Now, pull the wide part of the tie back down. It should hang over the front again.
Step 4:
Slide the wide part of the tie under the skinny part and pull it to the right. You should see the back side of the wide part showing.
Step 5:
Take the big end of the tie. Pull it through the loop between its and your neck.
Step 6:
Pull the big end of the its down to make the knot tight. Then, take the big end and wrap it over the skinny end. Make sure the front of the big end is showing again. This helps the tie look neat and ready.
Step 7:
Next, take the big end of the tie. Pull it up through the loop again.
Step 8:
Then you need to slide the wider end down through the knot’s front loop.
Step 9:

Grip the knot gently, pull the wider end to snug it, and adjust so it sits centered and hits your beltline.
Method 5. How to Tie a Bow Tie
Here are the instructions on how to tie a tie with a bow knot. Including –
1. Drape the bow tie:

Place the bow tie around your neck, with one end (call it End A) on your dominant side, hanging about 2 inches lower than End B.
2. Cross to kick off:
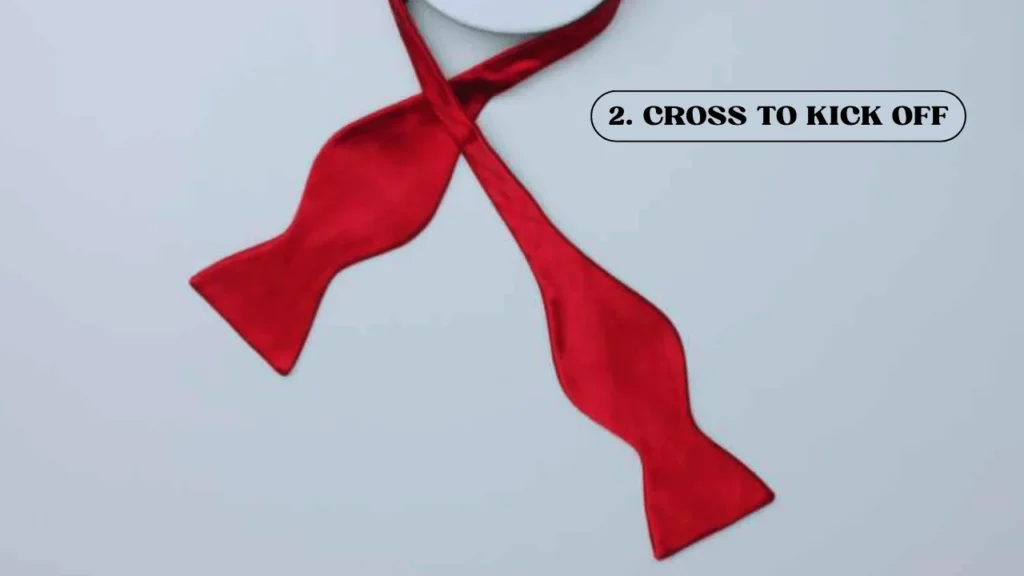
Swing End A over End B near your collar, forming a gentle crossover.
3. Pop through the gap:
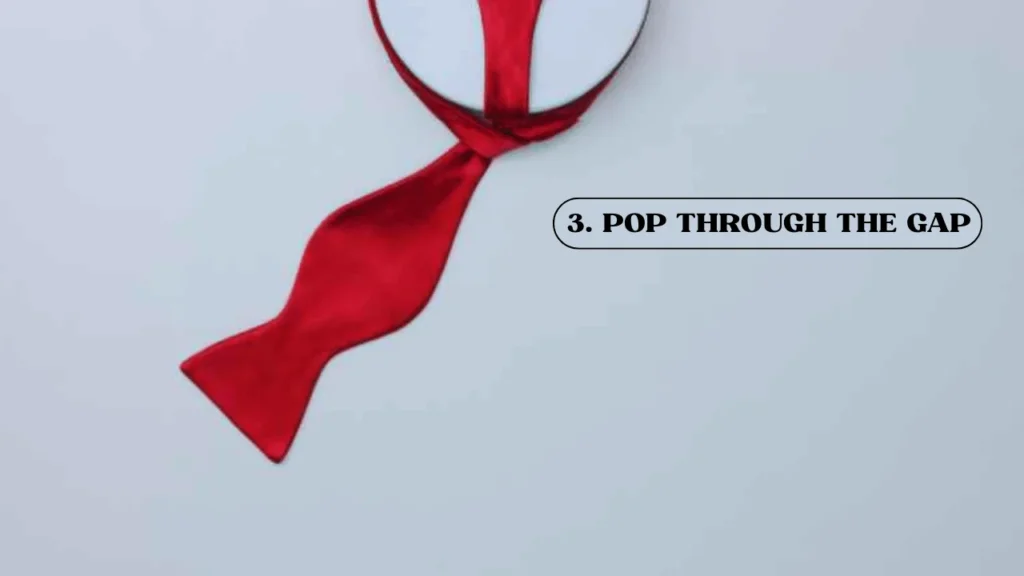
Push End A up through the space between your neck and the bow tie, pulling it down to create a loose knot.
4. Shape End B:

Fold End B horizontally at its widest point, forming a bow shape, and hold it flat against your collar.
5. Drop End A:
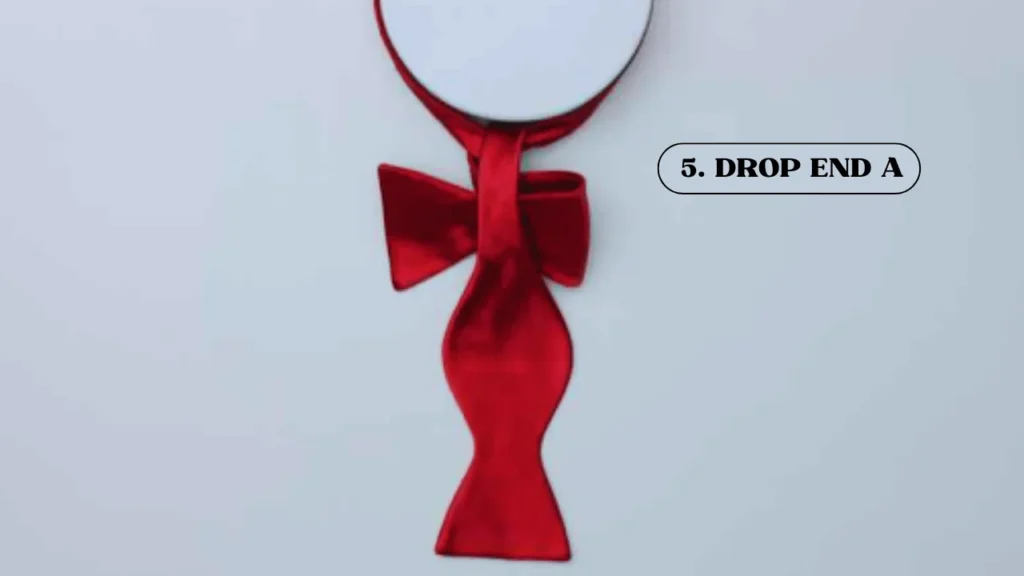
Let End A fall over the front of the folded End B, aligning it centrally.
6. Fold End A into a bow:
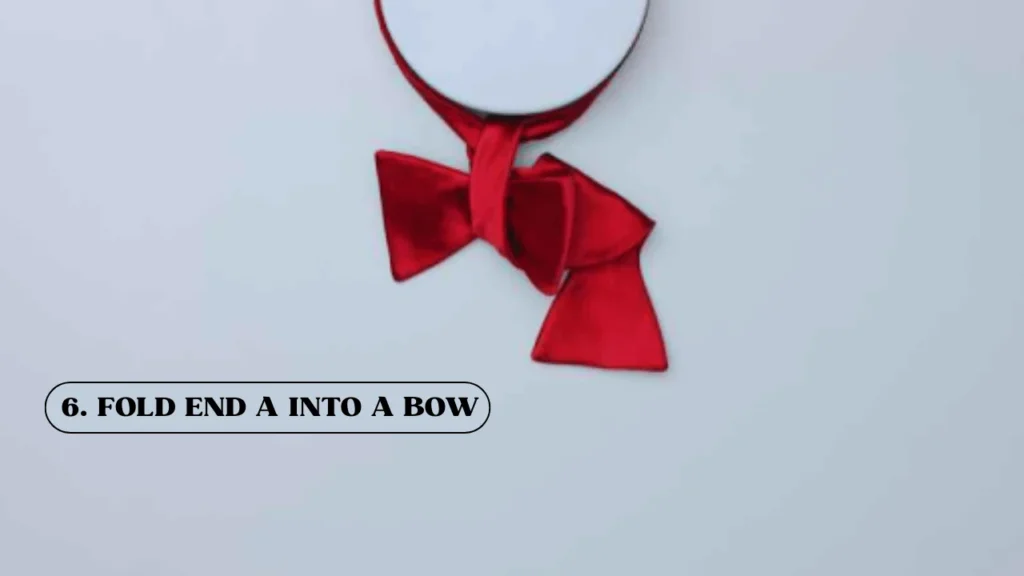
Pinch End A at its widest point to form another bow shape, mimicking End B’s fold.
7. Thread the fold:
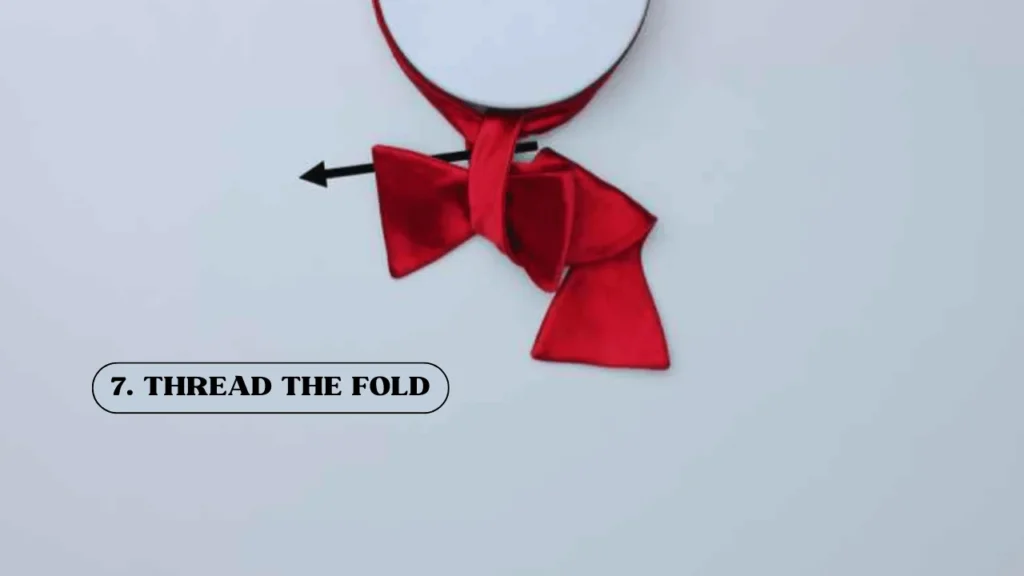
Carefully push the folded End A through the loose knot behind End B, aiming for the opposite side.
8. Tug and tweak:
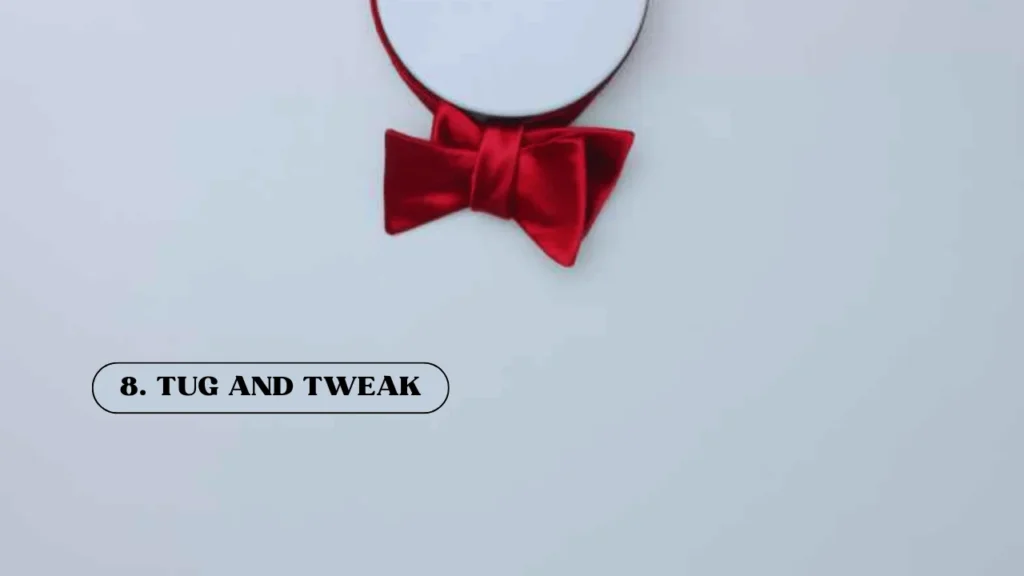
Gently pull both folded ends to tighten the knot, then adjust the bows by tugging their edges for a balanced, puffy look.
9. Smooth the tails:
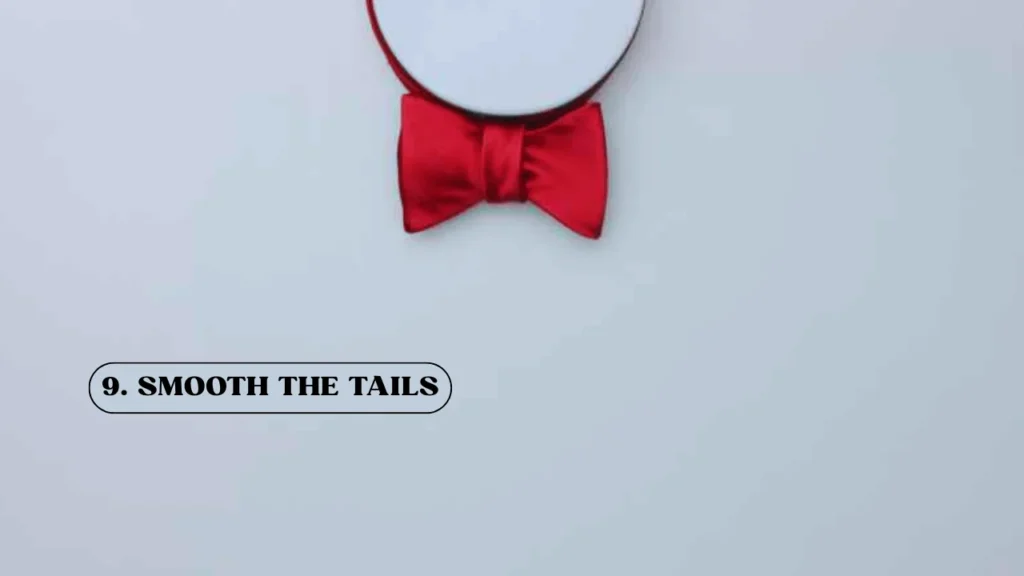
Straighten the loose ends behind the bows, ensuring they’re hidden and the knot sits snug against your collar.
Different Types Of Tying Knots
Among the above ties, if you want to look forward to more types of type of typing knots. Then, keep exploring below. Look forward to your favorite tie knot and wear it in various typeof occasions.
The Fundamentals Tie Knot
1. Skinny Tie Knot
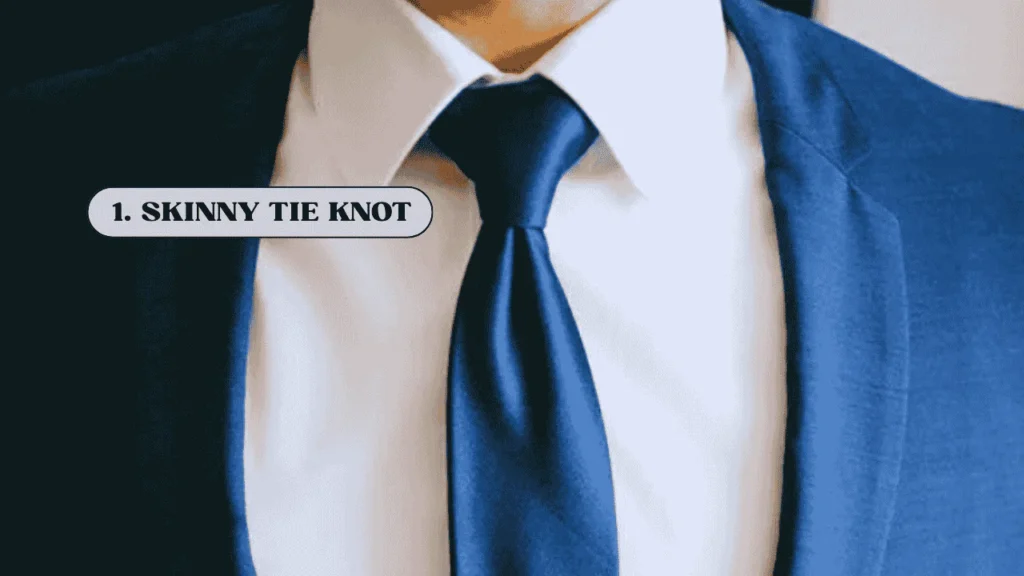
Skinny ties are one of the fundamental ties that you can wear in various settings. Essentially, you can use this tie where you want a modern and stylish look, like Red-Carpet Events. These ties need a bit more care than regular neckties since they require a bold knot to stand out. Being only 3/4 as wide as standard ties, they benefit from a special knot that gives them a fuller, more striking appearance.
2. 10 Second Knot
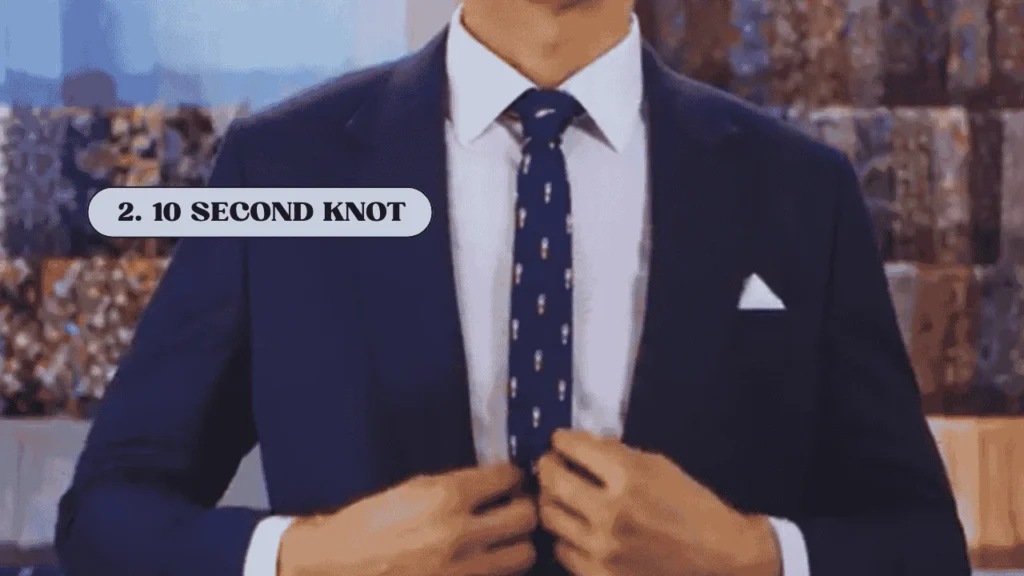
For guys who love saving time, the 10-Second Tie Knot is your go-to for getting ready for the daily 9-to-5 hustle. We all hit the snooze button a few too many times in the morning—it happens! But with this quick knot, you can ditch the guilt of cutting corners and still look sharp. This simple trick makes your morning routine smoother than ever.
Tie Knot creates a slim and slightly uneven knot, which makes it an ideal backdrop to showcase your boldest patterns and vibrant colors. It’s perfect for adding a fun, stylish touch to any event.
3. Simple Knot
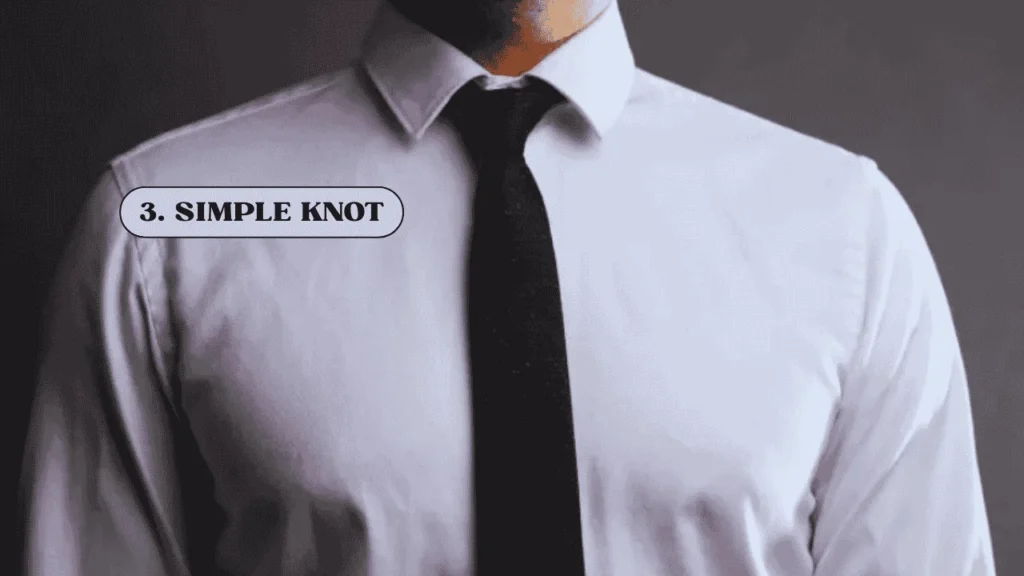
The Simple Knot is also called the Oriental Knot, which is the easiest way to tie a necktie. This knot is perfect for when you’re in a rush but still want to look sharp. With just a few simple steps and no complicated twists, you’ll be out the door in no time.
This knot is small and neat. Besides, sits snug at the top of your collar which giving you a clean and professional look. It’s great for any occasion, whether you’re heading to the office, a meeting, or a casual event.
4. Nicky Knot
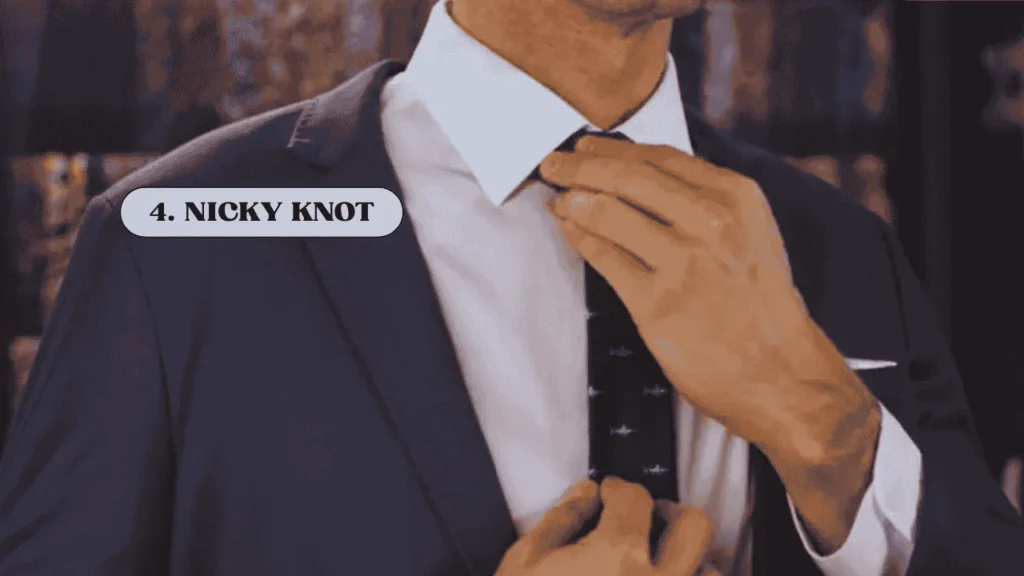
Some knots are all about showing off, but the Nicky Knot is different. It carries that same refined elegance you see on Milan’s most stylish displays – the kind where every detail looks intentional yet completely natural.
It borrows the best bits from the Victoria and Four-in-Hand knots. This gives you a neat and symmetrical shape that doesn’t waste precious tie length. That means it’s perfect when your tie runs a little short or when you want something polished but not stuffy.
Sure, it’s not the only knot you’ll ever need, but once you’ve got it down. You’ll find yourself reaching for it whenever your outfit needs that extra touch of quiet confidence. After all, real style isn’t about shouting – it’s about the details.
5. Plattsburgh Knot
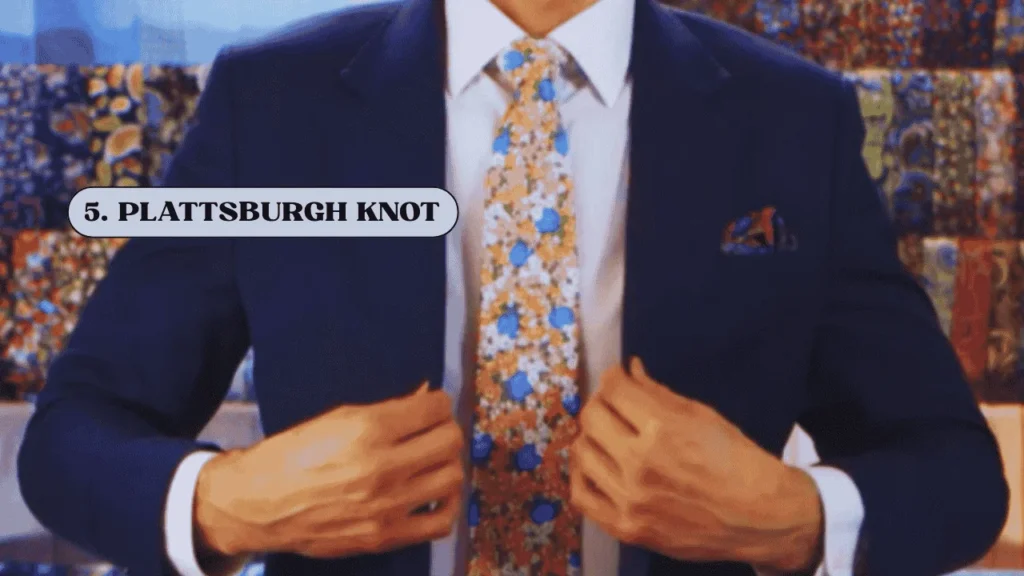
The Plattsburgh Knot was designed by Thomas Fink, who is the inventor of 85 tie knots. The Plattsburgh Knot creates a large triangular shape that stands out with confidence. It’s an excellent choice for a strong, professional look in the boardroom. This distinctive knot forms a symmetrical, elongated triangle that stands out for its structural integrity and visual weight. It is particularly flattering for those who are Taller gentlemen 6′ and above with Broad-shouldered builds. This knot is also best for those needing to balance narrow hips.
More than just a styling choice, the Plattsburgh makes a quiet statement about attention to detail and understanding of personal proportions. It’s the sartorial equivalent of a perfectly tailored suit shoulder – unmistakably intentional.
6. Knitted Tie Knot
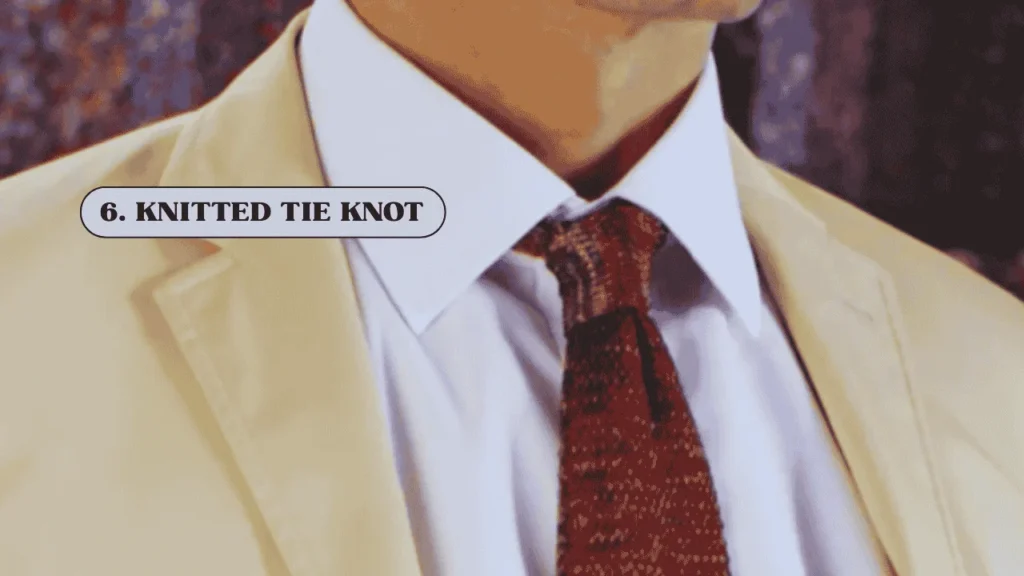
Knitted ties stand apart with their textured, flexible weave, giving them a springy drape that moves differently than standard ties. But that same quality makes them trickier to knot well. Too tight, and you crush their character; too loose, and they lose shape. The ideal knot for knitted ties needs to hold securely while respecting the fabric’s natural give. Look for one that balances structure with flexibility, keeping the tie’s elegant texture intact. Master this, and you’ll unlock the knitted tie’s full potential: effortless polish with a touch of personality.
The Timeless Tie Knot
9. Prince Albert Knot
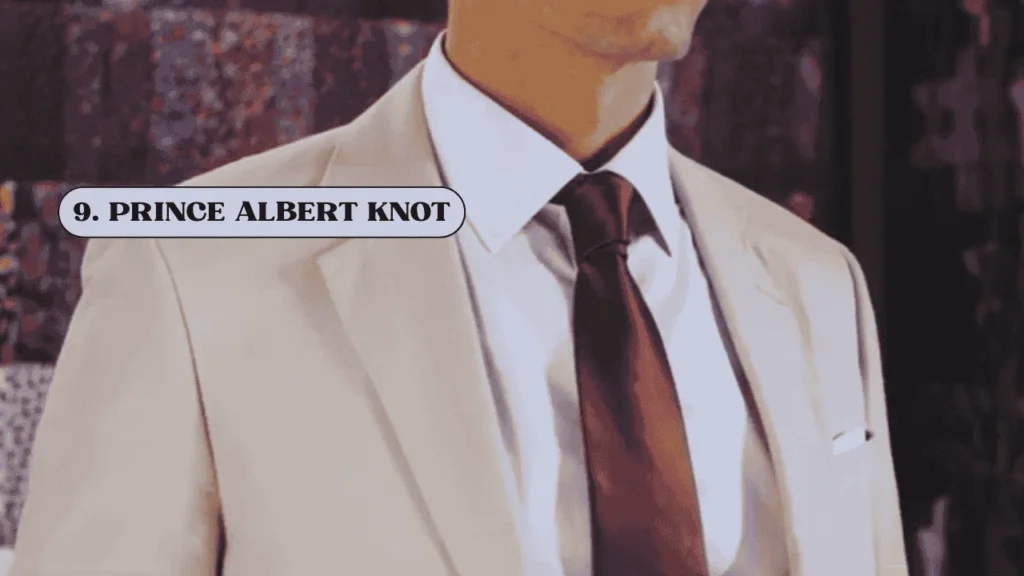
The Prince Albert knot sounds royal, but history doesn’t show the prince actually wearing it. Still, this neat little knot gives you a polished look without being flashy.
The beauty lies in its compact and slightly off-center silhouette that nestles perfectly against narrow collars. Unlike showier knots that dominate the neckline, the Prince Albert looks sharp without trying too hard.
It’s particularly flattering with thicker silks that might overwhelm smaller knots, providing just enough structure to keep things polished without appearing stiff. The effect is deliberate yet effortless – the kind of detail that suggests you didn’t just throw your look together, but carefully considered each element.
10. St Andrew Knot
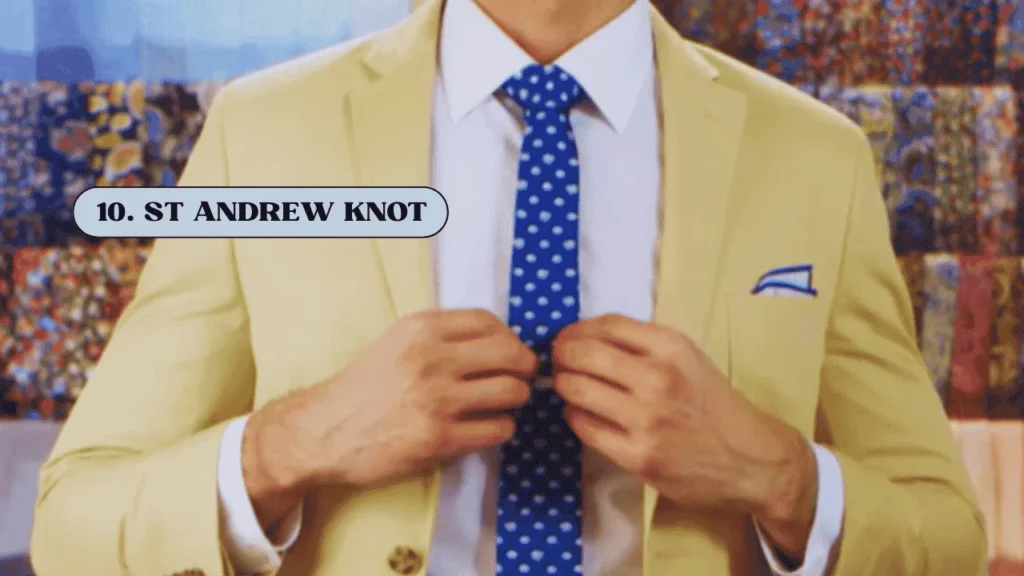
The St. Andrew Knot is a versatile, medium-sized tie knot with a slightly asymmetrical, elongated shape. Named after the patron saint of Scotland, it’s tied similarly to a Half Windsor but with an extra loop, offering a balanced look suitable for both formal and casual occasions. Ideal for standard-collar shirts and medium-width ties, it’s easy to master and adds a refined touch to any outfit.
11. Murrell Knot
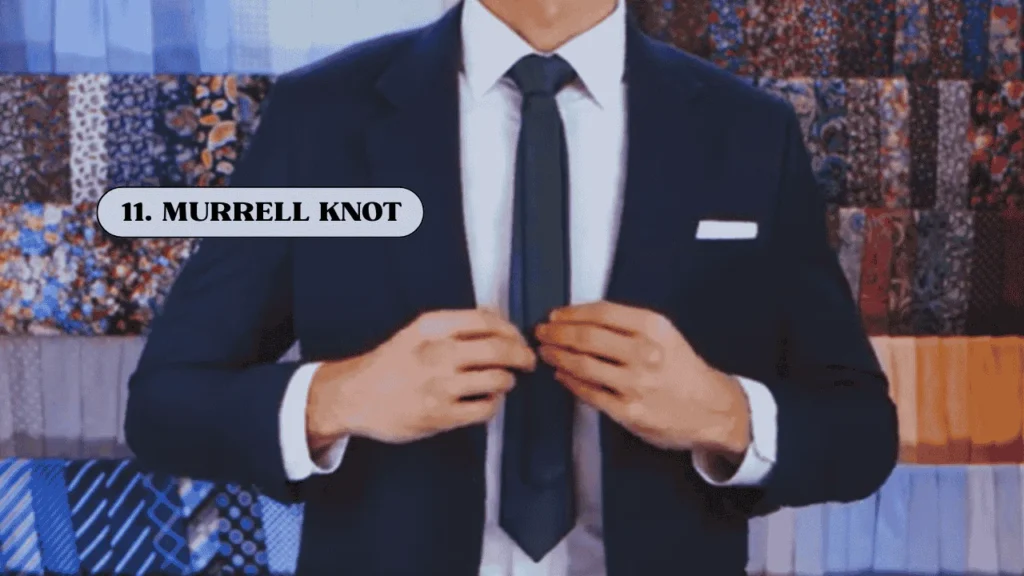
The Murrell Knot, invented by Brent Murrell in 1995, is a distinctive tie knot that inverts the classic Windsor, placing the narrow end in front of the wide end for a playful, layered look. Its triangular, wide, and symmetrical shape makes it ideal for casual settings or making a bold statement at semi-formal events. Best paired with solid-colored, slim ties and wide-collar shirts, it’s tied similarly to a Windsor but with the narrow end as the active part
The Flamboyant
12. Cross Knot
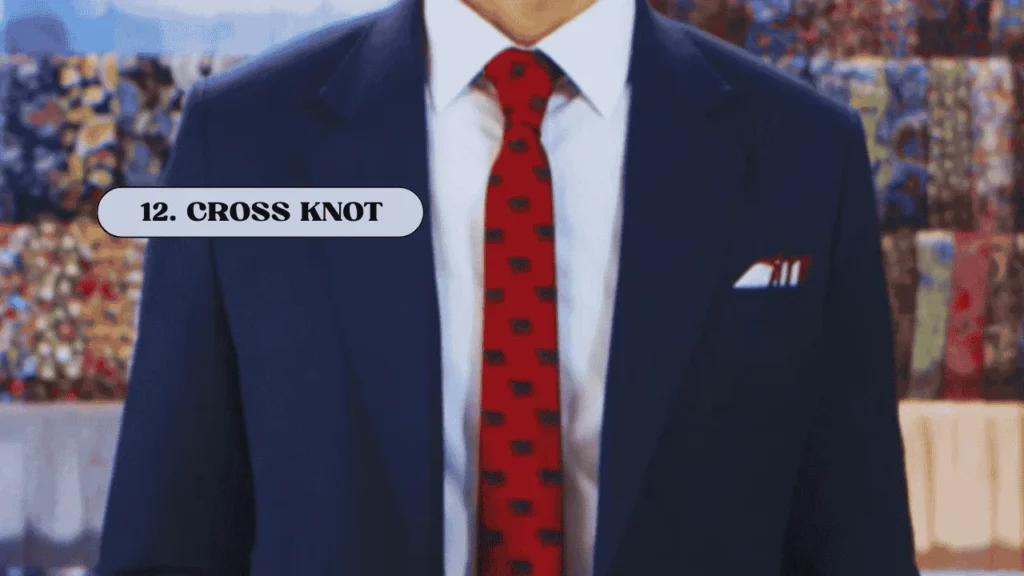
The Cross Knot, also known as the Christensen or Square Knot, is a stylish, compact tie knot with a distinctive crisscross pattern. Ideal for slim ties and semi-formal occasions, it’s easy to tie and adds a unique, sophisticated flair to your look.
13. Merovingian Knot
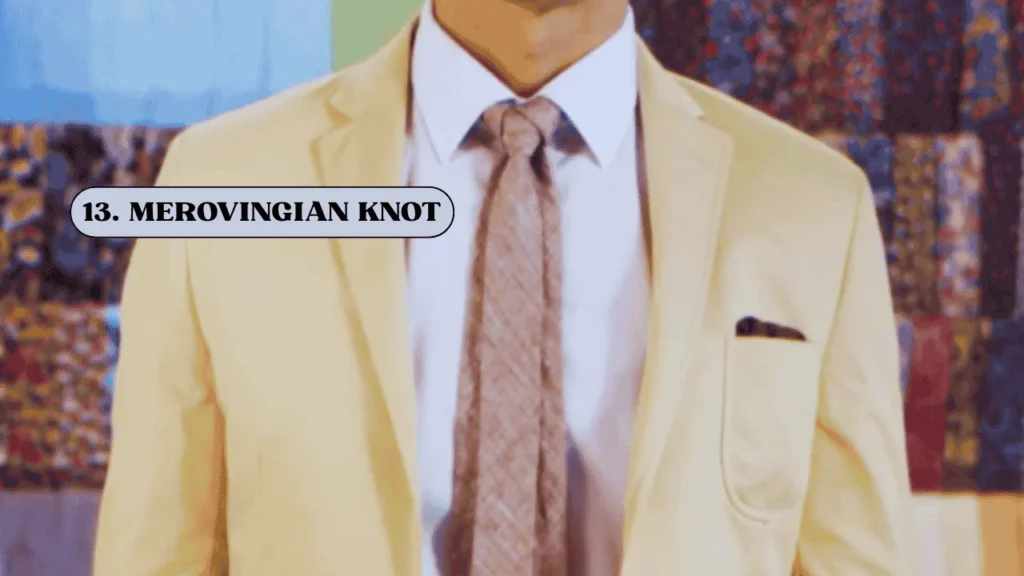
The Merovingian Knot—sometimes called the Matrix Knot—owes its fame to The Matrix films, but its origins trace back further under the name Ediety Knot. What sets it apart is its striking design: the narrow end of the tie wraps visibly on the outside, creating a layered, almost self-referential effect.
With its sharp folds and unconventional structure, this knot makes a bold statement. Popularized by a cinematic villain, it carries an air of intrigue and rebellion. If you’re after a look that’s sharp, distinctive, and just a little mysterious, this knot is an excellent choice—but be prepared to practice. After all, mastering style takes effort.
14. Trinity Knot
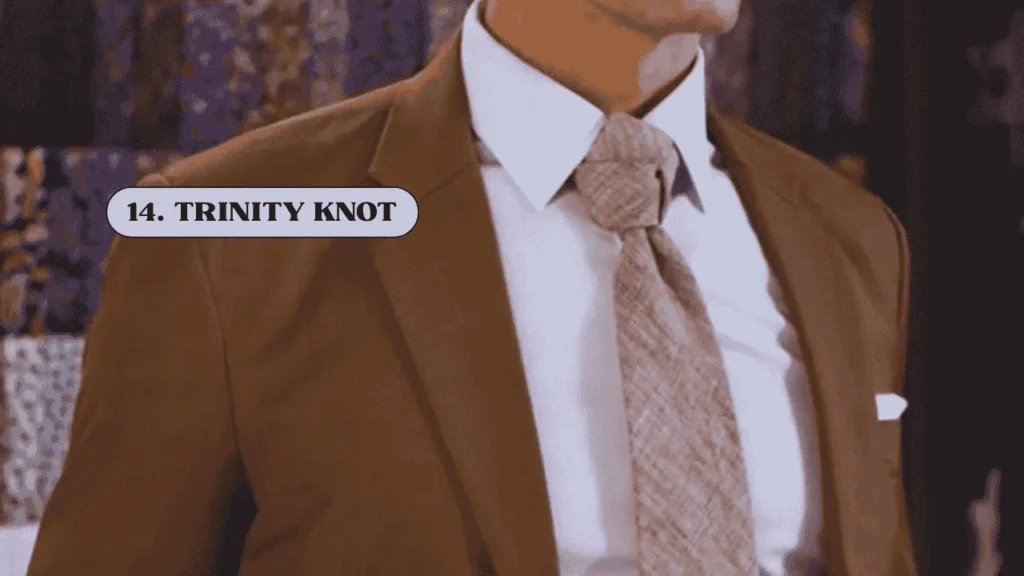
Due to its reputation for overwhelming people, the Trinity Knot is not your typical tie knot. It is also regarded as one of the hardest knots to learn, requiring accuracy and perseverance. Three separate portions that merge at the center make up its complex design. This produces an eye-catching and ornate appearance. (free crochet halter top-patterns)
Ideal for puzzle enthusiasts and perfectionists. For those who like honing their skills, the Trinity Knot is a satisfying challenge. It displays remarkable craftsmanship and attention to detail when knotted properly. This knot is a worthwhile attempt if you’re willing to learn how to do something exceptional.
15. Van Wijk Knot
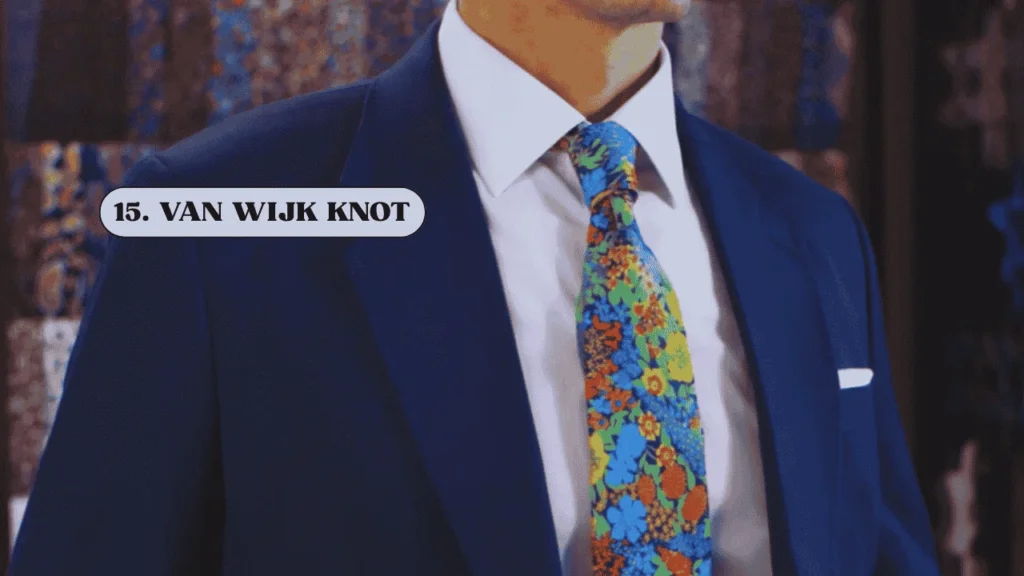
The Van Wijk Knot gives a unique and classy look to any suit. It has a tall, stacked shape with three smooth layers, making it look very stylish and neat. This knot was created by an artist named Lisa Van Wijk, who wanted to design the tallest tie knot in the world. The result is a long, sleek knot that really stands out, especially at fancy events. If the goal is to wear a tie that shows off a love for art and culture, the Van Wijk Knot says it all without a word.
16. Balthus Knot
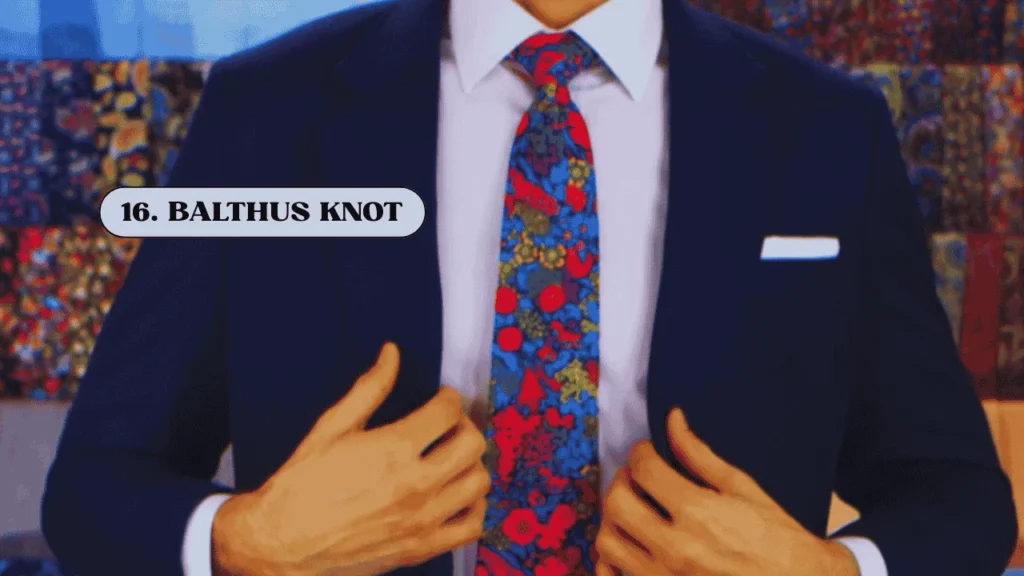
The Balthus Knot is the biggest tie knot out there—even larger than the Full Windsor. It gets its bold and strong shape by wrapping the tie around more times than usual. Because of all those folds, the tie ends up shorter in length. This knot makes a strong, confident statement, ideal for professional settings or any occasion where you want to stand out. For the best look, pair it with a wide-collared shirt to give the knot enough space and ensure comfort around the neck.
The James Bond
18. Diamond Bow Tie
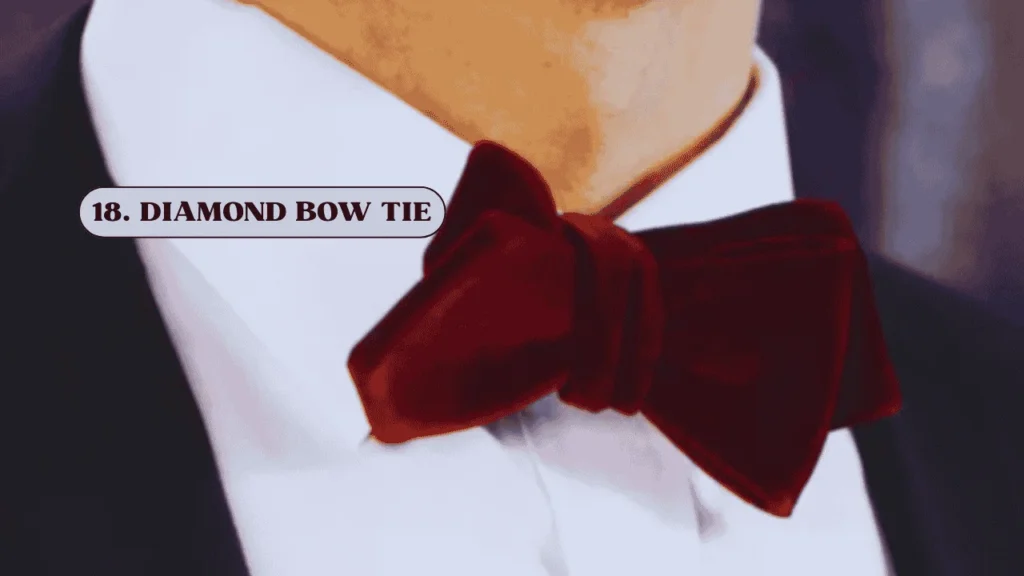
The diamond bow tie is a stylish choice for men who like to dress differently. It’s a cooler, more modern version of the classic bow tie. With its pointed ends, it gives off a sharp and bold look, perfect for someone who wants to look classy but also a little daring. This type of bow tie is becoming more and more popular because of its fresh and trendy style. It might not be seen at every formal event yet, but it’s quickly making its way into the fashion scene. It’s a great way to stand out and show some personality.
19. Velvet Bow Tie
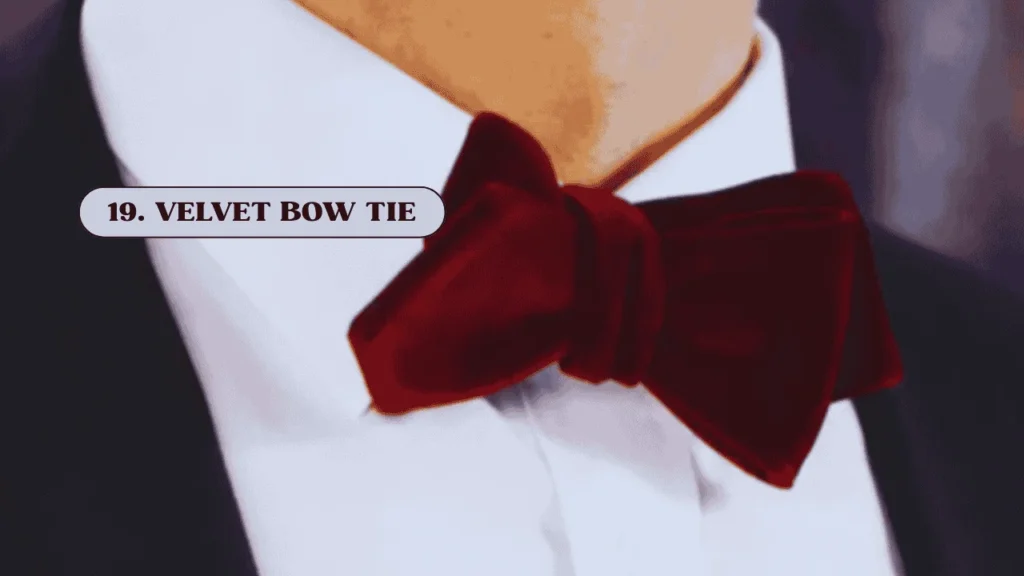
The diamond bow tie is a cool and modern twist on the regular bow tie. It’s great for men who want to try something different and don’t always follow the usual fashion rules. The pointed tips give it a bold, sharp look that still feels classy. More and more people are starting to wear it because it looks stylish and fresh. It might not be common at fancy events yet, but it’s definitely becoming more popular. It’s a fun choice if someone wants to stand out and look confident.
How To Choose The Perfect Tie For Your Suit
Color Coordination: Pick a tie that works with your suit and shirt. Go for navy or gray for formal vibes, or red for some pop. Make sure the tie’s darker than the shirt and matches the suit’s vibe—like blue or red with a navy suit.
Pattern and Texture: Choose patterns that don’t fight each other. Solids are safe, stripes feel classic, and dots or paisleys add flair. Keep the sizes different to avoid clashing. Use silk for dressy looks, wool or knit for casual, and match the suit’s feel—smooth for sharp suits, textured for tweed.
Width and Proportion: Get a tie width that matches your suit’s lapels—around 2.75–3.5 inches for most, narrower for slim cuts. Pick a knot that fits your collar, like a four-in-hand for smaller ones or half-Windsor for wider. The tie should hit your belt buckle.
Occasion and Details: Match the tie to the event—simple solids for work, bold patterns for fun. Keep tie bars small and clean. Lay the tie on your suit and shirt first to make sure it all looks sharp together.
How to Dimple a Tie
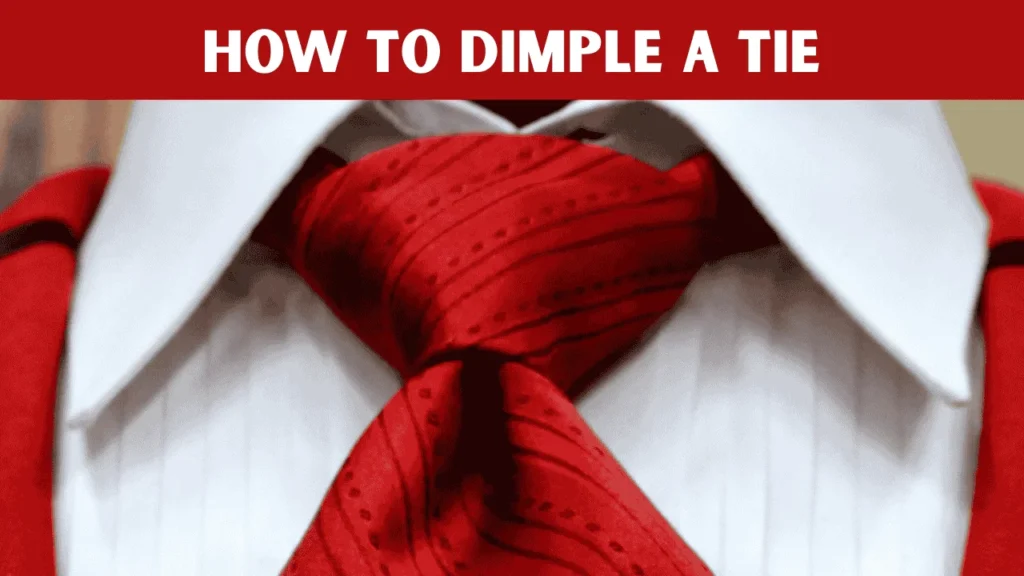
Here are the steps on how to dimple a tie. Including-
Tie the Knot: Start tying your tie using your preferred knot (e.g., four-in-hand or half-Windsor). Stop just before fully tightening the knot, leaving it slightly loose.
Form the Dimple: Pinch the center of the tie just below the knot with your thumb and forefinger, creating a small fold or crease. Hold it gently to shape the dimple while keeping the sides smooth.
Tighten Carefully: Pull the wide end of the tie slowly to tighten the knot, keeping the pinch in place to preserve the dimple. Adjust the knot to ensure the dimple stays centered and defined.
Final Adjustments: Slide the knot up to your collar, making sure the tie hangs straight and the dimple remains visible. If needed, tweak the fold with your fingers for a clean, symmetrical look.
In Closing
Learning how to tie a tie is a helpful and easy-to-learn skill. Starting with a simple knot like the Four-in-Hand makes it easier for beginners. With practice, tying a tie takes only a few minutes and becomes part of a smooth routine. It helps create a neat and polished look for school, work, or special events. Knowing how to tie a tie adds confidence and shows attention to appearance.
Frequently Asked Questions (FAQs)
How Long Should It Take To Tie A Tie?
Tying a tie usually takes about 1 to 3 minutes. It might take longer when learning, but with practice, it gets quicker and easier. Some people can do it in under a minute once they know the steps well.
Can Women Tie These Knots?
Yes, women can tie these knots too. Anyone can learn how to tie a tie with a little practice. It’s just like learning a simple skill, like tying shoelaces.
What’s The Easiest Knot For Beginners?
The easiest knot for beginners is the Four-in-Hand knot. It’s simple, quick, and looks neat. Just a few steps to follow, and it works well with most shirts and ties. Great for learning and everyday use.
How Do I Untie A Tie Without Damaging It?
To untie a tie without hurting it, gently loosen the knot by pulling on the small end, not the big end. Don’t yank or twist. Use fingers to slowly work the knot loose. Lay the tie flat after. This keeps the tie smooth, neat, and ready to wear again.

![How to Crochet Sunflower Bouquet [6 Easy Steps]](https://crochetmind.com/wp-content/uploads/2025/06/How-to-Crochet-Sunflower-Bouquet-6-Easy-Steps-150x150.jpg)