Crochet Scrunchies Patterns: Crochet scrunchie to add a touch of glamor to your hairstyle. It’s a fabric-covered elastic hair tie for aligning medium to long hair, typically the ponytail. Scrunchies come in all sorts of colors, materials, and sizes, from big and bold to small and subtle. The reason for its popularity is that it avoids damage to your hair, unlike the traditional hair tie. Also, it creates an adorable look that catches the attention of everyone around you. So, how to make a crochet scrunchie?
With the right materials, stitch into a chain to create a loop around the hair elastic. Thus, create the foundation for your scrunchie. As I elaborate the process comprehensively in the following, it’ll take 5 or 6 minutes to get the job done.
If you’ve been trying to make a perfect scrunchie, the following guide will be a big help for you. Just a few slip stitches around your hair tie and you’ll get what you have been looking for. So, how would you do that? Let’s find out below-
Key Takeaways:
- Create a slip knot into your selected yarn.
- Slip the chain through the hair elastic.
- Continue the chain stitching until the scrunchie comes to your desired size.
Table of Contents
- The Best 20+ Crochet Scrunchies Patterns
- Soft Scrunchies Pattern
- Free Round Pattern
- Easy Crochet Scrunchies
- Crochet Ruffled Scrunchie Pattern
- Simple Crochet Hair Scrunchie Pattern
- Quick and Easy Crochet Scrunchie Pattern
- Glow in the Dark Scrunchie Crochet Pattern
- Comfy Pattern
- 4th of July Hair Scrunchie Pattern
- Gorgeous Crochet Velvet Scrunchies Pattern
- Summer Berries Scrunchies Pattern
- Modern Crochet Scrunchie Pattern
- Cute Free Pattern Scrunchie
- Free Pattern Crochet Scrunchie
- Velvet Plus Scrunchie Pattern
- Ruffle Sleek Velvet Scrunchie Pattern
- Crochet Velvet Scrunchie
- Free Scrunchie Pattern
- Free Scrunchie Design
- Simple Crochet Scrunchie Design
- Materials:
- How To Crochet A Scrunchie For Beginners?
- How Many Rounds Does A Crochet Scrunchie Need?
- How To Adjust The Size Of A Crochet Scrunchies?
- Things to Remember While Making Crochet Scrunchies
- Conclusion
- Frequently Asked Questions (FAQs)
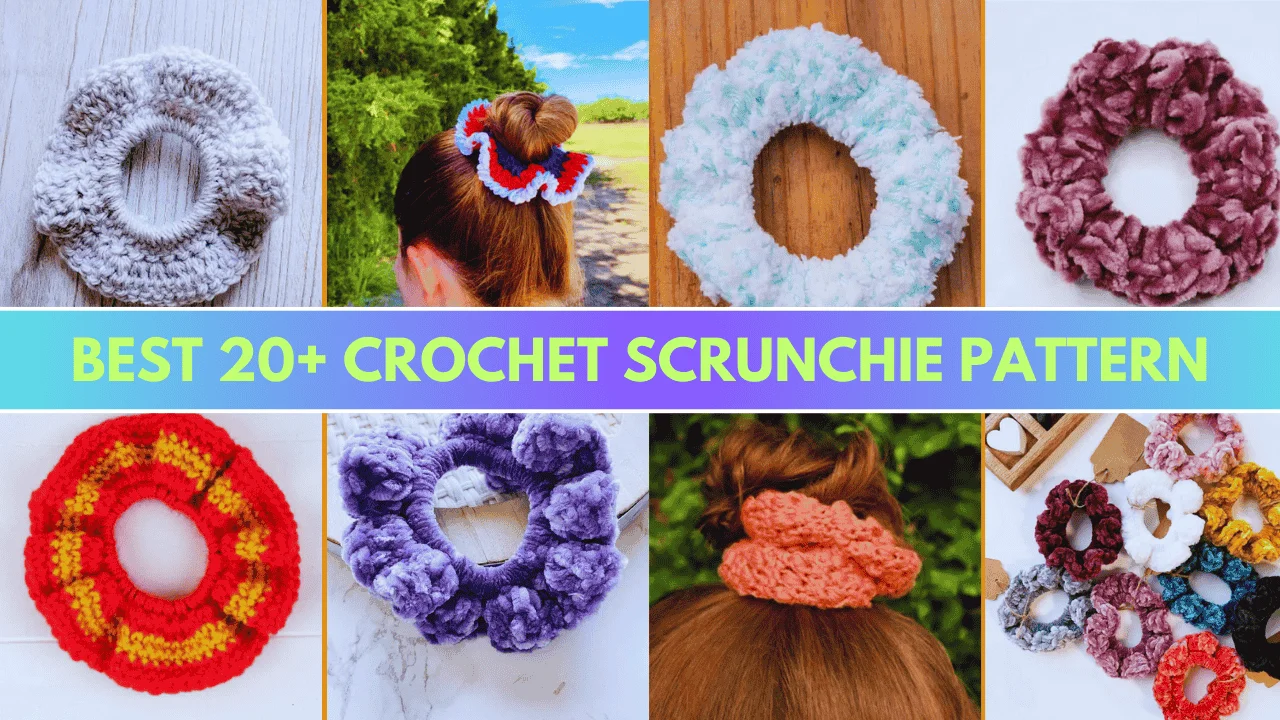
The Best 20+ Crochet Scrunchies Patterns
If you know the right way, you can use any crochet scrunchie pattern, in just a few minutes. Unless we are working with a more complex pattern, you can easily make it even as a beginner. It’s timeless work with no big expenses.
Here, we’ve come up with numerous styles to take your headdress appearance to the next level. The following are the most creative and easy crochet scrunchie patterns for you.
1
Soft Scrunchies Pattern
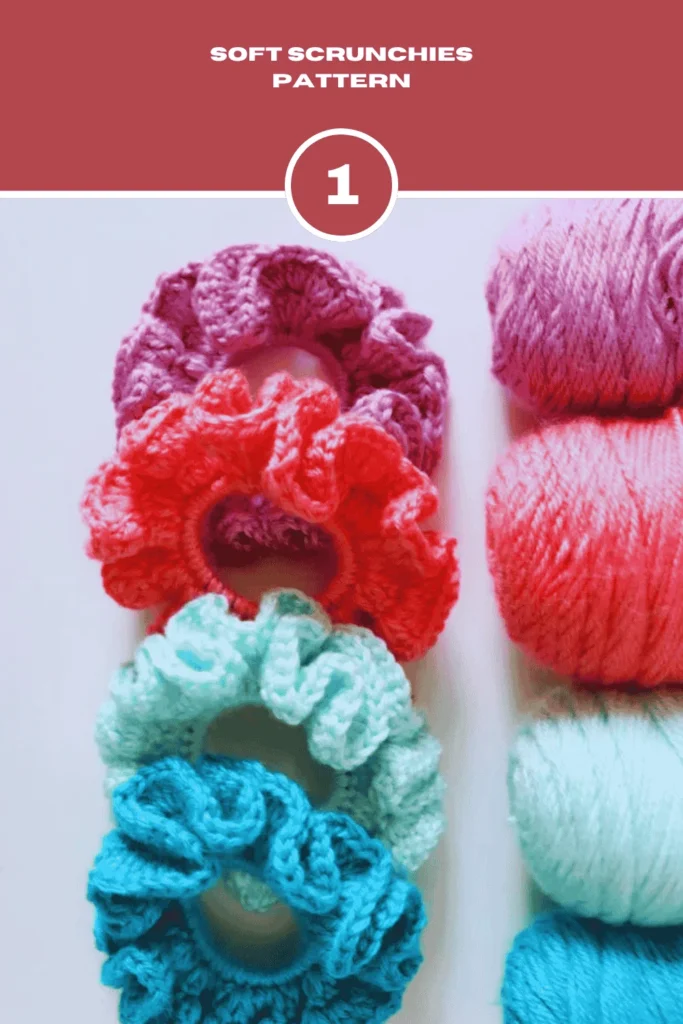
This is a beginner-friendly crochet pattern for comfy hair scrunchies made with Caron Simply Soft yarn.
Materials:
- Soft yarn
- F-size crochet hook
- A caron
- Goodie brand elastic hair ties
- A tapestry needle
Instructions:
- Start with a small chain in the round: You make a chain of a few stitches (text mentions 8 for worsted weight yarn) and join them into a circle around the hair elastic.
- Crochet in a spiral: Using half double crochet stitches, you continuously crochet around and around the elastic, building a tube-like form.
- Keep crocheting past the meeting point: Even when the circle seems complete, keep crocheting. The more rounds you do, the scrunchies the final product will be.
- Fasten and seam the ends: Once you’re happy with the scrunchies, secure your work (fasten off) and sew the ends of the tube together to create a closed loop.
2
Free Round Pattern
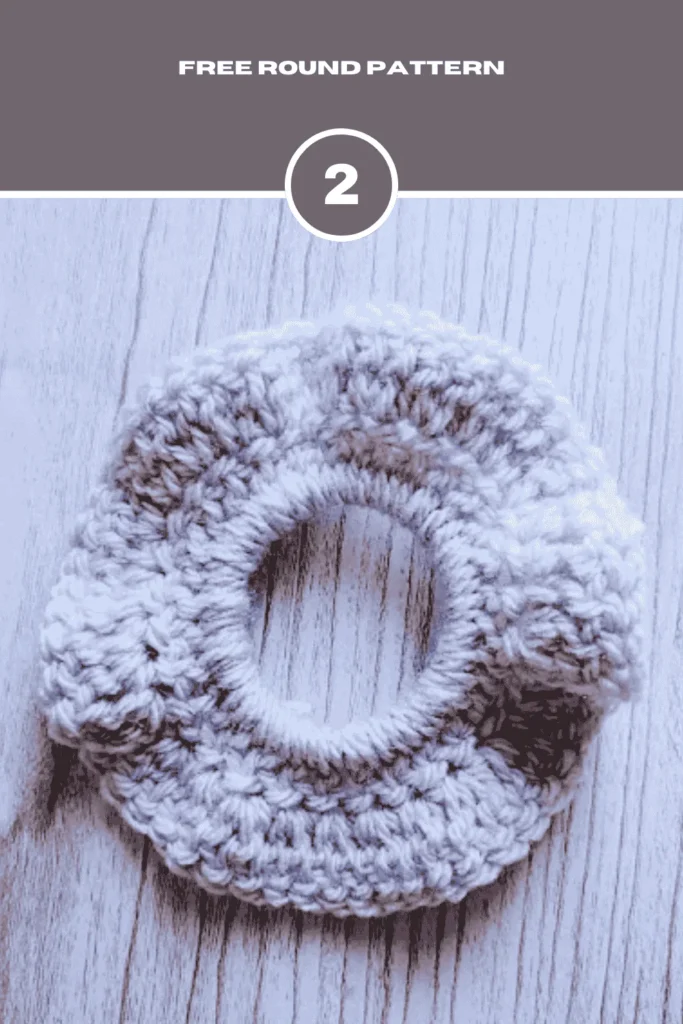
This pattern creates a ruffled scrunchie by crocheting double crochets around a hair tie, then adding increases in the second round to create ruffles.
Materials:
- Worsted weight yarn
- A crochet hook
- A hair tie
Instructions:
- Start around the elastic: Insert your hook into the hair tie and make a slip knot on the hook. Chain 3, then begin making double crochets (DC) around the hair tie. Make sure the entire elastic is covered with DC stitches.
- Close the first round: Once you’ve crocheted around the whole elastic, slip stitch into the top of your starting chain 3 to join the round and close it.
- Create ruffles (round 2): Chain 3 again. In the same stitch you chained from, make a double crochet. Then, in the next stitch, make two double crochets (2dc). In the very next stitch, make three double crochets (3dc).
- Repeat the ruffle pattern: Continue crocheting around the elastic, following the repeat pattern: 2dc, 2dc, 3dc. Don’t worry if you can’t fit the entire repeat sequence before the round ends.
- Finish and weave in ends: Once you’re happy with the size and ruffles, fasten off your yarn and weave in any loose ends.
3
Easy Crochet Scrunchies
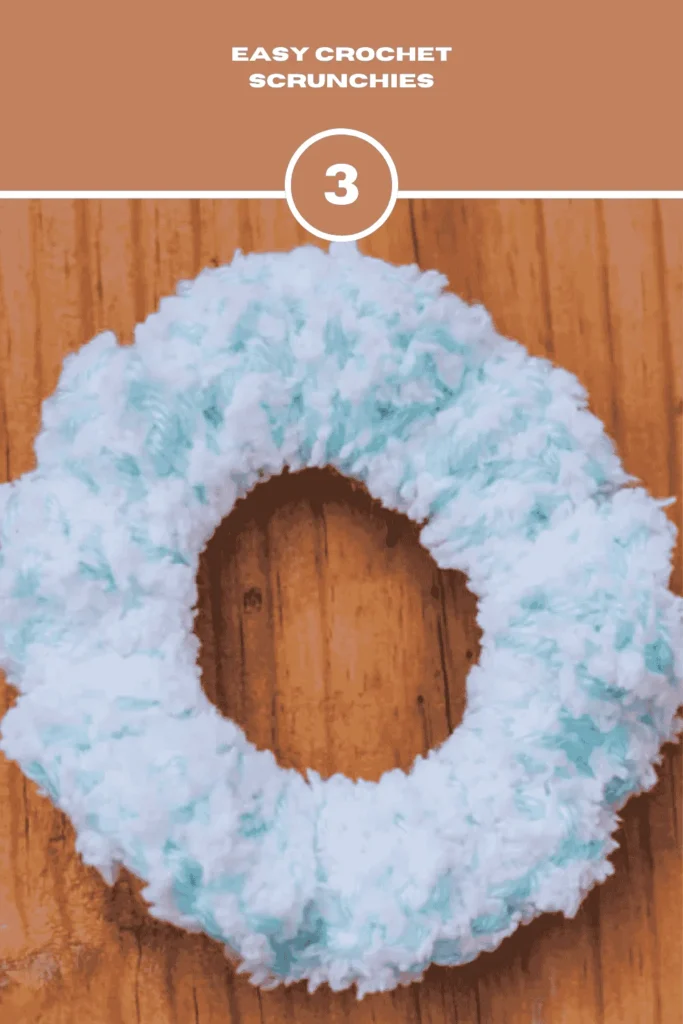
This is a basic crochet scrunchie pattern that’s easy to make and can be customized to your desired size and level of scrunch.
Materials:
- Medium weight yarn
- 5 mm hook
- Needle
- Scissor
Instructions:
- Attach the yarn to the hair tie with a single crochet (SC) stitch. The provided resources (video or picture tutorial) can help with this step if needed.
- Continuously crochet around the hair tie for approximately 150 stitches, using double crochet (DC) stitches. The exact number isn’t crucial. It actually will depend on your hair tie size. So use your judgment here.
- Once you’re happy with the scrunchies, use a slip stitch (SL ST) to connect the last stitch you made to the top.
- Now, secure your work by fastening off the yarn. Finally, use a yarn needle to weave in any loose yarn ends for a clean finish.
4
Crochet Ruffled Scrunchie Pattern
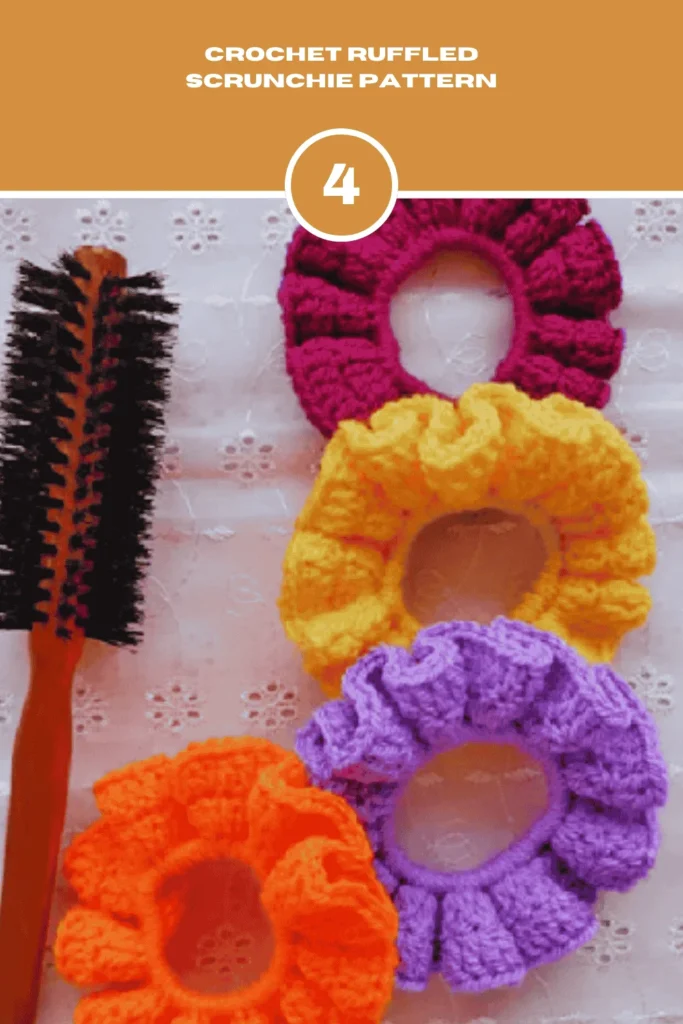
This is a crochet scrunchie pattern with increasing stitches that create a ruffled or gathered effect.
Materials:
- Light worsted (DK) Yarn
- 4 mm hook
- Needle
- Scissor
Instructions:
- Attach the yarn to the hair tie with a single crochet (SC) stitch. The provided resources (video or picture tutorial) can help with this step if needed.
- Continuously crochet around the hair tie for approximately 150 stitches, using double crochet (DC) stitches. The exact number isn’t crucial. It actually will depend on your hair tie size. So use your judgment here.
- Once you’re happy with the scrunchies, use a slip stitch (SL ST) to connect the last stitch you made to the top.
- Now, secure your work by fastening off the yarn. Finally, use a yarn needle to weave in any loose yarn ends for a clean finish.
5
Simple Crochet Hair Scrunchie Pattern
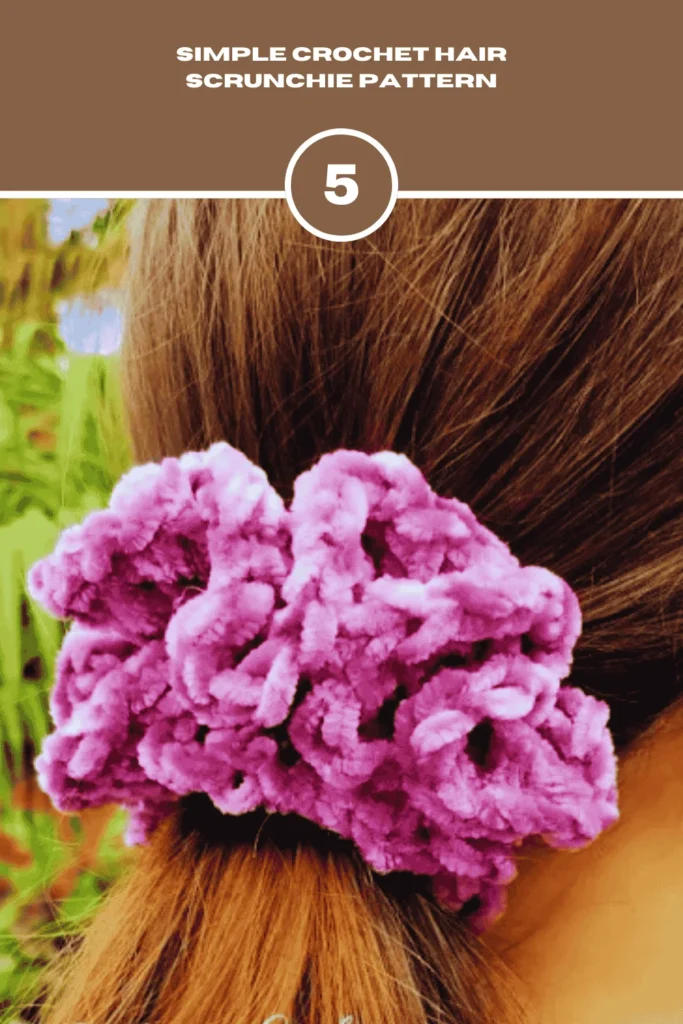
This is a crochet pattern for a simple scrunchie. It’s made by crocheting two rounds around a hair tie.
Materials:
- Bernat baby velvet yarn
- A j/1 6 mm hook
- An elastic hairband
- Your trusty needle
Instructions:
Round 1:
- Single crochet (ssc) around the hair band.
- Make 49 single crochets (sc) around the hair band.
- Slip stitch (sl st) to the beginning single crochet to connect the ends (creates a total of 50 sc).
Round 2:
- Chain 3 (counts as the first double crochet).
- Make 2 double crochets (DC) in the same stitch.
- Repeat the pattern of making 3 dc in each stitch around the hair band.
- Slip stitch (sl st) to the top of the beginning chain-3 to connect the ends (creates a total of 150 dc).
- Fasten off the yarn and weave in the ends.
6
Quick and Easy Crochet Scrunchie Pattern
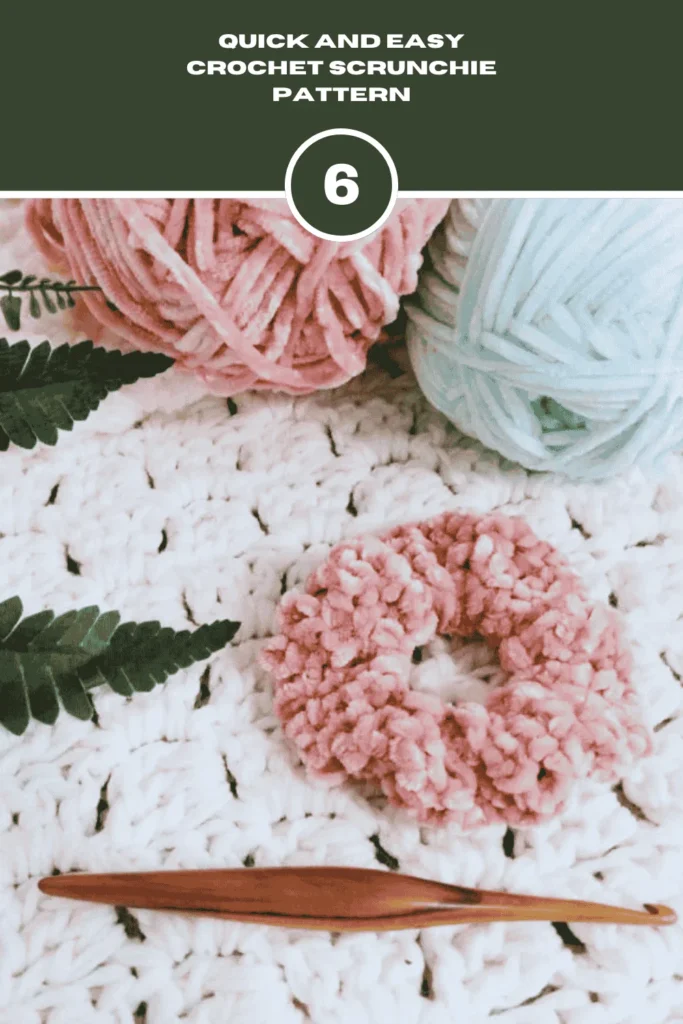
This is a beginner-friendly pattern for a crocheted scrunchie using half-double crochet stitches. You repeat rounds until the elastic is fully covered when stretched.
Materials:
- 20 grams of bulky velvet yarn
- An elastic hairband
- 6 mm crochet hook
- A yarn needle
- A scissor
Instructions:
- Setup Round: Make a chain of 6, and connect the ends into a ring around the hair elastic.
- Rounds 1 & 2: These rounds establish the basic stitch pattern. Crochet half-double crochets around the ring.
- Rounds 3-24 (or more): Repeat round 2 until the scrunchie covers the elastic band entirely when fully stretched.
- Finishing: Secure the yarn, sew the starting chain to the last round to create a closed loop, and weave in any loose ends.
7
Glow in the Dark Scrunchie Crochet Pattern
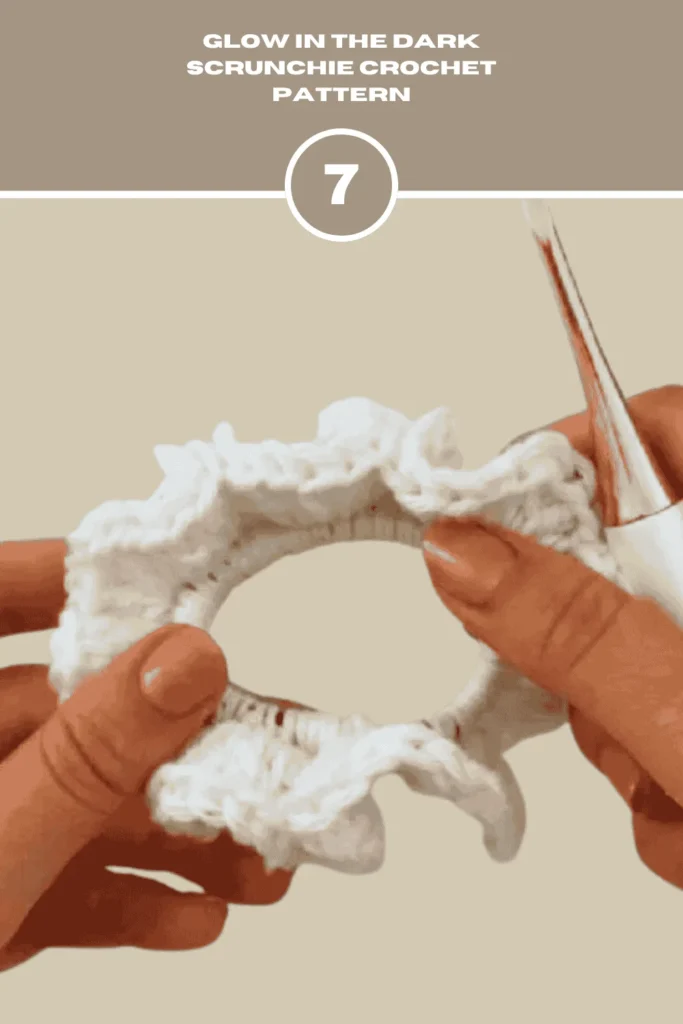
This is a crochet scrunchie pattern with specific stitch counts. It uses a single crochet for the base and increases stitch count in the next round using double crochet for a gathered, scrunchie effect.
Materials:
- 1 ball of lion brand DIY glow
- 6 mm crochet hook
- A hair tie without a metal bracket
- A tapestry needle
- A scissor
Instructions:
- Start with a slip knot and size 6mm hook.
- Round 1: Single crochet around the hair tie until you reach a desired tightness (the pattern suggests 40 sc).
- Round 2: Increase stitch count by crocheting 3 double crochets into each single crochet from the previous round. Slip stitch into the first double crochet to join the round.
- Finish: Fasten off your yarn (secure the work) and weave in any loose ends.
8
Comfy Pattern
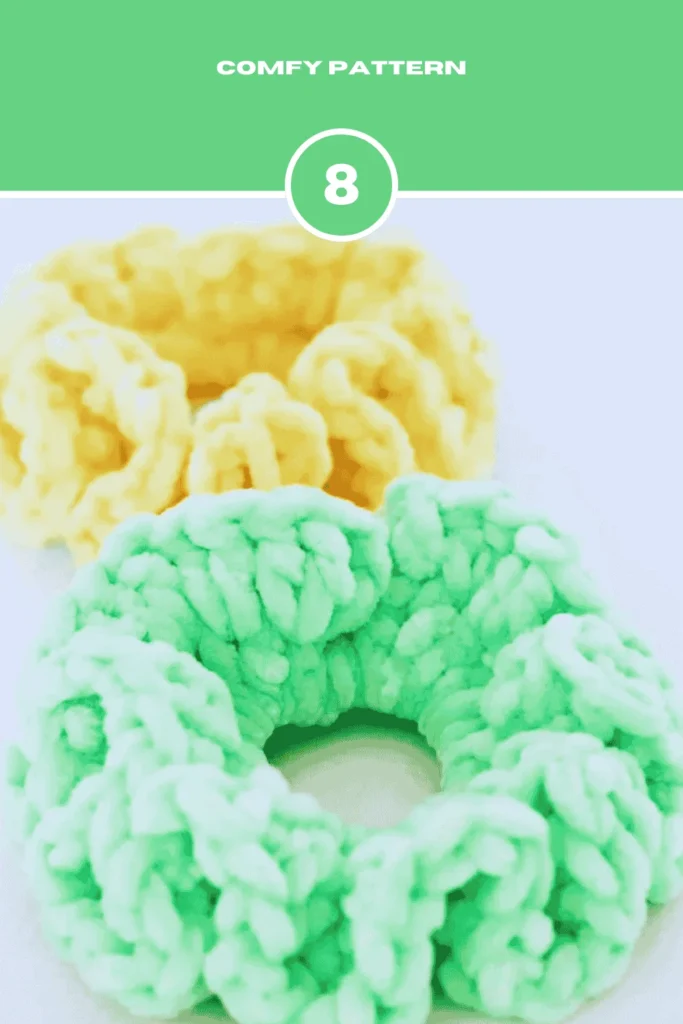
This is a crochet pattern for a scrunchie. It starts with a row of half double crochets around a hair tie, followed by a round with increases to create a scrunched effect.
Materials:
- chenille or velvet yarn
- k crochet hook
- hair elastic
- scissors
- yarn needle
Instructions:
- Start with a slip stitch (sl st) on your hook.
- Work 1 slip stitch around your hair tie and chain 2 (ch2).
- Round 1: Crochet 35 half double crochets (hdc) around the hair tie, join with a slip stitch in the first stitch, chain 3 (ch3) (35 stitches).
- Round 2: Repeat the sequence 16 times: 2 double crochets (dc), 3 double crochets (dc). Crochet another 2 double crochets. You should have a total of 87 stitches.
- Fasten off and weave in the ends to secure your work.
9
4th of July Hair Scrunchie Pattern
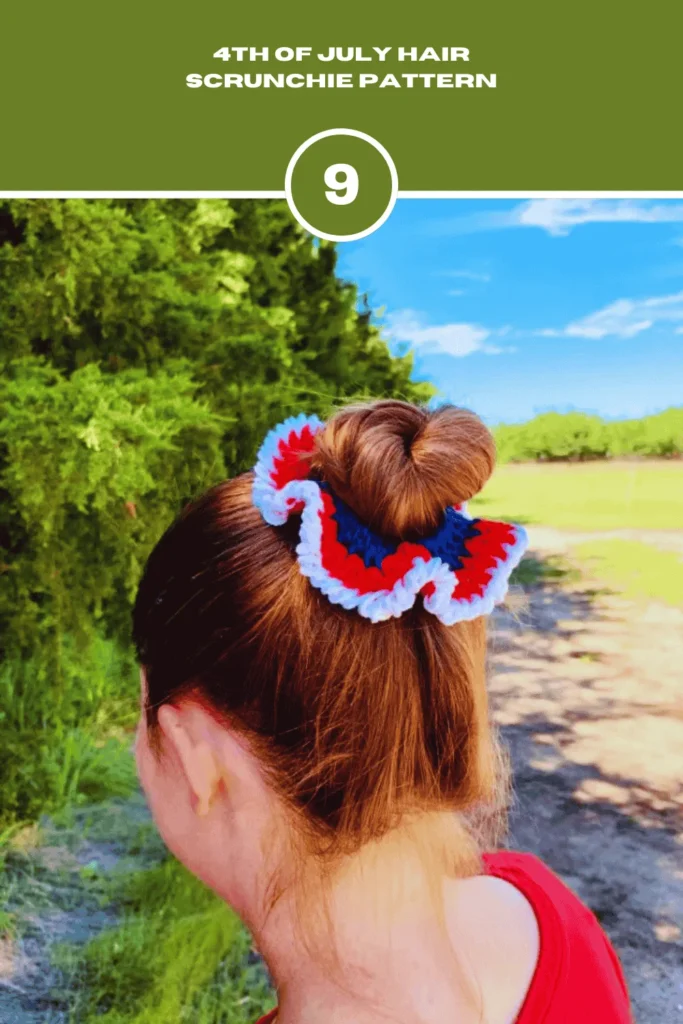
This pattern creates a striped scrunchie with a unique rolled border using the “crab stitch” technique. It starts with crocheting around a hair tie, switching colors for stripes, and finishes with a decorative border.
Materials:
- Lion brand 24/7 cotton yarn in three colors,
- an elastic hair band,
- 5.50mm hook
Instructions:
- Start with navy yarn: Attach the yarn to the hair tie with a slip stitch, chain 2, then crochet 32 half double crochets (hdc) around the hair tie. Join the round with a slip stitch.
- Switch to red yarn: Chain 2, then crochet two HDC stitches in each stitch from the previous round (increases the stitch count). Join with a slip stitch.
- Switch to white yarn: Chain 1, then use the “crab stitch” technique. In crab stitch, you work single crochets (sc) but insert your hook in the opposite direction (to the right) to create a rolled border.
- Finish and neaten: Once you’ve completed the crab stitch border around, slip the stitch to join and cut the yarn. Weave in all yarn ends for a clean finish.
10
Gorgeous Crochet Velvet Scrunchies Pattern
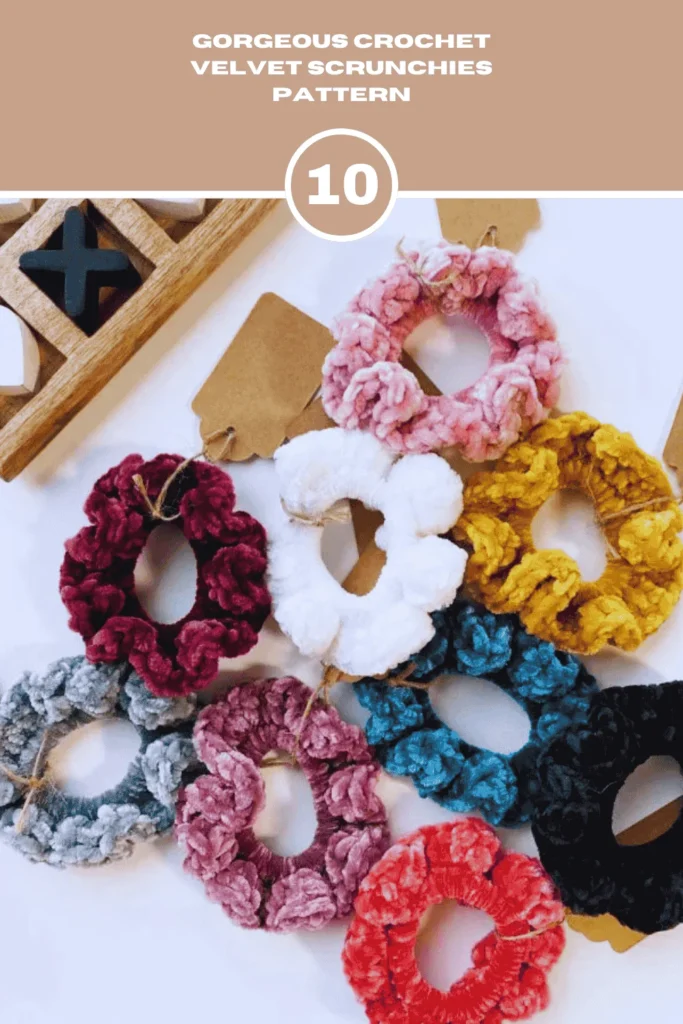
This is a crochet pattern for a scrunchie that starts with a single crochet foundation round and increases in the second round to create a scrunched effect.
Materials:
- 10g of bernet velvet yarn
- a hair tie
- a size k/6.5mm crochet hook
- a darning needle
- Scissors
Instructions:
- Attach the yarn to the hair tie: Begin by attaching the yarn to the hair tie using a slip stitch.
- First round: Chain 1, then single crochet 45 times around the hair tie. Slip stitch to join with the first single crochet.
- Second round: Chain 1, then half double crochet increase (HDCINC) in the first stitch. In the next two stitches, alternate between half double crochet (HDC) and half double crochet increase (HDCINC). Repeat this pattern around the entire scrunchie. Slip stitch to the first half double crochet.
- Fasten and weave: Fasten off the yarn and weave in any loose ends to secure your scrunchie.
Note: You may need to adjust the number of stitches to fit comfortably on your hair tie.
11
Summer Berries Scrunchies Pattern
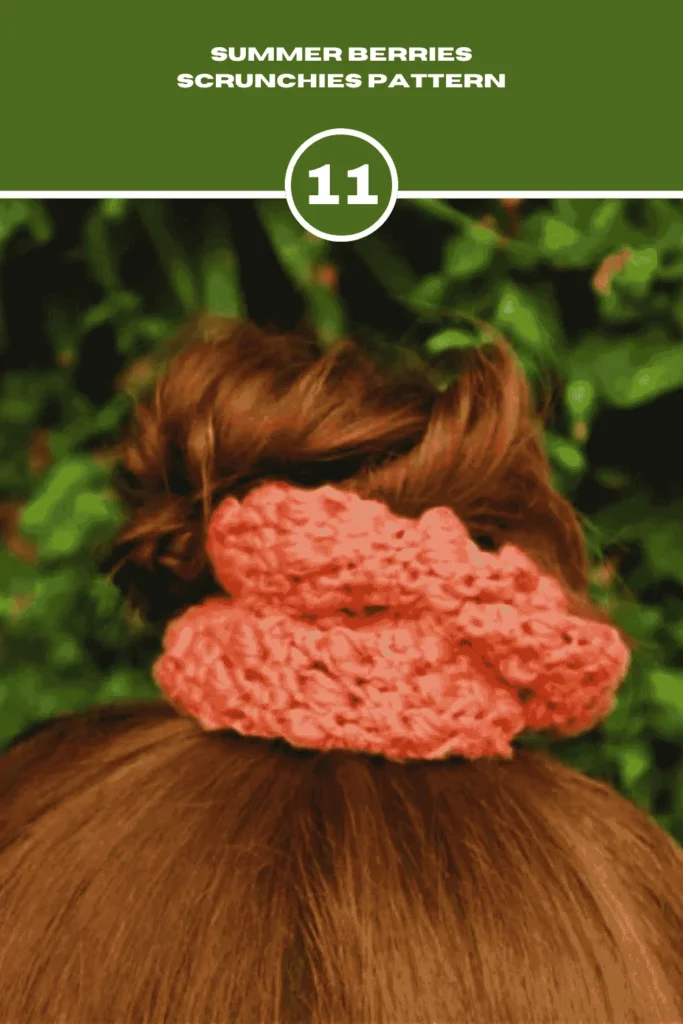
This is a small scrunchie pattern that creates a fancy single crochet stitch.
Materials:
- 3 different yarn weights
- Crochet hook
- A tapestry needle
Instructions:
- Start with the first half of a dc stitch: Yarn over, insert your hook into the stitch, and pull up a loop. Yarn over again, and pull through two loops on your hook.
- Repeat in the same stitch/space: Keep repeating steps 1 and 2 in the same stitch or space until you have a total of 6 loops on your hook.
- Complete the stitch: Yarn over one more time, then pull through all 6 loops on your hook. Secure the stitch with a chain 1. Then finish the crocheting as it’s supposed to.
12
Modern Crochet Scrunchie Pattern
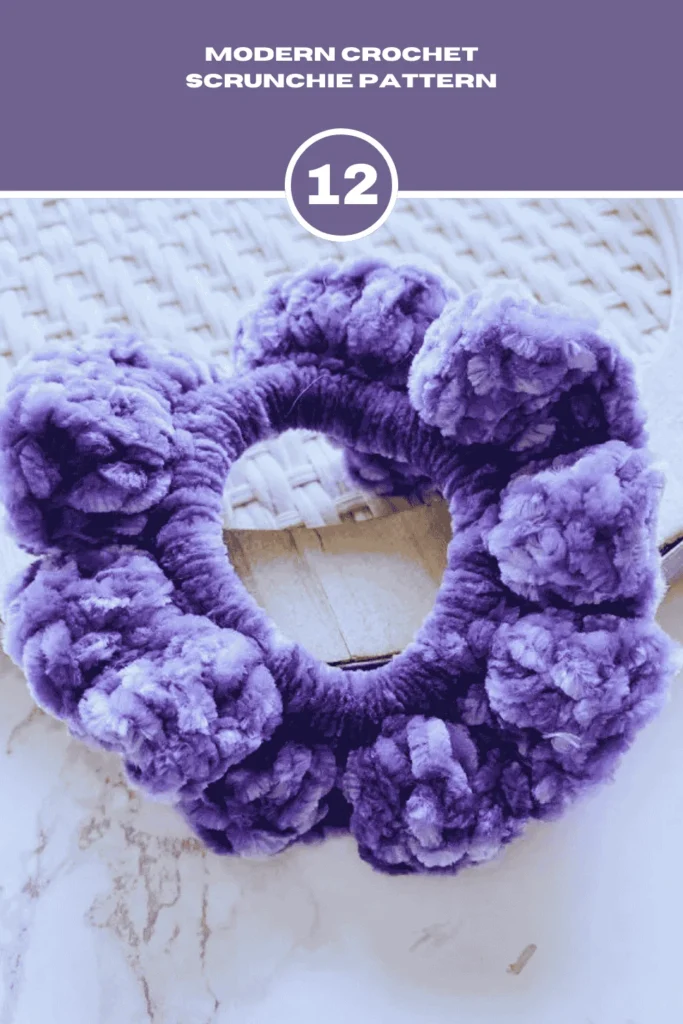
This is a beginner-friendly pattern for a soft velvet scrunchie. You simply single-crochet around a hair tie, adding more rows for extra scrunch.
Materials:
- A Bernat velvet yarn
- An 8.5-size crochet hook
- Hair elastic band
- Scissors
- Yarn needle
Instructions:
- Start with a magic ring or chain 4 and slip stitch to join into a ring. This creates the base around the hair tie.
- Single crochet (sc) repeatedly around the hair tie. Aim for 30-40 stitches for good coverage, but adjust based on the hair tie size and desired scrunchiness.
- Once around, slip stitch to the first sc to join the round.
- Continue crocheting rows of sc in each stitch below. You can crochet additional rounds for a thicker and scrunchier scrunchie.
- When happy with the size, fasten off by cutting the yarn, leaving a tail, and weaving it through the last loop on your hook. Pull to tighten and secure.
- Weave in any remaining ends with the yarn needle.
13
Cute Free Pattern Scrunchie
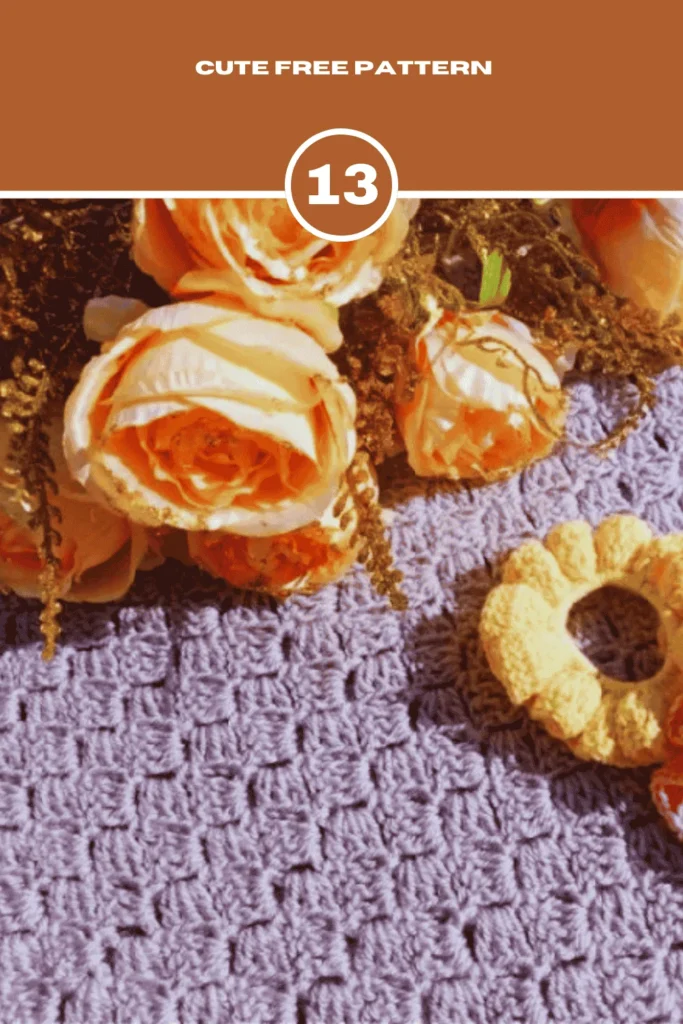
This is a crochet scrunchie pattern with a ribbed texture and ruffled details.
Materials:
- DK yarn
- 4 mm hook
- Needle
- Scissor
- Elastic band
Instructions:
- Use Double crochet stitches throughout.
- Round 1: Single crochets are worked tightly around the elastic band.
- Round 2: Creates a ribbed effect with alternating groups of 3 double crochets.
- Round 3: Maintains the ribbed pattern with single double crochets in each stitch.
14
Free Pattern Crochet Scrunchie
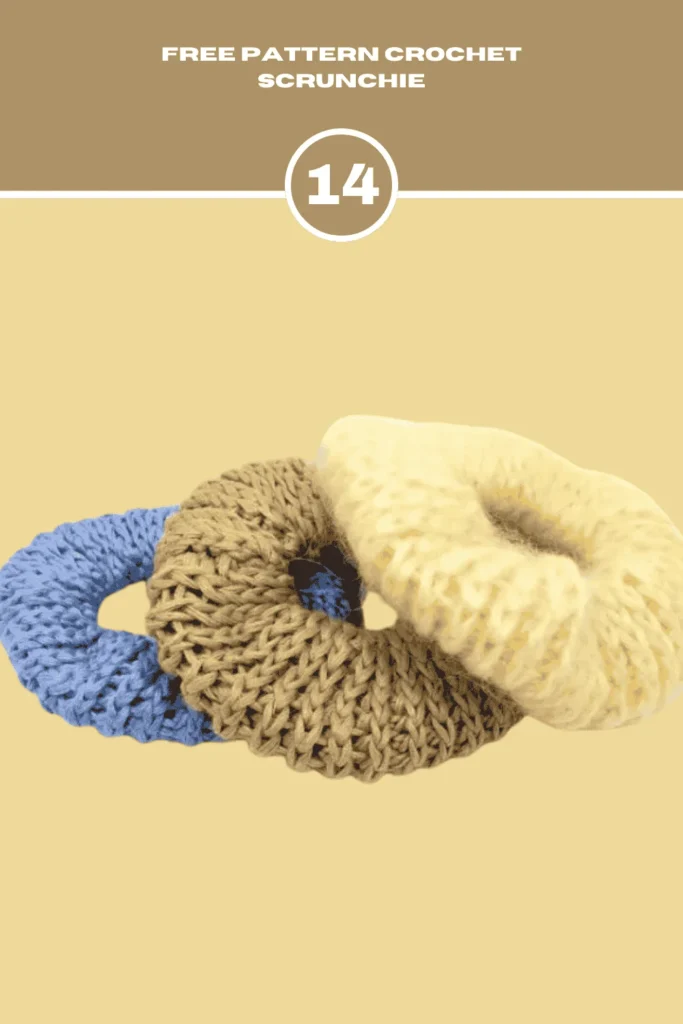
This pattern creates a braided-look scrunchie with a comfortable fit. It uses half-double crochet stitches and focuses on crocheting in the back loops for a unique design.
Materials:
- Yarn of any kind
- A crochet hook
- A hair tie
- A darning needle
Instructions:
- Start with a chain: Make a chain of 15 stitches with a G-6 hook (adjust for width). Join the chain around a hair tie to form a tube (be sure not to twist).
- Crochet the first row: Make 15 half-double crochets (hdc) in the first row.
- Create the braid effect: In the next row, crochet hdc stitches in the back loops of the chain from the previous row. Continue crocheting in a spiral from here on out.
- Add scrunch: Keep crocheting rows of hdc stitches in a spiral until the tube reaches a size that fits comfortably around your hair.
- Join and finish: Sew the two ends of the tube together using your crochet hook and yarn. Flatten the scrunchie to ensure no twisting, then weave in the ends to secure.
15
Velvet Plus Scrunchie Pattern
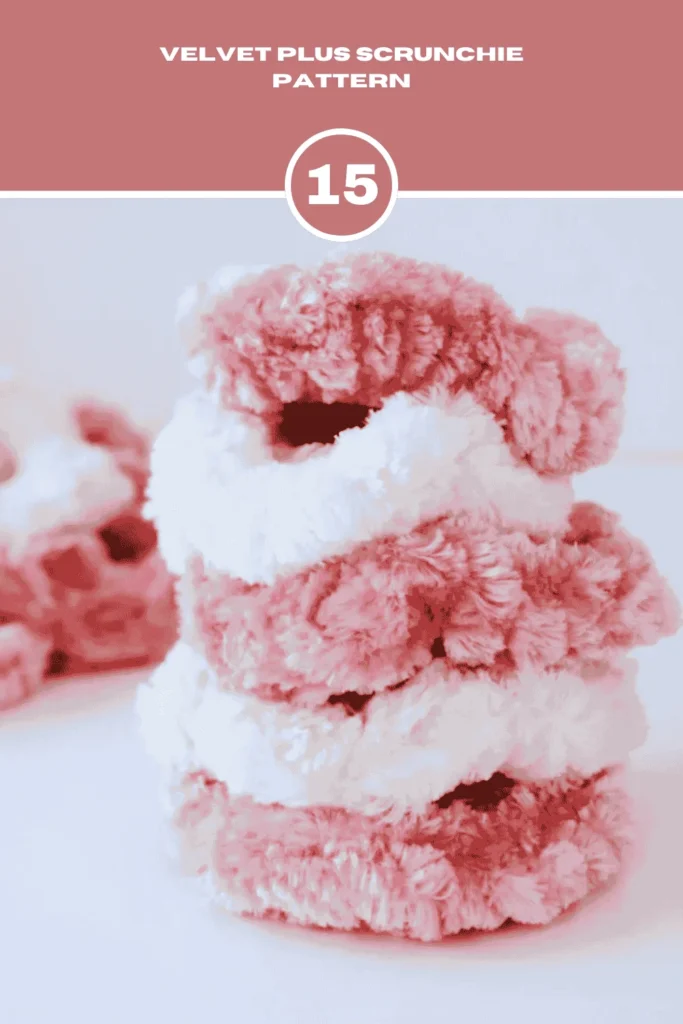
This is a crochet scrunchie pattern made with velvet yarn, specifically using half-double crochet stitches around a hair tie.
Materials:
- An elastic hair tie
- 10 mm crochet hook
- Scissor
- Needle
Instructions:
- Start with a slip knot and crochet an HDC into the center of the hair tie.
- Work HDC stitches continuously around the hair tie, keeping them snug but not too tight.
- Once you’ve circled the hair tie and gathered the stitches somewhat tight, slip stitch to the first HDC to join the round.
- Fasten off by cutting yarn, tying a knot with the starting and ending tails, and clipping any excess.
16
Ruffle Sleek Velvet Scrunchie Pattern
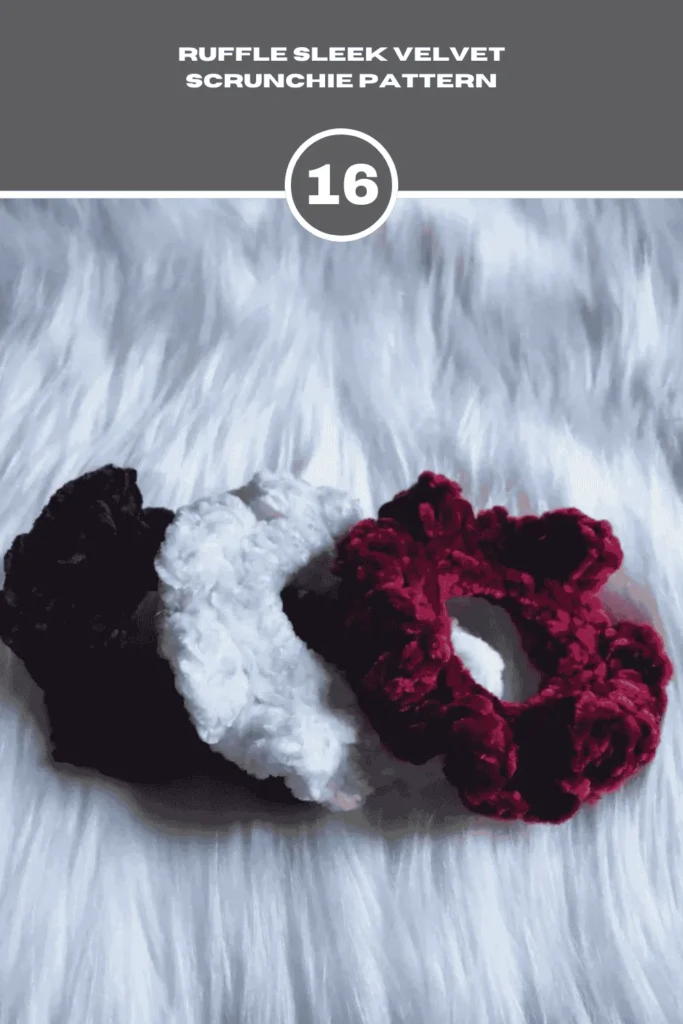
This is a beginner-friendly pattern for a scrunchie made with leftover velvet yarn. You simply crochet single crochets around a hair tie, adding more rounds for extra scrunch and using up your scrap yarn!
Materials:
- Scrap velvet yarn
- 6.5 mm hook
- 35 yards of velvet yarn
- Hair elastic
- Scissors
- Tape measure
- Yarn needle
Instructions:
- Start with a magic ring or chain a few stitches and slip stitch to join into a ring. This creates the base around the hair tie.
- Using single crochet (sc) stitches, crochet continuously around the hair elastic. Aim for enough stitches to comfortably cover the elastic (around 30-40 stitches).
- Join each round with a slip stitch to the first sc of the round.
- Continue crocheting rounds of sc stitches in each stitch below. The more rounds you make, the thicker and scrunchier the final scrunchie will be.
- When you’re happy with the size and scrunchiness, fasten off your work. Cut the yarn, leaving a tail, and weave it through the last loop on your hook. Pull to tighten and secure the yarn.
- Weave in any remaining ends with the yarn needle.
17
Crochet Velvet Scrunchie
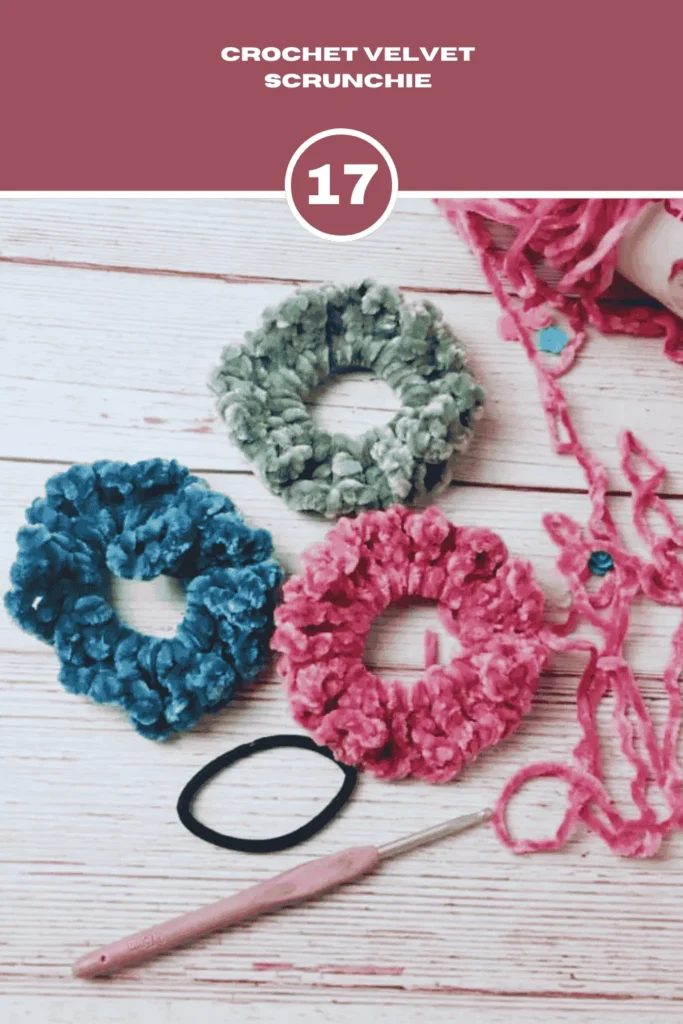
This is a textured crochet scrunchie pattern made with treble crochets around a hair tie.
Materials:
- Bernat baby velvet yarn
- 4 mm hook
- Elastic hair band
- Scissors
- Needle
Instructions:
- Start with a magic ring (or chain 4 & slip stitch to join) around your hair tie.
- Double your yarn and treble crochet (Tr) all around the hair tie, separated by a chain 3 spaces.
- Chain 3, slip stitch to the first chain of your turning chain, then fasten off (cut yarn, weave tail in).
- Use your yarn needle to weave in any remaining yarn ends.
18
Free Scrunchie Pattern
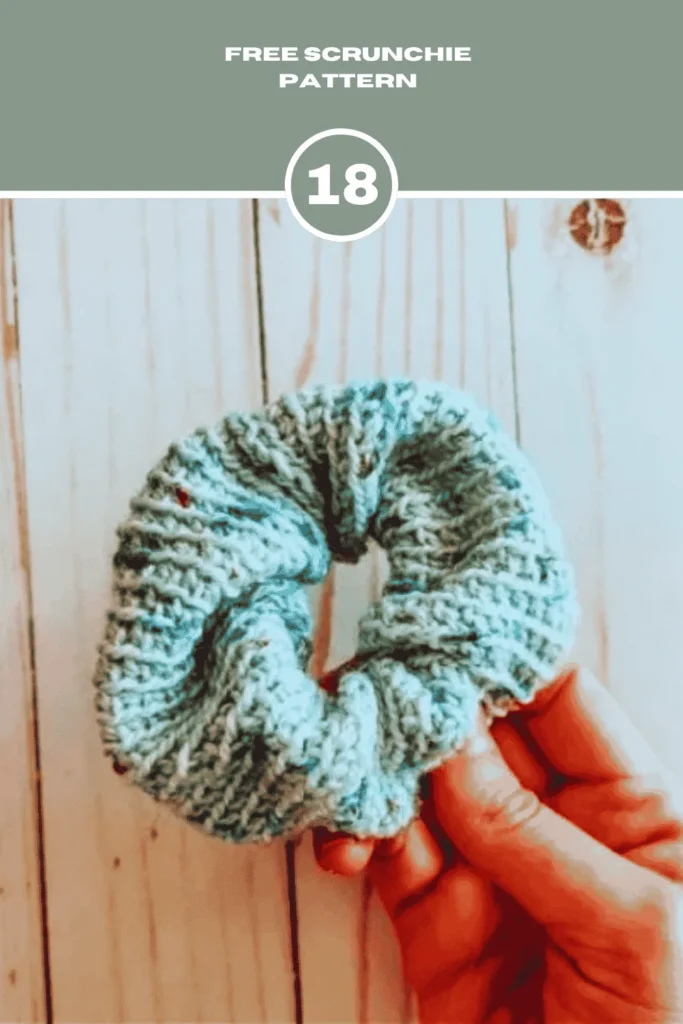
This beginner-friendly pattern creates a simple scrunchie using single crochet stitches. You can make it using basic crochet techniques and create a cute hair accessory.
Materials:
- Yarn
- Needle
- Scissors
- 5 mm hook
Instructions:
[The process is similar to the general crocheting a scrunchie method].
19
Free Scrunchie Design
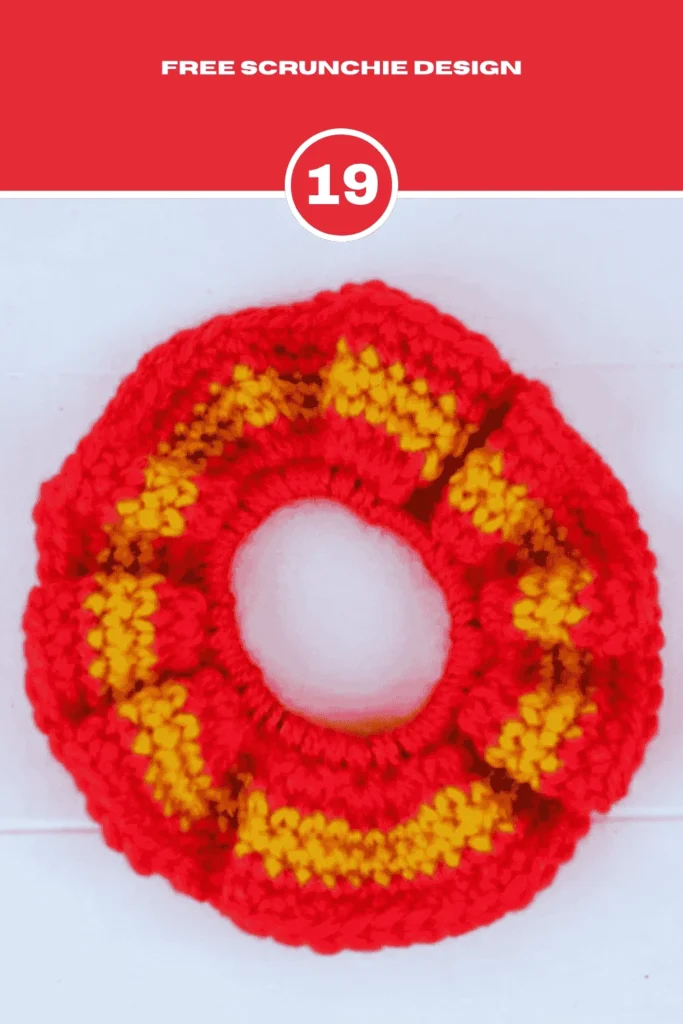
This is a beginner-friendly scrunchie pattern with single crochets. You can customize the size by adjusting the stitch count in the first row.
Materials:
- 52 yards of red heart super saver yarn
- 6 mm hook
- Yarn needle
- Scissors
- Elastic hairband
Instructions:
[The process is similar to the basic method of crocheting scrunchies]
20
Simple Crochet Scrunchie Design
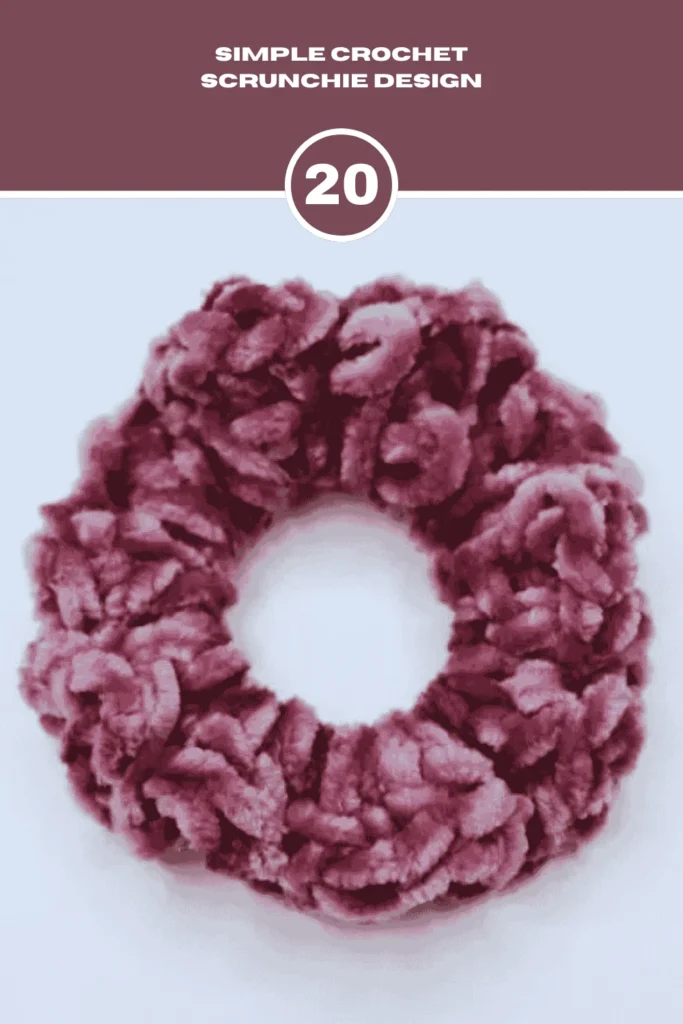
Materials:
- 6.5 mm hook
- Hair ties
- Bernat velvet in shadow purple
Instructions:
[The process is quite similar to the basic method of crocheting a scrunchie]
How To Crochet A Scrunchie For Beginners?
The look of your hairstyle increases a bit more with a perfect alignment of ponytail. But to keep the ponytail in its place, women hassle a lot. And the hassle ends here as we show you how to crochet a scrunchie perfectly.
Materials:
- Yarn (DK or Worsted Weight): Yarn is basically a thread for crafting. It’s a long strand of fibers used for knitting, crocheting, sewing, etc. It’s like building blocks for making comfy sweaters and cool scarves.
- Hair elastic: Hair elastic is a tiny rubber band that keeps your mane in check.
- 6.5 mm crochet hook: A crochet hook is a tiny cane for yarn. It’s a small hooked tool used to grab and loop yarn to create fabric.
- A scissor: Scissors are basically a handheld cutting tool with two sharp blades. It contains a pair of metal jaws that slide past each other to snip things like paper, fabric, or hair.
- A tapestry needle: A tapestry needle is a big, blunt needle for yarn. It helps sew stuff in crafts without snagging.
Note: Always use a bit larger crochet hook to prevent the scrunchie from turning out too stiff.
To crochet a scrunchie the steps are-
- Gather The Materials and Choose Your Style
- Secure the Chains Onto A Hair Elastic
- Crocheting in A Circular Pattern
- Complete the Scrunchie
- Wash the Scrunchie (Optional).
Let’s describe in detail:
Step 1: Gather The Materials and Choose Your Style
Firstly, gather all the materials needed for the task. Choose from the free crochet scrunchie patterns we’ve mentioned below. Pick the one that you feel is easy to make and seems pretty good as well. Now, double-check check you have all the supplies you need to create the scrunchie. Once you choose your desired pattern and all the supplies are collected, move on to the next step
Step 2: Secure the Chains onto A Hair Elastic
Now we’ll create a temporary anchor for your crocheting using a hair elastic. Here’s how:
- Form a Slip Knot: Make a slip knot with your yarn. It creates a secure loop on your crochet hook. You can find many tutorials online if you’re unfamiliar with the slip knot.
- Chain the Foundation: With the slip knot in place on your hook, chain 16 stitches. These initial chains will form the base of your crocheted piece.
- Thread the Hair Elastic: Now, grab your hair elastic and carefully slip the entire chain of 16 stitches through the loop of the elastic. Be gentle here to avoid snagging the yarn.
- Secure the Loop (Optional): Here’s a trick to keep things tidy: While holding the chain in place on the elastic, you can use a slip stitch to create a small loop around the elastic itself. It’ll prevent the chain from twisting as you continue crocheting.
Simply insert your hook under both loops of the chain closest to the elastic, yarn over, and pull through both loops to create a new stitch. Repeat this slip stitch once or twice right next to the elastic to form a tiny loop that holds the chain in place.
Tip: Don’t make it too long. Keep it to the size of your hair tie you’re using.
Step 3: Crocheting In A Circular Pattern
Now that your foundation chain is secure on the hair elastic, it’s time to start building the body of your scrunchie! Here’s how:
- Continuous Circle: You’ll be crocheting in a continuous spiral for this step. Do not join each round with a slip stitch or turn your work at the end.
- Single Crochet Each Stitch: Using single crochet stitches, work one stitch into each chain around the loop you created on the hair elastic. Ensure that your stitches are evenly spaced.
- Keep Going! Once you’ve completed a full round by crocheting a single crochet into every chain, don’t stop! Continue crocheting in this same manner, working one single crochet into each stitch of the previous round. This continuous crocheting will build up the fabric of your scrunchie.
- Reaching Your Goal: The length of your scrunchie will determine how many rounds you crochet. There’s no set number here – it depends on your desired final size. A good rule of thumb is to keep crocheting until the tube of fabric feels like it can comfortably wrap around your hair a couple of times. You can try wrapping the fabric around your hair periodically to gauge how close you are to your ideal length.
Tip: When you reach your desired length, it’s better to err on the side of slightly too long than too short. You can always trim a bit later if needed, but adding length after the fact is more difficult.
Remember: You’re creating a tube shape in this step. The hair elastic will be hidden inside this tube when the scrunchie is complete.
Step 4: Complete the Scrunchie
We’re almost there! Now it’s time to tie up the loose ends (literally) and give your scrunchie its final flourish.
- Snip and Save: Grab your scissors and carefully cut your yarn, leaving a generous tail of about 12 inches. This tail will weave in and secure the end of your crocheting.
- Weaving the Weaver: Thread your yarn needle with the remaining 12-inch tail. Now use the needle to weave the tail through the stitches of your scrunchie, burying it within the crocheted fabric. It’ll hide the end of the yarn and create a clean finish.
- Sewing the Ends: While weaving the yarn tail, focus on sewing the two ends of your crocheted tube together. Don’t leave any unwanted gaps. Carefully weave your needle and yarn through the corresponding stitches on both ends, essentially sewing them shut. Take care not to twist your work as you sew.
- Hide and Seek Champion: Once you’ve knitted your way to the opposite side of the scrunchie, your yarn tail should be practically invisible. For good measure, you can thread the remaining bit of yarn through the scrunchie a couple more times to ensure it’s securely hidden.
- Remove the Elastic Band: The trusty hair elastic has served as a temporary foundation for your scrunchie. Now that the crocheted part is secure, you can finally remove the elastic.
- Trim the Triumphant Tail: Trim off any excess yarn tail that remains with a final snip of your scissors. That’s it. Your very own Crochet Scrunchie is complete now.
Step 5: Wash the Scrunchie (Optional)
While your scrunchie won’t necessarily require frequent washing, you can give it a refresh if you feel it needs it. Here’s how:
- Handwashing is Key: Since scrunchies are delicate, do not use the washing machine. Instead, go for a gentle handwash. Fill a small bowl with warm water and add a few drops of mild soap or gentle shampoo.
- Submerge and Swish: Gently sink your scrunchie in the soapy water and swish it around carefully. Avoid any harsh scrubbing or wringing, as this could damage the fabric.
- Rinse Thoroughly: Once you’ve given it a light cleaning, thoroughly rinse the scrunchie with clean water to remove all soap residue. You can keep rinsing until the water runs clear.
- Gently Remove Excess Water: Don’t wring out the scrunchie. Instead, press out some of the excess water with a clean towel.
- Lay Flat to Dry: Find a clean towel or drying rack and lay the scrunchie flat to air dry. Avoid direct sunlight or heat sources, as this could shrink or fade the fabric.
Tip: If your scrunchie has any stubborn stains, you can try treating them with a stain remover suitable for the fabric type before washing.
Haven’t you clear yet? For better understanding, watch this video on how to make a crochet scrunchie tutorial:
How Many Rounds Does A Crochet Scrunchie Need?
The stitching rounds you need for a scrunchie depend on the yarn weight. DK-weight yarn requires more rounds as it is thinner. In a DK-weight scrunchie, you should use around 100 to 110 rounds of yarn. Worsted-weight yarn, on the other hand, is thicker and requires less yarn. For a worsted-weight scrunchie, use anything between 65 to 75 rounds.
Yet, it sometimes gets influenced by the stretchiness of the elastic you use. A looser elastic might require more rounds of yarn to achieve a secure hold, while a tighter elastic might need slightly less. So, keep the stretchiness of your elastic in mind as you work on your scrunchie.
How To Adjust The Size Of A Crochet Scrunchies?
The starting chain count plays a key role in determining the final size of your scrunchie. By simply adjusting this number, you can create scrunchies in various sizes to suit your preference. For those who love a voluminous and chunky scrunchie, using a higher number of starting chains is the way to go.
Numerous chains provide more fabric to gather and create that satisfyingly full look. Conversely, if you prefer a more delicate and smaller scrunchie, you can get by with a much lower number of starting chains. This will result in a tighter gather and a sleeker overall size.
Things to Remember While Making Crochet Scrunchies
People always face problems with a stiff and bulky scrunchie. If your yarn is too big for the crochet hook, this problem appears. To avoid such problems, there are several things you must take into account while making crochet scrunchies:
- Always go for the lighter-weight yarn for a flowery look.
- Find a bigger crochet hook to prevent any stiffness in the scrunchie.
- After finishing the stitch, you can snip the end open to avoid stiffness.
- Stretch out the hair tie to make the tube cover up your entire hair tie. Otherwise, you may end up with a bizarre look at your scrunchie.
- Try to crochet a few more inches to get plenty of scrunched.
Conclusion
From innovative style to the most basic pattern, we’ve provided with you all the Crochet Scrunchie designs possible. It’s usually a 5-minute job with basic materials to start with. If you’ve been paying attention to our instruction and the video tutorial, things must go like a breeze for you. Just take your trusty needle and sew the fabric as per the guidance. Till then, happy stitching.

![How to Crochet Sunflower Bouquet [6 Easy Steps]](https://crochetmind.com/wp-content/uploads/2025/06/How-to-Crochet-Sunflower-Bouquet-6-Easy-Steps-150x150.jpg)


