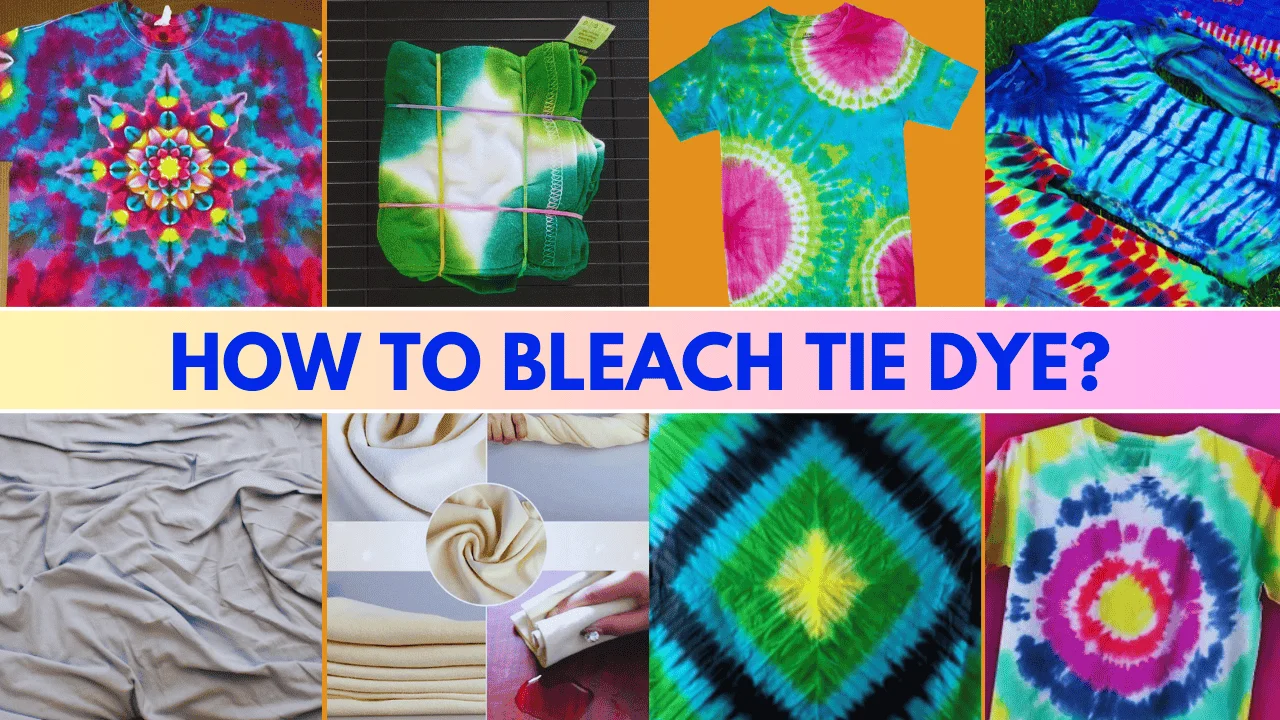
Bleach Tie Dye: Are your dark clothes looking old and boring? You can creatively use fashion without spending much on new clothes or design skills.
Keeping up with the latest fashion styles costs a lot of money and takes a lot of time. Standard tie-dye methods do not allow you to customize them to your preferences, and purchasing trendy items from stores can be costly. It is too expensive. You find it difficult to switch up your style and want fun ways without spending much money on new clothes.
Relax!
What is bleach tie dye? How does it work? What fabrics should you use? The next guide has all the information about bleach tie dye, including step-by-step instructions. It includes simple steps, helpful tips, and safety warnings that will help you make unique, trendy patterns in the privacy of your home for a reasonable price.
Whether you are new to DIY art or like messing around with fabric, this article will teach you how to master bleach tie dye in a way that works.
So, let’s take a look…
Table of Contents
- Key Takeaways:
- What is Bleach Tie Dye?
- 15+ Creative Bleach Tie Dye Folding Techniques & Their Detailed Procedures
- Crinkle or Scrunch Fold
- How to Fold:
- Crinkle OR Scrunchie Fold
- Creates a random, marbled pattern with chaotic energy.How to Fold:
- 3. Bullseye Fold
- Description: Produces concentric circles from a single central point.How to Fold:
- 4. Accordion or Pleated Fold
- 5. Sunburst Fold
- Description: Small bursts or flares scattered across the fabric.How to Fold:
- 6. Triangle Accordion Fold
- Description: Geometric triangular impressions throughout the fabric.How to Fold:
- 7. Heart-Shaped Fold
- Description: Creates a heart-shaped pattern when bleached.How to Fold:
- 8. Spider Web Fold
- Description: A spidery, web-like twist pattern from the corner.How to Fold:
- 9. Diamond Fold
- Description: Creates diamond-like layers and shapes throughout.How to Fold:
- 10. Square Grid Fold
- Description: Results in a checkerboard or grid-like bleached effect.How to Fold:
- 11. Crumpled Fold
- Description: Light, soft bleach patches in a loose, organic form.How to Fold:
- 12. Mandala Fold
- Description: Intricate symmetrical circular designs, similar to mandalas.How to Fold:
- 13. Wave Fold
- Description: Soft, flowing lines like water ripples.How to Fold:
- 14. X-Shaped Fold
- Description: Distinct X formation with intersecting dye contrasts.How to Fold:
- 15. Zig-Zag Fold
- Description: Creates sharp, stair-like bleach lines across the fabric.How to Fold:
- 16. Half-Spiral Fold
- Description: A spiral effect only on one side for asymmetrical appeal.How to Fold:
- 17. Fan Fold
- Description: Semi-circle or arch-like folds like a hand fan.How to Fold:
- 18. Diagonal Stripe Fold
- Description: Clean stripes diagonally cross the fabric.How to Fold:
- 19. Reverse V-Fold
- Description: Strong V-shaped bleach visuals with arrow patterns.How to Fold:
- 20. Wave & Twist Combo
- Description: Combines wave softness with the boldness of spiral twists.How to Fold:
- Tips for Staying Safe When Dying Clothes with Bleach
- How Does It differ from Traditional Tie Dye?
- FAQs About Bleach Tie Dye
- Final Thoughts
Key Takeaways:
- Easy bleach tie-dye methods for beginners.
- Step-by-step DIY bleaching techniques.
- Creative pattern ideas with bleach.
- Instructions for bleach safety must be followed for proper use.
- Must-have supplies for tie-dye bleaching.
What is Bleach Tie Dye?
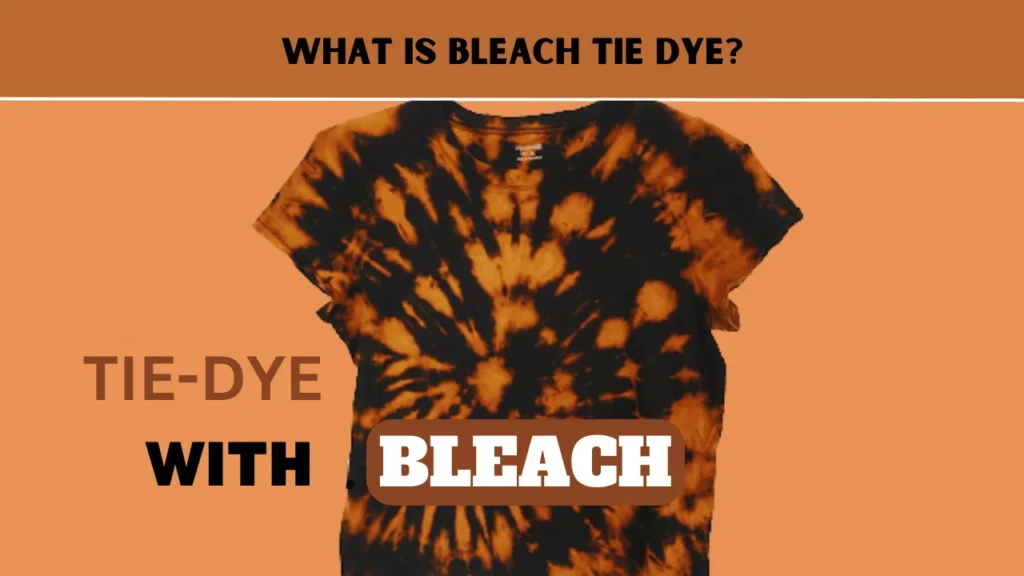
Bleach tie dye is a fabric design process that uses bleach to eliminate color from black or dark textiles. Rather than using standard dye treatments, bleach tie-dye removes existing cloth dye. When the dye is applied to the knotted cloth, it interacts with bleach, causing the fabric to lighten while displaying contrasting motifs.
Depending on the cloth type and the starting color, the bleach operation produces unique color combinations of beige, orange, rust, and peach. Bleach tie dye is ideal for bold but simple fashion because it may create vintage or edgy looks.
The process is eco-friendly. It dyes old clothes without commercial dye sets or advanced equipment.
15+ Creative Bleach Tie Dye Folding Techniques & Their Detailed Procedures
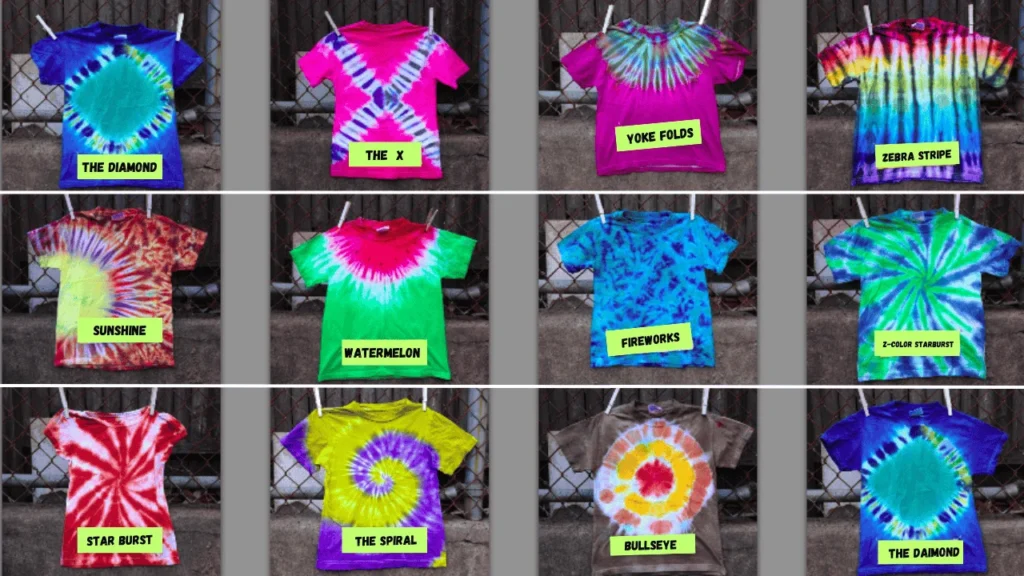
Find out about the newest and most exciting ways to fold bleach tie-dye to give your clothes, accessories, and home textiles a vibrant, beautiful, and artistic makeover. Here are more than 20 unique folding techniques, all of which can produce bright, lively results and are taught in a way that is easy to understand. This is how you can get the look you want, whether swirls, stripes, hearts or something more abstract.
1
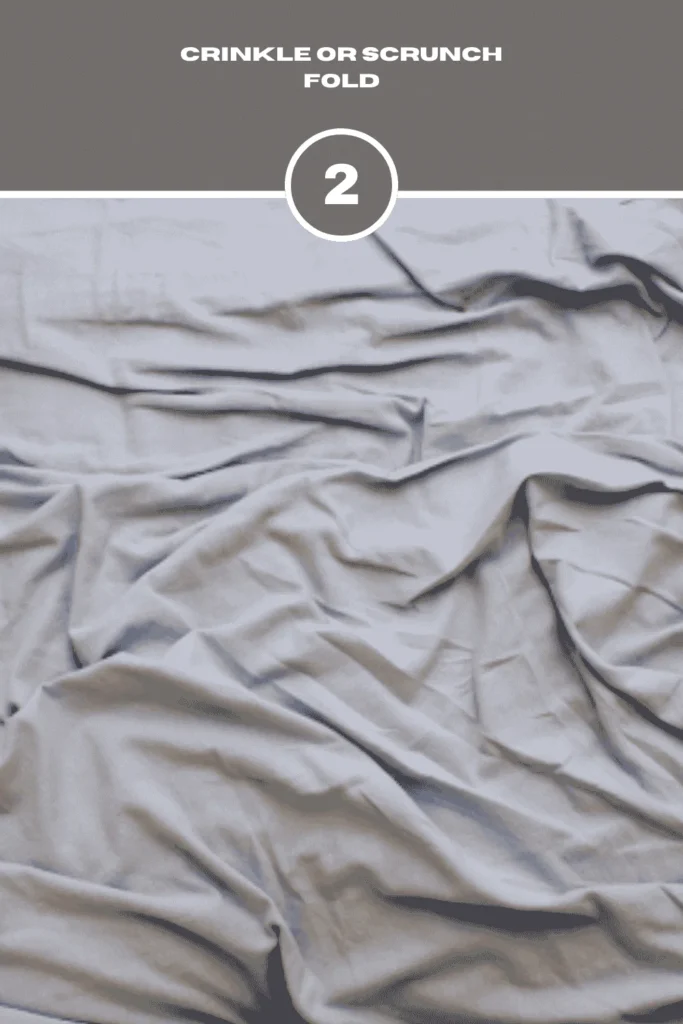
Crinkle or Scrunch Fold
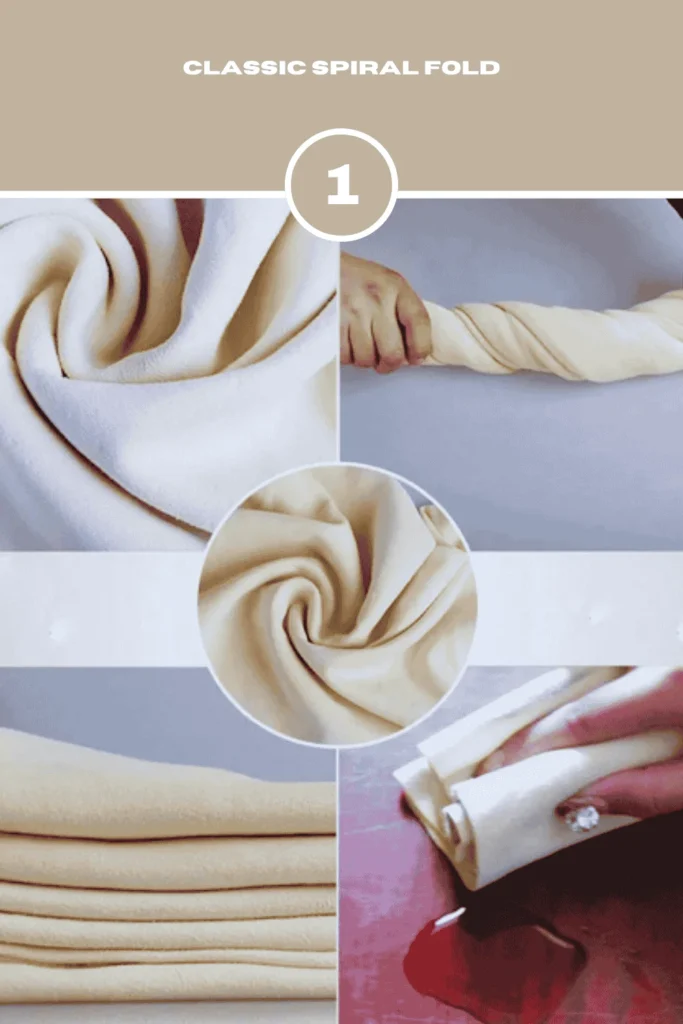
A timeless spiral pattern radiating from the center, perfect for bold, eye-catching designs.
How to Fold:
- Lay the fabric flat.
- Pinch the center point.
- Twist the fabric in a circular motion until the whole thing spirals.
- Secure it with rubber bands in pie-like sections.
Best For: T-shirts, tote bags, and statement pieces.
Crinkle OR Scrunchie Fold
Creates a random, marbled pattern with chaotic energy.
How to Fold:
- Lay the fabric flat.
- Scrunch the fabric randomly into a tight ball without a pattern.
- Use rubber bands to hold the crumpled fabric tightly.
Best For: Hoodies, sweatshirts, and layered texture.
3. Bullseye Fold
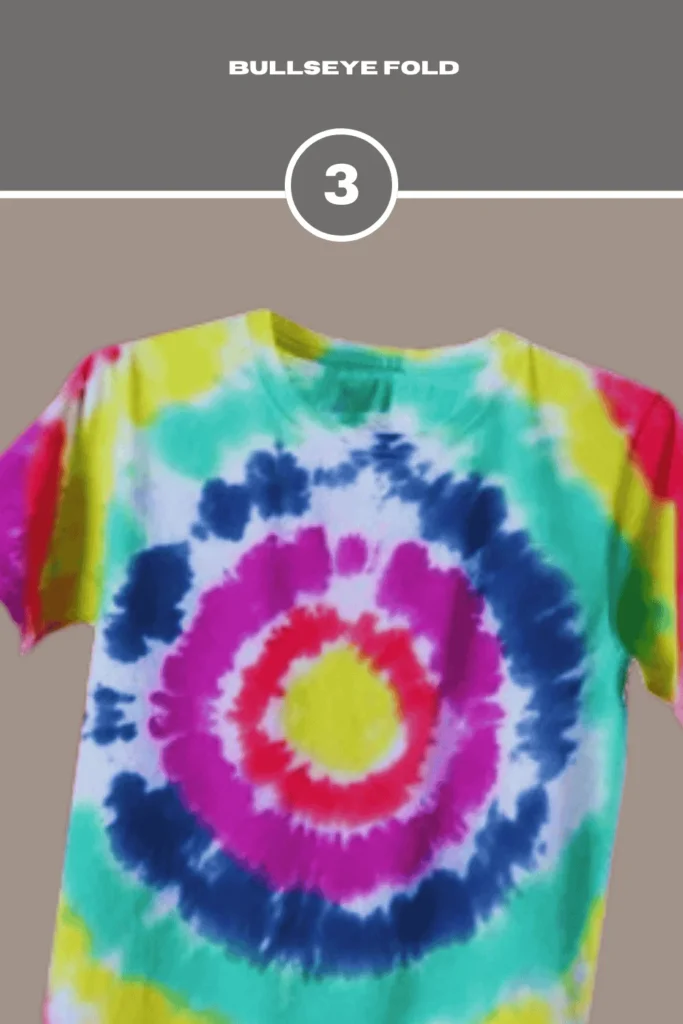
Description: Produces concentric circles from a single central point.
How to Fold:
- Pinch the center and pull it upward like a cone.
- Wrap rubber bands every few inches from top to bottom.
Best For: Tees, pillow covers, and bedsheets.
4. Accordion or Pleated Fold
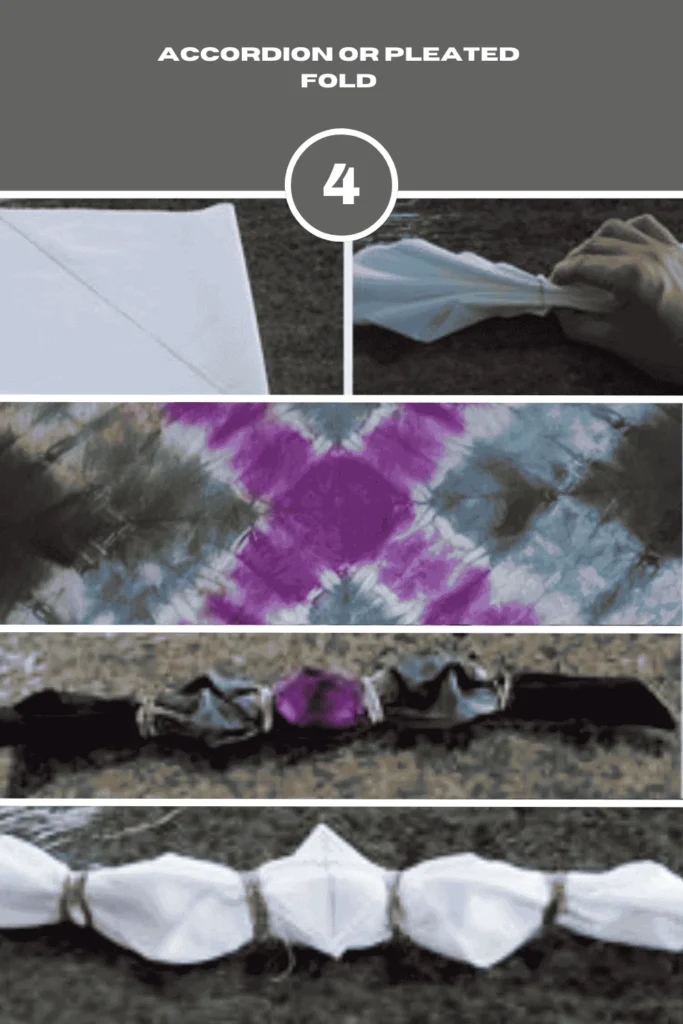
Description: Clean, linear stripes across the fabric.
How to Fold:
- Keep folding the fabric like an accordion.
- Tie bands at even intervals along the pleats.
Best For: Scarves, formal wear, and runners.
5. Sunburst Fold
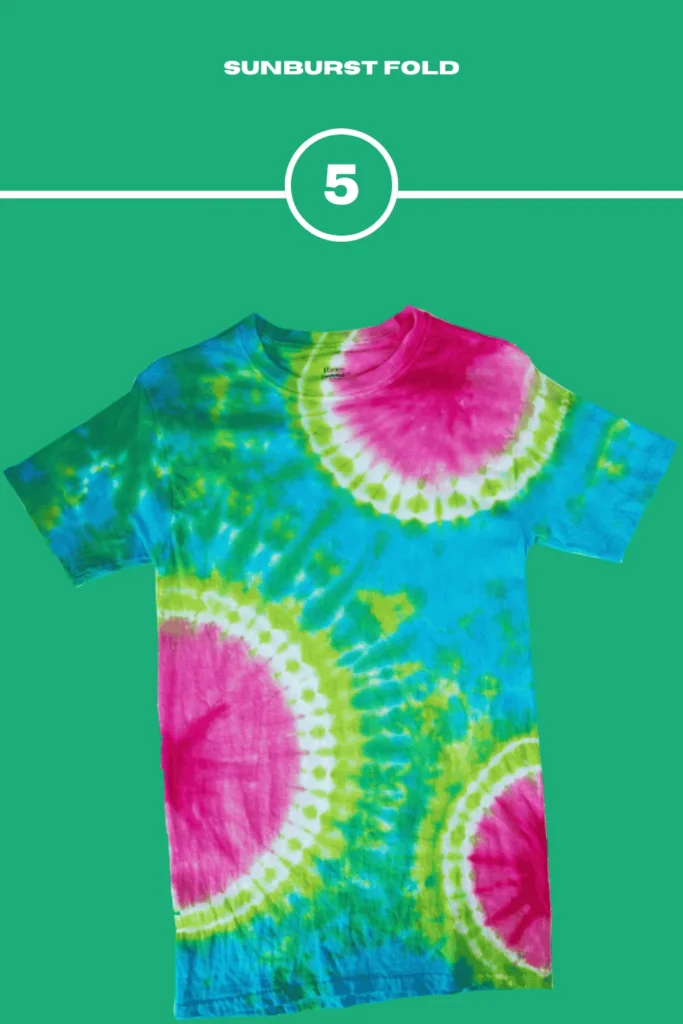
Description: Small bursts or flares scattered across the fabric.
How to Fold:
- Pinch small random sections and pull upward.
- Secure tightly with rubber bands.
Best For: Summer dresses, casual tees, and playful looks.
6. Triangle Accordion Fold
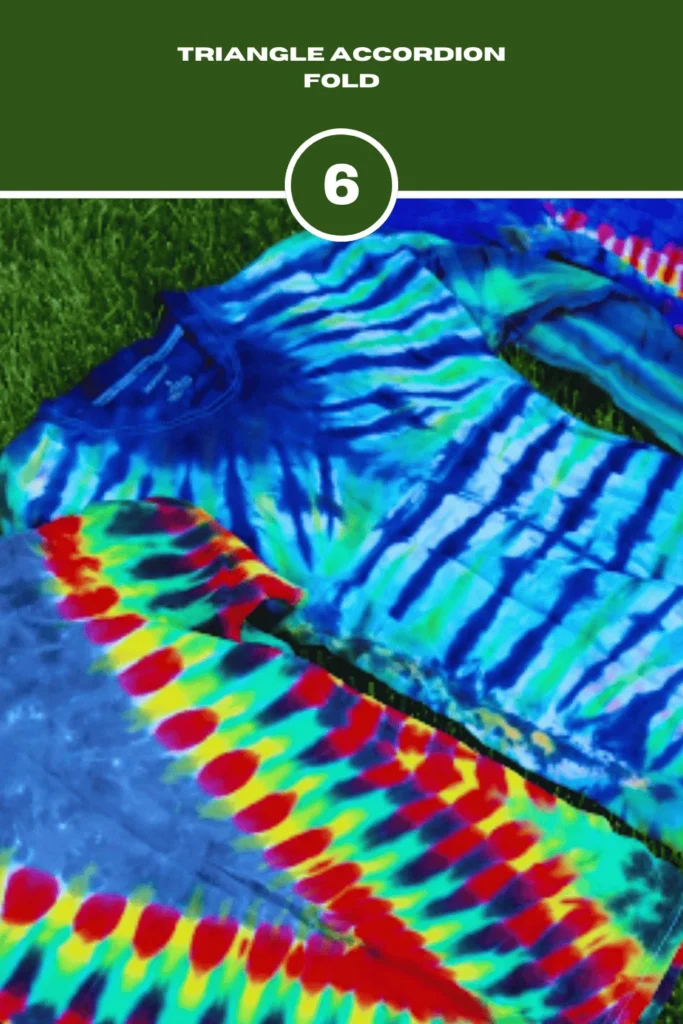
Description: Geometric triangular impressions throughout the fabric.
How to Fold:
- Fold fabric into a long strip.
- Then pleat that strip into small triangle shapes, like a paper fan.
- Bind with rubber bands securely.
Best For: Scarves, napkins, and minimal home decor.
7. Heart-Shaped Fold
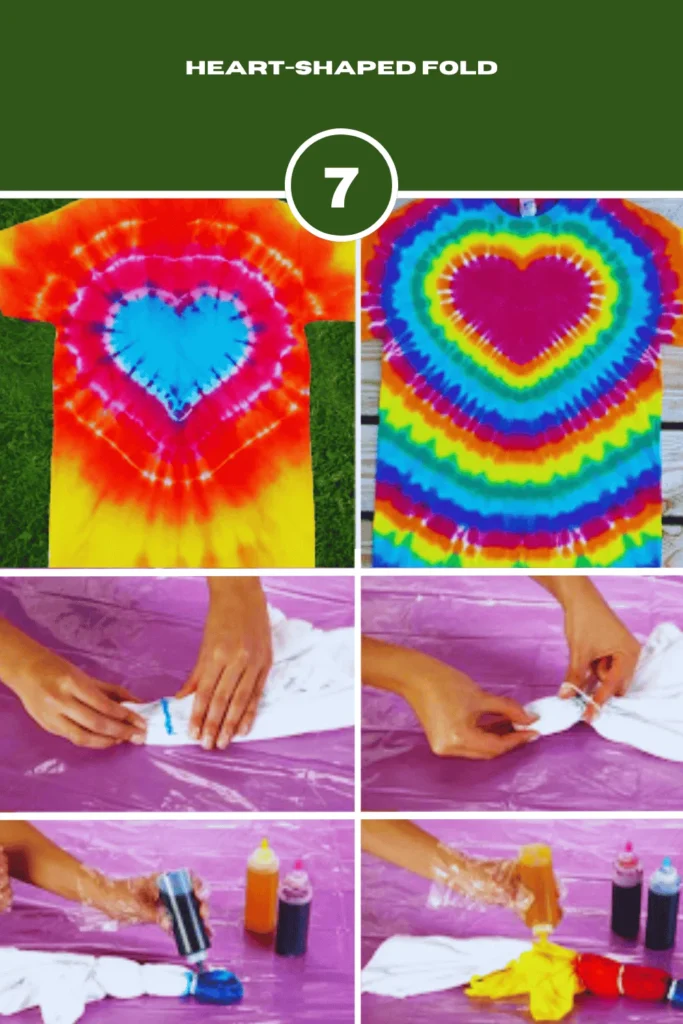
Description: Creates a heart-shaped pattern when bleached.
How to Fold:
- Fold fabric vertically in half.
- Draw half a heart shape along the fold line.
- Accordion pleat along the heart outline.
- Tie tightly with bands.
Best For: Romantic gifts, Valentine’s Day tees, or custom designs.
8. Spider Web Fold
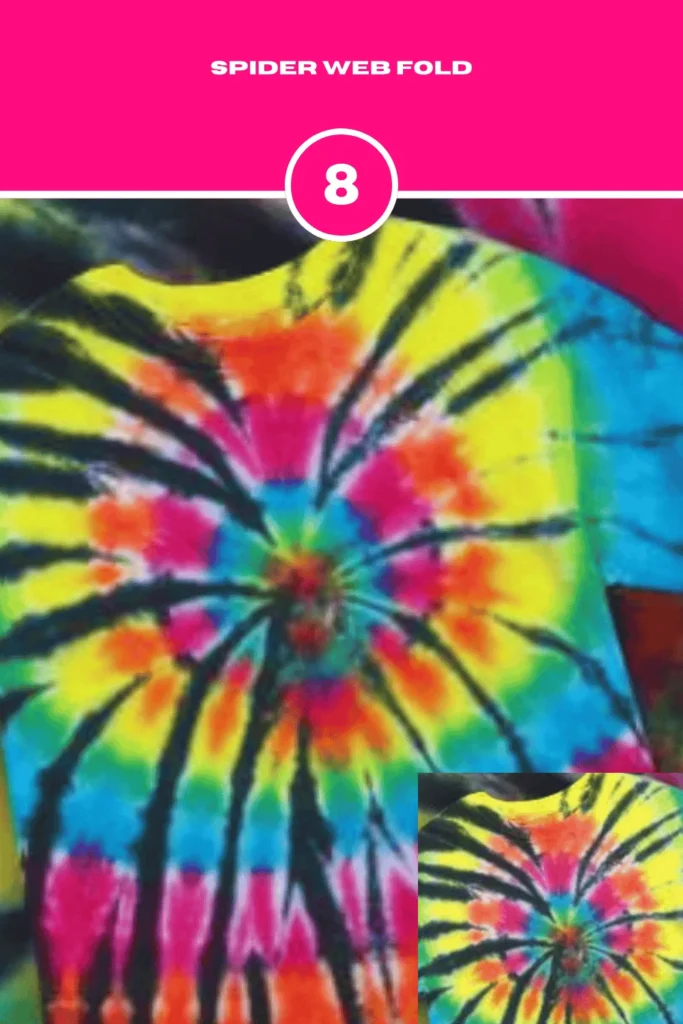
Description: A spidery, web-like twist pattern from the corner.
How to Fold:
- Twist fabric starting from a corner (not the center).
- Let folds curve naturally as you twist.
- Secure different twist sections with bands.
Best for: Gothic themes, Halloween outfits, and edgy streetwear.
9. Diamond Fold
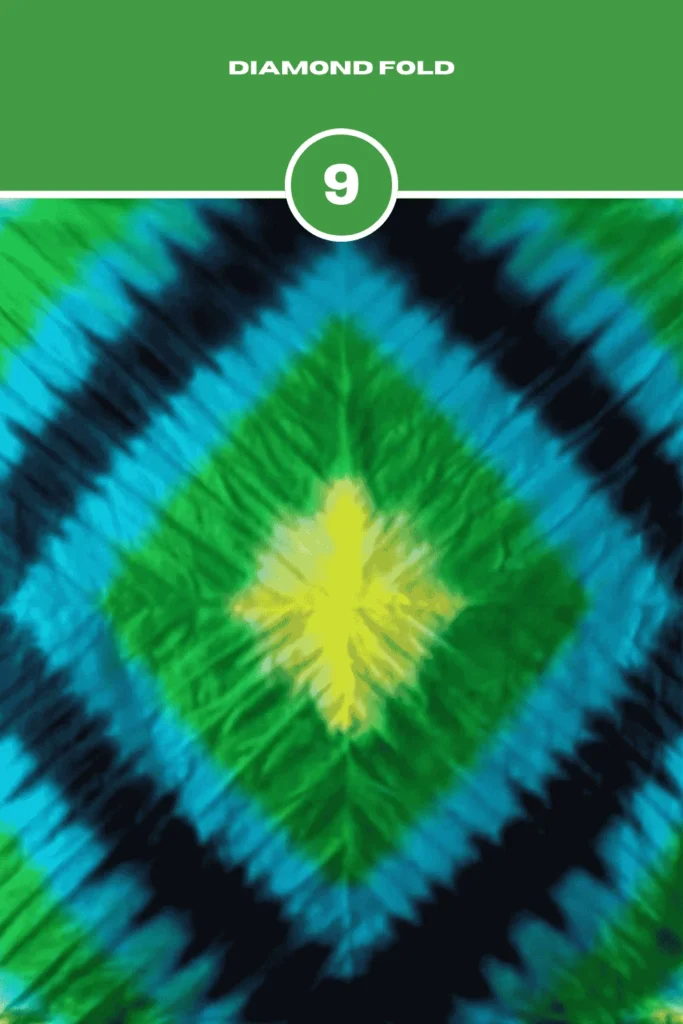
Description: Creates diamond-like layers and shapes throughout.
How to Fold:
- Fold fabric into a square.
- Then fold diagonally to create diamond sections.
- Tie with rubber bands at intervals.
Best For: Trendy tops, table linens, or geometric styles.
10. Square Grid Fold
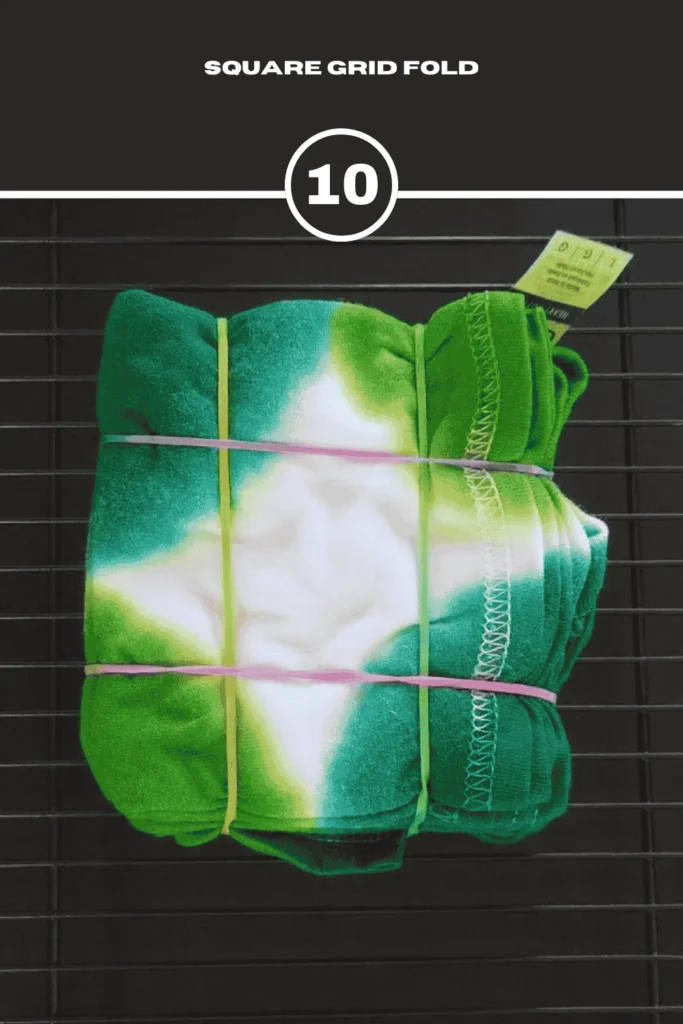
Description: Results in a checkerboard or grid-like bleached effect.
How to Fold:
- Fold the fabric vertically and horizontally into small square pleats.
- Bind tightly at intersecting points.
Best For: Curtains, bedsheets, and home textiles.
11. Crumpled Fold
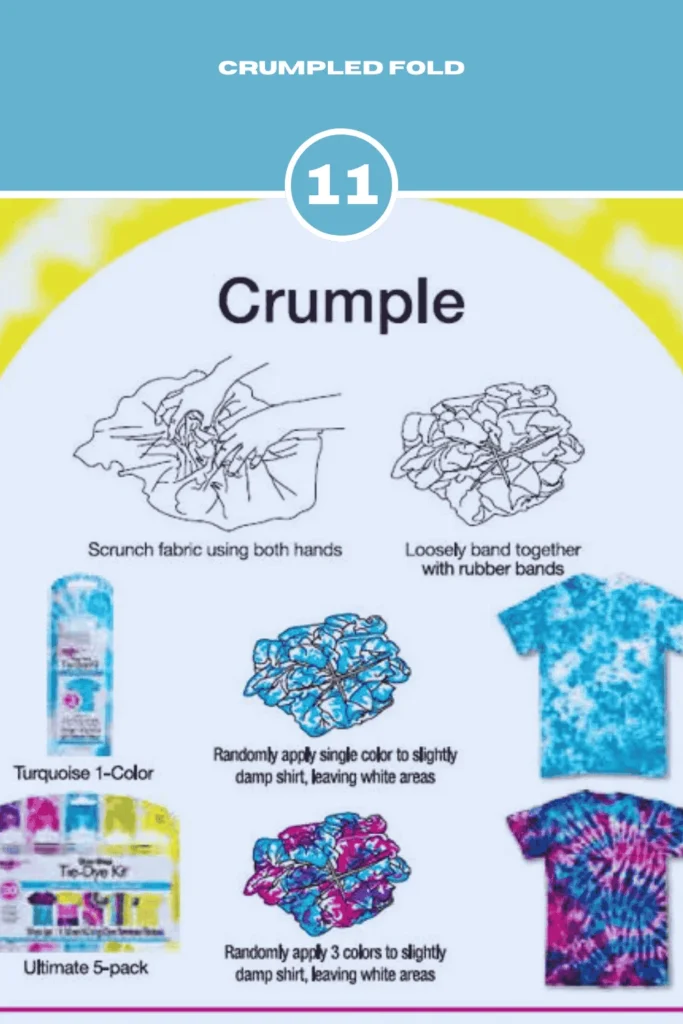
Description: Light, soft bleach patches in a loose, organic form.
How to Fold:
- Loosely scrunch the fabric (softer than crinkle).
- Bind gently with a few rubber bands.
Best For: Oversized shirts, jackets, cardigans.
12. Mandala Fold
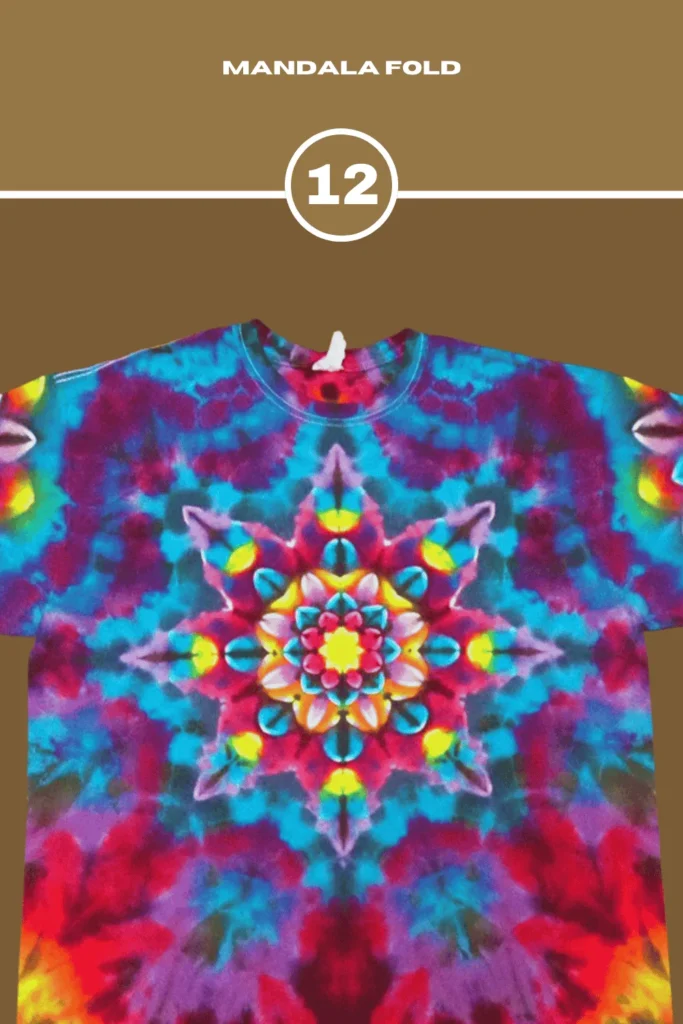
Description: Intricate symmetrical circular designs, similar to mandalas.
How to Fold:
- Fold the fabric in half, then again into quarters.
- Pleat in a circular fan motion from the center.
- Secure each section with rubber bands.
Best For: Wall hangings, cushion covers, decorative cloths.
13. Wave Fold
Description: Soft, flowing lines like water ripples.
How to Fold:
- Fold the fabric in soft, curvy wave motions.
- Secure randomly with rubber bands.
Best for: Beachwear, towels, and summer tops.
14. X-Shaped Fold
Description: Distinct X formation with intersecting dye contrasts.
How to Fold:
- Fold fabric diagonally from both corners toward the center.
- Add rubber bands where folds meet.
Best For: Bold statement tees, crop tops, or geometric styles.
15. Zig-Zag Fold
Description: Creates sharp, stair-like bleach lines across the fabric.
How to Fold:
- Fold fabric in angular zigzag pleats (like a staircase).
- Tie along different sections securely.
Best For: Denim jackets, abstract wear, rugged fashion.
16. Half-Spiral Fold
Description: A spiral effect only on one side for asymmetrical appeal.
How to Fold:
- Twist just half of the fabric into a spiral.
- Leave the other half flat or lightly crumpled.
- Tie only the spiral part.
Best For: Two-tone designs, dual-pattern garments.
17. Fan Fold
Description: Semi-circle or arch-like folds like a hand fan.
How to Fold:
- Fold fabric in a fan shape with even pleats.
- Tie tightly across the arch.
Best For: Elegant scarves, dress sleeves, accent designs.
18. Diagonal Stripe Fold
Description: Clean stripes diagonally cross the fabric.
How to Fold:
- Fold the fabric in diagonal pleats, corner to corner.
- Secure with bands along the fold lines.
Best For: Fashion tops, kitchen linens, artistic aprons.
19. Reverse V-Fold
Description: Strong V-shaped bleach visuals with arrow patterns.
How to Fold:
- Fold fabric from both sides inward to make a V.
- Pleat both arms and tie each one separately.
Best For: Varsity shirts, joggers, statement hoodies.
20. Wave & Twist Combo
Description: Combines wave softness with the boldness of spiral twists.
How to Fold:
- Divide into two parts, one wave, and one spiral.
- Tie each separately for a blended look.
Best For: Creative experiments and dual-pattern pieces.
Tips for Staying Safe When Dying Clothes with Bleach
- Always put on gloves to protect your hands.
- Ventilation is essential when handling toxic products. Whether using glue or paint, vent your workspace to the outside for optimal airflow.
- Wear safety glasses to keep your eyes safe.
- Keep your arms away from anything that might touch them.
- Bleach should never be mixed with any other products.
- Make sure the bleach is properly diluted before using it.
- Put plastic sheets down on the surface where you’ll be working.
- Keep water on hand so that you can rinse quickly.
- Bleach should not be in full sunlight.
- After dying, wash your hands and the tools you used.
How Does It differ from Traditional Tie Dye?
Bleach and traditional tie dye decorate clothes differently due to their methods. In conventional tie-dye methods, bright colors are put on white or lightly colored fabrics to make patterns that go all over the surface of the cloth. Bleach tie dye, on the other hand, uses a way of removing color. Instead of adding new colors, this method removes the colors already on the dark fabric.
Some important changes are:
- Traditional tie dye differs from bleach tie dye in that it creates patterns. Traditional tie dye uses colored dyes, while bleach tie dye removes colors to create designs.
- Dark fabrics are best for bleach tie dye, but white or light-colored fabrics work well for standard tie dye methods.
- Traditional tie dye gives clothes psychedelic, bright colors, while bleach tie dye gives clothes a worn-in, retro, or grunge look.
- You need more than one dye and soda ash for traditional tie dye. For bleach tie dye, you only need bleach and water.
- Compared to other dye ways, bleach tie dye takes less time to finish and makes less mess.
FAQs About Bleach Tie Dye
Q1: What kinds of clothes can you bleach and tie dye?
If you ask, bleach tie dye doesn’t work on artificial fabrics like polyester, rayon, or linen. Bleach might not be good for synthetic fabrics like polyester; they might get ruined or not work.
Q 2: How long does bleach stay on clothes?
Generally, the best time to use bleach is 5 to 15 minutes. If you leave bleach on for too long, it can damage the cloth or create holes. The process must be closely monitored while the color changes and the item must be rinsed immediately after the result is seen.
Q3: Can bleach be used to dye black clothes?
To answer your question, bleach tie dye works well on dark or black clothes because it stands out. In contrast, lighter colors will weaken and may not turn out well.
Q4: How can I keep from whitening too much?
A: Monitor the fabric closely to prevent it from becoming too light. Rinse it as soon as you notice a noticeable color change. Then, rinse the cloth and spray it with a neutralizing solution (1 part peroxide to 2 parts water or 1 part vinegar to 4 parts water). This step will prevent the bleach from doing its job.
Q5: Can you dye over patterns that were made with bleach?
A: Of course! After rinsing and drying, color the bleached areas with fabric dye to make them look more artistic. Depending on your tastes, the outcome may be multicolored or layered.
Final Thoughts
Tie-dyeing with bleach is a fun, creative, and low-cost way to give your clothing a daring new look. You can transform any ordinary dark fabric into art with a few tools and safety precautions. And as for what you might call a “basic project” with this technique, there’s something outrageous (and thus memorable) about using bleach to create a bold design on a shirt, for example. The method makes for an effortless DIY with a distinctly finished project. Bleach tie dye is that memorable.
CTA: Are you ready to give it a try? Gather your supplies, follow our safety tips, and create bleach tie-dye masterpieces. Don’t forget to share your finished pieces with us, the rest of the Internet, and maybe even your neighbors. Tag us for maximum impact.


![How to Crochet Sunflower Bouquet [6 Easy Steps]](https://crochetmind.com/wp-content/uploads/2025/06/How-to-Crochet-Sunflower-Bouquet-6-Easy-Steps-150x150.jpg)