How To Knit: Are you looking for a simple yet detailed guide to learning how to knit but have yet to find a suitable one? Do not worry! Here I am to help you with all the ways of knitting. It is easier than you think, and you only need a pair of needles and yarn. And, with some practice, you will become a new master of this knitting world.
So, how do you knit? To knit, start by casting on stitches. It is the foundation of your work. Insert one needle into a loop on the other needle and wrap the yarn around. Then, pull it through and slide the hook off the old loop. Repeat it row by row to create the fabric. Once you have reached the desired length, bind off to secure your stitches. So, the process consists of three main steps: casting on, knitting stitches, and casting off.
Now, I will break down the procedure of how to knit in easy steps. Let’s learn together.
In This Post
Key Pointers:
- Although you can use any yarn, try to start with a heavy-weight or chunky one.
- Use a slip knot to start the cast and keep making knots to work the stitches.
- Use one hand’s needle to slip through the stitches to knit the stitches. Finally, pull your needle through the stitch and cast off.
What Does Knitting Mean?
Knitting is a valuable and enjoyable skill. You can create beautiful patterns with just two needles and yarn. You can knit both manually and with a machine. Want to make a sweater or a pair of socks to beat the cold winter? Or a decorative item like a stuffed animal, cushion cover, or little wall mat?
Knitting is the best choice due to its easy yet beautiful creations, as you can easily make any of these using knit and purl stitch.
What Supplies Do I Need To Start Knitting?
Knitting is an easy and simple handcraft method. You will need only some basic supplies. I have charted them below. Take a look!
| Material Name | Functions |
|---|---|
| Yarn | You can use any yarn. But, if you are a beginner, choose a light color chunky yarn. Because, with this type of yarn, you can see the stitches and work efficiently. |
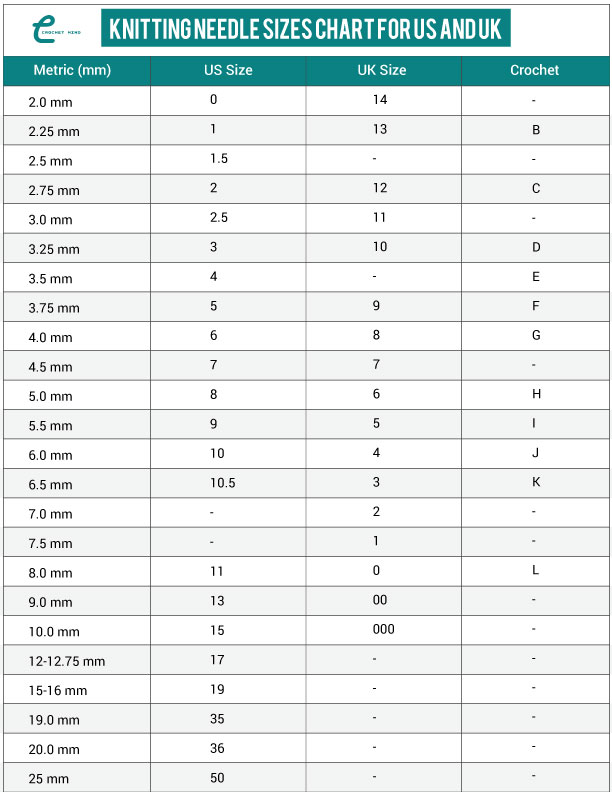
| Knitting Needles | Knitting needles are made of various materials, such as wood, metal, and plastic. You can choose the material to your liking. However, for the size, use the recommended one with your yarn. |
| Scissors | Use a small and sharp scissor to trim the end of the yarn after knitting. |
| Tapestry Needle | Use a tapestry needle to weave the last ends and sew knitted pieces together. |
| Stitch Markers | To keep track of your stitch, use the stitch markers. |
Tips And Tricks To Hold Your Yarn And Knitting Needles
To learn how to knit, the first and foremost thing is to learn how to hold your knitting needle and yarn properly.
There are many different methods for holding the needles and yarn. Now, I will share the easiest and most common methods with you. Try them out and find the perfect method for you:
Different Methods to Hold The Needle
Pencil Grip:
The pencil grip is also known as the underhand method. To try it out, follow the tips below:
- Hold your needle like a pencil (rest the needle between your thumb and index finger)
- Using your fingers, guide the needle tip into the stitches. Be aware to keep your movements light and do not force them. It will help to keep your stitches precise and avoid hand fatigue.
As this gripping method is quite similar to holding a pencil, it is the most popular among beginners.
Knife Grip:
This knife grip method is also called the overhand method. In this method, you hold the needle like a knife. I have explained it below:
- Keep the back part of the needle under your palm and grip the needle with your thumb and fingers.
- This method provides excellent stability as your palm encircles the back of your needle. It is great for fastening up the project with heavy or chunky yarn.
Different Methods To Hold The Yarn
Let’s take a look at the various ways you can hold the yarn while knitting.
Left-hand Method or Continental Style
If you are left-handed, this is the perfect choice for you. To master it, follow the instructions below:
- Hold the yarn with your left hand.
- Then, guide the yarn with your index finger and use the other fingers to manage the tension by looping the yarn around them.
This method is fast, so it is popular for efficiency.
Right-hand Method or English Style
If you feel comfortable using your right hand more, then practice this English method or right-hand method to master holding the yarn properly. This method is also called throwing because, to make a stitch, your right hand usually throws the yarn over the needle.
- Hold the yarn with your right hand.
- With the help of the index finger, control your working yarn.
- Wrap the yarn around your other fingers to manage the tension.
Portuguese Style
This knitting method is rare. However, it requires less hand movement and is a good choice for maintaining constant yarn tension. It is also an excellent option for people with disabilities. Try it out to find out whether you like it or not.
- Loop the yarn around your neck.
- Using both of your hands, control the needle quickly.
You can even combine convenience and English styles to make your style.
How To Knit For Beginners? [Learn With Easy Step-By-Step Process]
There are basically three steps to learn how to knit. Here I have explained them clearly and simply with pictures. Let’s take a look!
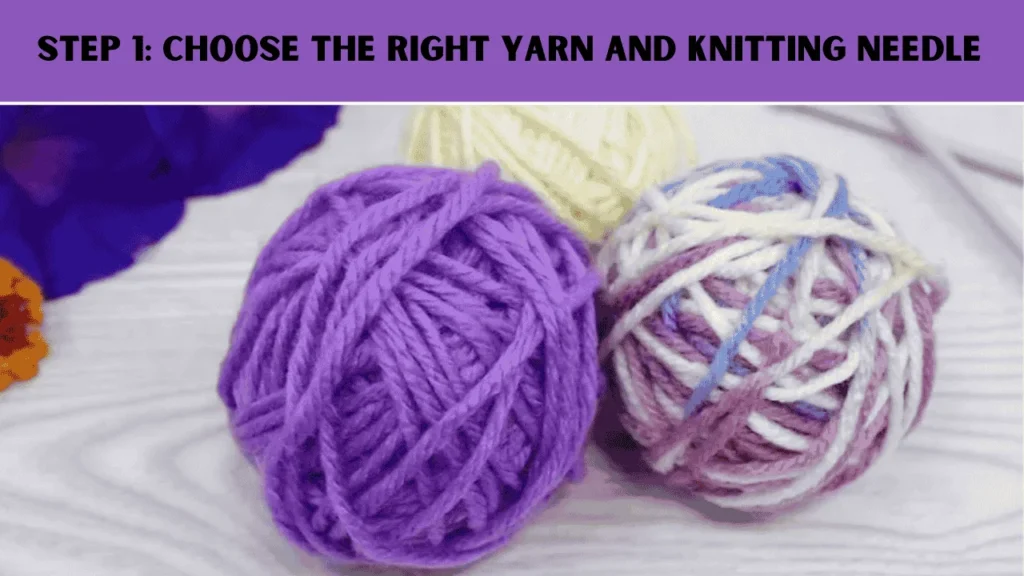
Step 1: Choose the Right Yarn And Knitting Needle
You can use any yarn you like with needles of the recommended size. However, if you are learning to knit, choose a worsted or chunky yarn with large knitting needles. Also, remember to use light-colored yarn.
For the needle material, go with a wooden or plastic one and avoid a metal one. They are lightweight and will not make your hand tire soon. Also, choose a circular needle as it is more suitable for holding the stitches.
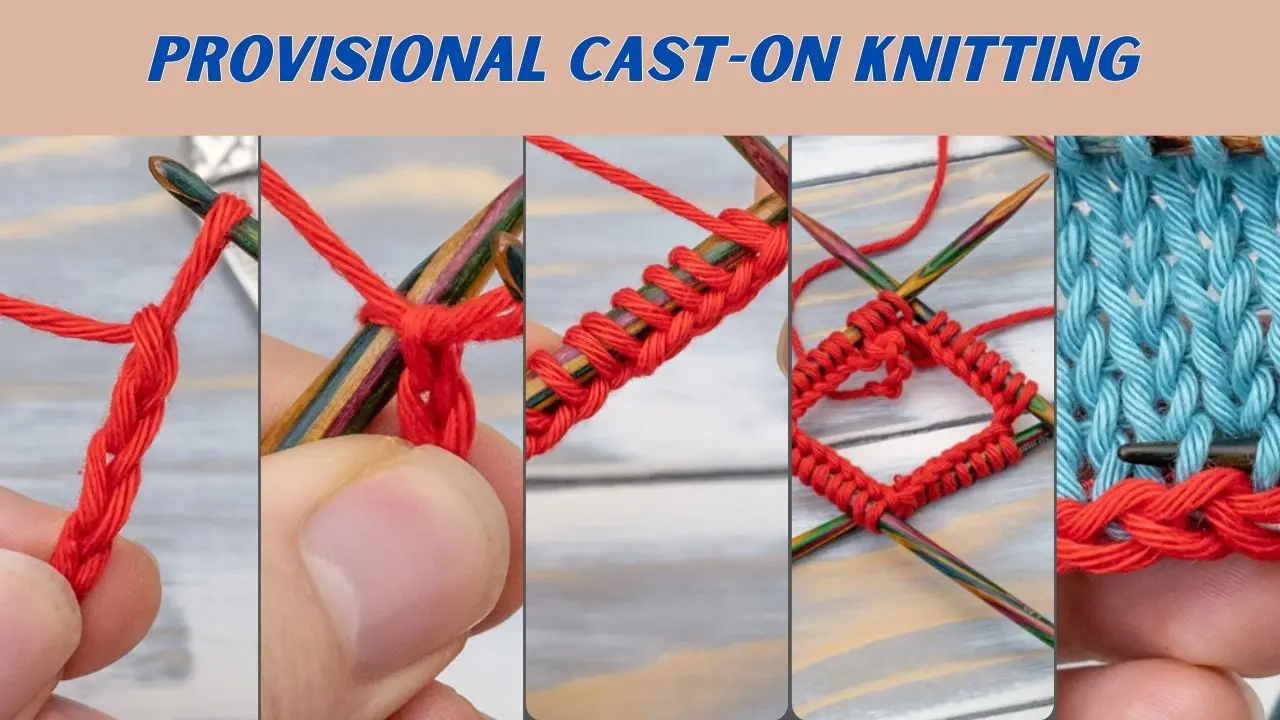
Step 2: Casting On
- We will start casting on with a slip knot. Wrap the yarn around your index and middle finger 2 times. So, you will have 2 loops on your finger. Now, pull the first one over the second one. To tighten your knot, pull the end of the yarn. Finally, slip a knitting needle through the loop and pull the tail tightly to secure your first cast (the slip knot). As it is the first stitch, do not forget to include it when you count the stitches.

- After the first cast, you will have a long tail of the yarn. Wrap the end of the yarn around your left hand and hold the knitting in your right hand (English style). Now, position your first loop half inches or 1.3 cm from the tip of your knitting needle. Grip the tail of the yarn and loop it around your other hand (left one) clockwise. You will see it draping over your palm.
Now, grip your needle near the first cast using whichever method you like, but make sure it is securely grabbed. Then, wrap the body of the knitting needle with the other fingers.

- Now, thread your knitting needle through the bottom of our loop. Then, pull out the needle. Turn your yarn over the needle to loop above the first cast. Use the hand holding the yarn (the left one)to draw the yarn tail. This will tighten your loop and make the second stitch. Remember not to pull too hard.

- Let’s continue the order to cast on ten stitches more. Wrap the yarn around your hand to make a loop, thread the knitting needle up, insert it into the loop, and finally pull the yarn tail.

Step 3: Work Your Stitch
As we are beginners or new to knitting, I will start with the basic knitting stitch.
- To start the knitting stitches, first, change the hand holding the needle with the cast-on stitches. If that needle was in your right hand, transfer it to the left hand by turning and vice versa. In fact, we will always start a new row by turning our work and changing the hand holding the needle with stitches on. So, if you are working with the English style or using the proper-handed method, the needle with the stitches will always be on your left hand. Now, you need to hold the working yarn tail with your right hand and thread it over your index finger. Work vice-versa for the continental style or left-handed method. Remember, the knitting needle gripping method will always be the same for all the stitches.

- Now, thread your knitting needle (the right one)through the bottom of your top stitch. You will work the needle from left to right. Push the tip of your right needle through the bottom of the stitch by approximately half an inch. At this stage, if your cast-on stitches were too tight, you would have difficulty pushing the needle through, and if the cast-ob stitches were too loose, the needle would slip through. So, in any case, you must redo the cast–on stitches.

- Using your right index finger, wrap the working yarn around the back of the needle on your right hand. After that, draw the needle back toward you until it lies between the two needles’ cruxes. That is, Wrap the working yarn around the right-hand needle in a counterclockwise direction.

- Pull down the yarn through the stitch. With the tip of the right-hand needle, pull the working yarn through the uppermost stitch. Let the old, cast-on stitch on the left-hand needle slide off, allowing the new stitch to settle onto the right-hand needle. Make sure the new stitch doesn’t come loose from the right-hand needle.

- Continue knitting until the row is finished. To knit additional stitches, repeat the same pattern. Continue knitting until the left-hand needle is empty and you have reached the end of the row. If you find it difficult to keep track of the row count, use a row counter.

- Hold the needle with all the stitches in your left hand by placing the right-hand needle in your left hand. Your right hand should hold the empty needle. After that, carry on knitting as you did in the previous row. To ensure every stitch is the same size, maintain the yarn at an even tension. Although it may require some practice, that is the purpose of this first knitting exercise!

Step 4: Casting Off The Work
- After you have completed the knitting stitches, it is time to cast off. Work your first two stitches of casting off the same way you did in step 3.

- Now, you need to insert the tip of the knitting needle into the second stitch from it. Then, in the same stitch, push your knitting needle on your left hand to the other one in your right hand. In all of this, make sure to use the working yarn. So, you will insert the knitting needle (left-hand one) into the stitch under the knitting needle on the right hand.

- With the knitting needle on your left hand, lift your bottom stitch up over the top stitch on the other needle on your right hand. You will have a stitch on your needle on the right hand.

- Pull the knitting needle on your right hand through the stitch in the needle on your left one. Then, wrap your yarn both under and over it. Now, pull the yarn through. This action will make your old stitch slip off when the new one forms. So, after this work, you will have two stitches on your needle on the right hand.

- Now, lift your bottom stitch up on the needle on your right hand and over to the top stitch. We have done this before in instruction 13 of step 4.

- Continue working like instruction 15 in step 4 until there is only one stitch left on the needle of your right hand. Then, widen the stitch by pulling it and cutting the yarn, keeping at least six inches or 15 cm long tail. Finally, tug this yarn tail and tighten the last stitch. Voila, your casting off is done.

How To Manage The Yarn Tension In Knitting?
Managing the yarn tension in knitting is a crucial factor. It affects your knitted fabric’s size and appearance and helps you produce a consistent and even stitch structure by preventing too loose or too tight stitches. Practice the techniques below to control the yarn tension properly.
Wrapping Techniques: Wrap the yarn around your pinky finger. Now, weave the yarn over or under (depending on your method) other fingers. Try different wrapping styles to find the most comfy one.
Placement of Fingure: Using the index finger to guide the yarn, try to maintain even yarn tension. You can adjust the yarn by moving your hand slightly.
Keep Practicing: Try out a few stitches. Remember to keep the stitches loose enough to slide on the needle yet tight enough to keep holding their shape.
Keep your hands relaxed: Do not grip the yarn or the needle too tightly, as this will make the tension uneven and cause hand fatigue. Also, rest your hands between knitting to relax them.
Frequently Asked Questions (FAQ’s)
What Are The Uses Of Knitting?
Is Knitting Easier Than Crocheting?
Conclusion
I hope that after reading the entire article, you now know how to knit! It is easy. Just properly do the casting on, knitting stitches, and casting off, and voila! You have completed your first knitting! Remember to use the chunky yarn and big knitting needles to complete your first knitting stitches.
However, I have also shared the detailed methods for gripping the knitting needle and the yarn and maintaining the correct tension. So, remember to try gripping before starting to knit. Also, remember to share your experience with me through the comment section. It is all for today. I will come up again with the procedure for knitting a bag, a sweater, and so on. Till then, stay healthy!








![Select Crochet Clothing Ideas: [Best Crochet Fashion] Crochet Clothing Ideas](https://crochetmind.com/wp-content/uploads/2025/07/Crochet-Clothing-Ideas-Best-Crochet-Fashion-in-2025-1-1.jpg)


![How To Knit [Step-By-Step Instructions For Beginners]](https://crochetmind.com/wp-content/uploads/2024/12/1-How-To-Knit-Step-By-Step-Instructions-For-Beginners.webp)


![The Best 30+ Free Crochet Cat Patterns [Beginner-Friendly Guide]](https://crochetmind.com/wp-content/uploads/2025/04/1-The-Best-30-Free-Crochet-Cat-Patterns-Beginner-Friendly-Guide.webp)
